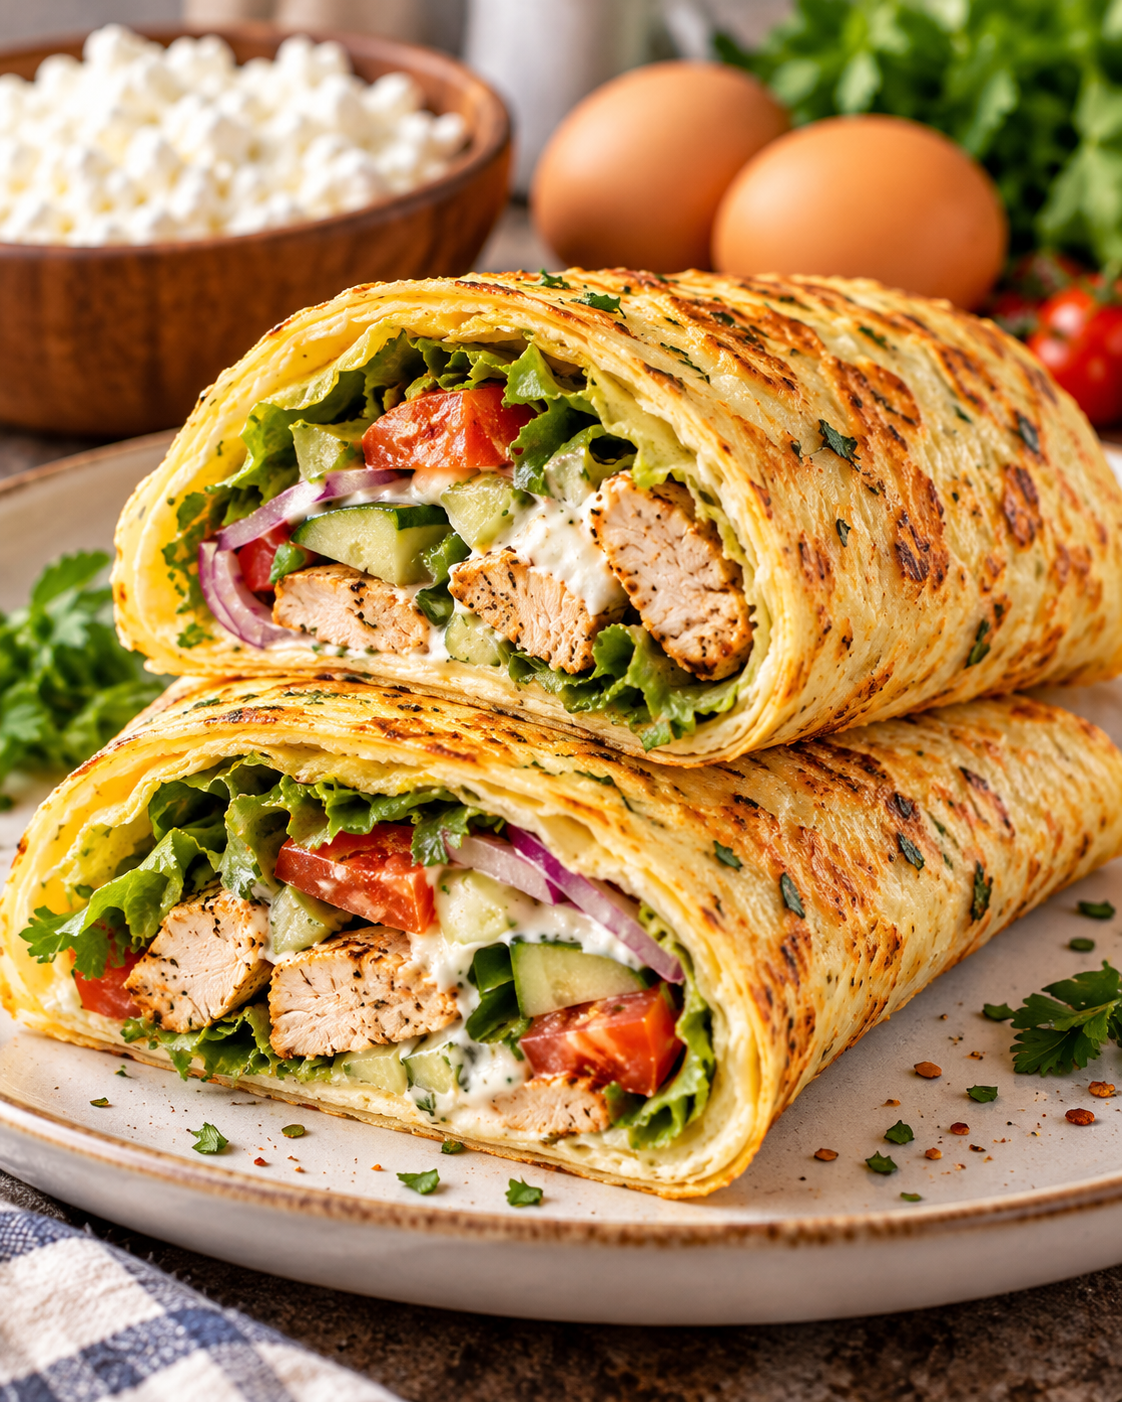
High Protein Cottage Cheese Wrap

2-Ingredient High Protein Cottage Cheese Wrap

2-Ingredient

High Protein Cottage Cheese Wrap

Description:
This 2-Ingredient High Protein Cottage Cheese Wrap is one of the easiest protein-packed wraps you can make at home. It uses just cottage cheese and eggs to create a soft, flexible wrap that works perfectly for breakfast, lunch, meal prep, or a quick high-protein snack. It is naturally flourless, low in carbs, and can be filled with chicken, turkey, tuna, avocado, salad, or your favorite vegetables. The wrap has a light cheesy flavor, holds together well once cooled slightly, and is a simple option when you want more protein without using regular tortillas.

Ingredients for the Cottage Cheese Wrap

Main Ingredients

1 cup cottage cheese
2 large eggs

Optional Seasonings

¼ teaspoon salt
¼ teaspoon black pepper
½ teaspoon garlic powder
½ teaspoon Italian seasoning or dried herbs

Step-by-Step Instructions

1. Preheat the Oven

Preheat your oven to 375°F (190°C). Line a large baking sheet with parchment paper. Lightly grease the parchment if your paper tends to stick.

2. Blend the Ingredients

Add the cottage cheese and eggs to a blender or food processor. Blend until completely smooth and creamy. There should be very few visible cottage cheese curds left.

If you want extra flavor, add salt, black pepper, garlic powder, or dried herbs before blending.

3. Spread the Mixture

Pour the blended mixture onto the prepared baking sheet.

Use the back of a spoon or spatula to spread it into a thin rectangular layer. Try to keep the thickness even so the wrap cooks at the same rate throughout.

Do not make it extremely thin, or it may become too crispy around the edges.

4. Bake

Bake for approximately 25 to 30 minutes, depending on your oven and the thickness of the wrap.

The wrap is ready when the center looks fully set and the edges are lightly golden.

5. Cool Slightly

Remove the baking sheet from the oven and allow the wrap to cool for about 5 to 10 minutes.

Cooling is important because the wrap becomes more flexible and easier to remove from the parchment.

6. Remove from the Paper

Gently peel the wrap away from the parchment paper.

If needed, use a thin spatula to loosen the edges first.

7. Add Your Filling

Place your favorite filling in the center of the wrap.

Good options include grilled chicken, turkey, tuna salad, sliced avocado, cucumber, spinach, lettuce, tomatoes, roasted vegetables, or scrambled eggs.

Fold the sides inward and roll tightly like a traditional wrap.

Tips and Notes

Use full-fat or low-fat cottage cheese depending on your preference. Full-fat cottage cheese usually creates a slightly richer and softer wrap.

Blend the mixture until very smooth. This helps produce a more even texture.

Do not remove the wrap from the parchment immediately after baking. Letting it rest for several minutes makes it much easier to handle.

If the wrap feels too soft, return it to the oven for another 3 to 5 minutes.

If the edges become crispier than the middle, trim them slightly before rolling.

For meal prep, prepare the wrap ahead of time and refrigerate it without filling. Add your filling when ready to eat.

You can also cut the baked wrap into smaller pieces and use them as protein-rich sandwich alternatives.

Filling Ideas

Chicken Avocado Wrap

Fill with grilled chicken, avocado, lettuce, cucumber, and Greek yogurt sauce.

Turkey Veggie Wrap

Add sliced turkey breast, spinach, tomato, cucumber, and mustard.

Tuna Protein Wrap

Fill with tuna mixed with Greek yogurt, celery, black pepper, and lettuce.

Breakfast Wrap

Add scrambled eggs, spinach, tomatoes, and a little shredded cheese.

Mediterranean Wrap

Fill with grilled chicken, cucumber, tomato, olives, spinach, and a spoonful of tzatziki.

Q&A

Can I make this cottage cheese wrap without a blender?
You can mash the cottage cheese very well and whisk it with the eggs, but a blender gives a much smoother and more flexible wrap.

Can I make it in an air fryer?
Yes, but only if your air fryer has a flat baking tray or suitable pan. Bake at a slightly lower temperature and watch carefully because air fryers cook faster.

Why did my wrap stick to the parchment paper?
Some parchment papers stick more than others. Lightly greasing the parchment can help. Allowing the wrap to cool before peeling it away also makes a big difference.

Can I store the wrap?
Yes. Store the cooled wrap in an airtight container in the refrigerator for about 2 to 3 days.

Can I freeze it?
Yes. Place parchment paper between wraps and freeze them in an airtight freezer-safe bag. Thaw in the refrigerator before using.

Is this wrap low carb?
Yes, it is much lower in carbohydrates than traditional flour tortillas because it contains no flour.

Can I use flavored cottage cheese?
Plain cottage cheese works best because flavored varieties may contain extra sugar or ingredients that affect the texture.

Servings & Nutrition

Servings: 1 large wrap or 2 smaller wraps

Approximate nutrition for the full basic recipe:

Calories: 300–340
Protein: 30–35 g
Carbohydrates: 8–10 g
Fat: 15–18 g
Fiber: 0 g

Nutrition will vary depending on the cottage cheese brand, fat percentage, egg size, and any fillings you add.

Final Thoughts

The 2-Ingredient High Protein Cottage Cheese Wrap is a simple way to turn two everyday ingredients into a flexible, protein-rich meal base. It is especially useful when you want something quick, flourless, and easy to customize. Fill it with vegetables and lean protein for lunch, turn it into a breakfast wrap, or keep it simple with avocado and greens.

Because the base recipe contains only cottage cheese and eggs, it is easy to prepare and works well for anyone looking for a convenient high-protein alternative to traditional wraps.
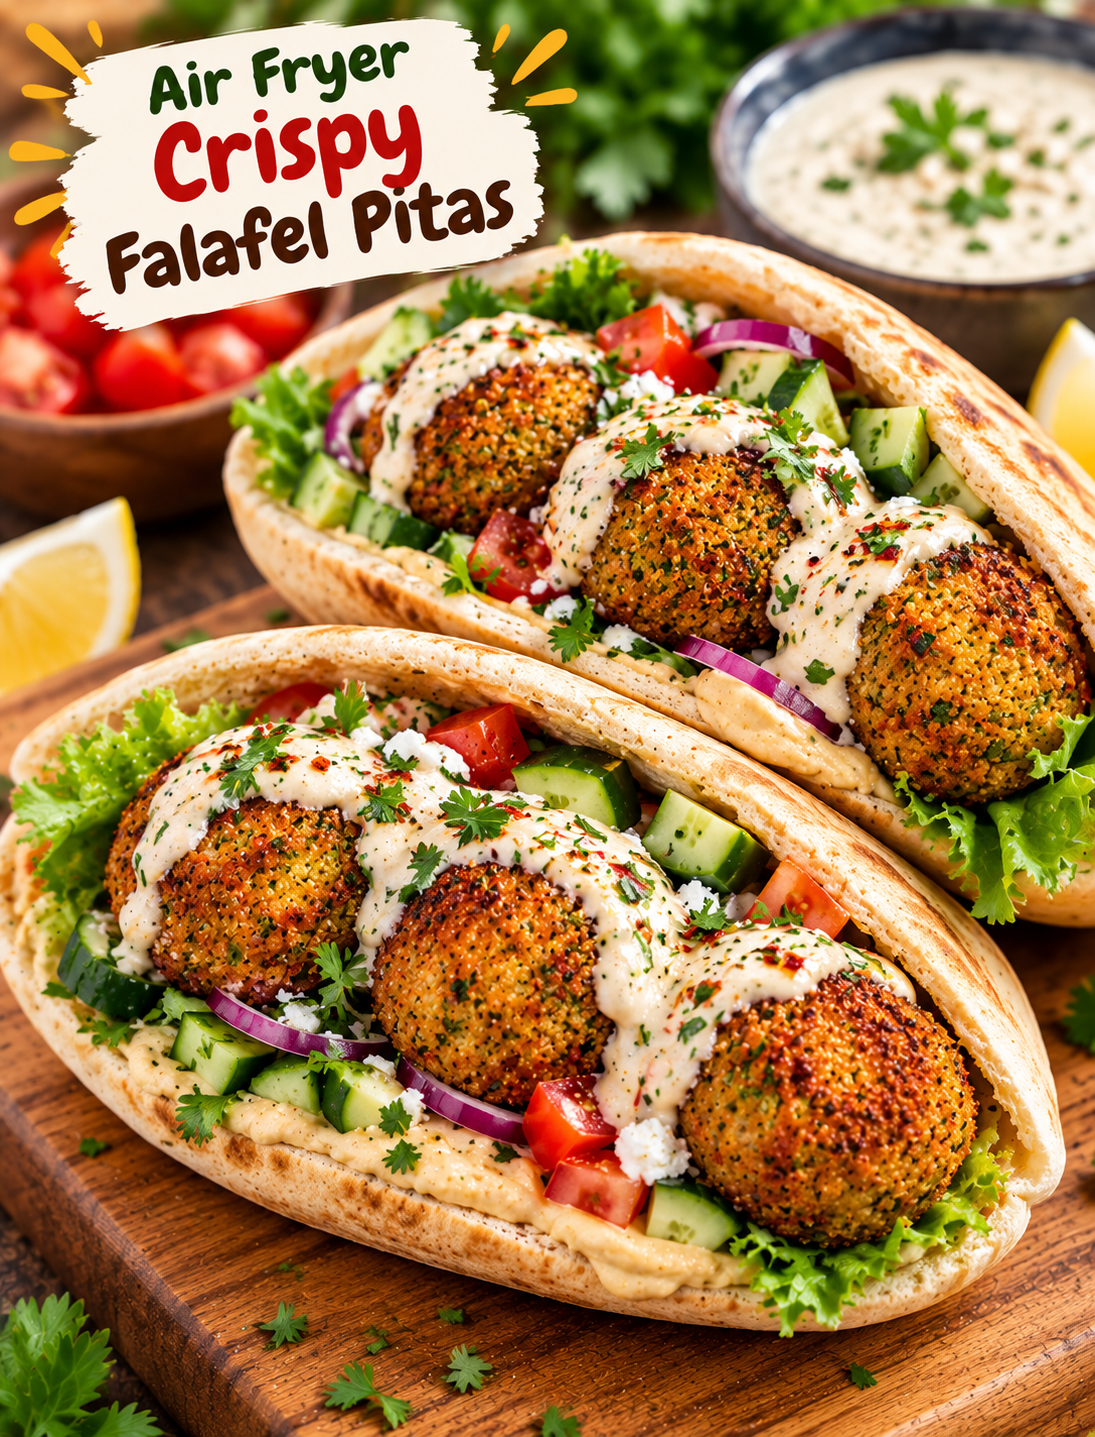
Air Fryer Crispy Falafel Pitas

Crispy air fryer falafel stuffed into warm pita with fresh vegetables and garlic yogurt sauce

Air Fryer Crispy Falafel Pitas

Crispy falafel, fresh vegetables, creamy sauce, and warm pita come together in these easy Air Fryer Crispy Falafel Pitas. The falafel gets golden and crisp outside while staying tender and flavorful inside.

This recipe is a great choice when you want a meat-free lunch or dinner that feels filling without being complicated. The air fryer uses less oil than deep frying and gives the falafel a crisp finish with simple ingredients.

Serve the falafel inside warm pita with crunchy lettuce, tomato, cucumber, red onion, and a quick garlic yogurt sauce. Add hummus, pickles, or fresh herbs for even more flavor.

Why You’ll Love This Recipe

  • Crispy without deep frying: The air fryer creates a golden outside with only a small amount of oil.
  • Easy plant-based meal: Chickpeas provide a hearty base for a satisfying meat-free dinner.
  • Fresh and flavorful: Parsley, cilantro, garlic, cumin, and lemon add bright Mediterranean flavor.
  • Great for meal prep: Prepare the falafel mixture ahead and cook it when needed.
  • Customizable: Add your favorite vegetables, sauces, herbs, and toppings.
  • Family-friendly: Serve the ingredients separately so everyone can build their own pita.
  • Perfect for lunch or dinner: These pitas are filling enough for a main meal but easy enough for a quick weekday lunch.

Ingredients You’ll Need

For the Falafel

  • 1 can (15 ounces) chickpeas, drained and rinsed
  • ½ cup fresh parsley
  • ½ cup fresh cilantro
  • ¼ cup finely chopped red onion
  • 3 garlic cloves
  • 1 teaspoon ground cumin
  • ½ teaspoon ground coriander
  • ½ teaspoon smoked paprika
  • ½ teaspoon salt
  • ¼ teaspoon black pepper
  • 1 tablespoon fresh lemon juice
  • 2 tablespoons all-purpose flour
  • ½ teaspoon baking powder
  • 1 tablespoon olive oil

Garlic Yogurt Sauce

  • ½ cup plain Greek yogurt
  • 1 tablespoon fresh lemon juice
  • 1 small garlic clove, finely grated
  • 1 tablespoon chopped parsley
  • ¼ teaspoon cumin
  • Pinch of salt

For the Pitas

  • 4 small pita breads
  • 1 cup shredded lettuce
  • 1 medium tomato, diced
  • ½ cucumber, diced
  • ¼ red onion, thinly sliced
  • ½ cup hummus
  • Fresh parsley or cilantro
  • Pickled turnips or cucumbers, optional

How to Make Air Fryer Crispy Falafel Pitas

Step 1: Prepare the Chickpeas

Drain and rinse the canned chickpeas well.

Spread them on a clean kitchen towel and gently pat them dry. Removing extra moisture helps the falafel mixture hold together and brown better.

For the best texture, avoid using chickpeas that are still wet.

Step 2: Make the Falafel Mixture

Add the chickpeas, parsley, cilantro, red onion, garlic, cumin, coriander, smoked paprika, salt, black pepper, and lemon juice to a food processor.

Pulse several times until the mixture becomes finely chopped and crumbly.

Do not blend it into a smooth paste. Small pieces should still be visible because they help create a better falafel texture.

Step 3: Add the Dry Ingredients

Transfer the mixture to a bowl.

Add the flour and baking powder. Stir until evenly combined.

The mixture should be moist enough to hold together when pressed but not wet or sticky.

If it feels too loose, add another teaspoon of flour at a time until it becomes easy to shape.

Step 4: Chill the Mixture

Cover the bowl and refrigerate the falafel mixture for 20–30 minutes.

This short resting time helps the ingredients bind together and makes shaping easier.

You can also prepare the mixture several hours ahead and keep it refrigerated until cooking time.

Step 5: Shape the Falafel

Scoop out about 1½ tablespoons of the mixture for each falafel.

Roll each portion gently into a ball, then flatten it slightly into a small thick patty.

Keeping the falafel slightly flat helps the center cook while the outside becomes crisp.

You should get about 12–14 falafel pieces, depending on their size.

Step 6: Preheat the Air Fryer

Preheat your air fryer to 375°F for about 3 minutes.

Lightly spray the basket with olive oil.

Avoid using too much oil because the falafel only needs a light coating to brown properly.

Step 7: Air Fry the Falafel

Place the falafel in the basket in a single layer.

Leave a little space between each piece so hot air can circulate.

Lightly spray the tops with olive oil.

Air fry at 375°F for 10–14 minutes, turning the falafel halfway through cooking.

Continue until the outside is golden brown and crisp.

The exact cooking time can vary depending on the size of the falafel and your air fryer model.

Step 8: Make the Garlic Yogurt Sauce

While the falafel cooks, add Greek yogurt, lemon juice, grated garlic, parsley, cumin, and salt to a small bowl.

Stir until smooth.

Taste and add a little more lemon juice or salt if needed.

Keep the sauce chilled until you’re ready to assemble the pitas.

Step 9: Warm the Pitas

Warm the pita breads in the air fryer at 300°F for about 1–2 minutes, or heat them briefly in a dry skillet.

Do not overheat them because they can become dry and difficult to fold.

Step 10: Build the Crispy Falafel Pitas

Spread hummus inside each warm pita.

Add shredded lettuce, diced tomato, cucumber, and sliced red onion.

Place 3–4 crispy falafel pieces inside each pita.

Drizzle generously with garlic yogurt sauce.

Finish with fresh herbs and optional pickled vegetables.

Serve immediately while the falafel is still warm and crisp.

Tips for Extra Crispy Falafel

Dry the chickpeas well: Excess moisture can make the mixture soft and difficult to crisp.

Do not over-process: A slightly coarse mixture creates better texture than a smooth paste.

Chill before shaping: Refrigeration helps the falafel hold its shape during cooking.

Do not overcrowd the basket: Space between the pieces allows hot air to circulate.

Turn halfway: Flipping helps both sides develop an even golden crust.

Use a light oil coating: A small amount of olive oil helps the outside brown without deep frying.

Serve right away: Falafel loses some crispness as it sits inside the pita.

How to Customize Your Pitas

These falafel pitas are easy to change based on what you have in your kitchen.

Extra creaminess, add hummus or a tahini sauce.

For more crunch, add shredded cabbage, cucumber, or thinly sliced radishes.

More heat, add sliced jalapeños or a drizzle of spicy chili sauce.

Fresh Mediterranean flavor, add chopped parsley, cilantro, mint, or a squeeze of lemon.

Tangy bite, add pickled onions, cucumbers, or turnips.

You can also skip the pita and serve the crispy falafel over a salad or grain bowl.

What to Serve With Falafel Pitas

A simple cucumber and tomato salad pairs well with the warm falafel and creamy sauce.

You can also serve these pitas with hummus, tabbouleh, roasted vegetables, crispy potatoes, or a light lemon salad.

For a larger meal, create a Mediterranean-style platter with falafel, pita, hummus, vegetables, pickles, and several sauces.

How to Store Leftover Falafel

Allow cooked falafel to cool before placing it in an airtight container.

Store it in the refrigerator for up to 4 days.

Keep the falafel separate from the pita, vegetables, and sauce so the bread does not become soggy.

For the best texture, reheat the falafel in the air fryer at 375°F for 3–5 minutes.

Avoid reheating it in the microwave if you want to keep the outside crisp.

Can You Freeze Falafel?

Yes, falafel freezes well.

Allow cooked falafel to cool completely, then place the pieces on a baking sheet and freeze them until firm.

Transfer the frozen falafel to a freezer-safe bag or container.

For the best quality, use within about 2 months.

Reheat directly from frozen in a 375°F air fryer for 6–9 minutes, turning halfway through.

Recipe Notes

  • Use canned chickpeas for a convenient weeknight version.
  • Dry the chickpeas before processing to reduce excess moisture.
  • Keep the mixture slightly coarse for better texture.
  • Chill the mixture before shaping.
  • Make evenly sized falafel so they cook at the same rate.
  • Avoid overcrowding the air fryer basket.
  • Add sauces and vegetables just before serving.
  • Reheat leftovers in the air fryer instead of the microwave for better crispness.
  • Adjust the toppings based on your preferred Mediterranean flavors.

Frequently Asked Questions

Can I use canned chickpeas for falafel?

Yes, canned chickpeas work well for this easy air fryer version when they are thoroughly drained and dried.

Why does my falafel fall apart?

The mixture may contain too much moisture, so chill it longer and add a small amount of flour if needed.

How do I make falafel extra crispy?

Use dry chickpeas, avoid overcrowding the basket, lightly spray with oil, and turn the falafel halfway through cooking.

Can I make these falafel pitas ahead of time?

Yes, prepare and refrigerate the falafel mixture ahead, then shape and air fry it when ready to serve.

What sauce goes best with falafel?

Garlic yogurt sauce, tahini sauce, hummus, and lemon-garlic dressing all pair well with crispy falafel.

Can I freeze cooked falafel?

Yes, freeze cooled falafel in an airtight freezer-safe container and reheat it directly in the air fryer.

Are falafel pitas vegetarian?

Yes, this recipe is vegetarian because the falafel is made with chickpeas, herbs, spices, and plant-based ingredients.

How should I reheat leftover falafel?

Reheat falafel in a 375°F air fryer for 3–5 minutes to restore some of its crisp texture.

Final Thoughts

These Air Fryer Crispy Falafel Pitas turn simple chickpeas and fresh herbs into a flavorful meal with a satisfying crunch. The air fryer makes the falafel golden and crisp without the need for deep frying.

Build each pita with fresh vegetables, hummus, and creamy garlic yogurt sauce for a balanced combination of textures and flavors. For the best result, keep the falafel separate from the wet toppings until you are ready to eat.

Once you have the basic recipe down, you can change the sauces, vegetables, and toppings to create a different pita every time.