Cheesy Garlic Pizza Bread

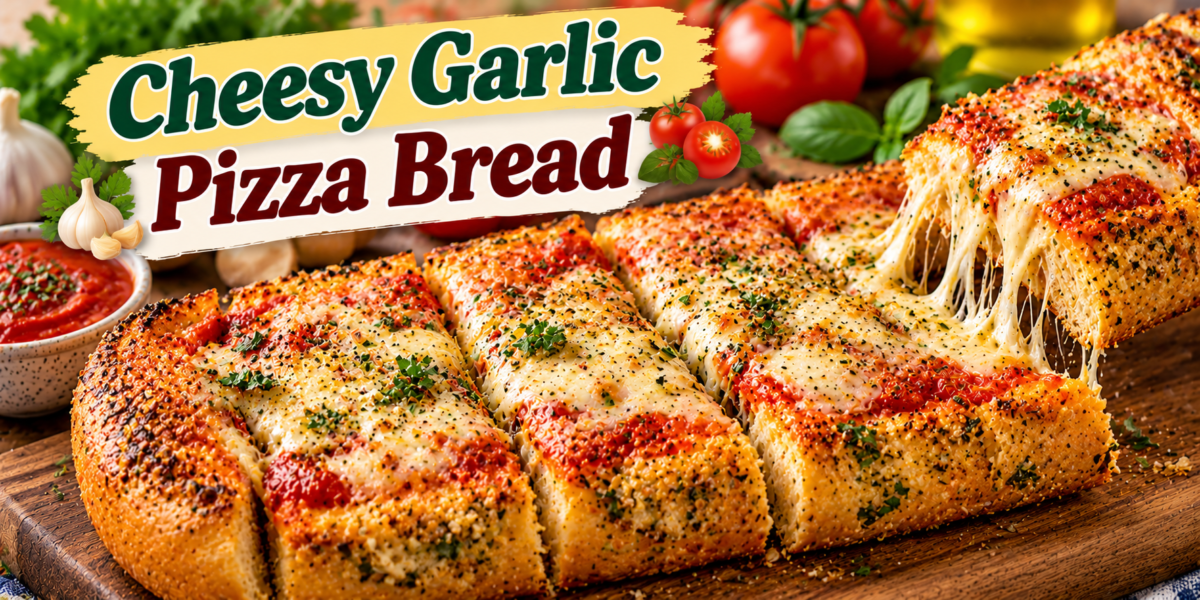
Cheesy Garlic Pizza Bread with garlic butter, pizza sauce, mozzarella, Parmesan, herbs, and crispy golden bread

Cheesy Garlic Pizza Bread

Cheesy Garlic Pizza Bread is a quick, savory bake made with crusty bread, garlic butter, pizza sauce, mozzarella, Parmesan, herbs, and your favorite toppings. It combines the crisp edges of garlic bread with the cheesy comfort of pizza, making it perfect for snacks, easy lunches, family dinners, parties, or game-day spreads.

This Cheesy Garlic Pizza Bread is simple enough for beginners and flexible enough to customize. You can keep it classic with cheese and herbs, add pepperoni or vegetables, or serve it with marinara for dipping.

Prep Time: 15 minutes
Bake Time: 12 to 15 minutes
Total Time: About 30 minutes
Servings: 6

Ingredients

For the Garlic Bread Base

  • 1 large French bread loaf or Italian bread loaf
  • 4 tablespoons unsalted butter, softened
  • 2 tablespoons extra virgin olive oil
  • 3 garlic cloves, finely minced
  • 1 tablespoon chopped fresh parsley
  • 1/2 teaspoon dried oregano
  • 1/4 teaspoon garlic powder
  • 1/4 teaspoon salt

For the Pizza Topping

  • 3/4 cup pizza sauce or thick marinara
  • 2 cups shredded mozzarella cheese
  • 1/3 cup freshly grated Parmesan cheese
  • 1/2 teaspoon Italian seasoning
  • 1/4 teaspoon red pepper flakes, optional
  • 1/3 cup sliced pepperoni, optional
  • 1/4 cup sliced black olives, optional
  • 1/4 cup diced bell pepper, optional
  • 2 tablespoons chopped fresh basil

 Serving

  • Warm marinara sauce
  • Extra Parmesan
  • Fresh basil
  • Red pepper flakes

Why You’ll Love This Recipe

Cheesy Garlic Pizza Bread gives you the best parts of pizza and garlic bread in one easy recipe. The base turns crisp around the edges while staying slightly soft in the center, and the garlic butter soaks into the bread before the sauce and cheese are added.

Another reason to love this recipe is how easy it is to adapt. Use different cheeses, vegetables, or cooked meats to suit your taste.

How to Make Cheesy Garlic Pizza Bread

Step 1: Preheat the Oven

Preheat the oven to 425°F or 220°C.

Line a large baking sheet with parchment paper or foil.

A hot oven helps Cheesy Garlic Pizza Bread develop crisp edges quickly while melting the cheese evenly.

Step 2: Prepare the Bread

Slice the loaf in half lengthwise so you have two long pieces.

Place them cut-side up on the prepared baking sheet.

If the loaf is very thick, gently press the center down slightly with your hand to create a flatter surface for the toppings.

Step 3: Make the Garlic Butter

In a small bowl, combine softened butter, olive oil, minced garlic, parsley, oregano, garlic powder, and salt.

Mix until smooth.

Spread the garlic butter evenly over the cut surfaces of the bread.

This layer is what gives Cheesy Garlic Pizza Bread its rich garlic flavor from the very first bite.

Step 4: Toast the Bread First

Bake the buttered bread for 5 minutes before adding the pizza toppings.

This short pre-bake helps the surface become slightly crisp and prevents the sauce from soaking in too deeply.

Remove the bread from the oven once the edges begin to look lightly golden.

Step 5: Add the Pizza Sauce

Spread a thin, even layer of pizza sauce over each half.

Do not use too much sauce because excess moisture can make Cheesy Garlic Pizza Bread soggy.

Leave a small border around the edges for a crisp finish.

Step 6: Add the Cheese

Sprinkle mozzarella evenly over the sauce.

Add Parmesan, Italian seasoning, and red pepper flakes if using.

For the best melt, spread the cheese all the way toward the edges without covering the crust completely.

Step 7: Add Optional Toppings

Add pepperoni, olives, bell pepper, mushrooms, cooked sausage, or any other toppings you enjoy.

Keep the toppings fairly light so Cheesy Garlic Pizza Bread stays crisp and easy to slice.

Watery vegetables should be cooked or patted dry before adding.

Step 8: Bake Until Golden

Return the bread to the oven.

Bake for 7 to 10 minutes, or until the mozzarella is fully melted and bubbling.

For extra color, broil for 1 to 2 minutes at the end, watching closely.

Cheesy Garlic Pizza Bread is ready when the cheese has golden spots and the bread edges are crisp.

Step 9: Finish with Fresh Herbs

Remove the bread from the oven and sprinkle with fresh basil, extra parsley, or more Parmesan.

Let it rest for 2 to 3 minutes before slicing.

Step 10: Slice and Serve

Cut each half into thick strips or squares.

Serve Cheesy Garlic Pizza Bread warm with marinara sauce for dipping.

Serving Suggestions

Cheesy Garlic Pizza Bread works as an appetizer, snack, or light meal.

Serve it with tomato soup, minestrone, Caesar salad, cucumber salad, or roasted vegetables.

For a party, cut Cheesy Garlic Pizza Bread into smaller squares and serve with warm marinara or garlic dip.

It also pairs well with grilled chicken, meatballs, pasta, or a large Italian-style salad.

For another crispy and flavorful air fryer recipe, try our Air Fryer Crispy Pesto Gnocchi with basil pesto and Parmesan.

Recipe Tips

Use sturdy French or Italian bread rather than very soft sandwich bread.

Do not skip the first short bake with garlic butter.

Use a thick pizza sauce so the bread stays crisp.

Freshly shredded mozzarella melts more smoothly than many pre-shredded varieties.

Cheesy Garlic Pizza Bread tastes best when served immediately after baking.

Avoid overloading the bread with toppings.

Cook mushrooms, zucchini, or other watery vegetables before adding them.

Broil briefly at the end if you want browned cheese.

Let the bread rest for a few minutes before slicing so the cheese stays in place.

Easy Variations

For a classic pepperoni version, add thin slices of pepperoni over the mozzarella.

Cheesy Garlic Pizza Bread can also be made with cooked chicken, mushrooms, spinach, roasted peppers, or olives.

For a Mediterranean variation, use feta, mozzarella, tomatoes, olives, oregano, and a little red onion.

For extra heat, add jalapeños, chili flakes, or spicy sausage.

You can also use pesto instead of pizza sauce for a basil-forward version.

For a white pizza variation, skip the tomato sauce and use ricotta, mozzarella, Parmesan, garlic, and herbs.

Make-Ahead Instructions

Cheesy Garlic Pizza Bread is best baked fresh, but you can prepare several components ahead.

Mix the garlic butter up to 3 days in advance and refrigerate it in an airtight container. Let it soften slightly before spreading.

Prepare the cheese and toppings a day ahead if needed.

For best texture, assemble and bake the bread shortly before serving rather than letting it sit with sauce for hours.

Storage and Reheating

Store leftover Cheesy Garlic Pizza Bread in an airtight container in the refrigerator for up to 3 days.

To reheat, place slices in a 375°F or 190°C oven for 5 to 8 minutes until hot and crisp.

An air fryer also works well at 350°F or 175°C for 3 to 5 minutes.

The microwave is convenient, but the bread will become softer.

You can freeze baked slices for up to 2 months and reheat them in the oven.

Nutrition Information

Approximate nutrition per serving:

Calories: 390
Protein: 16 g
Carbohydrates: 38 g
Fat: 20 g
Saturated Fat: 9 g
Fiber: 3 g
Sugar: 5 g
Sodium: 760 mg

Nutrition values are estimates and may vary depending on the bread, cheese, sauce, and toppings.

Frequently Asked Questions

Can I use baguette instead of French bread?

Yes. A baguette works well and gives the finished bread an even crispier texture.

Can I make this without pizza sauce?

Yes. Use pesto, garlic cream sauce, or a thin layer of ricotta instead.

What cheese works best?

Mozzarella is the best base cheese because it melts well, while Parmesan adds flavor. Provolone and cheddar can also be mixed in.

How do I keep the bread from getting soggy?

Pre-bake the garlic-buttered bread, use a thick sauce, and avoid adding too many wet toppings.

Can I make it vegetarian?

Yes. Skip the pepperoni and use vegetables such as peppers, olives, mushrooms, spinach, or artichokes.

Can I use an air fryer?

Yes. Cut the bread to fit the basket and air fry at 375°F or 190°C until the cheese is melted and the edges are crisp.

What can I serve with it?

Soup, salad, pasta, grilled chicken, meatballs, or a simple vegetable side all pair well.

Final Thoughts

Cheesy Garlic Pizza Bread is an easy way to turn a simple loaf of bread into a warm, cheesy, crowd-pleasing meal or snack. Garlic butter, pizza sauce, mozzarella, Parmesan, herbs, and crisp bread come together quickly with very little preparation.

Because Cheesy Garlic Pizza Bread is so customizable, you can keep it simple or add your favorite pizza toppings depending on the occasion.

Keep this Cheesy Garlic Pizza Bread recipe in your rotation whenever you want something fast, flavorful, and comforting without making pizza dough from scratch.

If you enjoy easy Mediterranean-inspired brunch recipes, you may also like our Mediterranean Turkey, Cheese & Tomato Toast Bake.
Air Fryer Loaded Mini Pizza Roll-Ups

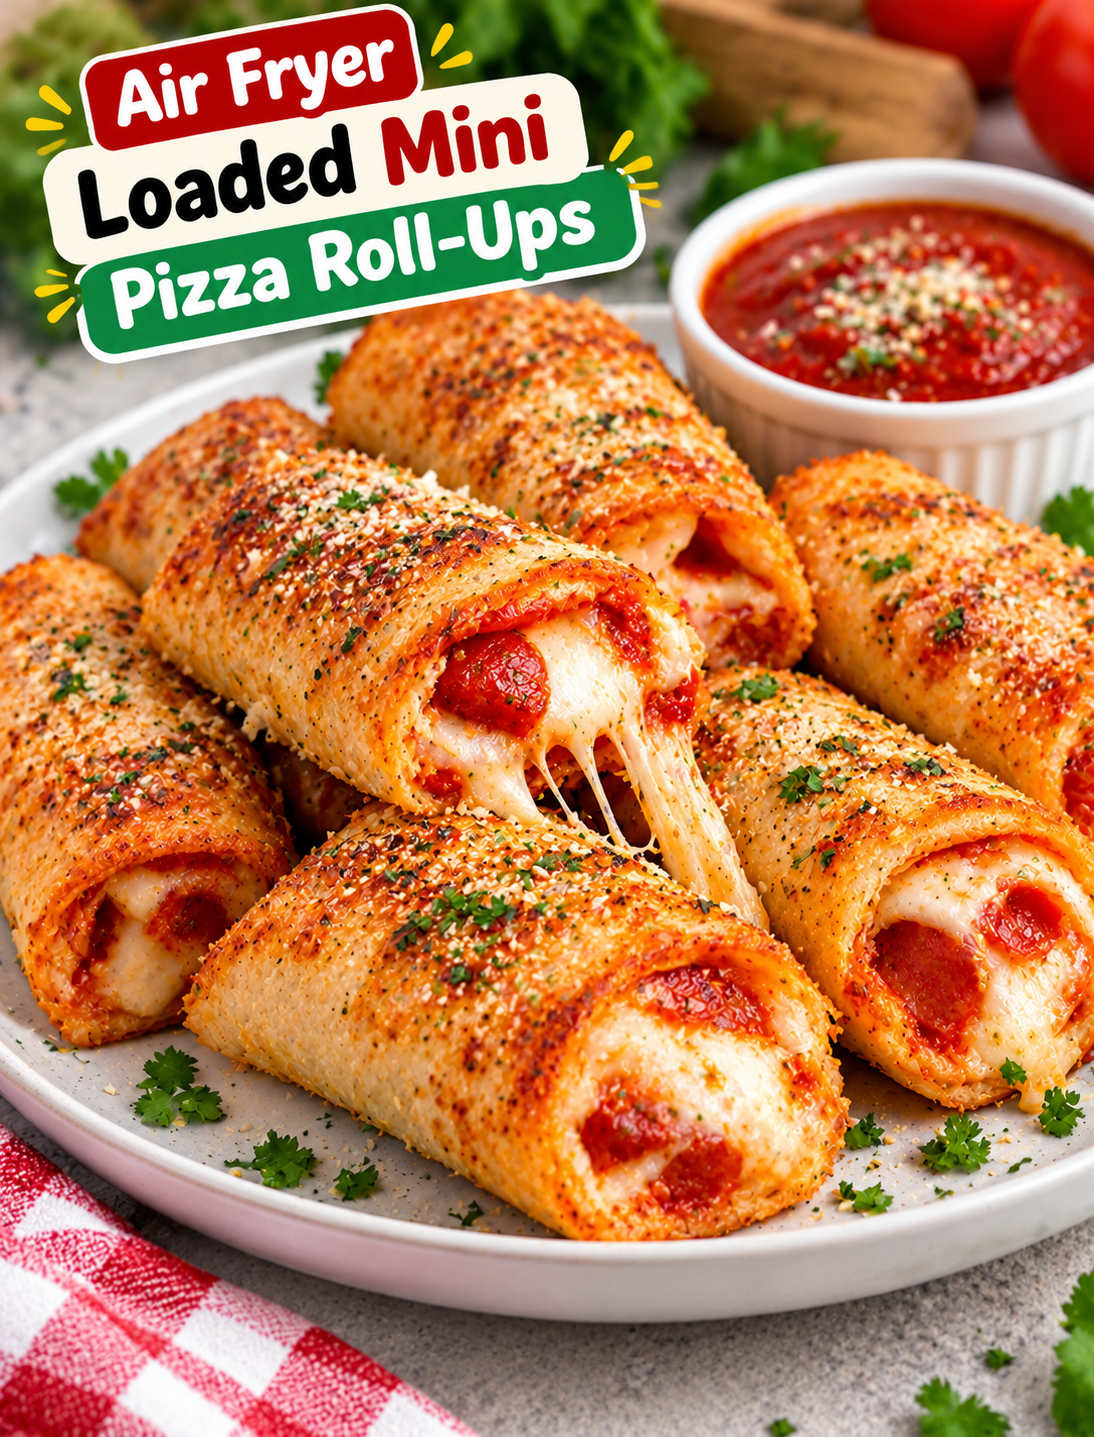
Crispy air fryer loaded mini pizza roll-ups filled with melted mozzarella, pepperoni, and pizza sauce

Air Fryer Loaded Mini Pizza Roll-Ups

These Air Fryer Loaded Mini Pizza Roll-Ups turn classic pizza flavors into crispy, bite-sized rolls that are ready in minutes. Each roll is packed with melted mozzarella, savory pepperoni, pizza sauce, and Italian seasoning, then cooked until the outside is golden and crisp.

They are a fun choice for game days, after-school snacks, quick lunches, family movie nights, or easy party appetizers. The air fryer gives the rolls a crunchy finish without needing a deep fryer.

You can also customize the filling with your favorite pizza toppings. Try cooked sausage, mushrooms, bell peppers, olives, or extra cheese to make every batch your own.

Why You’ll Love These Mini Pizza Roll-Ups

This recipe uses simple ingredients and a fast cooking method, making it useful when you want pizza without waiting for a full pie to bake.

  • Quick to make: The roll-ups cook in the air fryer in just a few minutes.
  • Crispy outside: Lightly brushing the rolls with oil helps create a golden finish.
  • Cheesy center: Mozzarella melts into the pizza sauce for a warm, gooey filling.
  • Easy to customize: Use your favorite pizza toppings or leftover cooked ingredients.
  • Great for sharing: Their small size makes them easy to serve at parties and gatherings.
  • Kid-friendly: Familiar pizza flavors make these an easy snack for children.
  • No deep frying: The air fryer provides crisp texture with only a small amount of oil.

Ingredients You’ll Need

For the Pizza Roll-Ups

  • 8 slices soft white or wheat sandwich bread
  • ½ cup pizza sauce
  • 1 cup shredded mozzarella cheese
  • ½ cup finely chopped pepperoni
  • 1 teaspoon Italian seasoning
  • ¼ teaspoon garlic powder
  • 1 tablespoon grated Parmesan cheese
  • 1 tablespoon melted butter or olive oil
  • ½ teaspoon dried parsley, optional

Use soft sandwich bread that can flatten without cracking. Fresh mozzarella can also work, but shredded low-moisture mozzarella melts evenly and creates less excess moisture.

Optional Pizza Toppings

You can add small amounts of other toppings without making the rolls difficult to wrap.

Good options include:

  • Cooked Italian sausage
  • Finely diced bell peppers
  • Sliced black olives
  • Finely chopped mushrooms
  • Diced jalapeños
  • Cooked bacon
  • Sun-dried tomatoes
  • Red pepper flakes

Always cook raw meat before adding it to the roll-ups. Keep vegetable pieces small so the rolls remain easy to fold and seal.

How to Make Air Fryer Loaded Mini Pizza Roll-Ups

Step 1: Flatten the Bread

Place one slice of bread on a clean cutting board.

Use a rolling pin to flatten the bread into a thin, even rectangle.

Repeat with all the slices.

Flattening the bread makes it flexible enough to roll tightly and helps create a crisp outer layer during air frying.

Tip: Avoid pressing the bread so hard that it becomes torn or paper-thin.

Step 2: Add the Pizza Sauce

Spread about 1 tablespoon of pizza sauce over each flattened bread slice.

Leave a small border around the edges.

Too much sauce can make the bread soggy and cause the filling to leak during cooking.

For a stronger tomato flavor, use a thick pizza sauce rather than a thin pasta sauce.

Step 3: Add Cheese and Toppings

Sprinkle mozzarella evenly over the sauce.

Add the chopped pepperoni and a small amount of Parmesan.

Finish with Italian seasoning and garlic powder.

Keep the filling toward the center of the bread so the roll can close properly.

Avoid overfilling because melted cheese and sauce can escape while the rolls cook.

Step 4: Roll the Bread

Starting from one short end, roll the bread tightly around the filling.

Continue rolling until you have a compact cylinder.

Place the roll seam-side down.

Repeat with the remaining bread slices.

If a roll does not stay closed, lightly press the seam against the cutting board for a few seconds.

Step 5: Prepare the Air Fryer

Preheat the air fryer to 375°F for about 3 minutes.

Lightly brush the outside of each roll with melted butter or olive oil.

A thin coating is enough to help the bread brown and crisp.

Do not soak the rolls with oil because excess oil can make the bread greasy.

Step 6: Air Fry the Pizza Roll-Ups

Place the rolls in the air fryer basket with the seam-side down.

Leave a little space between each roll so hot air can circulate around them.

Air fry at 375°F for 5 to 8 minutes.

Turn the rolls halfway through cooking if your air fryer does not brown evenly.

Cook until the bread is golden and crisp and the cheese inside has melted.

Because air fryers vary in power, start checking around the 5-minute mark.

Step 7: Let Them Rest

Carefully remove the pizza roll-ups from the basket.

Let them rest for about 1 to 2 minutes before serving.

The filling will be extremely hot immediately after cooking, especially the melted cheese and sauce.

Sprinkle the finished rolls with dried parsley or a little Parmesan if desired.

Tips for Crispy Pizza Roll-Ups

Getting the outside crisp while keeping the filling inside takes a few simple steps.

  • Flatten the bread evenly: This helps the rolls cook at the same rate.
  • Use less sauce: A thin layer prevents soggy bread.
  • Do not overfill: Too much cheese or pepperoni can make the rolls burst.
  • Roll tightly: A compact roll keeps the filling contained.
  • Place seam-side down: This helps the roll stay closed while cooking.
  • Use a light oil coating: A small amount helps create a golden crust.
  • Avoid overcrowding: Space allows hot air to reach every side.
  • Watch the final minutes: Bread can brown quickly in an air fryer.

Easy Flavor Variations

These roll-ups are easy to change based on your favorite pizza combination.

Pepperoni Pizza Roll-Ups

Use pepperoni, mozzarella, pizza sauce, and Italian seasoning for a classic pizza flavor.

Supreme Pizza Roll-Ups

Add finely chopped bell peppers, olives, mushrooms, and cooked sausage along with the cheese.

Spicy Pizza Roll-Ups

Add crushed red pepper flakes and diced jalapeños for a spicy version.

BBQ Chicken Pizza Roll-Ups

Replace pizza sauce with a thin layer of BBQ sauce and add cooked shredded chicken, mozzarella, and red onion.

Garlic Cheese Roll-Ups

Skip the meat and add extra mozzarella, Parmesan, garlic powder, and Italian herbs.

Hawaiian-Style Roll-Ups

Add finely chopped cooked ham and small pieces of pineapple with the mozzarella.

Keep the added ingredients finely chopped so the bread can still roll tightly.

What to Serve With Pizza Roll-Ups

These mini pizza rolls are delicious on their own, but a dipping sauce makes them even more enjoyable.

Try serving them with:

  • Warm marinara sauce
  • Ranch dressing
  • Garlic butter
  • Spicy marinara
  • Creamy Parmesan dip
  • Hot honey
  • Garlic herb sauce

For a party platter, arrange the rolls around small bowls of two or three dipping sauces.

For a quick family meal, serve them with a simple green salad, roasted vegetables, or fresh fruit.

How to Store Leftovers

Allow leftover roll-ups to cool completely before storing them.

Place them in an airtight container and refrigerate for up to 3 days.

For the best texture, reheat them in the air fryer instead of the microwave.

Air fry refrigerated roll-ups at 350°F for about 3 to 5 minutes, or until heated through and crisp again.

Check the center before serving because the melted cheese can become very hot.

Can You Make Them Ahead?

Yes. You can prepare the rolls several hours before cooking and keep them covered in the refrigerator.

For the best results, avoid storing them for too long after assembly because the sauce can gradually soften the bread.

When ready to serve, lightly brush the rolls with oil and air fry them directly from the refrigerator.

Add about 1 to 2 minutes to the cooking time if needed.

Common Mistakes to Avoid

Adding Too Much Sauce

Excess sauce can make the bread soft and difficult to roll. Use a thin, even layer instead.

Overloading the Filling

Too many toppings can prevent the bread from sealing and cause cheese to leak during cooking.

Skipping the Preheat

A preheated air fryer helps the bread begin crisping as soon as it enters the basket.

Using Wet Toppings

Drain vegetables and other ingredients with excess moisture before adding them to the rolls.

Overcrowding the Basket

Crowding blocks hot air and can leave some sides pale or soft.

Cutting Immediately

Give the rolls a minute or two to rest so the hot cheese and sauce are less likely to spill out.

Frequently Asked Questions

Can I use tortillas instead of bread?

Yes, small flour tortillas can work, but the texture will be different and more like a crispy tortilla pizza roll.

How long do pizza roll-ups take in an air fryer?

Most batches take about 5 to 8 minutes at 375°F, depending on the air fryer and the size of the rolls.

Can I make these without pepperoni?

Yes. Replace pepperoni with cooked sausage, vegetables, chicken, bacon, or simply add more cheese.

Why are my pizza roll-ups soggy?

Too much sauce, wet toppings, or overcrowding the air fryer can prevent the bread from becoming crisp.

Can I freeze pizza roll-ups?

Yes. Freeze fully cooled rolls in a freezer-safe container, then reheat them in the air fryer until hot and crisp.

What cheese is best for pizza roll-ups?

Low-moisture shredded mozzarella melts smoothly and gives the rolls a classic pizza-style cheese pull.

Can I use whole wheat bread?

Yes. Soft whole wheat bread works well, although it may produce a slightly firmer texture than white bread.

What temperature is best for air frying them?

375°F provides a good balance between crisping the bread and melting the cheese without burning the outside too quickly.

Final Thoughts

These Air Fryer Loaded Mini Pizza Roll-Ups are an easy way to enjoy classic pizza flavors in a small, crispy package. Soft bread wraps around pizza sauce, mozzarella, pepperoni, and Italian seasoning before the air fryer turns everything golden and crunchy.

The recipe is flexible enough for busy weeknights, school snacks, game-day gatherings, and casual parties. You can keep the filling classic or add your favorite toppings for a personalized version.

For the best results, use a thin layer of sauce, avoid overfilling, roll the bread tightly, and leave space between the rolls in the air fryer. Serve them warm with marinara, ranch, or your favorite dipping sauce for an easy snack everyone can grab and enjoy.

Air Fryer Mac & Cheese Balls

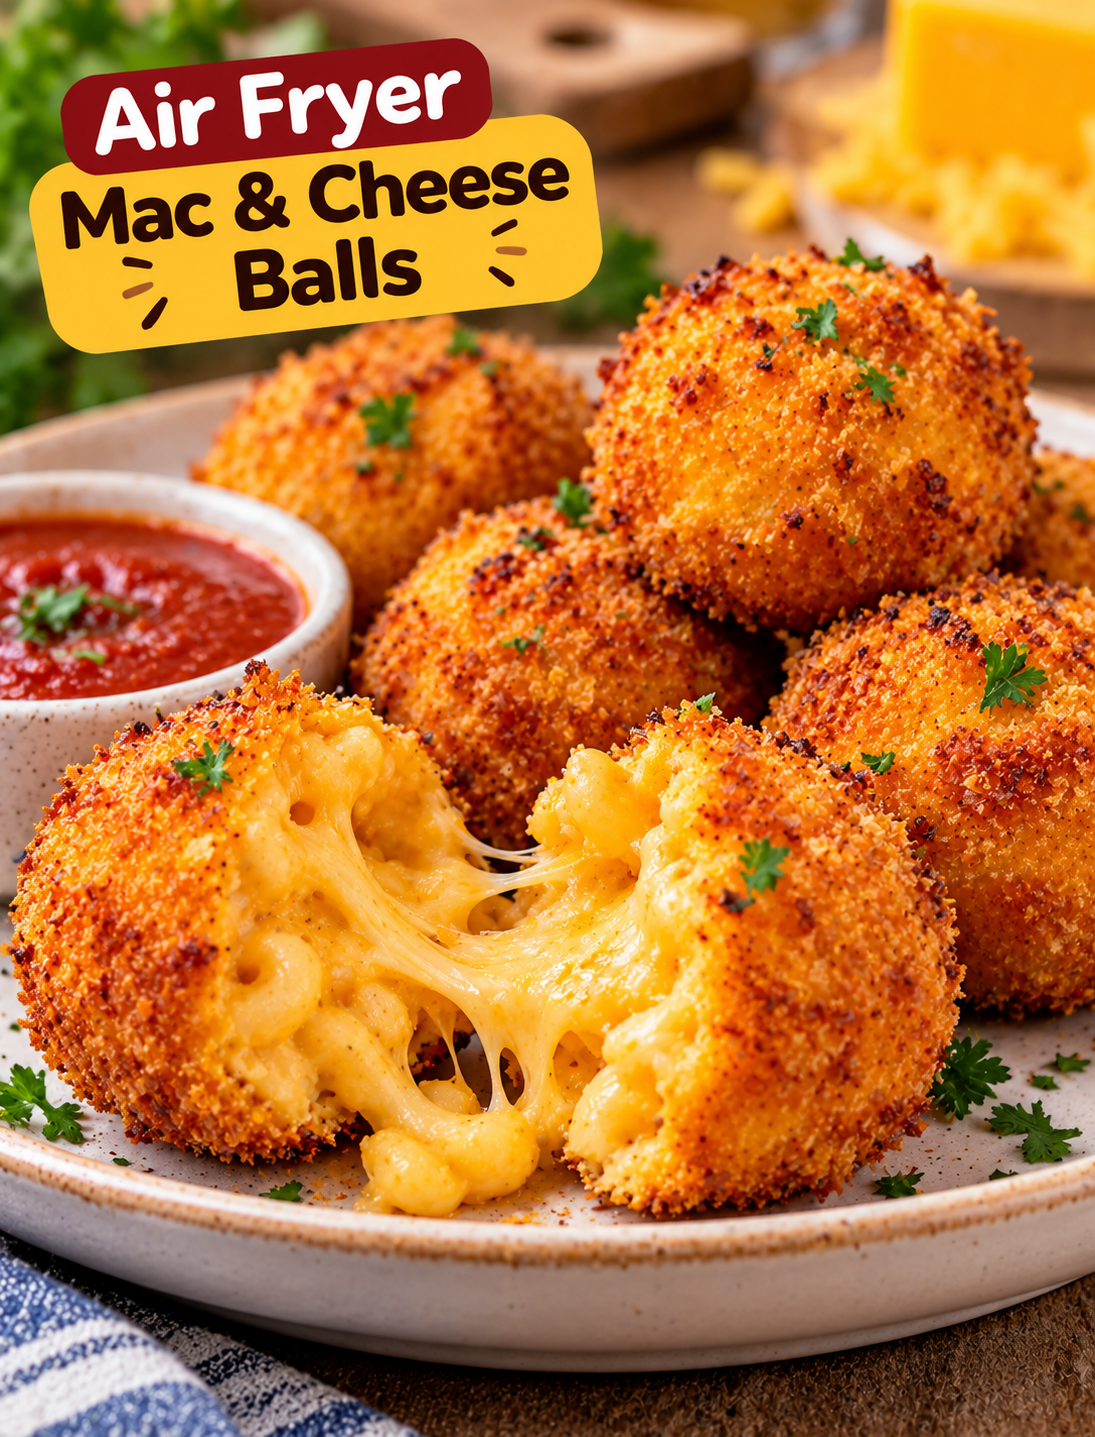
Crispy air fryer mac and cheese balls with golden breadcrumb coating and creamy melted cheese center served with dipping sauce

Air Fryer Mac & Cheese Balls

These Air Fryer Mac & Cheese Balls turn leftover macaroni and cheese into crispy, golden bites with a warm, cheesy center. They are easy to make, use simple ingredients, and need much less oil than deep-fried versions.

The outside becomes crunchy while the inside stays soft and creamy. A quick air-fryer finish gives these cheesy bites the texture people love without filling your kitchen with hot oil.

They are perfect for game-day snacks, party appetizers, family dinners, or a fun way to use leftover mac and cheese. Serve them with marinara sauce, ranch dressing, or your favorite dipping sauce for an extra burst of flavor.

Why You’ll Love These Mac & Cheese Balls

  • Crispy outside: Breadcrumbs create a golden, crunchy coating.
  • Creamy center: Chilled macaroni and cheese keeps the middle rich and cheesy.
  • Air-fryer friendly: You only need a light coating of cooking spray.
  • Great for leftovers: This recipe gives leftover mac and cheese a fresh purpose.
  • Easy party snack: Small portions make them simple to serve and share.
  • Customizable: Add different cheeses or seasonings to change the flavor.
  • Freezer friendly: You can prepare the balls ahead of time and cook them later.

Ingredients You’ll Need

  • 3 cups cooked macaroni and cheese, chilled
  • ½ cup shredded sharp cheddar cheese
  • ½ cup all-purpose flour
  • 2 large eggs
  • 1 tablespoon milk
  • 1 cup seasoned breadcrumbs
  • ½ teaspoon garlic powder
  • ½ teaspoon paprika
  • ¼ teaspoon black pepper
  • ¼ teaspoon salt
  • Cooking spray
  • Fresh parsley, optional for serving

For the best texture, use thick, chilled macaroni and cheese. Very loose or freshly made mac and cheese can be difficult to shape into firm balls.

Sharp cheddar adds a stronger cheese flavor, while mozzarella can make the center extra stretchy. You can also use a blend of cheddar and Monterey Jack.

How to Make Air Fryer Mac & Cheese Balls

Step 1: Chill the Mac and Cheese

Place the cooked macaroni and cheese in the refrigerator for at least 2 hours.

Cold mac and cheese is much easier to shape because the cheese sauce becomes firmer. If you have leftover mac and cheese from the previous day, it works especially well.

Step 2: Add Extra Cheese

Place the chilled mac and cheese in a large bowl.

Add the shredded cheddar cheese and gently mix until the cheese is evenly distributed.

Do not overmix because breaking the pasta too much can make the mixture difficult to shape.

Step 3: Shape the Balls

Scoop about 2 tablespoons of the mixture into your hands.

Press and roll it into a compact ball about the size of a golf ball.

If the mixture feels too soft, refrigerate it for another 30 minutes before shaping. Firming the mixture helps prevent the balls from falling apart during cooking.

Place each shaped ball on a parchment-lined plate or tray.

Step 4: Prepare the Coating

Set up three shallow bowls.

Place the flour in the first bowl.

Whisk the eggs with milk in the second bowl.

Combine breadcrumbs, garlic powder, paprika, black pepper, and salt in the third bowl.

This three-step coating creates a more even and crunchy exterior.

Step 5: Coat Each Ball

Roll one mac and cheese ball in flour and shake off the excess.

Dip it into the egg mixture and coat it completely.

Finally, roll it through the seasoned breadcrumbs, gently pressing the crumbs onto the surface.

Repeat with the remaining balls.

Step 6: Chill Before Air Frying

Place the coated balls in the refrigerator for 15–20 minutes.

This short chilling step helps the coating stick and gives the cheese mixture more structure.

For even easier preparation, you can freeze the coated balls for about 20–30 minutes before cooking.

Step 7: Preheat the Air Fryer

Preheat your air fryer to 375°F for about 3 minutes.

A preheated basket helps the breadcrumb coating start crisping immediately.

Step 8: Arrange the Mac & Cheese Balls

Lightly spray the air fryer basket with cooking spray.

Place the balls in a single layer with space between each one.

Do not stack them or overcrowd the basket because hot air needs room to circulate around each bite.

Step 9: Air Fry

Lightly spray the tops with cooking spray.

Air fry at 375°F for 8–10 minutes, turning them carefully halfway through cooking.

Continue cooking until the coating is golden brown and crisp.

Keep a close eye on them during the final few minutes because the cheese can begin to leak if they become too hot.

Step 10: Rest and Serve

Carefully remove the cooked bites from the air fryer.

Let them rest for about 2–3 minutes before serving.

The center will be extremely hot immediately after cooking, so allowing them to cool slightly makes them easier to eat.

Serve warm with your favorite dipping sauce.

Tips for Crispy Mac & Cheese Balls

Use cold mac and cheese. Chilled pasta and cheese sauce are easier to shape and less likely to fall apart.

Make compact balls. Press each portion firmly before rolling it between your hands.

Do not skip the flour. The flour helps the egg mixture adhere to the surface.

Press in the breadcrumbs. A gentle press creates a thicker coating that becomes crisp in the air fryer.

Avoid overcrowding. Cook in batches if your basket is small.

Use cooking spray. A light coating helps the breadcrumbs brown evenly without deep frying.

Chill before cooking. A short rest in the refrigerator helps the balls maintain their shape.

Turn carefully. Use tongs or a small spatula to prevent the coating from breaking.

Best Cheese for Mac & Cheese Balls

Sharp cheddar is a great choice because it provides a bold cheese flavor that works well with crispy breadcrumbs.

For a stretchier center, mix cheddar with mozzarella.

Monterey Jack gives the filling a smooth, mild flavor, while pepper Jack adds a little heat.

Avoid using only very soft or watery cheese because excess moisture can make the balls harder to shape and crisp.

Easy Flavor Variations

Spicy Mac & Cheese Balls

Add ¼ teaspoon of cayenne pepper or ½ teaspoon of crushed red pepper flakes to the breadcrumb mixture.

Buffalo-Style Bites

Mix a small amount of buffalo sauce into the chilled mac and cheese before shaping. Serve with ranch or blue cheese dressing.

Garlic Parmesan Bites

Add grated Parmesan cheese, garlic powder, and Italian seasoning to the breadcrumbs for a savory coating.

Jalapeño Cheddar Bites

Mix finely chopped pickled jalapeños and extra cheddar into the chilled macaroni and cheese.

Bacon-Free Loaded Bites

Add chopped green onions, extra cheddar, and a little smoked paprika for a loaded flavor without using bacon.

What to Serve With Mac & Cheese Balls

These crispy bites pair well with sauces and simple side dishes.

For dipping, try marinara sauce, ranch dressing, honey mustard, buffalo sauce, garlic aioli, or a creamy cheese dip.

For a party, serve them alongside vegetable sticks, a fresh green salad, chicken wings, or other finger foods.

They also make a fun side dish for burgers, grilled chicken, or sandwiches.

How to Store Leftovers

Let the cooked bites cool completely before storing them.

Place them in an airtight container and refrigerate for up to 3 days.

For the best texture, reheat them in the air fryer at 350°F for 3–5 minutes.

Avoid microwaving when possible because it can make the breadcrumb coating soft.

Can You Freeze Mac & Cheese Balls?

Yes, these bites can be frozen before or after cooking.

For the best results, freeze the breaded, uncooked balls in a single layer until firm. Transfer them to a freezer-safe bag or container and store for up to 2 months.

When ready to cook, air fry them directly from frozen at 375°F, adding a few extra minutes to the cooking time. Check that the center is heated through before serving.

Recipe Notes

  • Prep time: 25 minutes
  • Chilling time: 2 hours
  • Cook time: 8–10 minutes
  • Total active time: About 35 minutes
  • Air fryer temperature: 375°F
  • Servings: About 12–14 bites
  • Category: Appetizer
  • Cuisine: American

Cooking time can vary by air fryer model and the size of the balls. Smaller bites may finish sooner, while larger ones may need additional cooking time.

Frequently Asked Questions

Can I use leftover mac and cheese?

Yes, chilled leftover mac and cheese works especially well because the firmer texture makes the balls easier to shape.

Why are my mac and cheese balls falling apart?

The mixture may be too warm or loose; chill it longer and press each ball firmly before breading.

Can I make these without eggs?

Yes, but the egg helps the breadcrumbs adhere; a suitable egg substitute can be used for the coating.

How long do mac and cheese balls take in an air fryer?

They usually take 8–10 minutes at 375°F, depending on their size and your air fryer.

Can I freeze mac and cheese balls?

Yes, freeze the breaded balls in a single layer and transfer them to a freezer-safe container once firm.

What dipping sauce goes with mac and cheese balls?

Marinara, ranch, buffalo sauce, honey mustard, and garlic aioli all pair well with the crispy cheese bites.

Can I use different types of cheese?

Yes, cheddar, mozzarella, Monterey Jack, and pepper Jack can be combined for different flavors and textures.

How do I make them extra crispy?

Use seasoned breadcrumbs, avoid overcrowding the basket, and lightly spray the coated balls before air frying.

Final Thoughts

These Air Fryer Mac & Cheese Balls are an easy way to turn leftover macaroni and cheese into something completely different. The crunchy breadcrumb coating contrasts with the warm, creamy center, making every bite satisfying.

For the best results, start with cold mac and cheese, make firm balls, chill them before cooking, and leave enough space in the air fryer basket. Serve them hot with a flavorful dipping sauce for an easy appetizer that works for family dinners, parties, game days, and casual gatherings.