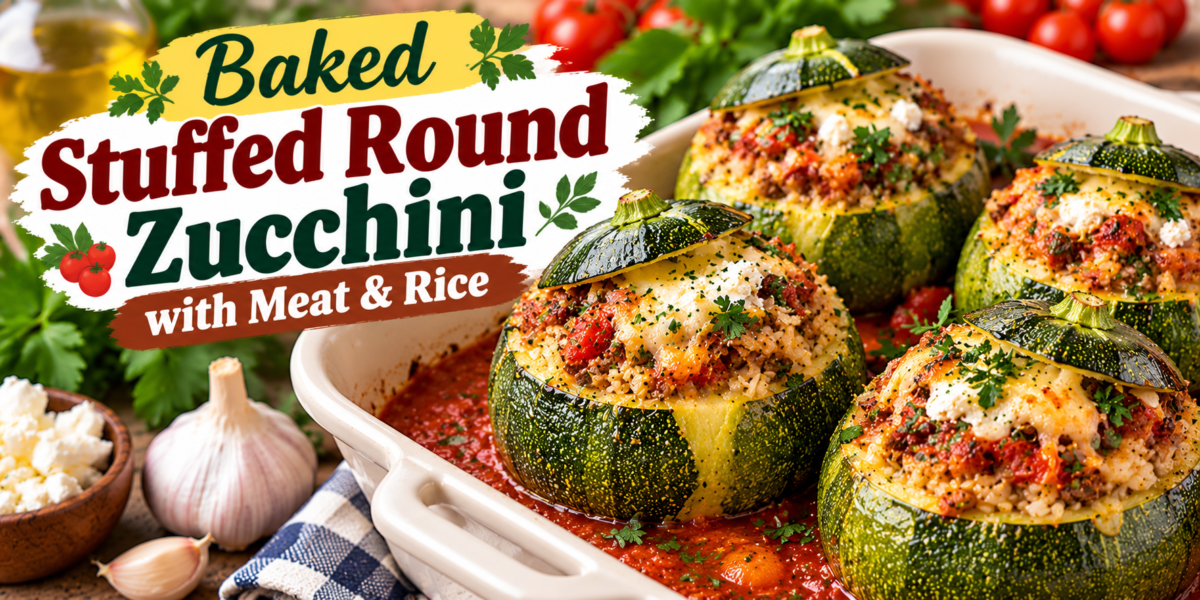
Baked Stuffed Round Zucchini with Meat & Rice

Stuffed Round Zucchini with seasoned meat, rice, tomatoes, herbs, feta, and savory tomato sauce

Baked Stuffed Round Zucchini with Meat & Rice

Stuffed Round Zucchini is a comforting Mediterranean-inspired dinner made with tender round zucchini filled with seasoned ground meat, rice, tomatoes, herbs, and a touch of cheese. The zucchini softens in the oven while the filling stays juicy and flavorful, creating a complete meal in an edible vegetable shell.

This Stuffed Round Zucchini recipe is ideal for family dinners, meal prep, or weekend cooking.

Prep Time: 25 minutes
Cook Time: 45–50 minutes
Total Time: About 1 hour 15 minutes
Servings: 6

Ingredients

For the Zucchini

  • 6 medium round zucchini
  • 1 tablespoon extra virgin olive oil
  • 1/2 teaspoon salt
  • 1/4 teaspoon black pepper

Ingredients For the Meat and Rice Filling

  • 1 pound lean ground beef or ground lamb
  • 1 tablespoon extra virgin olive oil
  • 1 small yellow onion, finely diced
  • 3 garlic cloves, minced
  • 1/2 cup uncooked long-grain white rice
  • 1 cup crushed tomatoes
  • 1 tablespoon tomato paste
  • 1 teaspoon dried oregano
  • 1 teaspoon ground cumin
  • 1/2 teaspoon smoked paprika
  • 1/4 teaspoon ground cinnamon, optional
  • 1/2 teaspoon salt
  • 1/4 teaspoon black pepper
  • 2 tablespoons chopped fresh parsley
  • 1 tablespoon chopped fresh mint
  • 1/3 cup crumbled feta cheese, optional

For the Baking Sauce

  • 1 cup tomato sauce
  • 1/2 cup low-sodium chicken or vegetable broth
  • 1 tablespoon olive oil
  • 1 tablespoon fresh lemon juice
  • 1/2 teaspoon dried oregano
  • 2 tablespoons chopped parsley, for garnish

Why You’ll Love This Recipe

Stuffed Round Zucchini combines vegetables, protein, grains, herbs, and sauce in one balanced dish. Each zucchini holds a generous portion of savory filling, while the tomato-based baking liquid keeps everything moist as it cooks.

Another reason to love Stuffed Round Zucchini is how adaptable it is. You can use beef, lamb, turkey, or chicken, switch the rice, add feta, or make the filling spicier. It also reheats well for meal prep.

How to Make Stuffed Round Zucchini

Step 1: Prepare the Zucchini

Preheat the oven to 375°F or 190°C.

Wash and dry the zucchini. Slice a thin cap from the top of each one and set the caps aside.

Use a small spoon or melon baller to scoop out the centers, leaving about a 1/4-inch wall around the sides and bottom. Do not cut through the skin. Chop about 1 cup of the scooped flesh and reserve it for the filling.

Step 2: Season the Zucchini Shells

Brush the inside and outside of each shell lightly with olive oil. Sprinkle with salt and black pepper.

Arrange the shells upright in a baking dish that holds them snugly. Keeping them close together helps Stuffed Round Zucchini remain stable while baking.

Step 3: Cook the Aromatics

Heat 1 tablespoon olive oil in a large skillet over medium heat.

Add the onion and cook for 3 to 4 minutes until softened. Stir in the garlic and cook for 30 seconds. Add the reserved zucchini flesh and cook for another 2 minutes so some moisture evaporates.

Step 4: Brown the Meat

Add the ground beef or lamb and cook for 5 to 7 minutes, breaking it into small pieces, until browned. Drain excess fat if needed.

Season with oregano, cumin, smoked paprika, optional cinnamon, salt, and black pepper. These warm seasonings give Stuffed Round Zucchini a rich Mediterranean-style flavor.

Step 5: Add Rice and Tomatoes

Stir the uncooked rice, crushed tomatoes, and tomato paste into the meat mixture. Cook for 2 minutes, stirring frequently.

Remove from the heat, then mix in parsley, mint, and feta if using. The rice will finish cooking inside the vegetables, absorbing flavor from the meat, tomatoes, and sauce.

Step 6: Fill the Zucchini

Spoon the meat and rice mixture into each hollow zucchini.

Fill them about three-quarters full rather than packing the mixture tightly. Rice expands during cooking and needs room.

Place the reserved caps loosely on top. This gives Stuffed Round Zucchini a rustic presentation and helps protect the filling from drying out.

Step 7: Prepare the Baking Sauce

Combine the tomato sauce, broth, olive oil, lemon juice, and oregano.

Pour the sauce around the zucchini rather than directly over the filling. The liquid creates steam and gives Stuffed Round Zucchini a tender texture while the rice cooks.

Step 8: Cover and Bake

Cover the baking dish tightly with foil and bake for 35 minutes.

Remove the foil and check the rice. Continue baking uncovered for another 10 to 15 minutes, or until the zucchini is tender and the rice is fully cooked. If the pan becomes dry, add a splash of hot broth.

Step 9: Rest Before Serving

Remove the dish from the oven and let it rest for 10 minutes.

This resting period allows the filling to settle and makes Stuffed Round Zucchini easier to serve without breaking.

Step 10: Garnish and Serve

Spoon some tomato sauce from the baking dish around each zucchini.

Finish with chopped parsley, feta, fresh mint, or lemon. Serve Stuffed Round Zucchini warm.

Serving Suggestions

Stuffed Round Zucchini can be served as a complete meal because it already contains meat, rice, and vegetables.

For a fresh contrast, pair it with cucumber-tomato salad, Greek salad, chopped lettuce, or lemony arugula.

You can also serve Stuffed Round Zucchini with roasted potatoes, hummus, olives, warm pita, or crusty bread for a larger Mediterranean-inspired dinner.

For a cheesy Mediterranean-inspired meal, try our Mediterranean Style Calzone filled with spinach, feta, olives, and roasted vegetables.

Recipe Tips

Choose round zucchini that are similar in size so they cook at the same rate. Leave enough flesh around the walls when hollowing them so they remain sturdy.

Do not pack the filling tightly because the rice needs space to expand.

Check the baking liquid before the final cooking stage and add hot broth if needed.

Let the finished dish rest briefly before serving so the filling firms slightly.

Easy Variations

You can make Stuffed Round Zucchini with ground turkey or chicken instead of beef or lamb.

For stronger Mediterranean flavor, add chopped Kalamata olives, sun-dried tomatoes, pine nuts, or extra feta.

Brown rice can be used, but partially cook it first because it takes longer than white rice. For heat, add crushed red pepper flakes or cayenne.

To make a vegetarian version, replace the meat with cooked lentils, chickpeas, mushrooms, or a mixture of vegetables and beans. Quinoa also works in place of rice if it is cooked first.

If you enjoy fresh Mediterranean flavors, you may also like our Mediterranean Chickpea Cucumber Feta Salad.

Make-Ahead Instructions

Prepare the filling and hollow the zucchini several hours ahead. Fill the shells, arrange them in the baking dish, cover, and refrigerate.

Prepare the sauce separately and pour it around the zucchini just before baking. If the dish goes straight from the refrigerator to the oven, add about 5 to 10 minutes to the covered cooking time.

Storage and Reheating

Store leftover Stuffed Round Zucchini in an airtight container in the refrigerator for up to 3 days.

Reheat in a covered baking dish at 350°F or 175°C for about 15 minutes, adding a spoonful of tomato sauce or broth to keep the filling moist. Individual portions can also be microwaved.

For longer storage, freeze fully cooked and cooled zucchini for up to 2 months. Thaw overnight in the refrigerator before reheating.

Nutrition Information

Approximate nutrition per serving:

Calories: 390
Protein: 25 g
Carbohydrates: 36 g
Fat: 17 g
Saturated Fat: 6 g
Fiber: 5 g
Sugar: 8 g
Sodium: 610 mg

Nutrition values are estimates and may vary depending on the meat, feta, rice, sauce, and serving size.

Frequently Asked Questions

Can I use regular long zucchini instead of round zucchini?

Yes. Cut long zucchini in half lengthwise, scoop out the centers, and use them as boats. Their baking time may be slightly shorter.

Should the rice be cooked first?

No. Long-grain white rice can go into the filling uncooked as long as there is enough baking liquid and the dish stays covered during the first part of cooking.

How do I know when the zucchini are done?

The zucchini should be tender when pierced with a knife, the meat should be fully cooked, and the rice should be soft.

Can I use cooked rice?

Yes. Reduce the baking liquid slightly and shorten the cooking time because the filling will already be mostly cooked.

Final Thoughts

Stuffed Round Zucchini is a comforting way to turn fresh vegetables into an attractive and satisfying main dish. Tender zucchini shells hold a savory mixture of meat, rice, tomatoes, herbs, and warm seasonings while a light tomato sauce keeps everything juicy.

Because Stuffed Round Zucchini is easy to customize with different proteins, grains, herbs, and cheeses, it can fit both weeknight dinners and relaxed family gatherings.

Keep this Stuffed Round Zucchini recipe handy whenever you want a hearty Mediterranean-inspired meal that combines vegetables, protein, and rice in one beautiful dish.
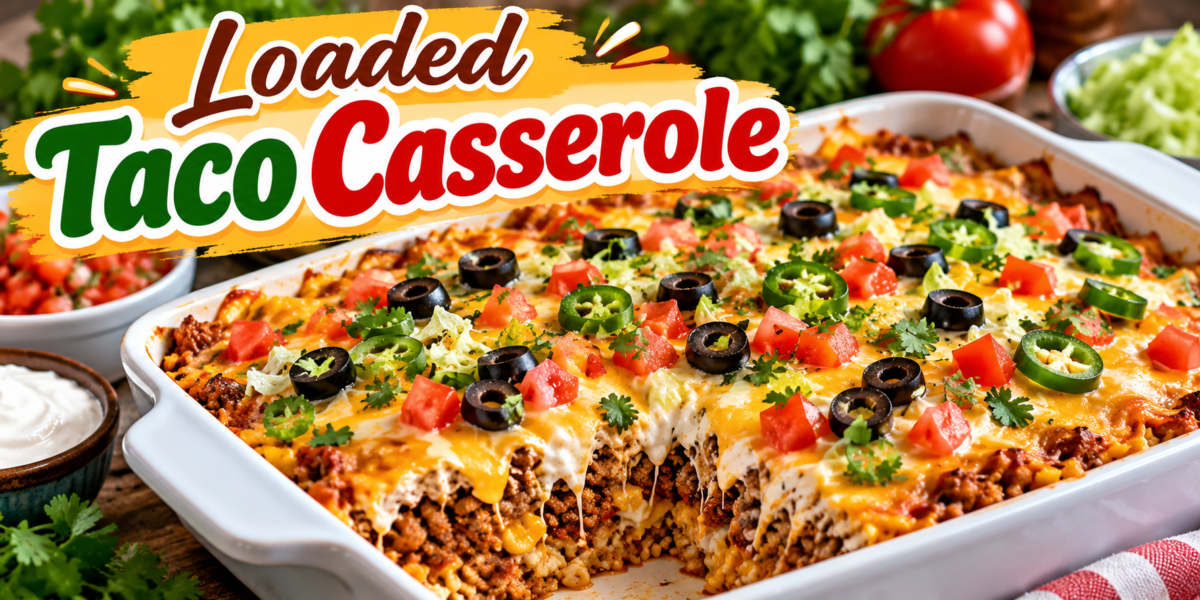

Loaded Taco Casserole

Loaded Taco Casserole with seasoned beef, rice, beans, corn, melted cheese, tomatoes, jalapeños, and cilantro

Loaded Taco Casserole

Loaded Taco Casserole is a hearty, cheesy, and flavorful dinner that brings together seasoned ground beef, tender rice, creamy sauce, melted cheese, tomatoes, jalapeños, black olives, and fresh cilantro in one comforting dish. It is easy to assemble, family-friendly, and perfect for busy weeknights.

The beauty of this recipe is its flexibility. You can prepare it with ground beef, ground turkey, or shredded chicken. Rice makes the casserole filling, while taco seasoning, salsa, and cheese create plenty of bold flavor. Fresh toppings add brightness and crunch after baking.

This Loaded Taco Casserole is also a practical choice for meal prep. The leftovers reheat well, making it useful for lunches and quick dinners throughout the week.

Prep Time: 20 minutes
Cook Time: 30 minutes
Total Time: 50 minutes
Servings: 8
Course: Dinner
Cuisine: Mexican-inspired American

Ingredients

For the Beef Mixture

Ground beef: 1 1/2 pounds
Olive oil: 1 tablespoon
Yellow onion: 1 small, diced
Garlic cloves: 3, minced
Taco seasoning: 1 packet
Chili powder: 1 teaspoon
Ground cumin: 1/2 teaspoon
Smoked paprika: 1/2 teaspoon
Black pepper: 1/2 teaspoon
Salsa: 1 cup
Diced tomatoes: 1 can, drained
Corn kernels: 1 cup
Black beans: 1 can, drained and rinsed

For the Rice Layer

3 cups cooked white or brown rice

1/2 cup salsa

1/2 teaspoon salt

1/4 teaspoon black pepper

1 tablespoon fresh cilantro, chopped

For the Creamy Layer

1 cup sour cream

4 ounces cream cheese, softened

1/2 cup salsa

1/2 teaspoon garlic powder

1/4 teaspoon cumin

For the Cheese Topping

2 cups shredded Mexican-blend cheese

1 cup shredded cheddar cheese

For the Toppings

1 large tomato, diced

1 jalapeño, thinly sliced

1/3 cup sliced black olives

1/4 cup chopped fresh cilantro

2 green onions, sliced

1 avocado, diced, optional

Fresh lime wedges, optional

Step-by-Step Instructions

Prepare the Rice

Start with cooked rice that has cooled slightly.

Place the rice in a large bowl.

Add salsa, salt, black pepper, and chopped cilantro.

Stir gently until everything is evenly combined.

White rice gives the casserole a classic texture. Brown rice adds a slightly nuttier flavor and more texture.

If you are using leftover rice, break up any large clumps before mixing.

The rice should remain fluffy rather than becoming mashed.

Set it aside while you prepare the beef mixture.

Cook the Ground Beef

Heat a large skillet over medium-high heat.

Add olive oil and allow it to warm.

Add the diced onion.

Cook for about 3 minutes, stirring occasionally.

The onion should become soft and slightly translucent.

Add the ground beef.

Break it apart with a wooden spoon or spatula.

Cook until the beef is browned and no longer pink.

Drain excess grease if necessary.

Add the minced garlic.

Cook for about 30 seconds.

The garlic should become fragrant without turning dark.

Add taco seasoning, chili powder, cumin, smoked paprika, and black pepper.

Stir thoroughly so the spices coat the beef.

This seasoned mixture creates the bold foundation of the Loaded Taco Casserole.

Add the Vegetables

Pour the salsa into the skillet.

Add drained diced tomatoes.

Stir in corn and black beans.

Mix everything together.

Reduce the heat to medium-low.

Allow the mixture to simmer for about 5 minutes.

The salsa adds moisture while the tomatoes provide a light acidity.

Corn adds natural sweetness, while black beans provide a hearty texture.

Keep the mixture thick.

A watery filling can make the finished casserole difficult to slice.

Remove the skillet from the heat once the ingredients are hot and well combined.

Make the Creamy Layer

Place softened cream cheese in a mixing bowl.

Add sour cream and salsa.

Sprinkle in garlic powder and cumin.

Stir until the mixture becomes smooth.

If the cream cheese is too firm, allow it to sit at room temperature for a little longer before mixing.

You can also microwave it for a few seconds, but do not overheat it.

The creamy layer creates a smooth contrast against the seasoned beef and rice.

For a milder casserole, use mild salsa.

A medium or spicy salsa will give the dish more heat.

Prepare the Baking Dish

Preheat your oven to 375°F (190°C).

Lightly grease a 9-by-13-inch baking dish.

A ceramic or glass baking dish works well.

Spread the seasoned rice across the bottom.

Press it gently into an even layer.

Do not compact the rice too firmly.

A light, even layer keeps the texture pleasant after baking.

Add the Beef Layer

Spoon the seasoned beef mixture over the rice.

Spread it evenly from edge to edge.

Try to keep the layer consistent so every serving contains beef, beans, corn, and tomatoes.

The combination of rice and seasoned beef gives the Loaded Taco Casserole its hearty structure.

Add the Creamy Layer

Spoon the sour cream mixture over the beef.

Use the back of a spoon or an offset spatula to spread it gently.

The creamy mixture does not need to reach every tiny corner.

An even layer across most of the surface is enough.

Avoid pressing down too hard because you do not want to disturb the beef underneath.

Add the Cheese

Sprinkle the Mexican-blend cheese over the creamy layer.

Follow with the shredded cheddar.

Try to cover the surface evenly.

The cheese will melt into a golden, bubbling layer during baking.

For extra flavor, you can use Monterey Jack, pepper Jack, or a combination of cheddar and mozzarella.

Freshly shredded cheese often melts more smoothly than pre-shredded varieties.

Bake the Casserole

Cover the baking dish loosely with aluminum foil.

Place it in the preheated oven.

Bake for approximately 20 minutes.

Remove the foil.

Continue baking for another 8 to 10 minutes.

The cheese should be completely melted and lightly golden around the edges.

If you want a more browned topping, switch the oven to broil for 1 to 2 minutes.

Watch carefully during broiling because cheese can brown quickly.

Remove the dish from the oven.

Allow it to rest for about 10 minutes before adding fresh toppings.

Resting helps the layers settle and makes serving easier.

Add Fresh Toppings

Scatter diced tomatoes over the warm casserole.

Add sliced jalapeños, black olives, green onions, and fresh cilantro.

For extra creaminess, add diced avocado.

Serve with fresh lime wedges.

The fresh toppings provide color and balance the rich cheese and creamy layers.

This combination makes the Loaded Taco Casserole look just as inviting as it tastes.

Tips for the Best Results

Use cooked rice that is fluffy rather than wet.

Drain canned beans and tomatoes thoroughly.

Keep the beef mixture thick before assembling the casserole.

Allow cream cheese to soften before making the creamy layer.

Use freshly shredded cheese when possible.

Do not overbake the casserole.

Let the finished dish rest before cutting.

Add avocado only after baking.

Fresh cilantro and lime should also be added at the end.

For a crispier cheese topping, bake uncovered during the final few minutes.

These small techniques help create a flavorful Loaded Taco Casserole with distinct layers and a satisfying texture.

Easy Ingredient Substitutions

Ground turkey can replace ground beef.

Shredded cooked chicken also works well.

For a vegetarian version, replace the beef with extra black beans, pinto beans, or lentils.

Brown rice can replace white rice.

Quinoa is another option if you want a different grain.

Greek yogurt can replace some or all of the sour cream.

Pepper Jack cheese can replace cheddar when you want extra heat.

Monterey Jack creates an especially creamy topping.

Fresh bell peppers can be added to the beef mixture.

You can also use frozen corn when fresh corn is unavailable.

The flexible ingredients make this Loaded Taco Casserole easy to adapt to what you already have in your kitchen.

How to Make It Spicier

Choose hot salsa instead of mild salsa.

Add extra jalapeño slices to the topping.

A pinch of cayenne can be mixed into the beef.

You can also add crushed red pepper flakes.

Pepper Jack cheese provides another layer of heat.

For a smoky spicy flavor, add a little extra smoked paprika.

Keep the toppings separate when serving so each person can adjust the heat.

This approach makes the Loaded Taco Casserole suitable for both mild and spicy food lovers.

How to Make It Kid-Friendly

Use mild taco seasoning and mild salsa.

Skip the jalapeños if your family does not enjoy spicy food.

You can leave out black olives or onions for picky eaters.

Serve diced avocado, tomatoes, and cilantro on the side.

Let children choose their own toppings.

Ground turkey can also be used for a lighter-tasting filling.

The familiar combination of rice, beef, cheese, and creamy sauce makes the casserole approachable for younger diners.

Serving Suggestions

Serve warm portions with a simple green salad.

Fresh guacamole makes an excellent side.

Salsa and sour cream can be served separately.

Warm tortilla chips add a crunchy contrast.

You can also serve the casserole with corn salad or roasted vegetables.

For a complete Mexican-inspired dinner, add black beans, fresh pico de gallo, and lime wedges.

A bowl of fresh fruit can provide a refreshing finish.

The rich layers of the Loaded Taco Casserole pair especially well with crisp and fresh side dishes.

Make-Ahead Instructions

The casserole can be assembled several hours before baking.

Prepare the rice, beef mixture, and creamy layer.

Layer everything in the baking dish.

Cover tightly with foil.

Refrigerate until you are ready to bake.

Take the dish out of the refrigerator while the oven preheats.

Because the casserole starts cold, you may need to add several minutes to the baking time.

Always make sure the center is hot before serving.

For the freshest texture, add tomatoes, avocado, cilantro, and other fresh toppings after baking.

Storage Instructions

Allow leftovers to cool before storing.

Place individual portions in airtight containers.

Refrigerate for up to 3 to 4 days.

Keep fresh toppings separate when possible.

Reheat individual portions in the microwave or oven until heated through.

Add fresh cilantro, tomatoes, avocado, and lime after reheating.

The flavors often become even more developed after the casserole rests overnight.

That makes Loaded Taco Casserole particularly useful for planned lunches and busy weekday dinners.

Freezing Instructions

You can freeze the casserole before or after baking.

For best texture, assemble the casserole without fresh toppings.

Wrap the baking dish tightly with plastic wrap and aluminum foil.

Freeze for up to 2 months.

Thaw overnight in the refrigerator before baking.

If freezing individual portions, place them in freezer-safe containers.

Allow frozen portions to thaw before reheating whenever possible.

Fresh toppings should always be added after reheating.

Common Mistakes to Avoid

Do not use overly wet rice.

Avoid adding undrained tomatoes or beans.

Do not leave excess grease in the beef mixture.

Avoid spreading the creamy layer while the beef is extremely hot.

Do not use too much salsa in the filling.

Excess moisture can make the layers loose.

Avoid overbaking because the rice can become dry.

Do not add avocado before baking.

Wait until the casserole has finished cooking.

Allowing the casserole to rest before serving also helps the layers stay together.

Frequently Asked Questions

Can I use ground turkey instead of beef?

Yes. Ground turkey is an easy substitute and works well with the taco seasoning and other ingredients.

Can I use chicken?

Absolutely. Shredded cooked chicken can replace the ground beef. Rotisserie chicken is a convenient option.

Can I make this casserole vegetarian?

Yes. Increase the beans and add vegetables such as bell peppers, zucchini, or corn.

What rice works best?

White rice, brown rice, and even leftover seasoned rice can work. Make sure the rice is cooked before assembling.

Can I use different cheese?

Yes. Cheddar, Monterey Jack, Pepper Jack, Colby, or a Mexican cheese blend are all suitable choices.

Can I make it without sour cream?

Greek yogurt is a good alternative. It creates a creamy layer while adding a slightly tangy flavor.

How do I prevent a watery casserole?

Drain canned vegetables thoroughly and avoid adding too much salsa. The beef mixture should be thick before layering.

Can I prepare it the night before?

Yes. Assemble the casserole, cover it, and refrigerate it. Add some extra baking time because the dish will be cold.

Can I freeze leftovers?

Yes. Store cooled portions in freezer-safe containers and thaw them in the refrigerator before reheating.

What toppings go best with it?

Tomatoes, avocado, cilantro, green onions, jalapeños, olives, lime, salsa, and sour cream are all delicious options.

Nutrition Information

Approximate nutrition per serving:

Calories: 560 kcal
Protein: 31g
Carbohydrates: 48g
Fat: 27g
Fiber: 7g
Sugar: 6g
Sodium: 980mg

Nutrition values are estimates and may vary depending on the ingredients, brands, cheese, seasoning, and serving size used.

Why You Will Love This Recipe

There is something especially comforting about a hot casserole covered with bubbling melted cheese.

This recipe combines several familiar ingredients into one easy meal.

The seasoned beef provides savory flavor.

Rice makes each serving filling.

Black beans and corn add texture.

Salsa brings tomatoes and spices into the filling.

The creamy layer adds richness.

Melted cheese creates the golden topping that makes the casserole so inviting.

Fresh vegetables provide a crisp contrast after baking.

Another advantage is how easy the recipe is to customize.

You can change the protein, rice, cheese, beans, spice level, or toppings.

That flexibility makes Loaded Taco Casserole useful when you need to cook with ingredients already available in your pantry.

The casserole is also convenient for gatherings.

You can prepare a large baking dish and let everyone add their favorite toppings.

For family dinners, place toppings in small bowls and allow everyone to build their own serving.

Final Thoughts

Loaded Taco Casserole brings together seasoned beef, fluffy rice, black beans, corn, tomatoes, creamy sauce, and plenty of melted cheese.

The layers create a satisfying combination of textures and flavors.

Fresh toppings such as avocado, cilantro, jalapeños, tomatoes, and green onions add color and brightness.

The recipe is simple enough for a weeknight but substantial enough for a family gathering.

You can prepare it ahead, refrigerate it, and bake it when needed.

Leftovers are easy to store and reheat, which makes the recipe especially useful for busy schedules.

For a milder version, choose mild salsa and skip the jalapeños.

For more heat, add spicy salsa, pepper Jack cheese, or extra chili.

Ground turkey or chicken can replace the beef, while extra beans can create a vegetarian version.

The result is a flexible meal that can be adapted to different tastes without complicated cooking.

Serve each portion with fresh lime, salsa, guacamole, or a crisp salad.

For the best presentation, add colorful toppings just before serving.

The combination of creamy, cheesy, savory, fresh, and slightly spicy flavors makes Loaded Taco Casserole a comforting dinner that is easy to prepare and enjoyable to share.

With simple ingredients and straightforward steps, this casserole can become a reliable addition to your family dinner rotation.

Air Fryer Crispy Cheeseburger Bites

Crispy air fryer cheeseburger bites filled with melted cheddar cheese and served with ketchup and burger dipping sauce

Air Fryer Crispy Cheeseburger Bites

Air Fryer Crispy Cheeseburger Bites bring the flavor of a classic American cheeseburger into small, crispy portions that are easy to eat and share. Seasoned ground beef, melted cheese, and a golden outer layer come together in every bite.

These bite-sized cheeseburger snacks are a great choice for game day, family gatherings, parties, quick lunches, or easy weeknight dinners. The air fryer gives them a crisp outside without the need for deep frying.

The filling can be prepared with simple ingredients you may already have in your kitchen. Ground beef provides the classic burger flavor, while shredded or cubed cheese melts into the center. Pickles, onions, ketchup, mustard, and burger seasoning can be added to create the familiar taste of a cheeseburger.

Why You’ll Love These Cheeseburger Bites

These crispy cheeseburger bites are easy to prepare and cook in small portions. Their size makes them convenient for appetizers, snacks, or casual meals.

The air fryer helps create a browned and crunchy exterior while keeping the beef filling juicy. You can also customize the filling based on the flavors your family enjoys.

Unlike traditional burgers, these bites do not require buns, plates, or a grill. They are easy to serve with dipping sauces and can be enjoyed warm straight from the air fryer.

They are also useful for entertaining because you can prepare the bites before guests arrive and cook them in batches.

Ingredients You’ll Need

Ground Beef

Use lean or moderately lean ground beef for the filling. Ground beef with some fat provides better flavor and helps keep the center moist during cooking.

Cheese

Cheddar cheese gives the bites a classic cheeseburger taste. American cheese, Monterey Jack, Colby Jack, or mozzarella can also be used.

Breadcrumbs

Breadcrumbs help bind the beef mixture and give the outside a firmer texture. Plain or seasoned breadcrumbs both work well.

Egg

An egg helps hold the filling together and makes the mixture easier to shape.

Onion

Finely diced onion adds moisture and savory flavor. Dice the onion very small so it cooks evenly inside each bite.

Pickles

Finely chopped dill pickles add the tangy flavor associated with a classic cheeseburger. Drain excess pickle liquid before mixing them into the filling.

Seasonings

Use salt, black pepper, garlic powder, onion powder, and a small amount of paprika for a balanced burger-style seasoning.

Cooking Spray

A light coating of cooking spray helps the bites brown evenly and reduces sticking in the air fryer basket.

How to Make Air Fryer Crispy Cheeseburger Bites

Prepare the Beef Mixture

Place the ground beef in a large mixing bowl. Add breadcrumbs, egg, finely diced onion, chopped pickles, salt, pepper, garlic powder, onion powder, and paprika.

Mix the ingredients gently until they are evenly combined. Avoid overmixing because compacting the beef can make the finished bites dense.

Add the Cheese

Cut the cheese into small cubes if you want a melted center. Small cheese pieces are easier to cover completely with the beef mixture.

Take a small portion of the seasoned beef and flatten it slightly in your hand. Place a piece of cheese in the center and gently wrap the beef around it.

Seal the edges completely so the cheese stays inside during cooking. Roll the mixture gently between your hands to create a compact bite.

Air Fry the Bites

Preheat the air fryer if your model recommends preheating. Lightly spray the basket with cooking spray.

Arrange the cheeseburger bites in a single layer. Leave space between each piece so hot air can circulate around the entire surface.

Cook until the outside is golden brown and the beef is fully cooked. Turn the bites partway through cooking if your air fryer produces uneven browning.

Ground beef should reach a safe internal temperature of 160°F. Use an instant-read food thermometer to check the center of the largest bite.

Let the bites rest briefly before serving. The melted cheese inside will be extremely hot immediately after cooking.

Tips for Extra Crispy Cheeseburger Bites

Keep the beef portions similar in size so they cook at the same rate. Uneven pieces can leave some bites overcooked while others need more time.

Do not use excessive filling. A thin, even layer of beef around the cheese cooks more reliably and creates a better balance between the crispy exterior and cheesy center.

Make sure the cheese is completely covered. Any exposed cheese can melt into the basket during cooking.

Avoid overcrowding the air fryer. Cooking in batches gives the hot air enough room to circulate and helps the outside become crisp.

For a deeper golden crust, lightly spray the shaped bites with cooking spray before placing them in the basket.

Check the first batch carefully because air fryers vary in size, heating power, and airflow. Adjust the cooking time as needed for your specific appliance.

Best Dipping Sauces

The right dipping sauce can make these cheeseburger bites even more flavorful.

Classic ketchup provides a familiar sweet and tangy flavor. Yellow mustard adds sharpness and works especially well with cheddar cheese.

For a creamy option, combine mayonnaise with ketchup and a little pickle juice. A burger sauce made with mayonnaise, mustard, ketchup, and finely chopped pickles is another easy choice.

Ranch dressing works well for guests who prefer a creamy dip. Barbecue sauce adds smoky sweetness and pairs nicely with seasoned beef.

Serve two or three sauces together so everyone can choose a favorite.

Easy Recipe Variations

Bacon Cheeseburger Bites

Add finely cooked and crumbled bacon to the beef mixture for a smoky, savory flavor. Use small pieces so the bites remain easy to shape.

Jalapeño Cheeseburger Bites

Mix finely chopped jalapeño into the filling for a spicy version. Remove the seeds and membranes for a milder heat level.

Mushroom Swiss Bites

Finely chop cooked mushrooms and pair them with Swiss cheese. Cook the mushrooms first to remove excess moisture before adding them to the beef mixture.

BBQ Cheeseburger Bites

Add a small amount of barbecue sauce to the cooked bites or serve it as a dipping sauce. Avoid adding too much sauce to the raw mixture because excess moisture can affect the texture.

Pizza Cheeseburger Bites

Use mozzarella cheese and add a small amount of Italian seasoning. Serve with warm marinara sauce for dipping.

What to Serve With Cheeseburger Bites

These bite-sized burgers pair well with simple sides and party foods.

Serve them with crispy potato wedges, French fries, onion rings, coleslaw, or a fresh garden salad for a complete meal.

For a game-day spread, place the bites on a large serving platter with ketchup, mustard, ranch, and burger sauce. Add pickle spears and fresh vegetable sticks for extra variety.

For a family dinner, serve them with roasted potatoes and steamed vegetables. Their small size also makes them convenient for kids who prefer finger foods.

How to Store and Reheat

Allow leftover bites to cool before placing them in an airtight container. Refrigerate them promptly and use them within a few days for the best quality.

The air fryer is the best way to reheat them because it helps restore the crisp exterior. Heat the bites until they are warmed through.

Avoid reheating them for too long because the beef can become dry and the cheese can become overly firm.

If freezing, arrange fully cooked and cooled bites in a single layer before transferring them to a freezer-safe container. Reheat them from frozen in the air fryer until hot throughout.

Common Mistakes to Avoid

Overmixing the beef can create a tough texture. Combine the ingredients only until they are evenly distributed.

Using large cheese cubes can make sealing difficult. Choose small pieces that can be completely surrounded by the beef.

Skipping the spacing between bites can reduce crispiness. Always leave enough room for air to move around each piece.

Adding wet ingredients directly to the raw mixture can make the bites difficult to shape. Drain pickles and cooked vegetables well before using them.

Do not rely only on the outside color to determine whether ground beef is cooked safely. Check the internal temperature with a food thermometer.

Frequently Asked Questions

Can I use frozen ground beef?

Thaw the ground beef completely in the refrigerator before mixing and shaping the bites for even cooking.

What cheese works best?

Cheddar and American cheese provide a classic cheeseburger flavor, while Monterey Jack and Colby Jack offer a smooth, melty texture.

How do I keep the cheese from leaking out?

Seal the beef completely around each cheese piece and avoid using oversized cheese cubes.

Can I make these ahead of time?

Yes, shape the bites ahead of time and refrigerate them until you are ready to cook them.

Can I freeze cheeseburger bites?

Yes, cooked bites can be frozen in an airtight container and reheated in the air fryer when needed.

How do I make them crispy?

Cook the bites in a single layer, avoid overcrowding, and lightly coat the outside with cooking spray.

What dipping sauce goes with cheeseburger bites?

Ketchup, mustard, ranch, barbecue sauce, and homemade burger sauce all pair well with the savory beef and melted cheese.

What temperature should ground beef reach?

Ground beef should reach an internal temperature of 160°F for safe consumption.

Final Thoughts

Air Fryer Crispy Cheeseburger Bites offer all the familiar flavors of a cheeseburger in a convenient, shareable format. The seasoned beef, melted cheese, and crisp exterior make them suitable for appetizers, snacks, family dinners, and parties.

Keep the portions small and even, seal the cheese inside, and avoid overcrowding the basket for the best results. Serve the finished bites with your favorite burger sauces and simple sides for an easy meal everyone can enjoy.

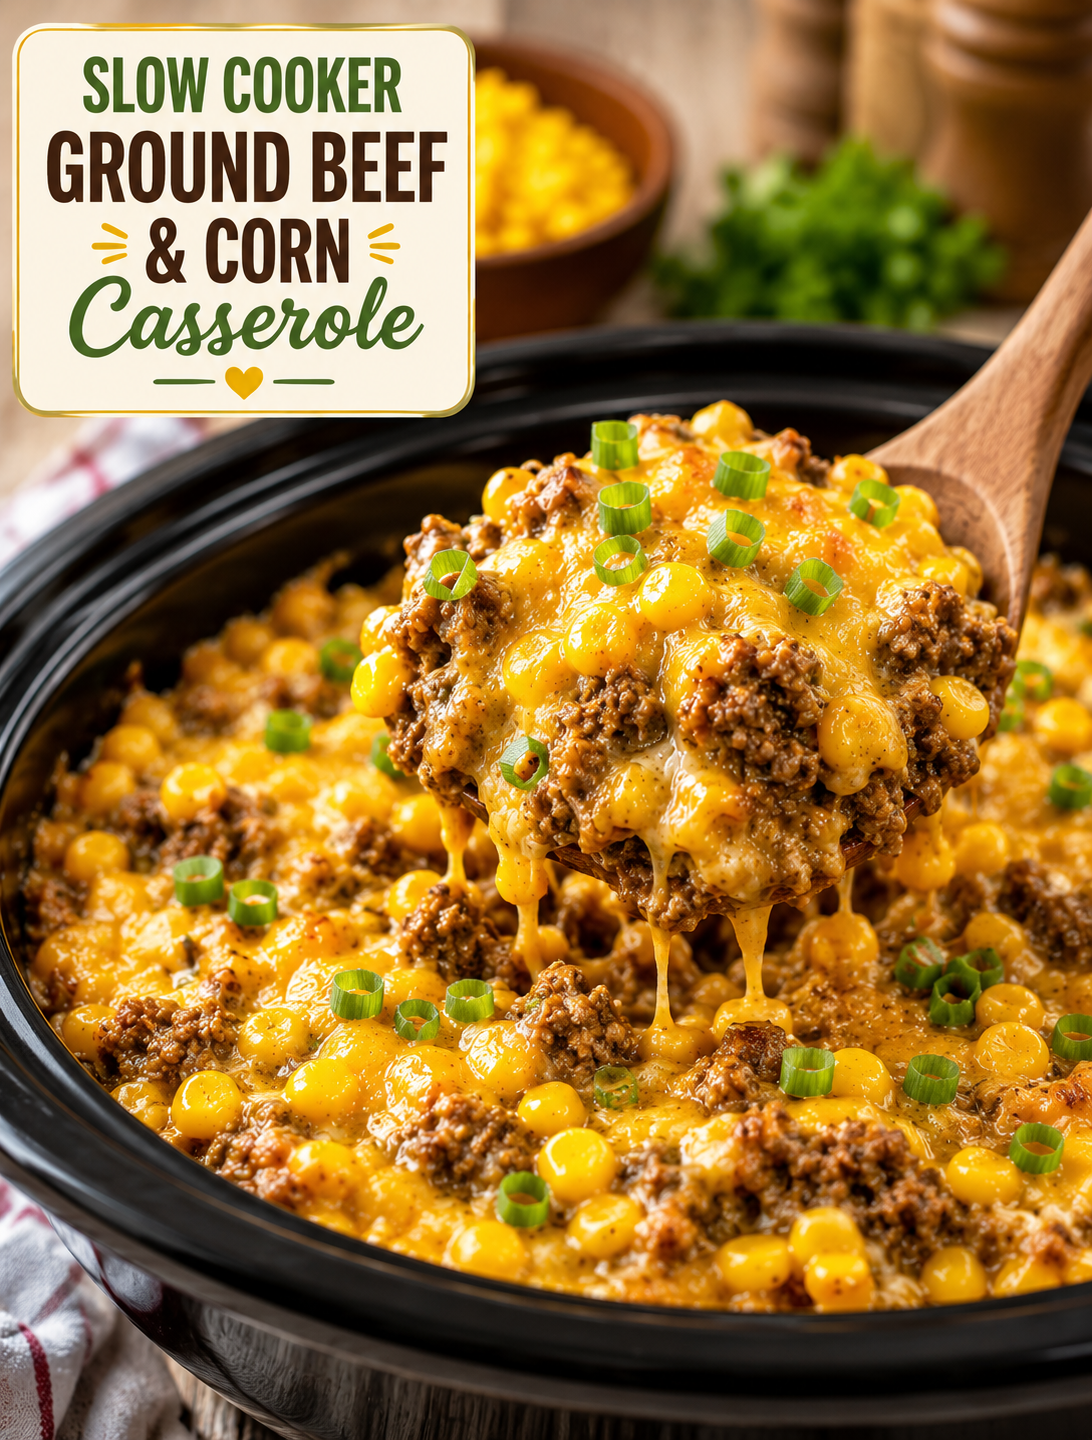
Slow Cooker Ground Beef and Corn Casserole

Slow Cooker Ground Beef and Corn Casserole – Easy Cheesy Dinner

Slow Cooker Ground Beef and Corn Casserole

Description

This Slow Cooker Ground Beef and Corn Casserole is an easy comfort-food dinner made with lean ground beef, sweet corn, creamy soup, sour cream, and cheddar cheese. The ingredients come together in the slow cooker for a warm, filling meal with very little hands-on work.

The beef is browned first to build a rich savory base, then mixed with corn and a creamy sauce before slow cooking. Melted cheddar adds a cheesy finish, while optional green onions, parsley, or crushed tortilla chips give the casserole extra flavor and texture.

This family-friendly casserole is a practical choice for busy weeknights, casual gatherings, potlucks, and make-ahead meals. It makes 6–8 servings, so leftovers can be packed for lunch or reheated for another dinner.

Ingredients

Main Ingredients

  • 1½ lbs (680g) lean ground beef: Choose lean beef to limit excess grease while keeping the casserole flavorful.
  • 1 medium onion, diced: Onion adds savory flavor and a slightly sweet taste as it cooks.
  • 2 cloves garlic, minced: Fresh garlic gives the beef mixture a deeper flavor.
  • 2 cans (15 oz each) whole kernel corn, drained: Corn adds sweetness, texture, and color to the casserole.
  • 1 can (10.5 oz) cream of mushroom soup: The soup creates the creamy base and helps bind the ingredients.
  • 1 cup sour cream: Sour cream adds richness and a mild tangy flavor.
  • 1½ cups shredded cheddar cheese: Cheddar melts into the casserole and creates a cheesy topping.
  • 1 teaspoon salt: Salt brings out the flavor of the beef, corn, and creamy sauce.
  • ½ teaspoon black pepper: Black pepper adds mild seasoning without overpowering the other ingredients.
  • 1 teaspoon paprika: Paprika provides gentle warmth and a subtle smoky note.

Optional Toppings

  • Chopped green onions: Add them after cooking for a fresh, mild onion flavor.
  • Fresh parsley: Parsley gives the finished casserole a fresh look and light herbal taste.
  • Crushed tortilla chips: Sprinkle them on individual servings for a crunchy contrast.

Instructions

Step 1: Brown the Beef

Heat a large skillet over medium heat and add the ground beef. Cook until no longer pink, breaking it into small pieces as it browns.

Add the diced onion and minced garlic. Cook for another 2–3 minutes, until the onion begins to soften and the garlic becomes fragrant.

Drain excess grease from the skillet if needed. Removing extra fat keeps the casserole from becoming overly oily during slow cooking.

Step 2: Mix the Casserole

Place the cooked beef mixture in a large mixing bowl. Add the drained corn, cream of mushroom soup, sour cream, 1 cup of shredded cheddar cheese, salt, black pepper, and paprika.

Stir until the beef, corn, seasoning, and creamy ingredients are evenly combined. Mixing everything before transferring it to the slow cooker helps distribute the flavors throughout the casserole.

Step 3: Transfer to Slow Cooker

Lightly grease the inside of your slow cooker to make serving and cleanup easier.

Pour the beef and corn mixture into the slow cooker. Spread it into an even layer so it cooks consistently from edge to center.

Step 4: Add Cheese

Sprinkle the remaining ½ cup of shredded cheddar cheese evenly over the top.

The cheese will melt during cooking and create a rich, creamy layer over the casserole.

Step 5: Cook

Cover the slow cooker with its lid and cook according to your preferred setting.

  • LOW: Cook for 4–5 hours.
  • HIGH: Cook for 2–3 hours.

Avoid repeatedly removing the lid because heat escapes each time, which can extend the cooking time.

The casserole is ready when it is hot throughout and the cheese has melted completely.

Step 6: Serve

Turn off the slow cooker and allow the casserole to rest for about 10 minutes before serving. This short resting period allows the creamy mixture to settle and makes portions easier to scoop.

Top each serving with chopped green onions, fresh parsley, or crushed tortilla chips if desired.

Serve the casserole warm with a simple green salad, steamed vegetables, garlic bread, or dinner rolls.

Servings

This recipe makes approximately 6–8 servings, depending on portion size.

It works well for family dinners because the slow cooker keeps the casserole warm while everyone gets ready to eat. For a larger gathering, serve it alongside simple vegetable dishes or a fresh salad.

Nutritional Information

The following nutrition estimates are based on the listed ingredients and may vary depending on the brands and products used.

Nutrient Approximate Amount
Calories 390
Protein 24g
Carbohydrates 18g
Fat 25g
Saturated Fat 11g
Fiber 3g
Sugar 4g
Sodium 620mg

For more accurate nutrition information, calculate the recipe using the exact ingredient brands and quantities you use.

Health Benefits

High in Protein

Ground beef provides protein that helps support normal muscle function and contributes to a satisfying meal. Using lean ground beef also helps reduce the amount of excess fat.

Source of Fiber

Corn contributes dietary fiber along with carbohydrates and other nutrients. Keeping the corn in the recipe also adds texture and natural sweetness.

Complete Comfort Meal

This casserole combines beef, vegetables, dairy, and seasonings in one dish. Pairing it with a green salad or steamed vegetables can add more variety to the meal.

Easy Slow Cooker Recipe

Most of the preparation involves browning the beef and combining the ingredients. Once the mixture is in the slow cooker, it requires little hands-on attention.

Great for Leftovers

The recipe makes several servings and reheats well when stored properly. Leftovers can provide a convenient lunch or dinner during the following days.

Recipe Notes

Use lean ground beef when possible because it produces less grease and keeps the creamy sauce from becoming too heavy.

Cream of chicken soup can replace cream of mushroom soup if you prefer a different flavor. The consistency should remain similar when making this substitution.

Fresh or frozen corn can replace canned corn. If using frozen corn, thaw it first and drain any excess liquid.

The casserole becomes slightly thicker as it cools. Letting it rest for about 10 minutes before serving helps it reach a better serving consistency.

For a different flavor profile, try pepper jack instead of cheddar. You can also add diced bell peppers, jalapeños, or cooked rice.

Helpful Tips

Brown the ground beef before adding it to the slow cooker. This step improves the flavor and lets you remove excess grease before the creamy ingredients are added.

Drain canned corn well so extra liquid does not thin the casserole.

Shred cheddar cheese yourself when possible for smooth melting. Pre-shredded cheese can contain ingredients that affect its melting texture.

Add cooked rice or pasta if you want to turn the casserole into an even heartier meal. Make sure the rice or pasta is already cooked before mixing it in.

For extra vegetables, stir in diced bell peppers before slow cooking. Green, red, or yellow peppers all work well.

If you enjoy spicy food, add diced jalapeños, chili powder, or your favorite hot sauce.

For a crunchy finish, add crushed tortilla chips or crispy fried onions immediately before serving. Adding them at the end helps maintain their texture.

If preparing the casserole ahead, keep the assembled mixture refrigerated until you are ready to cook it. Do not leave perishable ingredients at room temperature for extended periods.

Frequently Asked Questions

Can I make this casserole ahead of time?

Yes. Assemble the ingredients ahead, refrigerate them, and transfer the mixture to the slow cooker when you are ready to cook.

Can I freeze leftovers?

Yes. Cool the casserole completely, place it in airtight freezer-safe containers, and freeze for up to 3 months.

What can I serve with this casserole?

A green salad, steamed vegetables, garlic bread, or dinner rolls pair well with this creamy beef and corn dish.

Can I use ground turkey instead of ground beef?

Yes. Ground turkey can replace ground beef for a lighter variation while keeping the same basic cooking method.

How long do leftovers last?

Refrigerate leftovers in an airtight container and use them within 4 days for the best quality and food safety.

Can I make this casserole spicy?

Yes. Add diced jalapeños, chili powder, hot sauce, or pepper jack cheese to increase the heat.

Can I use frozen corn?

Yes. Thaw frozen corn first and drain excess water before adding it to the mixture.

Can I add rice to the casserole?

Yes. Add cooked rice for a heartier dish, and mix it with the beef and corn mixture before slow cooking.

Recipe Information

Recipe Name: Slow Cooker Ground Beef and Corn Casserole
Prep Time: 15 minutes
Cook Time: 4–5 hours on LOW or 2–3 hours on HIGH
Total Time: About 5 hours 15 minutes
Difficulty: Easy
Course: Main Course, Dinner
Cuisine: American Comfort Food
Diet: High-Protein
Yield: 6–8 servings
Calories: Approximately 390 per serving