Comfort Food Stuffed Eggplant Bake

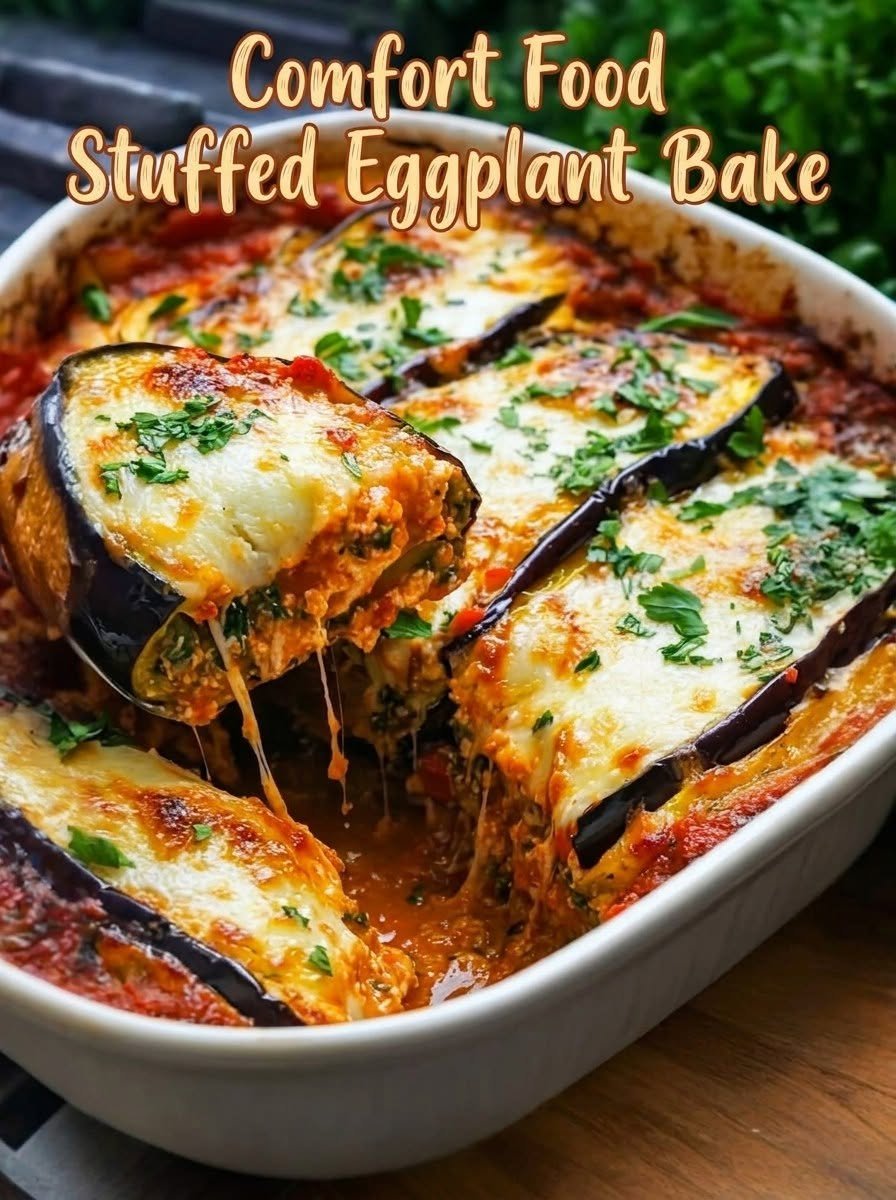
Stuffed Eggplant Bake with roasted eggplant, savory ground beef, tomatoes, ricotta, mozzarella, and fresh herbs

Comfort Food Stuffed Eggplant Bake

Stuffed Eggplant Bake is a warm, hearty dinner made with tender roasted eggplant, savory ground beef, tomatoes, onions, garlic, herbs, and plenty of melted cheese. It is cozy enough for family dinners yet attractive enough for casual entertaining. The filling is rich and flavorful, the eggplant becomes soft and creamy, and the cheese topping turns golden and bubbly in the oven.

Prep Time: 20 minutes
Cook Time: 50 minutes
Total Time: About 1 hour 10 minutes
Servings: 4 to 6

Ingredients

For the Eggplant

  • 3 medium eggplants
  • 2 tablespoons olive oil
  • 1/2 teaspoon salt
  • 1/4 teaspoon black pepper

For the Savory Filling

  • 1 pound ground beef
  • 1 small onion, finely chopped
  • 3 garlic cloves, minced
  • 1 red bell pepper, diced
  • 1 can diced tomatoes, 14.5 ounces
  • 2 tablespoons tomato paste
  • 1 teaspoon dried oregano
  • 1 teaspoon dried basil
  • 1/2 teaspoon smoked paprika
  • 1/4 teaspoon red pepper flakes, optional
  • 1/2 teaspoon salt
  • 1/4 teaspoon black pepper
  • 2 tablespoons chopped fresh parsley

Ingredients For the Creamy Cheese Layer

  • 1 cup ricotta cheese
  • 1/2 cup grated Parmesan cheese
  • 1 large egg
  • 1 tablespoon chopped parsley
  • 1/4 teaspoon black pepper

For the Topping

  • 1 1/2 cups shredded mozzarella cheese
  • 1/4 cup grated Parmesan cheese
  • Fresh parsley or basil, for garnish

Why You’ll Love This Recipe

Stuffed Eggplant Bake brings together the rich flavor of a classic baked casserole with plenty of vegetables and protein. The roasted eggplant turns tender and slightly sweet, while the beef and tomato filling adds a savory, satisfying center.

It is also flexible. You can use beef, turkey, chicken, lentils, or mushrooms and adjust the cheese to suit what you have. Leftovers reheat well for next-day lunches.

How to Make Stuffed Eggplant Bake

Step 1: Preheat the Oven

Preheat the oven to 400°F or 200°C.

Lightly grease a large baking dish with olive oil or cooking spray.

Step 2: Prepare the Eggplant

Cut the eggplants in half lengthwise.

Use a small knife to score the flesh in a crisscross pattern, being careful not to cut through the skin.

Brush the cut sides with olive oil and season with salt and black pepper.

Arrange them cut-side up on a baking sheet.

Step 3: Roast the Eggplant

Roast for 20 to 25 minutes, or until the flesh becomes soft and lightly golden.

Remove from the oven and let the eggplants cool for several minutes.

Roasting first gives Stuffed Eggplant Bake a soft, creamy texture and helps prevent the finished dish from tasting watery.

Step 4: Scoop Out the Centers

Use a spoon to carefully scoop out most of the softened eggplant flesh, leaving a sturdy border around the skin.

Chop the removed flesh into small pieces and set it aside.

Arrange the hollowed eggplant halves in the prepared baking dish.

Step 5: Brown the Ground Beef

Heat a large skillet over medium-high heat.

Add the ground beef and cook for 6 to 8 minutes, breaking it apart with a wooden spoon.

Once browned, drain excess grease if necessary.

Step 6: Cook the Vegetables

Add the onion and bell pepper to the beef.

Cook for 4 to 5 minutes, or until the vegetables begin to soften.

Add the garlic and cook for another 30 seconds.

Step 7: Add Tomatoes and Seasonings

Stir in the diced tomatoes, tomato paste, oregano, basil, smoked paprika, red pepper flakes, salt, and black pepper.

Add the chopped eggplant flesh and mix well.

Simmer the filling for 8 to 10 minutes so the flavors combine and excess liquid reduces.

The filling for Stuffed Eggplant Bake should be thick and spoonable rather than watery.

Step 8: Make the Ricotta Mixture

In a medium bowl, combine ricotta, Parmesan, egg, parsley, and black pepper.

Mix until smooth.

Step 9: Fill the Eggplant

Spoon a layer of the beef mixture into each roasted eggplant half.

Add a spoonful of the ricotta mixture, then top with more beef filling.

Continue until all of the filling has been used.

Step 10: Add the Cheese Topping

Sprinkle mozzarella and Parmesan generously over the top.

At this stage, Stuffed Eggplant Bake should be completely filled and covered with an even layer of cheese.

Step 11: Bake

Reduce the oven temperature to 375°F or 190°C.

Bake uncovered for 20 to 25 minutes.

The filling should be hot and bubbling, and the cheese should be melted.

Step 12: Broil for Extra Color

If you want a deeper golden top, switch the oven to broil for 1 to 2 minutes.

Watch carefully because the cheese can brown quickly.

Step 13: Rest Before Serving

Remove Stuffed Eggplant Bake from the oven and let it rest for 8 to 10 minutes.

This resting time helps the filling settle and makes the eggplant easier to serve.

Step 14: Garnish and Serve

Sprinkle with chopped parsley or basil.

Serve Stuffed Eggplant Bake warm with your favorite side dishes.

Serving Suggestions

Stuffed Eggplant Bake is filling enough to serve as a complete meal, but lighter sides pair especially well with the rich filling.

Serve Stuffed Eggplant Bake with a crisp green salad, cucumber tomato salad, roasted vegetables, garlic bread, or warm crusty bread.

For a cozy dessert option, try our Toasted Marshmallow Pumpkin Chocolate Bars with pumpkin, warm spices, chocolate, and gooey toasted marshmallows.

Recipe Tips

Choose medium eggplants that feel firm and heavy for their size.

Roast the eggplant before stuffing it so the flesh becomes tender and easy to scoop.

Do not remove too much flesh from the eggplant skins. Leaving a sturdy border helps them hold their shape during baking.

Reduce the tomato mixture until it is fairly thick. A watery filling can make Stuffed Eggplant Bake difficult to serve.

Use freshly shredded mozzarella for better melting.

Allow the finished casserole to rest before serving so the cheese and filling can set slightly.

Easy Variations

Stuffed Eggplant Bake can easily be adapted to suit different tastes.

Replace the ground beef with ground turkey, ground chicken, or Italian sausage.

For a vegetarian version, use cooked lentils, chickpeas, chopped mushrooms, or a combination of vegetables instead of meat.

You can add spinach, zucchini, mushrooms, or chopped artichoke hearts to the filling for extra vegetables.

For a spicy Stuffed Eggplant Bake, add more red pepper flakes, cayenne pepper, or chopped jalapeño.

Feta can replace part of the mozzarella or ricotta for a tangier Mediterranean flavor.

You can also add cooked rice, quinoa, or couscous to the filling if you want to stretch the recipe into more servings.

You may also enjoy our Cheesy Potato Meatball Casserole for a hearty family dinner with tender potatoes, juicy meatballs, creamy sauce, and melted cheese.

Make-Ahead Instructions

Stuffed Eggplant Bake is a convenient make-ahead dinner.

Roast the eggplant and prepare the filling up to one day in advance.

Assemble the casserole, cover it tightly, and refrigerate until you are ready to bake.

When baking directly from the refrigerator, add about 5 to 10 minutes to the cooking time.

Storage and Reheating

Store leftover Stuffed Eggplant Bake in an airtight container in the refrigerator for up to 3 days.

For the best texture, reheat portions in a 350°F or 175°C oven until thoroughly hot.

You can also microwave individual portions in short intervals.

Nutrition Information

Approximate nutrition per serving:

Calories: 430
Protein: 28 g
Carbohydrates: 24 g
Fat: 26 g
Saturated Fat: 12 g
Fiber: 7 g
Sugar: 10 g
Sodium: 720 mg

Nutrition values are estimates and will vary according to the ground beef, cheeses, eggplant size, and exact portion size.

Frequently Asked Questions

Do I need to peel the eggplant?

No. The skin helps the eggplant halves hold their shape during roasting and baking.

Can I make this without meat?

Yes. Lentils, mushrooms, chickpeas, or a combination of vegetables can replace the ground beef.

Why is my filling watery?

The tomatoes and eggplant may have released too much moisture. Simmer the filling uncovered until the excess liquid evaporates before stuffing the eggplant.

Can I use cottage cheese instead of ricotta?

Yes. Drain it well first if it contains a lot of liquid.

Can I freeze it?

Yes, although the eggplant may become slightly softer after thawing. For the best texture, refrigerate and enjoy within a few days.

Final Thoughts

This recipe is a comforting way to turn eggplant into a satisfying family dinner with layers of savory beef, tomatoes, creamy ricotta, herbs, and melted cheese.

Because Stuffed Eggplant Bake can be customized with different meats, vegetables, and cheeses, it is easy to adapt for weeknight dinners, meal prep, or casual entertaining.

Keep this Stuffed Eggplant Bake recipe handy whenever you want a cozy oven-baked meal that feels hearty without relying on pasta.

With tender roasted eggplant, rich tomato-beef filling, creamy ricotta, and bubbling mozzarella, Stuffed Eggplant Bake delivers classic comfort-food flavor in every serving.
Cheesy Low Carb Spaghetti Squash Bake

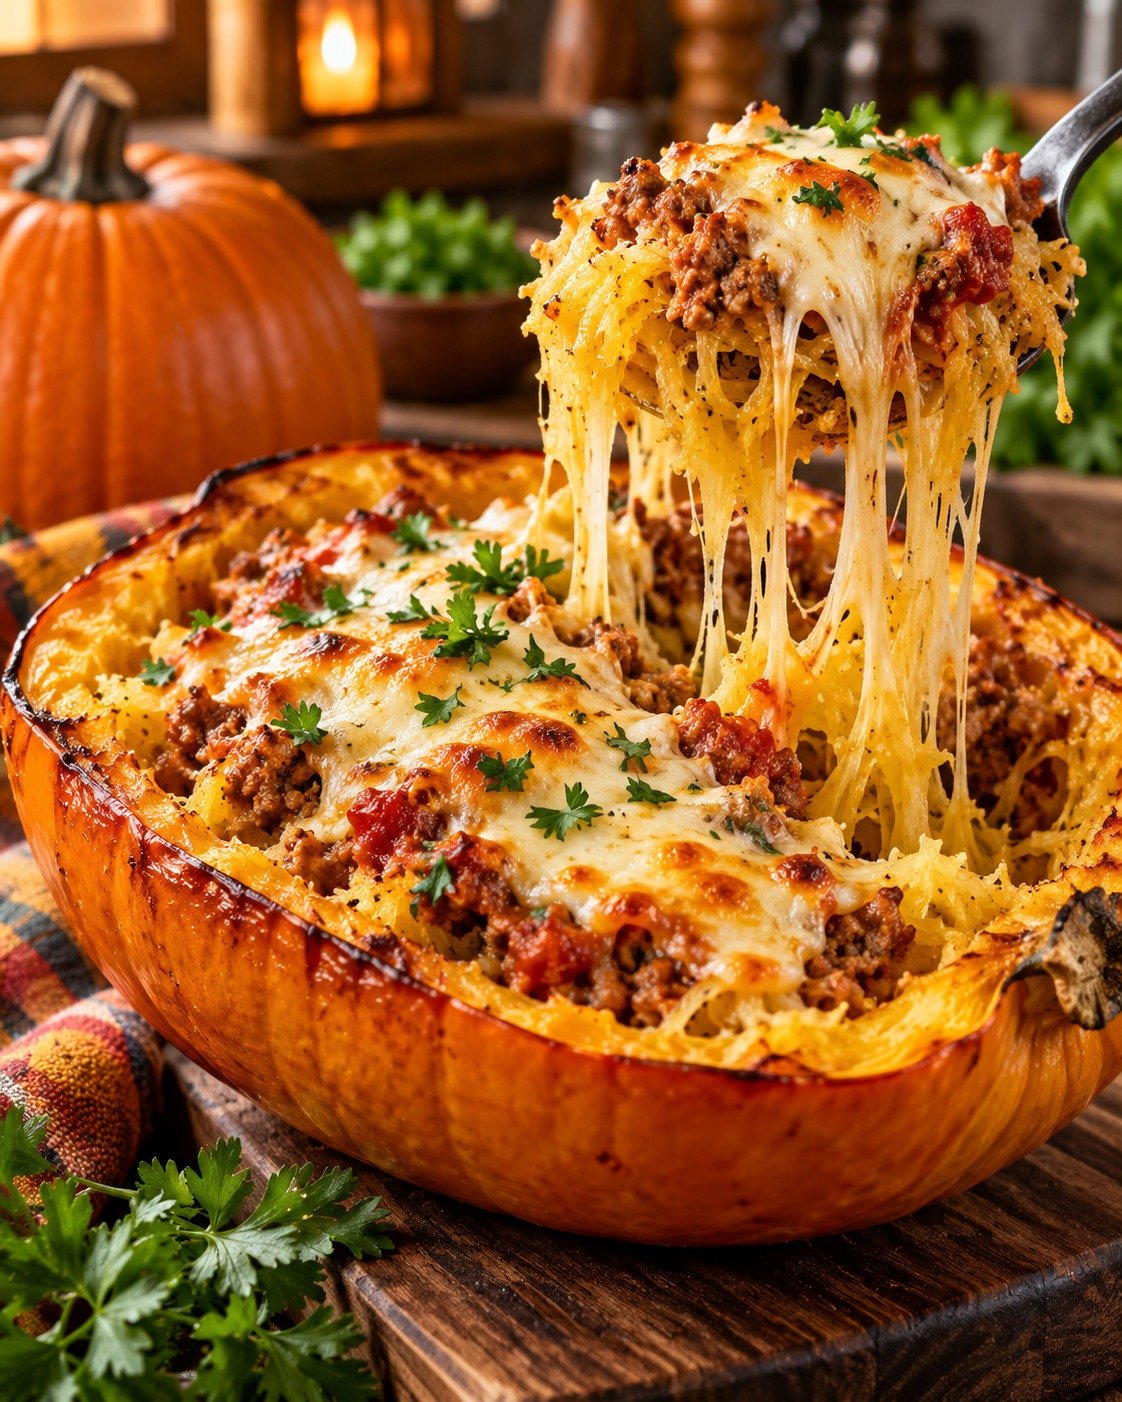
Spaghetti Squash Bake with roasted spaghetti squash, seasoned ground beef, marinara, mozzarella, cheddar, Parmesan, and fresh herbs

Cheesy Low Carb Spaghetti Squash Bake

Spaghetti Squash Bake is a cheesy, comforting, low-carb dinner made with roasted spaghetti squash, seasoned ground beef, tomato sauce, mozzarella, Parmesan, herbs, and simple spices. It has the cozy flavor of a baked pasta casserole, but the tender strands of spaghetti squash take the place of traditional noodles.

This Spaghetti Squash Bake is perfect for family dinners, meal prep, or cooler evenings when you want something warm and satisfying without a heavy pasta base.

Prep Time: 20 minutes
Cook Time: 55 minutes
Total Time: 1 hour 15 minutes
Servings: 6

Ingredients

For the Spaghetti Squash

1 large spaghetti squash, about 3 to 4 pounds

1 tablespoon olive oil

1/2 teaspoon salt

1/4 teaspoon black pepper

For the Meat Sauce

1 pound lean ground beef or ground turkey

1 small yellow onion, diced

3 garlic cloves, minced

1 can (14.5 ounces) diced tomatoes

1 cup marinara sauce

2 tablespoons tomato paste

1 teaspoon Italian seasoning

1/2 teaspoon dried oregano

1/2 teaspoon smoked paprika

1/4 teaspoon red pepper flakes, optional

1/2 teaspoon salt

1/4 teaspoon black pepper

For the Cheesy Topping

1 1/2 cups shredded mozzarella cheese

1/2 cup shredded cheddar cheese

1/3 cup grated Parmesan cheese

2 tablespoons chopped fresh parsley

1 tablespoon chopped fresh basil, optional

Why You’ll Love This Recipe

Spaghetti Squash Bake gives you the comfort of a cheesy casserole while keeping the base lighter than traditional pasta. The squash has a mild flavor that works beautifully with tomato sauce, seasoned beef, garlic, herbs, and melted cheese.

Another reason to love Spaghetti Squash Bake is how flexible it is. You can use ground beef, turkey, chicken, or even a vegetarian filling. It also reheats well, which makes it useful for meal prep or busy weeknights.

How to Make Spaghetti Squash Bake

Step 1: Preheat the Oven

Preheat the oven to 400°F or 200°C.

Line a large baking sheet with parchment paper or lightly grease it with olive oil.

Step 2: Prepare the Squash

Carefully cut the spaghetti squash in half lengthwise.

Use a spoon to scoop out the seeds and stringy center.

Brush the cut sides with olive oil and season with salt and black pepper.

Place the squash halves cut-side down on the prepared baking sheet.

Step 3: Roast the Squash

Roast for 35 to 40 minutes, or until the flesh is tender enough to scrape easily with a fork.

Avoid overcooking because very soft squash can release too much moisture into Spaghetti Squash Bake.

Remove from the oven and let the halves cool for several minutes.

Step 4: Make the Meat Sauce

While the squash roasts, heat a large skillet over medium heat.

Add the ground beef and cook for 5 to 7 minutes, breaking it into small crumbles.

Add the onion and cook for another 3 to 4 minutes until softened.

Stir in the garlic and cook for about 30 seconds.

Step 5: Add Tomatoes and Seasonings

Stir in the diced tomatoes, marinara sauce, tomato paste, Italian seasoning, oregano, smoked paprika, red pepper flakes, salt, and black pepper.

Reduce the heat to medium-low and simmer for 10 to 12 minutes.

Step 6: Shred the Squash

Use a fork to gently scrape the roasted squash flesh into long strands.

Leave a thin layer of squash inside the shell if you plan to use the halves as serving bowls.

If you prefer a casserole dish, transfer all the squash strands to a large bowl.

Step 7: Remove Extra Moisture

Place the squash strands in a clean kitchen towel or several layers of paper towels.

Press gently to remove excess moisture.

This step is important because dry squash helps Spaghetti Squash Bake stay cheesy and rich instead of watery.

Step 8: Combine the Filling

Add the spaghetti squash strands to the skillet with the meat sauce.

Stir gently until the squash is evenly coated.

Add half of the mozzarella and half of the Parmesan, then stir again.

Step 9: Fill the Squash Shells

Divide the filling between the two roasted squash shells.

Sprinkle the remaining mozzarella, cheddar, and Parmesan evenly over the top.

Step 10: Bake Until Bubbly

Return the filled squash halves or casserole dish to the oven.

Bake for 15 to 20 minutes, or until the cheese is fully melted and the edges are bubbling.

For a deeper golden top, broil for 1 to 2 minutes at the end, watching carefully.

Step 11: Rest Before Serving

Remove Spaghetti Squash Bake from the oven and let it rest for 5 to 10 minutes.

Step 12: Garnish and Serve

Sprinkle fresh parsley and basil over the top.

Serve Spaghetti Squash Bake warm from the squash shells or portion it from the casserole dish.

Serving Suggestions

Spaghetti Squash Bake is hearty enough to serve as a complete dinner, but fresh sides work especially well with its cheesy tomato flavor.

Pair it with a crisp green salad, cucumber tomato salad, roasted broccoli, steamed green beans, or garlic sautéed spinach.

For a more substantial meal, serve it with grilled chicken, roasted vegetables, or a small piece of garlic bread if you are not strictly limiting carbohydrates.

For another cheesy and flavorful pasta dinner, try our Low Syn Cheesy Taco Salsa Spaghetti Bake Recipe with a delicious taco-inspired twist.

Recipe Tips

Choose a spaghetti squash that feels firm and heavy for its size.

Do not overroast the squash or the strands can become mushy.

Remove as much moisture as possible before mixing with the sauce.

Simmer the meat sauce until it is thick rather than watery.

Use freshly shredded cheese when possible because it melts more smoothly.

For the best texture, let the finished casserole rest before serving.

Broil only briefly at the end so the cheese browns without burning.

Easy Variations

Spaghetti Squash Bake can be customized in many different ways.

For a chicken version, replace the ground beef with shredded cooked chicken and use a creamy garlic or tomato sauce.

For a vegetarian version, omit the meat and add sautéed mushrooms, spinach, zucchini, bell peppers, or lentils.

You can also make a pizza-inspired version with pepperoni, mushrooms, olives, and extra mozzarella.

For a spicier version, add jalapeños, crushed red pepper, or spicy Italian sausage.

Make-Ahead Instructions

Spaghetti Squash Bake is a good make-ahead dinner because the components can be prepared separately.

Roast and shred the squash up to 2 days ahead. Keep it refrigerated in an airtight container after removing excess moisture.

Prepare the meat sauce up to 3 days ahead and store it separately.

When ready to bake, combine the squash and sauce, add cheese, transfer to the shells or casserole dish, and bake until hot and bubbly.

Storage and Reheating

Store leftover Spaghetti Squash Bake in an airtight container in the refrigerator for up to 4 days.

Reheat individual portions in the microwave for 1 to 2 minutes, or warm larger portions in a 350°F or 175°C oven for about 15 minutes.

If the casserole seems slightly dry after refrigeration, add a spoonful of marinara before reheating.

For longer storage, freeze cooled portions for up to 2 months. Thaw overnight in the refrigerator before reheating.

Nutrition Information

Approximate nutrition per serving:

Calories: 355
Protein: 28 g
Carbohydrates: 20 g
Fat: 20 g
Saturated Fat: 9 g
Fiber: 5 g
Sugar: 8 g
Sodium: 690 mg

Nutrition values are estimates and will vary depending on the meat, cheese, sauce, squash size, and serving portion.

Frequently Asked Questions

Can I make this without meat?

Yes. Replace the ground beef with mushrooms, lentils, spinach, zucchini, or another vegetable mixture.

Why is my casserole watery?

Spaghetti squash naturally contains a lot of moisture. Pressing the cooked strands dry and using a thick sauce helps prevent excess liquid.

Can I use ground turkey?

Yes. Ground turkey works very well and gives Spaghetti Squash Bake a lighter flavor.

Can I use store-bought marinara?

Yes. Choose a thick marinara sauce with a flavor you enjoy.

Can I prepare it ahead?

Yes. Assemble the casserole, cover it, refrigerate for up to one day, and bake when ready.

Can I freeze it?

Yes. Freeze fully cooled portions in airtight containers for up to 2 months.

What cheese works best?

Mozzarella gives the best melt, while cheddar adds flavor and Parmesan creates a savory finish.

Final Thoughts

Spaghetti Squash Bake is a satisfying way to enjoy a cheesy, comforting casserole while using tender spaghetti squash instead of traditional pasta.

Because Spaghetti Squash Bake combines vegetables, protein, tomato sauce, herbs, and melted cheese in one dish, it works well for family dinners, meal prep, and cozy weeknight meals.

Keep this Spaghetti Squash Bake recipe handy whenever you want a warm, flavorful dinner with plenty of cheesy goodness and a lighter pasta-style base. Spaghetti Squash Bake also works beautifully for make-ahead family meals.

With golden melted cheese, rich meat sauce, and tender squash strands, Spaghetti Squash Bake delivers the cozy look and flavor of a classic baked casserole without relying on traditional noodles.

If you enjoy comforting baked pasta dishes, you may also like our Baked Spaghetti Recipe: The Ultimate Comfort Food You’ll Love.

Crustless Cheesy Taco Casserole

Crustless Cheesy Taco Casserole – Easy Low-Carb Taco Dinner

Crustless Cheesy Taco Casserole

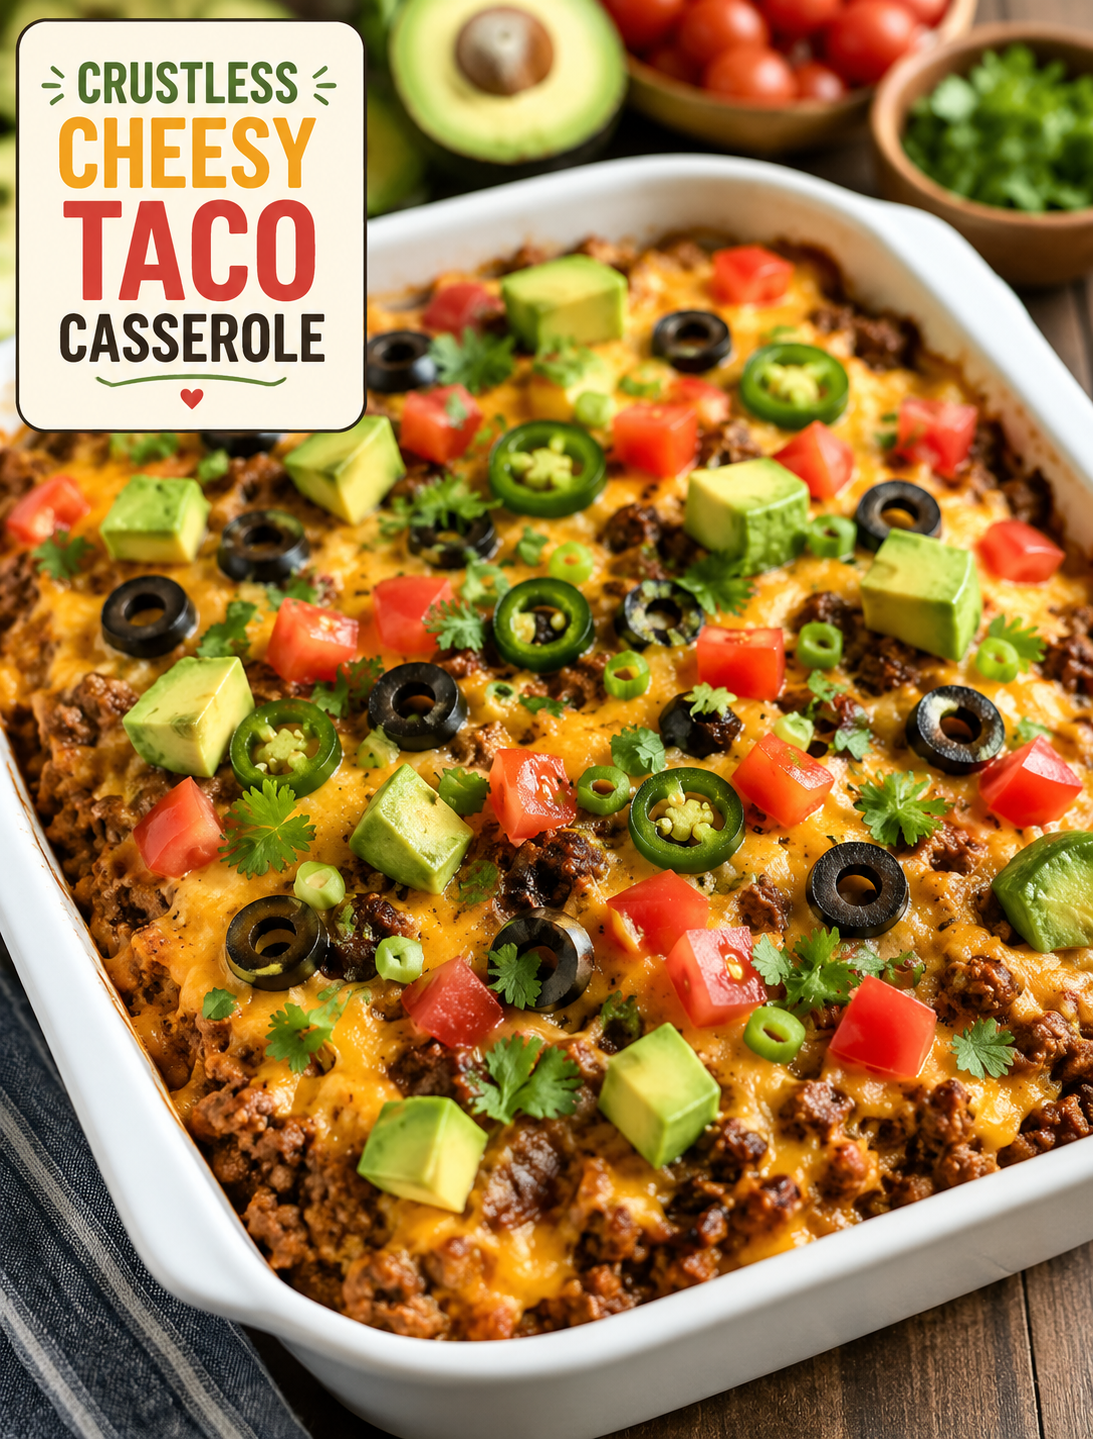
All the bold, comforting flavor of tacos comes together in one easy baked dish with no tortillas, rice, or flour crust. This Crustless Cheesy Taco Casserole combines seasoned lean ground beef with a creamy cheese layer, melted cheddar, and fresh taco-style toppings for a filling family dinner.

The casserole is simple to prepare and takes about 45 minutes from start to finish. The beef is cooked with onion, garlic, taco seasoning, cumin, and smoked paprika before it is layered with a creamy mixture of cream cheese, sour cream, cheddar, and Monterey Jack or mozzarella.

Because there is no tortilla or rice layer, this dish can be a convenient lower-carbohydrate taco-inspired meal. It is not a zero-carb recipe, since ingredients such as tomatoes, onion, avocado, dairy, and taco seasoning contain carbohydrates.

Ingredients For:

Beef Layer

  • 1 lb (450 g) lean ground beef
  • 1 small onion, finely diced
  • 2 cloves garlic, minced
  • 1 tablespoon olive oil, if needed
  • 2 tablespoons taco seasoning
  • ½ teaspoon ground cumin
  • ½ teaspoon smoked paprika
  • ¼ teaspoon black pepper
  • ¼ teaspoon salt, or to taste
  • ¼ cup water

Creamy Layer

  • 4 oz (115 g) softened cream cheese
  • ½ cup sour cream
  • ½ cup shredded cheddar cheese
  • ¼ cup shredded Monterey Jack or mozzarella
  • ½ teaspoon garlic powder
  • ¼ teaspoon black pepper

The Topping

  • 1 cup shredded cheddar cheese
  • ½ cup diced tomatoes
  • 1 small jalapeño, thinly sliced
  • ¼ cup sliced black olives
  • ¼ cup chopped fresh cilantro
  • ½ avocado, diced
  • 2 green onions, chopped
  • Optional: a few crumbled tortilla chips for serving

Servings & Timing

Servings: 6

Prep Time: 15 minutes

Cook Time: 25–30 minutes

Total Time: Approximately 45 minutes

Instructions

1. Preheat the Oven

Preheat your oven to 375°F (190°C). Lightly grease an 8×8-inch or 9×9-inch baking dish.

For a larger family meal, use a 9×13-inch baking dish and increase the ingredient amounts as needed.

2. Brown the Ground Beef

Heat a large skillet over medium-high heat. Add the ground beef and cook for about 5–7 minutes, breaking it apart with a wooden spoon.

Cook until no pink remains. If the beef produces a large amount of excess grease, carefully drain it before continuing.

3. Add Onion and Garlic

Add the diced onion to the cooked beef and sauté for about 3–4 minutes. Cook until the onion begins to soften.

Add the minced garlic and cook for another 30–60 seconds. Avoid overcooking the garlic because it can become bitter.

4. Season the Beef

Add the taco seasoning, cumin, smoked paprika, black pepper, and salt. Pour in ¼ cup water and stir well.

Let the beef mixture simmer for 2–3 minutes. The water helps the spices spread evenly and coats the beef with a flavorful taco-style sauce.

Remove the skillet from the heat.

5. Prepare the Creamy Mixture

Place the softened cream cheese, sour cream, ½ cup cheddar, Monterey Jack or mozzarella, garlic powder, and black pepper in a mixing bowl.

Stir until the mixture is smooth and well combined. If the cream cheese is too firm, microwave it for about 10–15 seconds to make mixing easier.

6. Build the First Layer

Spread about half of the seasoned beef across the bottom of the prepared baking dish.

Use the back of a spoon to create an even layer so the creamy mixture can spread more easily.

7. Add the Creamy Layer

Spread the cream cheese mixture over the beef. It does not need to be perfectly smooth because the warm beef underneath will help soften the mixture as you assemble the casserole.

8. Add the Remaining Beef

Spread the remaining seasoned beef over the creamy layer. Press it down gently to help the casserole hold its shape after baking.

9. Add the Cheese

Sprinkle the remaining 1 cup of shredded cheddar evenly over the top.

For an extra-rich cheese topping, add a small amount of Monterey Jack or mozzarella before baking.

10. Bake

Place the casserole in the preheated oven and bake uncovered for about 20–25 minutes.

The casserole is ready when the cheese is fully melted, the edges are bubbling, the center is hot, and the top is lightly golden.

For a more browned cheese topping, broil for 1–2 minutes at the end. Watch it closely because cheese can brown very quickly under the broiler.

11. Add Fresh Toppings

Remove the casserole from the oven and let it rest for 5–10 minutes.

Add the diced tomatoes, jalapeños, black olives, cilantro, avocado, and green onions after baking. Adding these ingredients at the end keeps them fresh, colorful, and crisp.

12. Slice and Serve

Cut the casserole into six portions and serve warm with your favorite taco toppings.

For extra creaminess, add a spoonful of sour cream or drizzle a low-sugar taco sauce over each serving.

Flavour Variations

Spicy Taco Casserole

For extra heat, add one finely diced jalapeño to the beef mixture and ½ teaspoon cayenne pepper. Finish the casserole with additional sliced jalapeños and hot sauce.

Chicken Taco Casserole

Replace the ground beef with approximately 3 cups of shredded cooked chicken. Season the chicken with the same taco spices and follow the remaining steps as written.

Turkey Taco Casserole

Lean ground turkey works well when you want a lighter alternative to beef. Add extra cumin, smoked paprika, garlic, or chili powder if you want a stronger flavor.

Vegetarian Version

Replace the beef with mushrooms, cauliflower crumbles, vegetarian ground meat, black beans, or pinto beans.

If keeping carbohydrates lower is important, mushrooms, cauliflower, or a low-carb meat alternative are better choices than beans.

Best Toppings

The fresh toppings are easy to customize based on what you have available.

Try avocado, cilantro, jalapeños, green onions, diced tomatoes, black olives, sour cream, pico de gallo, salsa, guacamole, shredded lettuce, queso fresco, or lime wedges.

A squeeze of fresh lime over the casserole just before serving adds brightness and balances the rich cheese.

Important Recipe Tips

Drain Excess Beef Fat

Higher-fat ground beef can release a lot of grease during cooking. Drain excess fat after browning to keep the casserole from becoming greasy.

Soften the Cream Cheese

Room-temperature cream cheese blends more smoothly with sour cream and shredded cheese, which makes the creamy layer easier to spread.

Don’t Add Too Much Liquid

This casserole has no tortilla or rice layer to absorb moisture. Too much liquid can make the finished dish watery.

Add Fresh Toppings After Baking

Tomatoes, avocado, cilantro, and green onions are best added after baking. This keeps their texture and fresh flavor intact.

Let It Rest

Allow the casserole to rest for 5–10 minutes before serving. This gives the layers time to firm up and makes portions easier to lift from the dish.

Don’t overbake.

Bake only until the cheese is melted and bubbling. Overbaking can dry out the beef and may cause the creamy dairy layer to separate.

What to Serve With It

Since this casserole is rich and cheesy, fresh vegetables make a great side.

Serve it with a crisp green salad, cucumber salad, shredded lettuce, cauliflower rice, roasted vegetables, avocado, pico de gallo, or steamed broccoli.

For a lower-carbohydrate meal, pair a serving with a large fresh salad instead of tortillas, chips, or rice.

Storage

Let leftover casserole cool before storing. Place individual servings in airtight containers and refrigerate for 3–4 days.

The dish also works well for meal prep because the flavors can become more developed after resting overnight.

Reheating

Microwave

Place one serving on a microwave-safe plate. Cover loosely and heat for 1–2 minutes, or until heated through.

Oven

Transfer the casserole to an oven-safe dish and cover loosely with foil. Reheat at 350°F (175°C) until hot.

Add fresh avocado, tomatoes, and cilantro after reheating for the best texture.

Can You Freeze It?

Yes. For the best texture, freeze the casserole before adding the fresh toppings.

Let it cool completely, divide it into individual freezer-safe containers, and freeze for up to approximately 2 months.

Thaw overnight in the refrigerator before reheating. The cream cheese layer may have a slightly different texture after freezing, but the casserole will still be flavorful.

Approximate Nutritional Information

Nutrition varies according to the exact brands and amounts of beef, cheese, sour cream, taco seasoning, and toppings used.

When divided into six servings, one portion is estimated to contain approximately:

  • Calories: 400–450
  • Protein: 27–32 g
  • Carbohydrates: 8–11 g
  • Fiber: 2–3 g
  • Net Carbohydrates: 6–9 g
  • Fat: 28–33 g
  • Sugar: 3–4 g
  • Sodium: 700–900 mg

These figures are estimates rather than laboratory measurements, and changing ingredients can significantly affect the final nutrition.

Potential Benefits

Protein

Ground beef and cheese provide protein that can help make the meal satisfying.

Healthy Fats

Avocado supplies mostly unsaturated fat, while beef and cheese contribute additional dietary fat.

Lower-Carbohydrate Alternative

Leaving out tortillas and rice reduces the carbohydrate content compared with many traditional taco casseroles.

Vegetable Toppings

Tomatoes, jalapeños, avocado, cilantro, and green onions add flavor, color, fiber, and various micronutrients.

Big Flavor Without Flour

Taco seasoning, garlic, cumin, smoked paprika, cheese, and fresh toppings create a bold taco-inspired meal without a flour-based crust.

Frequently Asked Questions

Is this really a zero-carb recipe?

No. It is a lower-carb casserole, not a zero-carb dish, because ingredients such as dairy, tomatoes, onion, avocado, and seasonings contain carbohydrates.

Can I eat as much as I want?

Portion size still matters because beef, cheese, cream cheese, and sour cream can contribute significant calories even in a lower-carb meal.

Will this casserole make me lose weight quickly?

No recipe guarantees weight loss; this casserole can fit into a balanced eating plan when portions and total food intake are appropriate.

Can I make it without cream cheese?

Yes. Replace the cream cheese with additional sour cream, Greek yogurt, cottage cheese, or another suitable creamy sauce.

Can I use ground turkey?

Yes. Ground turkey is an easy substitute for beef and works well with the same taco seasoning and toppings.

Can I use chicken?

Yes. About 3 cups of shredded cooked chicken can replace the ground beef while keeping the taco-style flavor.

Can I add beans?

Yes, but black beans or pinto beans will increase the carbohydrate content while making the casserole more filling and hearty.

Can I make it dairy-free?

Yes. Use dairy-free cream cheese, dairy-free sour cream, and dairy-free shredded cheese in place of the regular dairy ingredients.

Can I make it gluten-free?

The casserole can be made gluten-free, but check the taco seasoning label because some packaged blends may contain gluten ingredients or have cross-contact warnings.

Why is my casserole watery?

Fresh vegetables can release liquid during baking, so adding tomatoes and other fresh toppings after baking helps maintain a firmer texture.

Can I prepare it ahead?

Yes. Assemble the beef and creamy layers, cover, and refrigerate for up to about 24 hours, then add the final cheese layer before baking.

What is the best cheese?

Cheddar provides classic taco flavor, Monterey Jack melts smoothly, and mozzarella adds stretch; combining two cheeses gives a balanced result.

Can I make it spicier?

Yes. Add jalapeño, cayenne, chili powder, hot sauce, or spicy salsa to increase the heat.

Can I make individual portions?

Yes. Divide the mixture among small oven-safe ramekins and begin checking them after about 15 minutes because smaller portions cook faster.