Air Fryer Crispy Sweet Chili Garlic Steak Bites

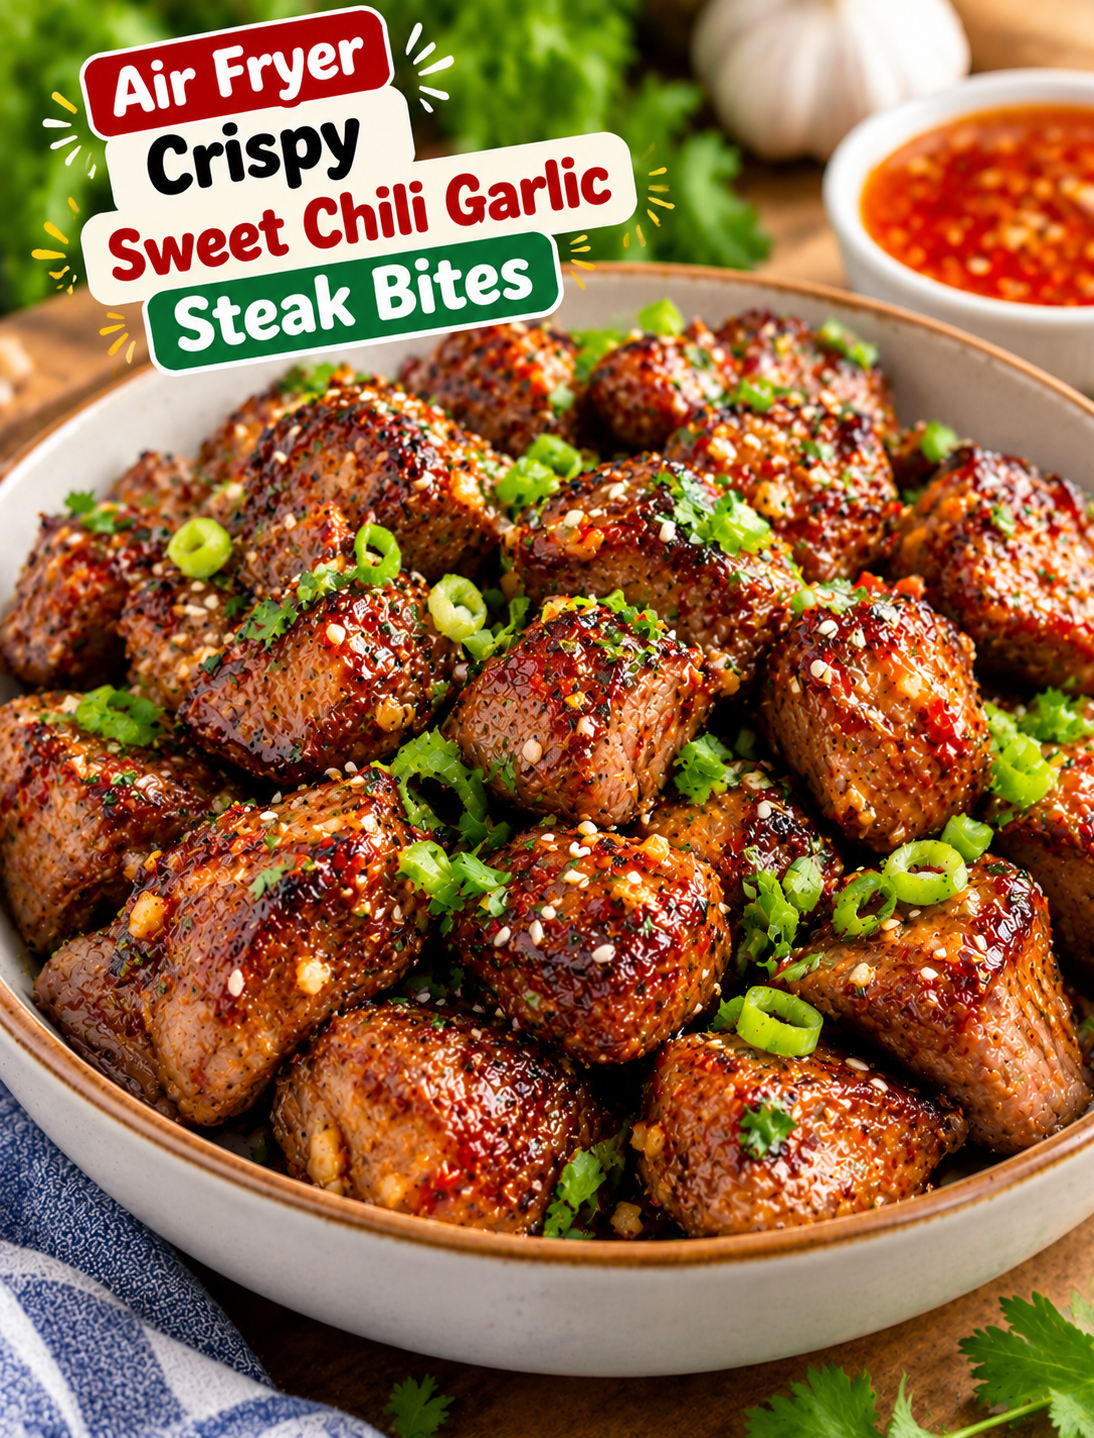
Air fryer sweet chili garlic steak bites coated in glossy sauce and garnished with sesame seeds and sliced green onions.

Air Fryer Crispy Sweet Chili Garlic Steak Bites

Craving steak with crispy edges and a sweet, spicy glaze? These Air Fryer Crispy Sweet Chili Garlic Steak Bites deliver big flavor in small pieces. Tender beef is seasoned, air fried until browned, and coated in a sticky sweet chili garlic sauce that makes every bite delicious.

This easy steak recipe is perfect for busy weeknights, game-day snacks, or a quick dinner when you want something different from the usual chicken or burgers. The air fryer helps brown the steak without using a large amount of oil, while the homemade glaze adds a balance of sweetness, garlic, and gentle heat.

Serve these steak bites over steamed rice, alongside roasted vegetables, or with toothpicks as a party appetizer. You can also adjust the chili sauce to make the dish milder or spicier.

Why You’ll Love This Recipe

These steak bites combine simple preparation with bold, restaurant-style flavor.

  • Crispy, browned edges: Small steak pieces cook quickly and develop a flavorful outer surface.
  • Sweet and spicy glaze: Sweet chili sauce, garlic, soy sauce, and lime create a balanced coating.
  • Quick cooking: The steak usually cooks in about 7–10 minutes, depending on the cut and size.
  • Easy ingredients: Most items are available at regular U.S. grocery stores.
  • Flexible serving options: Pair the beef with rice, noodles, vegetables, or potatoes.
  • Great for sharing: Serve the bites with toothpicks for parties or game-day gatherings.
  • Easy to customize: Adjust the heat, sweetness, and garlic to suit your taste.

Ingredients You’ll Need

For the Steak Bites

  • 1 ½ pounds sirloin steak, cut into 1-inch cubes
  • 1 tablespoon olive oil or avocado oil
  • 1 teaspoon garlic powder
  • ½ teaspoon smoked paprika
  • ½ teaspoon onion powder
  • ½ teaspoon black pepper
  • ½ teaspoon salt, or to taste

Sirloin is a good choice because it offers beefy flavor and cooks quickly. New York strip can also work, while ribeye gives a richer result because it contains more fat.

For the Sweet Chili Garlic Sauce

  • ¼ cup sweet chili sauce
  • 3 garlic cloves, finely minced
  • 1 tablespoon low-sodium soy sauce
  • 1 tablespoon honey
  • 1 teaspoon rice vinegar
  • 1 teaspoon fresh lime juice
  • ½ teaspoon sesame oil
  • ¼ teaspoon red pepper flakes, optional

Sweet chili sauce provides sweetness and mild heat, while fresh garlic adds a savory kick. Honey makes the glaze slightly thicker, and lime juice helps balance the sweetness.

For Garnishing

  • 1 tablespoon sliced green onions
  • 1 teaspoon sesame seeds
  • Lime wedges, optional
  • Chopped fresh cilantro, optional

How to Make Air Fryer Crispy Sweet Chili Garlic Steak Bites

Step 1: Cut and Dry the Steak

Cut the steak into evenly sized 1-inch cubes.

Pat the pieces dry with paper towels before seasoning. Removing excess moisture helps the surface brown instead of steaming.

Trim away any tough pieces of connective tissue. Leave some natural marbling because it adds flavor and helps keep the beef tender.

Step 2: Season the Beef

Place the steak cubes in a large mixing bowl.

Add olive oil, garlic powder, smoked paprika, onion powder, salt, and black pepper.

Toss until each piece is lightly coated with oil and seasoning.

Let the steak sit for 5–10 minutes while you prepare the sauce and preheat the air fryer.

Step 3: Preheat the Air Fryer

Preheat your air fryer to 400°F for about 3–5 minutes, following the appliance manufacturer’s instructions.

A hot cooking basket helps the beef start browning quickly.

Lightly coat the basket with an air-fryer-safe cooking spray if needed to prevent sticking.

Step 4: Air Fry the Steak Bites

Arrange the seasoned steak cubes in a single layer in the air fryer basket.

Leave space between the pieces so hot air can circulate. Cook in batches if your basket is small.

Air fry at 400°F for about 7–10 minutes, shaking the basket halfway through cooking.

The exact time depends on the steak cut, cube size, air fryer model, and desired doneness.

Check the internal temperature with a food thermometer. For whole-muscle beef steak, the USDA recommends a minimum internal temperature of 145°F followed by a 3-minute rest.

If you prefer more browning, cook the steak for another minute or two while checking the temperature and texture.

Step 5: Prepare the Sweet Chili Garlic Sauce

While the steak cooks, place the sweet chili sauce, minced garlic, soy sauce, honey, rice vinegar, lime juice, sesame oil, and optional red pepper flakes in a small saucepan.

Stir over medium-low heat for about 2–3 minutes, until the garlic smells fragrant and the sauce is evenly combined.

Avoid cooking the glaze over high heat because the honey and sweet chili sauce can burn.

If the sauce becomes too thick, add 1–2 teaspoons of water and stir.

Step 6: Coat the Steak Bites

Transfer the cooked steak to a clean mixing bowl.

Pour the warm sweet chili garlic sauce over the beef.

Toss gently until the steak pieces are evenly coated.

For a less saucy finish, add the glaze gradually and stop when the steak has a thin, shiny coating.

Crispness tip: Add the sauce just before serving. The glaze adds moisture, so leaving the steak in the sauce for too long can soften the browned exterior.

Step 7: Garnish and Serve

Transfer the glazed steak bites to a serving plate.

Sprinkle with sliced green onions and sesame seeds.

Add lime wedges or chopped cilantro for a fresh finish.

Serve immediately while the steak is warm and the glaze is glossy.

Tips for Crispy and Tender Steak Bites

A few simple techniques can improve the texture and flavor of your beef.

  • Choose the right cut: Sirloin offers a good balance of flavor, tenderness, and price.
  • Cut evenly: Similar-sized cubes cook more consistently.
  • Dry the steak: Surface moisture can slow browning.
  • Avoid overcrowding: Cook in batches to prevent steaming.
  • Preheat the air fryer: A hot basket helps create a browned exterior.
  • Add sauce after cooking: This helps preserve the steak’s browned surface.
  • Check the temperature: Use a thermometer rather than relying only on cooking time.
  • Rest briefly: Let the beef rest for 3 minutes after reaching the recommended minimum temperature.

Easy Variations

Extra-Spicy Garlic Steak Bites

Add more red pepper flakes or a small amount of sriracha to the sauce. Taste as you go because sweet chili sauces vary in heat.

Honey Garlic Steak Bites

Replace the sweet chili sauce with extra honey, a little soy sauce, and additional garlic for a sweeter, milder glaze.

Teriyaki-Style Steak Bites

Use teriyaki sauce in place of the sweet chili sauce. Reduce the added honey if the teriyaki sauce is already sweet.

Lemon-Lime Garlic Steak

Skip the honey and sweet chili sauce. Toss the cooked steak with garlic butter and fresh lemon or lime juice for a brighter flavor.

Steak and Vegetable Bowl

Serve the glazed beef over rice with steamed broccoli, sliced carrots, and bell peppers. Add the vegetables separately to keep their texture fresh.

What to Serve With Sweet Chili Garlic Steak Bites

These steak bites work well as a snack, appetizer, or main course.

Try serving them with:

  • Steamed jasmine or brown rice
  • Garlic mashed potatoes
  • Air fryer potato wedges
  • Roasted broccoli
  • Stir-fried vegetables
  • Asian-style cucumber salad
  • Fried rice
  • Steamed green beans

For a party, arrange the steak on a platter with toothpicks and a small bowl of extra sauce. For dinner, serve the beef over rice with vegetables for a balanced plate.

Storage and Reheating

Let the leftover steak cool, then refrigerate it in an airtight container within 2 hours of cooking.

Store the cooked steak bites for 3–4 days in the refrigerator.

For the best texture, reheat the steak in the air fryer at 350°F for about 2–4 minutes, checking frequently to prevent overcooking. Add a small amount of extra sauce after reheating if needed.

You can also reheat the beef in a skillet over medium-low heat with a splash of water. Avoid prolonged heating because steak bites can become tough when overcooked.

Common Mistakes to Avoid

Overcrowding the Basket

Too many steak cubes at once can trap steam and prevent good browning. Leave space around the pieces or cook in batches.

Cutting the Steak Too Small

Very small cubes can overcook before they develop a good browned surface. Aim for pieces close to 1 inch.

Adding the Glaze Too Early

Sweet chili sauce and honey can burn at high temperatures. Cook the beef first, then toss it with the prepared sauce.

Skipping the Thermometer

Cooking time varies between air fryers. Check the center of a few pieces to make sure the beef reaches the recommended safe temperature.

Making the Sauce Too Thick

A thick glaze can coat the steak unevenly. Add a teaspoon of water at a time if the sauce needs thinning.

Frequently Asked Questions

What cut of steak is best for air fryer steak bites?

Sirloin is a reliable choice because it cooks quickly and has good beef flavor. New York strip and ribeye can also work.

How long do steak bites take in the air fryer?

One-inch steak cubes usually take about 7–10 minutes at 400°F, depending on the air fryer and desired doneness.

Can I use frozen steak?

For the best browning, thaw the steak safely in the refrigerator and pat it dry before cutting and seasoning.

How do I make the sauce less spicy?

Skip the red pepper flakes and choose a mild sweet chili sauce. Add extra honey or lime to adjust the flavor.

Can I make these steak bites without honey?

Yes. Omit the honey or replace it with a small amount of brown sugar, adjusting the sauce to taste.

Why are my steak bites tough?

They may be overcooked, cut unevenly, or made from a less tender cut. Use evenly sized cubes and check the temperature early.

Can I prepare the sauce ahead of time?

Yes. Mix and refrigerate the sauce for up to 3 days, then warm it gently before tossing it with the cooked steak.

What should I serve with sweet chili garlic steak bites?

Rice, roasted vegetables, potato wedges, or a crisp cucumber salad all pair well with the sweet and savory glaze.

Final Thoughts

These Air Fryer Crispy Sweet Chili Garlic Steak Bites bring together browned beef, fresh garlic, and a glossy sweet-and-spicy sauce in an easy recipe. They are quick enough for a weeknight dinner and flavorful enough to serve at a party.

For the best results, use evenly cut steak cubes, avoid overcrowding the basket, check the internal temperature, and add the glaze after cooking. Finish with green onions, sesame seeds, and a squeeze of lime for a simple meal with plenty of flavor.
Crispy Rice Paper Chicken Roll-Ups

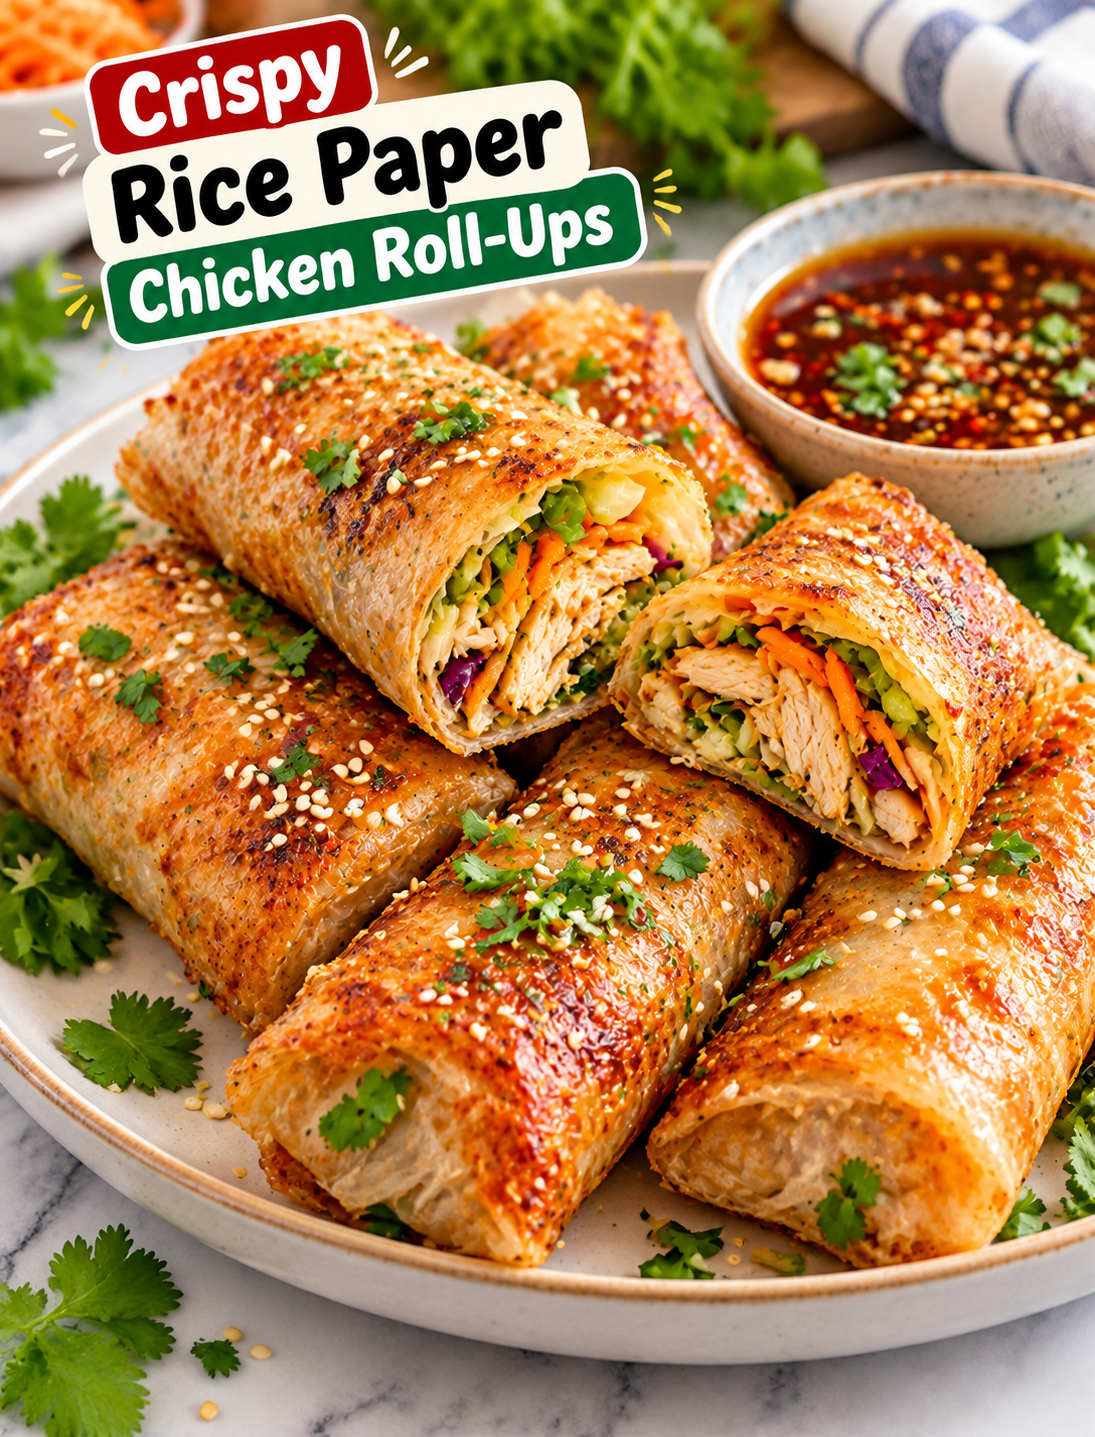
Crispy rice paper chicken roll-ups filled with seasoned chicken and vegetables, served with dipping sauce

Crispy Rice Paper Chicken Roll-Ups

These Crispy Rice Paper Chicken Roll-Ups are a simple way to turn seasoned chicken and fresh vegetables into a crunchy, satisfying meal. Rice paper wrappers become golden and crisp when cooked, while the chicken filling stays juicy and flavorful inside.

This recipe is inspired by the popular crispy rice paper snack trend, but it uses everyday ingredients that are easy to find at most U.S. grocery stores. You can serve the roll-ups as an appetizer, quick lunch, party snack, or light dinner.

The filling combines cooked chicken, shredded carrots, cabbage, green onions, and simple seasonings. A little soy sauce and sesame oil add savory flavor without making the filling too heavy.

The best part is the texture. The outside becomes crisp and lightly chewy, while the center is warm, tender, and packed with seasoned chicken and vegetables.

Why You’ll Love This Recipe

These chicken roll-ups are easy to prepare and work well for busy weeknights.

  • Crispy texture: Rice paper turns golden and crunchy when cooked properly.
  • Easy filling: Cooked chicken and fresh vegetables make a quick savory mixture.
  • Simple ingredients: Most ingredients are available at regular supermarkets.
  • Quick cooking: The assembled rolls only need a few minutes to become crisp.
  • Easy to customize: Change the vegetables, sauce, or protein to suit your taste.
  • Great for sharing: Cut them in half and serve with dipping sauces for parties.
  • Meal-prep friendly: The filling can be prepared ahead of time.

Ingredients You’ll Need

For the Chicken Filling

  • 2 cups cooked shredded chicken
  • 1 cup finely shredded cabbage
  • ½ cup shredded carrots
  • 3 green onions, thinly sliced
  • 2 cloves garlic, minced
  • 1 tablespoon low-sodium soy sauce
  • 1 teaspoon sesame oil
  • ½ teaspoon grated fresh ginger
  • ¼ teaspoon black pepper
  • 1 teaspoon rice vinegar
  • 1 teaspoon cooking oil

Rotisserie chicken is a convenient choice for this recipe. You can also use leftover roasted chicken or freshly cooked chicken breast.

For the Rice Paper Roll-Ups

  • 8 to 10 round rice paper wrappers
  • 2 tablespoons cooking oil, if pan-frying
  • Water for softening the rice paper

Choose medium or large rice paper sheets so they are easier to fold around the filling.

Optional Dipping Sauce

  • 3 tablespoons low-sodium soy sauce
  • 1 tablespoon rice vinegar
  • 1 teaspoon honey
  • ½ teaspoon sesame oil
  • ½ teaspoon chili garlic sauce
  • 1 teaspoon finely sliced green onion

Mix the ingredients in a small bowl and adjust the chili sauce to your preferred heat level.

How to Make Crispy Rice Paper Chicken Roll-Ups

Step 1: Prepare the Chicken Filling

Place a large skillet over medium heat and add 1 teaspoon of cooking oil.

Add the minced garlic and grated ginger. Cook for about 30 seconds until fragrant.

Add the shredded cabbage and carrots.

Cook the vegetables for 2 to 3 minutes, stirring often. They should soften slightly while keeping some crunch.

Add the shredded chicken, soy sauce, sesame oil, black pepper, and rice vinegar.

Stir everything together and cook for another 2 to 3 minutes.

Turn off the heat and mix in the sliced green onions.

Let the filling cool for several minutes before wrapping.

Important: The filling should be warm rather than very hot when you add it to the rice paper. Excess heat can make the wrappers difficult to handle.

Step 2: Prepare Your Work Surface

Place a clean cutting board or large plate near your cooking area.

Fill a shallow dish with lukewarm water.

Keep the rice paper wrappers, chicken filling, and a clean plate nearby.

Work with one wrapper at a time because soaked rice paper becomes sticky quickly.

Step 3: Soften the Rice Paper

Dip one rice paper wrapper into the lukewarm water for about 5 to 10 seconds.

Remove it while the wrapper is still slightly firm.

Place it flat on your work surface.

Do not soak the wrapper until it becomes completely soft. It will continue to soften as you add the filling.

Step 4: Add the Filling

Place about 2 to 3 tablespoons of the chicken mixture slightly below the center of the wrapper.

Keep the filling compact and avoid adding too much.

Leave enough empty space around the edges to fold the wrapper securely.

If you add too much filling, the rice paper can tear during rolling or cooking.

Step 5: Fold the Roll-Up

Fold the bottom edge of the rice paper over the chicken filling.

Fold both sides toward the center.

Roll the wrapper upward while gently pressing the filling into a compact shape.

Continue rolling until you have a tight cylinder.

Place the finished roll seam-side down on a clean plate.

Repeat with the remaining rice paper and filling.

Step 6: Let the Rolls Set

Allow the wrapped roll-ups to rest for about 2 to 3 minutes.

This gives the rice paper time to become slightly tacky and helps the seam hold together.

Keep the rolls separated so they do not stick to one another.

Step 7: Cook Until Crispy

You can cook the roll-ups in a skillet, air fryer, or oven.

Skillet Method

Heat a nonstick skillet over medium heat and lightly coat it with cooking oil.

Place the roll-ups seam-side down in the pan.

Cook for about 2 to 3 minutes per side.

Turn them carefully with tongs until all sides are golden and crisp.

Avoid high heat because the outside can brown before the wrapper becomes evenly crisp.

Air Fryer Method

Preheat the air fryer to 375°F.

Lightly brush or spray the roll-ups with oil.

Place them in the basket in a single layer with space between each roll.

Air fry for about 8 to 10 minutes, turning halfway through.

Cook until the wrappers are golden and crisp.

Air fryer cooking times can vary, so start checking after 7 minutes.

Oven Method

Preheat the oven to 425°F.

Place the roll-ups on a parchment-lined baking sheet.

Lightly brush them with oil.

Bake for approximately 12 to 16 minutes, turning them halfway through.

Remove them when the wrappers are crisp and lightly golden.

Tips for Perfect Crispy Roll-Ups

A few small details can make these chicken rolls much easier to prepare.

  • Do not over-soak the rice paper: A wrapper that is too soft can tear easily.
  • Use a moderate amount of filling: Two to three tablespoons are usually enough.
  • Keep the filling fairly dry: Excess liquid can weaken the wrapper.
  • Roll firmly: A tight roll helps keep the filling inside during cooking.
  • Leave space between rolls: This prevents sticking and helps them crisp evenly.
  • Use moderate heat: Very high heat can burn the wrapper before the inside warms.
  • Cook seam-side down first: This helps seal the roll.
  • Serve soon after cooking: The wrappers are crispest when freshly cooked.

Easy Variations

This recipe is flexible, so you can adjust the filling based on what you have available.

Spicy Chicken Roll-Ups

Add chili flakes, sriracha, or chili garlic sauce to the chicken mixture for extra heat.

Teriyaki Chicken Roll-Ups

Replace some of the soy sauce with a small amount of teriyaki sauce for a sweeter flavor.

Chicken and Cheese Roll-Ups

Add a small amount of shredded mozzarella or Monterey Jack cheese before rolling. Keep the filling amount moderate so the wrapper does not split.

Fresh Vegetable Roll-Ups

Add thinly sliced bell peppers, cucumber, or fresh herbs for extra color and crunch.

Ground Chicken Version

Replace shredded chicken with cooked ground chicken. Break the meat into small pieces so it mixes evenly with the vegetables.

Vegetarian Option

Replace the chicken with sautéed mushrooms, shredded cabbage, carrots, edamame, or crumbled tofu.

What to Serve With Chicken Roll-Ups

A flavorful dipping sauce makes these crispy rolls even better.

Try serving them with:

  • Sweet chili sauce
  • Soy-ginger dipping sauce
  • Spicy mayo
  • Peanut sauce
  • Sriracha mayo
  • Sesame dipping sauce
  • Garlic chili sauce

For a complete meal, serve the roll-ups with a simple cucumber salad, steamed edamame, or Asian-style slaw.

For a party, cut each roll diagonally and arrange the pieces on a platter with two or three dipping sauces.

How to Store Leftovers

For the best texture, these roll-ups are best eaten immediately after cooking.

If you have leftovers, allow them to cool completely before placing them in an airtight container.

Refrigerate them for up to 3 days.

Avoid stacking many rolls directly on top of one another because the wrappers can stick together.

To reheat, use an air fryer at 350°F for about 3 to 5 minutes.

Avoid the microwave when possible because it can make the rice paper soft and chewy instead of crisp.

Can You Make Them Ahead?

Yes, but it is best to prepare the filling ahead rather than fully assemble the rolls.

Cook and cool the chicken mixture, then refrigerate it in an airtight container for up to 3 days.

When you are ready to cook, prepare fresh rice paper wrappers and assemble the roll-ups.

This method gives you a better texture than storing fully wrapped uncooked rolls for a long period.

Common Mistakes to Avoid

Overfilling the Wrapper

Too much chicken can cause the rice paper to split while rolling or cooking.

Soaking the Rice Paper Too Long

Rice paper becomes softer as it sits, so a short dip in water is usually enough.

Using Watery Filling

Drain excess moisture from vegetables and avoid adding too much sauce to the chicken mixture.

Cooking at Excessive Heat

High heat can burn the wrapper before the filling is heated properly.

Crowding the Pan

Give each roll enough space so hot air or cooking heat can reach the surface evenly.

Frequently Asked Questions

Can I use raw chicken?

Yes, but cook the chicken completely before adding it to the rice paper and confirm it reaches 165°F internally.

Why does my rice paper tear?

Rice paper can tear when it is over-soaked, overfilled, or handled too roughly while wrapping.

Can I make these in an air fryer?

Yes. Lightly oil the rolls and air fry them at 375°F for about 8 to 10 minutes, turning halfway through.

Can I use leftover rotisserie chicken?

Absolutely. Rotisserie chicken is one of the easiest options because the meat is already cooked and seasoned.

How do I make the rolls extra crispy?

Use a light coating of oil, avoid overcrowding, and cook the rolls until the wrapper becomes evenly golden.

Can I freeze rice paper chicken rolls?

Freezing fully assembled rolls is not recommended because the texture of softened rice paper can change after thawing.

What dipping sauce goes best with them?

Sweet chili sauce, spicy mayo, peanut sauce, and soy-ginger sauce all pair well with the savory chicken filling.

Can I make these without chicken?

Yes. Substitute cooked tofu, mushrooms, edamame, or additional vegetables for a vegetarian version.

Final Thoughts

These Crispy Rice Paper Chicken Roll-Ups are a fun way to turn simple chicken and vegetables into a crunchy meal or appetizer. The rice paper creates a light, crisp exterior while the seasoned chicken filling adds plenty of savory flavor.

For the best results, keep the filling fairly dry, avoid over-soaking the wrappers, and cook the rolls in a single layer. Serve them hot with your favorite dipping sauce for a quick lunch, easy dinner, or shareable snack.

Once you have the basic method down, you can change the filling and sauce to create a different version every time.

Air Fryer Cheesy Chicken Quesadillas

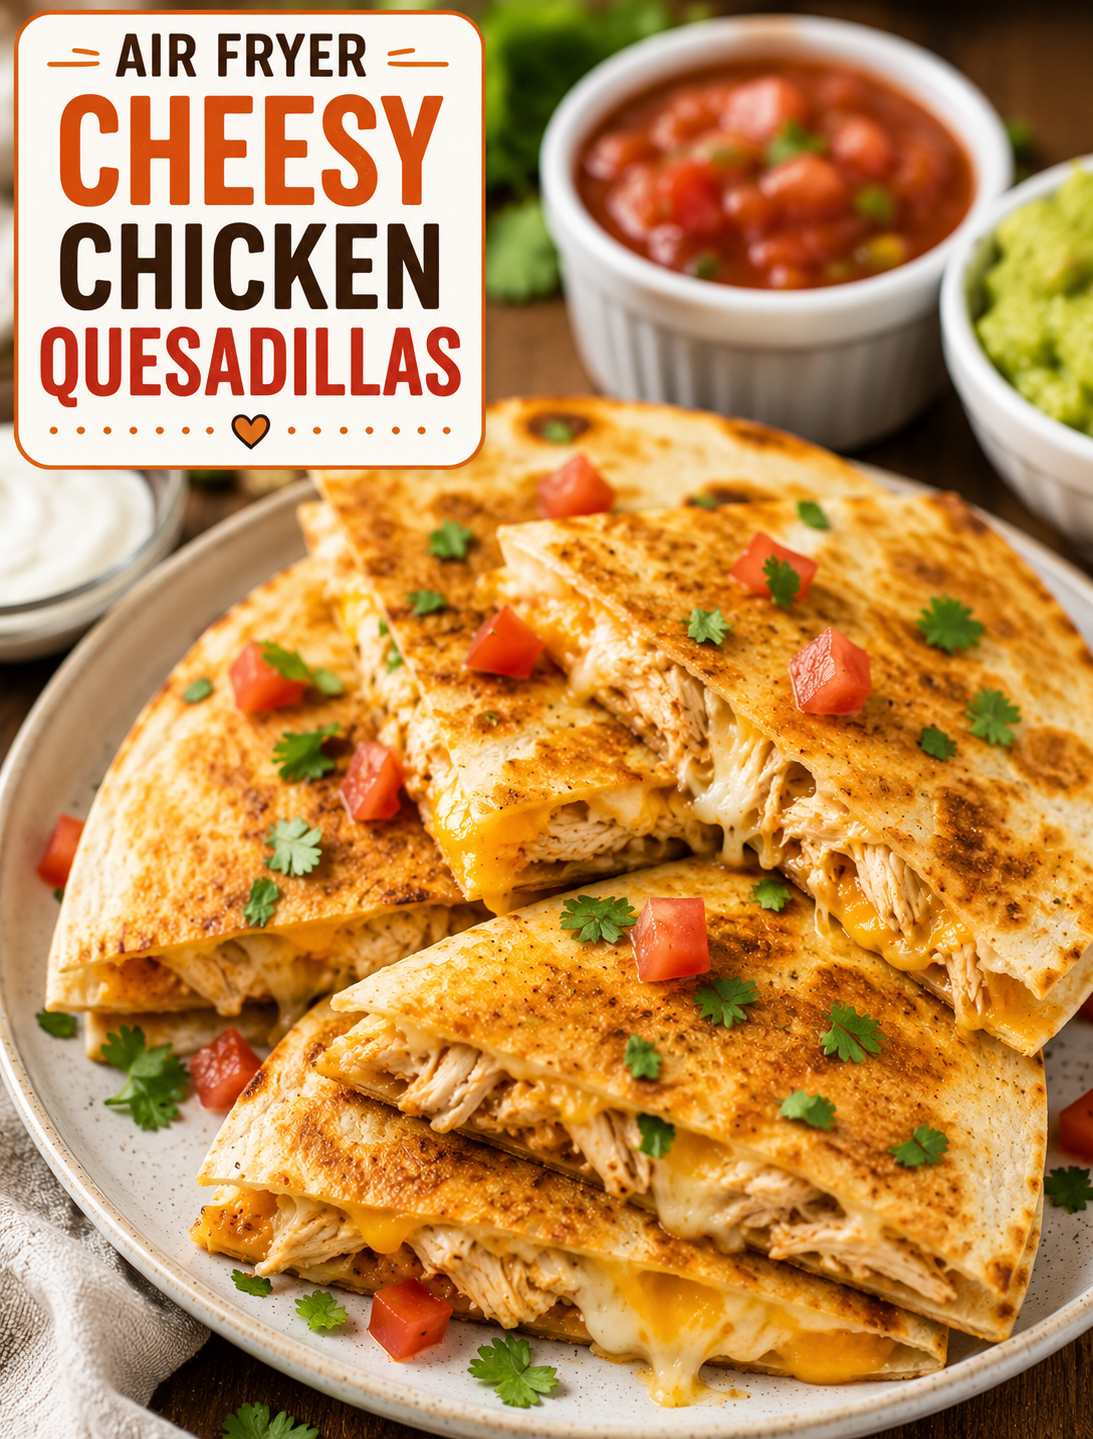
Air Fryer Cheesy Chicken Quesadillas with crispy golden tortillas, seasoned chicken, melted cheese, and fresh toppings

Air Fryer Cheesy Chicken Quesadillas

Air Fryer Cheesy Chicken Quesadillas are crispy, golden, and packed with seasoned chicken and melted cheese. The air fryer gives the tortillas a crunchy finish while keeping the filling hot and gooey.

This easy chicken quesadilla recipe is perfect for a quick lunch, weeknight dinner, after-school snack, or game-day meal. It uses simple ingredients and takes only a few minutes to assemble.

You can make these quesadillas with leftover chicken, rotisserie chicken, or freshly cooked chicken breast. Add your favorite vegetables, salsa, or spicy peppers to create a filling that fits your taste.

Why You’ll Love This Recipe

  • Quick and easy: The quesadillas cook in the air fryer in about 6–8 minutes.
  • Crispy texture: Hot circulating air makes the tortilla golden and crunchy.
  • Cheesy filling: Melted cheese holds the chicken and toppings together.
  • Great for leftovers: Cooked chicken can be turned into a fresh meal.
  • Family-friendly: Mild ingredients make this recipe easy to serve to kids.
  • Easy to customize: Add beans, peppers, corn, onions, or your favorite salsa.
  • Perfect for dipping: Serve with sour cream, guacamole, salsa, or ranch.

Ingredients

For the Chicken Filling

  • 2 cups cooked chicken, shredded or finely chopped
  • 1 cup shredded Mexican cheese blend
  • 1/2 cup shredded cheddar cheese
  • 1/4 cup finely diced red bell pepper
  • 2 tablespoons finely chopped green onions
  • 1/2 teaspoon garlic powder
  • 1/2 teaspoon chili powder
  • 1/2 teaspoon smoked paprika
  • 1/4 teaspoon ground cumin
  • 1/4 teaspoon salt
  • 1/4 teaspoon black pepper
  • 2 tablespoons salsa

Quesadillas

  • 4 large flour tortillas
  • Cooking spray or a small amount of olive oil

Serving

  • Salsa
  • Sour cream
  • Guacamole
  • Chopped cilantro
  • Pickled jalapeños
  • Lime wedges

How to Make Air Fryer Cheesy Chicken Quesadillas

Step 1: Prepare the Chicken Filling

Place the cooked chicken in a medium bowl.

Add the Mexican cheese blend, cheddar cheese, diced bell pepper, green onions, garlic powder, chili powder, smoked paprika, cumin, salt, black pepper, and salsa.

Stir until the chicken and seasonings are evenly combined.

Use finely shredded chicken so the quesadilla folds easily and the filling heats evenly.

If you are using plain leftover chicken, add a little extra salsa to keep the filling moist.

Step 2: Fill the Tortillas

Lay one flour tortilla on a clean work surface.

Spread about 3/4 cup of the chicken mixture over half of the tortilla.

Keep the filling away from the edges so it does not spill out during cooking.

Fold the empty half of the tortilla over the filling.

Press gently around the edges to keep the quesadilla closed.

Repeat with the remaining tortillas and filling.

Step 3: Preheat the Air Fryer

Preheat the air fryer to 375°F for about 3 minutes.

Preheating helps the tortilla begin crisping as soon as it enters the basket.

If your air fryer does not require preheating, you can skip this step and check the quesadillas slightly earlier.

Step 4: Prepare the Air Fryer Basket

Lightly spray the air fryer basket with cooking spray.

Place the quesadillas inside without overlapping them.

If your basket is small, cook them in batches.

Avoid overcrowding because proper airflow is important for an evenly crisp tortilla.

Step 5: Air Fry the Quesadillas

Lightly spray the top of each quesadilla with cooking spray.

Air fry at 375°F for 3–4 minutes.

Carefully flip each quesadilla and cook for another 2–4 minutes.

The quesadillas are ready when the tortillas are golden brown and the cheese has completely melted.

Cooking time may vary between air fryer models, so start checking during the final few minutes.

Step 6: Rest and Slice

Remove the quesadillas from the air fryer and let them rest for about 2 minutes.

Slice each one into triangles using a sharp knife or pizza cutter.

Allowing them to rest briefly helps the melted cheese settle and reduces filling from spilling out when sliced.

Step 7: Add Your Favorite Toppings

Serve the quesadillas immediately with salsa, sour cream, or guacamole.

Add chopped cilantro, jalapeños, or a squeeze of fresh lime for extra flavor.

For a family meal, place several dipping options on the table so everyone can customize their serving.

Tips for Crispy Quesadillas

A few simple steps can make a big difference in the final texture.

  • Do not overfill: Too much filling can prevent the tortilla from sealing properly.
  • Use shredded chicken: Smaller pieces distribute more evenly than large chunks.
  • Use enough cheese: Cheese helps hold the filling together as it melts.
  • Keep the basket uncrowded: Good airflow creates a crisp tortilla.
  • Use a light oil spray: A small amount helps the tortilla brown evenly.
  • Flip carefully: Melted cheese can make the quesadilla flexible while hot.
  • Watch the final minutes: Thin tortillas can brown quickly.

Best Chicken to Use

Rotisserie chicken is one of the easiest choices because it is already cooked and seasoned.

Leftover roasted chicken also works well. Remove any bones and skin, then shred or chop the meat before mixing it with the other ingredients.

You can also cook fresh chicken breasts specifically for this recipe. Season the chicken with salt, pepper, garlic powder, and paprika, then cook until the thickest part reaches 165°F before shredding.

Avoid using large chunks of chicken because they can make the quesadilla difficult to fold.

Best Cheese for Quesadillas

A Mexican cheese blend melts smoothly and provides a balanced flavor.

Cheddar adds a sharper taste and a rich golden color.

Monterey Jack creates a soft, stretchy filling and works especially well with spicy toppings.

Pepper Jack is a good option when you want mild heat without adding extra hot sauce.

For the best texture, shred cheese from a block when possible because it melts smoothly.

Easy Variations

Buffalo Chicken Quesadillas

Mix buffalo sauce into the cooked chicken before adding the cheese. Serve with ranch dressing or blue cheese dressing.

Chicken Fajita Quesadillas

Add sautéed bell peppers and onions with the chicken for a fajita-inspired filling.

BBQ Chicken Quesadillas

Mix shredded chicken with a small amount of barbecue sauce and add cheddar cheese before air frying.

Southwest Chicken Quesadillas

Add black beans, corn, diced tomatoes, and a little cumin for a hearty Southwest-style filling.

Spicy Chicken Quesadillas

Add sliced jalapeños, hot sauce, or Pepper Jack cheese for extra heat.

What to Serve With Chicken Quesadillas

These crispy quesadillas pair well with simple sides and fresh toppings.

Serve them with Mexican rice, black beans, corn salad, tortilla chips, or a fresh green salad.

Salsa, guacamole, sour cream, and pico de gallo are easy dipping options.

For a lighter meal, serve the quesadillas with lettuce, tomatoes, avocado, and a squeeze of lime.

Storage and Reheating

Store leftover quesadillas in an airtight container in the refrigerator for up to 3–4 days.

For the best texture, reheat them in the air fryer at 350°F for 3–5 minutes.

Avoid reheating them for too long because the tortilla can become overly dry and the chicken may lose moisture.

You can also freeze assembled, uncooked quesadillas individually. Wrap them tightly and place them in a freezer-safe bag.

Cook frozen quesadillas in the air fryer at 350°F for about 8–12 minutes, flipping halfway through.

Common Mistakes to Avoid

  • Adding too much salsa: Excess moisture can make the tortilla soft.
  • Overfilling the tortilla: A thick filling can prevent even cooking.
  • Skipping the flip: Turning the quesadilla helps both sides become crisp.
  • Overcrowding the basket: Limited airflow can create uneven browning.
  • Using too little cheese: The filling may not hold together properly.
  • Cutting immediately: A short resting time makes slicing easier.

Nutrition Facts

Approximate nutrition per quesadilla will vary based on the chicken, cheese, tortilla, and toppings used.

  • Calories: 430
  • Protein: 31g
  • Carbohydrates: 34g
  • Fat: 20g
  • Saturated Fat: 9g
  • Fiber: 3g
  • Sugar: 3g
  • Sodium: 720mg

These values are estimates and can change depending on the exact ingredients and brands used.

Frequently Asked Questions

Can I use rotisserie chicken?

Yes, shredded rotisserie chicken is a convenient option and adds plenty of flavor without extra cooking.

What temperature should I use?

Cook the quesadillas at 375°F for about 5–8 minutes, flipping halfway through.

How do I make them extra crispy?

Use a light oil spray, avoid overfilling, and leave enough space around each quesadilla for proper airflow.

Can I use corn tortillas?

Yes, but flour tortillas are more flexible and easier to fold without cracking.

What cheese melts best?

Mexican cheese blends, Monterey Jack, cheddar, and Pepper Jack all melt well for quesadillas.

Can I make these with frozen chicken?

Use fully cooked chicken that has been thawed before mixing it into the filling for even heating.

How do I store leftover quesadillas?

Refrigerate them in an airtight container for up to 3–4 days and reheat them in the air fryer for the best texture.

Can I freeze chicken quesadillas?

Yes, wrap them individually and freeze them in a sealed freezer-safe bag for convenient future meals.

Final Thoughts

Air Fryer Cheesy Chicken Quesadillas are a fast and satisfying way to turn cooked chicken and everyday ingredients into a crispy meal. The combination of golden tortillas, seasoned chicken, and melted cheese makes them ideal for lunch, dinner, snacks, or casual gatherings.

Keep the filling balanced, avoid overcrowding the air fryer, and flip the quesadillas halfway through cooking for an evenly crisp finish. Serve them hot with salsa, guacamole, or sour cream for a simple meal the whole family can enjoy.

Air Fryer Crispy Chicken Ranch Wraps

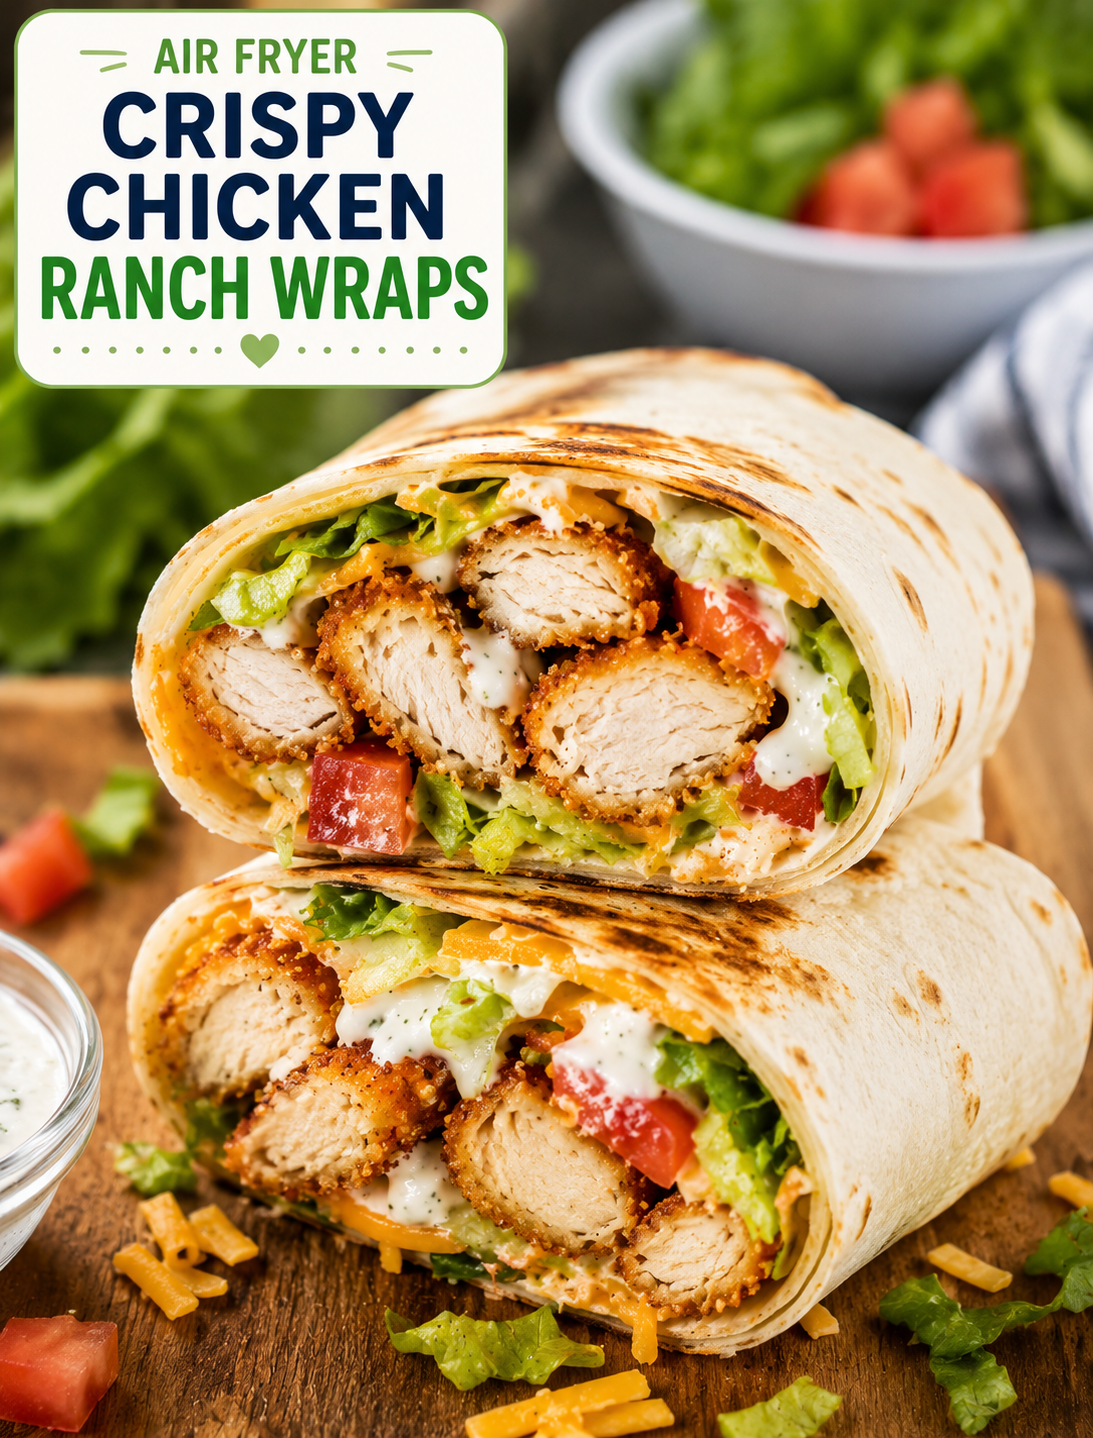
Air Fryer Crispy Chicken Ranch Wrap filled with crunchy chicken, ranch dressing, cheddar cheese, lettuce, and tomatoes

Air Fryer Crispy Chicken Ranch Wraps

Air Fryer Crispy Chicken Ranch Wraps are an easy lunch or dinner made with crunchy chicken, creamy ranch, fresh vegetables, and melted cheese. The chicken gets a golden, crisp coating in the air fryer while the inside stays juicy and tender.

These wraps are perfect for busy weeknights because the chicken cooks quickly and the filling comes together with simple ingredients. They also make a convenient meal for families, game-day gatherings, or an easy packed lunch.

The combination of crispy chicken and cool ranch dressing gives these wraps a familiar flavor that both kids and adults enjoy. You can add lettuce, tomatoes, onions, avocado, or your favorite hot sauce to make each wrap your own.

Why You’ll Love These Chicken Ranch Wraps

  • Crispy without deep frying: The air fryer creates a crunchy coating with only a light spray of oil.
  • Quick weeknight meal: The chicken cooks in about 10–14 minutes.
  • Easy to customize: Add vegetables, cheese, or spicy toppings based on your taste.
  • Family-friendly: Ranch dressing and crispy chicken make an easy combination for picky eaters.
  • Great for meal prep: Cook the chicken ahead and assemble fresh wraps when needed.
  • Simple ingredients: Most ingredients are easy to find at American grocery stores.
  • Easy cleanup: Air frying keeps the cooking process simple and contained.

Ingredients

For the Crispy Chicken

  • 1 pound boneless, skinless chicken breasts
  • 1/2 cup all-purpose flour
  • 1 large egg
  • 1 tablespoon milk
  • 1 cup seasoned breadcrumbs
  • 1/2 teaspoon garlic powder
  • 1/2 teaspoon onion powder
  • 1/2 teaspoon smoked paprika
  • 1/2 teaspoon salt
  • 1/4 teaspoon black pepper
  • Cooking spray

For the Wraps

  • 4 large flour tortillas
  • 1/2 cup ranch dressing
  • 1 cup shredded cheddar cheese
  • 2 cups shredded lettuce
  • 1 medium tomato, diced
  • 1/4 cup thinly sliced red onion
  • 1/4 cup chopped green onions

Optional Toppings

  • Sliced avocado
  • Pickled jalapeños
  • Buffalo sauce
  • Hot sauce
  • Extra ranch dressing

How to Make Air Fryer Crispy Chicken Ranch Wraps

Step 1: Prepare the Chicken

Pat the chicken breasts dry with paper towels.

Slice each breast into thin strips of similar size. Keeping the pieces close in thickness helps them cook evenly.

If the chicken breasts are very thick, gently pound them to an even thickness before slicing.

Step 2: Set Up the Coating

Place the flour in one shallow bowl.

Whisk the egg and milk together in a second bowl.

In a third bowl, combine the breadcrumbs, garlic powder, onion powder, smoked paprika, salt, and black pepper.

This three-step coating gives the chicken a crisp, flavorful crust.

Step 3: Coat the Chicken

Dip each chicken strip into the flour and shake off the excess.

Next, dip it into the egg mixture and allow the extra egg to drip back into the bowl.

Finally, press the chicken into the seasoned breadcrumbs until completely coated.

Place the coated strips on a clean plate while you finish the remaining chicken.

For a thicker crust, press the breadcrumbs firmly onto the chicken instead of simply rolling the pieces through them.

Step 4: Preheat the Air Fryer

Preheat the air fryer to 400°F for about 3 minutes.

A preheated basket helps the breading start crisping quickly and can improve the final texture.

Air fryer temperatures can vary, so check the chicken early during the first batch.

Step 5: Air Fry the Chicken

Lightly spray the air fryer basket with cooking spray.

Arrange the chicken strips in a single layer with space between each piece.

Lightly spray the tops of the chicken with cooking spray.

Air fry at 400°F for 10–14 minutes, turning the pieces halfway through cooking.

The chicken is ready when the coating is golden and the thickest part reaches 165°F on an instant-read thermometer.

Do not overcrowd the basket. Cook the chicken in batches if necessary.

Step 6: Prepare the Wrap Ingredients

While the chicken cooks, shred the lettuce and dice the tomato.

Slice the red onion and chop the green onions.

Warm the flour tortillas for about 10–15 seconds in the microwave or briefly heat them in a dry skillet.

Warm tortillas are softer and easier to fold without tearing.

Step 7: Build the Wraps

Place one warm tortilla on a flat surface.

Spread about 2 tablespoons of ranch dressing down the center.

Add shredded lettuce, diced tomato, red onion, and shredded cheddar cheese.

Place several pieces of crispy chicken over the vegetables.

Add green onions and any optional toppings you like.

Drizzle with additional ranch or hot sauce for extra flavor.

Step 8: Fold and Toast the Wraps

Fold the left and right sides of the tortilla toward the center.

Fold the bottom edge over the filling, then roll the wrap tightly toward the top.

For an extra-crispy finish, place the assembled wraps seam-side down in the air fryer.

Air fry at 375°F for 2–3 minutes until the tortilla is lightly toasted.

Let the wraps rest for about 1 minute before slicing.

Tips for Extra Crispy Chicken

Use dry chicken before starting the breading process because excess moisture can weaken the coating.

Choose seasoned breadcrumbs for a more flavorful crust, or use panko breadcrumbs when you want a lighter, crunchier texture.

Leave space around each chicken strip so hot air can circulate properly.

A light coating of cooking spray helps the breadcrumbs brown without making the chicken greasy.

Always check the internal temperature before serving because cooking time depends on the thickness of the chicken.

Best Tortillas to Use

Large flour tortillas are the easiest choice because they are flexible and provide enough space for the filling.

Whole-wheat tortillas can be used for a heartier option, while low-carb tortillas work if they hold their shape well.

Avoid overfilling the tortilla because too much filling makes the wrap difficult to roll and can cause it to split.

Easy Variations

Buffalo Chicken Ranch Wrap

Toss the cooked crispy chicken with a small amount of buffalo sauce before adding it to the tortilla. Finish with ranch dressing and cheddar cheese.

Spicy Ranch Wrap

Mix a little hot sauce or cayenne pepper into the ranch dressing for a spicy creamy sauce.

Bacon Ranch Chicken Wrap

Add cooked, crumbled bacon with the chicken and cheddar for a richer loaded wrap.

Avocado Ranch Wrap

Add sliced avocado for a creamy texture that balances the crunchy chicken.

Southwest Chicken Wrap

Add corn, black beans, diced jalapeños, and a little salsa for a Southwest-style filling.

What to Serve With Chicken Wraps

These wraps pair well with crispy air fryer potatoes, sweet potato fries, coleslaw, or a simple green salad.

For a party or casual gathering, cut each wrap into smaller pieces and serve them with ranch, buffalo sauce, or barbecue sauce for dipping.

A cold lemonade or iced tea also pairs well with the savory chicken and creamy ranch flavor.

Storage and Reheating

Store cooked chicken separately from the vegetables and tortillas whenever possible.

Place leftover chicken in an airtight container and refrigerate it for up to 3–4 days.

Reheat the chicken in the air fryer at 375°F for 3–5 minutes until hot and crisp.

Assemble fresh wraps after reheating to keep the lettuce and tortilla from becoming soggy.

Avoid microwaving the fully assembled wrap if you want to preserve the crispy chicken coating.

Make-Ahead Instructions

The crispy chicken can be prepared up to a few days ahead and refrigerated after cooking.

Keep the ranch, vegetables, cheese, tortillas, and chicken stored separately until serving.

When ready to eat, reheat the chicken in the air fryer and assemble the wrap with fresh ingredients.

This method works especially well for quick weekday lunches and family meal prep.

Common Mistakes to Avoid

  • Overcrowding the basket: Crowded chicken pieces can steam instead of becoming crisp.
  • Skipping the egg coating: The egg helps the breadcrumbs stick to the chicken.
  • Using wet chicken: Excess moisture can make the breading fall off.
  • Overfilling the wrap: Too much filling makes rolling difficult.
  • Overcooking the chicken: Cook until the center reaches 165°F, then remove it promptly.
  • Adding vegetables too early: Fresh lettuce and tomatoes are best added after the chicken is cooked.

Frequently Asked Questions

Can I use chicken thighs?

Yes, boneless skinless chicken thighs work well and provide a slightly richer, juicier texture.

What temperature should chicken reach?

Cooked chicken should reach an internal temperature of 165°F in the thickest part.

Can I use panko breadcrumbs?

Yes, panko creates a lighter and crunchier coating than standard breadcrumbs.

Can I make these wraps spicy?

Yes, add buffalo sauce, hot sauce, jalapeños, or spicy ranch to increase the heat.

Can I prepare the chicken ahead of time?

Yes, refrigerate cooked chicken for up to 3–4 days and reheat it in the air fryer before assembling.

How do I keep the wraps from getting soggy?

Keep the chicken and wet ingredients separate until serving, then assemble the wraps just before eating.

Can I use store-bought ranch dressing?

Yes, your favorite bottled ranch dressing works perfectly for this recipe.

Can I make these without cheese?

Yes, simply leave out the cheese or replace it with avocado for a creamy texture.

Final Thoughts

Air Fryer Crispy Chicken Ranch Wraps turn simple ingredients into a crunchy, creamy, satisfying meal. The seasoned chicken develops a golden crust in the air fryer, while ranch dressing, fresh vegetables, and cheddar create a flavorful filling.

For the best result, keep the chicken pieces evenly sized, avoid overcrowding the air fryer, and assemble the wraps shortly before serving. With a few simple toppings, this recipe can easily become a regular weeknight favorite.