
Air Fryer Cheesy Garlic Parmesan Chicken Tenders

Air Fryer Cheesy Garlic Parmesan Chicken Tenders

Air Fryer Cheesy Garlic Parmesan Chicken Tenders

Crispy on the outside, juicy on the inside, and loaded with cheesy garlic Parmesan flavor, these Air Fryer Cheesy Garlic Parmesan Chicken Tenders are an easy family dinner everyone will love. They have all the satisfying crunch of classic fried chicken tenders, but they’re made in the air fryer with just a light coating of oil.Each tender is coated in seasoned breadcrumbs, Parmesan cheese, garlic, and herbs before being air fried until golden brown. The result is wonderfully crunchy chicken with a savory, cheesy crust and tender center.These chicken tenders are perfect for busy weeknights, lunch boxes, game-day snacks, or a quick weekend meal. Serve them with marinara sauce, ranch dressing, honey mustard, or a fresh salad for an easy meal that comes together in less than 30 minutes.

Prep Time: 15 minutes

Cook Time: 12–15 minutes

Total Time: 27–30 minutes

Servings: 4

Difficulty: Easy

Why You’ll Love This Recipe

Crispy Without Deep-Frying

The air fryer creates a golden, crunchy coating using only a small amount of oil.

Cheesy and Flavorful

Parmesan, garlic, Italian seasoning, and paprika create a delicious savory crust.

Quick and Easy

The chicken cooks quickly, making this an excellent option for busy evenings.

Family-Friendly

Chicken tenders are naturally appealing to kids and adults alike, and you can adjust the seasonings to suit your family.

Versatile

Serve them as a main dish, appetizer, sandwich filling, salad topping, or wrap filling.

Minimal Cleanup

Using the air fryer means you don’t need a large pan of hot oil or a messy deep-frying setup.

Ingredients For Cheesy Garlic Parmesan Chicken Tenders

For the Chicken

  • 1½ pounds chicken tenderloins
  • All-purpose flour ½ cup
  • 1 large egg
  • 2 tablespoons milk
  • 1 cup panko breadcrumbs
  • ½ cup finely grated Parmesan cheese
  • 1 teaspoon garlic powder
  • Onion powder ½ teaspoon
  • 1 teaspoon Italian seasoning
  • Paprika ½ teaspoon
  • ½ teaspoon salt
  • ¼ teaspoon black pepper
  • Olive oil spray

Optional Garlic Parmesan Butter

For an extra-rich garlic Parmesan finish:

  • 1 tablespoon melted butter
  • 1 small garlic clove, finely minced
  • Grated Parmesan 1 tablespoon
  • Chopped fresh parsley 1 tablespoon

Instructions For Cheesy Garlic Parmesan Chicken Tenders

Step 1: Prepare the Chicken

Pat the chicken tenderloins dry with paper towels. If the tenderloins are very thick, gently pound them to a more even thickness so they cook consistently.

If using chicken breasts instead of tenderloins, cut them into strips approximately 1 inch thick.

Step 2: Set Up the Coating Station

Prepare three shallow bowls.

First bowl, add the flour.

Second bowl, whisk together the egg and milk.

Third bowl, combine the panko breadcrumbs, Parmesan cheese, garlic powder, onion powder, Italian seasoning, paprika, salt, and black pepper.

Mix the breadcrumb mixture thoroughly.

Step 3: Coat the Chicken

Take one chicken tender and coat it lightly in flour.

Shake off the excess.

Dip it into the egg mixture, making sure it is coated on all sides.

Finally, press the chicken into the Parmesan breadcrumb mixture. Gently press the crumbs onto the surface so they stick well.

Repeat with the remaining chicken.

Step 4: Preheat the Air Fryer

Preheat your air fryer to 400°F (200°C) for approximately 3 minutes if your model recommends preheating.

Lightly spray the air fryer basket with olive oil.

Step 5: Air Fry the Chicken

Place the chicken tenders in the air fryer basket in a single layer.

Don’t overcrowd the basket. Depending on the size of your air fryer, you may need to cook in two batches.

Lightly spray the tops of the tenders with olive oil.

Air fry at 400°F (200°C) for 6–8 minutes.

Carefully flip the chicken and continue cooking for another 5–7 minutes, or until golden brown and cooked through.

The chicken should reach an internal temperature of 165°F (74°C) at the thickest point.

Step 6: Make the Garlic Parmesan Finish

If you want an extra-garlicky finish, combine melted butter, minced garlic, Parmesan cheese, and chopped parsley in a small bowl.

Brush or drizzle a small amount over the cooked tenders immediately after they come out of the air fryer.

You can also skip this step for a lighter version.

Step 7: Serve

Transfer the crispy chicken tenders to a serving plate.

Sprinkle with additional Parmesan and fresh parsley if desired.

Serve immediately with your favorite dipping sauce.

Tips for the Best Chicken Tenders

Pat the chicken dry: Removing excess moisture helps the coating stick better.

Use panko breadcrumbs: Panko creates a lighter and crunchier crust than regular breadcrumbs.

Press the coating firmly: Gently pressing the breadcrumbs onto the chicken helps prevent them from falling off during cooking.

Don’t overcrowd the basket: Air needs to circulate around each tender to create a crisp exterior.

Use oil spray: A light coating of oil helps the breadcrumbs brown evenly.

Flip halfway: Turning the tenders helps both sides become golden and crispy.

Don’t overcook: Chicken tenders are lean and can dry out if cooked too long.

Use a thermometer: The safest way to check doneness is to make sure the chicken reaches 165°F (74°C).

Cook in batches: If necessary, cook several smaller batches rather than crowding the basket.

Benefits of This Recipe

These chicken tenders are a convenient source of protein and can be paired with vegetables and whole-food sides to create a balanced meal.

Chicken provides high-quality protein, while Parmesan contributes protein and calcium. Garlic and herbs add plenty of flavor without requiring large quantities of sauce.

Air frying also allows the chicken to become crisp with considerably less oil than traditional deep-frying.

For a lighter option, skip the garlic butter topping and use a reduced amount of Parmesan. You can also replace some of the breadcrumbs with finely crushed whole-grain cereal or breadcrumbs.

To increase the fiber and overall nutrient variety of the meal, serve the tenders alongside vegetables, beans, or a large salad.

Serving Suggestions For Cheesy Garlic Parmesan Chicken Tenders

These crispy chicken tenders are incredibly versatile.

With Dipping Sauces

Try serving them with:

Marinara sauce

Ranch dressing

Honey mustard

Garlic yogurt sauce

Tzatziki

Spicy mayo

Barbecue sauce

With Vegetables

Pair with:

Air-fried broccoli

Green beans

Roasted carrots

Corn

Garden salad

Sautéed spinach

As a Wrap

Place the tenders inside a tortilla with lettuce, tomatoes, cucumber, Parmesan, and a creamy garlic dressing.

As a Salad

Slice the cooked chicken and place it over mixed greens with tomatoes, cucumber, Parmesan, and a light vinaigrette.

With Potatoes

Serve alongside air-fried potato wedges or crispy baby potatoes for a classic family dinner.

Nutrition Facts For Cheesy Garlic Parmesan Chicken Tenders

Approximate nutrition per serving, without dipping sauce or optional garlic butter:

Calories: 430–470

Protein: 48–52 g

Carbohydrates: 25–30 g

Fat: 14–17 g

Saturated Fat: 4–5 g

Fiber: 1–2 g

Sugar: 1–2 g

Sodium: 650–850 mg

Calcium: Approximately 180–230 mg

Nutrition values are estimates and can vary depending on the size of the chicken tenders, breadcrumbs, Parmesan cheese, and other ingredients used.

Frequently Asked Questions

Can I use chicken breasts instead of tenderloins?

Yes. Cut boneless, skinless chicken breasts into evenly sized strips. Try to keep them similar in thickness so they cook at the same rate.

Can I use regular breadcrumbs?

Yes, but panko is recommended because it creates a crunchier coating. Regular breadcrumbs will give you a slightly finer crust.

Can I make these gluten-free?

Yes. Use gluten-free flour and gluten-free panko breadcrumbs. Check all packaged ingredients if you need to avoid gluten strictly.

Can I make these without Parmesan?

Absolutely. You can replace Parmesan with another finely grated hard cheese or simply leave it out, although the flavor and texture will be slightly different.

Why is my coating falling off?

Make sure the chicken is patted dry, shake off excess flour, and press the breadcrumb mixture firmly onto the chicken. Avoid moving the tenders too much while they’re cooking.

Why aren’t my tenders crispy?

Overcrowding is one of the most common reasons. Give the chicken enough space for air to circulate. A light spray of oil also helps the coating brown and crisp.

Can I freeze these chicken tenders?

Yes. Cooked tenders can be cooled completely and frozen in an airtight freezer-safe container. For best quality, use within a couple of months.

How do I reheat leftovers?

Place the chicken tenders in the air fryer at 350°F (175°C) for approximately 4–6 minutes, turning once. This helps restore some of the crispness.

Can I prepare them ahead of time?

Yes. You can bread the chicken several hours ahead and refrigerate it until you’re ready to cook. Keep the prepared chicken refrigerated and cook it thoroughly before serving.

What temperature should chicken tenders reach?

Chicken should reach an internal temperature of 165°F (74°C) in the thickest part.

Final Thoughts For Cheesy Garlic Parmesan Chicken Tenders

Air Fryer Cheesy Garlic Parmesan Chicken Tenders are an easy way to enjoy crispy, flavorful chicken without deep-frying. The combination of crunchy panko breadcrumbs, savory Parmesan, garlic, and Italian herbs creates a delicious coating that makes simple chicken incredibly satisfying.They’re quick enough for a weeknight dinner and versatile enough for lunch, appetizers, wraps, or salads. Pair them with roasted vegetables and potatoes for a complete family meal, or serve them with several dipping sauces for a fun finger-food dinner.For the crispiest results, remember to pat the chicken dry, use panko breadcrumbs, avoid overcrowding the air fryer, and lightly spray the coating with oil.Once you try these cheesy garlic Parmesan chicken tenders, they may become one of your favorite quick air fryer meals!
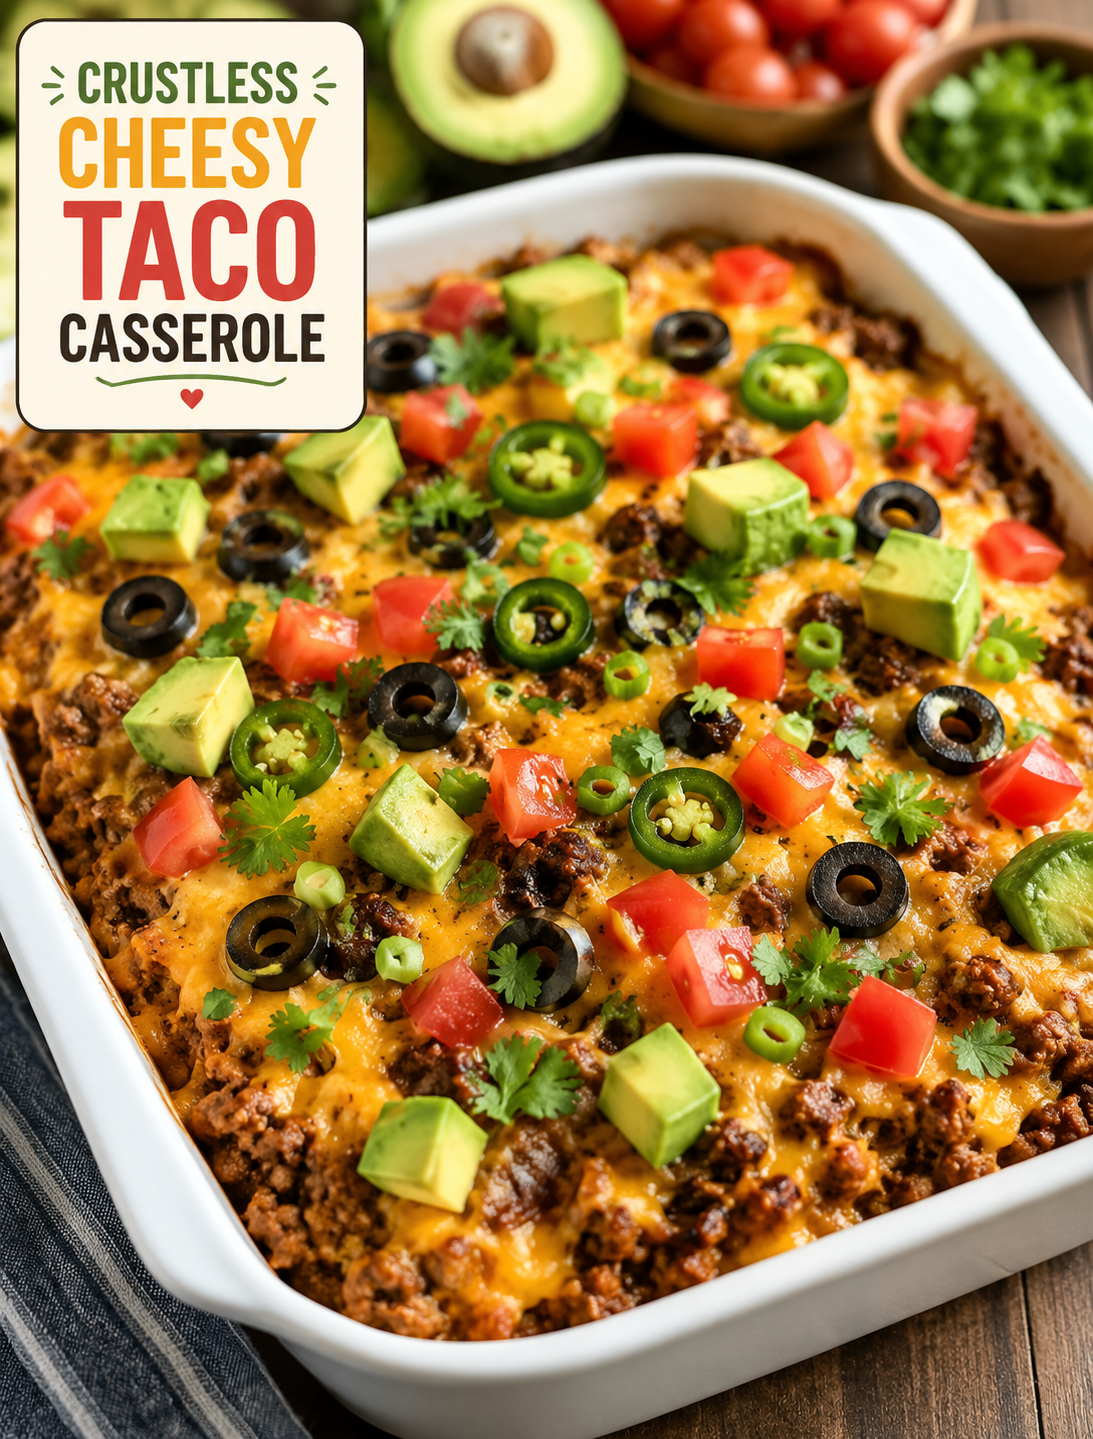
Crustless Cheesy Taco Casserole

Crustless Cheesy Taco Casserole – Easy Low-Carb Taco Dinner

Crustless Cheesy Taco Casserole

All the bold, comforting flavor of tacos comes together in one easy baked dish with no tortillas, rice, or flour crust. This Crustless Cheesy Taco Casserole combines seasoned lean ground beef with a creamy cheese layer, melted cheddar, and fresh taco-style toppings for a filling family dinner.

The casserole is simple to prepare and takes about 45 minutes from start to finish. The beef is cooked with onion, garlic, taco seasoning, cumin, and smoked paprika before it is layered with a creamy mixture of cream cheese, sour cream, cheddar, and Monterey Jack or mozzarella.

Because there is no tortilla or rice layer, this dish can be a convenient lower-carbohydrate taco-inspired meal. It is not a zero-carb recipe, since ingredients such as tomatoes, onion, avocado, dairy, and taco seasoning contain carbohydrates.

Ingredients For:

Beef Layer

  • 1 lb (450 g) lean ground beef
  • 1 small onion, finely diced
  • 2 cloves garlic, minced
  • 1 tablespoon olive oil, if needed
  • 2 tablespoons taco seasoning
  • ½ teaspoon ground cumin
  • ½ teaspoon smoked paprika
  • ¼ teaspoon black pepper
  • ¼ teaspoon salt, or to taste
  • ¼ cup water

Creamy Layer

  • 4 oz (115 g) softened cream cheese
  • ½ cup sour cream
  • ½ cup shredded cheddar cheese
  • ¼ cup shredded Monterey Jack or mozzarella
  • ½ teaspoon garlic powder
  • ¼ teaspoon black pepper

The Topping

  • 1 cup shredded cheddar cheese
  • ½ cup diced tomatoes
  • 1 small jalapeño, thinly sliced
  • ¼ cup sliced black olives
  • ¼ cup chopped fresh cilantro
  • ½ avocado, diced
  • 2 green onions, chopped
  • Optional: a few crumbled tortilla chips for serving

Servings & Timing

Servings: 6

Prep Time: 15 minutes

Cook Time: 25–30 minutes

Total Time: Approximately 45 minutes

Instructions

1. Preheat the Oven

Preheat your oven to 375°F (190°C). Lightly grease an 8×8-inch or 9×9-inch baking dish.

For a larger family meal, use a 9×13-inch baking dish and increase the ingredient amounts as needed.

2. Brown the Ground Beef

Heat a large skillet over medium-high heat. Add the ground beef and cook for about 5–7 minutes, breaking it apart with a wooden spoon.

Cook until no pink remains. If the beef produces a large amount of excess grease, carefully drain it before continuing.

3. Add Onion and Garlic

Add the diced onion to the cooked beef and sauté for about 3–4 minutes. Cook until the onion begins to soften.

Add the minced garlic and cook for another 30–60 seconds. Avoid overcooking the garlic because it can become bitter.

4. Season the Beef

Add the taco seasoning, cumin, smoked paprika, black pepper, and salt. Pour in ¼ cup water and stir well.

Let the beef mixture simmer for 2–3 minutes. The water helps the spices spread evenly and coats the beef with a flavorful taco-style sauce.

Remove the skillet from the heat.

5. Prepare the Creamy Mixture

Place the softened cream cheese, sour cream, ½ cup cheddar, Monterey Jack or mozzarella, garlic powder, and black pepper in a mixing bowl.

Stir until the mixture is smooth and well combined. If the cream cheese is too firm, microwave it for about 10–15 seconds to make mixing easier.

6. Build the First Layer

Spread about half of the seasoned beef across the bottom of the prepared baking dish.

Use the back of a spoon to create an even layer so the creamy mixture can spread more easily.

7. Add the Creamy Layer

Spread the cream cheese mixture over the beef. It does not need to be perfectly smooth because the warm beef underneath will help soften the mixture as you assemble the casserole.

8. Add the Remaining Beef

Spread the remaining seasoned beef over the creamy layer. Press it down gently to help the casserole hold its shape after baking.

9. Add the Cheese

Sprinkle the remaining 1 cup of shredded cheddar evenly over the top.

For an extra-rich cheese topping, add a small amount of Monterey Jack or mozzarella before baking.

10. Bake

Place the casserole in the preheated oven and bake uncovered for about 20–25 minutes.

The casserole is ready when the cheese is fully melted, the edges are bubbling, the center is hot, and the top is lightly golden.

For a more browned cheese topping, broil for 1–2 minutes at the end. Watch it closely because cheese can brown very quickly under the broiler.

11. Add Fresh Toppings

Remove the casserole from the oven and let it rest for 5–10 minutes.

Add the diced tomatoes, jalapeños, black olives, cilantro, avocado, and green onions after baking. Adding these ingredients at the end keeps them fresh, colorful, and crisp.

12. Slice and Serve

Cut the casserole into six portions and serve warm with your favorite taco toppings.

For extra creaminess, add a spoonful of sour cream or drizzle a low-sugar taco sauce over each serving.

Flavour Variations

Spicy Taco Casserole

For extra heat, add one finely diced jalapeño to the beef mixture and ½ teaspoon cayenne pepper. Finish the casserole with additional sliced jalapeños and hot sauce.

Chicken Taco Casserole

Replace the ground beef with approximately 3 cups of shredded cooked chicken. Season the chicken with the same taco spices and follow the remaining steps as written.

Turkey Taco Casserole

Lean ground turkey works well when you want a lighter alternative to beef. Add extra cumin, smoked paprika, garlic, or chili powder if you want a stronger flavor.

Vegetarian Version

Replace the beef with mushrooms, cauliflower crumbles, vegetarian ground meat, black beans, or pinto beans.

If keeping carbohydrates lower is important, mushrooms, cauliflower, or a low-carb meat alternative are better choices than beans.

Best Toppings

The fresh toppings are easy to customize based on what you have available.

Try avocado, cilantro, jalapeños, green onions, diced tomatoes, black olives, sour cream, pico de gallo, salsa, guacamole, shredded lettuce, queso fresco, or lime wedges.

A squeeze of fresh lime over the casserole just before serving adds brightness and balances the rich cheese.

Important Recipe Tips

Drain Excess Beef Fat

Higher-fat ground beef can release a lot of grease during cooking. Drain excess fat after browning to keep the casserole from becoming greasy.

Soften the Cream Cheese

Room-temperature cream cheese blends more smoothly with sour cream and shredded cheese, which makes the creamy layer easier to spread.

Don’t Add Too Much Liquid

This casserole has no tortilla or rice layer to absorb moisture. Too much liquid can make the finished dish watery.

Add Fresh Toppings After Baking

Tomatoes, avocado, cilantro, and green onions are best added after baking. This keeps their texture and fresh flavor intact.

Let It Rest

Allow the casserole to rest for 5–10 minutes before serving. This gives the layers time to firm up and makes portions easier to lift from the dish.

Don’t overbake.

Bake only until the cheese is melted and bubbling. Overbaking can dry out the beef and may cause the creamy dairy layer to separate.

What to Serve With It

Since this casserole is rich and cheesy, fresh vegetables make a great side.

Serve it with a crisp green salad, cucumber salad, shredded lettuce, cauliflower rice, roasted vegetables, avocado, pico de gallo, or steamed broccoli.

For a lower-carbohydrate meal, pair a serving with a large fresh salad instead of tortillas, chips, or rice.

Storage

Let leftover casserole cool before storing. Place individual servings in airtight containers and refrigerate for 3–4 days.

The dish also works well for meal prep because the flavors can become more developed after resting overnight.

Reheating

Microwave

Place one serving on a microwave-safe plate. Cover loosely and heat for 1–2 minutes, or until heated through.

Oven

Transfer the casserole to an oven-safe dish and cover loosely with foil. Reheat at 350°F (175°C) until hot.

Add fresh avocado, tomatoes, and cilantro after reheating for the best texture.

Can You Freeze It?

Yes. For the best texture, freeze the casserole before adding the fresh toppings.

Let it cool completely, divide it into individual freezer-safe containers, and freeze for up to approximately 2 months.

Thaw overnight in the refrigerator before reheating. The cream cheese layer may have a slightly different texture after freezing, but the casserole will still be flavorful.

Approximate Nutritional Information

Nutrition varies according to the exact brands and amounts of beef, cheese, sour cream, taco seasoning, and toppings used.

When divided into six servings, one portion is estimated to contain approximately:

  • Calories: 400–450
  • Protein: 27–32 g
  • Carbohydrates: 8–11 g
  • Fiber: 2–3 g
  • Net Carbohydrates: 6–9 g
  • Fat: 28–33 g
  • Sugar: 3–4 g
  • Sodium: 700–900 mg

These figures are estimates rather than laboratory measurements, and changing ingredients can significantly affect the final nutrition.

Potential Benefits

Protein

Ground beef and cheese provide protein that can help make the meal satisfying.

Healthy Fats

Avocado supplies mostly unsaturated fat, while beef and cheese contribute additional dietary fat.

Lower-Carbohydrate Alternative

Leaving out tortillas and rice reduces the carbohydrate content compared with many traditional taco casseroles.

Vegetable Toppings

Tomatoes, jalapeños, avocado, cilantro, and green onions add flavor, color, fiber, and various micronutrients.

Big Flavor Without Flour

Taco seasoning, garlic, cumin, smoked paprika, cheese, and fresh toppings create a bold taco-inspired meal without a flour-based crust.

Frequently Asked Questions

Is this really a zero-carb recipe?

No. It is a lower-carb casserole, not a zero-carb dish, because ingredients such as dairy, tomatoes, onion, avocado, and seasonings contain carbohydrates.

Can I eat as much as I want?

Portion size still matters because beef, cheese, cream cheese, and sour cream can contribute significant calories even in a lower-carb meal.

Will this casserole make me lose weight quickly?

No recipe guarantees weight loss; this casserole can fit into a balanced eating plan when portions and total food intake are appropriate.

Can I make it without cream cheese?

Yes. Replace the cream cheese with additional sour cream, Greek yogurt, cottage cheese, or another suitable creamy sauce.

Can I use ground turkey?

Yes. Ground turkey is an easy substitute for beef and works well with the same taco seasoning and toppings.

Can I use chicken?

Yes. About 3 cups of shredded cooked chicken can replace the ground beef while keeping the taco-style flavor.

Can I add beans?

Yes, but black beans or pinto beans will increase the carbohydrate content while making the casserole more filling and hearty.

Can I make it dairy-free?

Yes. Use dairy-free cream cheese, dairy-free sour cream, and dairy-free shredded cheese in place of the regular dairy ingredients.

Can I make it gluten-free?

The casserole can be made gluten-free, but check the taco seasoning label because some packaged blends may contain gluten ingredients or have cross-contact warnings.

Why is my casserole watery?

Fresh vegetables can release liquid during baking, so adding tomatoes and other fresh toppings after baking helps maintain a firmer texture.

Can I prepare it ahead?

Yes. Assemble the beef and creamy layers, cover, and refrigerate for up to about 24 hours, then add the final cheese layer before baking.

What is the best cheese?

Cheddar provides classic taco flavor, Monterey Jack melts smoothly, and mozzarella adds stretch; combining two cheeses gives a balanced result.

Can I make it spicier?

Yes. Add jalapeño, cayenne, chili powder, hot sauce, or spicy salsa to increase the heat.

Can I make individual portions?

Yes. Divide the mixture among small oven-safe ramekins and begin checking them after about 15 minutes because smaller portions cook faster.

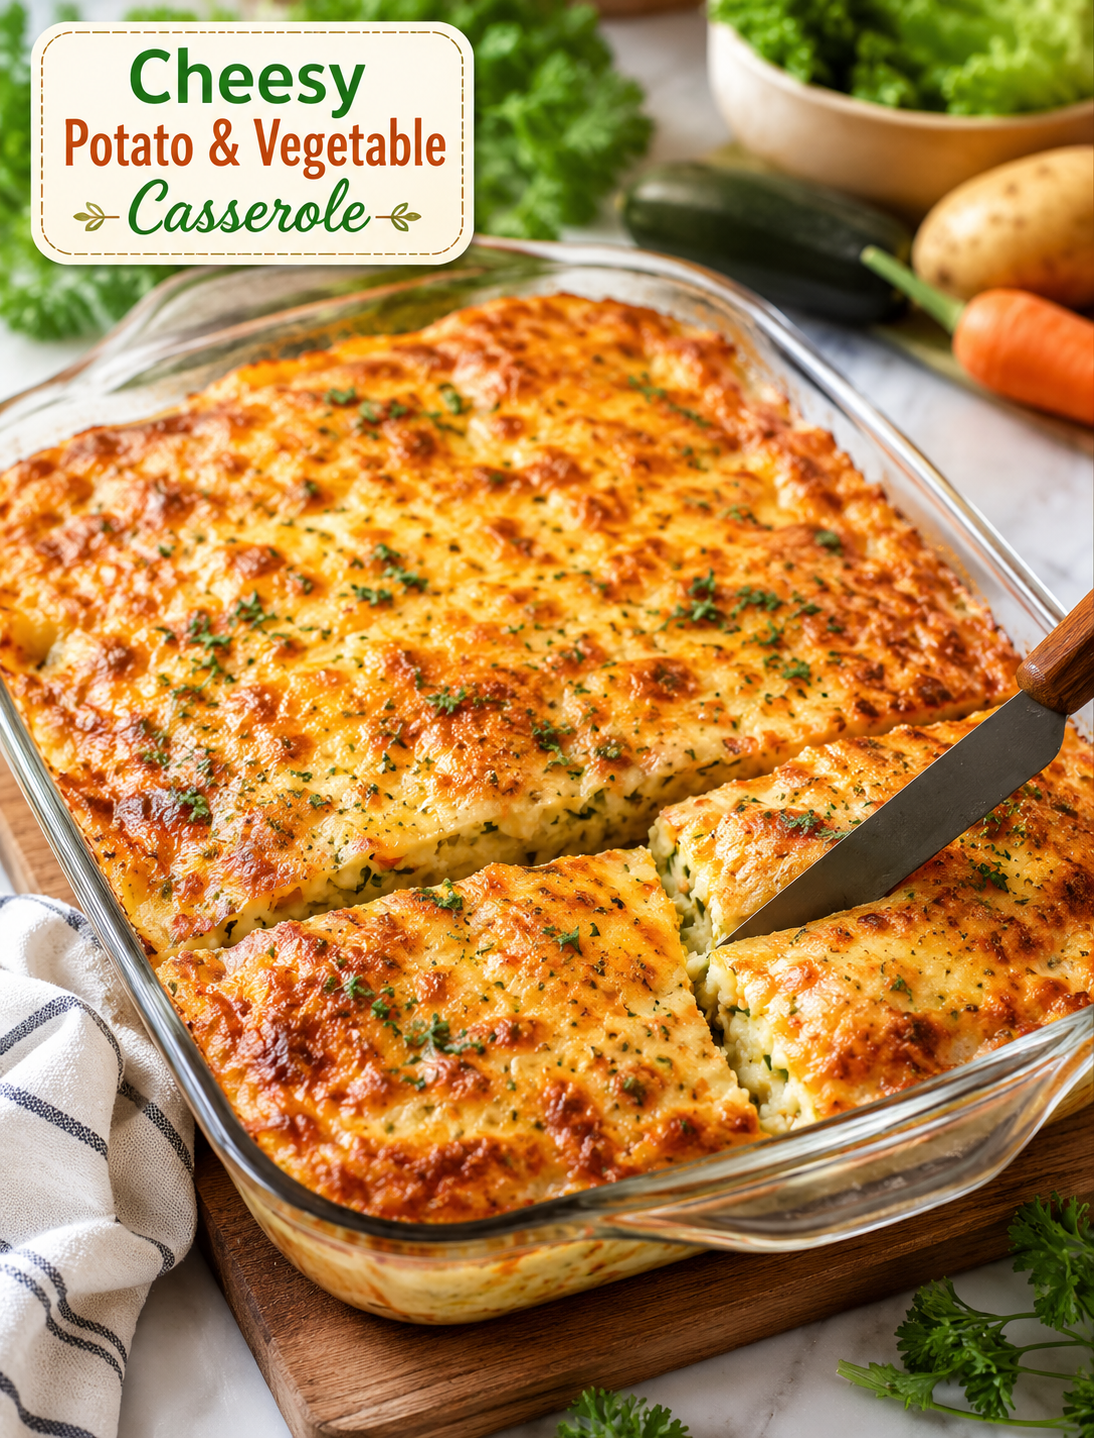
Cheesy Potato & Vegetable Casserole

Cheesy Potato & Vegetable Casserole

Cheesy Potato & Vegetable Casserole

A comforting, golden-baked casserole packed with potatoes, zucchini, carrots, cheese, eggs, herbs, and a creamy sauce. This easy vegetable bake has a crisp, cheesy top and a tender, flavourful center, making it perfect for breakfast, brunch, lunch, dinner, or as a hearty side dish.

Recipe at a Glance

Servings: 6–8

Prep time: 20 minutes

Cook time: 45–55 minutes

Total time: About 1 hour 15 minutes

Oven temperature: 375°F / 190°C

Difficulty: Easy

Cuisine: Comfort food / American-inspired

Best served: Warm

Description

This Cheesy Potato & Vegetable Casserole is a delicious way to turn everyday vegetables into a satisfying family meal. Grated potatoes provide a hearty base, while zucchini and carrots add moisture, color, flavor, and nutrients. Eggs and sour cream help bind everything together, while mozzarella, cheddar, and Parmesan create a rich, savory flavor and beautifully browned crust.

The combination of vegetables and cheese makes this casserole especially appealing to children and adults alike. The outside becomes golden and slightly crisp during baking, while the inside remains soft, creamy, and tender.

It is also a wonderfully flexible recipe. You can serve it as a vegetarian main dish with a fresh salad, or alongside roasted meat, grilled chicken, fish, or other favorite dishes.

Ingredients
For the casserole
4 medium potatoes, peeled
2 medium zucchini
2 carrots
1 small onion
3 cloves garlic, minced
4 large eggs
1 cup sour cream or plain Greek yogurt
1 cup shredded mozzarella cheese
1 cup shredded cheddar cheese
½ cup grated Parmesan cheese
2 tablespoons all-purpose flour
2 tablespoons olive oil
1 teaspoon salt
½ teaspoon black pepper
1 teaspoon paprika
½ teaspoon dried oregano or Italian seasoning
2–3 tablespoons chopped fresh parsley or dill
½ teaspoon red pepper flakes, optional
For greasing
1 teaspoon butter or olive oil
Instructions
1. Prepare the vegetables
Preheat your oven to 375°F (190°C).

Peel the potatoes and wash the zucchini and carrots thoroughly. Grate the potatoes, zucchini, and carrots using the large holes of a box grater.

Finely chop the onion and mince the garlic.

The vegetables can be grated by hand, but a food processor with a grating attachment can make the preparation much faster.

2. Remove excess moisture
This is one of the most important steps in the recipe.

Zucchini and potatoes naturally contain a considerable amount of water. If you skip this step, your casserole can become watery instead of firm and creamy.

Place the grated zucchini and potatoes in a clean kitchen towel or several layers of cheesecloth. Gather the towel and squeeze firmly over the sink to remove as much liquid as possible.

You can also place the grated vegetables in a colander, sprinkle them lightly with salt, and allow them to drain for about 10 minutes before squeezing.

The drier the vegetables, the better the final texture will be.

3. Prepare the creamy mixture
In a large mixing bowl, whisk together:

4 eggs
1 cup sour cream or Greek yogurt
2 tablespoons flour
minced garlic
salt
black pepper
paprika
oregano or Italian seasoning
Whisk until the mixture is smooth and evenly combined.

The eggs provide structure while the sour cream gives the casserole a creamy texture.

4. Combine the vegetables
Add the squeezed potatoes and zucchini to the bowl.

Add the grated carrots and chopped onion as well.

Add the fresh parsley or dill and red pepper flakes if using.

Stir thoroughly until all the vegetables are coated with the egg and sour cream mixture.

5. Add the cheese
Add:

½ cup mozzarella
½ cup cheddar
½ cup Parmesan
Mix everything together.

Reserve the remaining mozzarella and cheddar for the topping.

The Parmesan contributes a salty, nutty flavor, while mozzarella gives a stretchy texture and cheddar provides a stronger cheesy taste.

6. Prepare the baking dish
Grease a 9 × 13-inch (23 × 33 cm) baking dish with butter or olive oil.

Transfer the vegetable mixture into the dish and spread it evenly with a spatula or the back of a spoon.

Make sure the mixture is distributed evenly so that the casserole cooks consistently.

7. Add the cheese topping
Sprinkle the remaining mozzarella and cheddar over the entire surface.

For an extra golden crust, you can add another tablespoon or two of Parmesan.

Try to spread the cheese evenly from edge to edge. The cheese will melt during baking and form the delicious golden topping characteristic of this casserole.

8. Bake
Cover the baking dish loosely with aluminum foil.

Bake at 375°F (190°C) for approximately 30 minutes.

Then carefully remove the foil and return the casserole to the oven.

Continue baking uncovered for another 15–25 minutes, or until the vegetables are tender and the cheese is melted, bubbling, and golden brown.

The exact baking time can vary depending on how wet the vegetables are and how deep your baking dish is.

9. Brown the top
For an especially attractive golden crust, you can switch the oven to the broil/grill setting during the final 2–3 minutes.

Watch the casserole carefully during this stage because cheese can go from golden to burnt very quickly.

10. Rest before serving
Remove the casserole from the oven and allow it to rest for 10–15 minutes before slicing.

This resting period allows the eggs and cheese to set slightly, making the casserole easier to serve.

Cut into squares and serve warm.

Recipe Notes
Squeezing the vegetables is essential
Do not underestimate this step. Zucchini releases a lot of water during cooking. Potatoes can also contain substantial moisture. Removing excess liquid helps create a casserole that holds together rather than becoming soupy.

Choose good melting cheese
Mozzarella works beautifully for melting, while cheddar adds flavor and color. Parmesan helps create a savory crust.

You can substitute Monterey Jack, Colby, Gruyère, or a combination of your favorite melting cheeses.

Fresh herbs
Parsley gives the casserole a fresh flavor, while dill provides a slightly more distinctive taste. You can use dried herbs if fresh herbs aren’t available.

Baking dish
A glass or ceramic casserole dish works particularly well. If your dish is significantly smaller or deeper than 9 × 13 inches, you may need to adjust the baking time.

Make it ahead
The casserole can be assembled several hours in advance and refrigerated, covered, until you’re ready to bake. If baking directly from the refrigerator, allow additional cooking time and make sure the center is fully cooked.

Helpful Tips for the Best Casserole

  • Squeeze the potatoes and zucchini thoroughly. This is the most important tip.
  • Don’t shred the vegetables too finely. Coarse grating gives the casserole better texture.
  • Use freshly shredded cheese when possible. It generally melts more smoothly.
  • Don’t overbake. Once the center is set and the top is golden, remove it from the oven.
  • Let it rest before cutting. Ten to fifteen minutes makes serving much easier.
  • Season according to taste. Potatoes benefit from generous seasoning.
  • Add spice if desired. Red pepper flakes or a little cayenne can add pleasant heat.
  • Watch the broiler carefully. The cheese can brown extremely quickly.
  • Use full-fat sour cream for the richest result.
  • Serve with something fresh. A green salad or tomato-cucumber salad balances the richness of the cheese.

Variations
Cheesy Chicken Casserole
Add approximately 1½ cups cooked, shredded chicken to the vegetable mixture. This turns the recipe into a more substantial main course.

Bacon Version
Cook and crumble 150–200 g (5–7 oz) bacon, then stir it into the mixture before baking.

Spinach Version
Add approximately 1 cup chopped cooked spinach, making sure to squeeze out excess water first.

Mushroom Version
Sauté sliced mushrooms until their moisture has evaporated, then add them to the casserole.

Spicy Version
Add red pepper flakes, chopped jalapeño, or a pinch of cayenne pepper.

Extra-Cheesy Version
Increase the total cheese slightly and add a little Parmesan to the top during the final 10 minutes of baking.

Serving Suggestions
This casserole is versatile enough to serve in several ways.

Breakfast or brunch, serve it with fresh fruit, tomatoes, avocado, or a simple green salad.

Lunch, pair a square of casserole with cucumber and tomato salad or steamed vegetables.

Dinner, serve it alongside grilled chicken, roasted meat, fish, or a large leafy salad.

A spoonful of sour cream, Greek yogurt, or garlic-herb yogurt sauce on top is also delicious.

Storage and Reheating
Allow leftovers to cool and refrigerate them in a covered container.

The casserole should be refrigerated promptly rather than left at room temperature for an extended period.

For best quality, enjoy refrigerated leftovers within 3–4 days.

To reheat, place individual portions in the microwave until hot, or use a 350°F (175°C) oven for approximately 10–20 minutes, depending on the portion size.

The oven method helps restore some of the crispness of the cheesy top.

Approximate Nutritional Information
Estimated per serving, assuming 8 servings and excluding optional additions:

Calories: approximately 330–380 kcal
Protein: approximately 16–18 g
Carbohydrates: approximately 30–34 g
Fat: approximately 16–20 g
Saturated fat: approximately 8–10 g
Fiber: approximately 4–5 g
Sugar: approximately 4–6 g
Sodium: approximately 550–750 mg
Calcium: approximately 250–350 mg
These numbers are estimates and can vary considerably depending on the exact size of the vegetables, type of sour cream or yogurt, cheese brands, and portion size.

Potential Benefits
This casserole combines several food groups in one dish.

Potatoes provide carbohydrates and potassium, making them a satisfying source of energy.

Zucchini and carrots contribute fiber, vitamins, minerals, and naturally occurring plant compounds. Carrots are particularly well known for their beta-carotene content.

Eggs and cheese contribute protein, calcium, and other nutrients. Protein can help make the meal more satisfying.

Fresh herbs and vegetables add flavor without requiring large amounts of additional seasoning or sauces.

Because this recipe contains vegetables along with eggs and dairy, it can be a more nutritionally varied choice than a casserole made primarily from potatoes and cheese alone.

For a lighter version, you can use Greek yogurt instead of sour cream, reduce the cheese slightly, and increase the amount of zucchini, carrots, spinach, or other vegetables.

Frequently Asked Questions
Can I make this casserole without zucchini?
Yes. You can replace the zucchini with additional carrots, grated sweet potato, spinach, or another suitable vegetable. Remember that different vegetables contain different amounts of moisture, so adjust the draining accordingly.

Why is my casserole watery?
The most common reason is excess moisture from the zucchini or potatoes. Squeeze the grated vegetables very thoroughly before mixing them with the other ingredients.

Can I use sweet potatoes?
Yes. Sweet potatoes can replace some or all of the regular potatoes. They will give the casserole a sweeter flavor and a slightly different texture.

Can I prepare it the night before?
Yes. Assemble the casserole, cover it, and refrigerate it. Bake when ready. Because the casserole will be cold, it may require additional baking time.

Can I freeze it?
It is possible, although the texture of zucchini can become softer after freezing and thawing. For the best texture, freezing is generally less ideal than refrigerating leftovers.

Can I make it vegetarian?
Yes. The recipe as written is vegetarian as long as the cheeses and other ingredients you choose are vegetarian-friendly.

Can I make it gluten-free?
Yes. Replace the all-purpose flour with a suitable gluten-free flour or starch. Also check the labels of your other ingredients if strict gluten avoidance is required.

How do I know when it is done?
The top should be deeply golden and bubbling, while the center should look set rather than liquid. A knife inserted near the center should come out without a runny egg mixture.

Can I use pre-shredded cheese?
Yes, but freshly shredded cheese often melts more smoothly. Pre-shredded cheese can contain anti-caking ingredients that may slightly affect melting.

What can I serve with it?
A fresh green salad, tomato salad, roasted vegetables, grilled chicken, fish, or a simple yogurt-garlic sauce all pair beautifully with this casserole.

Final Recipe Summary
Cheesy Potato & Vegetable Casserole is an easy, hearty, family-friendly dish featuring grated potatoes, zucchini, carrots, onion, garlic, eggs, sour cream, herbs, and plenty of melted cheese. The key to achieving the beautiful golden top and firm, tender interior is to remove excess moisture from the grated vegetables and allow the finished casserole to rest before serving.