Baked White Fish on a Bed of Spinach

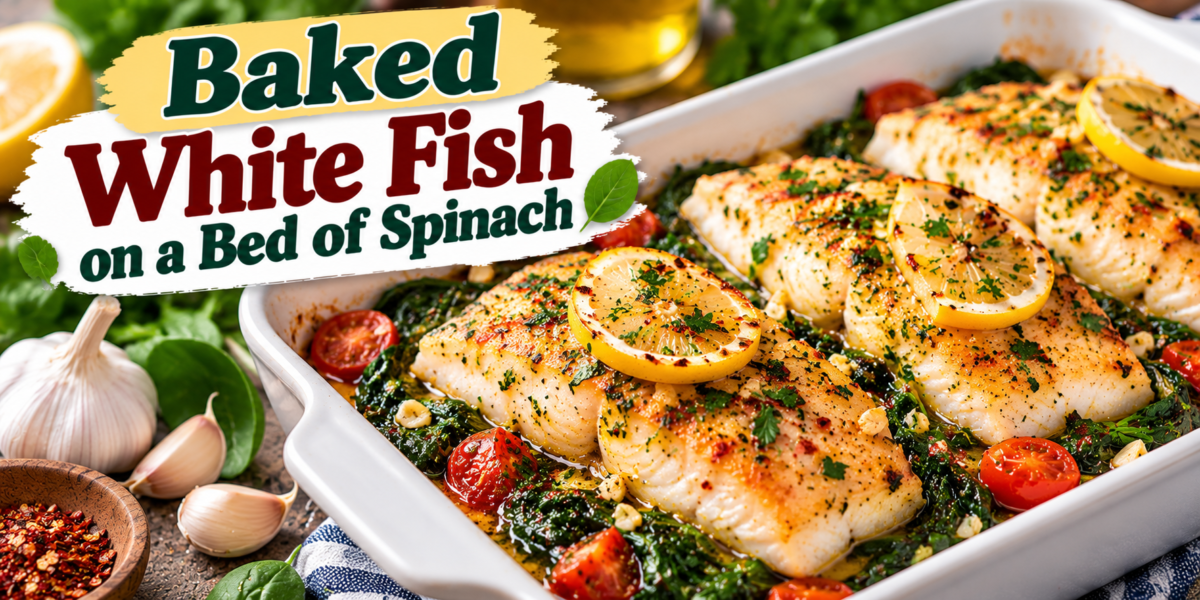
Baked White Fish on a bed of spinach with garlic, lemon, herbs, olive oil, and tender white fish fillets

Baked White Fish on a Bed of Spinach

Baked White Fish is a light, flavorful, and easy dinner made with tender white fish fillets, fresh spinach, garlic, lemon, olive oil, and simple herbs. The fish bakes gently over the spinach, allowing the juices to season the greens while keeping the fillets moist and delicate.

This Baked White Fish recipe works well for busy weeknights, family dinners, or weekends. It is simple for beginners yet elegant enough for guests with potatoes, rice, or crusty bread.

Prep Time: 15 minutes
Cook Time: 20–25 minutes
Total Time: 35–40 minutes
Servings: 4

Ingredients

For the Fish

  • 4 white fish fillets, about 5–6 ounces each
  • 1 tablespoon extra virgin olive oil
  • 1 tablespoon fresh lemon juice
  • 1 teaspoon lemon zest
  • 1 teaspoon garlic powder
  • 1/2 teaspoon paprika
  • 1/2 teaspoon dried oregano
  • 1/2 teaspoon salt
  • 1/4 teaspoon black pepper

For the Spinach Bed

  • 8 cups fresh baby spinach
  • 1 tablespoon extra virgin olive oil
  • 3 garlic cloves, minced
  • 1 small shallot, finely sliced
  • 1/4 teaspoon salt
  • 1/4 teaspoon black pepper
  • 2 tablespoons grated Parmesan, optional
  • 2 tablespoons chopped fresh parsley

For Serving

  • Lemon wedges
  • Fresh dill or parsley
  • Red pepper flakes
  • Extra virgin olive oil, for finishing

Why You’ll Love This Recipe

Baked White Fish is a great choice when you want something satisfying without a heavy sauce. The mild fish pairs naturally with lemon, garlic, herbs, and spinach, creating a balanced meal with bright, fresh flavor.

Another reason to love Baked White Fish is its simplicity. Everything cooks in one baking dish, cleanup is easy, and you can change the herbs, fish, or vegetables without changing the basic method.

How to Make Baked White Fish

Step 1: Preheat the Oven

Preheat the oven to 400°F or 200°C.

Lightly grease a baking dish with olive oil, large enough to hold the spinach and fish in one layer.

Step 2: Prepare the Spinach

Heat 1 tablespoon olive oil in a large skillet over medium heat.

Add the sliced shallot and cook for about 2 minutes, until slightly softened. Stir in the garlic and cook for 30 seconds.

Add the spinach in batches, tossing gently until just wilted. Season with salt and black pepper.

The spinach should remain bright green because it will continue cooking beneath the Baked White Fish in the oven.

Step 3: Arrange the Spinach Bed

Transfer the wilted spinach to the prepared baking dish and spread it evenly.

If there is a lot of liquid in the skillet, leave most of it behind so the finished dish does not become watery.

Sprinkle Parmesan over the spinach if using.

Step 4: Season the Fish

Pat the fish fillets dry with paper towels.

Brush both sides with olive oil and lemon juice. Season with lemon zest, garlic powder, paprika, oregano, salt, and black pepper.

Even seasoning helps Baked White Fish develop flavor while preserving the clean taste of the fish.

Step 5: Place the Fish Over the Spinach

Arrange the fillets directly on top of the spinach, leaving a little space between each piece.

Tuck thin ends under slightly if necessary so the fish cooks evenly.

Drizzle any remaining lemon and olive oil mixture over the top.

Step 6: Bake Until Tender

Bake uncovered for 15 to 20 minutes, depending on the thickness of the fillets.

Baked White Fish is ready when the flesh is opaque, flakes easily with a fork, and reaches an internal temperature of 145°F or 63°C at the thickest part.

Avoid overbaking because white fish can dry out quickly.

Step 7: Add Fresh Herbs

Remove the baking dish from the oven.

Sprinkle fresh parsley or dill over the fish and spinach. Add red pepper flakes if you like a little heat.

Fresh herbs give the dish a brighter finish and balance the savory garlic and spinach.

Step 8: Rest Briefly

Let the dish rest for 3 to 5 minutes before serving.

This brief rest helps the juices settle and keeps the fish moist.

Step 9: Finish with Lemon

Squeeze fresh lemon juice over the fish just before serving.

A light drizzle of olive oil adds a smooth Mediterranean-style finish.

Step 10: Serve

Divide the spinach among four plates and place one fish fillet over each portion.

Serve Baked White Fish immediately while the fillets are warm and tender.

Serving Suggestions

Baked White Fish pairs well with many simple side dishes.

Serve it with roasted baby potatoes, mashed potatoes, brown rice, quinoa, couscous, or orzo for a more filling meal.

For a lighter plate, add cucumber salad, roasted asparagus, green beans, or arugula.

Crusty bread is also excellent because it can soak up the lemony juices from the spinach and fish.

For a Mediterranean-style dinner, serve Baked White Fish with olives, hummus, pita, and tomato salad.

For a protein-rich breakfast option, try our Baked Blueberry Cottage Cheese Breakfast Bowl with cottage cheese, oats, and juicy blueberries.

Recipe Tips

Choose fish fillets of similar thickness so they finish cooking at the same time.

Pat the fish dry before seasoning. Removing surface moisture helps the seasonings cling better.

Do not fully cook the spinach before it goes into the baking dish because it will continue to soften in the oven.

Use fresh lemon juice for the best flavor.

Check the fish early if the fillets are thin.

Baked White Fish should flake easily but still look moist inside.

If the spinach releases too much water, spoon off a little liquid before serving.

A small amount of Parmesan adds savory flavor, but the dish is also delicious without cheese.

Easy Variations

You can make Baked White Fish with cod, haddock, pollock, tilapia, halibut, or another mild white fish.

For extra Mediterranean flavor, add halved cherry tomatoes, Kalamata olives, capers, or roasted red peppers around the fish before baking.

For a creamy variation, spoon a small amount of Greek yogurt mixed with lemon and dill over the fish after cooking.

You can replace part of the spinach with kale or Swiss chard; sauté tougher greens slightly longer first.

For extra crunch, sprinkle seasoned breadcrumbs or crushed whole-grain crackers over the fillets before they go into the oven.

Make-Ahead Instructions

Baked White Fish is best cooked shortly before serving, but several parts can be prepared ahead.

Wash the spinach, slice the shallot, mince the garlic, and mix the seasonings one day ahead.

You can also sauté the spinach earlier in the day. Let it cool, cover it, and refrigerate until needed.

For the best texture, season and bake the fish just before serving rather than leaving raw fish in the baking dish for many hours.

Storage and Reheating

Store leftover Baked White Fish in an airtight container in the refrigerator for up to 2 days.

Reheat gently in a 300°F or 150°C oven until warmed through. Cover the dish loosely with foil to help prevent the fish from drying out.

Individual portions can also be reheated gently in the microwave.

Avoid repeated reheating because delicate fish can become dry and tough.

Freezing is possible, but the spinach may become softer after thawing. Refrigerated leftovers usually give the best texture.

Nutrition Information

Approximate nutrition per serving:

Calories: 280
Protein: 34 g
Carbohydrates: 8 g
Fat: 13 g
Saturated Fat: 3 g
Fiber: 3 g
Sugar: 2 g
Sodium: 520 mg

Nutrition values are estimates and vary with the fish, oil, and optional Parmesan.

Frequently Asked Questions

What type of white fish works best?

Cod, haddock, pollock, tilapia, and halibut all work well. Choose fresh fillets with a mild aroma and firm texture.

Can I use frozen fish?

Yes. Thaw the fish completely in the refrigerator and pat it very dry before seasoning and baking.

Can I use frozen spinach?

Yes. Thaw it completely and squeeze out as much liquid as possible before placing it in the baking dish.

How do I know when the fish is done?

The flesh should be opaque and should separate easily into flakes with a fork. The thickest part should reach 145°F or 63°C.

Can I add tomatoes to this recipe?

Yes. Cherry tomatoes are especially good because they roast quickly and add sweet, juicy flavor.

Can I make it dairy-free?

Yes. Simply omit the optional Parmesan. The lemon, garlic, herbs, and olive oil provide plenty of flavor.

Is this recipe good for meal prep?

Yes, although fish is best within a couple of days. Prepare individual portions with rice or potatoes and refrigerate them in airtight containers.

Final Thoughts

Baked White Fish is a simple way to turn mild fish and fresh spinach into a complete, flavorful dinner. Lemon, garlic, olive oil, herbs, and tender greens complement the fish without covering its delicate flavor.

Because Baked White Fish requires minimal preparation and cooks quickly, it is especially useful for weeknight meals when you want something fresh without spending a long time in the kitchen.

Keep this Baked White Fish recipe handy whenever you want a light, comforting, Mediterranean-inspired dinner made with simple ingredients.

If you enjoy easy Mediterranean-inspired meals, you may also like our Mediterranean Baked Feta & Veggie Pasta.
Air Fryer Honey Garlic Glazed Salmon Bites

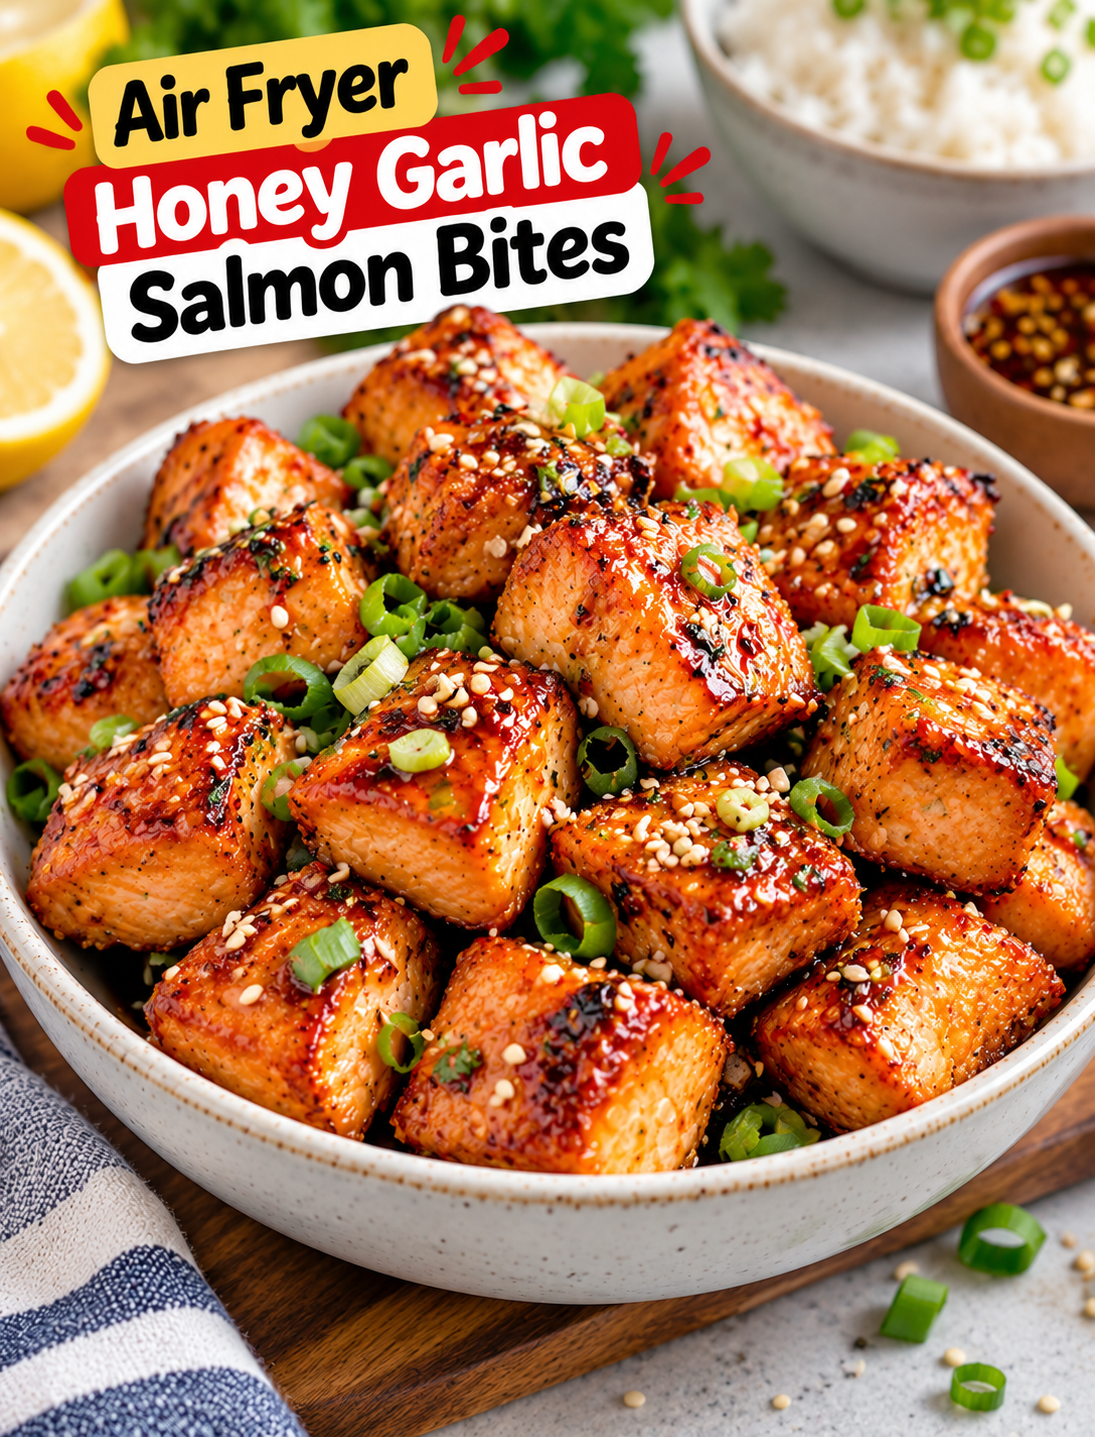
Air Fryer Honey Garlic Glazed Salmon Bites topped with green onions and sesame seeds

Air Fryer Honey Garlic Glazed Salmon Bites

These Air Fryer Honey Garlic Glazed Salmon Bites are a quick way to turn fresh salmon into tender, bite-sized pieces with golden edges and a sweet, savory garlic glaze. The air fryer cooks the salmon quickly while the honey garlic sauce adds rich flavor without requiring a long marinade.

This recipe is ideal for busy weeknights because the salmon cooks in small pieces rather than as one large fillet. The bite-sized pieces also make the dish easy to serve over rice, vegetables, noodles, or a fresh salad.

The glaze combines honey, garlic, soy sauce, lemon juice, and a little sesame oil. It creates a balanced mix of sweetness, saltiness, acidity, and savory flavor. For the best texture, the glaze is added near the end of cooking so the honey can caramelize without burning.

Why You’ll Love These Salmon Bites

This recipe brings together simple ingredients and fast air fryer cooking.

  • Quick cooking: Small salmon pieces cook much faster than a whole fillet.
  • Sweet and savory flavor: Honey balances the salty soy sauce and fresh garlic.
  • Tender texture: Salmon stays moist when it is not overcooked.
  • Golden edges: High air fryer heat helps brown the outside.
  • Easy cleanup: The air fryer keeps cooking contained to one basket.
  • Flexible serving: Pair the salmon with rice, vegetables, salad, or noodles.
  • Weeknight friendly: Most of the preparation can be done while the air fryer preheats.
  • Easy to customize: Adjust the garlic, spice, sweetness, or acidity to suit your taste.

The most important detail is to avoid adding the honey glaze too early. Honey contains natural sugars that can darken quickly at high temperatures, so brushing it on during the final minutes helps create a glossy coating without excessive browning.

Ingredients You’ll Need

For the Salmon

  • 1 1/4 pounds skinless salmon fillet
  • 1 tablespoon olive oil
  • 1/2 teaspoon garlic powder
  • 1/2 teaspoon paprika
  • 1/2 teaspoon salt
  • 1/4 teaspoon black pepper

Choose a firm salmon fillet and remove any remaining pin bones before cutting it into pieces. Skinless salmon makes this recipe easier to prepare, but skin-on salmon can also be used if the skin is removed before cutting.

For the Honey Garlic Glaze

  • 3 tablespoons honey
  • 2 tablespoons low-sodium soy sauce
  • 2 garlic cloves, finely minced
  • 1 tablespoon fresh lemon juice
  • 1 teaspoon sesame oil
  • 1/2 teaspoon grated fresh ginger, optional
  • 1/4 teaspoon red pepper flakes, optional

The honey provides sweetness and helps the glaze develop a shiny finish. Soy sauce adds savory depth, while lemon juice keeps the sauce from tasting too heavy.

Fresh garlic gives the glaze a stronger flavor than garlic powder. If you prefer a milder garlic taste, start with one clove and add more if needed.

For Garnishing

  • 1 tablespoon sliced green onions
  • 1 teaspoon sesame seeds
  • Lemon wedges
  • Fresh cilantro, optional
  • Red pepper flakes, optional

These toppings add freshness, color, and a little crunch to the finished dish.

How to Make Air Fryer Honey Garlic Glazed Salmon Bites

Step 1: Prepare the Salmon

Pat the salmon dry with paper towels.

Check the fillet for pin bones and remove any you find with clean kitchen tweezers.

Cut the salmon into approximately 1-inch bite-sized cubes. Try to keep the pieces similar in size so they cook at the same rate.

Do not cut the pieces too small because they can become dry before the glaze is ready.

Step 2: Season the Salmon

Place the salmon pieces in a medium bowl.

Add olive oil, garlic powder, paprika, salt, and black pepper.

Gently toss until the seasoning coats the salmon evenly.

Use a light hand when mixing because salmon can break apart easily.

Step 3: Preheat the Air Fryer

Preheat the air fryer to 400°F (200°C) for about 3 minutes if your model recommends preheating.

A hot cooking basket helps the salmon begin browning immediately.

Step 4: Arrange the Salmon

Place the seasoned salmon pieces in the air fryer basket in a single layer.

Leave a small amount of space between the pieces.

Avoid stacking the salmon because crowded pieces can release steam instead of developing browned edges.

If necessary, cook in two batches.

Step 5: Air Fry the Salmon

Cook the salmon at 400°F for about 5–7 minutes.

Shake the basket gently or turn the pieces around halfway through cooking.

The exact time depends on the size of the salmon pieces and the air fryer model.

Step 6: Prepare the Honey Garlic Glaze

While the salmon cooks, add honey, soy sauce, minced garlic, lemon juice, sesame oil, and optional ginger and red pepper flakes to a small bowl.

Whisk until the ingredients are evenly combined.

If the honey is thick, warm the mixture very briefly so it becomes easier to brush, but do not boil it.

Step 7: Add the Glaze

After the initial cooking period, carefully brush the honey garlic mixture over the salmon pieces.

Return the basket to the air fryer and cook for another 1–2 minutes.

Watch closely because the sugars in the honey can brown quickly.

The glaze should look glossy and lightly caramelized rather than dark or burnt.

Step 8: Check for Doneness

Check the thickest salmon piece with an instant-read thermometer.

For food safety, salmon should reach an internal temperature of 145°F.

If the salmon needs more time, continue cooking in short 30–60 second intervals and check again.

Avoid prolonged cooking because salmon can become dry when overcooked.

Step 9: Garnish and Serve

Transfer the glazed salmon bites to a serving plate.

Sprinkle with green onions and sesame seeds.

Add a squeeze of fresh lemon juice for a bright finish.

Serve immediately while the glaze is warm and glossy.

Tips for Perfect Honey Garlic Salmon Bites

A few simple techniques can make the finished salmon more flavorful and tender.

Dry the Salmon First

Patting the salmon dry removes excess moisture from the surface. This helps the seasoning stick and encourages better browning.

Cut the Pieces Evenly

Similar-sized pieces cook more evenly. If some pieces are much larger than others, the smaller ones may overcook before the larger pieces are done.

Don’t Overcrowd the Basket

Air needs to circulate around each piece. A crowded basket can create a steamed texture instead of browned edges.

Add Honey Near the End

The glaze contains sugar, so applying it during the final minutes reduces the chance of burning.

Use Fresh Garlic

Freshly minced garlic gives the glaze a stronger and more aromatic flavor than garlic powder.

Don’t Overcook the Salmon

Salmon continues to cook slightly after leaving the air fryer. Remove it once it reaches the safe internal temperature rather than cooking it far beyond that point.

What to Serve With Honey Garlic Salmon Bites

These glazed salmon pieces can become a complete meal with a few simple sides.

Serve them over steamed jasmine rice or brown rice to soak up the extra glaze.

For a lighter option, pair the salmon with roasted broccoli, asparagus, green beans, or a crisp cucumber salad.

You can also build a simple salmon bowl with:

  • Steamed rice
  • Avocado
  • Cucumber
  • Edamame
  • Shredded carrots
  • Green onions
  • Sesame seeds
  • Extra honey garlic sauce

For a lower-carb meal, serve the salmon over cauliflower rice with roasted vegetables.

Easy Flavor Variations

The basic honey garlic glaze is easy to change depending on what you have in your kitchen.

Spicy Honey Garlic Salmon

Add extra red pepper flakes or a small amount of sriracha to the glaze for a sweet and spicy finish.

Lemon Herb Salmon

Increase the lemon juice slightly and add fresh parsley or dill after cooking.

Teriyaki-Style Salmon Bites

Replace part of the honey with a small amount of brown sugar and add grated ginger to the sauce.

Garlic Butter Salmon

Replace the olive oil seasoning with melted butter and finish the cooked salmon with a small spoonful of garlic butter.

Sesame Ginger Salmon

Add extra grated ginger and sesame oil, then finish with toasted sesame seeds and green onions.

How to Store Leftover Salmon

Allow leftover salmon to cool before placing it in an airtight container.

Refrigerate cooked salmon promptly and use it within 3–4 days.

For the best texture, store the salmon separately from rice or vegetables when possible.

Avoid leaving cooked salmon at room temperature for extended periods.

How to Reheat Salmon Bites

The air fryer works well for reheating these salmon pieces.

Preheat the air fryer to 325°F and heat the salmon for about 2–3 minutes.

Check the pieces early because small salmon bites can dry out quickly during reheating.

You can brush a small amount of leftover glaze over the salmon before reheating, but avoid adding too much because the honey can darken quickly.

Frequently Asked Questions

How long do salmon bites take in the air fryer?

Small salmon pieces generally take about 5–7 minutes at 400°F, followed by another 1–2 minutes with the glaze.

What temperature should salmon reach?

For food safety, salmon should reach an internal temperature of 145°F at the thickest part.

Can I use frozen salmon?

Yes, but thaw the salmon completely and pat it dry before cutting and seasoning for the most even cooking.

Why did my honey glaze burn?

Honey contains sugar that can brown quickly, so apply the glaze during the final 1–2 minutes rather than at the beginning.

Can I use skin-on salmon?

Yes, but remove the skin before cutting the fillet into bite-sized pieces for an easier glazed preparation.

Can I make these salmon bites spicy?

Yes, add red pepper flakes, sriracha, or a small amount of cayenne pepper to the honey garlic glaze.

Can I use chicken instead of salmon?

Yes, but chicken requires a different cooking time and must reach 165°F internally before serving.

What is the best salmon for this recipe?

Fresh or properly thawed skinless salmon fillets with firm flesh work well because they hold their shape when cut into bite-sized pieces.

Final Thoughts

These Air Fryer Honey Garlic Glazed Salmon Bites are a simple way to make a flavorful seafood dinner without spending a long time in the kitchen.

The combination of tender salmon, fresh garlic, honey, soy sauce, lemon, and sesame oil creates a balanced sweet and savory glaze. Air frying keeps the cooking process quick while giving the salmon lightly browned edges.

For the best results, cut the salmon into even pieces, avoid overcrowding the basket, and add the glaze near the end of cooking. Always check the internal temperature before serving.

Serve the salmon over rice, add it to a colorful grain bowl, or pair it with roasted vegetables for an easy weeknight meal. Once you have the basic recipe down, you can adjust the sweetness, spice, garlic, and citrus to create a version that fits your taste.

Crispy Mozzarella Shrimp Taquitos

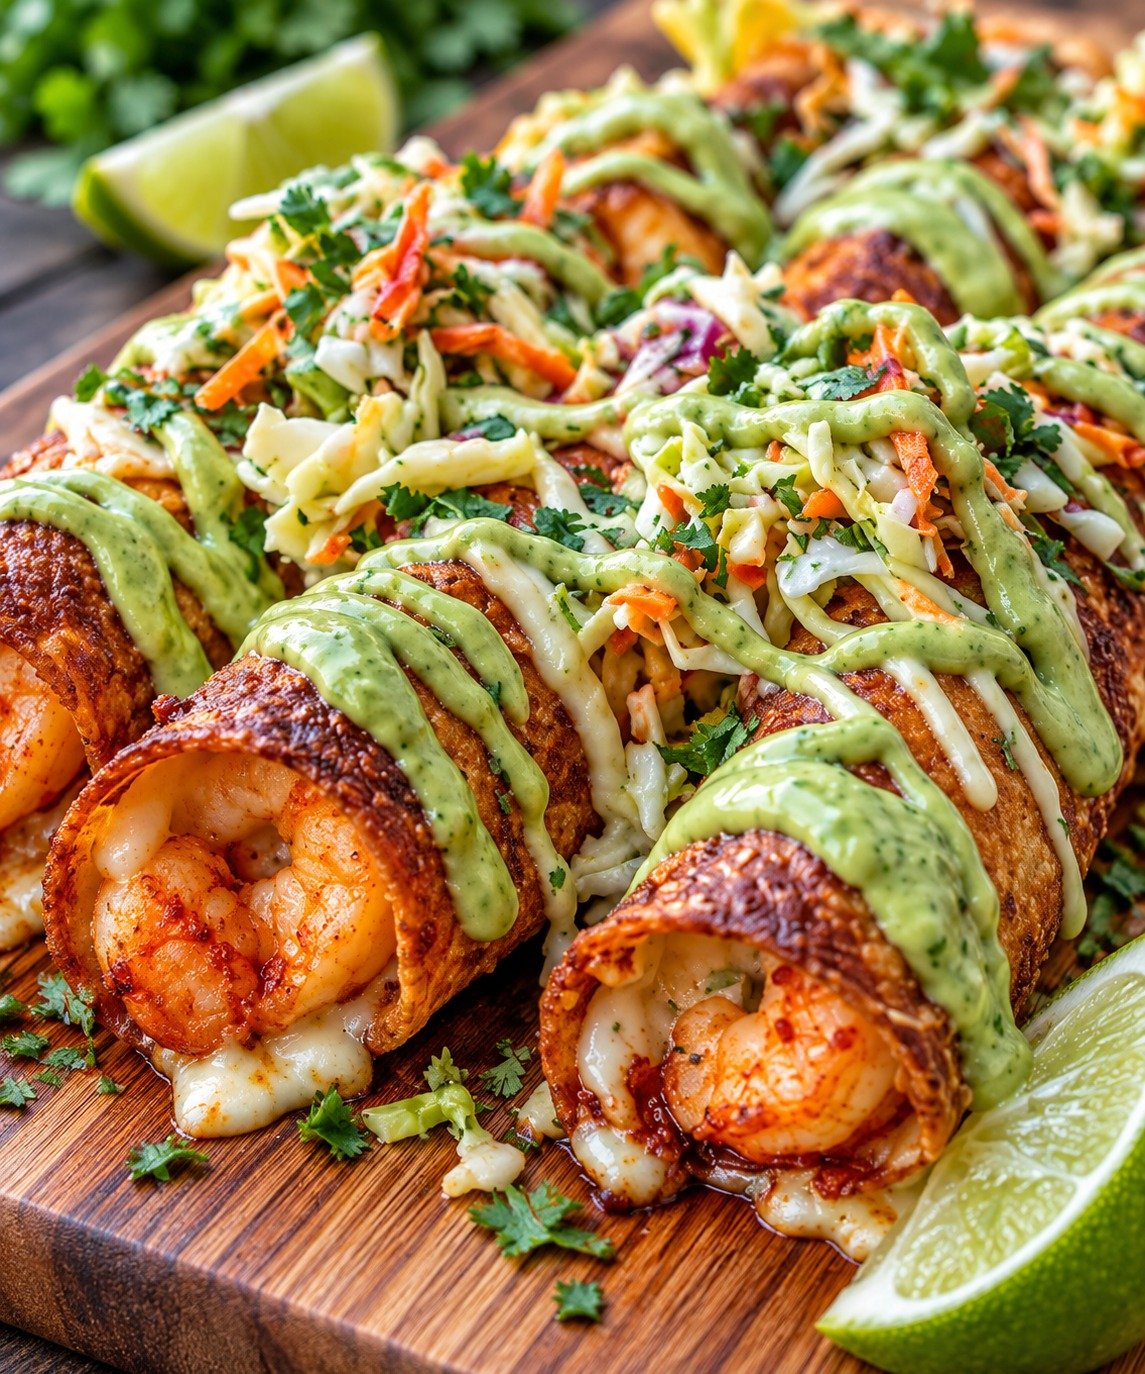
Crispy Shrimp Taquitos with mozzarella, garlic, lime, herbs, and golden tortillas

Crispy Mozzarella Shrimp Taquitos

Crispy Mozzarella Shrimp Taquitos are a crunchy, cheesy, flavor-packed dinner or appetizer made with juicy shrimp, melted mozzarella, garlic, herbs, and warm tortillas. The filling is simple, but the finished taquitos taste rich and satisfying thanks to the combination of tender seafood and gooey cheese inside a crisp shell.

If you love quick seafood meals, Shrimp Taquitos are an easy way to turn basic ingredients into something that feels fun and restaurant-inspired. They are perfect for weeknight dinners, game-day snacks, parties, or casual family meals.

Prep Time: 20 minutes
Cook Time: 20 minutes
Total Time: 40 minutes
Servings: 4

Ingredients

For the Shrimp Filling

1 pound raw shrimp, peeled and deveined

1 tablespoon olive oil

3 cloves garlic, minced

1 teaspoon smoked paprika

1/2 teaspoon chili powder

1/2 teaspoon ground cumin

1/2 teaspoon dried oregano

1/2 teaspoon salt

1/4 teaspoon black pepper

1 tablespoon fresh lime juice

2 tablespoons chopped fresh cilantro

1/4 cup finely diced red onion

1 small jalapeño, finely chopped, optional

1 1/2 cups shredded mozzarella cheese

1/4 cup cream cheese, softened

For the Taquitos

10 to 12 small flour or corn tortillas

2 tablespoons olive oil or cooking spray

1/2 teaspoon paprika, optional

For Serving

Sour cream or Greek yogurt

Fresh salsa

Guacamole

Lime wedges

Chopped cilantro

Sliced avocado

Why You’ll Love This Recipe

Shrimp Taquitos are crispy on the outside, creamy and cheesy on the inside, and easy to customize. The shrimp cooks quickly, which keeps the total preparation time short.

Mozzarella melts smoothly and gives the filling a stretchy texture, while cream cheese helps hold everything together. Garlic, paprika, cumin, lime, and cilantro add plenty of flavor without making the recipe complicated.

Another reason to love Shrimp Taquitos is that you can bake, air fry, or pan-cook them depending on what works best for your kitchen.

How to Make Crispy Mozzarella Shrimp Taquitos

Step 1: Prepare the Shrimp

Pat the shrimp dry with paper towels and chop them into small bite-size pieces.

Drying the seafood first helps it brown instead of steaming. Smaller pieces also make Shrimp Taquitos easier to roll and eat.

Season the shrimp with paprika, chili powder, cumin, oregano, salt, and black pepper.

Step 2: Cook the Shrimp

Heat olive oil in a large skillet over medium-high heat.

Add the garlic and cook for about 20 seconds, then add the seasoned shrimp.

Cook for 3 to 4 minutes, stirring frequently, until the shrimp turns pink and opaque.

Remove the skillet from the heat and stir in lime juice, cilantro, red onion, and jalapeño if using.

Let the filling cool slightly before assembling Shrimp Taquitos.

Step 3: Make the Cheese Filling

Transfer the cooked shrimp mixture to a bowl.

Add softened cream cheese and stir gently until evenly distributed.

Fold in the shredded mozzarella.

The cheese mixture should be creamy enough to stay together without becoming runny. This helps Shrimp Taquitos hold their shape while cooking.

Step 4: Warm the Tortillas

Warm the tortillas for about 20 to 30 seconds in the microwave, wrapped in a slightly damp paper towel.

Soft tortillas roll more easily and are less likely to crack.

If using corn tortillas, you may need a few extra seconds of warming so they become flexible enough for Shrimp Taquitos.

Step 5: Fill and Roll

Place one tortilla on a flat surface.

Spoon about 2 tablespoons of the shrimp and cheese mixture near one edge.

Roll tightly into a narrow cylinder and place seam-side down on a plate.

Repeat with the remaining tortillas and filling.

Do not overfill Shrimp Taquitos because too much filling can cause the tortillas to split during cooking.

Step 6: Bake Until Crispy

Preheat the oven to 425°F.

Arrange the taquitos seam-side down on a parchment-lined baking sheet.

Brush lightly with olive oil or spray with cooking spray. Sprinkle with paprika if desired.

Bake for 15 to 18 minutes, turning once halfway through, until Shrimp Taquitos are crisp and golden on all sides.

Step 7: Rest and Serve

Let the taquitos rest for 3 to 5 minutes after baking.

This gives the melted cheese time to settle slightly and makes them easier to handle.

Serve Shrimp Taquitos warm with salsa, sour cream, guacamole, lime wedges, and fresh cilantro.

Air Fryer Method

You can also prepare Shrimp Taquitos in the air fryer.

Preheat the air fryer to 390°F.

Arrange the taquitos in a single layer with a little space between each one. Lightly spray the tops with oil.

Cook for 7 to 9 minutes, turning halfway through, until golden and crisp.

Depending on the size of your air fryer, you may need to cook them in batches.

Pan-Fried Method

Heat a thin layer of oil in a skillet over medium heat.

Place the taquitos seam-side down and cook for 2 to 3 minutes per side until golden.

This method gives Shrimp Taquitos a very crisp exterior but uses slightly more oil than baking or air frying.

Transfer to a paper towel-lined plate before serving.

Serving Suggestions

Shrimp Taquitos pair well with many easy sides.

Serve them with Mexican rice, black beans, corn salad, or a fresh tomato and avocado salad.

A crunchy cabbage slaw with lime dressing also works especially well because it balances the rich cheese filling.

For a lighter meal, serve Shrimp Taquitos with mixed greens, cucumber, avocado, and a fresh citrus dressing.

For parties, arrange them on a platter with several dips such as salsa, guacamole, chipotle yogurt sauce, and queso.

Recipe Tips

Chop the shrimp into small pieces so the filling stays evenly distributed.

Do not overcook the shrimp before assembling because it will cook again inside the tortillas.

Warm the tortillas before rolling to prevent cracking.

Use low-moisture mozzarella for the best texture.

Keep the filling away from the tortilla edges so it does not leak out.

Place each rolled taquito seam-side down before baking.

Brush or spray lightly with oil to help Shrimp Taquitos become crisp and golden.

Let them rest briefly before serving because the filling will be very hot.

Easy Variations

For extra spice, add chopped jalapeño, cayenne, hot sauce, or chipotle powder to the filling.

For a creamy avocado version, add diced avocado after the shrimp cools slightly.

You can also add roasted corn, black beans, or finely chopped bell pepper.

For more cheese flavor, combine mozzarella with Monterey Jack or pepper jack.

For a Mediterranean-style twist, add feta, spinach, oregano, and lemon zest to Shrimp Taquitos.

Make-Ahead Instructions

The shrimp filling can be prepared up to one day in advance.

Store it in an airtight container in the refrigerator and assemble the taquitos when ready to cook.

You can also roll Shrimp Taquitos several hours ahead. Place them seam-side down in a covered container and refrigerate until baking.

For the best texture, wait to brush them with oil until just before cooking.

Storage and Reheating

Store leftover Shrimp Taquitos in an airtight container in the refrigerator for up to 3 days.

For the best texture, reheat them in a 375°F oven or air fryer until hot and crisp.

Microwaving works, but the tortillas will become softer.

You can also freeze cooked taquitos for up to 2 months.

Let them cool completely first, then freeze in a single layer before transferring to a freezer-safe bag.

Reheat frozen Shrimp Taquitos directly in the oven or air fryer until hot.

Nutrition Information

Approximate nutrition per serving, based on 4 servings:

Calories: 460
Protein: 31 g
Carbohydrates: 34 g
Fat: 22 g
Saturated Fat: 9 g
Fiber: 3 g
Sugar: 3 g
Sodium: 760 mg

Nutrition values are estimates and may vary depending on tortillas, cheese, and serving size.

Frequently Asked Questions

Can I use cooked shrimp?

Yes. Chop cooked shrimp and mix it with the seasonings, cream cheese, mozzarella, lime, and herbs. Skip the skillet cooking step.

Can I make them with corn tortillas?

Yes. Warm corn tortillas thoroughly before rolling because they are more likely to crack when cold.

What cheese works best?

Mozzarella gives the best stretchy texture, but Monterey Jack, pepper jack, or a Mexican cheese blend also works well.

Can I make these in advance?

Yes. Assemble Shrimp Taquitos earlier in the day and refrigerate until ready to cook.

How do I keep the filling from leaking out?

Do not overfill the tortillas, roll tightly, and place them seam-side down. Using softened cream cheese also helps bind the filling.

Can I freeze them?

Yes. Cooked or uncooked taquitos can be frozen. If freezing them uncooked, arrange them in a single layer first so they do not stick together.

Final Thoughts

Crispy Mozzarella Shrimp Taquitos are an easy way to turn shrimp, cheese, and tortillas into a crunchy, satisfying meal. Garlic, lime, herbs, and spices give the filling bold flavor, while mozzarella creates the gooey center that makes each bite especially comforting.

Shrimp Taquitos are versatile enough for quick dinners, appetizers, parties, or meal prep. You can bake, air fry, or pan-fry them depending on the texture you prefer.

Serve Shrimp Taquitos with salsa, guacamole, fresh lime, and a simple side salad for a complete meal that is easy to make and even easier to enjoy.

Mediterranean Baked Garlic Parmesan Shrimp

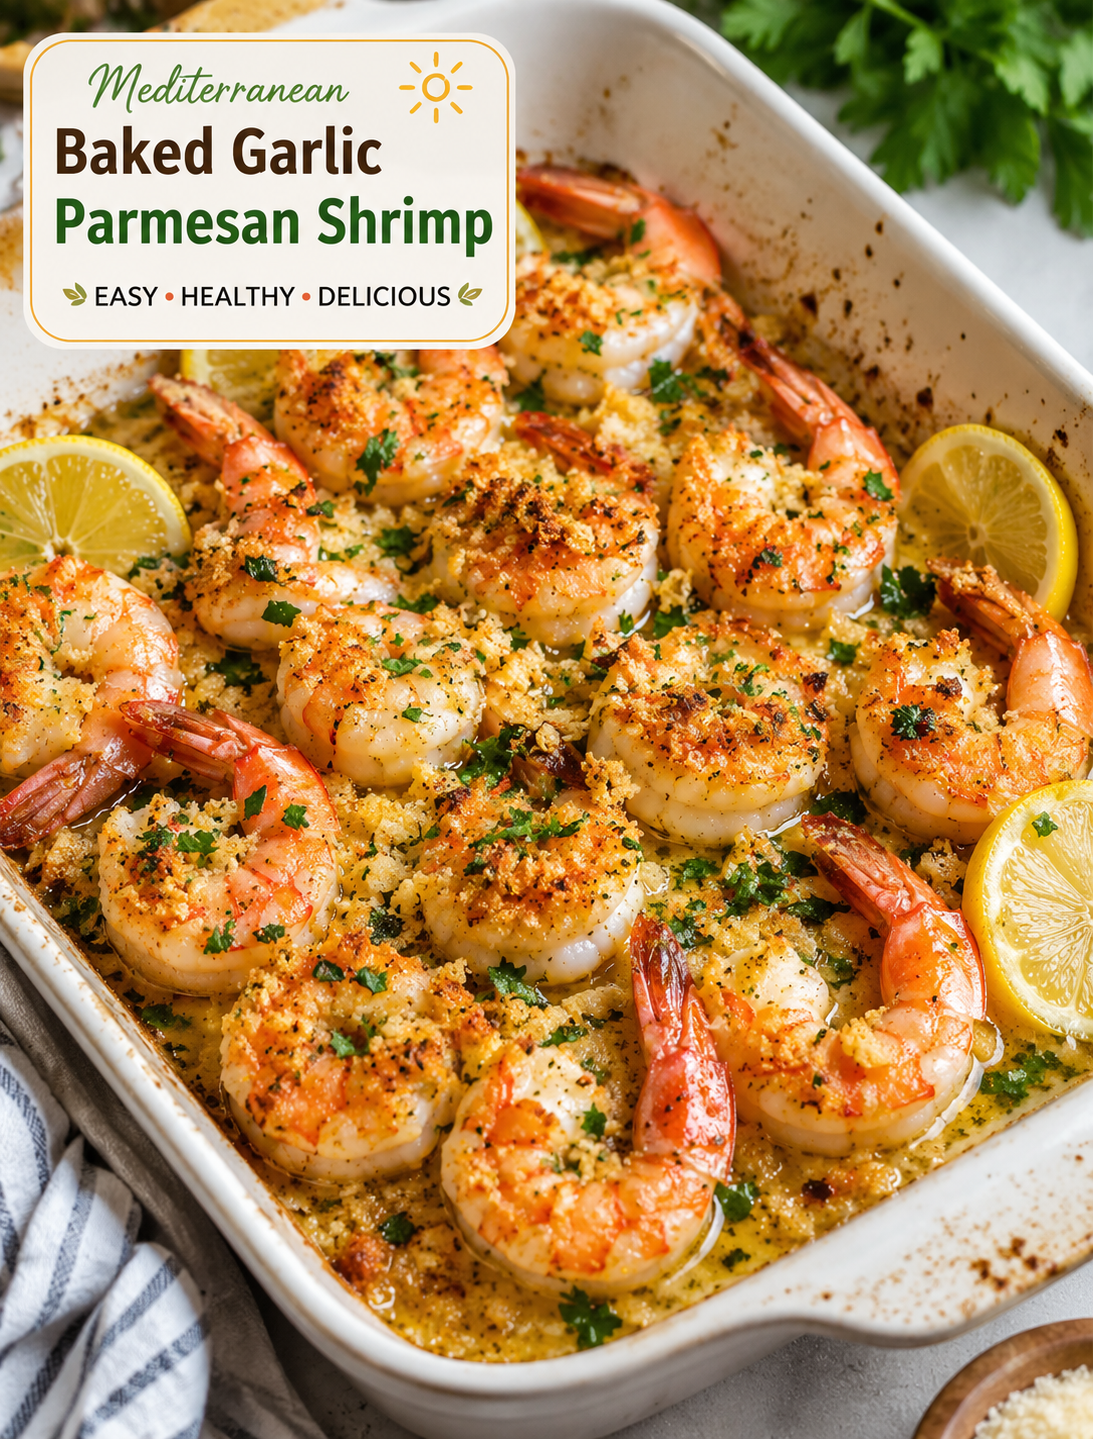
Mediterranean baked garlic Parmesan shrimp with lemon, herbs, and golden Parmesan topping served in a baking dish

Mediterranean Baked Garlic Parmesan Shrimp

Mediterranean Baked Garlic Parmesan Shrimp is a fast seafood dinner with bright lemon, fresh garlic, olive oil, herbs, and a golden Parmesan topping. The shrimp bake in one dish, so cleanup is simple and the meal is ready in about 25 minutes.

This easy shrimp recipe works well for busy weeknights, casual family dinners, or a simple appetizer when guests come over. The lemon adds freshness, while garlic, oregano, Parmesan, and paprika give the shrimp a rich savory flavor without making the dish heavy.

Mediterranean Baked Garlic Parmesan Shrimp Recipe

This baked shrimp dish uses simple ingredients that are easy to find at most U.S. grocery stores. Large or extra-large shrimp are ideal because they stay juicy while the Parmesan topping turns lightly golden.

For the best texture, use raw shrimp that have been peeled and deveined. Fresh shrimp are excellent, but frozen shrimp also work when they are fully thawed and dried before seasoning.

Prep Time

10 minutes

Bake Time

12–15 minutes

Total Time

25 minutes

Servings

4

Ingredients

  • 500 g (about 1 lb) raw shrimp, peeled and deveined
  • 2 tablespoons olive oil
  • 4 garlic cloves, finely minced
  • 2 tablespoons fresh lemon juice
  • ½ teaspoon lemon zest
  • ½ cup freshly grated Parmesan cheese
  • ¼ cup breadcrumbs or almond flour
  • 2 tablespoons fresh parsley, finely chopped
  • ½ teaspoon dried oregano
  • ½ teaspoon paprika
  • ½ teaspoon sea salt
  • ¼ teaspoon black pepper
  • Lemon wedges, for serving
  • Extra parsley, for garnish

Use freshly grated Parmesan when possible because it melts and browns more evenly than many pre-shredded varieties. Almond flour is a useful option when you want a lower-carb topping.

How to Make Mediterranean Baked Garlic Parmesan Shrimp

Start by heating your oven to 400°F (200°C). Lightly grease a baking dish with olive oil or line it with parchment paper for easier cleanup.

Pat the shrimp dry with paper towels. Removing excess moisture helps the garlic mixture cling to the shrimp and keeps the Parmesan topping from becoming watery.

Place the shrimp in the baking dish in one even layer. Avoid stacking them because crowded shrimp can cook unevenly.

In a small bowl, combine olive oil, minced garlic, lemon juice, lemon zest, oregano, paprika, salt, and black pepper. Stir until the mixture is well blended.

Pour the garlic and lemon mixture over the shrimp. Toss gently or turn the shrimp with a spoon so each piece gets an even coating.

In a separate bowl, mix Parmesan cheese, breadcrumbs or almond flour, and chopped parsley. Sprinkle the mixture evenly over the shrimp.

Bake uncovered for 12 to 15 minutes. The shrimp should become pink, opaque, and firm, while the topping should look lightly golden.

For a deeper golden crust, place the baking dish under the broiler for 1 to 2 minutes at the end. Watch closely because Parmesan can brown quickly.

Let the shrimp rest for about 2 minutes before serving. Add fresh parsley and lemon wedges for a bright finish.

Tips for the Best Baked Shrimp

Choose large or extra-large shrimp for a juicy texture and better presentation. Smaller shrimp can cook too quickly and become firm.

Do not overcook the seafood. Shrimp are ready when they are opaque and pink with a loose C-shaped curl.

Drying the shrimp before seasoning is an easy step that helps the topping stay flavorful and crisp.

Fresh garlic gives the strongest flavor, while freshly grated Parmesan creates a better crust.

Keep the shrimp in a single layer so heat reaches every piece evenly.

If you want more Mediterranean flavor, add sliced Kalamata olives, chopped cherry tomatoes, fresh basil, or a small pinch of red pepper flakes.

Use almond flour instead of breadcrumbs for a lower-carb version. Gluten-free breadcrumbs also work well if needed.

What to Serve With Garlic Parmesan Shrimp

Serve these shrimp with crusty bread to soak up the lemon-garlic juices. A simple green salad with cucumber, tomatoes, and a light vinaigrette adds freshness.

For a heartier dinner, serve the shrimp with rice, roasted potatoes, whole wheat pasta, or zucchini noodles. Roasted asparagus, green beans, or Mediterranean vegetables also make easy side dishes.

For an appetizer, arrange the baked shrimp on a serving platter with lemon wedges and fresh parsley. Serve them while warm for the best texture.

Easy Recipe Variations

Add cherry tomatoes before baking for extra color and natural sweetness.

Mix in crushed red pepper flakes if you enjoy a little heat with your seafood.

Replace Parmesan with Pecorino Romano for a sharper, saltier flavor.

Add chopped fresh basil or thyme for a different herb profile.

For extra Mediterranean character, add sliced olives or a small amount of crumbled feta after baking.

If you prefer a richer topping, add a light sprinkle of mozzarella before the final 2 minutes of baking.

Keep the shrimp tails on when serving guests for a more polished presentation.

Can You Make This Recipe Ahead?

You can prepare the shrimp and garlic-lemon mixture a few hours before cooking. Cover the prepared dish and refrigerate it until you are ready to bake.

For the best texture, add the Parmesan topping shortly before baking. Avoid leaving raw shrimp at room temperature for an extended period.

If using frozen shrimp, thaw them safely in the refrigerator and pat them completely dry before preparation.

Frequently Asked Questions

Can I use frozen shrimp for this recipe?

Yes. Thaw frozen shrimp completely, drain them well, and pat them dry before adding the garlic and Parmesan topping.

How do I know when the shrimp are fully cooked?

The shrimp should be pink, opaque, firm, and curled into a loose C shape when they are ready.

Can I make this recipe without breadcrumbs?

Yes. Replace breadcrumbs with almond flour for a lower-carb topping, or use gluten-free breadcrumbs if preferred.

Can I cook these shrimp in an air fryer?

Yes. Cook the prepared shrimp at 375°F for about 8–10 minutes, checking early because cooking time varies by shrimp size.

What size shrimp should I use?

Large or extra-large shrimp work best because they stay juicy and provide enough surface area for the Parmesan topping.

Can I use pre-cooked shrimp?

Raw shrimp are recommended because pre-cooked shrimp can become dry and rubbery when baked for a second time.

Is this baked shrimp recipe gluten-free?

It can be gluten-free when made with almond flour or certified gluten-free breadcrumbs instead of regular breadcrumbs.

What are the best side dishes for this shrimp?

Rice, pasta, crusty bread, roasted vegetables, zucchini noodles, and a fresh Mediterranean salad all pair well with the dish.

Nutrition Information

Approximate nutrition per serving:

  • Calories: 280
  • Protein: 32 g
  • Carbohydrates: 6 g
  • Fat: 14 g
  • Fiber: 1 g
  • Sugar: 1 g
  • Cholesterol: 220 mg

Nutrition values are estimates and can vary based on shrimp size, Parmesan, breadcrumbs, and serving portions.

Final Thoughts

Mediterranean Baked Garlic Parmesan Shrimp is an easy way to put a flavorful seafood dinner on the table without spending much time in the kitchen. The combination of juicy shrimp, garlic, lemon, herbs, olive oil, and Parmesan creates a balanced dish with plenty of fresh Mediterranean flavor.

Keep the preparation simple, avoid overbaking, and serve the shrimp immediately for the best texture. Add a salad, roasted vegetables, rice, or crusty bread to turn this quick recipe into a complete meal.