Sleeping Position Tips: How to Support Your Neck & Back at Night

Woman sleeping with proper neck and back alignment using supportive pillows

The Way You Sleep Every Night May Affect Your Neck and Back

Waking up with a stiff neck, tight shoulders, or a sore lower back can sometimes be linked to how your body is positioned during sleep.

Your sleeping position, pillow height, and the support under your body can affect whether your head, neck, and spine stay in a comfortable position overnight. Sleeping awkwardly or using too many or too few pillows can contribute to neck pain.

There is no single sleeping position that works perfectly for everyone. The goal is to find a position that keeps your body supported and your neck and spine in a comfortable, neutral alignment.

Here are practical ways to make your usual sleeping position more comfortable.

Keep Your Neck Aligned

Your neck should stay reasonably aligned with your chest and back while you sleep.

A pillow that pushes your head too far forward can leave your neck bent for hours. A pillow that is too thin may allow your head to drop backward or sideways.

A simple way to check your position is to notice whether your head feels level rather than tilted toward the mattress or ceiling.

Try these simple steps:

  1. Lie down in your normal sleeping position.
  2. Notice whether your head feels tilted.
  3. Adjust your pillow height if needed.
  4. Keep your chin from being pushed strongly toward your chest.
  5. Choose support that feels comfortable rather than forcing a specific position.

Mayo Clinic recommends keeping the head and neck aligned with the body during sleep and using a pillow that supports the neck.

Choose the Right Pillow Height

Pillow height matters because it changes the angle of your neck.

The “right” height is not the same for everyone. It depends on your sleeping position, body shape, mattress, and personal comfort.

If you sleep on your side

You generally need enough pillow height to fill the space between your head and mattress without allowing your head to droop toward the mattress.

A supportive pillow can help keep the head and neck in line with the rest of the body.

If you sleep on your back

A pillow should support your neck without pushing your head too far forward.

If you frequently wake with neck stiffness, experiment with a different pillow height rather than automatically adding more pillows.

If your pillow feels uncomfortable

Try changing one thing at a time. A small adjustment can make it easier to identify what is causing morning discomfort.


Side Sleeping

Side sleeping is common and can be comfortable when your head, shoulders, hips, and legs are properly supported.

One useful adjustment is placing a pillow between your knees.

This can help keep your hips and spine more aligned and reduce twisting through the lower body. Mayo Clinic recommends slightly bending the legs and using a pillow between them for people who sleep on their side.

Step-by-step side-sleeping setup:

  1. Lie comfortably on your side.
  2. Keep your head supported by a suitable pillow.
  3. Avoid tucking your chin tightly toward your chest.
  4. Keep your knees slightly bent.
  5. Place a pillow between your knees if it feels comfortable.
  6. Try to keep your shoulders and hips from twisting in opposite directions.

You do not need to force yourself to sleep on one particular side if another comfortable position works better for you.

Back Sleeping

Back sleeping can provide a neutral position for some people, especially when the neck and lower back have proper support.

A pillow under the knees can reduce pressure on the lower back for some sleepers and help maintain a comfortable spinal curve.

Try this setup:

  1. Lie flat on your back.
  2. Use a supportive pillow for your neck.
  3. Keep your head from being pushed too far forward.
  4. Place a pillow under your knees.
  5. Adjust the pillow height until your neck feels relaxed.

However, back sleeping is not automatically the best choice for everyone. Johns Hopkins notes that some people with neck pain may feel worse on their backs, while others may find this position helpful for lower-back discomfort.

Your comfort and individual health needs matter.

Avoid Uncomfortable Sleeping Positions

Sleeping on your stomach can make it harder to keep your neck in a neutral position because your head usually needs to turn to one side.

It can also place extra stress on the lower back for some people. Mayo Clinic recommends trying other positions when possible if stomach sleeping contributes to back discomfort.

If you naturally sleep on your stomach and changing positions is difficult, focus first on reducing obvious discomfort rather than forcing yourself into a position that prevents you from sleeping.

Watch for these signs:

  • Your neck feels twisted.
  • Your chin stays pushed toward your chest.
  • Your lower back feels overly arched.
  • Your shoulder becomes compressed or painful.
  • You repeatedly wake with stiffness.
  • Your pillow feels too high or too low.

Your sleeping position should allow you to rest without creating obvious strain.

Make Small Changes Before Bed

You do not need to replace your entire bedroom to improve your sleep position.

Start with one change and give yourself time to notice whether it helps.

Simple nighttime checklist:

1. Check your pillow:
Make sure it supports your head without forcing your neck into an awkward angle.

2. Check your position:
Before falling asleep, notice whether your head, neck, and body feel reasonably aligned.

3. Add knee support:
If you sleep on your side, try a pillow between your knees.

4. Try under-knee support:
If you sleep on your back, a pillow under your knees may make your lower back more comfortable.

5. Don’t force a painful position:
If a particular position makes your pain worse, adjust it rather than trying to “train” yourself to tolerate it.

6. Replace worn-out pillows:
An old pillow that no longer provides useful support may contribute to an uncomfortable sleeping position. Johns Hopkins recommends choosing supportive pillows and replacing old pillows when needed.

When Persistent Pain Needs Evaluation

Occasional morning stiffness does not always mean something serious.

However, persistent or severe neck or back pain deserves attention, especially when it does not improve or keeps returning.

You should consider talking with a healthcare professional if pain continues despite reasonable changes to your sleeping setup.

Seek prompt medical attention for back or neck pain accompanied by symptoms such as significant weakness, numbness or tingling, pain after a serious injury, fever, or loss of bladder or bowel control.

Do not assume that changing your pillow will fix pain caused by an underlying medical condition.

A Simple Sleeping-Position Routine

Use this quick routine tonight:

Step 1

Choose your normal sleeping position.

Step 2

Check whether your neck feels neutral and supported.

Step 3

Adjust your pillow height if your head feels tilted.

Step 4

If you sleep on your side, place a pillow between your knees.

Step 5

If you sleep on your back, try a pillow under your knees.

Step 6

Avoid positions that consistently create pain or stiffness.

Step 7

Notice how your neck and back feel when you wake up.

Step 8

Make one small adjustment the next night instead of changing everything at once.

The goal is not to find a “perfect” sleeping position. The goal is to create a comfortable setup that supports your body and allows you to sleep well.

Frequently Asked Questions

1. Can sleeping position cause neck pain?

An awkward sleeping position or poorly supportive pillow can contribute to neck strain and morning stiffness.

2. What is a good sleeping position for back pain?

Side sleeping with a pillow between the knees or back sleeping with a pillow under the knees may help some people feel more comfortable.

3. Is stomach sleeping bad for your back?

Stomach sleeping can place extra stress on the neck and lower back for some people, so another position may be more comfortable.

4. How high should my pillow be?

Your pillow should support your head and keep your neck reasonably aligned rather than pushing your head sharply forward or sideways.

5. Is side sleeping better than back sleeping?

Neither position is universally better; the most comfortable option depends on your body, symptoms, and individual health needs.

6. Should I put a pillow between my knees?

If you sleep on your side, a pillow between your knees can help keep your hips and spine more aligned.

7. Should I put a pillow under my knees?

If you sleep on your back, placing a pillow under your knees may help support a comfortable lower-back position.

8. When should I see a doctor about sleep-related back pain?

See a healthcare professional when pain persists, becomes severe, follows an injury, or occurs with weakness, numbness, fever, or bladder or bowel changes.

Final Takeaway

The way you sleep can affect how your neck and back feel when you wake up. A supportive pillow, comfortable alignment, and small adjustments such as placing a pillow between your knees or under your knees may improve comfort for some people.

There is no single sleeping position that works for everyone. Pay attention to how your body responds, make small changes, and seek professional advice when pain is persistent or comes with warning signs.
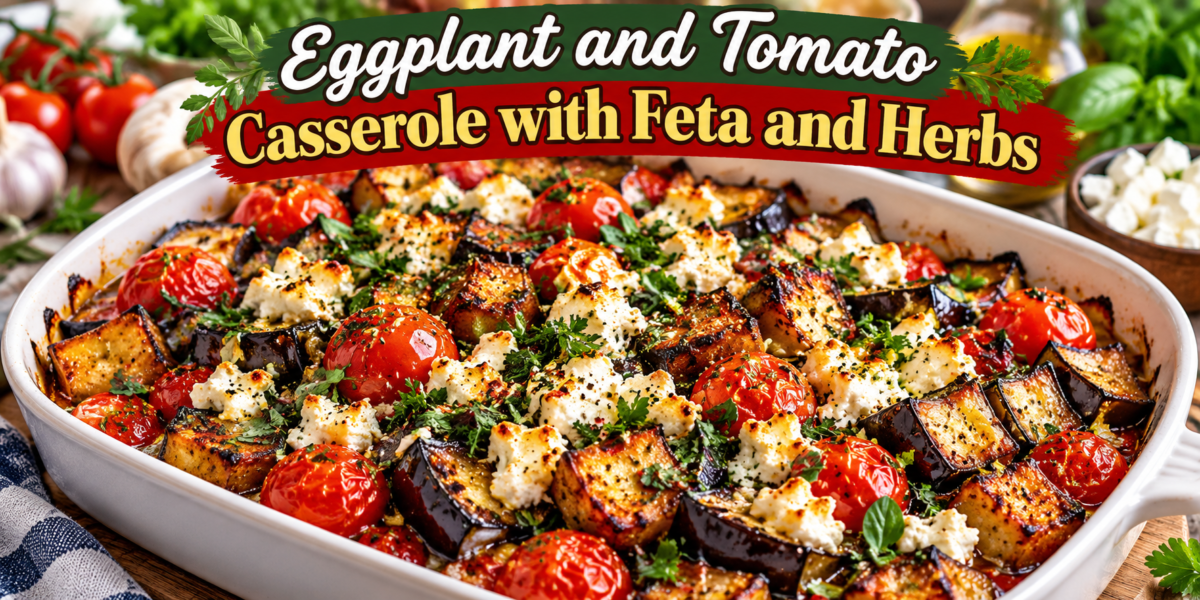
Eggplant and Tomato Casserole with Feta and Herbs

Eggplant and Tomato Casserole with Feta and Herbs featuring roasted eggplant, tomatoes, crumbled feta, garlic, and fresh herbs


Eggplant and Tomato Casserole with Feta and Herbs

This Eggplant and Tomato Casserole with Feta and Herbs is a warm, colorful Mediterranean-inspired dish made with tender roasted eggplant, juicy tomatoes, garlic, red onion, creamy feta, olive oil, and fresh herbs. The vegetables roast until their edges become beautifully caramelized while the feta adds a salty, creamy finish.

The short focus keyword for this recipe is Eggplant Tomato Casserole. This dish brings together a handful of everyday ingredients in one baking dish. Eggplant provides a soft, hearty texture, tomatoes add natural sweetness and acidity, and feta creates a salty contrast. Garlic, oregano, parsley, basil, lemon, and extra virgin olive oil give the dish its fresh Mediterranean character.

You can serve this Eggplant Tomato Casserole as a vegetarian main course with warm pita or crusty bread. It also works beautifully as a side dish with grilled chicken, baked fish, shrimp, or lamb. Because the vegetables can be prepared ahead, it is also useful for meal prep and relaxed family dinners.

Prep Time: 20 minutes
Cook Time: 45 minutes
Total Time: 1 hour 5 minutes
Servings: 6

Ingredients

For the Roasted Vegetables

  • 2 medium eggplants, cut into 1-inch cubes
  • 3 cups cherry tomatoes
  • 1 medium red onion, cut into wedges
  • 4 garlic cloves, finely minced
  • 4 tablespoons extra virgin olive oil
  • 1 teaspoon dried oregano
  • 1 teaspoon smoked paprika
  • 1 teaspoon sea salt
  • ½ teaspoon black pepper
  • ¼ teaspoon red pepper flakes, optional

For the Feta and Herb Topping

  • 1 cup crumbled feta cheese
  • 2 tablespoons fresh parsley, finely chopped
  • 2 tablespoons fresh basil, finely chopped
  • 1 teaspoon dried oregano
  • 1 teaspoon lemon zest
  • 1 tablespoon fresh lemon juice
  • 1 tablespoon extra virgin olive oil

Optional Additions

  • ½ cup Kalamata olives, sliced
  • ½ cup chickpeas, drained and rinsed
  • ¼ cup roasted red peppers, chopped
  • 2 tablespoons sun-dried tomatoes, chopped

Step-by-Step Instructions

1. Prepare the Eggplant

Start by washing the eggplants and drying them thoroughly. Cut off the tops and bottoms, then cut the eggplants into approximately 1-inch cubes. Try to keep the pieces close in size so they roast at the same rate.

Place the eggplant cubes in a large mixing bowl. Add three tablespoons of extra virgin olive oil, dried oregano, smoked paprika, sea salt, black pepper, and red pepper flakes if you are using them. Toss well until every piece is lightly coated with oil and seasoning.

For the best Eggplant Tomato Casserole, choose firm, fresh eggplants with smooth skin. Medium eggplants are usually tender and easy to roast. If the eggplant seems particularly large or has many visible seeds, you can scoop out some of the seed-heavy center before cutting it.

Let the seasoned eggplant sit for about 10 minutes while you prepare the remaining vegetables. This gives the seasonings a little time to settle onto the surface.

2. Prepare the Tomatoes, Onion, and Garlic

Preheat the oven to 425°F (220°C). Add the cherry tomatoes and red onion wedges to the bowl with the seasoned eggplant.

Add the minced garlic and the remaining tablespoon of olive oil. Toss gently so the tomatoes remain mostly intact while the onion and garlic become coated.

Cherry tomatoes are especially useful because they become soft and juicy in the oven without completely disappearing. If you prefer larger tomatoes, use ripe Roma tomatoes or another firm variety and cut them into large chunks.

The combination of tomato, onion, garlic, and eggplant creates the savory base of this Eggplant Tomato Casserole. Keep the garlic distributed throughout the vegetables so it roasts gently instead of sitting in one concentrated area.

3. Arrange the Vegetables

Transfer the vegetables to a large baking dish or rimmed sheet pan. Spread them into one even layer.

Try not to overcrowd the pan. When vegetables are packed too closely together, their moisture creates steam and prevents proper browning. If your baking dish is small, use two pans instead.

Place the pan in the preheated oven and roast for 20 minutes.

4. Roast Until Tender and Golden

After 20 minutes, carefully remove the pan from the oven. Use a spatula to turn the eggplant and gently move the tomatoes and onion around.

Return the pan to the oven and roast for another 15 to 20 minutes. The eggplant should be soft in the center with browned edges, while the tomatoes should look blistered and juicy. The onion should be tender with some caramelized edges.

Roasting is the most important flavor-building stage of this Eggplant Tomato Casserole. The high oven temperature concentrates the natural sweetness of the tomatoes and helps the eggplant develop deeper flavor.

If you want darker edges, roast for another five minutes, but watch carefully so the garlic does not burn. The finished vegetables should be tender without becoming completely mushy.

5. Prepare the Feta and Herb Topping

While the vegetables are roasting, prepare the feta mixture.

Place the crumbled feta in a small bowl. Add the chopped parsley, chopped basil, dried oregano, lemon zest, lemon juice, and one tablespoon of extra virgin olive oil.

Stir gently until the ingredients are combined. Do not mash the feta into a smooth paste. Small crumbles create a much better texture and allow the cheese to remain visible on top of the vegetables.

Taste the mixture before adding more salt. Feta can vary in saltiness, so additional salt may not be necessary.

For an extra bright finish, add a little more lemon zest instead of adding more salt. This keeps the topping fresh and aromatic.

6. Add the Feta

Remove the roasted vegetables from the oven. Scatter the feta and herb mixture evenly across the surface.

Return the dish to the oven for approximately five minutes. This warms the feta and allows it to soften slightly while keeping its crumbly character.

If you want a lightly browned top, place the dish under the broiler for one to two minutes. Watch it closely because feta can brown quickly under direct heat.

At this stage, the Eggplant Tomato Casserole should have tender eggplant, blistered tomatoes, soft red onion, fragrant garlic, and warm feta.

7. Finish and Rest

Remove the baking dish from the oven and let it rest for about five minutes.

Add a little extra parsley and basil if desired. A small drizzle of olive oil and a squeeze of fresh lemon juice can also be added just before serving.

Resting allows the tomato juices and olive oil to settle around the vegetables. It also gives the flavors a chance to come together.

Tips for the Best Results

Choose Fresh Eggplant

Select eggplants that feel firm and heavy for their size. The skin should be smooth and shiny without large soft spots.

Smaller and medium eggplants usually have a pleasant tender texture. Cut the pieces into similar sizes so they cook evenly. Even cubes help every serving of Eggplant Tomato Casserole contain a good balance of tender centers and browned edges.

Do Not Overcrowd the Pan

Good airflow is essential when roasting vegetables. If the pan is too crowded, the vegetables will steam instead of caramelizing.

Use the largest baking dish you have available, or divide the ingredients between two pans. This simple adjustment can make a noticeable difference in the final texture.

Use Olive Oil Wisely

Eggplant absorbs oil quickly, but adding too much can make the dish greasy. Start with the listed amount and toss the vegetables thoroughly.

If the vegetables look dry after roasting for several minutes, add a small drizzle. Avoid pouring a large amount of oil over the pan because the tomatoes will release their own juices.

Season in Layers

Seasoning the vegetables before roasting and finishing the casserole with fresh lemon and herbs creates more depth.

Oregano and garlic give the vegetables a savory foundation, while lemon, basil, and parsley brighten the final dish. The same approach works whenever you make Eggplant Tomato Casserole with different vegetables or optional toppings.

Use Good Feta

Choose a feta with a creamy, crumbly texture and a flavor you enjoy. Good feta provides much of the salty character of the dish.

If the feta is very salty, reduce the amount of added salt used on the vegetables.

Serving Suggestions

Serve With Warm Bread

Warm pita, flatbread, sourdough, or crusty Mediterranean bread is one of the easiest ways to serve this dish.

Bread is especially useful because it can soak up the tomato juices, olive oil, and softened feta. A spoonful of the vegetables over warm pita makes a simple and satisfying lunch.

Serve With Rice or Grains

Spoon the casserole over couscous, bulgur, quinoa, brown rice, or white rice.

The grains absorb the flavorful tomato juices and make the meal more filling. This combination is especially useful when serving Eggplant Tomato Casserole as a vegetarian main course.

Serve With Grilled Protein

The fresh vegetables pair well with grilled chicken, baked fish, shrimp, or lamb.

For a family-style meal, place the casserole in the center of the table and serve it alongside a simple protein, cucumber salad, olives, and warm pita.

Serve as a Mezze Dish

For a Mediterranean-inspired spread, serve smaller portions with hummus, tzatziki, olives, cucumber, tomatoes, roasted peppers, and toasted pita.

Eggplant Tomato Casserole also looks colorful on a shared table, with feta adding a savory finish.

Recipe Variations

Add Chickpeas

Add ½ cup of drained and rinsed chickpeas during the final 20 minutes of roasting. The chickpeas become lightly crisp on the outside and absorb the flavors of the vegetables.

This addition makes Eggplant Tomato Casserole more filling and provides extra plant-based protein and fiber.

Add Kalamata Olives

Add sliced Kalamata olives during the final 10 minutes of roasting. Their briny flavor works especially well with feta and sweet roasted tomatoes.

Use a moderate amount because both olives and feta can be salty.

Add Zucchini

Replace one cup of eggplant with chopped zucchini. Zucchini cooks quickly, so add it during the final 20 to 25 minutes if you want it to retain some texture.

Add Roasted Red Peppers

Chopped roasted red peppers bring sweetness, color, and a mild smoky flavor. Add them during the final five to ten minutes so they warm through without becoming too soft.

Make It Spicy

Increase the red pepper flakes or add a small pinch of cayenne pepper before roasting. You can also drizzle a little chili oil over the finished dish.

Storage and Reheating

Refrigerator Storage

Allow leftovers to cool before transferring them to an airtight container. Store the casserole in the refrigerator for up to three days.

The flavors often become more developed after resting overnight. Leftover Eggplant Tomato Casserole can be served warm for lunch or added to a grain bowl.

Oven Reheating

Place leftovers in a baking dish and cover loosely with foil. Heat at 350°F (175°C) for 10 to 15 minutes, or until warmed through.

Remove the foil during the final few minutes if you want the edges to become slightly crisp again.

Skillet Reheating

For a smaller portion, warm the casserole gently in a skillet over medium-low heat. Add a small splash of water if the vegetables seem dry.

Avoid high heat because it can make the feta firm and cause the vegetables to lose too much moisture.

Frequently Asked Questions

Do I Need to Salt Eggplant Before Roasting?

Modern eggplants usually do not require traditional salting. If you have an eggplant that tastes bitter, sprinkle the cubes lightly with salt and let them sit for about 20 minutes.

Rinse briefly and dry thoroughly before seasoning. This optional step can be useful when preparing Eggplant Tomato Casserole with a particularly large or mature eggplant.

Can I Use Regular Tomatoes?

Yes. Roma tomatoes or other firm ripe tomatoes work well. Cut them into large pieces so they maintain some texture during roasting.

Very watery tomatoes may release more liquid, so you may need to roast the vegetables slightly longer.

Can I Use Another Cheese?

Yes. Goat cheese, ricotta salata, or another mild crumbly cheese can replace feta. However, feta provides the salty Mediterranean flavor that makes this Eggplant Tomato Casserole distinctive.

Can I Make It Dairy-Free?

Yes. Use a dairy-free feta alternative or replace the feta with seasoned chickpeas or white beans.

The roasted vegetables are flavorful enough to stand on their own, especially when finished with fresh herbs and lemon.

Nutrition Information

Approximate nutrition per serving:

  • Calories: 310 kcal
  • Protein: 9g
  • Carbohydrates: 28g
  • Fat: 20g
  • Saturated Fat: 6g
  • Fiber: 8g
  • Sugar: 10g
  • Sodium: 650mg

Nutrition values are estimates and can vary according to ingredient brands, serving sizes, and optional additions.

Final Thoughts

This Eggplant Tomato Casserole is a simple way to turn everyday vegetables into a satisfying Mediterranean-inspired meal. The eggplant becomes tender and caramelized, the tomatoes develop concentrated sweetness, and the red onion becomes soft and lightly browned.

Feta provides a creamy, salty contrast, while parsley, basil, oregano, garlic, and lemon keep the dish bright. That combination makes Eggplant Tomato Casserole suitable for both casual weeknight meals and relaxed gatherings.

For the best result, give the vegetables plenty of space in the roasting pan and avoid using too much oil. This helps the Eggplant Tomato Casserole develop browned edges.

Serve Eggplant Tomato Casserole with warm pita, couscous, rice, quinoa, or a fresh salad. It also works beautifully as a side dish alongside grilled chicken or fish.

This Eggplant Tomato Casserole is flexible enough for different dietary preferences while keeping the original ingredients and method simple.

Whether you enjoy it fresh from the oven or as leftovers the next day, Eggplant Tomato Casserole is an easy recipe worth keeping in your regular meal rotation.

For a final finishing touch, add fresh parsley, lemon zest, and a small drizzle of extra virgin olive oil immediately before serving. The combination makes the dish colorful, fresh, and flavorful.

Enjoy this Eggplant Tomato Casserole while the feta is still warm and the roasted vegetables are tender. It is a practical Mediterranean-inspired recipe that brings plenty of flavor to the table without complicated preparation.

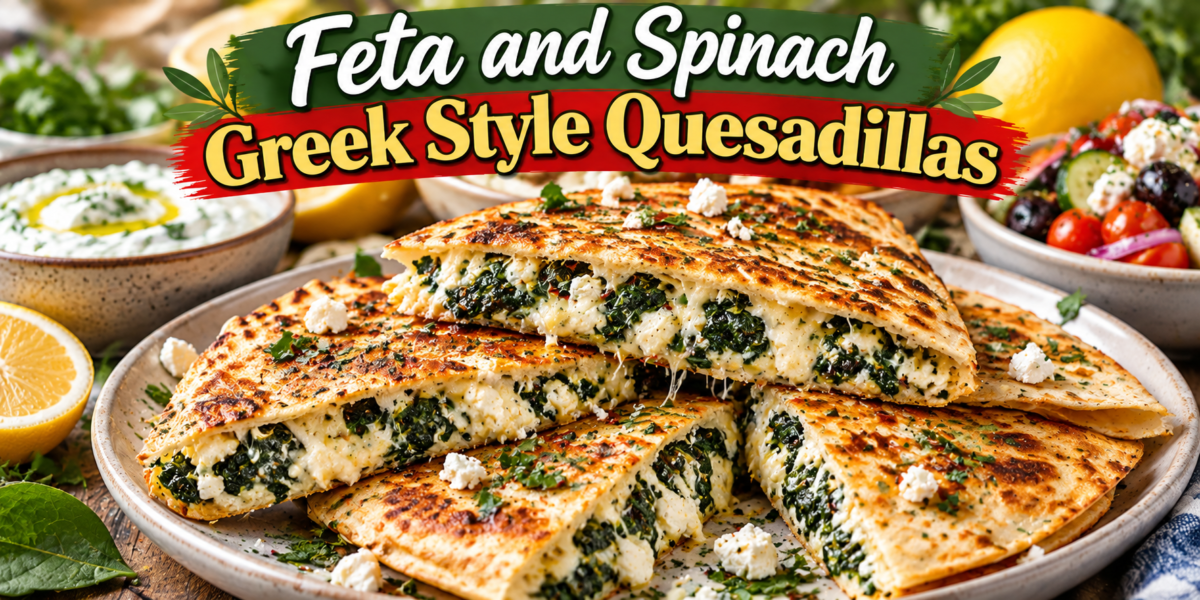
Feta and Spinach Greek Style Quesadillas Recipe

Feta and Spinach Greek Style Quesadillas with crispy tortillas, spinach, feta cheese, herbs, and lemon

Feta and Spinach Greek Style Quesadillas

These Feta and Spinach Greek Style Quesadillas are a delicious Mediterranean-inspired twist on classic quesadillas. Crisp golden tortillas are filled with creamy feta, tender spinach, mozzarella, garlic, herbs, and a touch of lemon before being toasted until perfectly crisp. The result is a quick and satisfying meal with a wonderful combination of crunchy, creamy, salty, and fresh flavors.

What makes these Feta and Spinach Greek Style Quesadillas special is the Greek-inspired filling. Feta provides a rich salty flavor, while spinach adds freshness and color. Garlic, oregano, parsley, and lemon zest give the filling a bright Mediterranean character. A little mozzarella helps everything melt together while keeping the feta flavor at the center.

These Feta and Spinach Greek Style Quesadillas are perfect for lunch, dinner, a quick snack, or a meatless family meal. They are also easy to customize with tomatoes, olives, roasted peppers, mushrooms, or artichokes.

Prep Time: 15 minutes
Cook Time: 15 minutes
Total Time: 30 minutes
Servings: 4

Ingredients

For the Greek Spinach Filling

4 large flour tortillas

2 cups fresh spinach, chopped

1 cup crumbled feta cheese

½ cup shredded mozzarella cheese

2 tablespoons extra virgin olive oil

3 garlic cloves, finely minced

¼ cup fresh parsley, finely chopped

1 teaspoon dried oregano

½ teaspoon dried dill

½ teaspoon black pepper

¼ teaspoon sea salt

1 teaspoon lemon zest

1 tablespoon fresh lemon juice

For the Optional Greek Filling Additions

¼ cup chopped Kalamata olives

¼ cup chopped roasted red peppers

2 tablespoons finely chopped red onion

2 tablespoons chopped sun-dried tomatoes

For Cooking

1 tablespoon extra virgin olive oil

Instructions

Prepare the Spinach

Begin by washing the fresh spinach thoroughly and drying it well. Excess water can make the filling too wet and prevent the quesadillas from becoming crisp.

Heat two tablespoons of extra virgin olive oil in a large skillet over medium heat. Add the minced garlic and cook for about thirty seconds until fragrant.

Add the chopped spinach and gently toss it in the warm garlic oil. Cook for two to three minutes, stirring occasionally, until the spinach wilts.

Remove the skillet from the heat and allow the spinach to cool for a few minutes.

For the best Feta and Spinach Greek Style Quesadillas, squeeze out any excess liquid from the cooked spinach before mixing it with the cheese. This small step helps keep the tortillas crisp instead of soggy.

Make the Greek Filling

Place the cooked spinach in a large mixing bowl. Add the crumbled feta, shredded mozzarella, parsley, oregano, dill, black pepper, sea salt, lemon zest, and lemon juice.

Mix gently until everything is evenly combined.

The feta should remain slightly chunky rather than becoming completely smooth. Those small pieces create a delicious salty texture throughout the filling.

If you are adding Kalamata olives, roasted red peppers, red onion, or sun-dried tomatoes, fold them into the mixture at this stage.

The filling should be moist but not watery. If it looks too wet, add a little more feta or mozzarella.

This flavorful mixture is the heart of the Feta and Spinach Greek Style Quesadillas, so taste it before assembling the tortillas. Add a little extra lemon, oregano, or black pepper according to your preference.

Assemble the Quesadillas

Place one tortilla on a clean work surface.

Spread approximately one quarter of the spinach and feta mixture over half of the tortilla. Do not spread the filling all the way to the edges because it can escape during cooking.

Fold the empty half of the tortilla over the filling to create a half-moon shape.

Press gently around the edges to help keep the filling inside.

Repeat with the remaining tortillas and filling.

For extra-crispy Feta and Spinach Greek Style Quesadillas, avoid overfilling the tortillas. A thinner, even layer of filling heats more quickly and allows the tortilla to become golden and crisp.

Cook the Quesadillas

Heat a large nonstick skillet or griddle over medium heat.

Lightly brush the skillet with a small amount of olive oil.

Place one or two assembled quesadillas in the skillet, depending on its size. Avoid overcrowding the pan.

Cook for approximately two to three minutes on the first side. Press gently with a spatula so the tortilla makes good contact with the skillet.

Once the bottom becomes golden and crisp, carefully flip the quesadilla.

Cook the second side for another two to three minutes until golden brown and the cheese inside has melted.

Continue with the remaining quesadillas.

The Feta and Spinach Greek Style Quesadillas should be crisp on the outside while the filling remains warm, creamy, and flavorful inside.

Rest and Slice

Transfer the cooked quesadillas to a cutting board.

Let them rest for one or two minutes before slicing. This allows the melted cheese to settle slightly and makes the quesadillas easier to cut.

Use a sharp knife or pizza cutter to slice each quesadilla into two or three wedges.

Garnish with fresh parsley, a little crumbled feta, and lemon zest.

Serve while warm for the best texture.

Tips for Crispy Quesadillas

Remove Excess Moisture

Spinach contains a lot of water, especially after cooking. Squeezing out the excess moisture is one of the most important steps.

Too much moisture can make the tortilla soft instead of crisp.

This technique is particularly useful when preparing Feta and Spinach Greek Style Quesadillas because feta and spinach both contribute moisture to the filling.

Use Medium Heat

High heat may brown the tortilla too quickly before the cheese becomes warm.

Medium heat gives the filling enough time to heat while allowing the tortilla to become evenly golden.

If the tortilla is browning too quickly, reduce the heat slightly.

Do Not Overfill

A generous amount of filling sounds tempting, but too much can make the quesadilla difficult to flip.

It can also cause the filling to spill out and make the skillet messy.

A thin, even layer gives the best result.

Choose Good Feta

Use good-quality feta with a creamy yet crumbly texture.

Greek feta made from sheep’s milk or a sheep-and-goat milk blend can provide an especially authentic flavor.

The salty feta is one of the main ingredients that gives Feta and Spinach Greek Style Quesadillas their distinctive Mediterranean character.

Serving Suggestions

Greek Yogurt Dip

Serve the quesadillas with plain Greek yogurt seasoned with lemon juice, garlic, parsley, and black pepper.

The cool yogurt provides a refreshing contrast to the warm, crispy tortilla.

Tzatziki

Tzatziki is another excellent choice.

Combine Greek yogurt with grated cucumber, garlic, lemon juice, dill, salt, and olive oil for a creamy cucumber sauce.

The fresh sauce pairs beautifully with the warm Feta and Spinach Greek Style Quesadillas.

Fresh Greek Salad

Serve with cucumber, tomatoes, red onion, Kalamata olives, and feta dressed with lemon juice and extra virgin olive oil.

The fresh vegetables balance the warm and cheesy filling.

Lemon Wedges

Add fresh lemon wedges to the serving plate.

A squeeze of lemon just before eating brightens the feta and spinach and enhances the herbs.

Recipe Variations

Tomato and Feta Version

Add finely chopped sun-dried tomatoes to the filling.

Their slightly sweet and tangy flavor works beautifully with spinach, feta, garlic, and oregano.

Olive and Herb Version

Add chopped Kalamata olives and extra fresh parsley.

The olives provide another salty Mediterranean flavor while the herbs keep the filling fresh.

Mushroom Version

Sauté sliced mushrooms with garlic before adding them to the spinach mixture.

Make sure the mushrooms are cooked until their excess moisture evaporates.

This creates a savory variation with an earthy flavor.

Roasted Pepper Version

Add chopped roasted red peppers for sweetness and color.

The peppers pair particularly well with feta and create a vibrant filling.

Spicy Version

Add crushed red pepper flakes to the filling for a gentle kick.

You can also drizzle the finished quesadillas with chili oil.

These variations make Feta and Spinach Greek Style Quesadillas easy to adapt depending on the ingredients available in your kitchen.

Storage Instructions

Refrigerator Storage

Allow leftover quesadillas to cool completely before placing them in an airtight container.

Store them in the refrigerator for up to three days.

Place parchment paper between layers if you are stacking several quesadillas.

Reheating Instructions

For the crispiest result, reheat the quesadillas in a dry skillet over medium-low heat.

Cook for two to three minutes per side until warm and crisp again.

An air fryer also works well. Heat at approximately 350°F or 175°C until the tortilla becomes crisp and the filling is warmed through.

Avoid microwaving when possible because it can make the tortilla soft.

Make-Ahead Instructions

Prepare the Filling Ahead

The spinach and feta filling can be prepared several hours ahead and stored in the refrigerator.

When ready to cook, assemble the tortillas and toast them fresh.

This makes Feta and Spinach Greek Style Quesadillas convenient for busy lunches and quick dinners.

You can also prepare the filling the night before and keep it refrigerated in a covered container.

Frequently Asked Questions

Can I use frozen spinach

Yes. Frozen spinach works well, but thaw it completely and squeeze out as much liquid as possible before adding it to the filling.

This is especially important for Feta and Spinach Greek Style Quesadillas because excess water can prevent the tortillas from becoming crisp.

Can I make these without mozzarella

Yes. Feta can be used on its own, although mozzarella provides extra melting quality.

You can also use a mild melting cheese such as Monterey Jack or provolone.

Can I use corn tortillas

Yes, although flour tortillas are generally easier to fold and crisp for this recipe.

If using corn tortillas, warm them slightly first so they do not crack.

Can I make these gluten-free

Yes. Simply use your favorite gluten-free tortillas.

Check the labels on all packaged ingredients to ensure they meet your dietary requirements.

Can I add chicken

Absolutely. Add cooked shredded chicken for a higher-protein version.

Season the chicken with oregano, garlic, lemon, and black pepper before mixing it with the spinach and feta.

Can I make them vegetarian

Yes. The basic recipe is vegetarian as written, provided the cheeses and tortillas you choose fit your dietary preferences.

Nutrition Information

Approximate Nutrition Per Serving

Calories: 430 kcal

Protein: 18g

Carbohydrates: 40g

Fat: 23g

Saturated Fat: 9g

Fiber: 4g

Sugar: 3g

Sodium: 780mg

Nutrition values are approximate and can vary depending on tortilla size, cheese brands, and optional ingredients.

Final Thoughts

These Feta and Spinach Greek Style Quesadillas are an easy way to bring Greek-inspired flavors into a familiar and comforting meal. Crispy tortillas surround a warm filling of spinach, salty feta, mozzarella, garlic, herbs, and lemon.

The combination of textures makes every bite satisfying. The tortilla becomes crisp and golden, while the spinach and cheese filling stays soft and creamy.

For an even more Mediterranean presentation, serve the Feta and Spinach Greek Style Quesadillas with tzatziki, Greek yogurt, fresh lemon, olives, and a colorful salad.

They are also flexible enough for meal preparation. Make the filling ahead, store it in the refrigerator, and cook the quesadillas fresh whenever you need a quick meal.

Whether served for lunch, dinner, or a casual snack, these Feta and Spinach Greek Style Quesadillas offer a delicious combination of Greek flavors with the familiar comfort of a crispy quesadilla.

With simple ingredients, quick preparation, and plenty of room for customization, this recipe is an easy addition to a Mediterranean-inspired weekly meal plan.

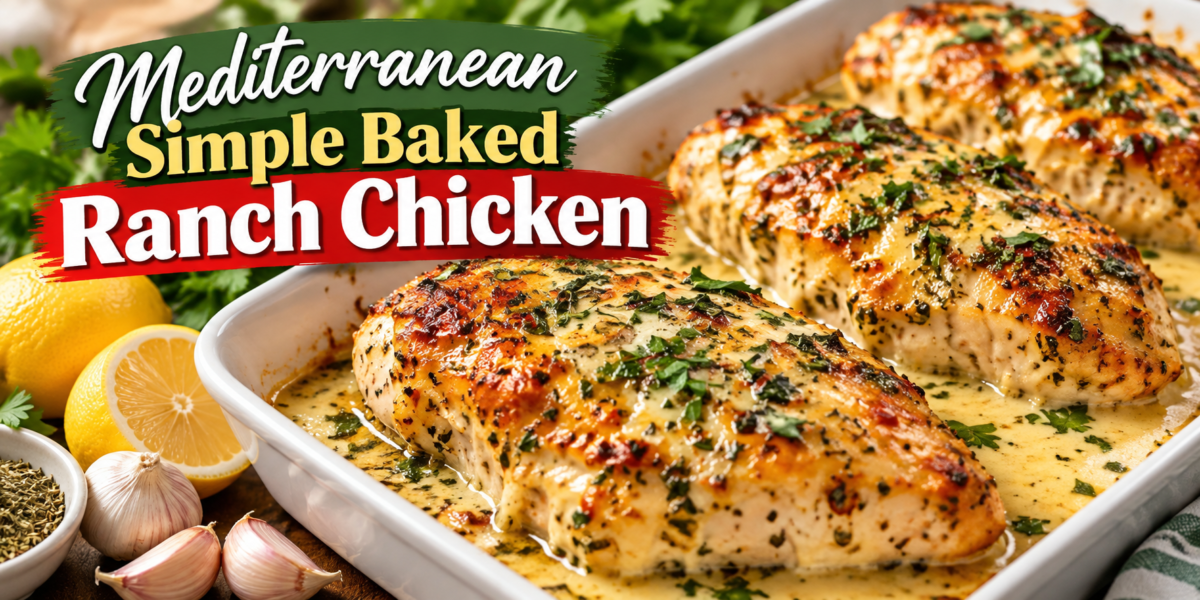
Mediterranean Simple Baked Ranch Chicken

Mediterranean Simple Baked Ranch Chicken with garlic, lemon, herbs, and creamy ranch seasoning

Mediterranean Simple Baked Ranch Chicken

This Mediterranean Simple Baked Ranch Chicken is an easy oven-baked dinner that combines juicy chicken breasts with creamy ranch seasoning, garlic, lemon, olive oil, and Mediterranean herbs. The chicken develops a golden, flavorful coating while staying tender inside, making it a practical meal for busy weeknights.

The recipe uses familiar ingredients but gives them a fresh Mediterranean-style twist. The Mediterranean Simple Baked Ranch Chicken is seasoned with ranch seasoning, oregano, garlic, paprika, lemon, and extra virgin olive oil. A small amount of Greek yogurt helps the seasoning cling to the chicken and keeps the surface moist while it bakes.

The result is flavorful enough to serve for guests but simple enough to prepare for a regular family dinner. This Mediterranean Simple Baked Ranch Chicken can be paired with roasted vegetables, rice, potatoes, couscous, salad, or warm pita.

Prep Time: 10 minutes

Marinating Time: 20 minutes

Cook Time: 25 minutes

Total Time: 55 minutes

Servings: 4

Ingredients

For the Chicken

4 boneless, skinless chicken breasts

2 tablespoons extra virgin olive oil

3 tablespoons plain Greek yogurt

2 tablespoons ranch seasoning

3 garlic cloves, finely minced

1 teaspoon dried oregano

1 teaspoon smoked paprika

½ teaspoon dried thyme

½ teaspoon sea salt

½ teaspoon black pepper

1 tablespoon fresh lemon juice

1 teaspoon lemon zest

2 tablespoons fresh parsley, chopped

For the Optional Lemon Herb Finish

1 tablespoon extra virgin olive oil

1 tablespoon fresh lemon juice

1 tablespoon fresh parsley, chopped

1 tablespoon fresh basil, chopped

¼ teaspoon black pepper

Instructions

Prepare the Chicken

Start by patting the chicken breasts dry with paper towels. Removing excess moisture helps the seasoning adhere better and encourages the outside to become golden while baking.

If the chicken breasts are very thick, place them between two pieces of parchment paper and gently pound them until they have a more even thickness. This step is useful because evenly sized chicken breasts cook at a similar rate and are less likely to become dry.

Place the chicken in a large bowl or shallow baking dish. Add the olive oil, Greek yogurt, ranch seasoning, minced garlic, oregano, smoked paprika, thyme, salt, black pepper, lemon juice, and lemon zest.

Use clean hands or tongs to coat each chicken breast thoroughly. Make sure the seasoning mixture reaches all sides of the chicken.

For the best flavor, let the chicken rest for about 20 minutes. If you have more time, cover it and refrigerate it for up to several hours.

This short marinating period allows the Mediterranean Simple Baked Ranch Chicken to absorb the garlic, herbs, lemon, and ranch seasoning before it goes into the oven.

Prepare the Baking Dish

Preheat the oven to 400°F or 200°C.

Lightly grease a baking dish with a little extra virgin olive oil. Arrange the seasoned chicken breasts in a single layer, leaving a small amount of space between each piece.

Avoid overcrowding the dish. Space around the chicken allows hot air to circulate and helps the surface brown more evenly.

Spoon any remaining seasoning mixture from the bowl over the chicken. This adds extra flavor and helps create a delicious coating as the chicken bakes.

Bake the Chicken

Place the baking dish in the preheated oven.

Bake for approximately 22 to 28 minutes, depending on the thickness of the chicken breasts. Thicker pieces may need additional cooking time, while smaller pieces may finish sooner.

The Mediterranean Simple Baked Ranch Chicken should develop a golden surface and remain juicy inside. The safest way to check doneness is with an instant-read thermometer inserted into the thickest part of the chicken. It should reach 165°F or 74°C.

Avoid repeatedly cutting the chicken open to check whether it is done because this can release juices and make the meat drier.

Once cooked, remove the dish from the oven and let the chicken rest for five minutes. This short resting period allows the juices to redistribute throughout the meat.

Make the Lemon Herb Finish

While the chicken rests, combine the olive oil, lemon juice, parsley, basil, and black pepper in a small bowl.

Whisk everything together until combined.

Taste the mixture and add a tiny pinch of salt if needed. The lemon herb mixture should taste fresh and bright.

Drizzle it lightly over the warm chicken just before serving. The fresh herbs and lemon provide a pleasant contrast to the savory ranch seasoning.

This fresh topping gives the Mediterranean Simple Baked Ranch Chicken an extra layer of brightness and makes the finished dish even more flavorful.

Tips for Juicy Baked Chicken

Choose Similar-Sized Chicken Breasts

Try to use chicken breasts that are similar in thickness. If one piece is much thicker than the others, it may require more time in the oven.

Pounding thicker pieces to an even thickness is one of the easiest ways to improve consistency.

Do Not Skip the Resting Time

Allowing the seasoned chicken to rest before baking gives the herbs, garlic, ranch seasoning, and lemon time to flavor the surface.

Even a short 20-minute rest can make the seasoning taste more balanced.

Use a Thermometer

Oven temperatures and chicken breast sizes can vary, so cooking time should be treated as a guide.

An instant-read thermometer gives you a more reliable way to know when the chicken is safely cooked.

Let the Chicken Rest After Baking

Once the chicken reaches the correct internal temperature, let it rest for about five minutes.

Cutting into the chicken immediately can release some of the juices. Resting helps keep the meat moist and tender.

These simple steps help the Mediterranean Simple Baked Ranch Chicken stay juicy while developing a flavorful golden exterior.

How the Mediterranean Flavors Work

Ranch and Mediterranean Herbs

Ranch seasoning gives the chicken a familiar savory flavor, while oregano, thyme, garlic, parsley, basil, olive oil, and lemon create a Mediterranean-inspired profile.

The combination works especially well because the creamy yogurt coating softens the stronger seasonings and helps them form a flavorful crust.

Lemon Adds Freshness

Lemon juice and zest are important in this recipe because they brighten the rich savory flavors.

The acidity also pairs naturally with chicken, herbs, and olive oil.

For a stronger lemon flavor, add extra zest to the seasoning mixture or serve additional lemon wedges at the table.

Serving Suggestions

With Roasted Vegetables

Serve the Mediterranean Simple Baked Ranch Chicken with roasted zucchini, bell peppers, broccoli, cherry tomatoes, or eggplant.

Toss the vegetables with olive oil, oregano, garlic, salt, and pepper before roasting until tender and lightly browned.

With Rice or Couscous

Fluffy rice, lemon herb rice, or couscous makes an easy side.

Spoon some of the juices from the baking dish over the rice before serving for extra flavor.

With Potatoes

Roasted baby potatoes or crispy smashed potatoes are another excellent pairing.

Season the potatoes with oregano, garlic, paprika, olive oil, and black pepper to keep the Mediterranean flavor consistent.

With Fresh Salad

A simple cucumber and tomato salad adds freshness to the meal.

Combine cucumber, tomatoes, red onion, parsley, lemon juice, and olive oil for a quick side that balances the warm baked chicken.

With Warm Pita

Warm pita bread is perfect for turning the chicken into a casual Mediterranean-style meal.

Slice the chicken and serve it with pita, cucumber, tomatoes, lettuce, and a spoonful of Greek yogurt or hummus.

Recipe Variations

Creamy Garlic Version

For a richer variation, mix one extra tablespoon of Greek yogurt with a teaspoon of minced garlic and a little lemon zest.

Spread a thin layer over the chicken before baking.

This creates an especially flavorful coating while keeping the chicken moist.

Spicy Version

Add ½ teaspoon of crushed red pepper flakes or a pinch of cayenne pepper to the seasoning mixture.

The heat works well with ranch seasoning, garlic, lemon, and smoked paprika.

Feta and Herb Version

After baking, sprinkle crumbled feta over the chicken and finish with fresh parsley.

The salty feta adds another Mediterranean element and pairs beautifully with the lemon.

Vegetable Tray Version

For a convenient one-pan dinner, arrange sliced zucchini, bell peppers, red onion, and cherry tomatoes around the chicken.

Toss the vegetables with olive oil and herbs before baking. Make sure the chicken still has enough space around it for even cooking.

These variations make the Mediterranean Simple Baked Ranch Chicken easy to customize based on the ingredients you already have.

Storage Instructions

Refrigerator Storage

Allow leftover Mediterranean Simple Baked Ranch Chicken to cool slightly before transferring it to an airtight container.

Store it in the refrigerator for up to three days.

Keep any fresh lemon herb topping in a separate small container if possible. Add it after reheating for a fresher flavor.

Reheating Instructions

Place the chicken in a covered skillet or baking dish with a small splash of chicken broth or water.

Reheat gently until warmed through.

Avoid using very high heat because chicken breast can become dry when reheated too aggressively.

You can also slice the leftover chicken and add it to salads, wraps, pita sandwiches, or rice bowls.

Make-Ahead Instructions

Prepare Before Baking

The chicken can be seasoned several hours before cooking.

Place the coated chicken in a covered container and refrigerate until you are ready to bake.

Take it out of the refrigerator while the oven preheats, but do not leave raw chicken at room temperature for an extended period.

The lemon herb topping can also be prepared ahead and refrigerated separately.

Easy Weeknight Preparation

For an especially easy dinner, prepare the seasoning mixture in the morning or the night before.

When dinner time arrives, place the chicken in the baking dish and bake it while preparing a salad or side dish.

This makes Mediterranean Simple Baked Ranch Chicken useful for busy evenings when you want a flavorful homemade meal without spending a long time at the stove.

Frequently Asked Questions

Can I use chicken thighs instead of chicken breasts

Yes. Boneless, skinless chicken thighs work very well and usually remain naturally juicy.

Because thighs vary in size, check the internal temperature rather than relying only on the suggested cooking time.

Can I use homemade ranch seasoning

Absolutely. A homemade mixture of dried parsley, garlic powder, onion powder, dried dill, black pepper, and a little salt can replace packaged ranch seasoning.

Adjust the amount according to your preferred flavor.

Can I use regular yogurt instead of Greek yogurt

Yes. Plain yogurt can be used, although Greek yogurt is thicker and creates a better coating.

If your yogurt is very thin, use slightly less so the seasoning mixture does not become watery.

Can I prepare this recipe without yogurt

Yes. Replace the yogurt with a little extra olive oil and lemon juice.

The chicken will still be flavorful, although the coating will be slightly less creamy.

Can I add cheese before baking

Yes. A small amount of Parmesan or feta can be added during the final few minutes of baking.

Avoid adding a large amount too early because it can brown before the chicken is fully cooked.

How do I keep baked chicken moist

Use evenly sized chicken breasts, avoid overcooking, and allow the meat to rest after baking.

A yogurt-based marinade also helps provide moisture and flavor.

Nutrition Information

Approximate Nutrition Per Serving

Calories: 390 kcal

Protein: 49g

Carbohydrates: 7g

Fat: 18g

Saturated Fat: 3g

Fiber: 1g

Sugar: 2g

Sodium: 720mg

These values are approximate and can vary depending on the size of the chicken breasts and the brand of ranch seasoning used.

Final Thoughts

This Mediterranean Simple Baked Ranch Chicken is a practical recipe for anyone who wants juicy oven-baked chicken with bold flavor and minimal effort. The combination of ranch seasoning, garlic, oregano, thyme, paprika, lemon, olive oil, and Greek yogurt creates a flavorful coating that becomes beautifully golden in the oven.

The recipe is flexible enough to serve with many different sides. Add roasted vegetables for a lighter dinner, rice or couscous for a filling meal, or warm pita and salad for a Mediterranean-inspired plate.

The fresh lemon herb finish is optional, but it adds a bright flavor that complements the savory chicken. Fresh parsley and basil also make the finished dish look colorful and inviting.

For the best results, use an instant-read thermometer to prevent overcooking, allow the chicken to rest before slicing, and serve it while warm.

Whether you prepare it for a quick family dinner or make it ahead for lunches, this Mediterranean Simple Baked Ranch Chicken offers a simple way to enjoy tender, flavorful chicken with fresh Mediterranean-inspired ingredients.

Mediterranean Garlicky Chicken Meatballs in Lemon Herb Sauce

Mediterranean Garlicky Chicken Meatballs in Lemon Herb Sauce with mushrooms and fresh parsley

Mediterranean Garlicky Chicken Meatballs in Lemon Herb Sauce

These Mediterranean Garlicky Chicken Meatballs in Lemon Herb Sauce are tender, juicy, and packed with fresh Mediterranean flavors. Golden-browned chicken meatballs are gently simmered in a creamy lemon herb sauce with garlic, mushrooms, parsley, oregano, and Parmesan. The result is a comforting one-pan meal that feels rich and satisfying while still tasting fresh and bright.

The chicken meatballs are made with ground chicken, garlic, herbs, Parmesan, breadcrumbs, and a few simple seasonings. They are pan-seared until beautifully golden on the outside, which adds extra flavor before they finish cooking in the sauce.

The lemon herb sauce is what brings everything together. Fresh lemon juice and zest add brightness, while garlic, chicken broth, cream, and herbs create a smooth and savory base. Sliced mushrooms add earthy flavor and a wonderful texture to every serving.

These meatballs are perfect for a family dinner, weekend meal, or casual gathering. Serve them with warm pita, rice, roasted vegetables, mashed potatoes, pasta, or a simple Mediterranean salad for a complete meal. These Mediterranean Garlicky Chicken Meatballs are an easy way to bring fresh Mediterranean flavors to the dinner table.

Prep Time: 20 minutes

Cook Time: 30 minutes

Total Time: 50 minutes

Servings: 4

Ingredients

For the Chicken Meatballs

1 pound ground chicken

½ cup plain breadcrumbs

¼ cup freshly grated Parmesan cheese

1 large egg

4 garlic cloves, finely minced

2 tablespoons fresh parsley, finely chopped

1 tablespoon fresh oregano, chopped, or 1 teaspoon dried oregano

1 teaspoon smoked paprika

½ teaspoon onion powder

½ teaspoon sea salt

¼ teaspoon black pepper

1 tablespoon extra virgin olive oil

For the Lemon Herb Sauce

2 tablespoons extra virgin olive oil

8 ounces mushrooms, sliced

3 garlic cloves, finely minced

1 cup low-sodium chicken broth

½ cup heavy cream

¼ cup freshly grated Parmesan cheese

2 tablespoons fresh lemon juice

1 teaspoon lemon zest

1 teaspoon dried oregano

½ teaspoon dried thyme

½ teaspoon sea salt

¼ teaspoon black pepper

2 tablespoons fresh parsley, chopped

1 tablespoon fresh basil, chopped

For Garnishing

Fresh parsley

Fresh basil

Lemon slices

Extra Parmesan cheese

Freshly cracked black pepper

A small drizzle of extra virgin olive oil

Instructions

Prepare the Chicken Meatball Mixture

Begin by placing the ground chicken in a large mixing bowl. Add the breadcrumbs, Parmesan cheese, egg, minced garlic, fresh parsley, oregano, smoked paprika, onion powder, sea salt, and black pepper.

Gently mix everything together using clean hands or a wooden spoon. Avoid overmixing because working the chicken too much can make the meatballs dense instead of tender.

The mixture should hold together when pressed but should still feel soft and moist. If it feels unusually wet, allow it to rest for a few minutes so the breadcrumbs can absorb some moisture.

Lightly coat your hands with a little olive oil or water. Shape the mixture into small meatballs, approximately one and a half inches wide.

Try to keep the meatballs similar in size so they cook evenly. You should have approximately sixteen to eighteen meatballs depending on their size.

Place the shaped meatballs on a clean plate while you prepare the skillet.

Brown the Chicken Meatballs

Heat one tablespoon of extra virgin olive oil in a large deep skillet over medium heat.

Once the oil is hot, carefully place the chicken meatballs into the skillet. Leave a little space between each piece so they can brown properly.

Cook the meatballs for about two to three minutes on each side, turning them gently with tongs or a spoon.

The goal at this stage is not necessarily to cook them completely through. Instead, develop a golden-brown crust on the outside. This browning creates deeper flavor and helps the meatballs hold their shape while finishing in the sauce.

Once browned on several sides, transfer the meatballs to a clean plate.

Do not worry if they are still slightly undercooked in the center because they will finish cooking later in the lemon herb sauce. Browning gives these Mediterranean Garlicky Chicken Meatballs a flavorful golden crust before they finish cooking in the sauce.

Cook the Mushrooms

Using the same skillet, add two tablespoons of extra virgin olive oil if the pan looks dry.

Add the sliced mushrooms in a single layer.

Cook the mushrooms for about four to five minutes, stirring occasionally. Allow them to release their moisture and develop golden edges.

Once the mushrooms are lightly browned, add the minced garlic.

Cook the garlic for about thirty to sixty seconds until fragrant. Keep the heat moderate so the garlic does not burn.

The combination of browned mushrooms and garlic creates a savory foundation for the sauce.

Make the Lemon Herb Sauce

Reduce the heat slightly and pour the chicken broth into the skillet.

Use a wooden spoon to gently scrape the bottom of the pan. Those browned bits contain concentrated flavor from the chicken and mushrooms.

Add the heavy cream and stir gently until the broth and cream are combined.

Add the Parmesan cheese, lemon juice, lemon zest, oregano, thyme, sea salt, and black pepper.

Stir the sauce and allow it to come to a gentle simmer.

Do not let the sauce boil aggressively. A gentle simmer allows the cream and cheese to combine smoothly while keeping the sauce rich and silky.

Taste the sauce at this stage. If you prefer a stronger lemon flavor, add another teaspoon of lemon juice. If you want more herb flavor, add a little extra oregano or fresh parsley. The bright lemon herb sauce makes these Mediterranean Garlicky Chicken Meatballs especially flavorful and tender.

Return the Meatballs to the Skillet

Once the lemon herb sauce begins to gently thicken, carefully return the browned chicken meatballs to the skillet.

Arrange them so they are partially surrounded by the sauce and mushrooms.

Cover the skillet loosely with a lid and allow the meatballs to simmer over low to medium-low heat for approximately eight to ten minutes.

Turn the meatballs once halfway through cooking so they absorb the sauce evenly.

The chicken meatballs should be fully cooked in the center. If you use a food thermometer, ground chicken should reach an internal temperature of 165°F or 74°C.

Once cooked, remove the lid and allow the sauce to simmer uncovered for another two to three minutes.

This final step helps the sauce become slightly thicker and allows the flavors to come together. Allow the Mediterranean Garlicky Chicken Meatballs to simmer gently so they absorb the creamy lemon herb sauce.

Finish with Fresh Herbs

Turn off the heat and add the fresh parsley and basil.

Stir gently so the herbs become incorporated into the warm sauce without losing their fresh flavor.

Taste the sauce one final time and adjust the seasoning if needed.

Add freshly cracked black pepper and another small squeeze of lemon juice if desired.

The finished sauce should be creamy, savory, slightly tangy, and full of garlic and herb flavor.

Tips for Tender Chicken Meatballs

Do Not Overmix the Chicken

The most important tip for tender meatballs is to avoid overworking the mixture.

Mix the ingredients only until everything is evenly combined. Excessive mixing can make the chicken mixture firm and dense.

Keep the Meatballs Similar in Size

Even-sized meatballs cook more evenly.

If some meatballs are much larger than others, the smaller pieces may become overcooked before the larger ones are finished.

Brown Before Simmering

Pan-searing the meatballs before adding them to the sauce creates a golden exterior and adds a deeper savory flavor.

The meatballs do not need to be fully cooked during the browning stage.

Use Fresh Lemon

Fresh lemon juice and zest give the sauce a brighter flavor than bottled lemon juice.

Add the lemon gradually and taste as you go because the strength of lemons can vary. These Mediterranean Garlicky Chicken Meatballs stay tender when the mixture is handled gently and cooked at the right temperature.

How to Make the Sauce Creamier

Use Parmesan Carefully

Freshly grated Parmesan melts beautifully into the warm sauce and gives it a savory depth.

Add the Parmesan gradually while stirring to prevent clumping.

If the sauce becomes thicker than you want, add a small splash of chicken broth.

Adjust the Consistency

For a thicker sauce, simmer it uncovered for a few extra minutes.

For a thinner sauce, add a little chicken broth or cream.

Remember that the sauce will continue to thicken slightly as it cools.

Serving Suggestions

Serve with Warm Pita

Warm pita bread is an excellent choice because it can be used to scoop up the creamy lemon herb sauce.

Add a simple cucumber and tomato salad on the side for a fresh Mediterranean-style meal.

Serve with Rice

Fluffy white rice, brown rice, or lemon herb rice works beautifully with these meatballs.

The rice absorbs the sauce and turns the dish into a satisfying complete meal.

Serve with Pasta

For a comforting dinner, spoon the chicken meatballs and lemon herb sauce over cooked pasta.

Short pasta shapes such as penne or rigatoni work particularly well because the sauce can settle into the pasta.

Serve with Roasted Vegetables

Roasted zucchini, bell peppers, broccoli, asparagus, or potatoes provide a delicious vegetable side.

Season the vegetables with olive oil, oregano, garlic, salt, and pepper before roasting.

Recipe Variations

Spinach Chicken Meatballs

Add a handful of finely chopped fresh spinach to the meatball mixture.

The spinach adds color and extra moisture while keeping the meatballs tender.

Feta Version

Replace part of the Parmesan in the meatballs with crumbled feta.

You can also sprinkle additional feta over the finished dish for a stronger Mediterranean flavor.

Tomato Herb Version

For a lighter sauce, replace some of the cream with crushed tomatoes.

Add oregano, basil, garlic, and a pinch of red pepper flakes for a tomato-based Mediterranean variation.

Spicy Version

Add crushed red pepper flakes to the meatball mixture and another pinch to the lemon herb sauce.

A small amount provides warmth without overpowering the fresh lemon and herbs.

Storage Instructions

Refrigerator Storage

Allow the meatballs and sauce to cool slightly before transferring them to an airtight container.

Store leftovers in the refrigerator for up to three days.

Keep the meatballs together with the sauce so they remain moist during storage.

Reheating Instructions

Place the meatballs and sauce in a skillet over low heat.

Add a small splash of chicken broth, cream, or water if the sauce has become too thick.

Cover the skillet and heat gently until the meatballs are warmed through.

Avoid high heat because cream-based sauces can separate when overheated.

Freezing Instructions

Freeze the Meatballs

The cooked chicken meatballs can be frozen with or without the sauce.

Allow them to cool completely before placing them in a freezer-safe container.

Freeze for up to two months for the best quality.

Thaw overnight in the refrigerator before reheating gently in a skillet with a little sauce or broth. Leftover Mediterranean Garlicky Chicken Meatballs can be stored with the sauce to help keep them moist.

Frequently Asked Questions

Can I use ground turkey instead of chicken

Yes. Ground turkey can be used instead of ground chicken.

Choose ground turkey with moderate fat content for the most tender result.

Can I make the meatballs without breadcrumbs

Yes. You can use almond flour, crushed oats, or a small amount of cooked quinoa instead.

The texture may be slightly different, but the meatballs can still hold together well.

Can I use milk instead of heavy cream

Yes. Milk will create a lighter sauce, although it will not be as rich.

For a creamier result, combine milk with a small amount of cream cheese or Parmesan.

Can I add more vegetables

Absolutely. Spinach, zucchini, bell peppers, broccoli, peas, and sun-dried tomatoes all pair nicely with the lemon herb sauce.

How do I know when chicken meatballs are cooked

The safest method is to check the center with a food thermometer. Ground chicken should reach 165°F or 74°C.

These Mediterranean Garlicky Chicken Meatballs can easily be customized with spinach, feta, vegetables, or extra herbs.

Nutrition Information

Approximate Nutrition Per Serving

Calories: 510 kcal

Protein: 34g

Carbohydrates: 20g

Fat: 32g

Saturated Fat: 12g

Fiber: 2g

Sugar: 4g

Sodium: 760mg

Nutrition values are approximate and may vary depending on the specific ingredients and brands used.

Final Thoughts

These Mediterranean Garlicky Chicken Meatballs in Lemon Herb Sauce are a comforting and flavorful way to turn simple ingredients into an impressive family meal. The tender chicken meatballs develop a golden crust before simmering gently in a creamy sauce filled with garlic, mushrooms, lemon, Parmesan, and fresh herbs.

The bright lemon balances the richness of the sauce, while parsley, basil, oregano, and thyme add layers of Mediterranean flavor. Mushrooms provide an earthy element that works especially well with the tender chicken. These Mediterranean Garlicky Chicken Meatballs are a flavorful choice for an easy family dinner.

Serve the meatballs with warm pita, rice, pasta, roasted vegetables, or a crisp Mediterranean salad. For the best flavor, spoon plenty of the lemon herb sauce over each serving and finish with fresh parsley, basil, Parmesan, and a squeeze of lemon.

This recipe is also easy to customize, making it useful for both weeknight dinners and relaxed weekend meals. Whether you add spinach, feta, vegetables, or a little chili heat, the creamy lemon herb sauce gives the dish a bright and satisfying finish.

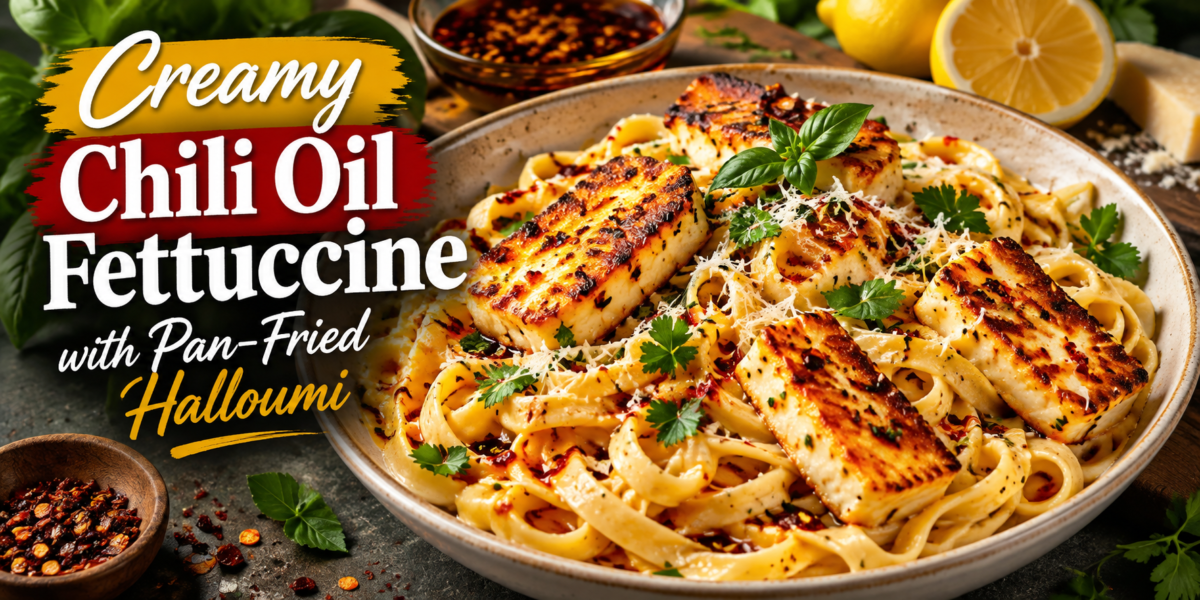
Creamy Chili Oil Fettuccine with Pan-Fried Halloumi

Creamy Chili Oil Fettuccine with pan-fried halloumi, Parmesan, fresh herbs, lemon, and chili oil

Creamy Chili Oil Fettuccine with Pan-Fried Halloumi

This Creamy Chili Oil Fettuccine is a rich and comforting pasta dish made with silky fettuccine, fragrant garlic, spicy chili oil, Parmesan cheese, fresh lemon, and golden pan-fried halloumi. The combination of creamy pasta and crispy-edged halloumi creates a delicious contrast of textures, while lemon and fresh herbs keep the dish bright and balanced.

The halloumi is cooked separately until golden brown, giving it a slightly crisp outside and pleasantly chewy center. Its salty flavor works beautifully with the creamy sauce and gentle heat from the chili oil. Meanwhile, the fettuccine absorbs the flavorful sauce, creating a smooth coating that clings to every strand.

This Creamy Chili Oil Fettuccine is easy enough for a busy weeknight but has enough flavor and presentation appeal for a weekend dinner. You can serve it on its own with a fresh salad or add roasted vegetables, chicken, shrimp, or spinach for a more complete meal. This Creamy Chili Oil Fettuccine is an easy choice for a flavorful weeknight dinner.

Prep Time: 15 minutes

Cook Time: 25 minutes

Total Time: 40 minutes

Servings: 4

Ingredients

For the Fettuccine

12 ounces fettuccine

1 tablespoon salt for the pasta water

½ cup reserved pasta water

For the Chili Oil Sauce

3 tablespoons extra virgin olive oil

2 tablespoons chili oil

3 garlic cloves, finely minced

1 teaspoon crushed red pepper flakes

½ teaspoon smoked paprika

½ teaspoon dried oregano

¼ teaspoon black pepper

For the Creamy Sauce

¾ cup heavy cream

½ cup freshly grated Parmesan cheese

2 tablespoons cream cheese

1 tablespoon fresh lemon juice

1 teaspoon lemon zest

½ teaspoon sea salt

¼ teaspoon black pepper

For the Pan-Fried Halloumi

8 ounces halloumi cheese

1 tablespoon extra virgin olive oil

½ teaspoon dried oregano

¼ teaspoon black pepper

For Garnishing

Fresh parsley, chopped

Fresh basil leaves

Extra Parmesan cheese

Crushed red pepper flakes

Fresh lemon wedges

Extra chili oil

Instructions

Prepare the Halloumi

Begin by preparing the halloumi because it is best served warm and golden. Remove the cheese from its packaging and pat it completely dry with paper towels. Removing excess moisture helps the halloumi develop a better crust when it touches the hot skillet.

Cut the halloumi into medium slices or bite-sized cubes. Try to keep the pieces similar in thickness so they cook evenly.

Heat a large nonstick skillet over medium heat and add one tablespoon of extra virgin olive oil. Once the oil is warm, carefully arrange the halloumi in a single layer.

Cook the halloumi for about two to three minutes on the first side. Leave it undisturbed while it cooks so the surface can develop a deep golden color. Turn each piece carefully and cook for another two minutes.

Once both sides are golden, sprinkle the halloumi with dried oregano and black pepper. Transfer it to a plate and keep it nearby while preparing the pasta.

Do not overcook the cheese because halloumi can become very firm and chewy when left over high heat for too long. This Creamy Chili Oil Fettuccine starts with golden halloumi for a delicious salty contrast.

Cook the Fettuccine

Prepare the Pasta Water

Bring a large pot of water to a strong boil. Add the salt and then carefully place the fettuccine into the boiling water.

Stir the pasta during the first minute to prevent the strands from sticking together. Continue cooking according to the package directions until the fettuccine is al dente.

Before draining, reserve about half a cup of the pasta cooking water. This water contains starch released from the pasta and is extremely useful for creating a smooth sauce.

Drain the fettuccine but do not rinse it. Keeping the natural starch on the pasta helps the creamy sauce cling to the noodles.

Set the cooked fettuccine aside while you prepare the chili oil sauce. The pasta water helps make the Creamy Chili Oil Fettuccine smooth and silky.

Prepare the Chili Oil

Build the Flavor Base

Use the same skillet that was used to cook the halloumi. The small golden pieces left behind can add extra flavor to the sauce.

Add the extra virgin olive oil and chili oil to the skillet. Warm the mixture over medium-low heat.

Add the minced garlic and cook gently for about thirty to sixty seconds. The garlic should become fragrant and lightly softened but should not become dark brown.

Add the crushed red pepper flakes, smoked paprika, dried oregano, and black pepper. Stir gently so the spices become coated in the warm oil.

Allow the mixture to cook for another thirty seconds. This helps release the aroma of the dried spices and gives the oil a deeper flavor.

Keep the heat moderate throughout this step. Burnt garlic can become bitter and overpower the creamy sauce. This flavorful chili oil gives the Creamy Chili Oil Fettuccine its signature spicy garlic flavor.

Make the Creamy Sauce

Combine the Cream and Cheese

Reduce the heat to low before adding the heavy cream. Slowly pour the cream into the seasoned chili oil while stirring continuously.

Add the cream cheese and whisk gently until it melts into the cream. Let the mixture simmer softly for two to three minutes.

Avoid boiling the sauce aggressively because high heat can cause the dairy ingredients to separate.

Gradually add the freshly grated Parmesan cheese while stirring. Continue mixing until the cheese melts and the sauce becomes smooth and slightly thick.

Add the fresh lemon juice and lemon zest. The citrus flavor is important because it cuts through the richness of the cream and cheese while adding freshness.

Season with sea salt and black pepper. Taste the sauce before adding additional salt because both Parmesan and halloumi already have a naturally salty flavor.

At this stage, the sauce should be creamy, smooth, fragrant, and lightly spicy. A gentle cooking temperature keeps the Creamy Chili Oil Fettuccine sauce creamy and smooth.

Combine the Pasta and Sauce

Create a Silky Finish

Add the cooked fettuccine directly to the skillet containing the creamy chili sauce.

Use kitchen tongs to gently toss the noodles through the sauce. Continue tossing until the sauce coats every strand.

If the sauce appears too thick, add one tablespoon of reserved pasta water at a time. Keep tossing after each addition until the desired consistency is reached.

The goal is a glossy sauce that clings naturally to the fettuccine without becoming watery.

Continue tossing the pasta over low heat for about one to two minutes. This allows the noodles to absorb some of the sauce and brings all the flavors together.

Taste the pasta again. If you want more brightness, add another small squeeze of lemon juice. If you prefer more heat, add a little extra chili oil or crushed red pepper. Tossing the noodles well ensures every strand of Creamy Chili Oil Fettuccine is coated with sauce.

Finish the Creamy Chili Oil Fettuccine

Add the Golden Halloumi

Divide the Creamy Chili Oil Fettuccine between four serving bowls or transfer it to a large serving platter.

Arrange the warm pan-fried halloumi over the pasta. The golden cheese should sit on top rather than being completely mixed into the sauce so its crisp edges remain noticeable.

Sprinkle fresh parsley and basil over the pasta. Add a little freshly grated Parmesan and a light pinch of crushed red pepper flakes.

Finish with a small drizzle of chili oil and fresh lemon juice.

Serve immediately while the pasta is hot and the halloumi is warm. The combination of creamy noodles, spicy oil, fresh lemon, and golden cheese is best enjoyed right away.

Tips for the Best Results

Use Fresh Parmesan

Freshly grated Parmesan melts more smoothly than many pre-shredded varieties. It creates a creamier sauce and gives the pasta a stronger savory flavor.

Add Parmesan gradually while stirring rather than adding it all at once. This allows the cheese to blend evenly into the cream.

Keep the Garlic Gentle

Garlic should become fragrant and lightly softened. It should not become dark brown.

Cooking the garlic over medium-low heat gives it a sweeter and smoother flavor. If it burns, the bitterness can affect the entire sauce.

Reserve Enough Pasta Water

Always reserve pasta water before draining the fettuccine. Even if your sauce looks perfect initially, the pasta can absorb more liquid as it rests.

A few tablespoons of pasta water can quickly bring the sauce back to a silky consistency.

Balance the Richness

Fresh lemon is one of the most important ingredients in this recipe. Cream, Parmesan, cream cheese, and halloumi are all rich, so lemon juice and zest help balance those flavors.

Add the lemon gradually and taste as you go. These simple tips help you make a smooth and flavorful Creamy Chili Oil Fettuccine every time

Recipe Variations

Creamy Spinach Version

For a vegetable-packed variation, add fresh spinach to the cream sauce just before adding the pasta.

Allow the spinach to wilt completely, then toss in the fettuccine. The spinach adds color and freshness without changing the creamy texture.

Roasted Vegetable Version

Roasted zucchini, bell peppers, cherry tomatoes, mushrooms, or eggplant work beautifully with this recipe.

Toss the vegetables with olive oil, oregano, garlic, salt, and pepper before roasting them until tender and lightly caramelized.

Fold the roasted vegetables into the finished Creamy Chili Oil Fettuccine and top with halloumi.

Chicken Version

For a heartier meal, add grilled chicken breast. Season the chicken with oregano, smoked paprika, garlic, lemon juice, salt, and black pepper.

Cook the chicken until fully done, slice it into thin strips, and arrange it over the pasta before serving.

Shrimp Version

Shrimp is another excellent addition. Cook peeled shrimp in the seasoned skillet until pink and opaque.

Remove the shrimp temporarily, prepare the creamy sauce, and return the shrimp before serving.

The combination of shrimp, lemon, garlic, and chili oil creates a fresh seafood variation. These variations make the Creamy Chili Oil Fettuccine easy to customize for different meals.

Serving Suggestions

Fresh Mediterranean Salad

Serve the pasta with a simple salad made from cucumber, tomatoes, red onion, parsley, olives, lemon juice, and extra virgin olive oil.

The crisp vegetables provide a refreshing contrast to the rich pasta.

Warm Bread

Warm pita, toasted sourdough, or Mediterranean flatbread makes an excellent side dish.

The bread is especially useful for enjoying any creamy sauce left on the plate.

Fresh Lemon

Serve lemon wedges alongside the pasta so everyone can add extra citrus according to taste.

A little fresh lemon juice just before eating can make the creamy sauce taste lighter and brighter. Serve this Creamy Chili Oil Fettuccine with a fresh Mediterranean salad for a balanced meal. A fresh Mediterranean salad pairs beautifully with Creamy Chili Oil Fettuccine.

Storage and Reheating

Refrigerator Storage

Allow leftover pasta to cool slightly before transferring it to an airtight container.

Store the Creamy Chili Oil Fettuccine in the refrigerator for up to three days.

If possible, store the halloumi separately because it reheats better without becoming too firm.

Reheating the Pasta

Place the pasta in a skillet over low heat and add one or two tablespoons of water, milk, or cream.

Stir gently until the sauce becomes smooth again.

Avoid high heat because it can cause the creamy sauce to separate.

Reheat the halloumi separately in a dry skillet for a short time. Place it over the pasta just before serving.

Finish with fresh herbs, lemon, and a small drizzle of chili oil.

Frequently Asked Questions

Can I make the Creamy Chili Oil Fettuccine less spicy

Yes. Reduce the crushed red pepper flakes and use less chili oil. The garlic, Parmesan, lemon, and herbs will still provide plenty of flavor.

Can I use another pasta shape

Yes. Linguine, spaghetti, tagliatelle, or even penne can be used.

Long pasta shapes are particularly good because the creamy sauce coats the noodles beautifully.

Can I replace halloumi

Yes. Firm paneer, grilled feta, or crispy tofu can be used instead.

However, halloumi provides a distinctive salty and chewy texture that makes this pasta especially satisfying.

Can I make the sauce without heavy cream

You can use half-and-half or evaporated milk instead.

For a thicker sauce, add a little extra cream cheese or Parmesan.

Why is my sauce too thick

The pasta may have absorbed too much liquid. Add reserved pasta water one tablespoon at a time while tossing until the sauce becomes smooth and glossy.

Why did my sauce become grainy

High heat can cause dairy-based sauces to separate. Keep the heat low while adding cream and Parmesan and avoid aggressive boiling.

Can I prepare the ingredients ahead of time

Yes. Slice the halloumi, mince the garlic, grate the Parmesan, chop the herbs, and measure the spices several hours ahead.

For the best texture, cook and combine the pasta shortly before serving.

Final Thoughts

This Creamy Chili Oil Fettuccine with pan-fried halloumi combines silky pasta, fragrant garlic, spicy chili oil, creamy Parmesan, fresh lemon, herbs, and golden cheese into one satisfying meal.

The creamy sauce balances the heat from the chili oil, while lemon keeps the dish bright and fresh. Golden halloumi adds a salty contrast and a pleasantly chewy texture that makes every bite more interesting.

The recipe is also easy to customize with spinach, roasted vegetables, chicken, shrimp, or mushrooms. Whether you prepare the classic version or create your own variation, the combination of creamy pasta and spicy garlic oil remains the heart of the dish.

For the best result, serve the Creamy Chili Oil Fettuccine immediately after tossing the pasta with the sauce. Add the halloumi while it is still warm, finish with fresh herbs and lemon, and drizzle a little extra chili oil over the top. This Creamy Chili Oil Fettuccine is also easy to customize for family dinners.

This flavorful Mediterranean-inspired pasta is simple enough for a weeknight dinner while still looking impressive enough for a relaxed weekend meal with family or guests. This Creamy Chili Oil Fettuccine is a flavorful choice for an easy family dinner.