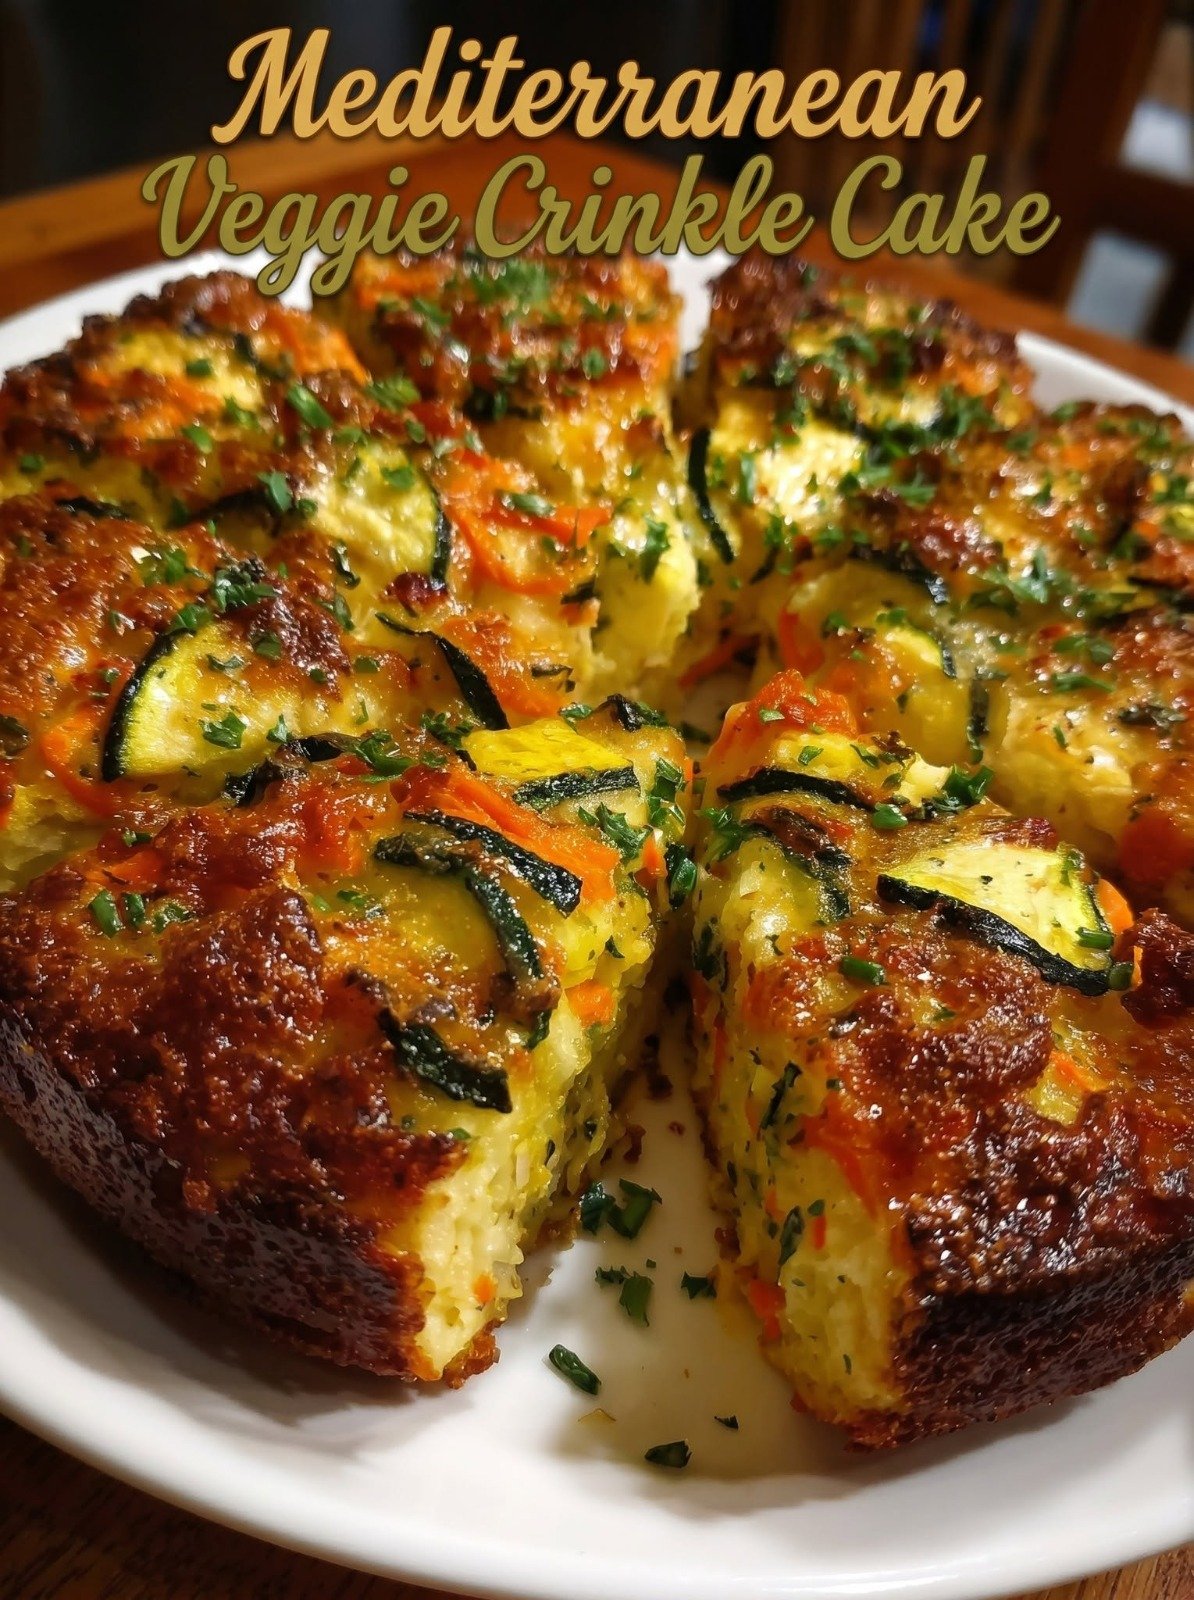
Mediterranean Veggie Crinkle Cake

Veggie Crinkle Cake with zucchini, carrots, bell peppers, feta cheese, herbs, and golden crispy phyllo pastry

Mediterranean Veggie Crinkle Cake

Veggie Crinkle Cake is a savory Mediterranean-inspired bake made with thin phyllo pastry, zucchini, carrots, bell peppers, feta, herbs, eggs, and a creamy custard-style filling. Veggie Crinkle Cake has crisp golden edges, tender vegetables, and a soft cheesy center that makes every slice satisfying.

This recipe works well for brunch, lunch, dinner, or a vegetarian side dish. It looks impressive on the table but uses simple ingredients and an easy layering method.

Prep Time: 25 minutes

Cook Time: 45 minutes
Total Time: About 1 hour 10 minutes
Servings: 8

Ingredients

For the Vegetable Filling

  • 2 medium zucchini, thinly sliced or grated
  • 2 medium carrots, grated
  • 1 red bell pepper, thinly sliced
  • 1 small yellow onion, finely chopped
  • 2 tablespoons olive oil
  • 3 garlic cloves, minced
  • 1 teaspoon dried oregano
  • 1/2 teaspoon dried thyme
  • 1/2 teaspoon smoked paprika
  • 1/2 teaspoon salt
  • 1/4 teaspoon black pepper

For the Crinkle Cake

  • 12 to 14 sheets phyllo pastry, thawed
  • 4 tablespoons melted butter or olive oil
  • 1 cup crumbled feta cheese
  • 1/2 cup shredded mozzarella
  • 1/4 cup grated Parmesan cheese
  • 2 tablespoons chopped fresh parsley
  • 2 tablespoons chopped fresh basil

Ingredients For the Custard

  • 4 large eggs
  • 1 cup milk
  • 1/2 cup plain Greek yogurt
  • 1/2 teaspoon garlic powder
  • 1/2 teaspoon dried oregano
  • 1/4 teaspoon salt
  • 1/4 teaspoon black pepper

For Garnishing

  • Fresh parsley
  • Fresh basil
  • Extra feta
  • Red pepper flakes, optional
  • Lemon zest, optional

Why You’ll Love This Recipe

Veggie Crinkle Cake is crisp, cheesy, colorful, and full of Mediterranean flavor. The phyllo pastry creates flaky layers, while the vegetables keep the center moist and tender.

Another reason to love Veggie Crinkle Cake is its flexibility. You can change the vegetables, cheeses, and herbs depending on what you already have at home.

It is also easy to serve. You can cut it into large wedges for dinner or smaller pieces for brunch, parties, or appetizer platters.

How to Make Veggie Crinkle Cake

Step 1: Preheat the Oven

Preheat the oven to 375°F or 190°C.

Grease a round baking dish, cake pan, or medium casserole dish with butter or olive oil.

Step 2: Prepare the Vegetables

Wash and dry the zucchini, carrots, and bell pepper.

Thinly slice or grate the zucchini. Grate the carrots and slice the bell pepper into narrow strips.

Finely chop the onion.

Step 3: Cook the Onion and Garlic

Heat olive oil in a large skillet over medium heat.

Add the onion and cook for 3 to 4 minutes until soft.

Stir in the garlic and cook for another 30 seconds.

Step 4: Add the Vegetables

Add zucchini, carrots, and bell pepper to the skillet.

Season with oregano, thyme, smoked paprika, salt, and black pepper.

Cook for 5 to 7 minutes, stirring often.

The vegetables should soften slightly but still keep some texture.

Step 5: Remove Extra Moisture

Continue cooking until most of the liquid released by the zucchini has evaporated.

This step is important because too much moisture can make Veggie Crinkle Cake soggy.

Remove the skillet from the heat and let the vegetables cool slightly.

Step 6: Prepare the Phyllo Pastry

Unroll the phyllo pastry carefully.

Cover unused sheets with a clean, slightly damp kitchen towel so they do not dry out while you work.

Take one sheet and brush lightly with melted butter or olive oil.

Step 7: Create the Crinkle Shape

Gently gather the phyllo sheet from one long side to the other, creating loose accordion-style folds.

Place the folded pastry into the prepared baking dish.

Repeat with the remaining sheets, arranging them closely together in a circular or layered pattern.

Do not compress the folds too tightly. Leaving space between the layers helps Veggie Crinkle Cake become crisp and airy.

Step 8: Add the Vegetables

Spoon the cooked vegetable mixture between and over the phyllo folds.

Try to distribute the zucchini, carrots, onions, and peppers evenly throughout the dish.

Step 9: Add the Cheese

Sprinkle feta, mozzarella, Parmesan, parsley, and basil over the vegetables.

Push some of the cheese gently between the pastry folds.

This helps create cheesy pockets throughout the bake.

Step 10: Make the Custard

In a medium bowl, whisk together eggs, milk, Greek yogurt, garlic powder, oregano, salt, and black pepper.

Whisk until smooth and fully combined.

Step 11: Pour in the Custard

Slowly pour the custard over the pastry and vegetables.

Pour gradually so the liquid can settle between the phyllo folds.

Do not completely cover the top edges because exposed pastry becomes crisp and golden.

Step 12: Bake

Place the dish in the preheated oven.

Bake for 35 to 45 minutes, or until the center is set and the top is deeply golden.

Veggie Crinkle Cake is ready when the custard no longer looks wet and the pastry edges are crisp.

Step 13: Rest Before Slicing

Remove the dish from the oven.

Let it rest for about 10 minutes before cutting.

This helps the custard firm up and makes the slices easier to serve.

Step 14: Garnish and Serve

Sprinkle with fresh parsley, basil, feta, or a little lemon zest.

Serve Veggie Crinkle Cake warm or at room temperature.

Serving Suggestions

Veggie Crinkle Cake works beautifully as a vegetarian main course with a crisp green salad, cucumber tomato salad, or roasted vegetables.

You can also serve Veggie Crinkle Cake with lentil soup, tomato soup, hummus, olives, or a simple yogurt sauce.

For brunch, pair it with fresh fruit, boiled eggs, or a light Mediterranean salad.

If you want a crunchy and family-friendly main dish, try these Crispy Chicken Strips with a golden seasoned coating and tender, juicy chicken inside.

Recipe Tips

Do not let phyllo pastry sit uncovered because it dries out quickly.

Brush each sheet lightly rather than soaking it with butter or oil.

Cook the zucchini long enough to remove extra moisture before assembling.

Use vegetables that are cut fairly thin so they cook evenly.

For the best Veggie Crinkle Cake, leave some phyllo edges exposed above the custard. These edges become extra crisp and golden.

Let the cake rest after baking before slicing.

Use feta for tangy flavor, but do not add too much salt because feta and Parmesan are naturally salty.

Easy Variations

Veggie Crinkle Cake can be customized with many different vegetables and cheeses.

Add spinach, mushrooms, roasted red peppers, or chopped artichoke hearts.

To make Veggie Crinkle Cake even more Mediterranean, add sliced olives, sun-dried tomatoes, and extra oregano.

You can replace mozzarella with provolone, Monterey Jack, or goat cheese.

For more heat, add chili flakes, chopped jalapeño, or a pinch of cayenne.

If you want extra protein, add cooked chickpeas or chopped cooked chicken.

For a creamy Mediterranean-inspired dessert, try this Mediterranean Pistachio & Honey Ice Cream (Healthy) made with Greek yogurt, pistachios, honey, vanilla, and a smooth no-churn base.

Make-Ahead Instructions

You can prepare the vegetable filling up to 2 days ahead.

Store it in an airtight container in the refrigerator.

The custard can also be mixed several hours in advance and refrigerated.

For the best texture, assemble Veggie Crinkle Cake shortly before baking so the phyllo stays crisp.

If you must assemble it ahead, refrigerate it for no more than 2 hours before baking.

Storage and Reheating

Store leftover Veggie Crinkle Cake in an airtight container in the refrigerator for up to 3 days.

To reheat, place slices in a 350°F or 175°C oven for 8 to 10 minutes.

An air fryer also works well for restoring crisp edges.

The microwave can be used, but the phyllo will become softer.

Freezing is possible, although the pastry may lose some crispness after thawing.

Nutrition Information

Approximate nutrition per serving:

Calories: 340
Protein: 15 g
Carbohydrates: 30 g
Fat: 19 g
Saturated Fat: 8 g
Fiber: 4 g
Sugar: 6 g
Sodium: 610 mg

Nutrition values are estimates and may vary depending on the phyllo pastry, cheese, vegetables, butter, and serving size.

Frequently Asked Questions

Can I make Veggie Crinkle Cake without feta?

Yes. Goat cheese, ricotta, mozzarella, or a dairy-free alternative can be used instead.

Can I use frozen phyllo pastry?

Yes. Thaw it according to package instructions before using. Keep it covered while assembling so the sheets remain flexible.

Why is my crinkle cake soggy?

The vegetables may have released too much moisture, or too much custard may have been poured over the pastry. Cook watery vegetables well before assembling.

Can I add spinach?

Yes. Cook fresh spinach briefly and squeeze out excess moisture before adding it to the filling.

Can I prepare it without Greek yogurt?

Yes. Replace the yogurt with extra milk or a small amount of cream.

Can I make Veggie Crinkle Cake ahead for brunch?

Yes. Prepare the vegetable filling and custard ahead, then assemble and bake closer to serving time.

What other vegetables work well?

Mushrooms, spinach, broccoli, roasted peppers, artichokes, and finely chopped cauliflower all work well.

Final Thoughts

Veggie Crinkle Cake turns simple vegetables, cheese, eggs, and phyllo pastry into a golden, colorful Mediterranean-inspired meal.

The combination of crisp pastry, tender zucchini, carrots, peppers, feta, herbs, and creamy custard gives Veggie Crinkle Cake plenty of flavor and texture.

Because Veggie Crinkle Cake can be customized with different vegetables and cheeses, it works well for brunch, lunch, dinner, or entertaining.

Keep Veggie Crinkle Cake in your recipe collection whenever you want a savory vegetarian bake that looks impressive but is still easy to prepare.

Golden Sweet Potato Zucchini Rosti Rolls with Feta & Spinach

Sweet Potato Rosti Rolls with zucchini, feta, spinach, melted cheese, sun-dried tomatoes, and fresh herbs

Golden Sweet Potato Zucchini Rosti Rolls with Feta & Spinach

Sweet Potato Rosti Rolls are a colorful, savory bake made with shredded sweet potato, zucchini, eggs, herbs, feta, spinach, and melted cheese. The outside bakes until golden and lightly crisp, while the inside stays soft, cheesy, and full of Mediterranean-style flavor.

This Sweet Potato Rosti Rolls recipe combines naturally sweet vegetables with a creamy spinach and feta filling. The contrast between the crisp vegetable layer and the soft, savory center makes every slice satisfying. They also look impressive when served on a platter, especially with sun-dried tomatoes, fresh herbs, or a spoonful of yogurt sauce.

Prep Time: 25 minutes
Cook Time: 35 minutes
Total Time: About 1 hour
Servings: 6

Ingredients

the Rosti Layer

  • 2 medium sweet potatoes, peeled and coarsely grated
  • 1 medium zucchini, coarsely grated
  • 2 large eggs
  • 1/2 cup shredded mozzarella cheese
  • 1/4 cup grated Parmesan cheese
  • 2 tablespoons all-purpose flour
  • 1 teaspoon garlic powder
  • 1/2 teaspoon smoked paprika
  • 1/2 teaspoon dried oregano
  • 1/2 teaspoon salt
  • 1/4 teaspoon black pepper
  • 1 tablespoon olive oil

the Spinach and Feta Filling

  • 2 cups fresh spinach, chopped
  • 1 tablespoon olive oil
  • 2 garlic cloves, minced
  • 3/4 cup crumbled feta cheese
  • 1/2 cup ricotta cheese
  • 1/2 cup shredded mozzarella cheese
  • 1 tablespoon chopped fresh parsley
  • 1 teaspoon lemon zest
  • 1/4 teaspoon black pepper

Topping

  • 1/3 cup shredded mozzarella cheese
  • 2 tablespoons crumbled feta
  • 2 tablespoons chopped sun-dried tomatoes
  • 1 tablespoon chopped fresh parsley
  • Red pepper flakes, optional

Why You’ll Love This Recipe

Sweet Potato Rosti Rolls are packed with vegetables, cheese, and fresh herbs, yet they still feel comforting and indulgent. The sweet potato brings natural sweetness and color, while zucchini keeps the base moist and tender.

Once rolled and sliced, the colorful spiral makes Sweet Potato Rosti Rolls ideal for entertaining or holiday brunches.

They are also flexible enough to serve warm or at room temperature and pair easily with salads, roasted vegetables, or simple sauces.

How to Make Sweet Potato Rosti Rolls

Step 1: Preheat the Oven

Preheat the oven to 400°F or 200°C.

Line a large rimmed baking sheet with parchment paper and lightly brush the parchment with olive oil.

Step 2: Prepare the Vegetables

Grate the sweet potatoes and zucchini using the large holes of a box grater.

Place the grated zucchini in a clean kitchen towel and squeeze firmly to remove as much excess moisture as possible.

This step is important because too much water can make Sweet Potato Rosti Rolls soft and difficult to roll.

Step 3: Mix the Rosti Base

Add the grated sweet potato and drained zucchini to a large mixing bowl.

Add eggs, mozzarella, Parmesan, flour, garlic powder, smoked paprika, oregano, salt, black pepper, and olive oil.

Mix thoroughly until the vegetables are evenly coated.

Step 4: Form the Rosti Sheet

Transfer the mixture to the prepared baking sheet.

Press it into a thin, even rectangle about 1/3 inch thick.

Keep the edges as even as possible so the Sweet Potato Rosti Rolls bake uniformly and are easier to shape later.

Step 5: Bake the Rosti Layer

Bake for 20 to 25 minutes, or until the surface looks set and the edges are golden brown.

The layer should feel firm enough to lift without falling apart.

Remove it from the oven and let it cool for about 5 minutes.

Step 6: Prepare the Spinach

While the base bakes, heat 1 tablespoon olive oil in a skillet over medium heat.

Add the garlic and cook for about 30 seconds.

Add the chopped spinach and cook for 1 to 2 minutes, just until wilted.

Transfer the spinach to a plate and let it cool slightly.

Step 7: Make the Filling

In a bowl, combine the cooked spinach, feta, ricotta, mozzarella, parsley, lemon zest, and black pepper.

Mix until creamy and evenly combined.

The filling for Sweet Potato Rosti Rolls should be thick enough to spread without running.

Step 8: Spread the Filling

Carefully loosen the baked vegetable layer from the parchment.

Spread the spinach and feta mixture evenly over the surface, leaving about a 1-inch border around the edges.

Do not overfill, or the mixture may squeeze out while rolling.

Step 9: Roll Carefully

Starting from one short side, gently roll the vegetable sheet into a firm log.

Use the parchment paper to help guide the roll and keep it compact.

Work slowly so the Sweet Potato Rosti Rolls keep their shape without cracking.

Step 10: Add the Topping

Place the rolled log seam-side down.

Sprinkle the top with mozzarella and feta.

Add chopped sun-dried tomatoes and a little parsley for extra color and flavor.

Step 11: Bake Again

Return the roll to the oven for 10 to 12 minutes.

Bake until the cheese melts and the top becomes golden.

For a slightly deeper color, broil for 1 to 2 minutes at the end.

Step 12: Rest and Slice

Remove the Sweet Potato Rosti Rolls from the oven and let them rest for 8 to 10 minutes.

Use a sharp serrated knife to slice the roll into thick rounds.

Resting helps the filling set and makes the slices cleaner.

Serving Suggestions

Sweet Potato Rosti Rolls can be served as a main dish, brunch centerpiece, appetizer, or savory side.

Serve them with a crisp cucumber tomato salad, mixed greens, roasted vegetables, or a simple lemon-dressed arugula salad.

Pair them with tzatziki, garlic yogurt sauce, whipped feta, or plain Greek yogurt.

You can also serve Sweet Potato Rosti Rolls with poached eggs or fried eggs for brunch.

For another hearty sweet potato meal, try our Ground Beef Zucchini Sweet Potato Skillet with tender vegetables, savory beef, and simple seasonings.

Recipe Tips

Squeeze the zucchini very well before mixing it with the sweet potato.

Spread the vegetable mixture into an even layer so it cooks at the same rate from edge to center.

Do not overbake the first layer. It should be golden and firm but still flexible enough to roll.

Let the spinach cool before adding it to the cheese mixture.

Use a sharp knife when slicing Sweet Potato Rosti Rolls to keep the spiral neat.

Easy Variations

The recipe is easy to customize with different fillings and seasonings.

Add chopped roasted red peppers, mushrooms, caramelized onions, or artichoke hearts to the filling.

Replace feta with goat cheese for a tangier flavor.

For extra protein, add shredded chicken or finely chopped cooked turkey.

You can also use fresh dill, basil, or mint in place of parsley.

For a spicier version, add chili flakes, cayenne pepper, or chopped jalapeño.

A Mediterranean variation of Sweet Potato Rosti Rolls can include olives, sun-dried tomatoes, oregano, feta, and a little lemon zest.

Make-Ahead Instructions

The rolls can be prepared in advance for easy entertaining or meal prep.

You can bake the vegetable layer and prepare the filling several hours ahead, then assemble and finish baking just before serving.

Assemble the complete roll, cover it tightly, and refrigerate for up to 24 hours before the final bake. Add a few extra minutes when baking it cold.

Storage and Reheating

Store leftover Sweet Potato Rosti Rolls in an airtight container in the refrigerator for up to 3 days.

Reheat slices in a 350°F or 175°C oven for 10 to 12 minutes.

Reheat briefly in an air fryer for a crisper exterior, or microwave for a softer texture.

Nutrition Information

Approximate nutrition per serving:

Calories: 320
Protein: 15 g
Carbohydrates: 28 g
Fat: 18 g
Saturated Fat: 8 g
Fiber: 5 g
Sugar: 7 g
Sodium: 610 mg

Nutrition values are estimates and may vary depending on the exact cheeses, vegetables, and serving size used.

Frequently Asked Questions

Can I make this gluten-free?

Yes. Replace the all-purpose flour with a gluten-free flour blend or oat flour.

Can I use frozen spinach?

Yes. Thaw it completely and squeeze out as much liquid as possible before mixing it with the cheese.

Why did my roll crack?

The vegetable layer may have been overbaked or allowed to cool too much before rolling. Roll it while it is still warm and flexible.

Can I make these without feta?

Yes. Use goat cheese, ricotta, cottage cheese, or extra mozzarella.

Can I make individual rolls instead of one large roll?

Yes. Divide the baked sheet into smaller rectangles, fill each one, and roll separately.

Can I freeze leftovers?

You can freeze them, but the zucchini may release some moisture after thawing. Refrigerated leftovers generally have the best texture.

Final Thoughts

Sweet Potato Rosti Rolls are a beautiful way to turn simple vegetables into a savory, cheesy meal with plenty of color and texture.

Because Sweet Potato Rosti Rolls can be served for brunch, lunch, dinner, or entertaining, they are a versatile recipe worth keeping in your collection.

Keep this Sweet Potato Rosti Rolls recipe handy whenever you want something comforting, vegetable-packed, and a little different from the usual casserole.

With golden sweet potato, tender zucchini, creamy feta, spinach, melted cheese, and fresh herbs, Sweet Potato Rosti Rolls deliver a satisfying combination of crisp edges, creamy filling, and Mediterranean-inspired flavor.

You may also enjoy our Creamy Mediterranean Chicken Bake with Sweet Potatoes, Spinach & Feta for a comforting dinner packed with creamy, savory Mediterranean flavor.


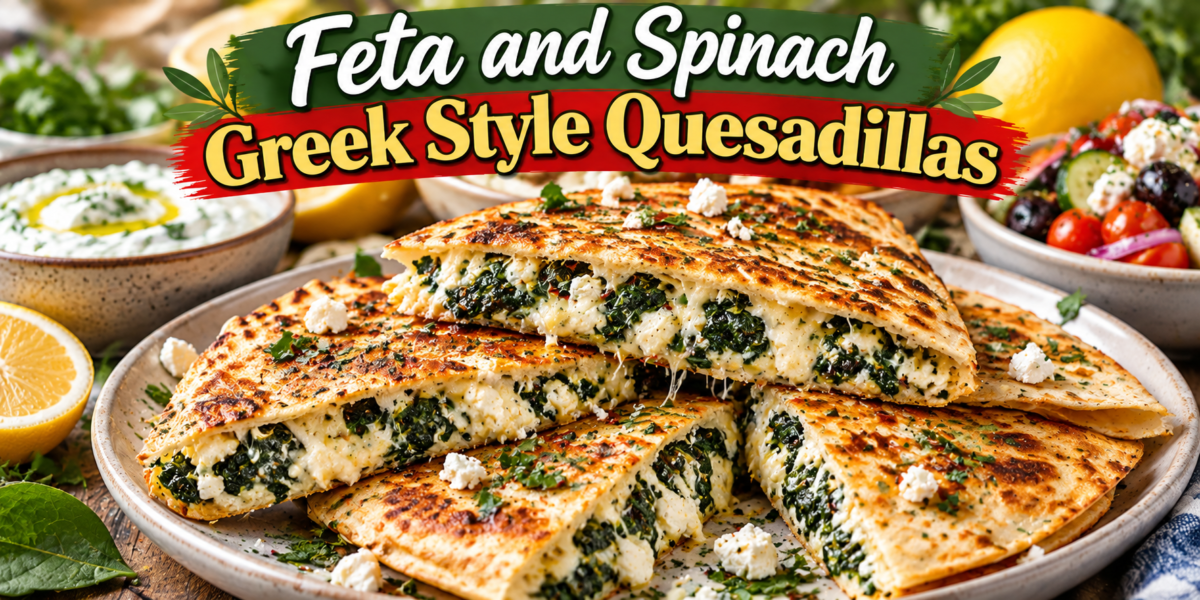
Feta and Spinach Greek Style Quesadillas Recipe

Feta and Spinach Greek Style Quesadillas with crispy tortillas, spinach, feta cheese, herbs, and lemon

Feta and Spinach Greek Style Quesadillas

These Feta and Spinach Greek Style Quesadillas are a delicious Mediterranean-inspired twist on classic quesadillas. Crisp golden tortillas are filled with creamy feta, tender spinach, mozzarella, garlic, herbs, and a touch of lemon before being toasted until perfectly crisp. The result is a quick and satisfying meal with a wonderful combination of crunchy, creamy, salty, and fresh flavors.

What makes these Feta and Spinach Greek Style Quesadillas special is the Greek-inspired filling. Feta provides a rich salty flavor, while spinach adds freshness and color. Garlic, oregano, parsley, and lemon zest give the filling a bright Mediterranean character. A little mozzarella helps everything melt together while keeping the feta flavor at the center.

These Feta and Spinach Greek Style Quesadillas are perfect for lunch, dinner, a quick snack, or a meatless family meal. They are also easy to customize with tomatoes, olives, roasted peppers, mushrooms, or artichokes.

Prep Time: 15 minutes
Cook Time: 15 minutes
Total Time: 30 minutes
Servings: 4

Ingredients

For the Greek Spinach Filling

4 large flour tortillas

2 cups fresh spinach, chopped

1 cup crumbled feta cheese

½ cup shredded mozzarella cheese

2 tablespoons extra virgin olive oil

3 garlic cloves, finely minced

¼ cup fresh parsley, finely chopped

1 teaspoon dried oregano

½ teaspoon dried dill

½ teaspoon black pepper

¼ teaspoon sea salt

1 teaspoon lemon zest

1 tablespoon fresh lemon juice

For the Optional Greek Filling Additions

¼ cup chopped Kalamata olives

¼ cup chopped roasted red peppers

2 tablespoons finely chopped red onion

2 tablespoons chopped sun-dried tomatoes

For Cooking

1 tablespoon extra virgin olive oil

Instructions

Prepare the Spinach

Begin by washing the fresh spinach thoroughly and drying it well. Excess water can make the filling too wet and prevent the quesadillas from becoming crisp.

Heat two tablespoons of extra virgin olive oil in a large skillet over medium heat. Add the minced garlic and cook for about thirty seconds until fragrant.

Add the chopped spinach and gently toss it in the warm garlic oil. Cook for two to three minutes, stirring occasionally, until the spinach wilts.

Remove the skillet from the heat and allow the spinach to cool for a few minutes.

For the best Feta and Spinach Greek Style Quesadillas, squeeze out any excess liquid from the cooked spinach before mixing it with the cheese. This small step helps keep the tortillas crisp instead of soggy.

Make the Greek Filling

Place the cooked spinach in a large mixing bowl. Add the crumbled feta, shredded mozzarella, parsley, oregano, dill, black pepper, sea salt, lemon zest, and lemon juice.

Mix gently until everything is evenly combined.

The feta should remain slightly chunky rather than becoming completely smooth. Those small pieces create a delicious salty texture throughout the filling.

If you are adding Kalamata olives, roasted red peppers, red onion, or sun-dried tomatoes, fold them into the mixture at this stage.

The filling should be moist but not watery. If it looks too wet, add a little more feta or mozzarella.

This flavorful mixture is the heart of the Feta and Spinach Greek Style Quesadillas, so taste it before assembling the tortillas. Add a little extra lemon, oregano, or black pepper according to your preference.

Assemble the Quesadillas

Place one tortilla on a clean work surface.

Spread approximately one quarter of the spinach and feta mixture over half of the tortilla. Do not spread the filling all the way to the edges because it can escape during cooking.

Fold the empty half of the tortilla over the filling to create a half-moon shape.

Press gently around the edges to help keep the filling inside.

Repeat with the remaining tortillas and filling.

For extra-crispy Feta and Spinach Greek Style Quesadillas, avoid overfilling the tortillas. A thinner, even layer of filling heats more quickly and allows the tortilla to become golden and crisp.

Cook the Quesadillas

Heat a large nonstick skillet or griddle over medium heat.

Lightly brush the skillet with a small amount of olive oil.

Place one or two assembled quesadillas in the skillet, depending on its size. Avoid overcrowding the pan.

Cook for approximately two to three minutes on the first side. Press gently with a spatula so the tortilla makes good contact with the skillet.

Once the bottom becomes golden and crisp, carefully flip the quesadilla.

Cook the second side for another two to three minutes until golden brown and the cheese inside has melted.

Continue with the remaining quesadillas.

The Feta and Spinach Greek Style Quesadillas should be crisp on the outside while the filling remains warm, creamy, and flavorful inside.

Rest and Slice

Transfer the cooked quesadillas to a cutting board.

Let them rest for one or two minutes before slicing. This allows the melted cheese to settle slightly and makes the quesadillas easier to cut.

Use a sharp knife or pizza cutter to slice each quesadilla into two or three wedges.

Garnish with fresh parsley, a little crumbled feta, and lemon zest.

Serve while warm for the best texture.

Tips for Crispy Quesadillas

Remove Excess Moisture

Spinach contains a lot of water, especially after cooking. Squeezing out the excess moisture is one of the most important steps.

Too much moisture can make the tortilla soft instead of crisp.

This technique is particularly useful when preparing Feta and Spinach Greek Style Quesadillas because feta and spinach both contribute moisture to the filling.

Use Medium Heat

High heat may brown the tortilla too quickly before the cheese becomes warm.

Medium heat gives the filling enough time to heat while allowing the tortilla to become evenly golden.

If the tortilla is browning too quickly, reduce the heat slightly.

Do Not Overfill

A generous amount of filling sounds tempting, but too much can make the quesadilla difficult to flip.

It can also cause the filling to spill out and make the skillet messy.

A thin, even layer gives the best result.

Choose Good Feta

Use good-quality feta with a creamy yet crumbly texture.

Greek feta made from sheep’s milk or a sheep-and-goat milk blend can provide an especially authentic flavor.

The salty feta is one of the main ingredients that gives Feta and Spinach Greek Style Quesadillas their distinctive Mediterranean character.

Serving Suggestions

Greek Yogurt Dip

Serve the quesadillas with plain Greek yogurt seasoned with lemon juice, garlic, parsley, and black pepper.

The cool yogurt provides a refreshing contrast to the warm, crispy tortilla.

Tzatziki

Tzatziki is another excellent choice.

Combine Greek yogurt with grated cucumber, garlic, lemon juice, dill, salt, and olive oil for a creamy cucumber sauce.

The fresh sauce pairs beautifully with the warm Feta and Spinach Greek Style Quesadillas.

Fresh Greek Salad

Serve with cucumber, tomatoes, red onion, Kalamata olives, and feta dressed with lemon juice and extra virgin olive oil.

The fresh vegetables balance the warm and cheesy filling.

Lemon Wedges

Add fresh lemon wedges to the serving plate.

A squeeze of lemon just before eating brightens the feta and spinach and enhances the herbs.

Recipe Variations

Tomato and Feta Version

Add finely chopped sun-dried tomatoes to the filling.

Their slightly sweet and tangy flavor works beautifully with spinach, feta, garlic, and oregano.

Olive and Herb Version

Add chopped Kalamata olives and extra fresh parsley.

The olives provide another salty Mediterranean flavor while the herbs keep the filling fresh.

Mushroom Version

Sauté sliced mushrooms with garlic before adding them to the spinach mixture.

Make sure the mushrooms are cooked until their excess moisture evaporates.

This creates a savory variation with an earthy flavor.

Roasted Pepper Version

Add chopped roasted red peppers for sweetness and color.

The peppers pair particularly well with feta and create a vibrant filling.

Spicy Version

Add crushed red pepper flakes to the filling for a gentle kick.

You can also drizzle the finished quesadillas with chili oil.

These variations make Feta and Spinach Greek Style Quesadillas easy to adapt depending on the ingredients available in your kitchen.

Storage Instructions

Refrigerator Storage

Allow leftover quesadillas to cool completely before placing them in an airtight container.

Store them in the refrigerator for up to three days.

Place parchment paper between layers if you are stacking several quesadillas.

Reheating Instructions

For the crispiest result, reheat the quesadillas in a dry skillet over medium-low heat.

Cook for two to three minutes per side until warm and crisp again.

An air fryer also works well. Heat at approximately 350°F or 175°C until the tortilla becomes crisp and the filling is warmed through.

Avoid microwaving when possible because it can make the tortilla soft.

Make-Ahead Instructions

Prepare the Filling Ahead

The spinach and feta filling can be prepared several hours ahead and stored in the refrigerator.

When ready to cook, assemble the tortillas and toast them fresh.

This makes Feta and Spinach Greek Style Quesadillas convenient for busy lunches and quick dinners.

You can also prepare the filling the night before and keep it refrigerated in a covered container.

Frequently Asked Questions

Can I use frozen spinach

Yes. Frozen spinach works well, but thaw it completely and squeeze out as much liquid as possible before adding it to the filling.

This is especially important for Feta and Spinach Greek Style Quesadillas because excess water can prevent the tortillas from becoming crisp.

Can I make these without mozzarella

Yes. Feta can be used on its own, although mozzarella provides extra melting quality.

You can also use a mild melting cheese such as Monterey Jack or provolone.

Can I use corn tortillas

Yes, although flour tortillas are generally easier to fold and crisp for this recipe.

If using corn tortillas, warm them slightly first so they do not crack.

Can I make these gluten-free

Yes. Simply use your favorite gluten-free tortillas.

Check the labels on all packaged ingredients to ensure they meet your dietary requirements.

Can I add chicken

Absolutely. Add cooked shredded chicken for a higher-protein version.

Season the chicken with oregano, garlic, lemon, and black pepper before mixing it with the spinach and feta.

Can I make them vegetarian

Yes. The basic recipe is vegetarian as written, provided the cheeses and tortillas you choose fit your dietary preferences.

Nutrition Information

Approximate Nutrition Per Serving

Calories: 430 kcal

Protein: 18g

Carbohydrates: 40g

Fat: 23g

Saturated Fat: 9g

Fiber: 4g

Sugar: 3g

Sodium: 780mg

Nutrition values are approximate and can vary depending on tortilla size, cheese brands, and optional ingredients.

Final Thoughts

These Feta and Spinach Greek Style Quesadillas are an easy way to bring Greek-inspired flavors into a familiar and comforting meal. Crispy tortillas surround a warm filling of spinach, salty feta, mozzarella, garlic, herbs, and lemon.

The combination of textures makes every bite satisfying. The tortilla becomes crisp and golden, while the spinach and cheese filling stays soft and creamy.

For an even more Mediterranean presentation, serve the Feta and Spinach Greek Style Quesadillas with tzatziki, Greek yogurt, fresh lemon, olives, and a colorful salad.

They are also flexible enough for meal preparation. Make the filling ahead, store it in the refrigerator, and cook the quesadillas fresh whenever you need a quick meal.

Whether served for lunch, dinner, or a casual snack, these Feta and Spinach Greek Style Quesadillas offer a delicious combination of Greek flavors with the familiar comfort of a crispy quesadilla.

With simple ingredients, quick preparation, and plenty of room for customization, this recipe is an easy addition to a Mediterranean-inspired weekly meal plan.