Fall Herbal Guide: 11 Traditional Herbs & What to Know Before Using Them

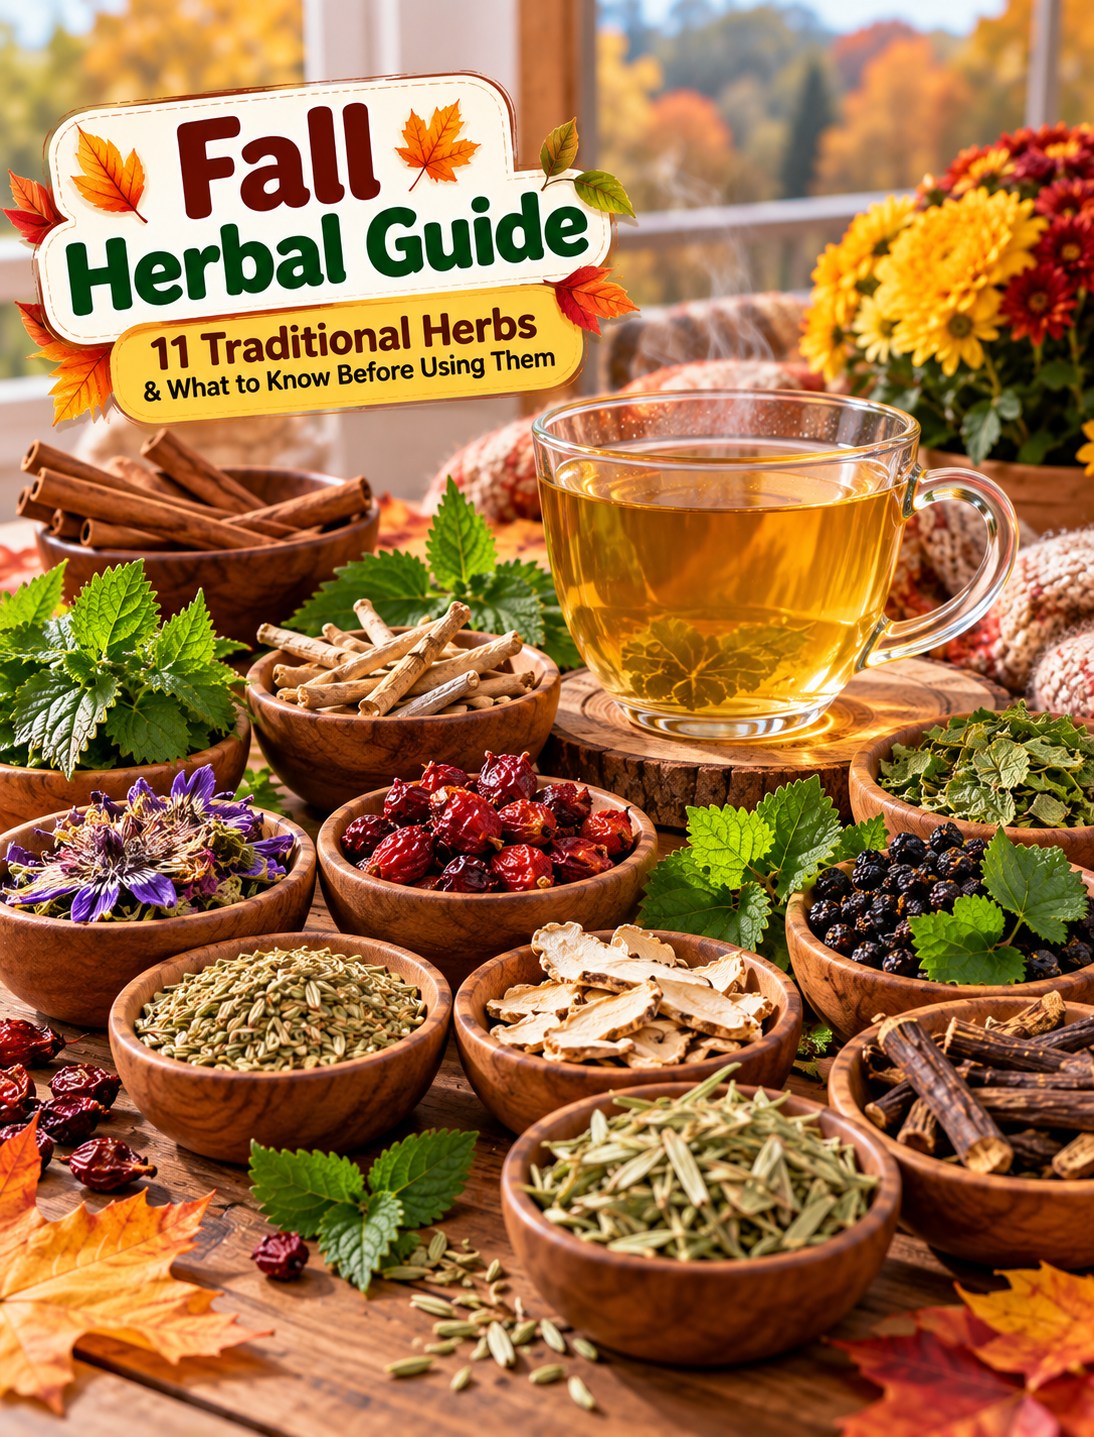
Fall herbal guide featuring 11 traditional herbs including cinnamon, fennel, rosehip, lemon balm, nettle, and licorice root

Fall Herbal Guide: 11 Traditional Herbs & What to Know Before Using Them


Introduction

As the weather turns cooler, many people reach for warm teas, comforting spices, and traditional herbal preparations. Fall is also a good time to look at herbs with a little more care—not just what they are traditionally used for, but what modern research actually tells us.

This Fall Herbal Guide covers 11 herbs and plants commonly found in teas, extracts, and traditional wellness practices:

  • Ashwagandha
  • Nettle
  • Cinnamon
  • Lemon balm
  • Passionflower
  • Black currant leaf
  • Fennel
  • Rosehip
  • Marshmallow root
  • Licorice root
  • Oat straw

Some have centuries of traditional use, while others have been studied in clinical research. The evidence is different for each herb, so a traditional use should not automatically be treated as a proven medical benefit.

1. Ashwagandha

Ashwagandha (Withania somnifera) is a traditional Ayurvedic herb that has been used for centuries. Modern supplements commonly contain root or root-and-leaf extracts.

Traditional use

Ashwagandha has traditionally been used to support general vitality, stress management, and sleep.

What research says

Some studies suggest that certain ashwagandha preparations may help with stress and insomnia, but studies vary in size, formulation, and quality. Evidence for several other claimed benefits remains insufficient. (NCCIH)

Safety

Ashwagandha may cause drowsiness or digestive upset. Rare cases of liver injury have also been reported. It should be avoided during pregnancy and breastfeeding and may interact with thyroid, blood-pressure, diabetes, sedative, and immune-related medicines. (NCCIH)

2. Nettle

Nettle (Urtica dioica and related species) is another traditional plant used in teas and herbal preparations.

Traditional use

Nettle leaf has traditionally been used in preparations associated with urinary health and general herbal wellness.

What research says

The European Medicines Agency recognizes traditional use of nettle leaf preparations in certain urinary-tract-related herbal products, but traditional-use recognition is not the same as strong clinical proof. (European Medicines Agency (EMA))

Safety

Only use properly prepared nettle products. Fresh stinging nettle can irritate the skin because of its tiny stinging hairs. People taking medication should check for possible herb-drug interactions before using concentrated products.

3. Cinnamon

Cinnamon is probably the easiest herb on this list to recognize. It is both a food spice and a traditional herbal ingredient.

Traditional use

Cinnamon has been used traditionally in foods and preparations for digestive and respiratory complaints, among other purposes.

What research says

Research has examined cinnamon supplements for blood sugar and other conditions, but results are inconsistent, and there is not enough evidence to recommend cinnamon as a treatment for a specific health condition. (NCCIH)

Safety

Normal culinary amounts are generally considered safe. Large or prolonged amounts may cause digestive problems, and cassia cinnamon contains coumarin, which can be a concern for people with liver disease when consumed in high amounts. (NCCIH)

4. Lemon Balm

Lemon balm (Melissa officinalis) has a mild lemon scent and is commonly prepared as tea.

Traditional use

It has traditionally been used for mild stress, occasional sleep problems, and minor digestive discomfort such as bloating.

What research says

The European Medicines Agency recognizes these uses based mainly on long-standing traditional use rather than strong clinical evidence. Some small studies have explored sleep and anxiety-related effects, but they are not enough for firm conclusions. (European Medicines Agency (EMA))

How people use it

Lemon balm is commonly found as dried tea leaves, teas, extracts, and combination herbal products.

5. Passionflower

Passionflower (Passiflora incarnata) is often associated with relaxing evening herbal teas.

Traditional use

It has traditionally been used for relaxation and sleep support.

What research says

A small amount of research suggests passionflower may increase total sleep time in some adults with insomnia, but findings for other sleep measures are mixed. (NCCIH)

Safety

Possible side effects include drowsiness, dizziness, and confusion. Passionflower may interact with anesthesia and other medicines that affect the nervous system. It should not be used during pregnancy unless specifically advised by a healthcare professional. (NCCIH)

6. Black Currant Leaf

Black currant leaf comes from Ribes nigrum, the same plant known for its dark berries.

Traditional use

The leaves have been used in traditional European herbal preparations, including preparations associated with urinary health and minor inflammation.

What research says

The European Medicines Agency has evaluated black currant leaf as a traditional herbal ingredient for certain urinary and inflammatory uses. (European Medicines Agency (EMA))

This does not mean black currant leaf has been proven to treat a medical condition. Evidence and approved uses can differ between countries.

7. Fennel

Fennel (Foeniculum vulgare) is both a culinary ingredient and a traditional herbal plant.

Traditional use

Fennel fruit has traditionally been used in herbal preparations for mild digestive discomfort and as an aromatic ingredient.

What research says

European herbal assessments recognize traditional preparations of fennel fruit for certain digestive and respiratory uses. These conclusions are based largely on traditional use rather than strong modern clinical trials. (European Medicines Agency (EMA))

How to use it

Fennel seeds can be used in cooking or prepared as a tea. Concentrated fennel oils are much stronger than culinary amounts and should not be treated like ordinary food.

8. Rosehip

Rosehip is the small fruit that develops after certain roses finish flowering.

Traditional use

Rosehips have traditionally been prepared as teas, syrups, preserves, and other foods. They are naturally rich in plant compounds, including vitamin C, although the amount can vary depending on the preparation.

Why it is popular in fall

Its tart flavor works well in warm teas and seasonal blends. Rosehip can also add variety to a caffeine-free beverage routine.

What research says

Some research has explored rosehip preparations for joint-related symptoms and other areas, but results depend on the specific preparation and study design. It should not be presented as a treatment for arthritis or another disease.

9. Marshmallow Root

Despite its name, marshmallow root (Althaea officinalis) is not the main ingredient in modern marshmallow candy.

Traditional use

The root has traditionally been used in herbal preparations for the mouth, throat, coughs, colds, and digestive discomfort.

What research says

The European Medicines Agency has assessed marshmallow root for traditional use in mouth and throat irritation, cough and cold symptoms, and mild gastrointestinal complaints. (European Medicines Agency (EMA))

Important point

Traditional-use evidence is different from proof that an herb can cure an illness. Persistent cough, severe throat pain, or digestive symptoms should be evaluated appropriately.

10. Licorice Root

Licorice root (Glycyrrhiza species) has a long history in traditional medicine and is also used as a flavoring.

Traditional use

Historically, licorice root has been used in preparations for respiratory, digestive, and other complaints.

What research says

Some small studies have explored licorice preparations for specific uses, but there is not enough high-quality evidence to support licorice as a treatment for most health conditions. (NCCIH)

⚠️ Why extra caution matters

Licorice contains glycyrrhizin, which can cause serious problems when consumed in large amounts or for long periods. It can affect blood pressure, potassium levels, and heart rhythm. The risk is especially important for people with hypertension or heart or kidney conditions. (NCCIH)

11. Oat Straw

Oat straw refers to the above-ground parts of Avena sativa harvested before flowering.

Traditional use

It has been used in traditional herbal preparations associated with relaxation, stress, and sleep.

What research says

The European Medicines Agency has assessed oat herb preparations for traditional use related to mild mental stress and temporary sleep problems. (European Medicines Agency (EMA))

How it is found

Oat herb may appear in teas, liquid extracts, and other herbal preparations. Always check the product label because oat straw products can differ considerably in strength and formulation.

How to Choose Herbal Products More Safely

Before adding a new herb to your fall routine, follow these simple steps:

  1. Identify the exact herb. Common names can refer to different plants.
  2. Check the plant part. Root, leaf, seed, bark, and extract can have different properties.
  3. Choose reputable products. Look for clear labeling and ingredient information.
  4. Start with the intended use. Do not assume an herb works for every condition associated with it.
  5. Read the medication warnings. Some herbs can interact with prescription and over-the-counter medicines.
  6. Avoid replacing medical treatment. Herbal products should not replace prescribed care.
  7. Be especially cautious with concentrated extracts. A tea and a high-strength supplement are not equivalent.
  8. Ask a healthcare professional when needed. This is particularly important during pregnancy, breastfeeding, before surgery, or when managing a chronic condition.

Frequently Asked Questions

1. What is the best herb for fall wellness?

There is no single best herb; the appropriate choice depends on the purpose, preparation, evidence, medications, and individual safety factors.

2. Can herbal teas replace medicine?

No. Herbal teas may complement a healthy routine, but they should not replace prescribed medication or professional medical care.

3. Are all traditional herbs safe?

No. “Natural” does not automatically mean safe, and some herbs can cause side effects or interact with medications.

4. Can I use several herbs together?

Yes, but combining herbs can increase uncertainty about safety and interactions, so avoid complex blends unless the ingredients and doses are well understood.

5. Which herbs require extra caution?

Licorice, ashwagandha, and concentrated herbal extracts deserve particular attention because of potential side effects and medication interactions. (NCCIH)

6. Can I drink herbal tea every day?

It depends on the herb, amount, preparation, and your health situation; regular use is not automatically appropriate for every herbal product.

7. Should I ask my doctor before using herbs?

Yes, especially if you take medication, have a chronic condition, are pregnant or breastfeeding, or have an upcoming surgery.

Final Takeaway

Fall is a natural time to enjoy warm teas, seasonal spices, and traditional herbal ingredients. Ashwagandha, nettle, cinnamon, lemon balm, passionflower, black currant leaf, fennel, rosehip, marshmallow root, licorice root, and oat straw all have different histories and levels of scientific evidence.

The most useful approach is simple: learn what the plant is, understand its traditional use, check what research actually shows, and consider safety before using concentrated products.

That keeps herbal wellness practical without turning traditional remedies into unsupported medical promises.
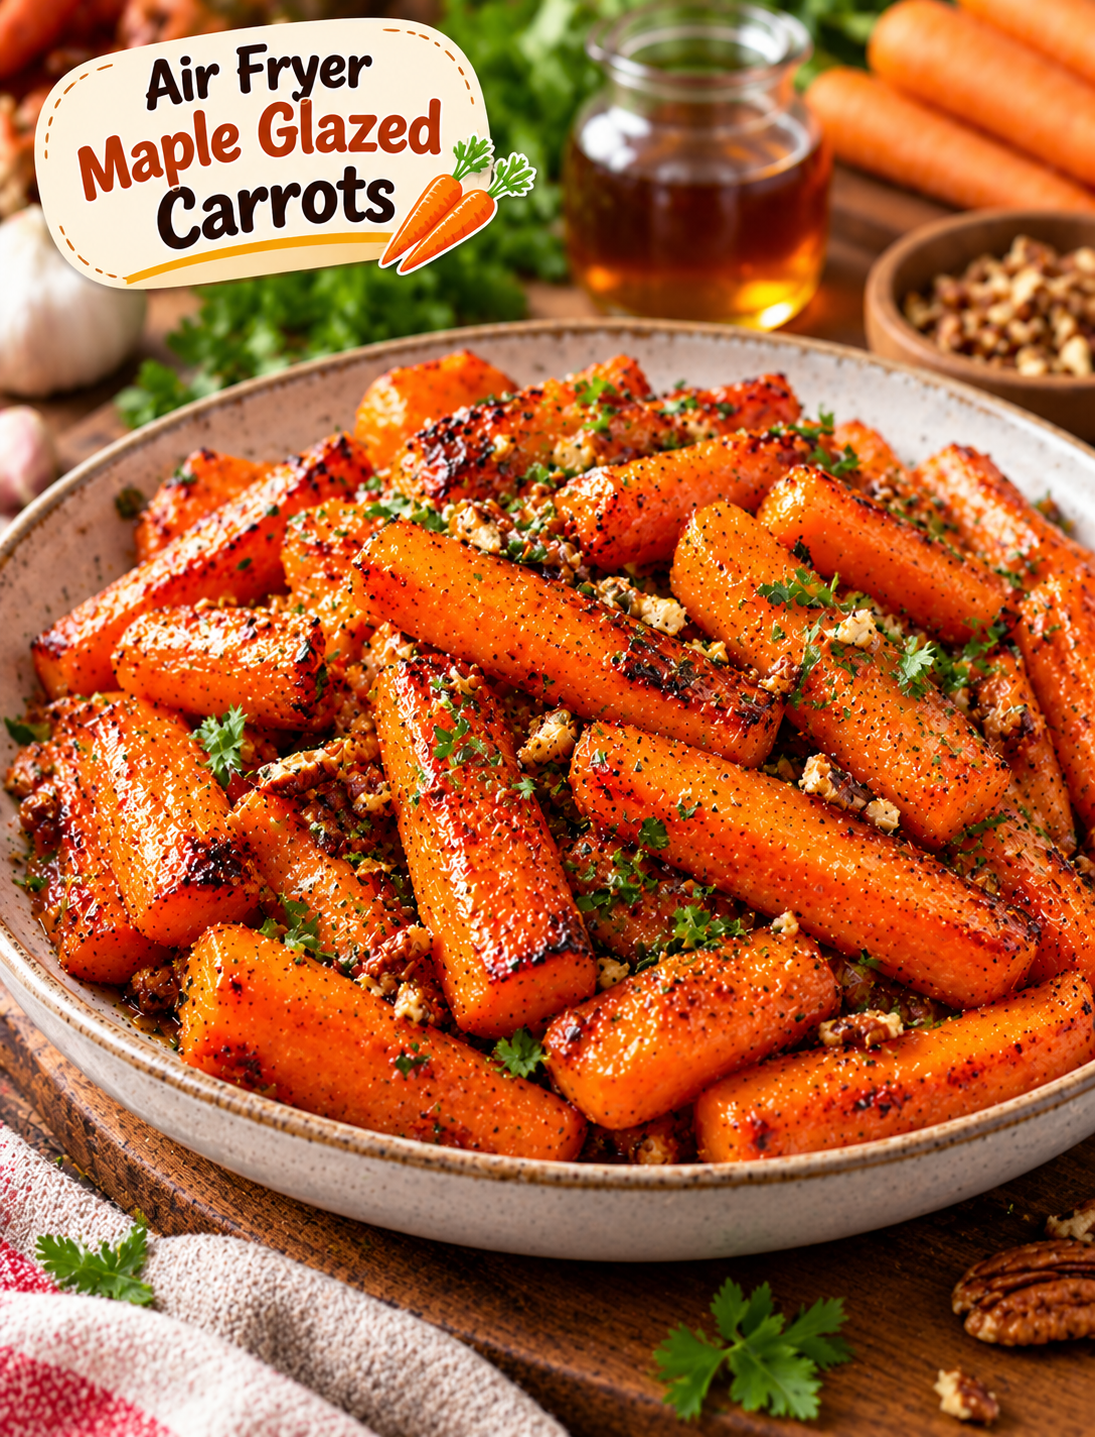
Air Fryer Maple Glazed Carrots

Air Fryer Maple Glazed Carrots with caramelized edges, maple glaze, fresh herbs, and chopped pecans.

Air Fryer Maple Glazed Carrots

Air Fryer Maple Glazed Carrots are a simple side dish with tender centers, caramelized edges, and a sweet maple glaze. The air fryer cooks the carrots quickly while giving them lightly crisp edges that you do not get from steaming.

This recipe uses everyday ingredients and takes about 20 minutes from start to finish. Maple syrup adds gentle sweetness, while butter, garlic, and a touch of thyme keep the flavor balanced.

These carrots are easy enough for a weeknight dinner but special enough for Thanksgiving, Christmas, Easter, or a family gathering. They pair well with roasted chicken, turkey, pork, steak, salmon, and other main dishes.

Why You’ll Love This Recipe

  • Fast side dish: The air fryer cooks the carrots in about 12–16 minutes.
  • Simple ingredients: You only need a few pantry and refrigerator staples.
  • Sweet and savory: Maple syrup adds sweetness without overpowering the carrots.
  • Great texture: Air frying creates caramelized edges while keeping the centers tender.
  • Easy cleanup: Everything can be prepared in one bowl and one air fryer basket.
  • Holiday-friendly: The warm maple flavor fits naturally into fall and winter meals.
  • Easy to customize: You can add herbs, spices, nuts, or a little heat.

Ingredients You’ll Need

  • 1 pound fresh carrots, peeled and cut into 2-inch pieces
  • 1½ tablespoons pure maple syrup
  • 1 tablespoon unsalted butter, melted
  • 1 tablespoon olive oil
  • 1 small garlic clove, finely minced
  • ½ teaspoon dried thyme
  • ½ teaspoon kosher salt
  • ¼ teaspoon black pepper
  • ¼ teaspoon ground cinnamon
  • 1 teaspoon fresh parsley, chopped, for garnish
  • 1 teaspoon fresh thyme leaves, optional
  • 2 tablespoons chopped pecans, optional

For the best flavor, use pure maple syrup rather than pancake syrup. Pure maple syrup has a cleaner flavor and works especially well with roasted vegetables.

How to Make Air Fryer Maple Glazed Carrots

Step 1: Prepare the Carrots

Wash and peel the carrots, then cut them into evenly sized pieces.

For whole carrots, cut them into pieces about 2 inches long and ½ inch thick. If the carrots are very thick, cut them in half lengthwise.

Keeping the pieces similar in size helps them cook evenly.

Step 2: Make the Maple Glaze

Add the maple syrup, melted butter, olive oil, minced garlic, thyme, salt, black pepper, and cinnamon to a small bowl.

Whisk until the mixture is smooth.

The butter adds richness, while olive oil helps the carrots brown in the air fryer.

Step 3: Coat the Carrots

Place the prepared carrots in a large mixing bowl.

Pour the maple mixture over the carrots and toss until every piece is lightly coated.

Do not add an excessive amount of glaze at this stage. Too much liquid can make the carrots steam instead of caramelize.

Step 4: Preheat the Air Fryer

Preheat the air fryer to 380°F (193°C) for about 3 minutes.

Preheating gives the carrots a head start on browning and helps create more consistent results.

Step 5: Arrange the Carrots

Place the glazed carrots in the air fryer basket.

Arrange them in as close to a single layer as possible, leaving a little space between pieces.

Avoid packing the basket tightly. Good airflow helps the carrots develop browned edges.

Step 6: Air Fry

Cook the carrots at 380°F (193°C) for 12–16 minutes.

Shake the basket after about 7 minutes to turn the carrots and encourage even browning.

Start checking the carrots around the 12-minute mark. They are ready when the edges are caramelized and the centers are tender when pierced with a fork.

Larger carrot pieces may need a few additional minutes.

Step 7: Add a Final Maple Finish

For a stronger maple flavor, mix 1 teaspoon maple syrup with ½ teaspoon melted butter.

Brush a very small amount over the hot carrots after cooking.

Do not add a large amount because excess syrup can make the finished carrots sticky rather than lightly glazed.

Step 8: Garnish and Serve

Transfer the carrots to a serving bowl.

Sprinkle with fresh parsley and thyme.

For extra texture, add a small amount of toasted chopped pecans.

Serve immediately while the carrots are warm.

Tips for Perfect Maple Glazed Carrots

Cut evenly: Similar-sized pieces cook at the same rate and prevent some carrots from becoming too soft.

Do not overcrowd: A crowded basket traps steam and reduces browning.

Use pure maple syrup: It gives the glaze a more natural maple flavor.

Watch the final minutes: Maple syrup contains natural sugars that can brown quickly.

Shake halfway through: Turning the carrots helps them caramelize more evenly.

Use fresh carrots: Firm carrots provide a better texture than older carrots that have become soft or dry.

Adjust the sweetness: If you prefer a less sweet side dish, reduce the maple syrup to 1 tablespoon.

How to Make Them Extra Crispy

If you want more caramelized edges, pat the carrots dry after washing them.

Use only enough glaze to coat the pieces lightly. Excess moisture can slow browning.

Keep the carrots in a single layer and avoid opening the air fryer repeatedly during the first several minutes.

For especially browned edges, increase the temperature to 400°F (205°C) for the final 1–2 minutes and watch them closely.

Easy Flavor Variations

Maple Cinnamon Carrots

Increase the cinnamon to ½ teaspoon and add a small pinch of nutmeg for a warmer fall flavor.

Spicy Maple Carrots

Add ¼ teaspoon cayenne pepper or a pinch of crushed red pepper flakes to the glaze.

The mild heat works well with the sweetness of the maple syrup.

Maple Garlic Carrots

Increase the garlic to 2 small cloves for a stronger savory flavor.

This version pairs especially well with roasted chicken or steak.

Maple Pecan Carrots

Add toasted chopped pecans after cooking for a sweet, crunchy finish.

The pecans also make the dish feel more festive for holiday dinners.

Maple Herb Carrots

Add fresh rosemary or thyme after cooking for a more savory herb flavor.

Fresh herbs should be added near the end so their flavor stays bright.

What to Serve With Maple Glazed Carrots

These carrots are versatile enough to serve with many popular American meals.

For a weeknight dinner, pair them with air fryer chicken, roasted turkey breast, baked salmon, or grilled pork chops.

Thanksgiving, serve them alongside turkey, mashed potatoes, stuffing, green beans, and cranberry sauce.

Simple vegetarian meal, serve them with quinoa, wild rice, lentils, or a hearty grain bowl.

Their sweet and savory flavor also works well beside a simple roast beef dinner.

Can You Use Baby Carrots?

Yes, baby carrots can be used in this recipe.

If the baby carrots are large, cut them lengthwise so they cook more evenly.

Very small baby carrots may need slightly less cooking time, so begin checking them around 10–12 minutes.

Can You Use Frozen Carrots?

Fresh carrots provide the best texture for this recipe.

Frozen carrots contain more moisture, so they may become softer and produce less caramelization in the air fryer.

If using frozen carrots, cook them without the maple glaze first, then add the glaze during the final few minutes.

How to Store Leftovers

Allow the cooked carrots to cool before transferring them to an airtight container.

Store them in the refrigerator for up to 4 days.

Keep them refrigerated at or below 40°F (4°C).

How to Reheat Maple Glazed Carrots

The air fryer is the best way to bring back some of the roasted texture.

Preheat the air fryer to 350°F (175°C).

Place the refrigerated carrots in the basket and heat for 3–5 minutes, shaking once halfway through.

You can also reheat them in a skillet over medium heat until warmed through.

Avoid overheating the carrots because the maple glaze can become overly dark or sticky.

Can You Make These Ahead?

Yes. You can peel and cut the carrots several hours ahead and store them covered in the refrigerator.

For the best texture, prepare the maple glaze separately and coat the carrots shortly before air frying.

This keeps the carrots from sitting in excess moisture before cooking.

Frequently Asked Questions

Do I need to boil carrots before air frying?

No. Fresh carrots can go directly into the air fryer after being peeled, cut, and coated with the maple glaze.

Can I use honey instead of maple syrup?

Yes. Honey can replace maple syrup in an equal amount, although it will create a slightly different flavor.

How do I stop the maple glaze from burning?

Cook at 380°F and watch the final minutes closely; avoid using too much glaze before cooking.

Why are my carrots not caramelizing?

Overcrowding, excess moisture, or large pieces can prevent browning; use a single layer and cut the carrots evenly.

Can I make this recipe dairy-free?

Yes. Replace the butter with additional olive oil or a dairy-free butter alternative.

Are maple glazed carrots good for Thanksgiving?

Yes. Their warm maple flavor and caramelized edges make them a simple side dish for Thanksgiving and other holiday meals.

Can I use whole carrots?

Yes. Whole carrots work well when cut into evenly sized sticks or chunks before air frying.

How long do carrots take in the air fryer?

At 380°F, most ½-inch carrot pieces take about 12–16 minutes, depending on their size and the air fryer model.

Final Thoughts

Air Fryer Maple Glazed Carrots turn an everyday vegetable into a flavorful side dish with very little effort. The carrots become tender inside while the maple glaze creates lightly caramelized edges.

The combination of maple syrup, butter, garlic, thyme, and cinnamon gives the dish a balanced sweet-and-savory flavor without requiring a long ingredient list.

Serve them fresh alongside chicken, turkey, pork, fish, or your favorite holiday main course. With a quick preparation time and easy cleanup, this recipe is a useful addition to any weeknight or holiday menu.

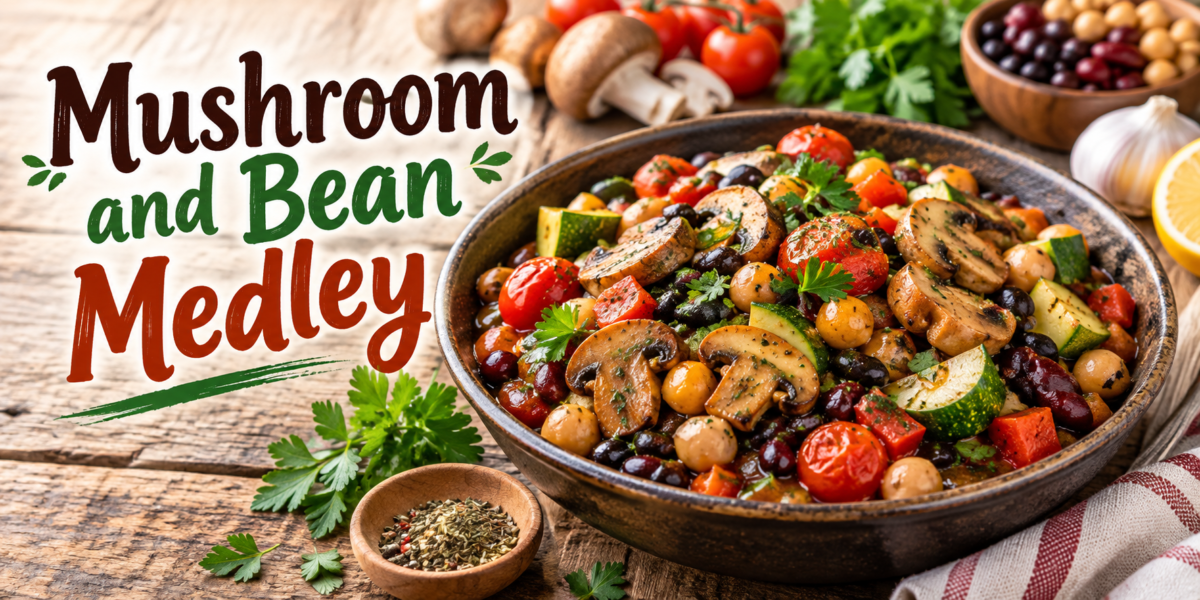
Mushroom and Bean Medley Recipe

Mushroom Bean Medley with mushrooms, mixed beans, vegetables, and fresh herbs in a bowl

Mushroom and Bean Medley Recipe

Mushroom and Bean Medley is a delicious, nutritious, and comforting plant-based recipe packed with earthy mushrooms, protein-rich beans, colorful vegetables, and flavorful herbs. This easy dish combines simple ingredients to create a satisfying meal that works perfectly for lunch, dinner, or a healthy side dish.

This Mushroom Bean Medley is a great option for anyone looking for a wholesome meal without complicated cooking. The combination of mushrooms and beans provides a wonderful balance of textures, from tender mushrooms to creamy beans, while fresh herbs and spices add incredible flavor.

This recipe is inspired by Mediterranean and rustic home-style cooking, using ingredients like garlic, onions, tomatoes, herbs, and olive oil. Each bite delivers a savory taste with natural sweetness from vegetables and a rich depth from perfectly cooked mushrooms.

Whether you are following a vegetarian lifestyle or simply trying to include more plant-based meals in your routine, this dish is a perfect choice. It is filling, budget-friendly, easy to prepare, and full of essential nutrients.

The best part about this Mushroom Bean Medley is its flexibility. You can enjoy it as a main meal, serve it with rice or bread, or use it as a flavorful topping for salads, wraps, and bowls.

Why You Will Love This Recipe

This Mushroom Bean Medley is a perfect choice for anyone who wants a delicious meal made with simple and wholesome ingredients. The combination of mushrooms, beans, and vegetables creates a satisfying dish that is full of flavor and texture. It is an affordable recipe that can be prepared easily without spending hours in the kitchen.

The earthy taste of mushrooms blends beautifully with the creamy texture of beans. Fresh herbs, garlic, and spices bring all the ingredients together and create a comforting meal that everyone can enjoy.

Preparation Time: 15 minutes
Cooking Time: 25 minutes
Total Time: 40 minutes
Servings: 4 servings

Ingredients

For the Mushroom and Bean Medley

To prepare this recipe, you will need the following ingredients:

Use 2 tablespoons of olive oil, 1 medium finely chopped onion, and 1 can of drained and rinsed chickpeas.

Add 4 minced garlic cloves, 16 ounces of sliced mushrooms, 1 diced red bell pepper, and 1 chopped zucchini.

Include 1 cup of halved cherry tomatoes, 2 tablespoons of tomato paste, 1 can of drained and rinsed kidney beans, and 1 can of drained and rinsed black beans.

Season the dish with 1 teaspoon smoked paprika, 1 teaspoon dried oregano, 1 teaspoon dried thyme, 1/2 teaspoon cumin, and 1/2 teaspoon chili flakes (optional).

Finally, add salt according to taste, 1/2 teaspoon black pepper, 1/4 cup chopped fresh parsley, and 2 tablespoons fresh lemon juice.

You can easily adjust this recipe according to your available ingredients. If you do not have chickpeas, you can replace them with extra kidney beans or white beans.
>Different mushroom varieties can also be used, including button mushrooms, cremini mushrooms, or portobello mushrooms. Each type adds a slightly different flavor and texture.
For a richer taste, you can add roasted vegetables like sweet potatoes, carrots, or bell peppers.

Step-by-Step Instructions

Prepare the Vegetables

Start by washing and preparing all vegetables before cooking.

Slice the mushrooms evenly so they cook at the same rate. Chop the onion, bell pepper, zucchini, and tomatoes into bite-sized pieces.

Preparing everything beforehand makes the cooking process smoother and faster.

Cook the Mushrooms

Heat olive oil in a large skillet or pan over medium heat.

Add sliced mushrooms and cook for 5 to 7 minutes until they become golden and release their natural moisture.

Allowing mushrooms to brown properly creates a deeper flavor and improves the overall taste of the dish.

Avoid overcrowding the pan because mushrooms need space to develop a rich texture.

Add Aromatic Ingredients

Next, add the chopped onion to the mushrooms and cook for 3 to 4 minutes until the onion becomes soft.

Then, add the minced garlic and cook for about 30 seconds until it becomes fragrant and releases its flavor.

This step helps create a delicious base and adds more depth to the Mushroom Bean Medley.

The garlic and onion create a flavorful base that enhances the taste of the beans and vegetables.

Add Beans and Vegetables

Add chickpeas, kidney beans, black beans, bell pepper, zucchini, and cherry tomatoes to the pan.

Stir everything together until the ingredients are evenly combined.

Add tomato paste, smoked paprika, oregano, thyme, cumin, salt, black pepper, and chili flakes.

Mix well so the spices coat all ingredients.

Cook for 10 to 12 minutes until the vegetables become tender and the flavors blend together.

Finish the Dish

Remove the pan from heat and add fresh parsley and lemon juice.

The lemon juice adds brightness and balances the earthy flavors of mushrooms and beans.

Taste and adjust seasoning if needed.

Your Mushroom Bean Medley is now ready to serve.

The final dish should have tender vegetables, creamy beans, and a rich savory flavor.

How to Make This Recipe More Flavorful

For deeper flavor, allow the mushrooms to cook until they become golden brown. This step helps develop a rich savory taste.

Adding fresh herbs at the end of cooking keeps their flavor bright and fresh. Lemon juice also helps balance the earthy flavors and makes the dish taste lighter.

If you have extra time, allow the cooked Mushroom Bean Medley to rest for a few minutes before serving. This helps the ingredients absorb the seasonings.

Tips for Making the Best Mushroom Bean Medley

Choose fresh mushrooms with a firm texture for the best results.

Do not wash mushrooms too early because excess moisture can prevent proper browning.

Cook mushrooms until golden because this creates a richer and deeper flavor.

Use a variety of beans for different textures and nutrients.

Fresh herbs added at the end provide a brighter flavor compared with dried herbs.

For extra richness, add a small amount of feta cheese or Parmesan before serving.

If you prefer a thicker consistency, simmer the dish uncovered for a few extra minutes.

This Mushroom Bean Medley tastes even better after the flavors have had time to combine.

Additional Cooking Tips

Always use a large pan so the mushrooms have enough space to cook properly.

Avoid adding too much liquid at the beginning because mushrooms naturally release water while cooking.

Taste the dish before serving and adjust salt, herbs, or spices according to your preference.

For extra protein, add lentils, tofu, or quinoa.

Variations

Mediterranean Style

Add olives, feta cheese, spinach, and extra herbs for a Mediterranean-inspired version.

Spicy Version

Increase chili flakes or add jalapeños for extra heat.

Creamy Mushroom Bean Medley

Add coconut milk or light cream at the end for a creamy texture.

Rice Bowl Version

Serve the mixture over brown rice, quinoa, or couscous for a complete meal.

Protein Boost Version

Add tofu, lentils, or extra beans for additional protein.

Serving Suggestions

This recipe can be served in many different ways.

Serve it with warm crusty bread to soak up the flavorful sauce.

Pair it with rice, quinoa, or couscous for a more filling meal.

Use it as a topping for baked potatoes or roasted vegetables.

It also works beautifully as a filling for wraps and sandwiches.

For meal preparation, divide portions into containers and enjoy throughout the week.

This Mushroom Bean Medley is a versatile recipe that fits different eating styles and occasions.

Meal Prep Ideas

This recipe is excellent for weekly meal preparation. Prepare a large batch and divide it into individual containers for easy lunches or dinners.

You can serve it in different ways throughout the week. Enjoy it with rice one day, use it as a wrap filling the next day, or add it over a fresh salad.

The flavors become even better after a few hours because the herbs and spices continue to blend with the beans and vegetables.

Health Benefits

Mushrooms provide important nutrients including B vitamins, antioxidants, and minerals.

Beans are excellent sources of plant-based protein and dietary fiber.

The combination of different beans helps create a satisfying meal that supports fullness and balanced nutrition.

Vegetables like bell peppers, zucchini, and tomatoes provide vitamins, minerals, and antioxidants.

Olive oil adds healthy fats that support a balanced diet.

Garlic and herbs contribute natural flavor while reducing the need for excessive salt.

This Mushroom Bean Medley is a nutrient-rich meal that supports healthy eating habits while still being delicious and satisfying.

Storage and Reheating Instructions

Allow leftovers to cool completely before storing.

Place the dish in airtight containers and refrigerate for up to 4 days.

For longer storage, freeze portions for up to 3 months.

When reheating, warm gently on the stovetop or microwave until heated through.

Add a small amount of water or broth if the mixture becomes too thick.

The flavors often become even better after resting because the ingredients continue to blend.

This Mushroom Bean Medley is an excellent meal-prep option because it stores and reheats well.

Why This Recipe Is Perfect for Every Occasion

This recipe is perfect because it is simple, affordable, and packed with flavor.

It works well for busy weeknight dinners because it requires minimal preparation.

Families enjoy it because everyone can customize the ingredients according to their preferences.

It is also a great choice for gatherings because it can be served as a main dish or side dish.

The combination of mushrooms and beans creates a satisfying meal that does not feel heavy.

This Mushroom Bean Medley proves that plant-based meals can be flavorful, comforting, and enjoyable.

Whether you are cooking for yourself or your family, this recipe offers a delicious way to enjoy wholesome ingredients.

Cooking Notes

Always cook mushrooms properly to bring out their best flavor.

Drain and rinse canned beans before adding them to remove excess sodium.

Adjust seasoning according to your taste preference.

Fresh lemon juice makes a big difference in the final flavor.

For the best texture, avoid overcooking the vegetables.

Use seasonal vegetables whenever possible for extra freshness.

Frequently Asked Questions

Can I use only one type of bean?

Yes, you can use your favorite beans or a combination of different varieties.

Can I make this recipe vegan?

Yes, the recipe is naturally vegan if you avoid dairy toppings.

Can I prepare it ahead of time?

Yes, it is a great make-ahead meal and tastes delicious the next day.

What mushrooms work best?

Button mushrooms, cremini mushrooms, or portobello mushrooms all work well.

Can I add meat to this recipe?

Yes, grilled chicken, turkey, or sausage can be added if preferred.

Is Mushroom Bean Medley healthy?

Yes, it provides protein, fiber, vegetables, and important nutrients in one balanced dish.

Can I make Mushroom Bean Medley ahead of time?

Yes, this recipe is perfect for preparing ahead. Store it in an airtight container and reheat when needed.

What beans can I use in this recipe?

You can use black beans, kidney beans, chickpeas, cannellini beans, or any combination you prefer.

Can I make this recipe gluten-free?

Yes, this recipe is naturally gluten-free. Just make sure all packaged ingredients are certified gluten-free.

How can I add more protein?

You can add tofu, lentils, quinoa, or extra beans to increase protein content.

Nutrition Information (Per Serving)

Calories: 380 kcal

Protein: 18g

Carbohydrates: 52g

Fat: 12g

Fiber: 14g

Sugar: 8g

Sodium: 520mg approximately

Nutrition values may vary depending on ingredients and portion sizes.

Final Thoughts

Mushroom and Bean Medley is a simple yet flavorful recipe that brings together wholesome ingredients in a satisfying meal.

The combination of earthy mushrooms, hearty beans, fresh vegetables, and Mediterranean-inspired seasonings creates a dish that is nutritious and delicious.

Whether you enjoy it as a main meal, side dish, or meal-prep option, this recipe offers great flavor and flexibility.

With easy preparation, affordable ingredients, and endless customization options, this Mushroom Bean Medley is a perfect addition to your healthy recipe collection. It is proof that simple plant-based cooking can be both satisfying and full of flavor.

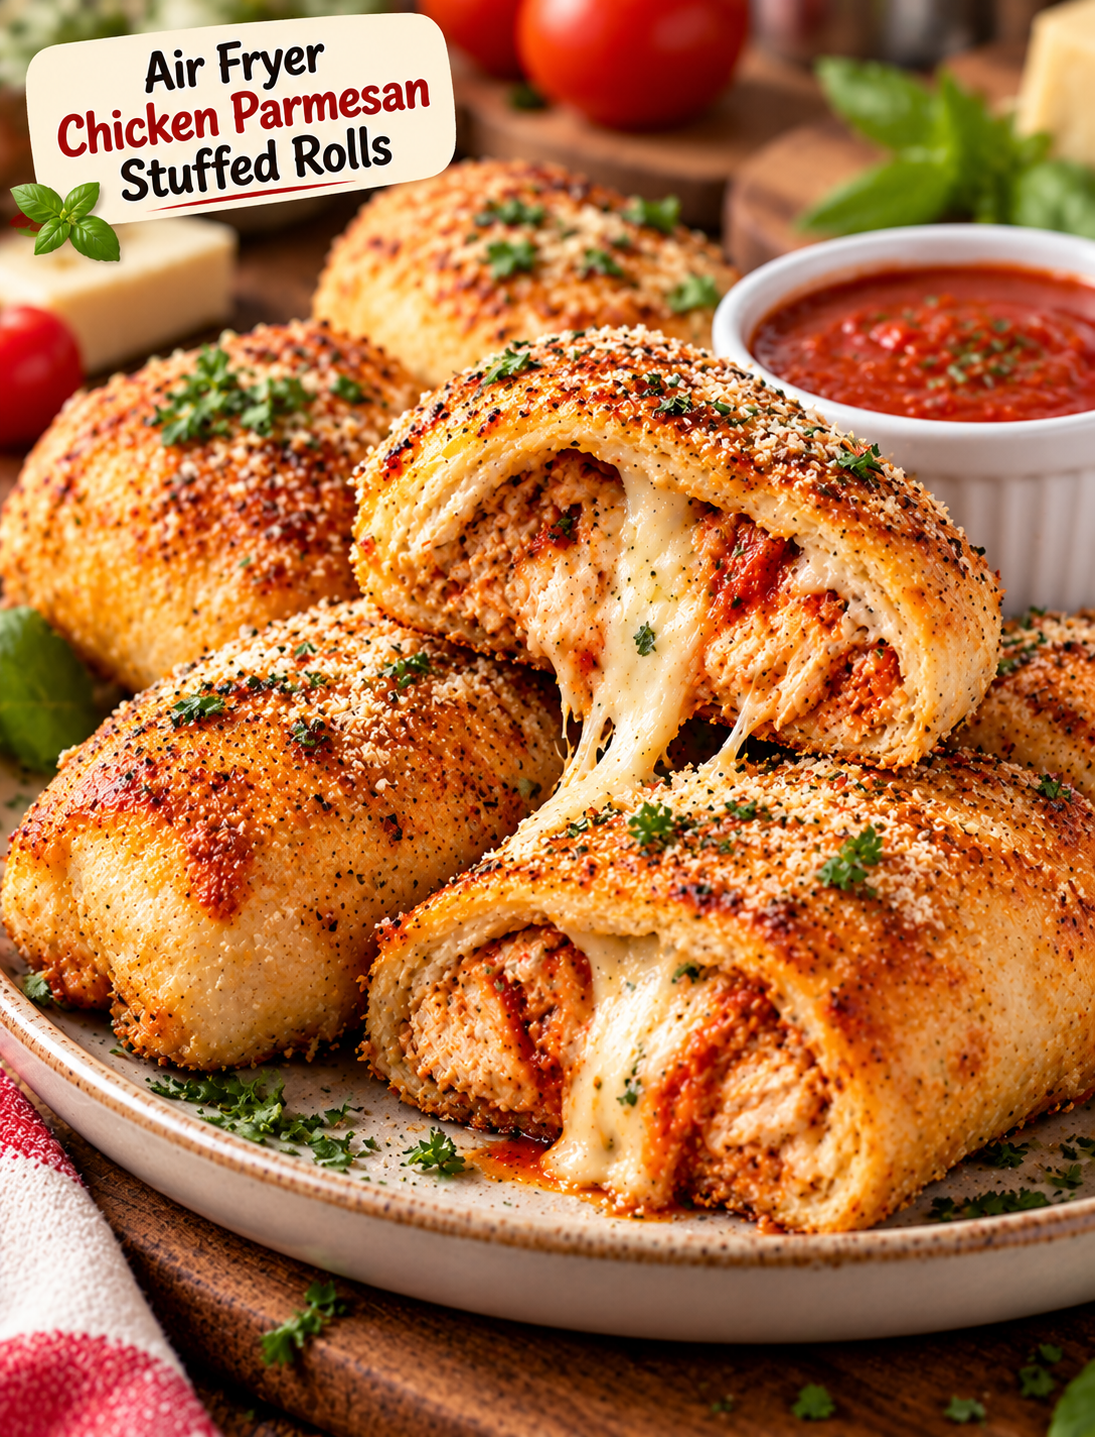
Air Fryer Chicken Parmesan Stuffed Rolls

Air Fryer Chicken Parmesan Stuffed Rolls filled with chicken, marinara, mozzarella, and Parmesan, served with warm marinara dipping sauce.

Air Fryer Chicken Parmesan Stuffed Rolls

If you love chicken Parmesan, these Air Fryer Chicken Parmesan Stuffed Rolls are an easy way to enjoy those same flavors in a crispy, handheld bite. Each roll is packed with seasoned chicken, marinara sauce, mozzarella, and Parmesan cheese, then air fried until golden and bubbly.

These stuffed rolls work well for a quick family dinner, game-day snack, lunch, or easy appetizer. The air fryer gives the outside a crisp finish while keeping the cheesy chicken filling warm and flavorful.

Why You’ll Love These Chicken Parmesan Stuffed Rolls

These stuffed rolls bring together the best parts of classic chicken Parmesan without the need to bread and fry individual chicken cutlets.

  • Quick to make: Cooked chicken helps cut down the preparation time.
  • Crispy outside: The air fryer creates a golden, lightly crisp crust.
  • Cheesy center: Mozzarella and Parmesan melt into the chicken filling.
  • Easy ingredients: Most ingredients are common grocery-store staples.
  • Family-friendly: The mild Italian flavors work well for both kids and adults.
  • Easy to customize: You can add spinach, basil, red pepper flakes, or extra cheese.
  • Great for leftovers: The rolls can be reheated in the air fryer for a quick snack.

Ingredients You’ll Need

For the Chicken Parmesan Filling

  • 2 cups cooked chicken, finely chopped or shredded
  • ½ cup marinara sauce
  • ¾ cup shredded mozzarella cheese
  • ¼ cup grated Parmesan cheese
  • 1 tablespoon chopped fresh parsley
  • 1 teaspoon Italian seasoning
  • ½ teaspoon garlic powder
  • ¼ teaspoon black pepper
  • ¼ teaspoon salt
  • ¼ teaspoon red pepper flakes, optional

For the Rolls

  • 1 package refrigerated pizza dough, about 13.8 ounces
  • 1 tablespoon melted butter
  • ½ teaspoon garlic powder
  • 1 tablespoon grated Parmesan cheese
  • 1 tablespoon chopped fresh parsley

For Serving

  • Warm marinara sauce
  • Extra Parmesan cheese
  • Fresh basil or parsley

How to Make Air Fryer Chicken Parmesan Stuffed Rolls

Step 1: Prepare the Chicken Filling

Place the cooked chicken in a medium bowl. Add the marinara sauce, mozzarella, Parmesan, parsley, Italian seasoning, garlic powder, black pepper, salt, and red pepper flakes if using.

Mix gently until the ingredients are evenly combined.

The filling should be moist enough to hold together but not overly wet. If it looks too loose, add another tablespoon of shredded mozzarella or Parmesan.

Step 2: Prepare the Dough

Place the refrigerated pizza dough on a lightly floured surface.

Stretch or roll the dough into a rectangle about ¼-inch thick. Try to keep the thickness even so the rolls cook at the same rate.

Cut the dough into 8 equal rectangles.

If the dough springs back while shaping, let it rest for about 5 minutes before continuing. This makes it easier to stretch without tearing.

Step 3: Add the Chicken Parmesan Filling

Place about 2 to 3 tablespoons of the chicken mixture in the center of each dough rectangle.

Keep the filling away from the edges. Overfilling can make the rolls difficult to seal and may cause cheese to leak during cooking.

Step 4: Seal the Rolls

Fold the long sides of each dough rectangle toward the center.

Then fold the short ends over the filling and pinch the seams firmly closed.

Place each roll seam-side down while you prepare the remaining pieces.

Check each roll carefully for open edges. A tight seal helps keep the melted cheese and marinara inside.

Step 5: Prepare the Garlic Parmesan Topping

In a small bowl, combine the melted butter, garlic powder, Parmesan cheese, and chopped parsley.

Brush a thin layer of the mixture over the top of each stuffed roll.

This topping adds extra flavor and helps the dough develop a golden finish.

Step 6: Preheat the Air Fryer

Preheat the air fryer to 375°F (190°C) for about 3 minutes.

Lightly spray the air fryer basket with cooking spray if needed.

Avoid using too much oil because the dough already contains some fat and the butter topping will help with browning.

Step 7: Air Fry the Stuffed Rolls

Place the rolls in the air fryer basket seam-side down.

Leave space between each roll so hot air can circulate around the dough.

Air fry at 375°F (190°C) for 8 to 11 minutes, or until the rolls are puffed and golden brown.

Check them around the 8-minute mark because air fryer cooking times can vary between models.

If the tops are browning too quickly while the dough still needs more time, reduce the temperature slightly and continue cooking.

Step 8: Rest Before Serving

Carefully remove the rolls from the air fryer and let them rest for about 3 minutes.

The filling will be very hot immediately after cooking, and resting also gives the melted cheese a moment to settle.

Serve the rolls with warm marinara sauce for dipping.

Tips for Crispy Chicken Parmesan Stuffed Rolls

Use cooked chicken: Rotisserie chicken, leftover roasted chicken, or freshly cooked chicken all work well.

Do not overfill the dough: Too much filling can break the dough and cause the cheese to leak.

Seal the edges well: Pinch the dough firmly and cook the rolls seam-side down.

Avoid overcrowding: Leave enough room between the rolls for the hot air to circulate.

Use freshly shredded mozzarella: It melts smoothly and gives the filling a creamy texture.

Keep the marinara thick: A thick sauce works better than a watery sauce because it reduces the chance of soggy dough.

Watch the final minutes: Cheese and butter can brown quickly in an air fryer.

What Type of Chicken Works Best?

Cooked chicken breast is a convenient choice because it is lean and easy to shred. Rotisserie chicken is also excellent because it adds extra flavor without requiring another cooking step.

You can also use cooked chicken thighs if you prefer darker meat. Remove the skin and bones before chopping the chicken.

The chicken should be fully cooked before it goes into the rolls.

Can You Use Crescent Dough Instead of Pizza Dough?

Yes. Refrigerated crescent roll dough can be used for a softer, more buttery version.

Crescent dough is more delicate than pizza dough, so avoid adding too much filling and seal the edges carefully.

The cooking time may also be slightly shorter, so begin checking the rolls early.

Delicious Ways to Customize Them

These rolls are easy to change based on what you have in the kitchen.

Add Spinach

Mix a small amount of finely chopped cooked spinach into the chicken filling for extra color and flavor.

Make Them Spicy

Add red pepper flakes, diced jalapeños, or a pinch of cayenne pepper to the filling.

Add Fresh Basil

Chopped fresh basil gives the rolls a classic Italian flavor and pairs especially well with marinara and mozzarella.

Try Different Cheese

Part-skim mozzarella works well, but you can also add provolone, fontina, or a little shredded Italian cheese blend.

Add Pepperoni

Finely chopped pepperoni can turn these rolls into a chicken Parmesan and pizza-inspired snack.

What to Serve With Chicken Parmesan Stuffed Rolls

These rolls are filling on their own, but they also pair well with simple side dishes.

Serve them with a fresh green salad, roasted vegetables, steamed broccoli, or a simple tomato and cucumber salad.

For a casual meal, add a bowl of marinara sauce for dipping and serve with roasted potatoes or air fryer vegetables.

If you are serving them as an appetizer, arrange the rolls on a platter with small bowls of marinara, garlic sauce, or pesto.

How to Store Leftovers

Allow the stuffed rolls to cool before placing them in an airtight container.

Store them in the refrigerator for up to 3 days.

Keep the marinara dipping sauce in a separate container so the rolls stay crisp.

For the best texture, reheat leftovers in the air fryer rather than the microwave.

How to Reheat Them in the Air Fryer

Preheat the air fryer to 350°F (175°C).

Place the refrigerated rolls in the basket and heat for about 3–5 minutes, turning them once if needed.

Make sure the chicken filling reaches a safe serving temperature before eating.

Avoid overheating them because the dough can become too dry and the cheese can become tough.

Can You Freeze Chicken Parmesan Stuffed Rolls?

Yes, these rolls can be frozen.

Let the cooked rolls cool completely, then wrap them individually and place them in a freezer-safe container or bag.

For best quality, use them within about 2 months.

To reheat, place the frozen rolls directly in a preheated air fryer at 350°F (175°C). Cook until heated through and crisp on the outside, adding a few extra minutes as needed.

Frequently Asked Questions

Can I use leftover chicken for this recipe?

Yes. Leftover roasted chicken or rotisserie chicken works very well as long as it has been properly refrigerated and is still within its safe storage period.

Can I make these without marinara sauce?

Yes. You can leave the sauce out of the filling and serve warm marinara on the side for dipping.

Why did my stuffed rolls open in the air fryer?

The rolls usually open because they were overfilled or the dough seams were not sealed firmly enough before cooking.

Can I use frozen cooked chicken?

Yes, but thaw the chicken completely and drain any excess moisture before mixing it with the other filling ingredients.

How do I keep the dough from getting soggy?

Use a thick marinara sauce, avoid overfilling the rolls, and leave enough space between them during air frying.

Can I prepare these ahead of time?

Yes. Assemble the rolls several hours ahead, cover them, and refrigerate until you are ready to air fry them.

What temperature should the chicken filling reach?

If you are cooking chicken specifically for this recipe, it should reach an internal temperature of 165°F (74°C) before being used in the rolls.

Can I make these in a regular oven?

Yes. Bake the assembled rolls on a lined baking sheet at 400°F (200°C) until the dough is puffed and golden, usually about 15–20 minutes.

Final Thoughts

These Air Fryer Chicken Parmesan Stuffed Rolls are an easy way to turn familiar Italian-American flavors into a fun handheld meal. The combination of tender chicken, rich marinara, melted mozzarella, Parmesan, and golden dough makes every bite satisfying.

The air fryer keeps the preparation simple while giving the rolls a crisp, golden exterior. Serve them fresh with warm marinara for dipping, or make a batch ahead for an easy family meal, party snack, or game-day appetizer.

Once you try this version, you can easily change the filling with your favorite cheese, herbs, or vegetables to create your own variation.

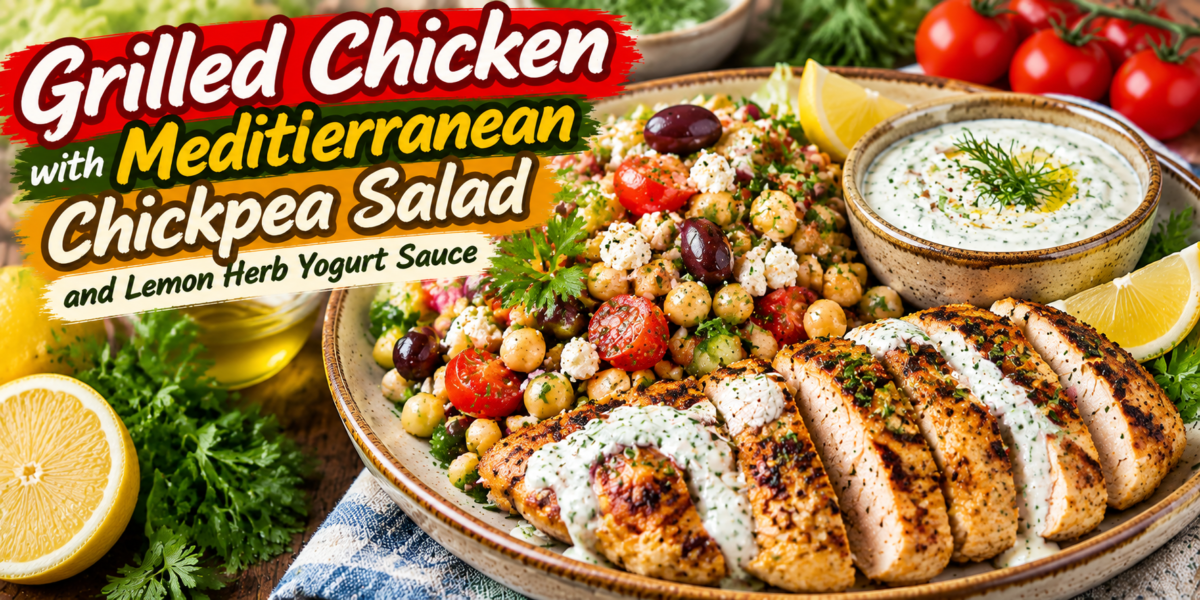
Grilled Chicken with Mediterranean Chickpea Salad and Lemon Herb Yogurt Sauce

Grilled Chicken served with Mediterranean chickpea salad and lemon herb yogurt sauce on a plate

Grilled Chicken with Mediterranean Chickpea Salad and Lemon Herb Yogurt Sauce

Grilled Chicken with Mediterranean Chickpea Salad and Lemon Herb Yogurt Sauce is a fresh, healthy, and flavorful meal packed with protein, vegetables, herbs, and creamy Mediterranean-inspired flavors. This recipe combines juicy chicken marinated with herbs and spices, a colorful chickpea salad filled with fresh ingredients, and a refreshing lemon herb yogurt sauce that brings everything together.

This Grilled Chicken recipe is perfect for lunch, dinner, meal preparation, or family gatherings because it is simple to make and full of nutritious ingredients. The tender chicken provides satisfying protein, while the chickpea salad adds fiber, vitamins, and minerals.

The Mediterranean flavors come from ingredients like olive oil, lemon juice, garlic, cucumber, tomatoes, parsley, and herbs. These ingredients create a bright and refreshing taste that makes this meal feel light yet filling.

Unlike heavy meals that leave you feeling tired, this dish provides a balanced combination of protein, healthy fats, and fresh vegetables. The creamy yogurt sauce adds a delicious tangy flavor without making the meal too heavy.

Whether you are looking for a healthy weekday dinner or a beautiful dish to serve guests, this recipe is an excellent choice. The ingredients are simple, the preparation is easy, and the final result is full of restaurant-style flavor.

This Grilled Chicken meal can also be customized with different vegetables, herbs, or grains depending on your preference.

Preparation Time: 20 minutes
Marinating Time: 30 minutes
Cooking Time: 15 minutes
Total Time: 65 minutes
Servings: 4 servings

Ingredients

For the Grilled Chicken Marinade:

Chicken breasts or thighs (boneless and skinless): 2 pounds

Olive oil: 3 tablespoons

Fresh lemon juice: 3 tablespoons

Garlic (minced): 3 cloves

Dried oregano: 1 teaspoon

Dried thyme: 1 teaspoon

Paprika: 1 teaspoon

Ground cumin: 1/2 teaspoon

Salt: 1 teaspoon

Black pepper: 1/2 teaspoon

Fresh parsley (chopped): 1 tablespoon

For the Mediterranean Chickpea Salad

2 cans chickpeas, drained and rinsed

1 cup cherry tomatoes, halved

1/2 cup feta cheese, crumbled

1/4 cup fresh parsley, chopped

2 tablespoons fresh mint, chopped

1/2 red onion, finely chopped

3 tablespoons olive oil

2 tablespoons lemon juice

1/2 cup Kalamata olives, sliced

1 cucumber, diced

1 teaspoon dried oregano

Salt and pepper to taste

For the Lemon Herb Yogurt Sauce

1 cup Greek yogurt

2 tablespoons lemon juice

1 tablespoon olive oil

2 garlic cloves, minced

2 tablespoons fresh parsley, chopped

1 tablespoon fresh dill

1 tablespoon fresh mint

1/2 teaspoon salt

1/4 teaspoon black pepper

Step-by-Step Instructions

Prepare the Chicken Marinade

Start by preparing the marinade for the chicken. In a bowl, combine olive oil, lemon juice, minced garlic, oregano, thyme, paprika, cumin, salt, black pepper, and fresh parsley.

Mix the ingredients well until everything is combined.

Add the chicken pieces and coat them completely with the marinade.

Cover the bowl and place it in the refrigerator for at least 30 minutes. For deeper flavor, you can marinate the chicken for up to 8 hours.

A good marinade helps create tender and flavorful Grilled Chicken with a beautiful herb-infused taste.

Grill the Chicken

Preheat your grill or grill pan over medium-high heat.

Remove the chicken from the marinade and allow excess liquid to drip off.

Place the chicken on the hot grill and cook for approximately 6 to 8 minutes per side, depending on thickness.

The chicken should develop a golden grilled surface while remaining juicy inside.

Check that the internal temperature reaches 165°F for safe cooking.

Remove the chicken from the grill and let it rest for 5 minutes before slicing.

Resting allows the juices to redistribute, creating tender and flavorful chicken.

Prepare the Mediterranean Chickpea Salad

While the chicken is cooking, prepare the salad.

Add chickpeas, cherry tomatoes, cucumber, red onion, olives, feta cheese, parsley, and mint to a large bowl.

In a separate small bowl, mix olive oil, lemon juice, oregano, salt, and pepper.

Pour the dressing over the salad ingredients and gently toss everything together.

Allow the salad to sit for a few minutes so the flavors can blend.

The chickpeas absorb the lemon and herb flavors, creating a refreshing Mediterranean taste.

Make the Lemon Herb Yogurt Sauce

Add Greek yogurt, lemon juice, olive oil, garlic, parsley, dill, mint, salt, and pepper to a bowl.

Mix until smooth and creamy.

Taste the sauce and adjust seasoning if needed.

If you prefer a thinner sauce, add a small amount of water or extra lemon juice.

The creamy yogurt sauce adds freshness and balances the smoky flavor of the grilled meat.

Assemble the Dish

Place a portion of Mediterranean chickpea salad on each plate.

Add sliced chicken beside the salad.

Drizzle lemon herb yogurt sauce over the chicken or serve it on the side.

Garnish with fresh herbs and a lemon wedge.

Your Grilled Chicken with Mediterranean flavors is ready to enjoy.

This combination creates the perfect balance of smoky chicken, refreshing salad, and creamy sauce.

Tips for Making the Best Grilled Chicken

Choose chicken pieces with similar thickness so they cook evenly.

Do not skip the marinating step because it helps improve flavor and tenderness.

Avoid cooking the chicken on extremely high heat because the outside may burn before the inside is fully cooked.

Allow the chicken to rest after grilling for better texture.

Fresh lemon juice provides a brighter flavor compared with bottled versions.

For extra Mediterranean flavor, add a pinch of crushed red pepper or extra herbs.

Prepare the yogurt sauce ahead of time and keep it chilled until serving.

This Grilled Chicken tastes even better when paired with fresh seasonal vegetables.

Variations

Mediterranean Chicken Bowl

Serve the chicken and chickpea salad over quinoa, brown rice, or couscous for a complete bowl meal.

Spicy Version

Add chili flakes, cayenne pepper, or hot paprika to the marinade for extra heat.

Vegetarian Option

Replace chicken with grilled tofu, halloumi cheese, or extra chickpeas.

Low-Carb Version

Serve the chicken with extra vegetables and salad instead of grains.

Wrap Style

Place sliced chicken, chickpea salad, and yogurt sauce inside pita bread for a Mediterranean wrap.

Serving Suggestions

Serve this meal with warm pita bread, roasted vegetables, or a simple green salad.

A side of hummus makes a great addition to the Mediterranean flavors.

For entertaining guests, arrange the chicken, salad, and sauce on a large serving platter.

This Grilled Chicken dish is also perfect for meal preparation because each component stores well separately.

Serve with sparkling water, lemon drinks, or fresh herbs for a complete Mediterranean-style meal.

Health Benefits

Chicken is a lean protein source that helps support muscle health and keeps you satisfied.

Chickpeas provide plant-based protein, fiber, and important minerals.

Fresh vegetables add antioxidants, vitamins, and hydration.

Greek yogurt contains protein and calcium while creating a creamy sauce without heavy ingredients.

Olive oil provides healthy fats that are commonly included in Mediterranean eating patterns.

This Grilled Chicken meal provides balanced nutrition by combining protein, vegetables, fiber, and healthy fats.

The fresh herbs and lemon also add flavor without requiring excessive salt or processed ingredients.

Storage and Reheating Instructions

Store grilled chicken in an airtight container in the refrigerator for up to 4 days.

Keep the chickpea salad and yogurt sauce stored separately.

Reheat chicken gently in a skillet, oven, or microwave until warmed through.

Avoid overheating because it may dry the chicken.

The salad can be served cold or at room temperature.

The yogurt sauce should remain refrigerated and should be used within 3 to 4 days.

This Grilled Chicken recipe is excellent for meal prep because it maintains flavor and texture when stored properly.

Why This Recipe Is Perfect for Every Occasion

This recipe is ideal because it combines healthy ingredients with incredible flavor.

It works for busy weeknight dinners because preparation is simple and efficient.

Families enjoy this meal because everyone can customize their plate.

It is also impressive enough for dinner parties because of its colorful presentation.

The Mediterranean flavors make this Grilled Chicken recipe different from ordinary chicken dishes.

It offers a fresh alternative to heavy meals while still providing comfort and satisfaction.

Cooking Notes

Always bring chicken close to room temperature before grilling.

Clean and oil the grill surface to prevent sticking.

Cut chicken into even pieces for consistent cooking.

Taste the salad dressing before mixing it with vegetables.

Fresh herbs create the best Mediterranean flavor.

Adjust lemon juice according to your taste preference.

Frequently Asked Questions

Can I use chicken thighs instead of chicken breasts?

Yes, chicken thighs work well and usually remain juicier after grilling.

How long should I marinate the chicken?

At least 30 minutes is recommended, but overnight marination creates deeper flavor.

Can I prepare this recipe ahead of time?

Yes, prepare all components separately and assemble before serving.

Can I freeze grilled chicken?

Yes, cooked chicken can be frozen for up to 3 months.

What can I serve instead of chickpea salad?

You can use quinoa salad, roasted vegetables, or a fresh green salad.

Is Grilled Chicken healthy?

Yes, when prepared with fresh ingredients, it provides protein, nutrients, and balanced flavors.

Nutrition Information (Per Serving)

Calories: 560 kcal

Protein: 48g

Carbohydrates: 32g

Fat: 28g

Fiber: 9g

Sugar: 6g

Sodium: 720mg approximately

Nutrition values may vary depending on ingredients and serving sizes.

Final Thoughts

Grilled Chicken with Mediterranean Chickpea Salad and Lemon Herb Yogurt Sauce is a delicious recipe that brings fresh Mediterranean flavors to your table.

The combination of juicy chicken, colorful chickpea salad, and creamy yogurt sauce creates a meal that is nutritious, satisfying, and easy to prepare.

Whether you are cooking for your family, preparing weekly meals, or serving guests, this recipe offers the perfect balance of flavor and nutrition.

With simple ingredients and flexible options, this Grilled Chicken recipe is a healthy addition to any meal plan. It proves that healthy food can be flavorful, beautiful, and enjoyable.

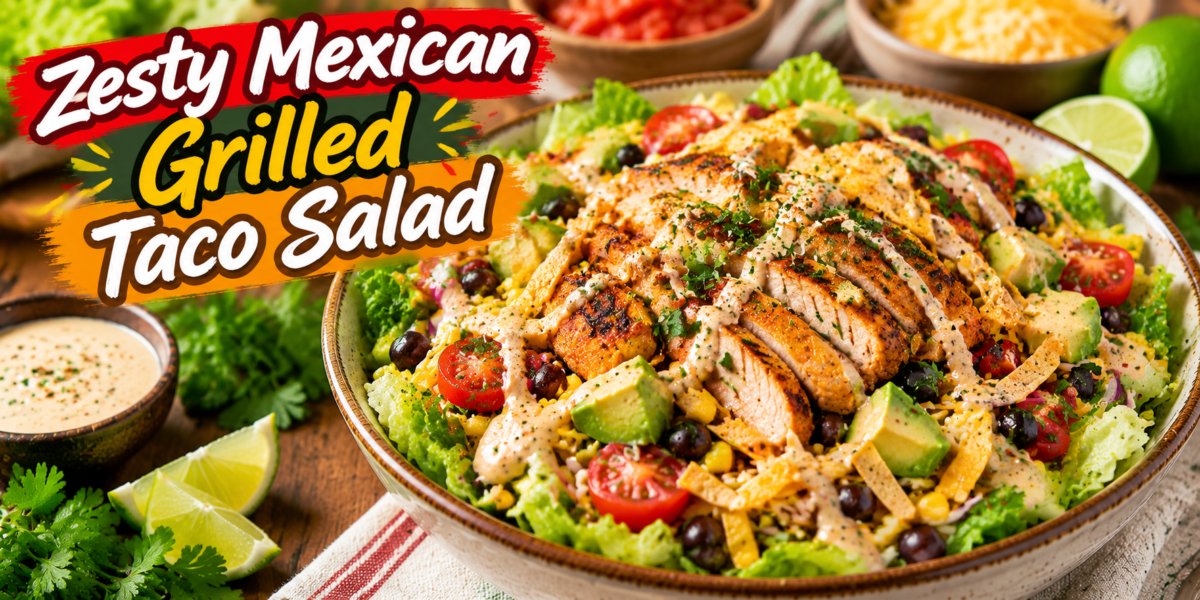
Zesty Mexican Grilled Taco Salad

Zesty Mexican Grilled Taco Salad with grilled chicken, vegetables, avocado, beans, and creamy dressing

Zesty Mexican Grilled Taco Salad

Zesty Mexican Grilled Taco Salad is a fresh, colorful, and flavorful meal that combines smoky grilled protein, crisp vegetables, creamy toppings, and delicious Mexican-inspired seasonings. This recipe brings together everything you love about classic tacos in a lighter and more refreshing bowl-style dish.

This Taco Salad is perfect for lunch, dinner, meal preparation, or family gatherings because it is easy to customize and packed with satisfying flavors. The combination of grilled meat, crunchy lettuce, juicy tomatoes, beans, corn, avocado, cheese, and a zesty dressing creates a perfect balance of textures.

Unlike traditional tacos served in tortillas, this version uses fresh greens as the base, making it a great option for anyone looking for a lighter meal without losing the delicious Mexican flavors. The smoky grilled ingredients add depth, while fresh toppings provide brightness and freshness.

This Taco Salad can be prepared quickly with simple ingredients available in most kitchens. Whether you are cooking for your family or preparing meals for the week, this recipe delivers a nutritious and satisfying option.

The homemade dressing adds the final touch with a combination of lime juice, spices, and creamy ingredients that bring all flavors together. Every bite provides a delicious mix of savory, spicy, creamy, and crunchy elements.

Preparation Time: 20 minutes
Cooking Time: 15 minutes
Total Time: 35 minutes
Servings: 4 servings

Ingredients

For the Grilled Protein

1 pound chicken breast, steak, or shrimp

Olive oil: 2 tablespoons

Fresh lime juice: 2 tablespoons

Chili powder: 2 teaspoons

Smoked paprika: 1 teaspoon

Ground cumin: 1 teaspoon

Garlic powder: 1 teaspoon

Salt: 1/2 teaspoon

Onion powder: 1/2 teaspoon

Black pepper: 1/2 teaspoon

For the Salad Base

1 cup sweet corn

1 red bell pepper, sliced

1/2 red onion, thinly sliced

1 avocado, diced

1 cup cherry tomatoes, halved

6 cups chopped romaine lettuce

1/2 cup shredded cheddar cheese

1/4 cup fresh cilantro, chopped

1 cup black beans, drained and rinsed

1 jalapeño, sliced (optional)

For the Mexican Dressing

1/3 cup Greek yogurt or sour cream

2 tablespoons lime juice

1 tablespoon olive oil

1/2 teaspoon cumin

1 small garlic clove, minced

1 teaspoon honey

Salt and pepper to taste

1 teaspoon chili powder

Step-by-Step Instructions

Prepare the Grilled Protein

Start by preparing the marinade for your protein. In a bowl, combine olive oil, lime juice, chili powder, smoked paprika, cumin, garlic powder, onion powder, salt, and black pepper.

Add the chicken, steak, or shrimp and coat evenly with the seasoning mixture. Allow the protein to marinate for at least 15 minutes. For stronger flavor, you can marinate it for several hours in the refrigerator.

Heat a grill pan or outdoor grill over medium-high heat.

Cook the protein until fully cooked and slightly charred on the outside. Chicken usually takes about 6 to 8 minutes per side, while shrimp cooks much faster.

Allow the grilled protein to rest for a few minutes before slicing. This helps keep the juices inside and creates a more tender texture.

Prepare the Salad Ingredients

Wash and dry the lettuce thoroughly before chopping. Fresh and crisp greens create the best base for the salad.

Prepare the vegetables by slicing tomatoes, bell peppers, onions, and jalapeños.

Drain and rinse the black beans to remove excess liquid.

Cut the avocado into cubes just before serving to prevent browning.

Place all prepared ingredients into a large salad bowl.

Make the Mexican Dressing

In a small bowl, combine Greek yogurt, lime juice, olive oil, honey, chili powder, cumin, garlic, salt, and pepper.

Whisk everything together until smooth and creamy.

Taste the dressing and adjust the seasoning according to your preference.

For extra heat, add a little hot sauce or additional chili powder.

Assemble the Salad

Add chopped romaine lettuce to a large serving bowl.

Top with grilled protein, black beans, corn, tomatoes, bell peppers, onion, avocado, cheese, and cilantro.

Drizzle the homemade dressing over the top.

Gently toss everything together until all ingredients are evenly coated.

Your Taco Salad is now ready to serve.

The combination of smoky grilled flavors, fresh vegetables, and creamy dressing creates a satisfying meal that everyone will enjoy.

Tips for Making the Best Taco Salad

Use fresh vegetables whenever possible because they provide better flavor and texture.

For the best grilled flavor, allow the protein to marinate before cooking.

Do not add dressing too early if you are preparing the salad ahead of time because the lettuce may become soft.

Keep avocado separate until serving to maintain freshness.

You can prepare all ingredients in advance and assemble the salad when ready to eat.

For extra crunch, add tortilla strips, crushed tortilla chips, or toasted corn.

Choose ripe avocados that are slightly soft but not overly mushy.

This Taco Salad tastes even better when served immediately after preparation while the ingredients are fresh and crisp.

Variations

Vegetarian Taco Salad

Replace grilled meat with roasted vegetables, extra beans, tofu, or grilled mushrooms for a delicious vegetarian version.

Low-Carb Taco Salad

Skip the beans and corn while adding extra vegetables, cheese, and protein.

Spicy Taco Salad

Add jalapeños, hot sauce, chipotle peppers, or spicy salsa for extra heat.

Seafood Version

Use grilled shrimp or fish instead of chicken for a lighter seafood option.

Creamy Avocado Dressing

Blend avocado with lime juice, yogurt, herbs, and spices to create a creamy homemade dressing.

Serving Suggestions

Serve this salad as a complete meal with fresh lime wedges on the side.

It pairs beautifully with homemade salsa, guacamole, or a refreshing Mexican drink.

For family dinners, prepare all ingredients separately and allow everyone to build their own bowl.

This Taco Salad is also perfect for summer gatherings because it is colorful, fresh, and easy to serve.

You can serve it with tortilla chips for extra crunch or alongside a bowl of Mexican rice for a larger meal.

Health Benefits

This recipe provides a good balance of protein, fiber, healthy fats, and fresh vegetables.

The grilled protein helps support muscle health and keeps you feeling satisfied.

Lettuce, tomatoes, peppers, and other vegetables provide vitamins, minerals, and antioxidants.

Black beans add plant-based protein and fiber that support digestion.

Avocado provides healthy fats that contribute to a balanced diet.

The homemade dressing allows you to control ingredients compared with many store-bought dressings that may contain extra additives.

This Taco Salad is a nutrient-rich meal option that can fit into many healthy eating plans.

Storage and Reheating Instructions

Store leftover ingredients separately for the best quality.

Keep the salad vegetables in an airtight container in the refrigerator for up to 3 days.

Store grilled protein separately and reheat gently before serving.

Keep dressing in a separate container until ready to eat.

Avoid freezing the assembled salad because fresh vegetables lose their texture after freezing.

For meal preparation, prepare individual containers with lettuce, vegetables, protein, and toppings separated.

This Taco Salad can be enjoyed fresh throughout the week when stored properly.

Why This Recipe Is Perfect for Every Occasion

This recipe is perfect because it combines convenience, nutrition, and incredible flavor in one meal.

It works well for busy weekdays because preparation is simple and quick.

Families enjoy it because everyone can customize their own toppings.

It is also a great choice for gatherings because the colorful presentation looks beautiful on any table.

The flexibility of this Taco Salad makes it suitable for different dietary preferences and taste choices.

Whether you prefer spicy flavors, extra vegetables, or different proteins, this recipe can easily be adjusted.

Cooking Notes

Always dry lettuce completely before assembling the salad.

Cook protein until it reaches the correct internal temperature for safety.

Add avocado and dressing right before serving for the freshest results.

Adjust spices according to your preferred heat level.

Fresh lime juice creates a brighter Mexican-inspired flavor.

Use high-quality ingredients because simple recipes depend on fresh flavors.

Frequently Asked Questions

Can I prepare Taco Salad ahead of time?

Yes, prepare all ingredients separately and combine them before serving.

What protein works best for this recipe?

Chicken, steak, shrimp, or turkey all work well depending on your preference.

Can I make this salad vegetarian?

Yes, replace the grilled protein with beans, tofu, or roasted vegetables.

How can I make the dressing healthier?

Use Greek yogurt instead of sour cream and reduce added sweeteners.

Can I use iceberg lettuce instead of romaine?

Yes, but romaine provides better texture and flavor.

Is Taco Salad good for weight management?

Yes, when prepared with balanced portions of protein, vegetables, and healthy toppings.

Nutrition Information (Per Serving)

Calories: 520 kcal

Protein: 38g

Carbohydrates: 42g

Fat: 26g

Fiber: 10g

Sugar: 7g

Sodium: 650mg approximately

Nutrition values may vary depending on ingredients and serving sizes.

Final Thoughts

Zesty Mexican Grilled Taco Salad is a delicious way to enjoy bold Mexican flavors in a fresh and satisfying meal. The combination of grilled protein, crunchy vegetables, creamy toppings, and homemade dressing creates a perfect balance of taste and nutrition.

This recipe is simple enough for everyday meals but impressive enough for entertaining guests.

With easy preparation, flexible ingredients, and plenty of customization options, this Taco Salad is a recipe you will want to make again and again.

Whether you are looking for a healthy lunch, quick dinner, or meal prep idea, this dish delivers amazing flavor in every bite.