Cheesy Herb Pull-Apart Bread

Cheesy Herb Pull-Apart Bread

Description

Cheesy Herb Pull-Apart Bread is the ultimate warm, buttery, cheesy appetizer or side dish. Made with a soft loaf of bread filled with melted cheese, garlic butter, and fresh herbs, every slice pulls apart into a deliciously crispy, gooey bite. The combination of golden toasted bread, fragrant herbs, garlic, and stretchy melted cheese makes this recipe perfect for family dinners, parties, game nights, holidays, or simply as a comforting snack.

The best part is how easy it is to prepare. You don’t need to make homemade dough unless you want to. A crusty Italian loaf, sourdough, French bread, or sturdy artisan loaf works beautifully. The bread is cut into a crosshatch pattern, allowing the garlic-herb butter and cheese to reach deep inside every section. After baking, the outside becomes golden and crisp while the center stays soft, buttery, and wonderfully cheesy.

Ingredients

For the Bread

  • 1 large crusty Italian, French, or sourdough loaf
  • 1 ½ cups shredded mozzarella cheese
  • ½ cup shredded sharp cheddar cheese
  • ¼ cup grated Parmesan cheese

For the Garlic Herb Butter

  • ½ cup unsalted butter, melted
  • 4 garlic cloves, finely minced
  • 2 tablespoons fresh parsley, finely chopped
  • 1 tablespoon fresh basil, chopped
  • 1 teaspoon dried Italian seasoning
  • ½ teaspoon dried oregano
  • ¼ teaspoon black pepper
  • ¼ teaspoon salt
  • 1 tablespoon olive oil

Optional Toppings

  • 1 tablespoon chopped green onions
  • 1 tablespoon fresh parsley
  • ½ teaspoon red pepper flakes
  • Extra Parmesan cheese for finishing

Instructions

1. Prepare the Bread

Preheat your oven to 375°F (190°C). Line a baking sheet with aluminum foil or parchment paper for easier cleanup.

Place the loaf on a cutting board. Using a sharp serrated knife, carefully cut the bread into approximately 1-inch slices, but do not cut completely through the bottom. You want the loaf to remain connected.

Turn the bread and make another series of cuts in the opposite direction, creating a crosshatch or diamond pattern.

Be careful not to slice all the way through the base. Keeping the bottom intact allows the bread to hold together while baking and makes it easier to pull apart when served.

2. Make the Garlic Herb Butter

In a small bowl, combine the melted butter, minced garlic, chopped parsley, basil, Italian seasoning, oregano, black pepper, salt, and olive oil.

Mix thoroughly until the garlic and herbs are evenly distributed throughout the butter.

For an even richer flavor, allow the mixture to sit for 5 minutes before using. This gives the garlic and herbs a little time to infuse the butter.

3. Add the Cheese

Gently open the cuts in the bread without separating the sections.

Start stuffing the shredded mozzarella into the spaces between the slices. Follow with the cheddar and Parmesan, distributing the cheese as evenly as possible throughout the loaf.

Don’t worry if some cheese remains on top. It will melt into a golden, bubbly layer while baking.

For an extra cheesy loaf, concentrate a little more mozzarella in the center sections where it can create those irresistible cheese pulls.

4. Add the Garlic Herb Butter

Using a pastry brush, spoon, or small silicone spatula, generously spread the garlic herb butter over the top of the bread.

Push some of the butter mixture directly into the cuts so it can soak into the soft interior.

Try to distribute the garlic and herbs throughout the loaf rather than leaving all the butter on the surface. This is what gives every pull-apart section incredible flavor.

If desired, drizzle any remaining butter over the top.

5. Wrap and Bake

Loosely wrap the prepared bread in aluminum foil, making sure the foil does not press tightly against the cheese.

Place the wrapped loaf on the prepared baking sheet and bake for 15 minutes.

The foil helps the bread warm through while keeping the interior soft and allowing the cheese to melt.

After 15 minutes, carefully open the foil. Return the bread to the oven uncovered and bake for another 8–12 minutes, or until the cheese is completely melted and the top is golden brown.

For an extra-crispy finish, switch the oven to broil for the final 1–2 minutes. Watch closely because the cheese and bread can brown quickly.

6. Garnish and Serve

Remove the bread from the oven and allow it to cool for about 5 minutes.

Sprinkle with freshly chopped parsley and green onions. Add a small pinch of red pepper flakes if you enjoy a little heat.

Serve the bread while it is still warm. Simply pull apart the individual sections with your hands and enjoy the gooey cheese and buttery garlic-herb flavor.

Tips for the Best Pull-Apart Bread

Choose sturdy bread: A crusty artisan loaf or sourdough works better than very soft sandwich bread because it holds its shape during baking.

Don’t cut all the way through: Keeping the bottom connected is important. It allows the loaf to stay together and makes pulling it apart much easier.

Use freshly shredded cheese: Freshly shredded mozzarella and cheddar usually melt more smoothly than pre-shredded cheese.

Don’t skip the foil: Baking covered first helps the cheese melt without making the bread overly dry.

Broil carefully: If you want a deeply golden top, broil briefly while watching constantly.

Add extra garlic: If you love strong garlic flavor, add another minced clove or a small amount of roasted garlic to the butter.

Delicious Variations

For a three-cheese version, combine mozzarella, cheddar, and Monterey Jack.

For a Mediterranean-style loaf, add crumbled feta, chopped sun-dried tomatoes, oregano, and a few sliced olives.

For a spicy version, mix red pepper flakes or finely chopped jalapeños into the garlic butter.

For a pizza-style bread, add mozzarella, Parmesan, Italian seasoning, and a little chopped pepperoni between the sections. Serve with warm marinara sauce for dipping.

For a roasted garlic version, replace some of the fresh minced garlic with mashed roasted garlic for a sweeter, richer flavor.

Make-Ahead Instructions

You can prepare the bread several hours before baking. Assemble the loaf, cover it tightly with foil, and refrigerate it until ready to bake.

Allow the bread to sit at room temperature for approximately 15–20 minutes before placing it in the oven. Then bake according to the instructions.

Leftovers can be wrapped tightly and refrigerated for up to 3 days. Reheat in a 350°F oven until warmed through. Avoid microwaving for too long because the bread can become chewy.

Serving Suggestions

Cheesy Herb Pull-Apart Bread pairs wonderfully with pasta, soups, salads, grilled chicken, roasted vegetables, and hearty casseroles.

It is especially delicious alongside tomato soup, creamy pasta, lasagna, baked chicken, or a fresh Mediterranean salad.

For entertaining, place the warm loaf in the center of the table and let everyone pull off their own cheesy pieces. Serve with marinara, ranch, garlic butter, or a creamy herb dip.

Recipe Details

Prep Time: 15 minutes
Cook Time: 25–30 minutes
Total Time: 40–45 minutes
Servings: 8–10
Cuisine: American/Italian-inspired
Category: Appetizer, Side Dish, Snack

Cheesy Herb Pull-Apart Bread is crispy on the outside, soft and buttery inside, and packed with melted cheese in every bite. With its golden crust, aromatic garlic, fresh herbs, and irresistible cheese pulls, it is an easy recipe that turns an ordinary loaf of bread into a show-stopping side dish.

Stuffed Cabbage Rolls in Tomato Sauce

Stuffed Cabbage Rolls in Tomato Sauce

Stuffed Cabbage Rolls in Tomato Sauce are the ultimate cozy comfort food. Tender cabbage leaves are wrapped around a savory filling of seasoned ground beef, rice, onion, garlic, and fresh herbs, then nestled into a rich, flavorful tomato sauce and baked until everything is perfectly tender. The cabbage absorbs the delicious tomato sauce as it cooks, while the beef and rice filling becomes juicy, hearty, and satisfying.

This classic homemade dish is perfect for family dinners, Sunday meals, potlucks, and cold-weather gatherings. Although preparing the cabbage rolls takes a little time, the ingredients are simple, affordable, and easy to find. The rolls can also be assembled ahead of time, making them convenient for busy days.

Ingredients

For the Cabbage Rolls

  • 1 large green cabbage
  • 1½ pounds ground beef
  • ¾ cup uncooked long-grain white rice
  • 1 medium yellow onion, finely diced
  • 3 cloves garlic, minced
  • 1 large egg
  • ¼ cup fresh parsley, finely chopped
  • 1 teaspoon paprika
  • 1 teaspoon dried oregano
  • 1 teaspoon salt
  • ½ teaspoon black pepper
  • ½ teaspoon Italian seasoning
  • 2 tablespoons Worcestershire sauce

For the Tomato Sauce

  • 2 tablespoons olive oil
  • 1 medium onion, finely diced
  • 3 cloves garlic, minced
  • 2 cans (15 ounces each) tomato sauce
  • 1 can (14.5 ounces) diced tomatoes
  • 2 tablespoons tomato paste
  • 1½ cups beef broth
  • 1 tablespoon brown sugar
  • 1 teaspoon Italian seasoning
  • 1 teaspoon paprika
  • ½ teaspoon salt
  • ½ teaspoon black pepper
  • ¼ teaspoon red pepper flakes, optional
  • 2 tablespoons fresh parsley, chopped

Instructions

1. Prepare the Cabbage

Start by preparing the cabbage leaves. Bring a large pot of water to a gentle boil and add a generous pinch of salt.

Carefully remove any damaged outer leaves from the cabbage. Using a sharp knife, cut deeply around the core at the bottom. This will make it easier to separate the leaves as they soften.

Place the whole cabbage into the boiling water with the core facing downward. After about 2–3 minutes, the outer leaves should begin to soften.

Carefully remove the softened leaves with tongs and place them on a large plate or baking sheet.

Continue cooking and removing leaves until you have approximately 14–16 good-sized leaves.

Allow the leaves to cool enough to handle. Use a small knife to carefully trim the thick center rib from each leaf. Do not cut completely through the leaf; simply remove enough of the thick section to make the leaf flexible for rolling.

2. Prepare the Filling

In a large mixing bowl, combine the ground beef, uncooked rice, finely diced onion, minced garlic, egg, parsley, paprika, oregano, salt, black pepper, Italian seasoning, and Worcestershire sauce.

Mix everything gently with your hands or a large spoon until evenly combined.

Avoid overmixing the meat because excessive mixing can make the filling dense instead of tender.

The uncooked rice will absorb moisture and flavor while the cabbage rolls bake, so there is no need to cook the rice beforehand.

3. Prepare the Tomato Sauce

Heat the olive oil in a large saucepan over medium heat.

Add the diced onion and cook for 3–4 minutes until softened and translucent. Add the minced garlic and cook for another 30 seconds, just until fragrant.

Stir in the tomato sauce, diced tomatoes, tomato paste, and beef broth.

Add the brown sugar, Italian seasoning, paprika, salt, black pepper, and red pepper flakes if using.

Bring the sauce to a gentle simmer and cook for about 10 minutes, stirring occasionally.

The small amount of brown sugar helps balance the natural acidity of the tomatoes without making the sauce noticeably sweet.

Taste the sauce and adjust the salt, pepper, or seasonings according to your preference.

4. Assemble the Cabbage Rolls

Preheat your oven to 350°F (175°C).

Spread approximately 1½ cups of tomato sauce over the bottom of a large deep baking dish.

Place one cabbage leaf on a clean work surface with the inside facing upward.

Add approximately 2–3 tablespoons of the beef and rice filling near the lower center of the leaf. Avoid overfilling because the rice expands as it cooks.

Fold the bottom edge of the cabbage over the filling. Fold the sides inward, then roll the cabbage upward tightly, similar to rolling a burrito.

Place the cabbage roll seam-side down in the baking dish.

Continue with the remaining leaves and filling, arranging the rolls snugly beside one another.

5. Cover With Tomato Sauce

Once all the cabbage rolls are arranged in the baking dish, pour the remaining tomato sauce evenly over the top.

Use a spoon to spread the sauce so that the rolls are well coated.

The sauce provides moisture during baking and helps the rice cook properly.

If your baking dish has a lid, use it. Otherwise, cover the dish tightly with aluminum foil.

6. Bake Until Tender

Place the covered baking dish in the preheated oven and bake for approximately 1 hour 30 minutes to 1 hour 45 minutes.

Check the cabbage rolls toward the end of the cooking time. The cabbage should be very tender, and the filling should be completely cooked.

If desired, remove the foil during the final 15 minutes of baking. This allows some of the sauce to thicken and gives the tops of the cabbage rolls a little extra color.

Once finished, remove the dish from the oven and allow the cabbage rolls to rest for about 10–15 minutes before serving.

7. Garnish and Serve

Spoon plenty of the rich tomato sauce over each cabbage roll.

Garnish with freshly chopped parsley for a bright, fresh finish.

These cabbage rolls pair wonderfully with creamy mashed potatoes, roasted potatoes, steamed vegetables, crusty garlic bread, or a simple green salad.

For an extra creamy touch, serve them with a spoonful of sour cream or plain Greek yogurt.

Tips for Perfect Cabbage Rolls

Don’t overfill the leaves: The rice expands while cooking, so keep the filling moderate.

Soften the cabbage properly: Flexible leaves are much easier to roll without tearing.

Trim the thick rib: Removing part of the tough center rib makes rolling much easier.

Keep the rolls snug: Arrange them close together so they don’t unravel during baking.

Use plenty of sauce: The tomato sauce keeps the cabbage moist and helps cook the rice.

Let them rest: A short resting period allows the filling to settle and makes the rolls easier to serve.

Variations

For a lighter version, replace part of the ground beef with ground turkey or chicken.

You can also add finely grated carrot, chopped mushrooms, or diced bell pepper to the filling for additional vegetables.

For extra richness, mix a small amount of shredded Parmesan cheese into the meat mixture.

If you enjoy spicy food, add red pepper flakes, cayenne pepper, or diced jalapeño to the tomato sauce.

For a slightly different flavor, substitute half of the beef with ground pork.

Make-Ahead Instructions

Stuffed cabbage rolls are excellent for preparing ahead of time.

Assemble the rolls and place them in the baking dish with the tomato sauce. Cover tightly and refrigerate for up to 24 hours before baking.

When ready to cook, place the chilled dish in a preheated oven. You may need to add approximately 10–20 minutes to the baking time to ensure the center is fully cooked.

You can also freeze cooked cabbage rolls. Allow them to cool completely, then place them in an airtight freezer-safe container with plenty of tomato sauce.

Thaw overnight in the refrigerator and reheat gently in the oven until hot throughout.

Recipe Details

Prep Time: 35 minutes
Cook Time: 1 hour 30–45 minutes
Resting Time: 10–15 minutes
Total Time: About 2 hours 20 minutes
Servings: 6–8

Honey Lime Chicken Stuffed Avocados with Corn Salsa

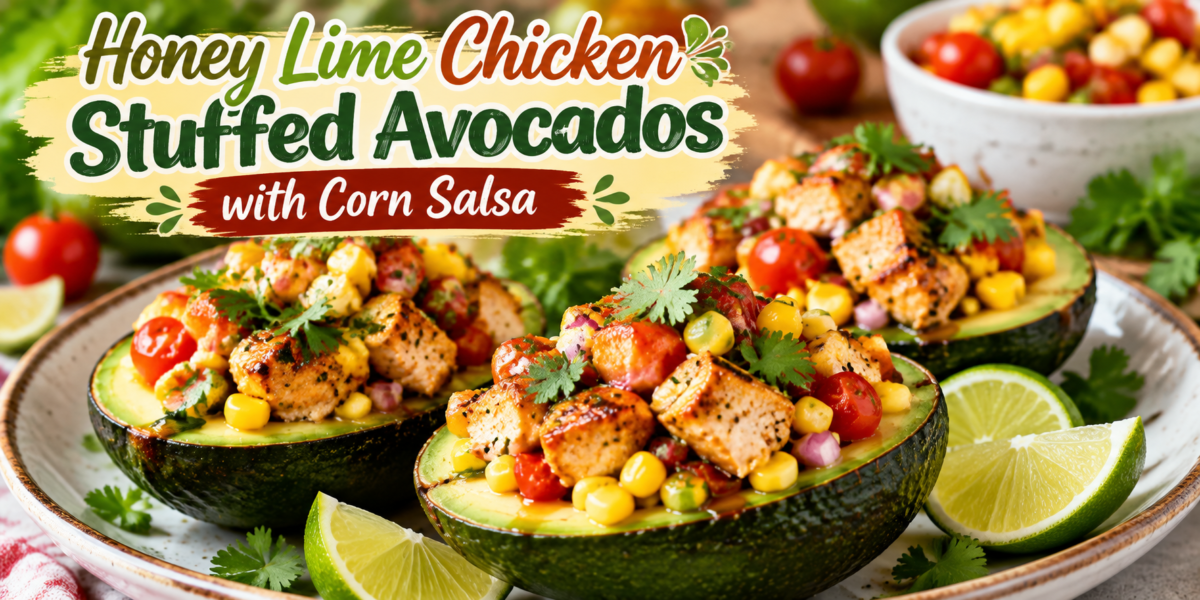
Stuffed Avocados filled with honey lime chicken, corn salsa, tomatoes, and fresh cilantro

Honey Lime Chicken Stuffed Avocados with Corn Salsa

Honey Lime Chicken Stuffed Avocados with Corn Salsa is a fresh, healthy, and flavorful recipe that combines juicy honey lime chicken, creamy avocados, sweet corn salsa, and vibrant Mexican-inspired flavors. This recipe is perfect for lunch, dinner, meal preparation, or a light summer meal.

The combination of tender chicken, creamy avocado, fresh vegetables, and a sweet-tangy honey lime dressing creates a balanced dish full of amazing textures and flavors. The natural creaminess of avocado pairs beautifully with the smoky seasoned chicken and refreshing corn salsa.

These Stuffed Avocados are a great choice for anyone who wants a nutritious meal without spending hours in the kitchen. The recipe uses simple ingredients but delivers restaurant-quality flavor.

Avocados provide healthy fats and a creamy base, while chicken adds lean protein to keep you satisfied. Fresh corn, tomatoes, onions, cilantro, and lime juice create a bright salsa that makes every bite refreshing.

This recipe is also easy to customize. You can add extra vegetables, adjust the spice level, or replace chicken with another protein according to your preference.

Whether you are looking for a quick weekday meal, a healthy party appetizer, or a colorful family dinner, these Stuffed Avocados are an excellent option.

Preparation Time: 20 minutes
Cooking Time: 15 minutes
Total Time: 35 minutes
Servings: 4 servings

Ingredients

For the Honey Lime Chicken

1 pound boneless skinless chicken breast, diced

2 tablespoons olive oil

3 tablespoons fresh lime juice

2 tablespoons honey

1/2 teaspoon salt

3 cloves garlic, minced

1 teaspoon chili powder

1 teaspoon smoked paprika

1/2 teaspoon cumin

1 tablespoon fresh cilantro, chopped

1/2 teaspoon black pepper

For the Corn Salsa

1 cup sweet corn kernels

1 cup cherry tomatoes, diced

1/4 cup red onion, finely chopped

1 small jalapeño, finely chopped (optional)

1/4 cup fresh cilantro, chopped

2 tablespoons fresh lime juice

1 tablespoon olive oil

Salt and pepper to taste

For the Stuffed Avocados

4 large ripe avocados

Extra cilantro for garnish

Lime wedges for serving

Step-by-Step Instructions

Prepare the Honey Lime Chicken

Start by preparing the chicken marinade.

In a medium bowl, combine olive oil, lime juice, honey, minced garlic, chili powder, smoked paprika, cumin, salt, and black pepper.

Add diced chicken and mix well until every piece is coated with the flavorful marinade.

Allow the chicken to rest for 15 to 20 minutes so the flavors can develop.

Heat a large skillet over medium heat.

Add the marinated chicken and cook for 8 to 10 minutes until the chicken is fully cooked and lightly browned.

Stir occasionally to cook the chicken evenly.

Remove the chicken from heat and add fresh cilantro.

The sweet and tangy honey lime flavor creates the perfect filling for these Stuffed Avocados.

Prepare the Corn Salsa

While the chicken is cooking, prepare the fresh corn salsa.

In a bowl, combine corn, diced tomatoes, red onion, jalapeño, and cilantro.

Add lime juice, olive oil, salt, and pepper.

Mix everything gently until the ingredients are well combined.

Allow the salsa to rest for a few minutes so the flavors blend together.

The fresh salsa adds a crunchy texture and refreshing taste to the creamy avocado.

Prepare the Avocados

Cut the avocados in half lengthwise.

Remove the pits carefully.

Use a spoon to slightly enlarge the center area if needed to create more space for the filling.

Keep the avocado flesh intact because it provides a beautiful presentation.

Brush a little lime juice over the avocado surface to help prevent browning.

Assemble the Stuffed Avocados

Fill each avocado half with the honey lime chicken mixture.

Top generously with the fresh corn salsa.

Add extra cilantro and serve with lime wedges.

Your Stuffed Avocados are now ready to enjoy.

The combination of creamy avocado, flavorful chicken, and fresh salsa creates a perfect balance of taste and nutrition.

Tips for Making the Best Stuffed Avocados

Choose ripe but firm avocados because they hold their shape better.

Do not prepare the avocados too far in advance because they can change color.

Use fresh lime juice for the best flavor.

Allow the chicken to marinate before cooking because it improves tenderness and taste.

For extra flavor, grill the chicken instead of cooking it in a skillet.

Add more jalapeño if you prefer a spicy version.

Keep the corn salsa chilled before serving for a refreshing contrast.

These Stuffed Avocados taste best when served immediately after preparation.

Variations

Shrimp Stuffed Avocados

Replace chicken with grilled shrimp seasoned with lime and spices.

Vegetarian Version

Replace chicken with black beans, chickpeas, or grilled vegetables.

Spicy Version

Add extra jalapeños, hot sauce, or cayenne pepper.

Cheese Version

Add shredded cheese, feta, or cotija cheese for extra flavor.

Tropical Version

Add diced mango or pineapple to the corn salsa for a sweet tropical twist.

Low-Carb Meal Option

This recipe is naturally low in carbohydrates and can be enjoyed as a light meal.

Serving Suggestions

Serve these Stuffed Avocados as a complete meal with a side salad or roasted vegetables.

They are also perfect as an appetizer for gatherings, summer parties, or family dinners.

Serve with tortilla chips, salsa, or a fresh cucumber salad.

For meal preparation, prepare the chicken and salsa separately, then assemble the avocados before eating.

A fresh lime drink or sparkling water pairs beautifully with this recipe.

Health Benefits

Avocados are rich in healthy fats, fiber, and important nutrients.

Chicken provides lean protein that helps support muscle health and keeps you feeling full.

Corn contains fiber and natural carbohydrates that provide energy.

Fresh vegetables provide vitamins, minerals, and antioxidants.

Lime juice adds fresh flavor while reducing the need for heavy sauces.

This recipe combines protein, healthy fats, and vegetables in one balanced meal.

These Stuffed Avocados are a nutritious option for anyone looking for a fresh and satisfying recipe.

Storage and Reheating Instructions

Store cooked chicken separately in an airtight container for up to 4 days.

Keep corn salsa refrigerated and use within 2 to 3 days.

It is best to prepare fresh avocados right before serving.

Do not freeze assembled avocados because the texture may change.

To reheat chicken, warm gently in a skillet or microwave.

Preparing ingredients separately helps maintain the freshness of these Stuffed Avocados.

Why This Recipe Is Perfect for Every Occasion

This recipe is perfect because it is simple, colorful, and packed with flavor.

It works well for quick lunches, healthy dinners, and special gatherings.

The presentation makes it look impressive while requiring minimal effort.

Families enjoy this recipe because everyone can customize their toppings.

The combination of creamy avocado, flavorful chicken, and fresh salsa makes these Stuffed Avocados a meal everyone will love.

It is also a great choice for warm weather because it feels light and refreshing.

Cooking Notes

Always use ripe avocados for the best creamy texture.

Avoid overcooking chicken because it can become dry.

Taste the salsa before serving and adjust seasoning if needed.

Fresh herbs create the best flavor.

If preparing ahead, keep each ingredient separate until serving.

Use a sharp knife when cutting avocados for cleaner presentation.

Frequently Asked Questions

Can I prepare Stuffed Avocados ahead of time?

You can prepare the chicken and salsa ahead, but assemble the avocados before serving.

How do I keep avocados from turning brown?

Adding fresh lime juice helps slow browning.

Can I use leftover chicken?

Yes, shredded leftover chicken works well in this recipe.

Are Stuffed Avocados healthy?

Yes, they provide protein, healthy fats, fiber, and fresh vegetables.

Can I make this recipe dairy-free?

Yes, the recipe is naturally dairy-free.

What other fillings can I use?

You can use shrimp, beans, vegetables, or turkey as alternative fillings.

Nutrition Information (Per Serving)

Calories: 430 kcal

Protein: 32g

Carbohydrates: 24g

Fat: 27g

Fiber: 10g

Sugar: 8g

Sodium: 520mg approximately

Nutrition values may vary depending on ingredients and portion sizes.

Final Thoughts

Honey Lime Chicken Stuffed Avocados with Corn Salsa is a delicious recipe that combines fresh ingredients with bold flavors.

The creamy avocado, sweet honey lime chicken, and colorful corn salsa create a meal that is both healthy and satisfying.

These Stuffed Avocados are easy enough for everyday cooking but impressive enough for serving guests.

With simple preparation, flexible variations, and nutritious ingredients, this recipe is a perfect addition to your healthy meal collection. It proves that wholesome food can be flavorful, beautiful, and enjoyable.

Milk Thistle Extract: Uses, Potential Benefits & Safety

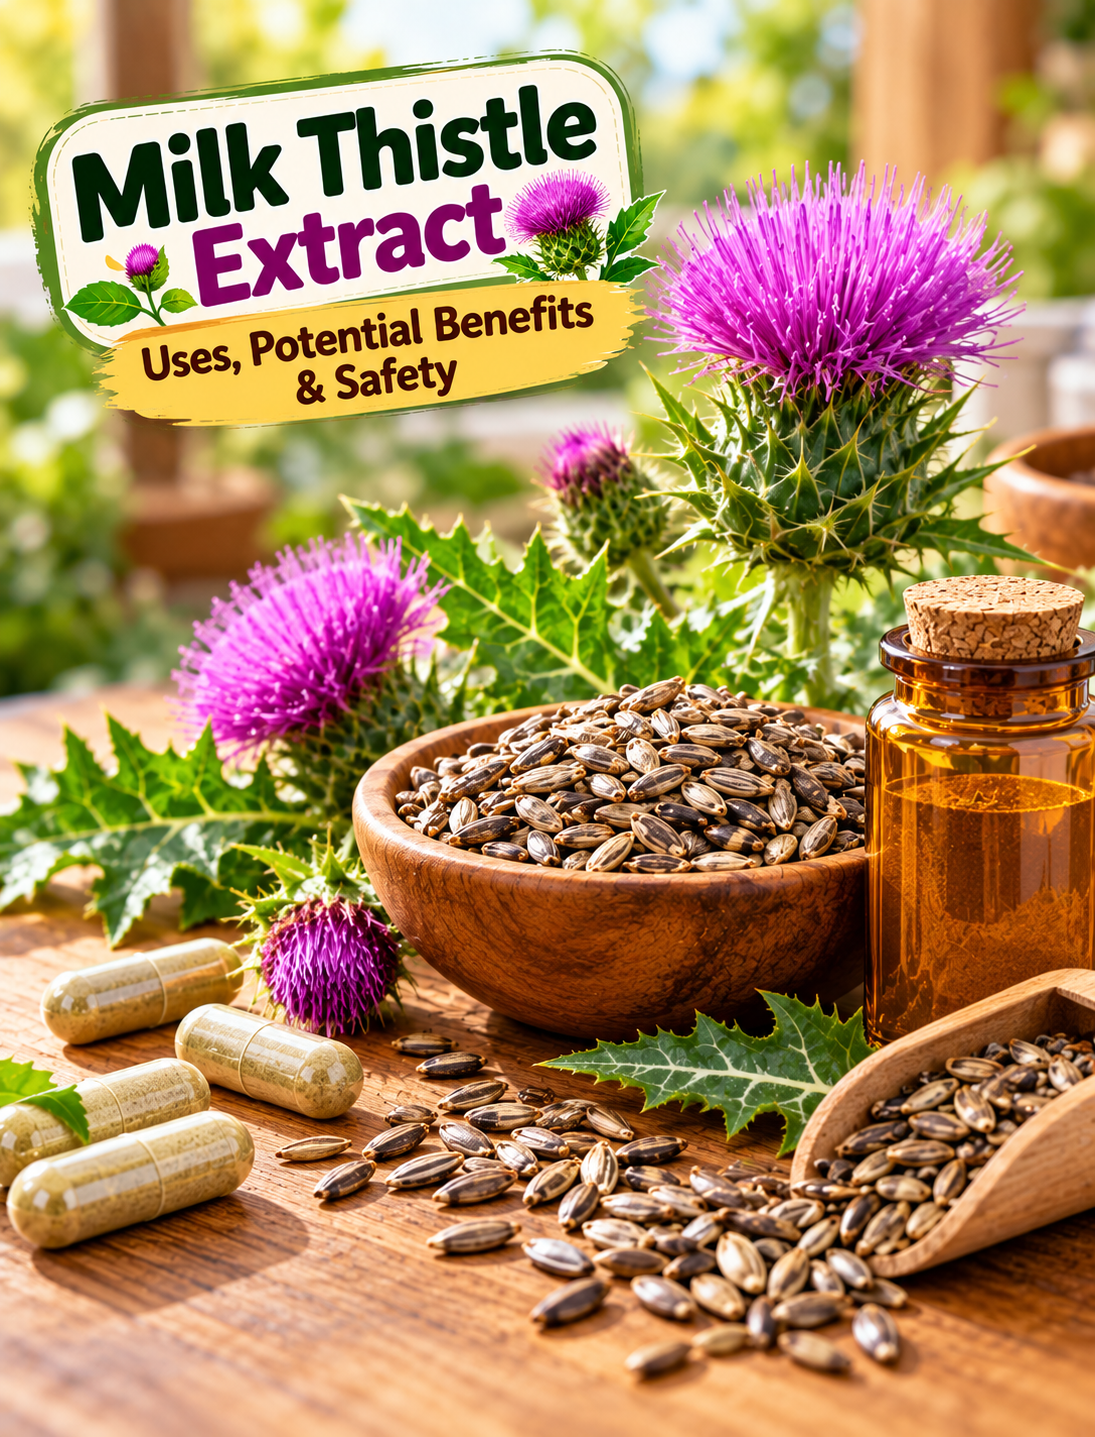
Milk thistle plant, purple flowers, seeds, and herbal extract representing milk thistle benefits and liver health research

Milk Thistle Extract: Uses, Potential Benefits & Safety

Milk thistle (Silybum marianum) is a flowering plant best known for its traditional connection with liver health. Today, milk thistle extract is widely sold as a dietary supplement, often promoted for liver support, antioxidant effects, blood sugar control, and general wellness.

The main compounds in milk thistle are collectively called silymarin. However, the research is more complicated than many supplement advertisements suggest. Human studies have produced mixed results, especially for liver disease, so milk thistle should not be described as a liver “detox” or cure. (NCCIH)

This guide explains what milk thistle is, why people use it, what research has found, and what to know before taking an extract.

What Is Milk Thistle?

Milk thistle is a plant native to Europe that has also been introduced to North America. It produces distinctive purple flowers and is sometimes called Mary thistle or holy thistle. (NCCIH)

Milk thistle supplements are usually made from the plant’s seeds or fruits. The best-known active component is silymarin, which is actually a mixture of several plant compounds.

Milk thistle has a long history in traditional herbal practices, particularly for liver-related complaints. It has also traditionally been used for other purposes, including supporting breast milk production, although evidence for this use remains unclear. (NCCIH)

What Is Silymarin?

Silymarin is the main group of compounds found in milk thistle extract.

Researchers have studied silymarin because of its antioxidant and other biological activities. Most modern milk thistle research focuses on standardized extracts containing measured amounts of silymarin.

One important point is that milk thistle products are not all identical. Extract strength, formulation, and product quality can vary, which makes results from one study difficult to apply to every supplement.

Why Do People Use Milk Thistle?

Milk thistle is commonly marketed for:

  • Liver health
  • Antioxidant support
  • Fatty liver concerns
  • Blood sugar support
  • General herbal wellness

Its strongest public association is with the liver. However, being commonly used for a condition does not mean that an herbal supplement has been proven to treat that condition.

The National Center for Complementary and Integrative Health (NCCIH) states that there is not enough high-quality evidence to reach definite conclusions about milk thistle’s effects on health conditions. (NCCIH)

Milk Thistle and Liver Health

Liver support is the main reason many people consider milk thistle supplements.

Researchers have studied silymarin in people with several liver conditions, including hepatitis B and C, alcohol-related liver disease, and nonalcoholic fatty liver disease.

The results have been mixed.

NCCIH reports that clinical trials of milk thistle for several liver conditions have been conflicting or too limited to support clear conclusions. Two NCCIH-funded studies, including research involving hepatitis C and nonalcoholic steatohepatitis, did not find a benefit from silymarin supplementation. (NCCIH)

What Does the Research Actually Show?

Some newer systematic reviews have reported improvements in certain laboratory markers, such as ALT and AST, among people taking silymarin. However, researchers have also pointed out limitations in study quality and called for better-designed clinical trials. (PubMed)

That distinction matters.

A change in a liver enzyme does not automatically mean that a supplement prevents liver damage, reverses disease, or improves long-term health outcomes.

Earlier systematic reviews also found insufficient evidence to recommend milk thistle as a treatment for chronic liver disease. (PubMed)

Can Milk Thistle Detox the Liver?

There is not enough evidence to say that milk thistle “detoxes” the liver.

Your liver already performs important processes that help metabolize substances and remove waste from the body.

Calling a supplement a “liver detox” can create unrealistic expectations. Milk thistle research should instead be discussed in terms of specific outcomes studied in humans, such as liver enzymes or symptoms.

If someone has abnormal liver tests or a diagnosed liver condition, the underlying cause should be evaluated rather than relying on an herbal supplement.

What Are the Potential Benefits?

Research has identified several areas of interest, but the evidence does not support treating milk thistle as a proven therapy.

Possible Liver Marker Effects

Some studies suggest silymarin may reduce certain liver enzymes in people with liver conditions. However, the clinical importance of these changes remains uncertain. (PubMed)

Antioxidant Activity

Silymarin contains compounds with antioxidant activity. Laboratory findings are interesting, but laboratory activity does not automatically translate into a proven health benefit in people.

Blood Sugar Research

Some small human studies have explored milk thistle in people with type 2 diabetes and reported possible improvements in blood sugar control. NCCIH notes that most of this research was conducted in Middle Eastern countries, so it remains unclear whether the same results would occur in other populations. (NCCIH)

General Wellness

Milk thistle may be used as part of an herbal supplement routine, but there is not enough high-quality evidence to recommend it for general disease prevention.

What Milk Thistle Cannot Be Claimed to Do

Avoid exaggerated claims that milk thistle:

  • “Cleans” or detoxes the liver
  • Reverses fatty liver disease
  • Cures hepatitis
  • Repairs liver damage
  • Prevents liver cancer
  • Replaces prescribed liver medication
  • Guarantees better liver function
  • Removes toxins from the body

These statements go beyond what current human evidence can support.

How Is Milk Thistle Extract Used?

Milk thistle is available as:

  • Capsules
  • Tablets
  • Standardized extracts
  • Powdered preparations
  • Combination herbal supplements

Because products can contain different amounts and forms of silymarin, follow the product label rather than assuming that every milk thistle supplement has the same dose or strength.

There is also a quality issue to consider. NCCIH notes that some milk thistle dietary supplements have been found to contain different amounts of silymarin than their labels state, while some have had contamination concerns. (NCCIH)

Choosing a reputable manufacturer and checking the full Supplement Facts label is therefore important.

Milk Thistle Side Effects

Milk thistle is generally well tolerated when taken orally, but side effects can occur.

The most commonly reported problems include:

  • Bloating
  • Gas
  • Nausea
  • Indigestion
  • Diarrhea

Allergic reactions are also possible, particularly in people who are sensitive to plants in the same family, such as ragweed, chrysanthemums, marigolds, and daisies. (NCCIH)

Stop using a supplement and seek appropriate medical advice if you develop a significant allergic reaction or other concerning symptoms.

Drug Interactions

Herbal supplements can interact with prescription and over-the-counter medicines.

The exact interaction risk depends on the medicine, dose, supplement formulation, and individual health factors. NCCIH recommends talking with a healthcare professional before using milk thistle if you take medications. (NCCIH)

Do not stop or change prescribed medication simply because you begin taking milk thistle.

Pregnancy and Breastfeeding

There is limited information about the safety of milk thistle during pregnancy or breastfeeding. (NCCIH)

If you are pregnant, trying to become pregnant, or breastfeeding, speak with a qualified healthcare professional before using milk thistle extract.

This is especially important with concentrated supplements because their strength can differ significantly from normal food exposure.

When Should You Speak With a Healthcare Professional?

Talk with a healthcare professional before using milk thistle if you:

  • Have diagnosed liver disease
  • Have abnormal liver enzyme results
  • Take prescription medication
  • Have diabetes
  • Have allergies to related plants
  • Are pregnant or breastfeeding
  • Are preparing for surgery
  • Take several dietary supplements

If you have symptoms such as yellowing of the skin or eyes, dark urine, severe abdominal pain, persistent vomiting, unusual bleeding, or unexplained weight loss, seek medical evaluation rather than trying to manage the problem with an herbal supplement.

How to Choose a Milk Thistle Supplement

If you decide to discuss milk thistle with your healthcare professional, use these steps:

Step 1: Check the ingredient

Look for milk thistle (Silybum marianum) and clearly stated silymarin content.

Step 2: Read the Supplement Facts panel

Check the serving size, amount per serving, additional ingredients, and suggested use.

Step 3: Avoid exaggerated claims

Be cautious of products promising a “complete liver cleanse,” instant detox, or guaranteed disease reversal.

Step 4: Choose transparent products

Look for manufacturers that provide clear information about ingredients and quality testing.

Step 5: Review medications

Ask a pharmacist or healthcare professional about possible interactions before starting the supplement.

Frequently Asked Questions

1. What is milk thistle extract used for?

Milk thistle extract is commonly used for liver-related wellness, but human evidence is not strong enough to establish it as a treatment for liver disease. (NCCIH)

2. What is silymarin?

Silymarin is a mixture of naturally occurring compounds that makes up the main active component of many milk thistle extracts.

3. Does milk thistle detox the liver?

No proven evidence shows that milk thistle “detoxes” the liver or removes toxins from the body.

4. Can milk thistle treat fatty liver?

Research is ongoing, but current evidence is not strong enough to recommend milk thistle as a proven treatment for fatty liver disease. (PubMed)

5. What are common milk thistle side effects?

Bloating, gas, nausea, indigestion, and diarrhea are among the commonly reported side effects. (NCCIH)

6. Can milk thistle interact with medications?

Yes. Because potential herb-drug interactions exist, people taking medication should consult a healthcare professional before using it. (NCCIH)

7. Is milk thistle safe during pregnancy?

Safety during pregnancy has not been adequately established, so pregnant people should consult a healthcare professional before using it. (NCCIH)

8. Is milk thistle proven to protect the liver?

Human studies have produced mixed results, and there is not enough high-quality evidence to make a broad liver-protection claim. (NCCIH)

Final Takeaway

Milk thistle is an interesting traditional herb with silymarin as its main group of active compounds. Its connection with liver health has led to substantial scientific research, but the human evidence remains mixed.

Some studies report changes in liver enzymes or other metabolic markers, while other well-designed studies have not found meaningful benefits. This means milk thistle should be viewed as a dietary supplement with ongoing research—not a proven liver treatment or detox product. (NCCIH)

If you are considering a milk thistle extract, focus on product quality, possible interactions, your existing health conditions, and the reason you want to use it. For diagnosed liver problems, professional medical evaluation should come before relying on an herbal supplement.

Eating These Foods on an Empty Stomach: Benefits, Myths & What to Know

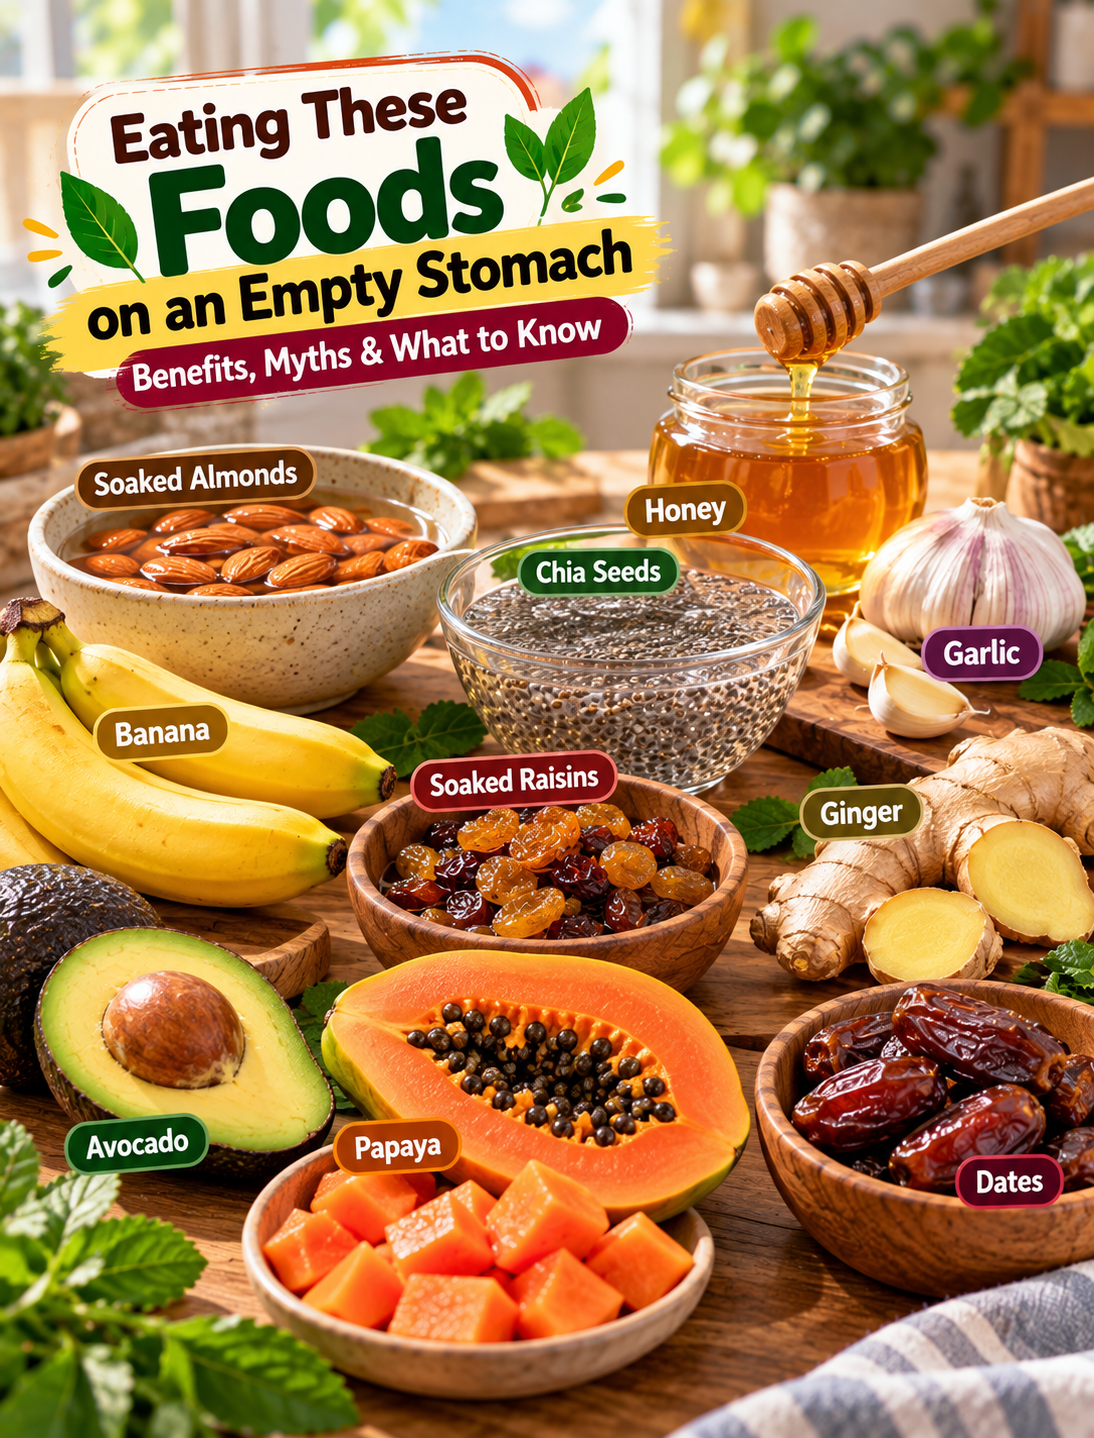
10 healthy foods on an empty stomach including almonds, chia seeds, banana, ginger, avocado, papaya, dates and raisins

Eating These Foods on an Empty Stomach: Benefits, Myths & What to Know

There is a popular idea that certain foods work better when eaten first thing in the morning or on an empty stomach. You may have seen claims that soaked almonds improve energy, honey “cleanses” the body, or papaya and chia seeds provide special morning benefits.

The truth is more practical: there is no scientifically proven list of foods that everyone should eat on an empty stomach. The overall quality of your diet, portion sizes, fiber intake, protein, healthy fats, hydration, and eating pattern matter more than whether a particular food is eaten before breakfast.

That does not make these foods unhelpful. Many are nutritious choices that can fit into a balanced diet. The key is understanding what each food can realistically offer.

The Empty-Stomach Myth: What Actually Matters?

Your digestive system is designed to process food throughout the day. For most healthy adults, there is no special requirement to eat a particular food before anything else.

Instead of asking, “What is the best food to eat on an empty stomach?”, a more useful question is:

“How can I include nutritious foods in a balanced meal or snack that works for my body?”

Fruits, nuts, seeds, and other whole foods can provide fiber, vitamins, minerals, healthy fats, or other nutrients. CDC guidance also recommends eating a variety of fruits, vegetables, protein foods, nuts, seeds, and fiber-rich foods rather than relying on one “special” food. (CDC)

1. Soaked Almonds

Soaked almonds are commonly eaten first thing in the morning in some traditional food practices.

What they provide

Almonds contain:

  • Protein
  • Fiber
  • Unsaturated fats
  • Vitamins and minerals
  • Plant compounds

What to know

Soaking may soften the almonds and change their texture, but there is no strong evidence that soaking makes almonds uniquely beneficial when eaten on an empty stomach.

You can eat almonds soaked or unsoaked depending on your preference.

Simple way to use them

Add a small portion of almonds to breakfast with fruit, yogurt, or oatmeal rather than treating them as a special morning remedy.

2. Honey

Honey is often recommended with warm water or eaten alone before breakfast.

What it provides

Honey contains naturally occurring sugars and small amounts of other compounds, but it is still a source of sugar.

What research says

Honey has been studied for certain uses, including cough relief, but that does not mean eating honey on an empty stomach provides a general detox or wellness effect. (NCCIH)

Important point

The CDC classifies honey as an added sugar when it is added to foods or drinks. (CDC)

Use it for flavor rather than assuming more honey means more health benefits.

3. Chia Seeds

Chia seeds are small but packed with nutrients.

What they provide

Chia seeds contain:

  • Fiber
  • Healthy fats
  • Plant-based omega-3 fatty acids
  • Protein
  • Antioxidant compounds

They absorb liquid and form a gel-like texture. Their fiber can help support regular bowel movements and fullness. (MedlinePlus)

Does timing matter?

There is no proven requirement to eat chia seeds before breakfast.

How to use them

Mix chia seeds into yogurt, oatmeal, smoothies, or a prepared chia pudding. Drink enough fluids when increasing your fiber intake. NIDDK recommends increasing fiber gradually and drinking enough liquids. (NIDDK)

4. Raw Garlic

Raw garlic is one of the most common foods promoted as a morning wellness remedy.

What it provides

Garlic contains sulfur-containing compounds and can add flavor and nutrients to meals.

What research says

Garlic supplements have been studied for cholesterol, blood pressure, and blood sugar, but these findings do not prove that eating raw garlic on an empty stomach treats these conditions. (NCCIH)

Precautions

Raw garlic may cause:

  • Heartburn
  • Stomach discomfort
  • Nausea
  • Gas
  • Strong breath odor

Garlic supplements may also increase bleeding risk and can interact with certain medicines. (NCCIH)

For most people, using garlic as part of normal meals is a simpler option.

5. Banana

Bananas are a convenient breakfast or snack because they require no preparation.

What they provide

Bananas provide:

  • Carbohydrates
  • Fiber
  • Potassium
  • Vitamin B6
  • Natural sweetness

Does eating one on an empty stomach offer special benefits?

There is no strong evidence that bananas have a unique effect simply because they are eaten before other foods.

If a banana makes you feel comfortable and satisfied in the morning, it can be part of a healthy breakfast.

Easy combination

Pair a banana with plain yogurt, nuts, nut butter, or oatmeal for a more balanced meal containing protein and healthy fats.

6. Soaked Raisins

Raisins are dried grapes, and soaking them is a traditional preparation in some cultures.

What they provide

Raisins contain:

  • Carbohydrates
  • Natural sugars
  • Some fiber
  • Potassium and other micronutrients

What to know

Soaking changes their texture but does not turn them into a detox food.

Because raisins are dried fruit, a small amount contains more concentrated sugars and calories than the same volume of fresh grapes.

Enjoy them as part of breakfast or a snack rather than relying on them as a morning cleanse.

7. Ginger

Ginger is widely used in cooking, tea, and traditional wellness practices.

What research says

Ginger has been studied for nausea and vomiting. Research suggests it may help with nausea associated with pregnancy, although many studies use supplements rather than ordinary food amounts. (NCCIH)

Does it need to be eaten on an empty stomach?

No. There is no established rule that ginger must be consumed before breakfast to work.

Precautions

Ginger can cause heartburn, abdominal discomfort, diarrhea, or mouth and throat irritation in some people. People taking medicines should discuss concentrated ginger products with a healthcare professional. (NCCIH)

8. Avocado

Avocado is very different from sugary fruits because it provides mostly healthy fats along with fiber.

What it provides

Avocado contains:

  • Unsaturated fats
  • Fiber
  • Potassium
  • Folate
  • Other vitamins and minerals

Best way to use it

Instead of eating avocado because it is supposedly “better on an empty stomach,” add it to a balanced breakfast.

Try avocado with:

  • Whole-grain toast
  • Eggs
  • Beans
  • Tomatoes
  • A vegetable omelet

Whole foods such as avocado can fit well into a balanced eating pattern without requiring special timing.

9. Papaya

Papaya is a naturally sweet fruit that provides fiber, vitamin C, and other plant compounds.

What people often claim

Papaya is sometimes promoted as a morning detox or digestive cleanser.

What to know

Eating papaya provides nutrients and fiber, but there is no need to eat it on an empty stomach to “clean” your digestive system.

Your body already has organs and systems that process and eliminate waste.

Simple idea

Enjoy fresh papaya with Greek yogurt, chia seeds, or another protein-rich food to create a more satisfying breakfast.

10. Dates

Dates are naturally sweet fruits that provide carbohydrates, fiber, and several minerals.

Why they are popular

Their sweetness makes them an easy alternative to candy or highly processed desserts.

Does timing matter?

There is no proven special benefit to eating dates before breakfast.

Because dates are concentrated dried fruit, portion size matters. A few dates can add sweetness to oatmeal, yogurt, smoothies, or energy bites.

How to Build a Better Morning Meal

Instead of searching for one perfect food for an empty stomach, build your first meal around several useful components.

Step 1: Choose a fiber-rich food

Try:

  • Chia seeds
  • Oatmeal
  • Whole fruit
  • Whole-grain toast

Fiber supports digestive health and can help you feel full. (NIDDK)

Step 2: Add protein

Good choices include:

  • Eggs
  • Plain Greek yogurt
  • Cottage cheese
  • Nuts
  • Seeds
  • Beans

Step 3: Include healthy fats

Try:

  • Avocado
  • Almonds
  • Walnuts
  • Chia seeds
  • Nut butter

Step 4: Add fruit if you enjoy it

Banana, papaya, berries, or a few dates can add natural sweetness and nutrients.

Step 5: Drink enough fluids

Water is usually enough for hydration. If you increase fiber, adequate fluids can help your digestive system handle the change. (NIDDK)

What Should You Avoid?

Be cautious with extreme morning routines that require large amounts of raw garlic, honey, concentrated ginger, or other ingredients.

More is not automatically better.

Also avoid claims that a particular food will:

  • Detox your organs
  • Melt belly fat
  • Cure diabetes
  • Clean your blood
  • Repair your liver
  • Guarantee weight loss

Those claims go beyond what the available evidence supports.

Frequently Asked Questions

1. What is the best food to eat on an empty stomach?

There is no scientifically established “best” food; choose nutritious foods that fit your dietary needs and make you feel comfortable.

2. Should I eat fruit before breakfast?

You can. Whole fruit provides fiber and nutrients, and there is no general requirement to eat it before other foods. (CDC)

3. Is honey on an empty stomach a detox?

No. Honey can be part of a diet, but eating it before breakfast has not been proven to detox the body.

4. Can I eat chia seeds every morning?

Chia can be part of a healthy diet because it provides fiber and healthy fats; increase fiber gradually and drink enough fluids. (MedlinePlus)

5. Is raw garlic safe every morning?

Food amounts are generally safe for most people, but raw garlic can cause stomach discomfort and may interact with some medicines. (NCCIH)

6. Does ginger need to be taken on an empty stomach?

No. Ginger can be included with meals or drinks, and there is no established requirement to consume it before eating.

7. Are soaked almonds healthier than regular almonds?

Soaking changes texture, but there is no strong evidence that soaked almonds have special health benefits because they are eaten on an empty stomach.

8. Can these foods replace breakfast?

Not necessarily. A balanced breakfast with protein, fiber, healthy fats, and fruit or vegetables can provide a broader range of nutrients than relying on one food.

Final Takeaway

The idea of a perfect empty-stomach food is more complicated than social media often suggests. Almonds, honey, chia seeds, garlic, bananas, raisins, ginger, avocado, papaya, and dates can all fit into a healthy eating pattern, but none needs to be eaten on an empty stomach to unlock a special benefit.

Focus on the bigger picture: whole foods, enough fiber, adequate protein, healthy fats, hydration, reasonable portions, and variety. That approach is more useful than building your morning routine around a single “miracle” ingredient. (CDC)

Easy Mediterranean Chicken Zucchini and Tomatoes Bake

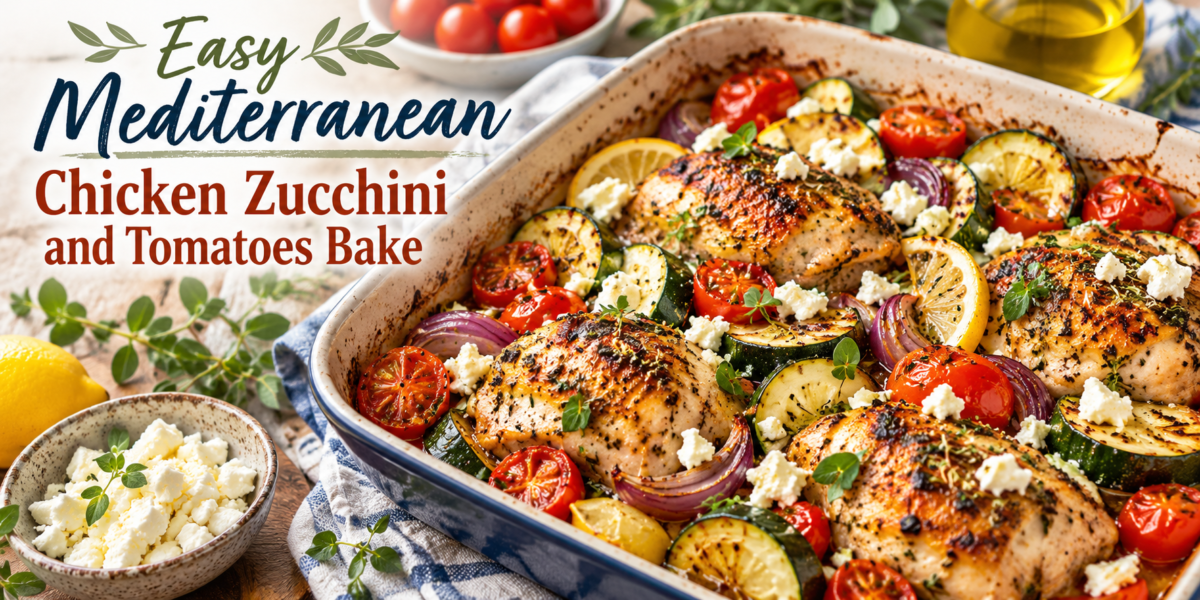
Mediterranean Chicken Bake with zucchini, tomatoes, herbs, feta cheese, and roasted chicken in a baking dish

Easy Mediterranean Chicken Zucchini and Tomatoes Bake

Easy Mediterranean Chicken Zucchini and Tomatoes Bake is a delicious, healthy, and comforting one-pan meal filled with juicy chicken, fresh zucchini, ripe tomatoes, herbs, and Mediterranean-inspired flavors. This simple baked dish combines wholesome ingredients to create a satisfying dinner that is perfect for busy weeknights, family meals, or meal preparation.

This Mediterranean Chicken Bake brings together tender chicken pieces with colorful vegetables, aromatic herbs, olive oil, garlic, and a touch of lemon. The result is a flavorful dish that feels light yet filling, making it a great option for anyone who enjoys fresh and nutritious meals.

The combination of zucchini and tomatoes creates a naturally juicy texture while the chicken absorbs the delicious flavors of oregano, garlic, and Mediterranean spices. Baking everything together allows the ingredients to blend beautifully while keeping the preparation simple.

This recipe requires minimal effort because everything cooks in one baking dish. There is no need for complicated cooking techniques or multiple pans. Simply prepare the ingredients, season them well, and let the oven create a flavorful meal.

Whether you are following a Mediterranean-style eating pattern or simply looking for a healthy dinner idea, this Mediterranean Chicken Bake is a perfect choice. It is packed with protein, vegetables, and fresh flavors that the whole family will enjoy.

Preparation Time: 15 minutes
Marinating Time: 20 minutes
Cooking Time: 40 minutes
Total Time: 75 minutes
Servings: 6 servings

Ingredients

For the Chicken Bake

2 pounds boneless skinless chicken breasts or thighs, cut into pieces

3 medium zucchini, sliced

3 large tomatoes, sliced

1 large red onion, sliced

4 cloves garlic, minced

1 teaspoon dried oregano

1 teaspoon dried basil

3 tablespoons olive oil

2 tablespoons fresh lemon juice

1/2 teaspoon cumin

1 teaspoon salt

1/2 teaspoon chili flakes (optional)

1 teaspoon paprika

1/2 teaspoon black pepper

1/4 cup fresh parsley, chopped

1 tablespoon fresh dill, chopped

1/2 cup feta cheese, crumbled

For Extra Flavor

1 tablespoon tomato paste

1 teaspoon honey

1/2 teaspoon garlic powder

Fresh lemon slices for serving

Step-by-Step Instructions

Prepare the Chicken Marinade

Start by preparing the seasoning mixture for the chicken.

In a large bowl, combine olive oil, lemon juice, minced garlic, oregano, basil, paprika, cumin, salt, black pepper, and chili flakes.

Add the chicken pieces and mix well until every piece is coated with the marinade.

Allow the chicken to rest for at least 20 minutes. This helps the flavors absorb and creates more tender chicken after baking.

For a stronger flavor, you can marinate the chicken for several hours in the refrigerator.

Prepare the Vegetables

Wash the zucchini and tomatoes thoroughly before slicing.

Cut zucchini into even slices so they cook properly.

Slice tomatoes and onions into medium pieces.

Arrange the vegetables in a large baking dish.

The combination of zucchini and tomatoes creates a delicious base that keeps the chicken moist while baking.

Assemble the Bake

Preheat the oven to 400°F (200°C).

Add the marinated chicken pieces over the vegetables.

Spread everything evenly so the ingredients cook at the same rate.

Mix tomato paste and honey with a small amount of olive oil, then drizzle it over the chicken and vegetables.

Sprinkle additional herbs if desired.

Cover the baking dish with foil and place it in the oven.

Bake the Chicken and Vegetables

Bake for 25 minutes covered.

Remove the foil and continue baking for another 15 minutes until the chicken is fully cooked and the vegetables become tender.

The chicken should reach an internal temperature of 165°F.

During baking, the tomatoes release their juices, creating a flavorful sauce that combines beautifully with the chicken.

Add Final Toppings

Remove the dish from the oven.

Sprinkle crumbled feta cheese, fresh parsley, and dill over the top.

Add fresh lemon slices before serving for an extra burst of Mediterranean flavor.

Your Mediterranean Chicken Bake is now ready to enjoy.

The combination of juicy chicken, tender zucchini, sweet tomatoes, and herbs creates a perfect balanced meal.

Tips for Making the Best Mediterranean Chicken Bake

Choose fresh vegetables because they provide better flavor and texture.

Cut chicken pieces into similar sizes so they cook evenly.

Do not overcrowd the baking dish because proper space helps the ingredients roast instead of steam.

For extra flavor, marinate the chicken overnight.

Use fresh herbs when available because they add a brighter taste.

If you prefer a richer flavor, add extra feta cheese before serving.

Avoid overbaking the zucchini because it can become too soft.

This Mediterranean Chicken Bake tastes even better when served with fresh lemon juice on top.

Variations

Creamy Version

Add a spoonful of Greek yogurt mixed with herbs as a topping before serving.

Low-Carb Version

Serve the bake with extra vegetables instead of bread or grains.

Mediterranean Chicken Bake with Potatoes

Add sliced baby potatoes to the baking dish for a more filling meal.

Spicy Version

Add extra chili flakes, crushed red pepper, or spicy paprika.

Cheese Variation

Replace feta cheese with mozzarella or goat cheese for a different flavor.

Vegetable Variation

Add bell peppers, mushrooms, spinach, or olives for more Mediterranean ingredients.

Serving Suggestions

Serve this dish warm with fresh bread, pita, or whole-grain rolls.

It pairs beautifully with a simple Greek salad or roasted vegetables.

For a complete meal, serve it over quinoa, couscous, or brown rice.

This Mediterranean Chicken Bake is also excellent for meal preparation because it stores well and reheats easily.

For gatherings, serve it directly from the baking dish with fresh herbs on top.

A side of tzatziki sauce can also add a refreshing creamy flavor.

Health Benefits

Chicken provides high-quality protein that helps support muscle health and keeps you satisfied.

Zucchini is a low-calorie vegetable rich in vitamins, minerals, and antioxidants.

Tomatoes contain important nutrients and natural compounds that support overall wellness.

Olive oil provides healthy fats that are commonly used in Mediterranean cooking.

Fresh herbs add flavor while reducing the need for extra salt.

This Mediterranean Chicken Bake combines protein, vegetables, and healthy fats to create a balanced meal.

The recipe is a great choice for anyone who wants a nutritious dinner without sacrificing taste.

Storage and Reheating Instructions

Allow leftovers to cool completely before storing.

Place the chicken and vegetables in airtight containers.

Store in the refrigerator for up to 4 days.

For longer storage, freeze portions for up to 3 months.

Reheat gently in the oven or microwave until warmed through.

Add fresh herbs or lemon juice after reheating to refresh the flavors.

This Mediterranean Chicken Bake is a convenient meal-prep option because it maintains great taste after storage.

Why This Recipe Is Perfect for Every Occasion

This recipe is perfect because it combines simple preparation with amazing flavor.

It works well for busy families who need a quick and healthy dinner.

The one-pan cooking method makes cleanup easier.

It is also impressive enough for serving guests because of its beautiful colors and presentation.

The fresh Mediterranean flavors make this dish different from ordinary baked chicken recipes.

This Mediterranean Chicken Bake can easily become a regular part of your weekly meal plan.

Cooking Notes

Use chicken thighs for a juicier result or chicken breasts for a leaner option.

Always check the chicken temperature before serving.

Allow the dish to rest for a few minutes after baking so the juices settle.

Adjust seasoning according to your personal preference.

Fresh tomatoes provide the best flavor, but canned tomatoes can work in a pinch.

Adding lemon at the end helps brighten the entire dish.

Frequently Asked Questions

Can I prepare Mediterranean Chicken Bake ahead of time?

Yes, you can prepare the ingredients earlier and bake when ready.

Can I use frozen vegetables?

Fresh vegetables are recommended, but frozen options can work if properly drained.

What chicken cut works best?

Both chicken breasts and thighs work well depending on your preference.

Can I make this recipe dairy-free?

Yes, simply remove the feta cheese or use a dairy-free alternative.

How do I prevent zucchini from becoming watery?

Avoid slicing zucchini too thin and do not overcook it.

Is Mediterranean Chicken Bake healthy?

Yes, it provides protein, vegetables, and healthy ingredients in one balanced meal.

Nutrition Information (Per Serving)

Calories: 420 kcal

Protein: 42g

Carbohydrates: 18g

Fat: 22g

Fiber: 5g

Sugar: 7g

Sodium: 680mg approximately

Nutrition values may vary depending on ingredients and portion sizes.

Final Thoughts

Easy Mediterranean Chicken Zucchini and Tomatoes Bake is a flavorful and nutritious recipe that brings fresh Mediterranean ingredients together in one simple dish.

The combination of tender chicken, juicy tomatoes, zucchini, herbs, and feta cheese creates a meal that is both comforting and healthy.

Whether you are preparing dinner for your family, planning weekly meals, or looking for a simple baked recipe, this dish delivers amazing flavor with minimal effort.

With easy preparation, flexible variations, and wholesome ingredients, this Mediterranean Chicken Bake is a recipe you will want to make again and again. It proves that healthy meals can be delicious, colorful, and satisfying.