Ground Turkey and Rice Soup with Kale

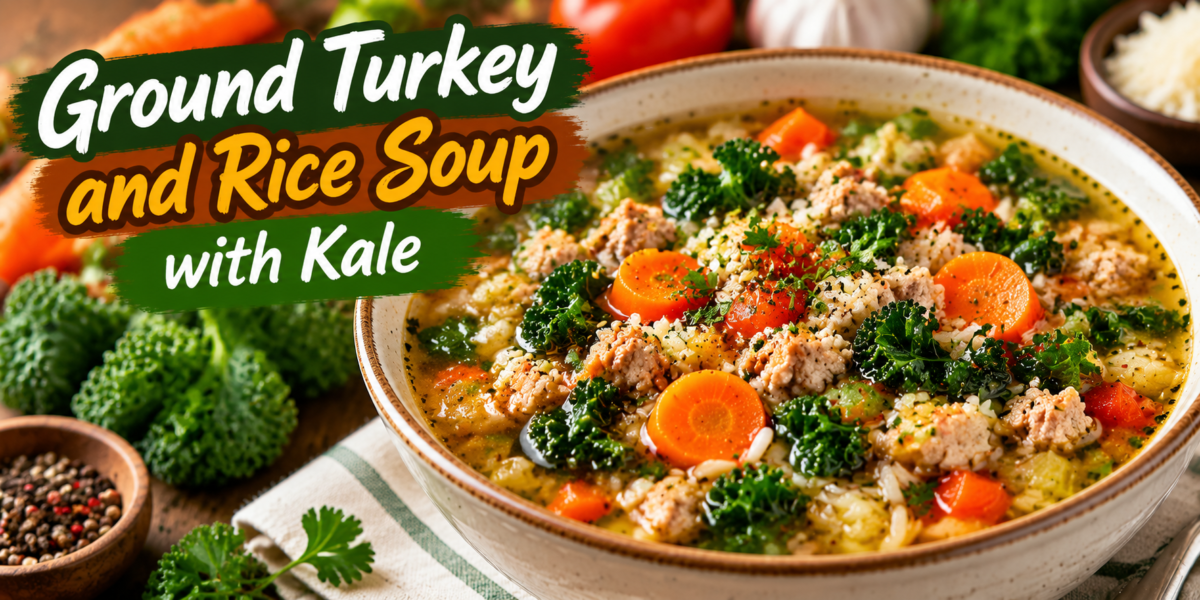
Turkey Rice Soup with kale, ground turkey, rice, and fresh vegetables in a bowl

Ground Turkey and Rice Soup with Kale

Ground Turkey and Rice Soup with Kale is a comforting, healthy, and flavorful homemade meal packed with lean protein, vegetables, and wholesome ingredients. This cozy soup combines tender ground turkey, hearty rice, fresh kale, and aromatic herbs in a delicious broth that is perfect for cold evenings, busy weekdays, or whenever you need a nourishing bowl of comfort food.

This Turkey Rice Soup is a great choice for families because it is simple to prepare, budget-friendly, and filled with nutritious ingredients. The ground turkey provides high-quality protein, while the rice adds satisfying carbohydrates that help keep you full and energized. Fresh kale brings vitamins, minerals, and a beautiful green color to the soup.

Unlike heavy cream-based soups, this recipe creates a lighter yet satisfying meal using fresh vegetables, flavorful seasonings, and a homemade-style broth. Every spoonful delivers a perfect balance of savory turkey, soft rice, and tender greens.

This Turkey Rice Soup is a comforting one-pot meal that combines delicious flavors with wholesome ingredients.

Whether you are preparing dinner for your family, meal prepping for the week, or looking for an easy healthy recipe, this soup is a wonderful option. It stores well, reheats beautifully, and can easily be customized with your favorite vegetables and seasonings.

This Turkey Rice Soup is also ideal during colder months because the warm broth and nourishing ingredients create a comforting meal that feels homemade and satisfying.

Preparation Time: 15 minutes
Cooking Time: 40 minutes
Total Time: 55 minutes
Servings: 6 servings

Ingredients

For the Soup

2 tablespoons olive oil

1 pound ground turkey

1 medium yellow onion, diced

3 cloves garlic, minced

3 medium carrots, sliced

3 celery stalks, chopped

1 red bell pepper, diced

1 teaspoon dried thyme

1 teaspoon dried oregano

1 teaspoon paprika

1/2 teaspoon black pepper

1 teaspoon salt (adjust to taste)

8 cups chicken broth or vegetable broth

1 cup long-grain white rice or brown rice

3 cups fresh kale, chopped and stems removed

1 tablespoon lemon juice

2 tablespoons fresh parsley, chopped

1 bay leaf

1/2 teaspoon red pepper flakes (optional)

Step-by-Step Instructions

This Turkey Rice Soup becomes more flavorful as the turkey, vegetables, and rice slowly absorb the seasoned broth.

Prepare the Turkey and Vegetables

Heat olive oil in a large soup pot or Dutch oven over medium heat.

Add ground turkey and cook for 5 to 7 minutes, breaking it apart with a wooden spoon until it is browned and fully cooked.

Once the turkey is cooked, remove excess liquid if needed. Keep the turkey in the pot because the small browned pieces add extra flavor to the soup.

Add diced onion, carrots, celery, and bell pepper. Cook for 5 minutes until the vegetables begin to soften.

Add minced garlic and cook for another 30 seconds until fragrant. Be careful not to burn the garlic because it can create a bitter taste.

Add Seasonings and Broth

Add thyme, oregano, paprika, black pepper, salt, and red pepper flakes if using.

Stir the seasonings with the turkey and vegetables so the flavors can blend together.

Pour in the chicken broth and add the bay leaf.

Bring the soup mixture to a gentle boil, then reduce the heat and allow it to simmer.

Cook the Rice

Add rice to the simmering broth and stir well.

Cover the pot and cook according to the rice type you are using.

White rice usually takes around 15 to 20 minutes, while brown rice may require additional cooking time.

Stir occasionally to prevent the rice from sticking to the bottom of the pot.

The rice should become tender and absorb some of the delicious flavors from the broth.

Add Kale and Finish the Soup

Once the rice is cooked, add chopped kale to the soup.

Cook for another 3 to 5 minutes until the kale becomes tender but still maintains its fresh color.

Remove the bay leaf.

Add lemon juice and fresh parsley before serving. The lemon adds brightness and balances the savory flavors.

Your Turkey Rice Soup is now ready to enjoy with warm bread, crackers, or your favorite side dish.

Tips for Making the Best Soup

Use fresh vegetables whenever possible because they provide better flavor and texture.

Choose lean ground turkey for a lighter version, but ground turkey with slightly higher fat content will create a richer flavor.

Do not overcook the rice because it can become too soft and absorb too much broth.

If you plan to store leftovers, consider cooking the rice separately and adding it when serving. This prevents the rice from becoming mushy.

For deeper flavor, sauté the vegetables until they become slightly golden before adding broth.

Fresh herbs like parsley, thyme, or basil can enhance the final taste.

If the soup becomes too thick after refrigeration, simply add more broth when reheating.

This Turkey Rice Soup becomes even more flavorful the next day because the ingredients continue to blend together.

For the best texture, store the Turkey Rice Soup properly and add extra broth when reheating.

Variations

Creamy Turkey Rice Soup

For a creamy version, add a small amount of milk, coconut milk, or light cream near the end of cooking.

Spicy Turkey Rice Soup

Add extra red pepper flakes, chili powder, or hot sauce for a spicy twist.

Vegetable Loaded Version

Increase the vegetables by adding zucchini, spinach, mushrooms, green beans, or peas.

Low-Carb Option

Replace rice with cauliflower rice for a lower-carbohydrate version while keeping the same comforting flavors.

Mediterranean Style

Add lemon zest, extra herbs, and a sprinkle of feta cheese before serving for a Mediterranean-inspired variation.

You can easily customize this Turkey Rice Soup by adding different vegetables or adjusting the seasonings.

Serving Suggestions

Serve this soup warm with freshly baked bread, garlic toast, or whole-grain crackers.

A simple side salad with fresh greens makes a perfect pairing.

For a complete family dinner, serve it with roasted vegetables or a light sandwich.

This Turkey Rice Soup is also excellent for meal preparation because it can be divided into individual containers and enjoyed throughout the week.

For extra flavor, garnish each bowl with fresh parsley, grated Parmesan cheese, or a drizzle of olive oil.

Health Benefits

Ground turkey is a great source of lean protein, which helps support muscle health and keeps you feeling satisfied.

Rice provides energy through carbohydrates and makes the soup more filling.

Kale is considered a nutrient-rich vegetable because it contains vitamins A, C, and K along with minerals and antioxidants.

The vegetables in this recipe provide fiber, which supports digestion and overall wellness.

Garlic and herbs add natural flavor while also contributing beneficial plant compounds.

This Turkey Rice Soup is a balanced meal because it combines protein, carbohydrates, vegetables, and healthy fats in one bowl.

It can be a great option for people who want a comforting meal without excessive calories or heavy ingredients.

Storage and Reheating Instructions

Allow the soup to cool completely before storing.

Place leftovers in airtight containers and refrigerate for up to 4 days.

For longer storage, freeze the soup for up to 3 months.

When freezing, rice may change texture slightly, so cooking fresh rice separately can provide better results.

To reheat, warm the soup on the stovetop over medium heat until heated through.

You can also microwave individual portions, stirring halfway through.

Add extra broth if the soup becomes thicker after storage.

This Turkey Rice Soup maintains excellent flavor when properly stored and reheated.

Why This Recipe Is Perfect for Every Occasion

This recipe works for many occasions because it is simple, comforting, and nutritious.

Busy families can prepare it ahead of time and enjoy an easy dinner throughout the week.

It is also an excellent choice for meal planning because it stores and reheats well.

The ingredients are affordable and easy to find, making it a practical recipe for everyday cooking.

During cold weather, this soup provides warmth and comfort while delivering important nutrients.

For gatherings, it can be served as a starter or a complete main dish.

The flexibility of this Turkey Rice Soup allows you to adjust ingredients based on your preferences and what you have available in your kitchen.

Cooking Notes

Always cook ground turkey completely before adding other ingredients.

Taste the soup before serving and adjust seasoning according to your preference.

If using brown rice, increase cooking time because it requires longer to soften.

Add kale near the end of cooking to maintain its texture and nutrients.

For richer flavor, use homemade broth if available.

Fresh lemon juice at the end makes the flavors brighter and more balanced.

Frequently Asked Questions

Can I use leftover turkey instead of ground turkey?

Yes, cooked shredded turkey can be used. Add it near the end because it only needs to warm through.

Can I use another type of rice?

Yes, jasmine rice, brown rice, wild rice, or basmati rice can work well.

Can I freeze this soup?

Yes, this soup freezes well. Store it in freezer-safe containers and thaw before reheating.

How can I make this soup thicker?

Allow it to simmer uncovered for a few extra minutes or add more rice.

Can I replace kale with another green vegetable?

Yes, spinach, Swiss chard, or collard greens are good alternatives.

Is Turkey Rice Soup healthy?

Yes, it contains lean protein, vegetables, and whole ingredients that make it a nutritious meal choice.

Nutrition Information (Per Serving)

Calories: 390 kcal

Protein: 32g

Carbohydrates: 45g

Fat: 12g

Fiber: 5g

Sugar: 6g

Sodium: 720mg approximately

Nutrition values may vary depending on ingredients and portion sizes.

Final Thoughts

Ground Turkey and Rice Soup with Kale is a simple yet delicious recipe that proves healthy meals can also be comforting and satisfying.

The combination of flavorful turkey, tender rice, fresh vegetables, and nourishing broth creates a perfect homemade soup for any season.

Whether you are cooking for your family, preparing weekly meals, or looking for a nutritious dinner option, this recipe delivers great taste and wholesome ingredients.

With easy preparation, flexible variations, and excellent storage options, this Turkey Rice Soup deserves a place in your regular recipe collection. It is warm, flavorful, and packed with everything you need for a satisfying homemade meal.
Salmon Skewers with Dill Yogurt Sauce

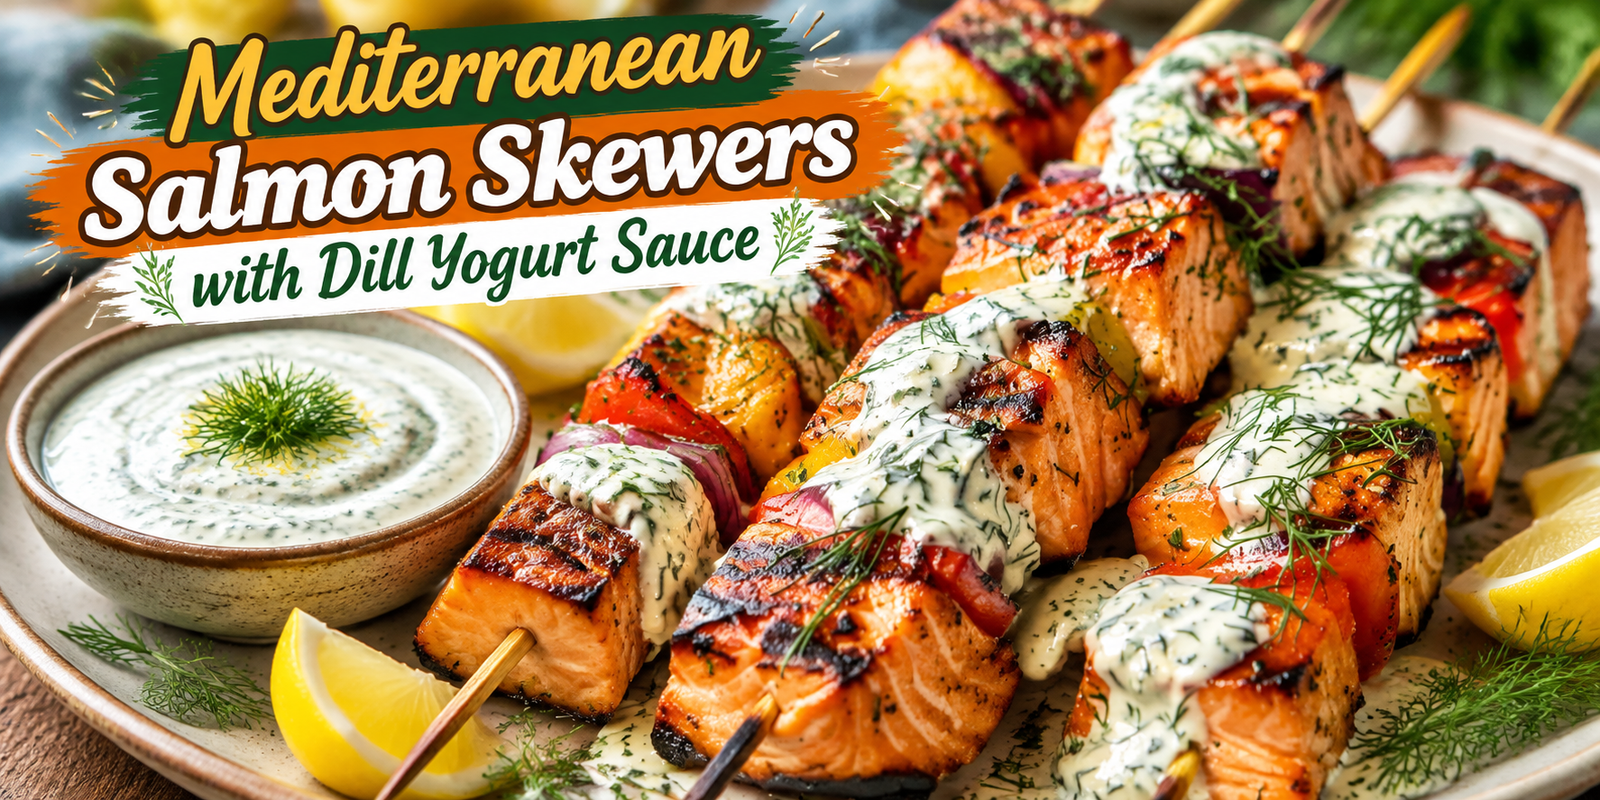
Mediterranean Salmon Skewers with Dill Yogurt Sauce featuring grilled salmon cubes, creamy yogurt sauce, fresh dill, and lemon

Mediterranean Salmon Skewers with Dill Yogurt Sauce

Description

Mediterranean Salmon Skewers with Dill Yogurt Sauce are a delicious combination of tender salmon, fresh Mediterranean flavors, and a creamy homemade yogurt sauce. These colorful skewers are packed with protein, healthy fats, and vibrant herbs, making them a perfect choice for a nutritious and satisfying meal.

The salmon is marinated with olive oil, lemon juice, garlic, and Mediterranean spices before being grilled to perfection. The smoky, slightly crispy salmon pieces pair beautifully with the refreshing dill yogurt sauce, creating a balance of rich and fresh flavors.

This recipe is perfect for summer BBQs, quick weeknight dinners, meal prep, or special gatherings. The creamy dill yogurt sauce adds a cooling flavor that complements the grilled salmon beautifully. Yogurt-based herb sauces are commonly paired with grilled foods in Mediterranean-style cooking because of their fresh and balanced taste.

If you love Mediterranean-style seafood recipes, you can also try our Mediterranean Baked Salmon with Feta & Sun-Dried Tomatoes, a flavorful salmon dish with rich herbs, feta cheese, and fresh Mediterranean flavors.

Preparation Time

Preparation Time: 15 minutes
Marinating Time: 30 minutes
Cooking Time: 12 minutes
Total Time: 57 minutes

Servings: 4 people

Ingredients

For Mediterranean Salmon Skewers

1½ pounds fresh salmon fillet, skin removed and cut into cubes

2 tablespoons extra virgin olive oil

3 tablespoons fresh lemon juice

3 cloves garlic, minced

1 teaspoon dried oregano

1 teaspoon paprika

½ teaspoon cumin powder

½ teaspoon salt

½ teaspoon black pepper

1 tablespoon fresh parsley, chopped

1 tablespoon fresh dill, chopped

1 red bell pepper, cut into pieces

1 yellow bell pepper, cut into pieces

1 small red onion, cut into chunks

For Dill Yogurt Sauce

1 cup Greek yogurt

2 tablespoons fresh dill, finely chopped

1 tablespoon lemon juice

1 garlic clove, minced

1 tablespoon olive oil

½ teaspoon salt

¼ teaspoon black pepper

1 tablespoon cucumber, finely grated (optional)

Step-by-Step Instructions

Step 1: Prepare the Salmon Marinade

In a large bowl, combine olive oil, lemon juice, garlic, oregano, paprika, cumin, salt, black pepper, parsley, and dill.

Mix well to create a flavorful Mediterranean marinade.

Add salmon cubes and gently coat each piece with the seasoning mixture.

Cover and refrigerate for 30 minutes to allow the flavors to develop.

Step 2: Prepare the Skewers

If using wooden skewers, soak them in water for 20–30 minutes to prevent burning.

Thread salmon pieces onto skewers, alternating with bell peppers and red onion.

Keep the pieces evenly spaced so they cook properly.

Step 3: Grill the Salmon Skewers

Preheat your grill or grill pan over medium-high heat.

Place the salmon skewers on the grill and cook for about 3–4 minutes per side.

The salmon should become golden on the outside while remaining juicy inside.

Avoid overcooking because salmon can become dry quickly.

Step 4: Make the Dill Yogurt Sauce

In a bowl, combine Greek yogurt, fresh dill, lemon juice, garlic, olive oil, salt, and black pepper.

Mix until smooth and creamy.

For extra freshness, add grated cucumber and mix well.

Chill the sauce until ready to serve.

Step 5: Serve

Arrange the Mediterranean Salmon Skewers on a serving plate.

Serve warm with the chilled dill yogurt sauce on the side.

Garnish with fresh herbs and lemon wedges for extra flavor.

Tips & Notes

Choose fresh salmon with a bright color and firm texture for the best results.

Do not marinate salmon for too long because lemon juice can change the texture of the fish.

Cut salmon pieces into equal sizes so they cook evenly.

Use a thermometer if needed; salmon is generally ready when it reaches a safe internal temperature.

For extra smoky flavor, cook the skewers on an outdoor grill.

Variations

Spicy Salmon Skewers

Add chili flakes or cayenne pepper to the marinade for extra heat.

Vegetable Salmon Skewers

Add zucchini, cherry tomatoes, or mushrooms for more variety.

Air Fryer Version

Cook salmon skewers in an air fryer at 400°F (200°C) for about 8–10 minutes.

Creamy Herb Sauce

Replace dill with parsley, mint, or cilantro for a different flavor.

Serving Suggestions

Serve Mediterranean Salmon Skewers with:

Greek salad

Roasted vegetables

Rice pilaf

Quinoa bowls

Warm pita bread

Fresh cucumber salad

These skewers also make a great appetizer for parties and gatherings.

Health Benefits

Mediterranean Salmon Skewers with Dill Yogurt Sauce provide many nutritional benefits.

Salmon is rich in high-quality protein and omega-3 fatty acids that support overall wellness.

Greek yogurt adds protein and calcium while creating a creamy sauce without heavy ingredients.

Fresh herbs like dill and parsley provide antioxidants and natural flavor.

Olive oil contains healthy fats that are commonly used in Mediterranean-style meals.

Vegetables add fiber, vitamins, and minerals to make this a balanced meal.

Storage Instructions

Store leftover salmon skewers in an airtight container in the refrigerator for up to 3 days.

Keep the dill yogurt sauce separately for the best texture.

Reheat salmon gently in the oven or air fryer to prevent drying.

The yogurt sauce can be stored for up to 3 days in the refrigerator.

Q/A

Can I use frozen salmon for this recipe?

Yes, thaw frozen salmon completely and pat it dry before marinating.

Can I bake these salmon skewers?

Yes, bake them at 400°F (200°C) for around 12–15 minutes.

What salmon works best for skewers?

Fresh Atlantic or wild salmon both work well for this recipe.

Can I prepare these ahead of time?

Yes, marinate the salmon and prepare the sauce a few hours before cooking.

Can I make the dill yogurt sauce without Greek yogurt?

Yes, use plain thick yogurt as an alternative.

Nutrition Information (Approximate Per Serving)

Calories: 420 kcal

Protein: 38g

Carbohydrates: 8g

Fat: 26g

Fiber: 2g

Omega-3 Fatty Acids: High

Final Thoughts

Mediterranean Salmon Skewers with Dill Yogurt Sauce are an easy and flavorful way to enjoy healthy seafood with fresh Mediterranean ingredients. The combination of juicy grilled salmon, colorful vegetables, and creamy dill yogurt sauce creates a meal that is both delicious and nutritious.

Whether you prepare them for a family dinner, summer barbecue, or healthy meal prep, these salmon skewers are sure to become a favorite recipe everyone will enjoy.

For a delicious protein-packed dinner option, pair your meal ideas with our Honey Garlic Glazed Salmon and Broccoli, featuring tender chicken and creamy feta flavors.


Honey Curry Roasted Cauliflower Recipe

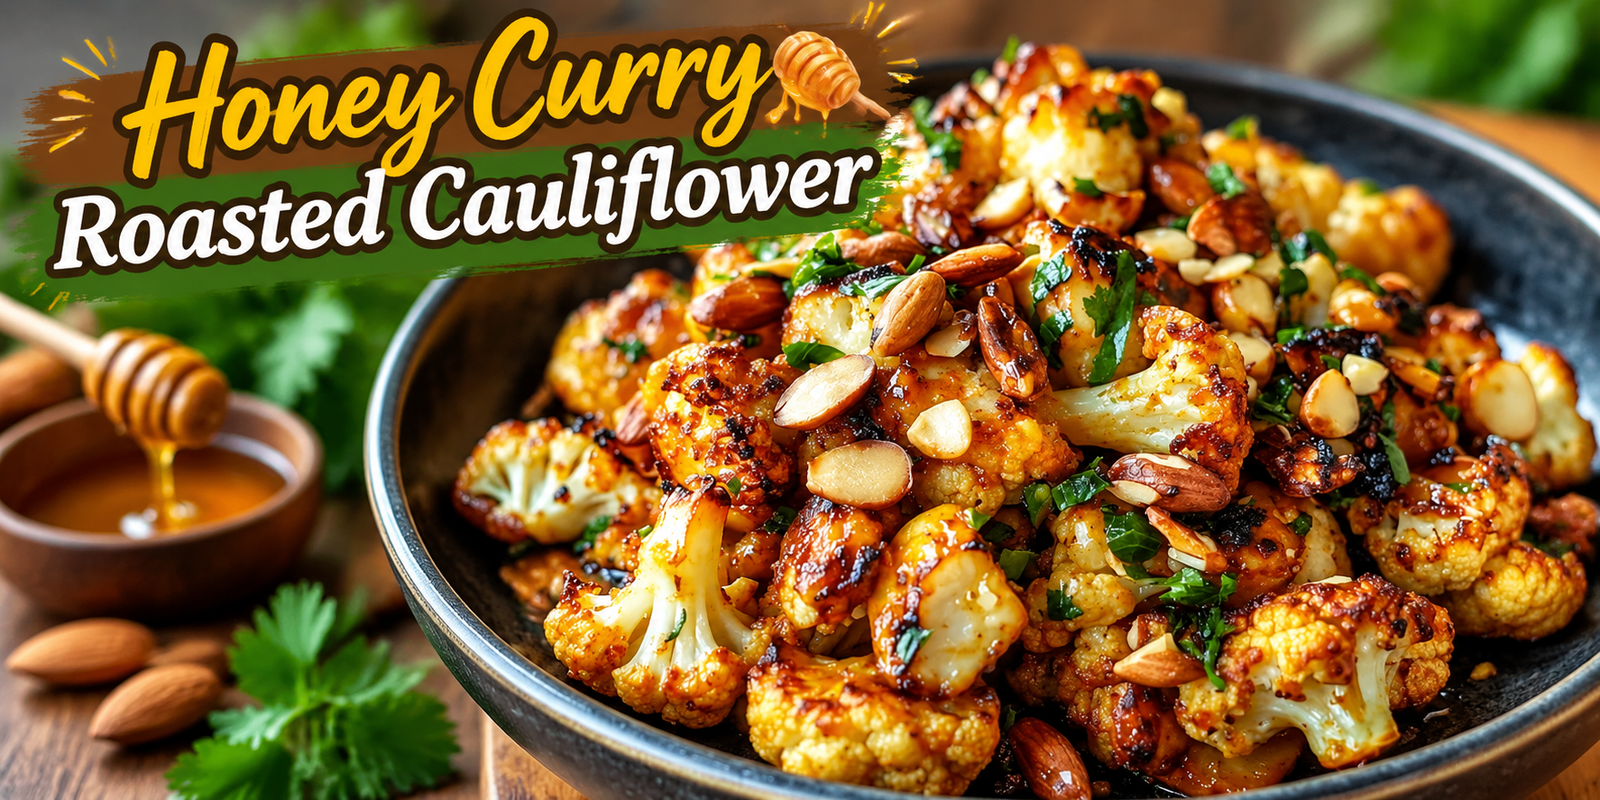
Honey Curry Roasted Cauliflower with crispy golden florets, almonds, and fresh herbs served as a healthy side dish

Honey Curry Roasted Cauliflower

Description

Honey Curry Roasted Cauliflower is a delicious and unique vegetable recipe that transforms simple cauliflower into a flavorful, golden, and crispy dish. The combination of warm curry powder, sweet honey, garlic, and roasted spices creates a perfect balance of sweet, savory, and slightly spicy flavors.

This recipe is a great choice for anyone looking for a healthy side dish that does not compromise on taste. Roasting cauliflower brings out its natural sweetness while creating beautifully caramelized edges. The honey curry glaze coats every piece, making each bite packed with flavor.

Whether served with grilled chicken, rice dishes, salads, or enjoyed as a healthy snack, this Honey Curry Roasted Cauliflower is an easy recipe that works for everyday meals and special occasions.

Preparation Time

Preparation Time: 10 minutes
Cooking Time: 30 minutes
Total Time: 40 minutes

Servings: 4 people

Ingredients

For Honey Curry Roasted Cauliflower

1 large head cauliflower, cut into bite-sized florets

3 tablespoons olive oil

2 tablespoons honey

1½ tablespoons curry powder

3 cloves garlic, minced

1 teaspoon ground turmeric

½ teaspoon smoked paprika

½ teaspoon cumin powder

½ teaspoon salt

¼ teaspoon black pepper

1 tablespoon lemon juice

For Garnish

2 tablespoons fresh cilantro, chopped

1 tablespoon roasted cashews or almonds (optional)

Fresh lemon wedges

Red chili flakes (optional)

Step-by-Step Instructions

Step 1: Prepare the Cauliflower

Preheat your oven to 425°F (220°C). Line a large baking sheet with parchment paper.

Wash the cauliflower thoroughly and cut it into evenly sized florets. Pat them dry completely because dry cauliflower roasts better and becomes crispier.

Place the cauliflower florets in a large bowl.

Step 2: Make the Honey Curry Glaze

In a small bowl, combine olive oil, honey, curry powder, garlic, turmeric, smoked paprika, cumin, salt, black pepper, and lemon juice.

Mix well until all ingredients form a smooth flavorful glaze.

The honey adds sweetness while the curry spices create a warm and aromatic flavor.

Step 3: Coat the Cauliflower

Pour the honey curry mixture over the cauliflower florets.

Toss gently until every piece is evenly coated with the seasoning.

Make sure the cauliflower is covered well so every bite gets the delicious curry flavor.

Step 4: Roast the Cauliflower

Spread the cauliflower pieces on the prepared baking sheet in a single layer.

Roast for 25–30 minutes, flipping halfway through cooking.

The cauliflower should become golden brown with crispy edges and a tender center.

Step 5: Garnish and Serve

Remove the roasted cauliflower from the oven.

Sprinkle fresh cilantro, roasted nuts, and chili flakes on top if desired.

Serve warm with lemon wedges for an extra fresh flavor.

Tips & Notes

Choose a fresh cauliflower with firm white florets for the best results.

Drying the cauliflower before roasting helps create crispy edges.

Do not overcrowd the baking tray because steam will prevent proper roasting.

Adjust honey according to your preferred sweetness level.

For extra spice, add cayenne pepper or extra chili flakes.

Use fresh curry powder for a stronger aroma and better flavor.

Variations

Spicy Honey Curry Cauliflower

Add cayenne pepper or hot paprika for a spicy version.

Vegan Version

Replace honey with maple syrup or agave nectar.

Cheesy Roasted Cauliflower

Add grated parmesan cheese during the last few minutes of roasting.

Mediterranean Style

Add olives, fresh herbs, and toasted nuts for a Mediterranean twist.

Serving Suggestions

Honey Curry Roasted Cauliflower pairs beautifully with:

Grilled chicken

Roasted salmon

Rice bowls

Quinoa salads

Lentil dishes

Fresh yogurt sauce

Flatbread or wraps

It can also be served as a healthy appetizer with a creamy dipping sauce.

For a complete protein-rich meal, serve this roasted cauliflower with our Healthy Chicken & Sweet Potato Bowls, a nutritious recipe made with tender chicken and wholesome sweet potatoes.

Health Benefits

Honey Curry Roasted Cauliflower is a nutrient-rich recipe packed with vitamins, minerals, and antioxidants.

Cauliflower is a great source of fiber, vitamin C, and plant-based nutrients that support overall health.

Turmeric contains curcumin, a natural compound known for its antioxidant properties.

Olive oil provides healthy fats that support a balanced diet.

Using roasted vegetables instead of fried foods makes this recipe a lighter and healthier choice.

Storage Instructions

Store leftover Honey Curry Roasted Cauliflower in an airtight container in the refrigerator for up to 4 days.

To reheat, place it in an oven or air fryer for a few minutes to restore crispiness.

Avoid reheating in the microwave for too long because the cauliflower may become soft.

Q/A

Can I make Honey Curry Roasted Cauliflower ahead of time?

Yes, you can prepare it ahead and reheat before serving.

Can I use frozen cauliflower?

Yes, but thaw and dry it completely before roasting for better texture.

How can I make this recipe vegan?

Replace honey with maple syrup or another plant-based sweetener.

What curry powder should I use?

Any mild or medium curry powder works well. Choose based on your preferred spice level.

Can I add protein to this recipe?

Yes, serve it with chickpeas, chicken, tofu, or grilled fish for a complete meal.

Nutrition Information (Approximate Per Serving)

Calories: 180 kcal

Protein: 5g

Carbohydrates: 20g

Fat: 10g

Fiber: 6g

Sugar: 8g

Final Thoughts

Honey Curry Roasted Cauliflower is a simple yet exciting recipe that turns everyday cauliflower into a flavorful and colorful dish. The sweet honey glaze combined with aromatic curry spices creates a perfect balance of taste and texture.

This easy roasted cauliflower recipe is perfect for healthy dinners, meal prep, holiday tables, and anyone who wants to enjoy vegetables in a more delicious way. Once you try this Honey Curry Roasted Cauliflower, it will become a favorite addition to your recipe collection.

If you enjoy fresh and healthy recipes, you can also try our Apple Cranberry Pecan Salad, a delicious combination of fruits, nuts, and seasonal flavors.


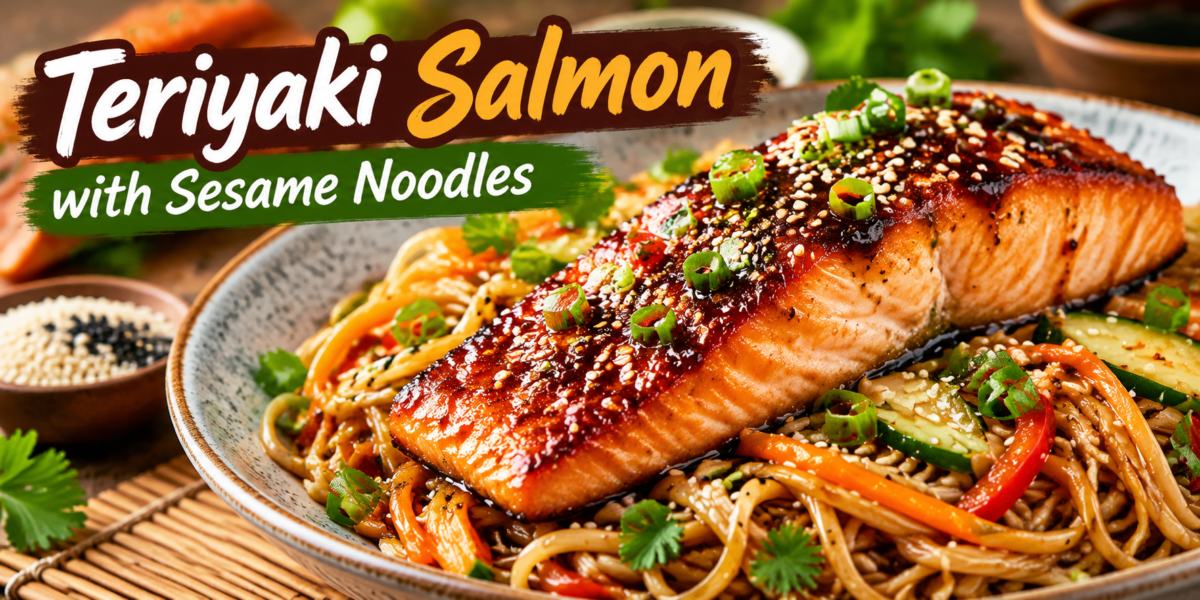
Teriyaki Salmon with Sesame Noodles Recipe

Teriyaki Salmon with Sesame Noodles served with sesame sauce and fresh vegetables

Teriyaki Salmon with Sesame Noodles Recipe

Teriyaki Salmon with Sesame Noodles is a delicious Asian-inspired meal that combines tender salmon fillets with a sweet, savory, and glossy teriyaki glaze served over flavorful sesame noodles. This recipe is perfect for anyone who loves restaurant-style flavors but wants to prepare a healthier homemade dinner.

The combination of fresh salmon, homemade sauce, and sesame noodles creates a balanced meal full of amazing textures and flavors. The salmon becomes juicy and flaky while the teriyaki coating adds a beautiful caramelized finish. The noodles provide a nutty sesame taste, while fresh vegetables add crunch and freshness.

This Teriyaki Salmon recipe is easy enough for a busy weeknight but impressive enough for family gatherings, dinner parties, or special occasions. It uses simple ingredients that are easy to find and requires minimal cooking experience.

Salmon is naturally rich in protein and omega-3 fatty acids, making this meal a nutritious choice for people who want a satisfying dinner without sacrificing flavor. The homemade sauce allows you to control sweetness and sodium levels compared with many restaurant versions.

Whether you are meal prepping for the week or preparing a quick family dinner, this recipe delivers a perfect balance of taste, nutrition, and convenience.

Preparation Time: 15 minutes
Cooking Time: 20 minutes
Total Time: 35 minutes
Servings: 4 servings

Ingredients

For Teriyaki Salmon

2 tablespoons honey

4 salmon fillets (6 ounces each)

1/3 cup low-sodium soy sauce

2 tablespoons rice vinegar

1 tablespoon sesame oil

2 tablespoons brown sugar

3 cloves garlic, minced

1 tablespoon fresh ginger, grated

1 tablespoon cornstarch

2 tablespoons water

1 tablespoon olive oil

1 teaspoon sesame seeds

2 green onions, sliced

Fresh cilantro for garnish (optional)

For Sesame Noodles

1 tablespoon rice vinegar

12 ounces soba noodles, spaghetti, or rice noodles

2 tablespoons sesame oil

3 tablespoons soy sauce

2 teaspoons chili sauce (optional)

2 cloves garlic, minced

1 tablespoon peanut butter or tahini

1 teaspoon grated ginger

1/2 cup shredded carrots

1/2 cup sliced cucumber

1 tablespoon honey

2 green onions, chopped

1 tablespoon sesame seeds

Step-by-Step Instructions

Prepare the Teriyaki Sauce

This Teriyaki Salmon is easy to prepare and delivers a restaurant-style flavor with minimal effort.

Begin by preparing the homemade sauce that creates the signature flavor of this dish. Add soy sauce, honey, brown sugar, rice vinegar, sesame oil, minced garlic, and grated ginger into a small saucepan.

Heat the mixture over medium heat and stir until the sugar dissolves completely. Allow the sauce to simmer gently for 2 to 3 minutes so all flavors combine together.

Mix cornstarch with water in a small bowl to create a smooth slurry. Slowly add the slurry into the sauce while stirring continuously.

Cook until the sauce becomes thick, glossy, and smooth. Remove from heat and keep it aside.

A good glaze should coat the salmon beautifully without being too watery or too thick.

Cook the Salmon

Pat the salmon fillets dry using a paper towel. This step helps create better browning and allows the sauce to stick properly.

Season the salmon lightly with black pepper. Avoid adding too much salt because soy sauce already provides enough seasoning.

Heat olive oil in a large skillet over medium heat. Place the salmon fillets into the pan.

Cook for 4 to 5 minutes on the first side until lightly golden. Carefully flip the salmon and cook for another 3 to 5 minutes.

Brush the prepared glaze over the fish and cook for an additional minute until the coating becomes slightly caramelized.

The perfect Teriyaki Salmon should be tender, moist, and easy to separate with a fork.

Prepare Sesame Noodles

Bring a large pot of water to boil and cook noodles according to package instructions.

Drain the noodles and rinse them briefly under cold water. This keeps the noodles from becoming too soft.

In a large bowl, combine sesame oil, soy sauce, rice vinegar, peanut butter, honey, chili sauce, garlic, and ginger.

Mix until the sauce becomes smooth.

Add cooked noodles and toss until completely coated.

Add shredded carrots, cucumber slices, green onions, and sesame seeds.

The noodles should have a delicious combination of creamy, nutty, and fresh flavors.

Assemble the Meal

Divide sesame noodles between serving bowls.

Place a glazed salmon fillet on top of each bowl.

Add extra sauce if desired and garnish with sesame seeds, green onions, and fresh herbs.

Serve immediately for the best taste and texture.

This Teriyaki Salmon combination works beautifully because the sweet glaze balances the savory sesame noodles perfectly.

Tips for Perfect Results

Choose fresh salmon whenever possible because it provides better flavor and texture. Frozen salmon can also work, but make sure it is completely thawed before cooking.

Do not overcook the fish. Salmon becomes dry when cooked for too long. The inside should remain juicy and flaky.

Allow the salmon to sit at room temperature for about 10 minutes before cooking. This helps it cook evenly.

Always cook the sauce slowly. High heat can burn the sugar and create a bitter taste.

Fresh garlic and ginger provide the best flavor, but powdered versions can be used if needed.

For extra crunch, add roasted peanuts, cashews, or additional vegetables.

You can prepare the sauce ahead of time and store it in the refrigerator until needed.

This Teriyaki Salmon recipe becomes even more flavorful when the glaze is allowed to sit on the fish for 15 minutes before cooking.

For the best results, cook the Teriyaki Salmon over medium heat to keep the fish moist and tender.

Variations

Spicy Teriyaki Salmon

Add sriracha, red pepper flakes, or chili paste to the sauce for a spicy version. The heat creates a delicious contrast with the sweet glaze.

You can customize this Teriyaki Salmon recipe with vegetables, spice, or different noodles.

Vegetable Teriyaki Bowl

Add broccoli, bell peppers, mushrooms, or edamame for extra nutrients and color.

Low-Carb Version

Replace noodles with cauliflower rice, zucchini noodles, or a fresh salad base.

Air Fryer Version

Cook salmon in an air fryer at 400°F for approximately 8 to 10 minutes. Add sauce halfway through cooking for a caramelized finish.

Serving Suggestions

This recipe can be served with many side dishes.

Steamed broccoli, roasted vegetables, cucumber salad, or miso soup pair beautifully with the flavors.

For a complete Asian-inspired dinner, serve it with green tea and a light dessert.

For meal preparation, divide noodles and salmon into separate containers and add fresh toppings before eating.

The colorful presentation of this Teriyaki Salmon makes it perfect for entertaining guests.

Serve this Teriyaki Salmon with fresh vegetables for a complete and balanced dinner.

Health Benefits

Salmon is one of the best sources of high-quality protein and healthy fats. It contains omega-3 fatty acids that support heart health and overall wellness.

This meal provides important nutrients including vitamin D, selenium, and B vitamins.

The vegetables in the noodles add fiber, antioxidants, and essential vitamins.

Garlic and ginger contain natural compounds that support a healthy diet.

Compared with many takeout options, homemade Teriyaki Salmon gives you better control over ingredients, portion sizes, and nutrition.

The protein content helps support muscle health, while healthy fats help keep you satisfied for longer.

This Teriyaki Salmon provides protein, omega-3 fatty acids, and essential nutrients.

Storage and Reheating Instructions

Store leftover salmon in an airtight container in the refrigerator for up to 3 days.

Sesame noodles can also be stored for 3 to 4 days.

Keep the salmon and noodles separate for the best texture.

To reheat salmon, warm it gently in the oven or microwave. Avoid overheating because it may become dry.

Warm noodles with a small amount of water or extra sauce to refresh their texture.

Leftover salmon can also be used in salads, wraps, or rice bowls.

Why This Recipe Is Perfect for Every Occasion

This recipe is perfect because it combines simplicity with incredible flavor.

It does not require complicated techniques, yet the final result looks like a restaurant-quality meal.

Families love this dish because it is filling, colorful, and easy to customize.

Busy professionals can prepare it quickly, while home cooks can enjoy experimenting with different ingredients.

The combination of salmon and sesame noodles creates a complete meal that satisfies both taste and nutrition needs.

This Teriyaki Salmon is also a great option for celebrations because it looks elegant when served with fresh herbs and sesame toppings.

Cooking Notes

Always dry salmon before cooking to achieve better texture.

Use low-sodium soy sauce if you want to reduce salt.

Adjust sweetness according to your preference.

If the sauce becomes too thick, add a tablespoon of water.

For extra flavor, toast sesame seeds before adding them.

Cook noodles until just tender to avoid a mushy texture.

Fresh ingredients will always create the best results.

Frequently Asked Questions

Can I use frozen salmon?

Yes, frozen salmon works well. Thaw it completely before cooking and remove excess moisture.

Can I make this recipe without soy sauce?

Yes, coconut aminos can be used as an alternative.

How long does cooked salmon last?

Cooked salmon stays fresh for around 3 days when properly stored.

Can I prepare the sauce earlier?

Yes, the sauce can be prepared several days ahead and refrigerated.

What noodles are best for this recipe?

Soba noodles provide the most traditional flavor, but spaghetti and rice noodles also work well.

Is Teriyaki Salmon healthy?

Yes, when prepared at home with balanced ingredients, it can be a nutritious meal rich in protein and healthy fats.

Nutrition Information (Per Serving)

Calories: 620 kcal

Protein: 42g

Carbohydrates: 58g

Fat: 25g

Fiber: 5g

Sugar: 12g

Omega-3 Fatty Acids: High

Sodium: Approximately 850mg

Nutrition values may vary depending on ingredients and portion sizes.

Final Thoughts

Teriyaki Salmon with Sesame Noodles is a flavorful, healthy, and satisfying meal that brings amazing Asian-inspired flavors directly to your kitchen.

The sweet and savory glaze, tender fish, and delicious sesame noodles create a perfect combination that works for everyday dinners and special occasions.

With simple ingredients, easy preparation, and impressive results, this recipe deserves a place in your regular meal rotation.

Preparing this Teriyaki Salmon at home allows you to enjoy restaurant-style taste while maintaining control over quality and nutrition.

Whether you are cooking for your family, preparing meals for the week, or serving guests, this dish offers everything you want from a complete dinner: flavor, freshness, and satisfaction.

Paprika Chicken with Olive Walnut

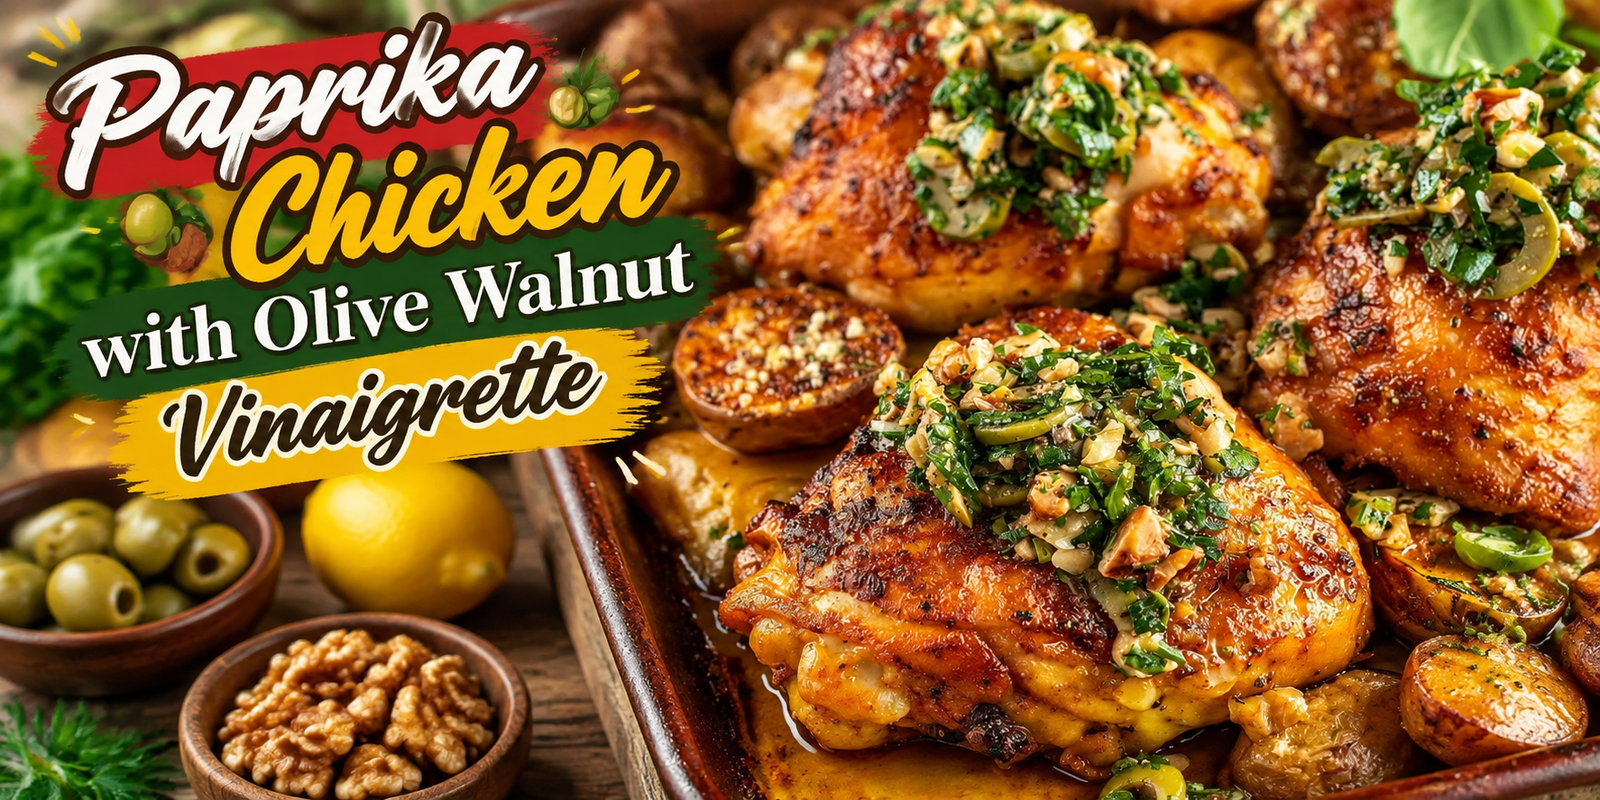
Juicy paprika chicken topped with olive walnut vinaigrette, fresh herbs, and roasted potatoes in a Mediterranean style dish

Paprika Chicken with Olive Walnut Vinaigrette

Description

Paprika Chicken with Olive Walnut Vinaigrette is a delicious Mediterranean-inspired recipe that combines juicy roasted chicken with a smoky paprika seasoning and a fresh, flavorful olive walnut topping. The crispy golden chicken pairs beautifully with the crunchy walnuts, salty olives, fresh herbs, and tangy vinaigrette.

This recipe is perfect for weeknight dinners, family meals, or special occasions when you want a dish that looks impressive but is simple to prepare. The combination of warm spices and fresh ingredients creates a balanced meal packed with rich flavors and satisfying textures.

The star of this dish is the olive walnut vinaigrette, which adds freshness and a slightly nutty taste that transforms simple roasted chicken into a restaurant-style meal.

Preparation Time

Preparation Time: 15 minutes
Cooking Time: 40 minutes
Total Time: 55 minutes

Servings: 4 people

Ingredients

For Paprika Chicken

4 bone-in, skin-on chicken thighs

2 tablespoons olive oil

2 tablespoons smoked paprika

1 teaspoon sweet paprika

4 cloves garlic, minced

1 teaspoon dried oregano

1 teaspoon salt

½ teaspoon black pepper

1 teaspoon lemon zest

2 tablespoons fresh lemon juice

For Olive Walnut Vinaigrette

½ cup green olives, chopped

½ cup walnuts, roughly chopped

¼ cup fresh parsley, chopped

2 tablespoons fresh basil leaves, chopped

2 tablespoons extra virgin olive oil

1 tablespoon red wine vinegar

1 teaspoon honey

1 garlic clove, finely minced

¼ teaspoon black pepper

Pinch of salt

Optional Garnish

Fresh herbs

Lemon slices

Extra chopped walnuts

Step-by-Step Instructions

Step 1: Prepare the Chicken Marinade

In a small bowl, combine olive oil, smoked paprika, sweet paprika, minced garlic, oregano, salt, black pepper, lemon zest, and lemon juice.

Mix well to create a flavorful marinade.

Coat the chicken thighs thoroughly with the paprika mixture, making sure the seasoning reaches under the skin for maximum flavor.

Allow the chicken to marinate for at least 30 minutes. For deeper flavor, refrigerate for several hours.

Step 2: Roast the Chicken

Preheat your oven to 400°F (200°C).

Place the marinated chicken thighs on a baking tray lined with parchment paper or lightly greased.

Roast for 35–40 minutes until the chicken develops a golden crispy skin and reaches an internal temperature of 165°F (74°C).

Allow the chicken to rest for 5 minutes before serving.

Step 3: Prepare the Olive Walnut Vinaigrette

While the chicken is cooking, prepare the topping.

In a bowl, combine chopped olives, walnuts, parsley, basil, garlic, olive oil, red wine vinegar, honey, salt, and black pepper.

Mix everything together until well combined.

Let the vinaigrette sit for a few minutes so the flavors blend together.

Step 4: Assemble the Dish

Place the roasted paprika chicken on a serving plate.

Spoon the olive walnut vinaigrette generously over the chicken.

Add fresh herbs and lemon slices for extra freshness.

Serve warm and enjoy.

Tips & Notes

Use smoked paprika for a deeper smoky flavor and beautiful color.

Bone-in chicken thighs remain juicy during roasting, but you can also use chicken breast.

Toast the walnuts lightly before adding them to the vinaigrette for extra crunch and aroma.

Allowing the chicken to marinate longer will create richer flavor.

Do not skip resting the chicken after cooking because it helps keep the meat tender and juicy.

Variations

Grilled Paprika Chicken

Instead of roasting, grill the chicken over medium heat until perfectly cooked.

Spicy Version

Add chili flakes or cayenne pepper to the paprika marinade for extra heat.

Chicken Breast Version

Use boneless chicken breast for a lighter option and reduce cooking time.

Vegetarian Option

Serve the olive walnut vinaigrette over roasted vegetables like zucchini, peppers, and eggplant.

Serving Suggestions

Serve Paprika Chicken with Olive Walnut Vinaigrette alongside:

Roasted vegetables

Mediterranean salad

Steamed rice

Quinoa

Creamy mashed potatoes

Fresh bread

The flavorful vinaigrette also works beautifully with grilled fish or roasted vegetables.

For a complete and nutritious meal, you can also try our Healthy Chicken & Sweet Potato Bowls, a protein-rich recipe made with tender chicken and wholesome sweet potatoes.

Health Benefits

Paprika Chicken with Olive Walnut Vinaigrette provides a good balance of protein, healthy fats, and fresh ingredients.

Chicken is a great source of lean protein that supports muscle health and helps keep you full.

Walnuts provide omega-3 fatty acids, antioxidants, and healthy fats.

Olive oil contains heart-friendly monounsaturated fats.

Fresh herbs add vitamins, minerals, and natural antioxidants.

Paprika contains beneficial plant compounds that contribute flavor and nutritional value.

Storage Instructions

Store leftover chicken in an airtight container in the refrigerator for up to 3 days.

Keep the olive walnut vinaigrette separately if possible to maintain the best texture.

Reheat chicken gently in the oven or air fryer until warmed through.

The vinaigrette can be stored refrigerated for up to 5 days.

Q/A

Can I use chicken breast instead of thighs?

Yes, chicken breast works well, but reduce cooking time to prevent dryness.

Can I make the vinaigrette ahead of time?

Yes, prepare it up to 2 days in advance and store it in the refrigerator.

What type of paprika is best for this recipe?

Smoked paprika gives the best depth of flavor, but sweet paprika can also be used.

Can I cook this chicken in an air fryer?

Yes, cook at 375°F (190°C) for around 25–30 minutes depending on chicken size.

Is this recipe good for meal prep?

Yes, it stores well and makes a delicious protein-rich meal throughout the week.

Nutrition Information (Approximate Per Serving)

Calories: 520 kcal

Protein: 38g

Carbohydrates: 8g

Fat: 38g

Fiber: 2g

Sugar: 2g

Final Thoughts

Paprika Chicken with Olive Walnut Vinaigrette is a flavorful and elegant meal that brings Mediterranean flavors straight to your kitchen. The smoky paprika chicken combined with the crunchy walnut and olive topping creates a perfect balance of savory, fresh, and slightly tangy flavors.

Whether you are preparing a family dinner or looking for a healthy recipe packed with flavor, this Paprika Chicken with Olive Walnut Vinaigrette is an easy recipe that delivers amazing results every time.

If you love flavorful chicken dinners, don’t miss our Lemon Butter Dijon Chicken and Orzo with Feta Sauce, another delicious recipe packed with creamy Mediterranean flavors.


Jalapeño Cornbread Poppers

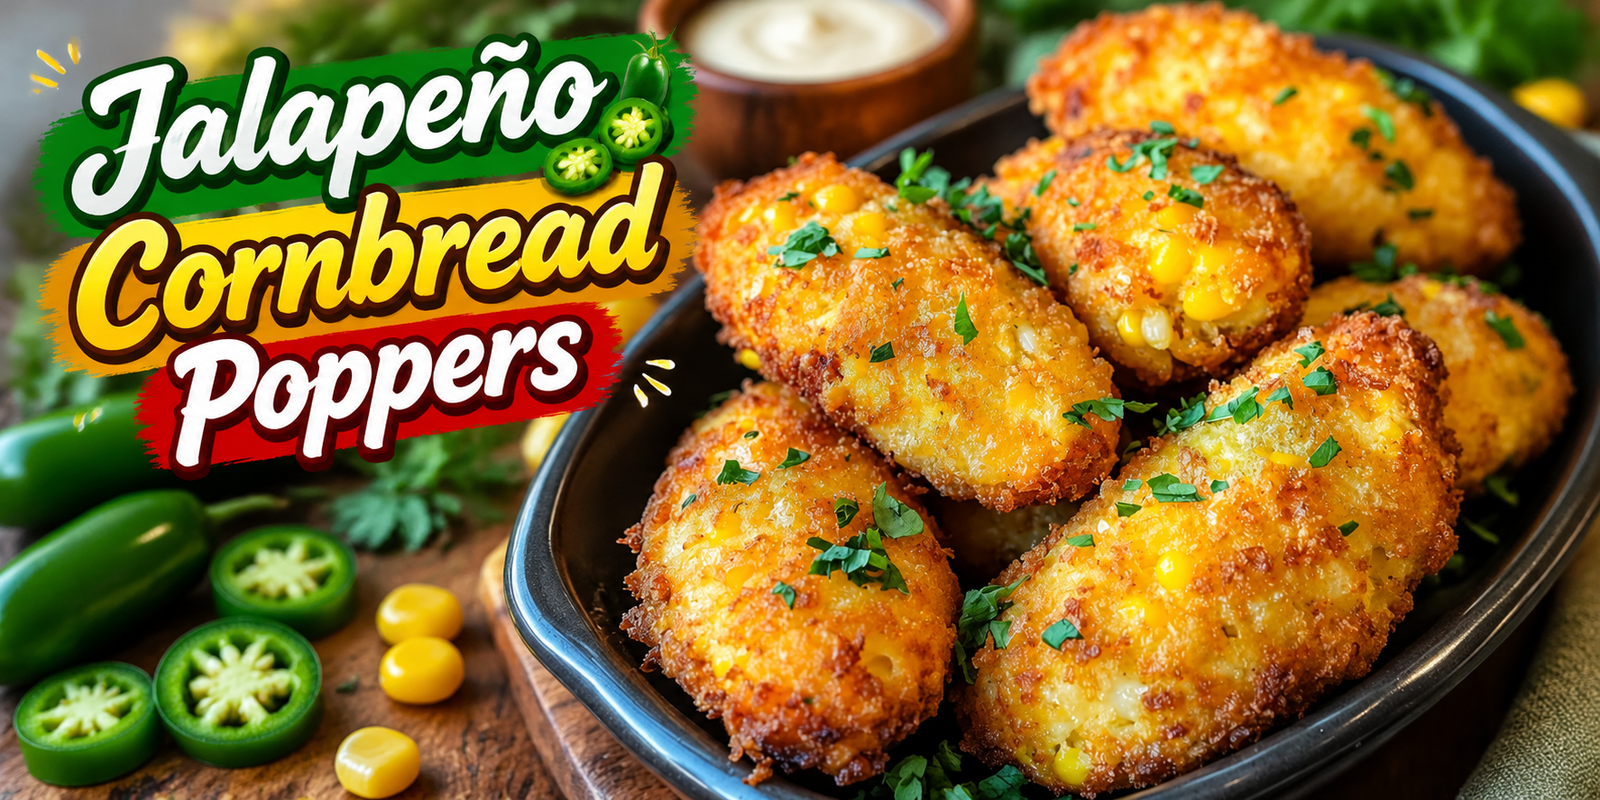
Crispy Jalapeño Cornbread Poppers with sweet corn, cheese, and fresh herbs served as a delicious party appetizer

Jalapeño Cornbread Poppers

Description

Jalapeño Cornbread Poppers are a fun and flavorful twist on classic cornbread. These bite-sized appetizers combine sweet cornmeal flavor, spicy jalapeños, creamy cheese, and a golden crispy outside to create the perfect snack for any occasion.

These cheesy poppers are easy to prepare and make a fantastic addition to game nights, family gatherings, holiday parties, or quick evening snacks. The combination of buttery cornbread texture with the spicy kick of jalapeños makes every bite delicious and satisfying.

Whether you serve them with ranch dressing, sour cream, or your favorite dipping sauce, Jalapeño Cornbread Poppers are guaranteed to become a crowd favorite.

Preparation Time: 15 minutes
Cooking Time: 20 minutes
Total Time: 35 minutes

Servings: 24 poppers

Ingredients

For Jalapeño Cornbread Poppers:

1 cup cornmeal

½ cup all-purpose flour

1 tablespoon baking powder

½ teaspoon salt

¼ teaspoon black pepper

1 tablespoon sugar (optional)

1 large egg

¾ cup milk

¼ cup melted butter

1 cup shredded cheddar cheese

½ cup cream cheese, softened

3 fresh jalapeños, finely chopped

½ cup sweet corn kernels

2 tablespoons chopped fresh cilantro

¼ teaspoon garlic powder

For Topping:

¼ cup shredded cheddar cheese

Extra sliced jalapeños

Fresh herbs for garnish

Step-by-Step Instructions

Step 1: Prepare the Batter

Preheat your oven to 375°F (190°C). Grease a mini muffin pan with cooking spray or butter.

In a large bowl, combine cornmeal, flour, baking powder, salt, black pepper, sugar, and garlic powder. Mix well until all dry ingredients are combined.

In another bowl, whisk together egg, milk, and melted butter. Slowly add the wet ingredients into the dry mixture and stir until combined.

Step 2: Add Cheese and Jalapeños

Fold in shredded cheddar cheese, cream cheese, chopped jalapeños, sweet corn, and cilantro. Mix gently until everything is evenly distributed.

Avoid overmixing because it can make the poppers dense instead of soft and fluffy.

Step 3: Fill the Muffin Pan

Spoon the mixture into the prepared mini muffin pan, filling each cup about three-fourths full.

Top each popper with a little extra cheddar cheese and a small slice of jalapeño for extra flavor.

Step 4: Bake the Poppers

Bake for 18–20 minutes or until the tops become golden and a toothpick inserted in the center comes out clean.

Allow them to cool for a few minutes before removing them from the pan.

Step 5: Serve

Serve warm with ranch dressing, sour cream, honey butter, or spicy dipping sauce.

Tips & Notes

Use fresh jalapeños for the best flavor and texture.

Remove jalapeño seeds if you prefer a milder taste.

For extra crispy edges, lightly brush the muffin pan with butter before adding the batter.

Freshly shredded cheese melts better compared to pre-packaged shredded cheese.

Do not overbake the poppers because they can become dry.

These poppers taste best when served warm and fresh.

Variations

Bacon Jalapeño Cornbread Poppers

Add cooked crispy bacon pieces for a smoky flavor.

Mexican Style Poppers

Add taco seasoning, black beans, and pepper jack cheese for a Mexican-inspired version.

Healthier Version

Use whole wheat flour, reduced-fat cheese, and Greek yogurt instead of cream cheese.

Extra Spicy Version

Add crushed red pepper flakes or extra jalapeños for more heat.

Serving Suggestions

Serve Jalapeño Cornbread Poppers as:

Party appetizers

Game-day snacks

Holiday starters

Side dishes with chili or soup

Lunchbox snacks

They pair especially well with barbecue dishes, grilled chicken, and creamy dips.

Serve this soup with a healthy side dish like Healthy Marry Me Chickpeas for a complete and satisfying meal.

Health Benefits

Jalapeño Cornbread Poppers can provide several nutritional benefits when prepared with quality ingredients.

Cornmeal provides carbohydrates that give your body energy.

Jalapeños contain antioxidants and vitamin C.

Cheese provides calcium and protein that support healthy bones and muscles.

Adding fresh herbs and vegetables increases the overall nutritional value.

Using whole grain ingredients can make this snack higher in fiber.

Storage Instructions

Store leftover Jalapeño Cornbread Poppers in an airtight container in the refrigerator for up to 4 days.

To reheat, warm them in an oven or air fryer for a few minutes to restore their crispy texture.

They can also be frozen for up to 2 months. Thaw and reheat before serving.

Q/A

Can I make Jalapeño Cornbread Poppers ahead of time?

Yes, you can prepare them a day before and reheat before serving.

Can I make these without jalapeños?

Yes, replace jalapeños with bell peppers for a mild version.

Can I use frozen corn?

Yes, frozen corn works well. Thaw and drain before adding.

Can I bake these in a regular muffin pan?

Yes, but the cooking time may increase because regular muffins are larger.

How do I make them more cheesy?

Add extra cheddar, mozzarella, or pepper jack cheese.

Nutrition Information (Approximate Per Serving)

Calories: 95 kcal

Protein: 3g

Carbohydrates: 12g

Fat: 4g

Fiber: 1g

Calcium: 60mg

Sugar: 2g

Final Thoughts

Jalapeño Cornbread Poppers are the perfect combination of sweet, spicy, cheesy, and comforting flavors. They are simple to make, easy to customize, and perfect for sharing with friends and family.

Whether you need a quick appetizer for a party or a delicious snack for your family, these Jalapeño Cornbread Poppers deliver amazing flavor in every bite.

For more comforting and nutritious recipes, try our Stuffed Pepper Soup a creamy and delicious plant-based recipe your family will love.