Air Fryer Foil Handle Hack

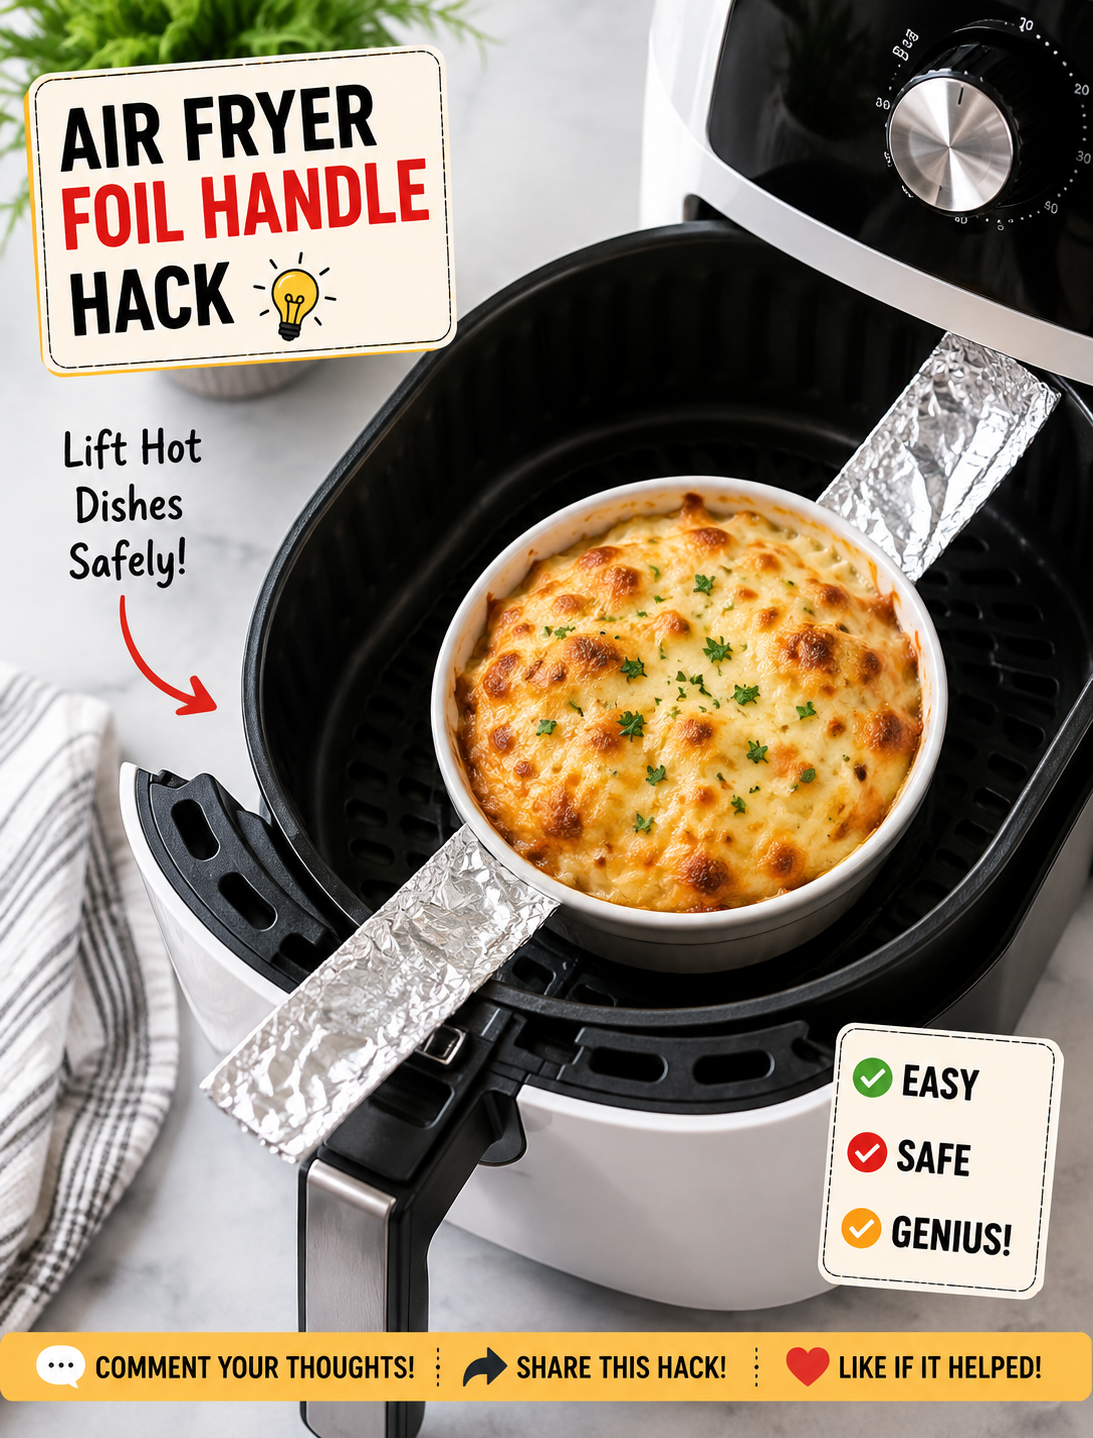
Air fryer foil handle hack showing folded aluminum foil used to lift food from a hot air fryer basket

Air Fryer Foil Handle Hack

An air fryer foil handle hack is a simple kitchen trick that can make certain air fryer recipes easier to lift, turn, and remove. By folding a small strip of aluminum foil into a sturdy handle, you can create a temporary lifting aid for foods that sit in a pan, dish, or liner inside the basket.

This trick is especially useful when cooking delicate foods that are difficult to grab with tongs. It can also help when you need to lift a small baking dish or food container from a hot air fryer basket.

The key is to use foil correctly. A foil handle should stay secure, avoid loose edges, and never interfere with the air fryer’s heating element or airflow. When used carefully, this kitchen shortcut can make everyday air frying more convenient.

What Is the Air Fryer Foil Handle Hack?

The air fryer foil handle hack uses folded aluminum foil to create a temporary handle that helps you lift food or a suitable oven-safe container from the basket.

Instead of reaching into a hot basket with your hands, you can use the folded strip as a grip point. This can be helpful for foods such as baked dips, casseroles, stuffed peppers, small cakes, and other recipes prepared in an oven-safe dish.

The method is simple, inexpensive, and does not require a special accessory. Most kitchens already have a roll of aluminum foil available.

However, foil should not be treated as a universal replacement for an air fryer basket, rack, or approved accessory. The foil must remain stable during cooking and should never be allowed to touch the heating element.

How to Make an Air Fryer Foil Handle

Making a foil handle takes only a few steps, but the strip should be folded firmly enough to support the food or container.

Step 1: Cut a Foil Strip

Tear off a long strip of heavy-duty aluminum foil. The strip should be long enough to extend under the food or dish while leaving two ends available for lifting.

A wider strip provides better support than a very narrow piece of foil.

Step 2: Fold the Foil

Fold the foil lengthwise several times to create a thick, sturdy band. Press the folds firmly so the strip does not unfold while you are handling the food.

Avoid leaving sharp foil points that could scratch a nonstick surface or catch on the basket.

Step 3: Position the Handle

Place the folded strip underneath the food or oven-safe container before cooking. Keep the two ends positioned where they can be reached easily after cooking.

Do not cover the entire basket with foil because air circulation is essential for proper air frying.

Step 4: Lift Carefully

Once the food is finished, allow the basket and food to cool enough for safe handling. Use heat-resistant gloves or silicone mitts when lifting anything hot.

Hold both ends of the foil evenly and lift slowly. If the food feels too heavy or unstable, stop and use a suitable heat-safe utensil instead.

Why This Air Fryer Hack Is Useful

The main benefit of this trick is easier handling. Some foods are fragile, deep, or difficult to grip without breaking.

A foil lifting strap can make it easier to remove items such as small baked dishes and delicate desserts. It may also reduce the need to reach deep into a hot air fryer basket.

This method can be particularly useful for recipes that use a small oven-safe pan. The foil strip acts as a temporary lifting aid, allowing you to raise the pan without touching its hot sides.

Another benefit is convenience. You do not need to purchase a separate lifting tool for occasional recipes.

Best Foods to Use With a Foil Handle

This method works best with foods or containers that have a stable shape and can safely be lifted from underneath.

Good examples include baked pasta, mini casseroles, stuffed vegetables, brownies, cakes, baked dips, and small oven-safe dishes.

A foil handle can also help with recipes prepared in silicone or metal baking containers, provided the container is rated for the air fryer’s temperature and fits properly inside the basket.

Avoid using the trick for very heavy foods. A thin foil strip can tear if it is carrying more weight than it can safely support.

Air Fryer Foil Safety Tips

Aluminum foil can be used in many air fryers, but incorrect placement can create problems. Always check your air fryer’s manufacturer’s instructions before using foil.

Never place loose foil directly against the heating element. A lightweight sheet can move because of the powerful airflow inside some air fryers.

Keep foil secured under food or inside an appropriate oven-safe container. Do not allow foil to cover the basket’s ventilation openings more than necessary.

Do not preheat an air fryer with loose foil inside unless the manufacturer specifically permits it. The airflow can move unsecured foil before food is added.

Foil should also never be used to completely seal the cooking basket. Air fryers depend on circulating hot air to cook food evenly and create crisp surfaces.

Use fresh foil that is free from tears when creating a lifting strap. If the foil becomes damaged, replace it before attempting to move hot food.

Common Mistakes to Avoid

One common mistake is using too little foil. A narrow or thin strip may tear when you lift a heavy dish.

Another mistake is placing the handle where it blocks too much airflow. Air needs room to circulate around the food for even cooking and browning.

Do not let the foil handle extend close to the heating element. Keep the material contained within the basket and away from exposed heating components.

Avoid pulling quickly when the food is hot. A slow, balanced lift gives you better control and reduces the chance of spilling.

Finally, do not assume every air fryer has the same design. Basket depth, heating element position, and manufacturer instructions vary between models.

Air Fryer Foil Handle Hack vs. Parchment Liners

Foil and parchment serve different purposes in an air fryer.

A foil handle is mainly a lifting aid. It can help remove food or a small cooking container from the basket.

Parchment liners are designed to help reduce sticking and make cleanup easier. Perforated air fryer parchment is often designed to support airflow around the food.

Neither material should completely block the basket’s airflow. For crisp results, the hot air needs enough space to move around the food.

If you use parchment, choose a product intended for cooking and follow its temperature and placement instructions. Do not use parchment as a substitute for a lifting handle unless the product specifically supports that use.

Tips for Getting Better Air Fryer Results

Use the foil handle only when it solves a real handling problem. Many foods can be removed safely with silicone-tipped tongs or a heat-resistant spatula.

Keep food arranged in a single layer when the recipe calls for maximum crispness. Overcrowding can prevent hot air from reaching all surfaces evenly.

Shake or turn food when the recipe requires it. A foil handle should never interfere with the movement needed during cooking.

Use an oven-safe container that fits comfortably inside the basket. Leave enough room around the container for hot air to circulate.

Always follow the temperature and cooking instructions for your specific recipe and air fryer model.

Is the Foil Handle Hack Worth Trying?

The air fryer foil handle hack is worth trying when you regularly cook foods that are difficult to lift. It is inexpensive, quick to prepare, and useful for certain baked recipes.

The biggest advantage is better control when removing hot food or a small cooking dish. The trick can also make some air fryer recipes less messy because you have a designated lifting point.

Still, it is not necessary for every recipe. If food can be removed easily with a safe utensil, there is no reason to add foil.

Think of this as a simple air fryer shortcut rather than a required cooking technique. Used properly, it can make your air fryer routine easier without adding another kitchen gadget.

Frequently Asked Questions

Can I use aluminum foil in an air fryer?

Yes, aluminum foil can be suitable for many air fryers when used correctly, but always follow the manufacturer’s instructions and keep foil away from the heating element.

Does foil affect air fryer cooking?

Foil can affect airflow if it covers too much of the basket, so use only the amount needed and keep ventilation areas as open as possible.

How thick should a foil handle be?

Fold the foil several times into a firm, wide strip so it can support the intended food or container without tearing.

Can I use the foil handle for heavy food?

A foil handle is best for light or moderately sized foods and small containers; use a proper heat-resistant utensil for heavy or unstable dishes.

Can the foil handle stay in the air fryer while cooking?

Yes, if your air fryer manufacturer allows foil and the handle is securely positioned away from the heating element and does not obstruct necessary airflow.

Can I use parchment paper instead of foil?

Parchment can help with sticking and cleanup, but it is not automatically a replacement for a foil lifting handle and should be used according to its product instructions.

Is this hack safe for every air fryer?

No air fryer is identical, so check your model’s manual before using foil and never allow loose material to contact the heating element.

What can I use instead of a foil handle?

Heat-resistant silicone tongs, a spatula, or an approved air fryer accessory can provide a safer and more durable lifting option for many recipes.

Final Thoughts

The air fryer foil handle hack is a simple way to make lifting certain foods and small baking dishes easier. It works best when you need extra control without buying another kitchen tool.

For the best results, fold the foil into a strong strip, keep it away from the heating element, and avoid blocking the air fryer’s airflow. Always check your model’s instructions before using aluminum foil.

Used carefully, this easy air fryer trick can make baked dishes, casseroles, desserts, and other delicate foods much easier to remove. It is a small kitchen shortcut that can save time and make air frying more convenient.
Air Fryer Crispy Cheese Wrap Hack

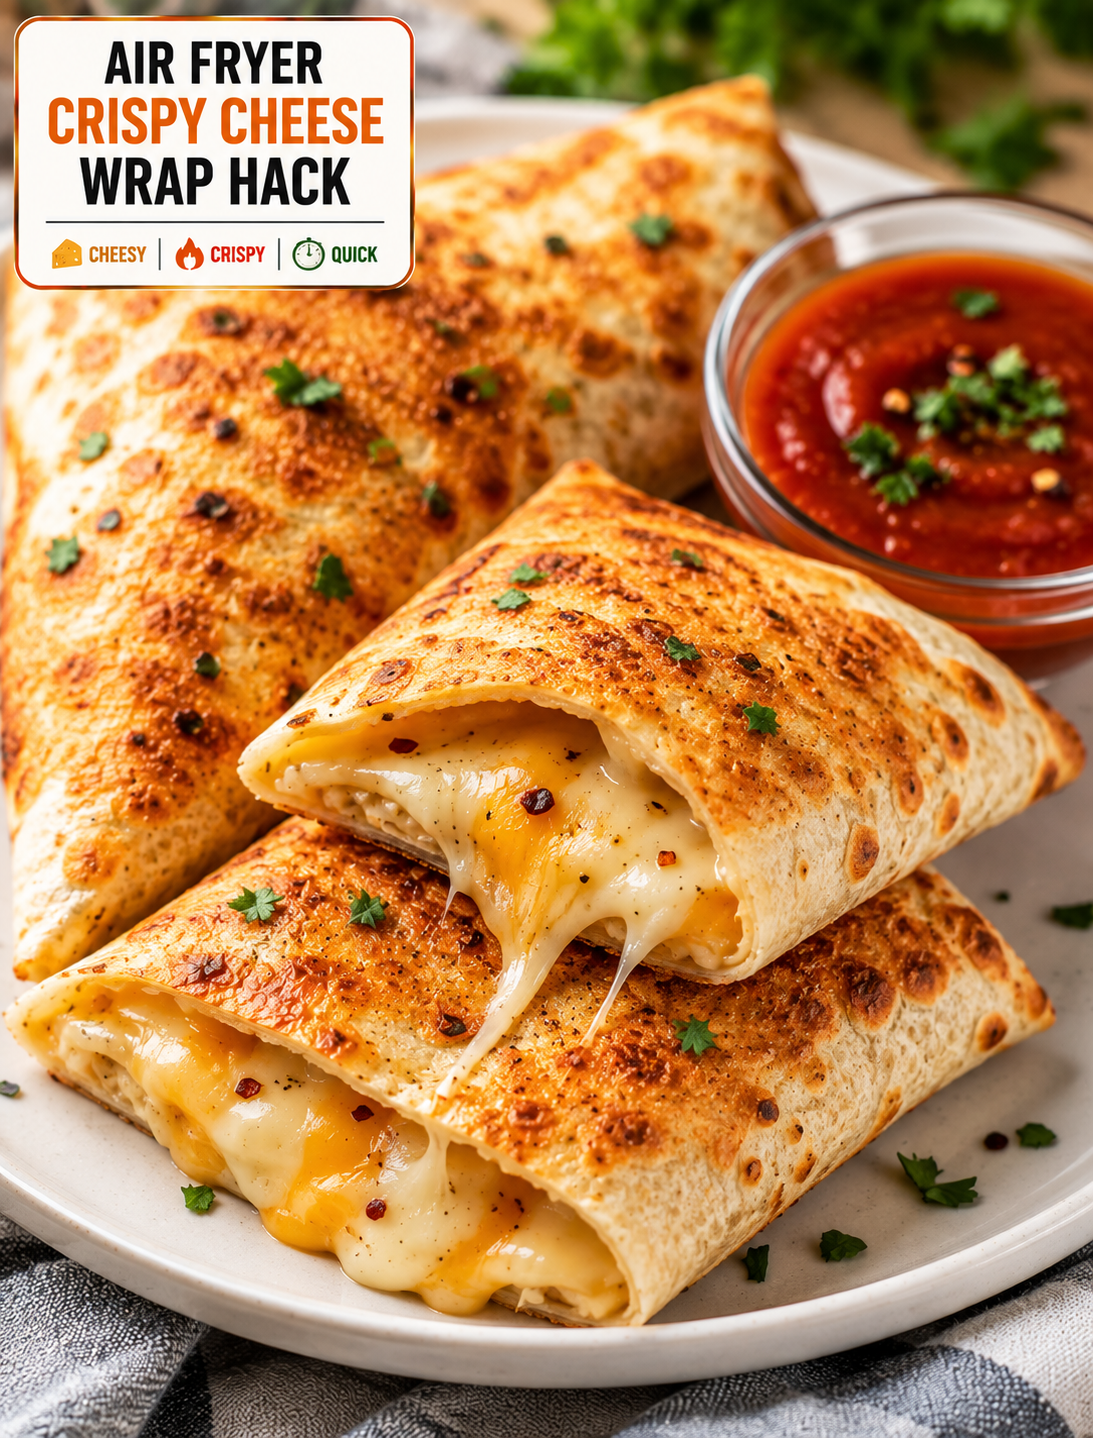
Golden crispy air fryer cheese wrap sliced open to reveal gooey melted cheese, served with dipping sauce and fresh herbs

Air Fryer Crispy Cheese Wrap Hack

Want a quick snack that turns a few simple ingredients into something crispy, cheesy, and seriously satisfying? This Air Fryer Crispy Cheese Wrap Hack is an easy recipe for busy days, quick lunches, after-school snacks, and casual gatherings.

A soft flour tortilla is filled with shredded cheese and simple seasonings, folded into a compact wrap, and cooked in the air fryer until the outside becomes golden and crisp. Inside, the cheese melts into a warm, gooey filling.

The recipe is easy to change based on what you already have in the refrigerator. Add cooked chicken, turkey, vegetables, jalapeños, or leftover taco meat for a more filling version.

The air fryer is the key to getting a crisp finish without deep frying. A light coating of oil or cooking spray is enough to help the tortilla brown evenly.

Why You’ll Love This Crispy Cheese Wrap

This recipe is fast, simple, and made with everyday ingredients.

The tortilla becomes crisp around the edges while the cheese melts inside. That combination gives the wrap a texture similar to a crispy quesadilla but with a tighter, snack-friendly shape.

You can prepare one wrap when you are hungry or make several for a family snack.

The recipe is also budget-friendly because it does not require expensive ingredients. Basic flour tortillas, shredded cheese, and seasonings are enough to make a tasty snack.

Another advantage is flexibility. Use cheddar for a sharp flavor, Monterey Jack for a smooth melt, or pepper Jack for extra heat.

You can also use small tortillas for snack-size wraps or larger tortillas when you want a more filling meal.

Ingredients You’ll Need

  • 4 large flour tortillas
  • 1½ cups shredded cheddar cheese
  • 1 cup shredded Monterey Jack cheese
  • Melted butter or olive oil 1 tablespoon
  • Garlic powder ½ teaspoon
  • Smoked paprika ½ teaspoon
  • ¼ teaspoon black pepper
  • Dried oregano ¼ teaspoon
  • 2 tablespoons chopped green onions
  • 1 small jalapeño, finely sliced, optional
  • Cooking spray

Optional Add-Ins

  • 1 cup cooked shredded chicken
  • Cooked taco meat ½ cup
  • Diced bell peppers ½ cup
  • ½ cup cooked corn
  • ¼ cup chopped black olives
  • 2 tablespoons chopped fresh cilantro
  • Sliced turkey

For the best texture, avoid adding too many wet ingredients. Excess moisture can make the tortilla soft instead of crisp.

Freshly shredded cheese usually melts smoothly and evenly. You can also use a pre-shredded blend when convenience matters.

How to Make the Air Fryer Cheese Wrap

1. Prepare the Cheese Filling

Add the cheddar and Monterey Jack cheese to a bowl.

Mix in garlic powder, smoked paprika, black pepper, oregano, and chopped green onions.

If you want extra heat, add finely sliced jalapeño.

Stir everything together so the seasonings are distributed throughout the cheese.

If you are adding chicken or taco meat, make sure it is already cooked and not overly wet.

2. Warm the Tortillas

Place the tortillas on a microwave-safe plate.

Warm them for about 10–15 seconds.

This makes the tortillas more flexible and helps prevent cracking when you fold them.

Keep the remaining tortillas covered with a clean kitchen towel while working.

3. Fill the Tortilla

Place one tortilla on a clean work surface.

Add about ¾ cup of the cheese mixture near the center.

Leave a border around the edges so the cheese does not spill out during cooking.

If adding chicken, vegetables, or meat, use a small amount so the wrap remains easy to fold.

Do not overfill the tortilla because a thick wrap takes longer to crisp and may open during cooking.

4. Fold the Wrap

Left side fold and right sides of the tortilla toward the center.

Fold the bottom edge over the filling.

Roll the tortilla upward tightly until the filling is enclosed.

Place the finished wrap seam-side down while you prepare the remaining wraps.

Keeping the seam underneath helps prevent the tortilla from opening in the air fryer.

5. Brush With Oil

Lightly brush the outside of each wrap with melted butter or olive oil.

You can also use cooking spray.

A thin coating is enough. Too much oil can make the tortilla greasy instead of crisp.

For extra flavor, mix a pinch of garlic powder and smoked paprika into the melted butter before brushing.

6. Air Fry Until Golden

Preheat your air fryer to 375°F if your model requires preheating.

Place the wraps seam-side down in the basket.

Leave space between each wrap so hot air can circulate properly.

Air fry for about 6–9 minutes, turning carefully halfway through.

The wraps are ready when the tortillas are golden brown and crisp and the cheese is fully melted.

Air fryer models vary, so begin checking around the six-minute mark.

7. Rest and Slice

Carefully remove the hot wraps from the basket.

Let them rest for about 1–2 minutes.

This gives the melted cheese time to settle slightly.

Slice each wrap diagonally and serve immediately.

The contrast between the crisp tortilla and warm melted cheese is best when the wraps are fresh.

The Best Cheese for Crispy Wraps

Cheese choice can change the texture and flavor of the finished wrap.

Cheddar provides a rich, slightly sharp flavor and melts well.

Monterey Jack has a mild taste and creates a smooth, creamy filling.

Pepper Jack adds both creaminess and a noticeable spicy kick.

Mozzarella creates a stretchy cheese center with a mild flavor.

Colby Jack is another good option because it melts easily and has a balanced taste.

For the best result, combine two cheeses. A sharp cheese paired with a mild melting cheese creates more flavor without becoming overpowering.

How to Make the Wrap Extra Crispy

The biggest mistake is adding too much filling.

A thinner layer of cheese allows the tortilla to cook evenly and become crisp.

Keep the outside of the tortilla relatively dry before adding the light oil coating.

Do not overcrowd the air fryer basket.

Leave enough space around each wrap for hot air to circulate.

Turn the wraps halfway through cooking to brown both sides.

For an even crunchier finish, add another 1–2 minutes of cooking time, but watch closely because tortillas can brown quickly.

Serve the wraps soon after cooking because steam from the hot filling can soften the exterior if they sit too long.

Easy Add-Ins to Try

This recipe is a great way to use small amounts of leftovers.

Add cooked shredded chicken for a simple chicken cheese wrap.

Use leftover taco meat with cheddar and jalapeño for a Tex-Mex version.

Add cooked bell peppers and onions for extra flavor and texture.

Corn adds a mild sweetness that works well with pepper Jack.

Chopped spinach can add color without changing the recipe very much.

For a breakfast version, add scrambled eggs, cooked bacon, and cheddar.

Deli-style wrap, use sliced turkey, Swiss cheese, and a little mustard.

Keep add-ins fairly dry so the tortilla can still become crisp.

Dipping Sauces for Cheese Wraps

A crispy cheese wrap becomes even better with the right dipping sauce.

Ranch dressing provides a cool and creamy contrast.

Salsa adds fresh tomato flavor and a little acidity.

Guacamole works well with Tex-Mex versions.

Quest creates an extra-cheesy combination for serious cheese lovers.

Hot sauce is an easy choice when you want more heat.

Chipotle mayo adds smoky spice and creaminess.

For kids, ketchup or a mild creamy dip can be served on the side.

Place several sauces on the table when serving a group so everyone can choose a favorite.

What to Serve With Crispy Cheese Wraps

These wraps can be served as a snack or as part of a larger meal.

Pair them with a fresh green salad for a simple lunch.

Serve them with tomato soup for a comforting combination.

For a Tex-Mex meal, add black beans, corn salsa, guacamole, and fresh pico de gallo.

Air fryer potato wedges also make a great side.

For breakfast, serve a cheese and egg version with fresh fruit.

For game day, cut the wraps into smaller pieces and serve them with several dipping sauces.

Can You Make These Wraps Ahead?

Yes, you can prepare the wraps ahead of time.

Assemble them and place them in the refrigerator in a covered container.

For the best texture, air fry them shortly before serving.

Avoid leaving assembled wraps at room temperature for long periods when they contain cooked meat or other perishable ingredients.

If you are preparing several wraps for a gathering, make the filling ahead and assemble the tortillas closer to cooking time.

This helps prevent moisture from softening the tortillas.

Storage and Reheating

Store leftover cooked wraps in an airtight container in the refrigerator.

For the best texture, reheat them in the air fryer at 350°F for about 3–5 minutes.

The air fryer helps bring back some of the crisp texture while warming the cheese.

Avoid using the microwave when possible because microwave heating can make the tortilla soft.

If you are reheating a wrap containing chicken or other cooked meat, make sure the filling is heated thoroughly before serving.

Discard leftovers that have an unusual smell, appearance, or texture.

Simple Variations

Spicy Jalapeño Cheese Wrap

Add sliced jalapeños, pepper Jack cheese, and a pinch of crushed red pepper.

Chicken Ranch Wrap

Add shredded cooked chicken, cheddar cheese, and ranch seasoning.

Taco Cheese Wrap

Combine cooked taco meat, cheddar, Monterey Jack, and a little salsa.

Breakfast Cheese Wrap

Fill the tortilla with scrambled eggs, cheddar, and cooked bacon.

Pizza Cheese Wrap

Add mozzarella, a small amount of pizza sauce, and Italian seasoning.

BBQ Chicken Wrap

Combine shredded chicken, cheddar, and a small amount of barbecue sauce.

These variations allow you to use the same basic air fryer method while creating completely different flavors.

Tips for the Best Results

Use soft flour tortillas that fold without cracking.

Warm the tortillas briefly before filling them.

Do not overfill the wraps.

Keep wet ingredients to a minimum.

Use a light layer of oil or cooking spray.

Place the wraps seam-side down in the basket.

Leave space between the wraps.

Turn them halfway through cooking.

Watch carefully during the final minutes because tortillas can brown quickly.

Allow the wraps to rest briefly before slicing.

Serve them while warm for the best crisp texture.

The Bottom Line

Air Fryer Crispy Cheese Wraps are an easy solution when you want something quick, cheesy, and crunchy without complicated preparation.

A few basic ingredients turn into a golden snack with a crisp tortilla and warm, melted cheese. The recipe is flexible enough to include chicken, taco meat, vegetables, eggs, or whatever leftovers you have available.

The air fryer makes the process especially simple. A light coating of oil, enough space in the basket, and a short cooking time are all you need for a delicious result.

Serve these wraps with ranch, salsa, guacamole, hot sauce, or your favorite dip.

Frequently Asked Questions

1. How long do cheese wraps take in the air fryer?

Cook them at 375°F for about 6–9 minutes, turning halfway, until the tortilla is golden and the cheese has melted.

2. What tortillas work best for this recipe?

Soft flour tortillas are ideal because they fold easily and become crisp without breaking.

3. How do I stop the cheese from leaking out?

Avoid overfilling the tortilla, leave a border around the filling, and roll the wrap tightly with the seam underneath.

4. Can I add chicken to the cheese wrap?

Yes. Add a small amount of fully cooked shredded chicken for a more filling chicken and cheese version.

5. Can I make these wraps spicy?

Yes. Use pepper Jack cheese, jalapeños, hot sauce, or crushed red pepper for extra heat.

6. Can I prepare cheese wraps ahead of time?

Yes. Assemble them ahead and refrigerate them, then air fry shortly before serving for the best crisp texture.

7. What dipping sauce goes with crispy cheese wraps?

Ranch, salsa, guacamole, quest, chipotle mayo, and hot sauce are all excellent choices.

8. Can I reheat leftover cheese wraps?

Yes. Reheat them in the air fryer at about 350°F for 3–5 minutes to restore some of the crisp texture.

Final Thoughts

This Air Fryer Crispy Cheese Wrap Hack proves that you do not need a complicated recipe to make something seriously satisfying.

The tortilla turns golden and crunchy while the cheese melts into a warm, gooey center. With a few simple add-ins, the same recipe can become a chicken wrap, taco wrap, breakfast wrap, or spicy snack.

For the crispiest result, keep the filling light, use a small amount of oil, and give each wrap enough room in the air fryer.

Crispy outside, melty inside, and ready in minutes—this is an easy recipe to keep in your back pocket for those cheesy cravings.

Crispiest Air Fryer Potatoes Hack

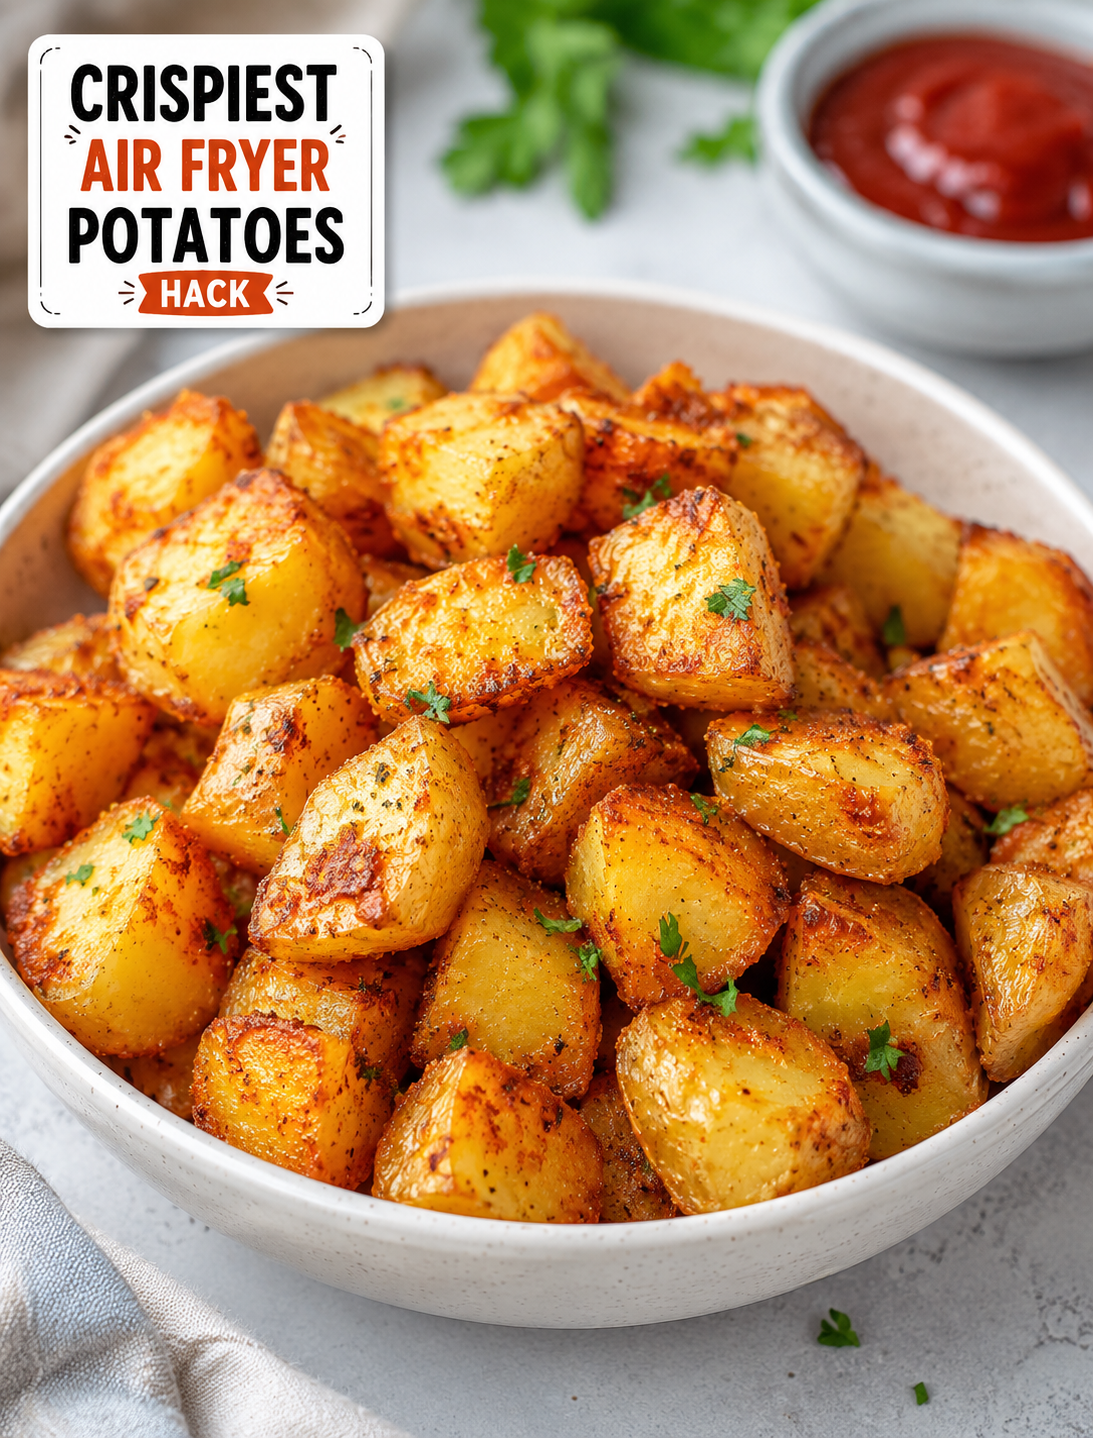
Crispy golden air fryer potatoes with crunchy edges and fluffy centers served on a white plate

Crispiest Air Fryer Potatoes Hack

If you want golden potatoes with a crunchy outside and fluffy center, this Crispiest Air Fryer Potatoes Hack is worth trying. The secret is not adding more oil. It is about preparing the potatoes correctly before they hit the air fryer.

A few simple steps can help remove excess starch, improve browning, and create a crispier surface. This method works well with baby potatoes, Yukon Gold potatoes, red potatoes, and other all-purpose varieties.

The best part is that you can make these crispy potatoes with basic ingredients you probably already have. They are quick enough for a weeknight dinner and tasty enough to serve with burgers, grilled chicken, steak, eggs, or sandwiches.

Ingredients for Crispy Air Fryer Potatoes

You only need a handful of ingredients to make this easy potato side dish.

  • 1 ½ pounds baby potatoes or Yukon Gold potatoes
  • 1 ½ tablespoons olive oil
  • 1 teaspoon garlic powder
  • 1 teaspoon paprika
  • ½ teaspoon onion powder
  • ½ teaspoon kosher salt
  • ¼ teaspoon black pepper
  • 1 tablespoon cornstarch
  • Fresh parsley for serving, optional

Baby potatoes are especially convenient because they have a creamy center and can be cut into even pieces. Yukon Gold potatoes also work well because their naturally buttery texture stays soft inside while the edges become crisp.

Cornstarch is the key ingredient in this method. A light coating helps create a dry, crisp outer layer as the potatoes cook.

How to Make the Crispiest Air Fryer Potatoes

1. Cut the Potatoes Evenly

Wash the potatoes well and dry them with a clean kitchen towel. Cut larger potatoes into 1-inch pieces so they cook at the same rate.

Keeping the pieces close in size is important. Small pieces can burn before larger pieces become tender, while uneven pieces may cook inconsistently.

2. Soak Away Excess Starch

Place the cut potatoes in a bowl of cold water and let them soak for about 20 to 30 minutes.

This simple step removes some of the surface starch. Less surface starch helps the potatoes develop a cleaner, crunchier exterior during air frying.

Drain the potatoes completely after soaking. Pat them very dry with paper towels or a clean kitchen towel.

Do not skip the drying step. Wet potatoes create steam, and excess moisture can prevent the outside from becoming properly crisp.

3. Add a Light Crispy Coating

Put the dry potatoes into a large bowl. Add olive oil, garlic powder, paprika, onion powder, salt, and black pepper.

Sprinkle the cornstarch over the potatoes and toss until every piece has a thin coating.

Use only a light amount of cornstarch. A heavy coating can make the potatoes taste powdery instead of crisp and golden.

4. Preheat the Air Fryer

Preheat your air fryer to 400°F for about 3 to 5 minutes if your model recommends preheating.

A hot cooking basket helps the potatoes start browning as soon as they are added.

If your air fryer does not require preheating, you can still make the potatoes successfully. Simply allow a little extra cooking time if needed.

5. Arrange the Potatoes in One Layer

Place the seasoned potatoes in the air fryer basket in a single layer.

Avoid packing the basket too tightly. Hot air needs room to move around each piece, especially around the cut surfaces.

If you are cooking a large batch, cook the potatoes in two batches instead of overcrowding the basket.

6. Air Fry Until Golden and Crisp

Cook the potatoes at 400°F for approximately 18 to 24 minutes.

Shake the basket after about 10 minutes to help the potatoes brown evenly. Continue cooking until the edges are deeply golden and crisp and the centers are fork-tender.

Cooking time can vary depending on the potato size, air fryer model, and basket design. Check the potatoes a few minutes early if your air fryer tends to cook quickly.

For extra browning, give the potatoes another 2 to 4 minutes at the end.

Why This Air Fryer Potato Hack Works

The trick works because several small preparation steps solve common problems that make potatoes soft.

First, soaking helps remove excess surface starch. Second, drying removes moisture that could create steam. Third, cornstarch adds a thin layer that becomes crisp under high heat.

The final piece is airflow. An air fryer cooks by circulating hot air around the food, so potatoes need enough space for that air to reach their surfaces.

That is why a crowded basket often produces softer potatoes even when the cooking temperature is correct.

You also do not need to drown the potatoes in oil. A small amount is enough to help the seasonings stick and support browning.

Best Potatoes for Air Frying

Different potato varieties produce slightly different results.

Baby potatoes: These are easy to prepare and have a creamy middle with crisp edges.

Yukon Gold potatoes: Their naturally buttery texture makes them excellent for roasting and air frying.

Red potatoes: These hold their shape well and develop a crisp skin when cooked properly.

Russet potatoes: Russets can become very crisp because they contain more starch, although their centers have a lighter, fluffier texture.

For the best balance of crispness and creaminess, baby potatoes and Yukon Golds are excellent choices.

Tips for Extra-Crispy Potatoes

For the crispiest results, focus on moisture, space, and heat.

Dry the potatoes thoroughly. Even a little excess water can slow browning.

Do not skip the soak. A short cold-water soak can help reduce surface starch.

Use a light oil coating. Too much oil can make the exterior greasy instead of crisp.

Add cornstarch sparingly. A thin coating gives the potatoes a crunchy finish without creating a thick crust.

Avoid overcrowding. Cook in batches when necessary.

Shake the basket. Moving the potatoes exposes more surfaces to circulating hot air.

Serve immediately. Air-fried potatoes are crispiest right after cooking.

If the potatoes soften after sitting, place them back in the air fryer at 375°F to 400°F for a few minutes to refresh the crunch.

Easy Seasoning Variations

The basic seasoning can be changed to match almost any meal.

For a smoky version, add smoked paprika and a pinch of chili powder.

For cheesy potatoes, sprinkle grated Parmesan over the cooked potatoes during the final few minutes.

For a ranch-style flavor, toss the finished potatoes with ranch seasoning.

For spicy potatoes, add cayenne pepper, chili powder, or crushed red pepper flakes.

For a breakfast-style version, use garlic powder, paprika, black pepper, and a little dried rosemary.

You can also finish the potatoes with fresh parsley, green onions, or a small squeeze of lemon juice.

What to Serve With Crispy Air Fryer Potatoes

These potatoes are flexible enough to fit breakfast, lunch, or dinner.

Serve them alongside scrambled or fried eggs for a quick breakfast. They also pair well with grilled chicken, steak, burgers, pork chops, or roasted vegetables.

For a casual meal, serve the potatoes with ketchup, garlic aioli, ranch dressing, or a spicy dipping sauce.

They also make an excellent side dish for weekend gatherings because most of the preparation can be done before cooking.

Common Mistakes to Avoid

The biggest mistake is overcrowding the air fryer basket. When potatoes are piled together, trapped moisture turns into steam and reduces browning.

Another common mistake is skipping the drying step after soaking. Potatoes should be as dry as possible before seasoning.

Using too much oil is another problem. Air frying needs much less oil than traditional deep frying, so a light coating is usually enough.

Finally, avoid cutting some pieces much larger than others. Uniform pieces cook more evenly and reduce the chance of having burnt edges with undercooked centers.

How to Store and Reheat Leftover Potatoes

Store leftover potatoes in an airtight container and refrigerate them for up to 3 to 4 days.

For the best texture, reheat them in the air fryer instead of the microwave. Heat them at 375°F for about 4 to 7 minutes, shaking once halfway through.

The microwave is convenient, but it can make the crispy exterior soft.

If you are preparing potatoes ahead of time, keep them refrigerated and reheat them shortly before serving for the best texture.

Frequently Asked Questions

Can I make crispy air fryer potatoes without soaking them?

Yes, but soaking can help remove surface starch and improve the final crispness. Always dry the potatoes thoroughly before cooking.

What temperature is best for crispy potatoes in an air fryer?

400°F works well because the high heat encourages fast browning while the centers become tender.

Why are my air fryer potatoes not crispy?

The most common causes are excess moisture, overcrowding, too much oil, or insufficient cooking time.

Should I boil potatoes before air frying?

Boiling is optional and not required for this method. A short cold-water soak is enough to help improve the texture.

Can I use frozen potatoes for this hack?

Yes, but frozen potatoes usually need different cooking times and may not need the same soaking process as fresh potatoes.

Can I use Russet potatoes instead of baby potatoes?

Yes. Russet potatoes can become very crisp, although they will have a fluffier center than waxier potato varieties.

How do I keep air fryer potatoes crispy?

Serve them immediately and avoid covering them tightly while hot because trapped steam can soften the crust.

Can I make these potatoes without cornstarch?

Yes. The potatoes can still become crispy, especially when they are dry, lightly oiled, properly spaced, and cooked at high heat.

Final Thoughts

This Crispiest Air Fryer Potatoes Hack proves that great texture often comes down to simple preparation. Soaking the potatoes, drying them well, adding a light cornstarch coating, and giving them enough space can make a noticeable difference.

The 400°F cooking temperature helps create golden edges while keeping the centers tender and fluffy. You can also change the seasonings to match breakfast, dinner, game day, or a family-style meal.

Once you try this method, keep the basic technique and make it your own. With a few simple ingredients and the right cooking steps, you can turn everyday potatoes into a crispy, flavorful side dish that belongs on almost any dinner table.

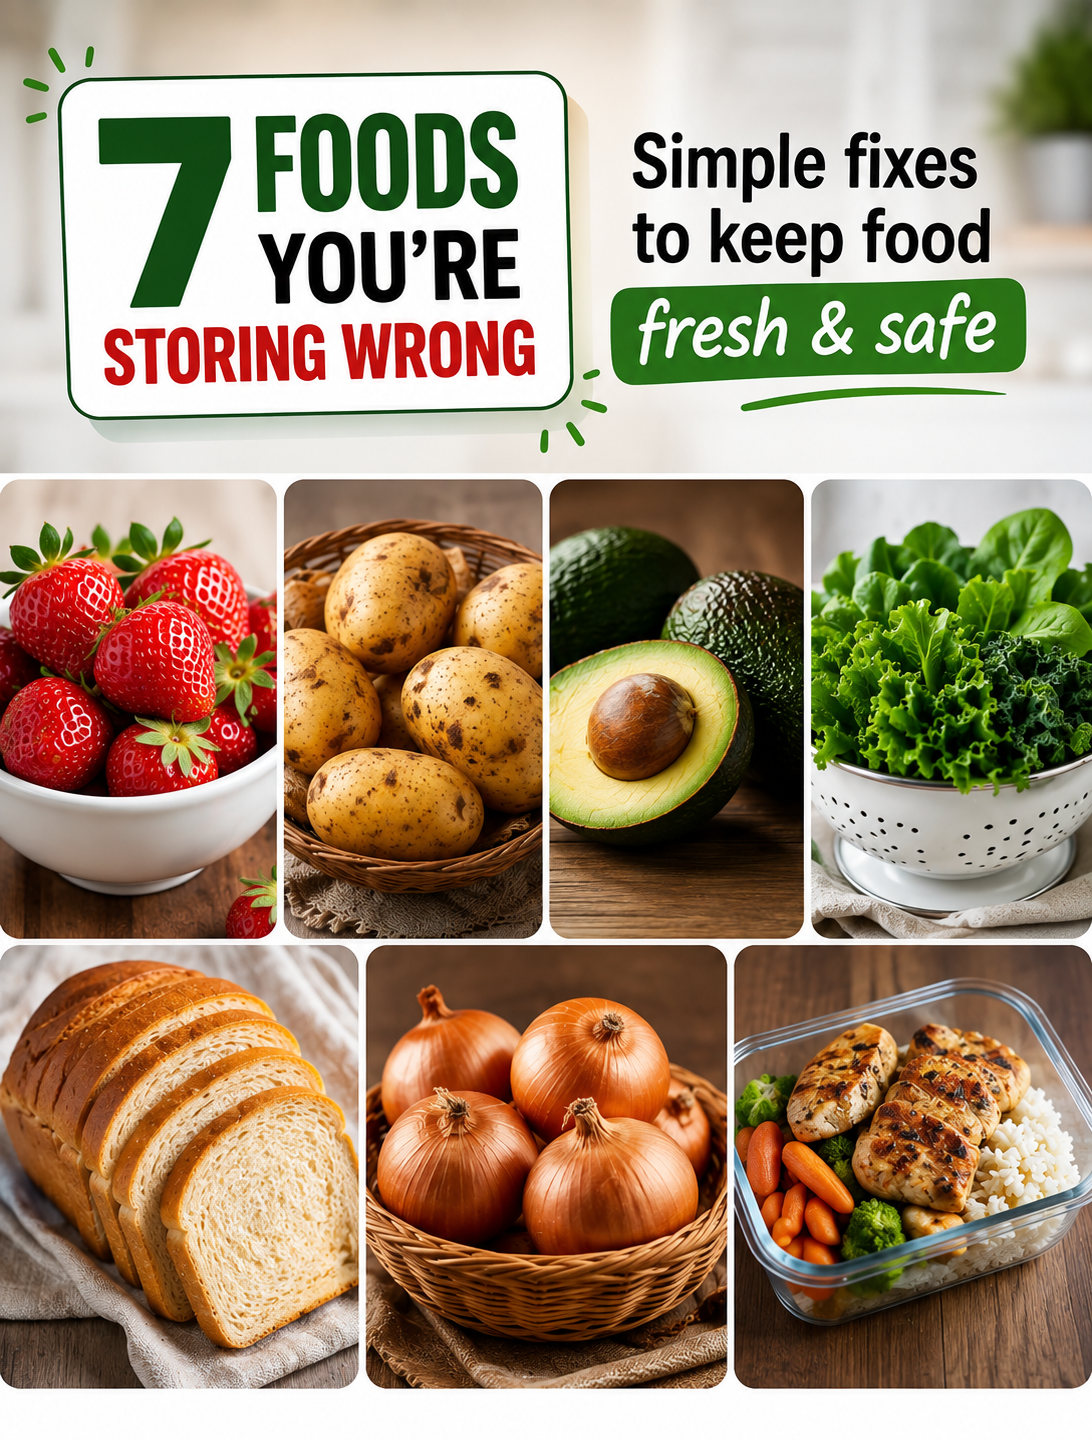
7 FOODS YOU’RE STORING WRONG

7 foods you’re storing wrong with fresh strawberries, potatoes, avocado, leafy greens, bread, onions, and leftovers

7 FOODS YOU’RE STORING WRONG

You may be storing some of your favorite foods the wrong way without even realizing it. The way you place food in your refrigerator, pantry, or freezer can affect freshness, texture, food quality, and safety.

A crowded fridge, warm leftovers, or poorly stored produce can also lead to unnecessary food waste. The good news is that most storage mistakes are easy to fix.

Here are seven common foods that many people store incorrectly, plus simple ways to keep them fresher and safer at home.

1. Strawberries

Fresh strawberries can spoil quickly when moisture gets trapped around the berries. Washing them too early can also shorten their shelf life because extra moisture encourages mold.

For better storage, keep strawberries refrigerated at 40°F or below. Store them unwashed until you are ready to eat them, then rinse them under cool running water.

Place the berries in a clean container that allows some airflow. Remove any damaged or moldy berries as soon as you notice them because mold can spread to nearby fruit.

Pre-cut or packaged produce should also be refrigerated promptly.

Simple tip: Buy only the amount of berries you expect to use within a few days, especially during warm weather.

2. Bread

Bread is often stored in the refrigerator because people assume cold temperatures keep it fresh. However, refrigeration can make bread become stale faster.

For most everyday bread, a cool, dry pantry or bread box is a better short-term option. Keep the package sealed to protect the bread from moisture and air.

If you have more bread than you can eat soon, freezing is a better choice. Wrap it tightly and freeze individual portions so you can take out only what you need.

Simple tip: Freeze extra bread instead of keeping it in the refrigerator for weeks.

3. Potatoes

Potatoes do not belong in the refrigerator for routine storage. Cold temperatures can affect their quality and may cause unwanted changes in flavor and texture when cooked.

Store potatoes in a cool, dry, dark place with good ventilation. Keep them away from direct sunlight and excessive moisture.

Do not store potatoes in a sealed plastic bag if it traps moisture. A breathable bag or open container works better.

USDA produce-storage guidance lists potatoes, sweet potatoes, and dry onions among produce that should be kept in dry storage rather than refrigerated.

Simple tip: Store potatoes away from light, heat, and moisture.

4. Avocados

Avocados can be tricky because their storage needs change as they ripen.

An unripe avocado usually does not need to be refrigerated. Keep it at room temperature until it becomes slightly soft when gently pressed.

Once an avocado is ripe, refrigeration can slow further ripening and help you keep it longer. For a cut avocado, cover the exposed flesh tightly and refrigerate it.

Remember that browning does not always mean an avocado is unsafe. It is often a quality issue caused by exposure to air.

Simple tip: Let hard avocados ripen on the counter, then move ripe ones to the refrigerator.

5. Leafy Greens

Lettuce, spinach, kale, and other leafy greens can quickly become limp when stored with too much moisture.

Keep fresh leafy greens refrigerated and remove damaged leaves before storage. If the greens are wet, gently dry them before placing them in the refrigerator.

A clean container or storage bag with a paper towel can help manage excess moisture. Avoid crushing the greens under heavy food.

Fresh produce such as lettuce, herbs, and strawberries should be stored in a clean refrigerator at 40°F or below.

Simple tip: Keep leafy greens cool, dry, and protected from excess moisture.

6. Cooked Leftovers

One of the most important storage mistakes involves leftovers.

Cooked food should not sit on the counter for hours before being refrigerated. FDA guidance recommends refrigerating or freezing perishable foods and leftovers within two hours, or within one hour when temperatures are above 90°F.

Large amounts of food should be divided into shallow containers. This allows the food to cool more quickly in the refrigerator.

Keep leftovers covered in sealed containers and label them with the date when helpful. Most cooked leftovers should be used within a few days; FDA storage guidance commonly recommends 3–4 days for many cooked foods.

Your refrigerator should stay at 40°F or below, while the freezer should be at 0°F. A refrigerator thermometer can help confirm that your appliance is actually holding the correct temperature.

Simple tip: Refrigerate leftovers promptly and use shallow containers for faster cooling.

7. Onions

Dry onions are another food that often ends up in the refrigerator unnecessarily.

Whole dry onions generally keep best in a cool, dry, well-ventilated place. Avoid storing them in a damp area because moisture can encourage spoilage.

Keep whole onions away from foods that may be affected by their strong odor. Once an onion has been cut, place it in a covered container and refrigerate it.

Proper storage helps protect both the onion’s quality and the rest of your kitchen from strong odors.

USDA produce guidance recommends dry storage for dry onions rather than routine refrigeration.

Simple tip: Keep whole dry onions in a cool, dry, ventilated area and refrigerate cut onions.

The One Refrigerator Rule Everyone Should Know

Correct food placement matters, but refrigerator temperature matters even more.

Set your refrigerator to 40°F or below and your freezer to 0°F. Cold air needs room to circulate, so avoid packing the refrigerator so tightly that air cannot move around the food.

Keep raw meat, poultry, and seafood separated from foods that will be eaten without cooking. Place raw items in a way that prevents their juices from dripping onto other foods.

Clean spills quickly, especially spills from raw meat or seafood. This helps reduce the chance of cross-contamination inside the refrigerator.

Also remember that refrigeration slows bacterial growth but does not make old food safe indefinitely. When you are unsure about a food’s safety, use reliable storage guidance rather than relying only on smell or appearance.

Quick Food Storage Checklist

Use these simple habits to improve food storage at home:

  • Keep your refrigerator at 40°F or below.
  • Keep your freezer at 0°F.
  • Refrigerate perishable foods within two hours.
  • Use shallow containers for large amounts of leftovers.
  • Keep refrigerated foods covered or sealed.
  • Store potatoes and dry onions in a cool, dry place.
  • Keep ripe avocados refrigerated if you are not using them soon.
  • Store fresh berries and leafy greens properly in the refrigerator.
  • Keep raw meat away from ready-to-eat foods.
  • Clean refrigerator spills as soon as they happen.
  • Freeze extra food when you will not use it soon.

These small changes can help reduce food waste while keeping your kitchen more organized.

Frequently Asked Questions

1. What temperature should a refrigerator be?

Keep your refrigerator at 40°F or below to slow the growth of harmful bacteria.

2. Should strawberries be refrigerated?

Yes. Keep fresh strawberries refrigerated at 40°F or below, and wash them shortly before eating.

3. Should potatoes go in the refrigerator?

No. Store whole potatoes in a cool, dry, dark, well-ventilated area rather than routinely refrigerating them.

4. How long can leftovers stay out?

Perishable leftovers should be refrigerated within two hours, or within one hour when temperatures exceed 90°F.

5. Should ripe avocados be refrigerated?

Yes. Refrigerating ripe avocados can slow further ripening and help extend their usable quality.

6. Should leafy greens be refrigerated?

Yes. Keep leafy greens refrigerated and manage excess moisture to help maintain freshness.

7. Can you freeze bread?

Yes. Freezing bread is a practical way to preserve extra loaves and reduce food waste.

8. Should whole onions be refrigerated?

Generally, no. Store dry onions in a cool, dry, ventilated area and refrigerate them after cutting.

Final Thoughts

Food storage does not have to be complicated. A few simple changes can help you protect freshness, reduce waste, and keep your kitchen safer.

Start with the foods you buy most often. Move potatoes and onions to a suitable dry-storage area, keep berries and greens properly chilled, refrigerate ripe avocados, and handle leftovers promptly.

Most importantly, check your refrigerator temperature. Keeping it at 40°F or below is one of the simplest steps you can take for safer food storage at home.

The next time you organize your kitchen, ask yourself one question: Am I storing this food because it is convenient, or because it is actually the best way to keep it fresh and safe?

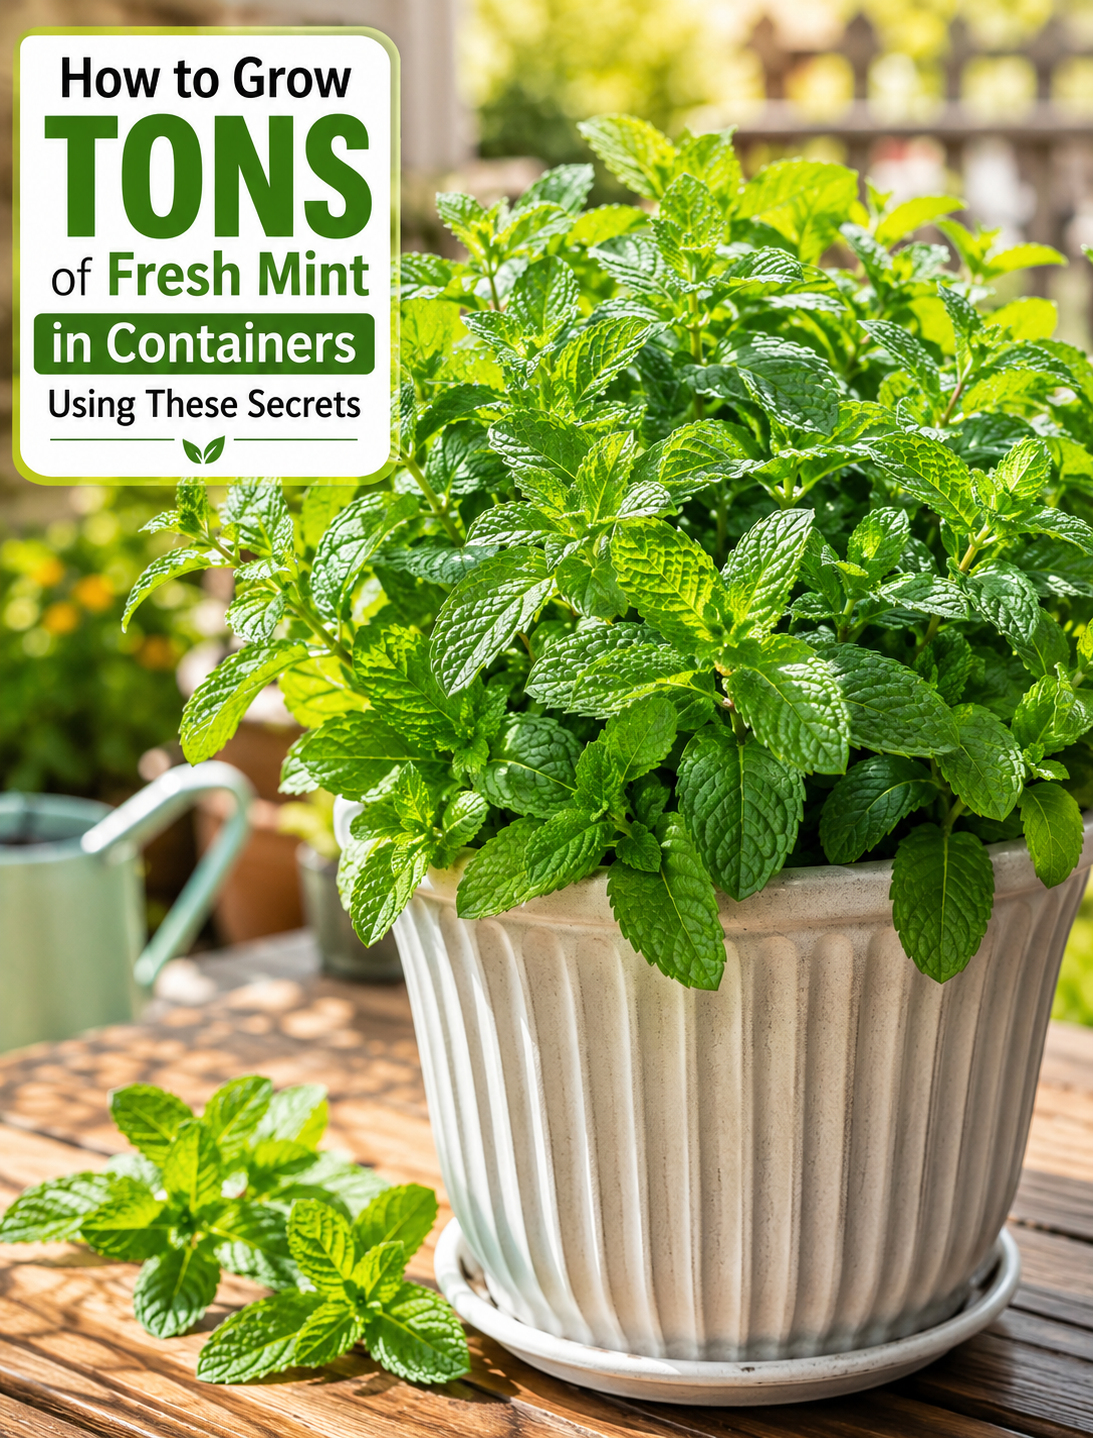
How to Grow Tons of Fresh Mint in Containers: 7 Easy Secrets

Fresh green mint growing lush and bushy in a container on a sunny home patio

How to Grow TONS of Fresh Mint in Containers Using These Secrets

Growing fresh mint in containers is one of the easiest ways to keep a steady supply of this fragrant herb at home. Mint grows quickly, produces plenty of leaves, and does well on patios, balconies, porches, and sunny windowsills.

The biggest challenge is controlling its fast-growing roots. When planted in garden beds, mint can spread quickly and become difficult to remove. A container keeps the plant contained while giving you easy access to fresh leaves for tea, desserts, salads, sauces, and summer drinks.

With the right container, soil, light, water, and harvesting routine, you can grow a thick, healthy mint plant from a small starter plant.

Choosing the Right Container

Choose a container that is at least 12 inches deep and 12 inches wide for a healthy mint plant. A larger pot gives the roots enough room to develop while allowing the plant to produce more stems and leaves.

Drainage is just as important as container size. Select a pot with several drainage holes so excess water can escape after watering. Standing water can keep the roots too wet and increase the risk of root problems.

Clay, ceramic, plastic, and fabric containers can all work well. Plastic pots hold moisture longer, while unglazed clay pots dry out faster and may need more frequent watering.

If you want to grow several mint plants, use separate containers rather than placing many plants in one small pot. This gives each plant enough space and makes watering easier.

Selecting the Ideal Location

Mint grows best with 4 to 6 hours of sunlight each day. Morning sunlight is especially useful because it provides strong light without the intense afternoon heat found in many parts of the USA.

A patio, balcony, kitchen window, or porch can work well if it receives enough light. In very hot regions, give mint some afternoon shade to protect the leaves from heat stress.

Indoor mint should be placed near a bright window. A south- or east-facing window can provide useful natural light, but rotate the pot every few days so the plant grows evenly.

If the stems become long and weak or the leaves remain small, the plant may need more light.

Using Quality Soil Mix

Use a well-draining potting mix made for containers rather than ordinary garden soil. Garden soil can become dense inside a pot and may restrict root growth and drainage.

A quality container mix should hold enough moisture for mint while still allowing excess water to drain. Adding compost can improve the soil structure and provide a gentle source of nutrients.

Avoid filling the container with heavy soil that stays wet for long periods. Mint likes moisture, but its roots still need access to air.

Before planting, loosen the potting mix and leave about an inch of space below the container rim. This makes watering easier and reduces soil runoff.

Watering Wisely

Mint prefers soil that stays evenly moist but not soggy. Check the top inch of soil with your finger before watering.

If the surface feels dry, water slowly until a little water drains through the bottom holes. This helps moisten the entire root zone instead of only wetting the surface.

During hot summer weather, container mint may dry out faster than plants growing in the ground. Check the soil more often during heat waves, especially when the pot receives direct afternoon sunlight.

Avoid keeping the container sitting in a saucer full of water. Empty excess water after watering to reduce the chance of root problems.

Fertilizing Sparingly

Mint does not require heavy feeding to produce healthy leaves. Too much fertilizer can encourage rapid, soft growth and may reduce the herb’s strong flavor.

During active growth, apply a balanced liquid fertilizer according to the product label every 4 to 6 weeks. Reduce feeding when growth slows during cooler weather.

You can also add a thin layer of compost to the surface of the potting mix. Water afterward so nutrients can gradually move into the root zone.

Healthy soil and regular harvesting are often more important than frequent fertilizer applications.

Controlling Growth

Mint is known for spreading aggressively through underground stems called runners. This is why containers are especially useful for home gardeners.

Keep the entire plant inside its container and avoid letting stems root in nearby pots or garden beds. If mint runners reach the soil around the container, remove them before they become established.

When roots completely fill the pot, move the plant into a larger container or divide the root ball. Repotting every couple of years can help maintain vigorous growth.

Pruning also keeps the plant compact. Remove weak, damaged, or overly long stems to encourage fresh shoots from the center of the plant.

Harvesting for Abundance

Regular harvesting is one of the best ways to encourage a fuller mint plant. Begin harvesting when the plant is established and has several healthy stems.

Use clean scissors to cut stems just above a pair of leaves. Avoid removing more than about one-third of the plant at one time, especially if the plant is still small.

Frequent trimming encourages new branches and helps prevent the plant from becoming tall and sparse. Harvesting before flowering usually provides tender leaves with a strong, fresh flavor.

For the best flavor, pick mint in the morning after the leaves have dried from overnight moisture. Use fresh leaves immediately or store them in the refrigerator for later use.

You can also dry extra mint for tea, seasoning, or homemade herb blends. Harvesting regularly can turn one healthy container plant into a long-lasting source of fresh leaves.

Troubleshooting Common Issues

Yellow leaves often indicate excess moisture, poor drainage, or another root-related problem. Check the drainage holes and allow the surface soil to dry slightly before watering again.

Small leaves and stretched stems can indicate insufficient sunlight. Move the container to a brighter location and monitor new growth.

Aphids, spider mites, and whiteflies may occasionally attack mint. Check the undersides of leaves and young stems for insects or sticky residue.

For a mild infestation, wash the foliage with a gentle stream of water or use insecticidal soap according to its label. Test any treatment on a small area first and follow the product directions.

Powdery mildew can appear as a white coating on leaves, especially when plants have poor airflow. Give containers more space, remove badly affected leaves, and water the soil rather than repeatedly wetting the foliage.

Frequently Asked Questions

Can mint grow well in containers?

Yes. Mint grows very well in containers because pots provide good root control while giving the plant enough space to produce fresh stems and leaves.

How much sunlight does container mint need?

Mint generally performs well with 4 to 6 hours of sunlight daily, while afternoon shade can protect it from excessive heat in hot climates.

How often should I water mint in a pot?

Water when the top inch of potting mix feels dry, then water thoroughly until excess moisture drains from the bottom.

What size pot is best for mint?

A container at least 12 inches deep and wide provides useful space for roots and helps support strong, bushy growth.

Can I grow mint indoors?

Yes. Place mint near a bright window that receives several hours of sunlight and rotate the pot regularly for balanced growth.

How do I make my mint plant bushier?

Harvest the growing tips regularly by cutting stems just above a pair of leaves to encourage new side shoots.

Why is my container mint turning yellow?

Yellow leaves can result from overwatering, poor drainage, or stressed roots, so check soil moisture and make sure the pot drains freely.

Can mint survive winter in a container?

Mint can become dormant during cold weather, but winter survival depends on the variety, container exposure, and local climate; protect the roots from severe freezing.