Spicy Garlic Butter Prawn Lettuce Boats

Spicy Garlic Butter Prawn Lettuce Boats

Looking for a fresh, flavorful meal that is easy to prepare and full of delicious flavor? These Spicy Garlic Butter Prawn Lettuce Boats are a perfect choice. They combine juicy shrimp, rich garlic butter, a little heat, and crisp lettuce leaves to create a light meal with plenty of texture.

Each lettuce boat is filled with tender shrimp coated in a buttery garlic sauce made with fresh garlic, paprika, chili flakes, lemon juice, and simple seasonings. The fresh lettuce adds a cool, crunchy contrast to the warm and spicy filling.

This recipe is ideal for a quick lunch, a light weeknight dinner, or an easy appetizer when friends and family visit. Since the shrimp cooks in just a few minutes, you can prepare the filling without spending much time in the kitchen. You can also customize the spice level and add your favorite toppings.

In the United States, shrimp is the more common name for prawns, so this recipe works perfectly with large raw shrimp from your local grocery store.

Why You’ll Love These Spicy Garlic Butter Prawn Lettuce Boats

  • Quick to prepare: The shrimp cooks in about 4–6 minutes, making this recipe useful for busy days.
  • Fresh and crunchy: Crisp lettuce leaves hold the warm shrimp filling and provide a refreshing bite.
  • Rich garlic butter flavor: Butter, fresh garlic, and lemon juice create a savory sauce with a bright finish.
  • Easy to customize: Adjust the chili flakes, paprika, and toppings to match your taste.
  • Great for different occasions: Serve these lettuce boats as a light lunch, appetizer, or simple dinner.
  • Naturally low in carbohydrates: Lettuce replaces traditional bread or tortillas, making this a lighter alternative.

Ingredients You’ll Need for Spicy Garlic Butter Prawn Lettuce Boats

These ingredients make approximately 4 servings, with 2 lettuce boats per person.

For the Garlic Butter Shrimp

  • 1 pound large raw shrimp: Use peeled and deveined shrimp with tails removed for easier serving.
  • 3 tablespoons unsalted butter: Creates a rich sauce and helps coat the shrimp.
  • 4 garlic cloves: Finely minced for a strong, fresh garlic flavor.
  • 1 tablespoon olive oil: Helps cook the shrimp evenly and prevents the butter from browning too quickly.
  • 1 teaspoon paprika: Adds color and a mild smoky flavor.
  • ½ teaspoon red pepper flakes: Give the shrimp a spicy kick; reduce the amount for a milder taste.
  • ½ teaspoon onion powder: Adds a gentle savory flavor.
  • ¼ teaspoon black pepper: Balances the buttery sauce.
  • ½ teaspoon salt: Enhances the natural flavor of the shrimp.
  • 1 tablespoon fresh lemon juice: Adds brightness and balances the richness of the butter.
  • 1 tablespoon chopped fresh parsley: Provides freshness and color.

For the Lettuce Boats

  • 8 large butter lettuce or romaine lettuce leaves: Choose fresh, firm leaves that can hold the filling.
  • ½ cup diced cucumber: Adds coolness and a refreshing crunch.
  • ¼ cup finely diced red bell pepper: Provides sweetness and color.
  • 2 tablespoons finely chopped red onion: Adds a mild sharp flavor.
  • 1 tablespoon chopped fresh cilantro: Optional, for a fresh herbal finish.

Optional Toppings

  • Extra red pepper flakes
  • Lemon wedges
  • A drizzle of garlic butter sauce
  • Sliced green onions
  • A little crumbled feta cheese
  • Fresh parsley or cilantro

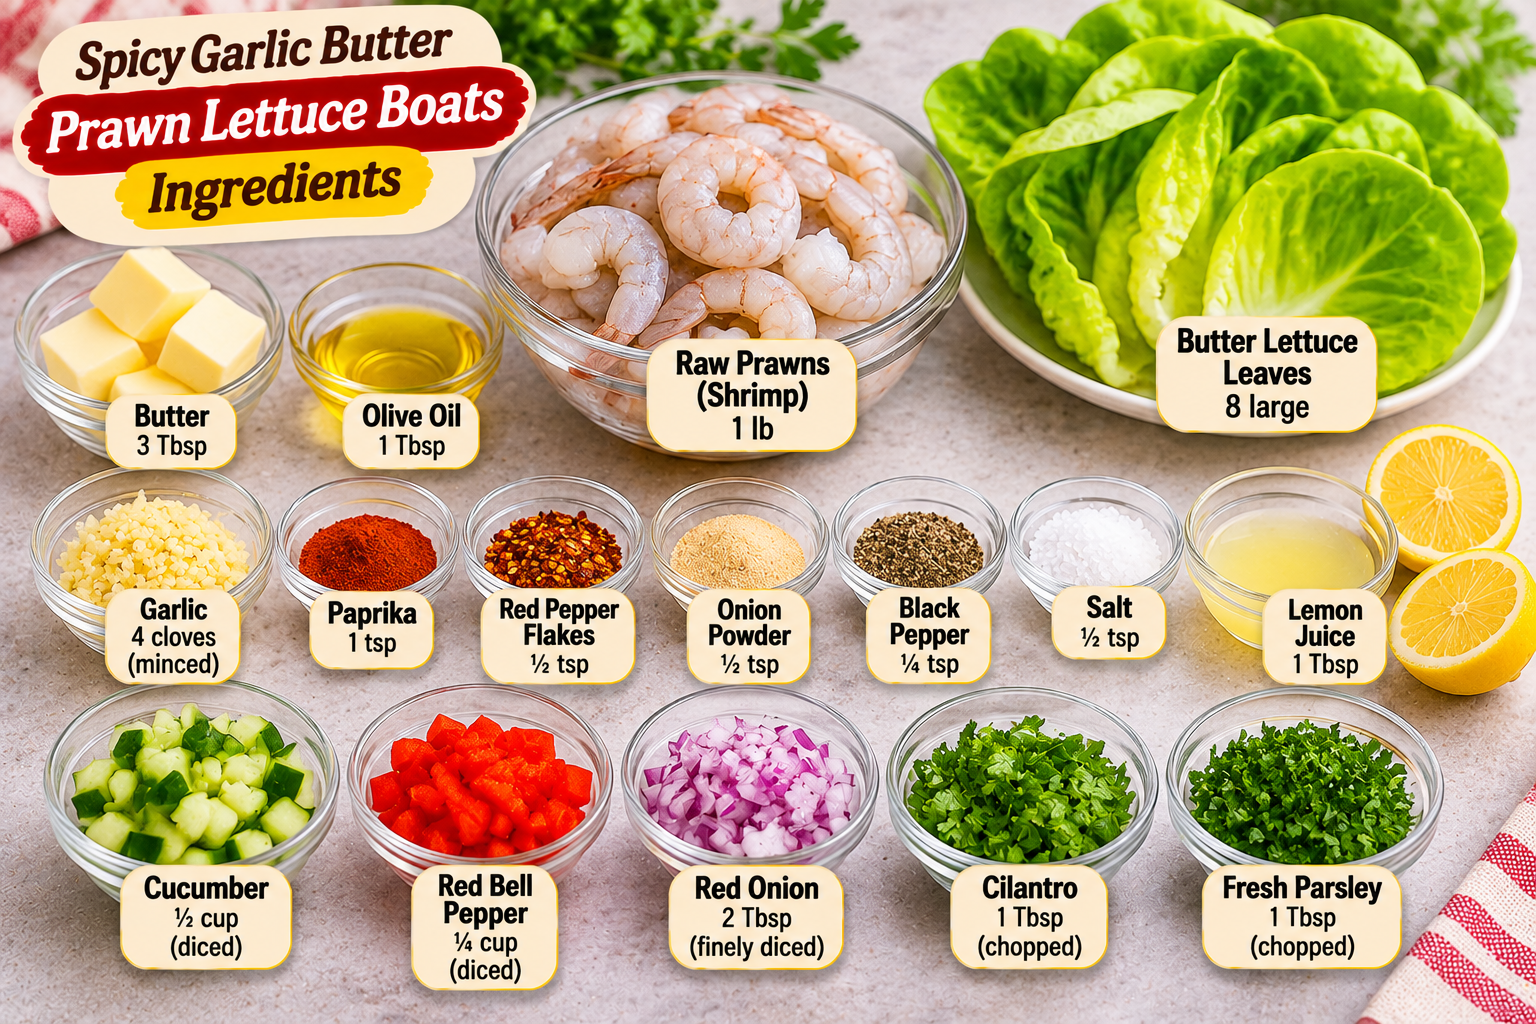
Ingredients for spicy garlic butter prawn lettuce boats, including raw shrimp, butter lettuce, garlic, butter, olive oil, paprika, chili flakes, lemon juice, cucumber, red pepper, red onion, and fresh herbs.

How to Make Spicy Garlic Butter Prawn Lettuce Boats

Follow these simple steps to prepare juicy shrimp with a flavorful garlic butter sauce and crisp lettuce.

Step 1: Prepare the Shrimp

If you are using frozen shrimp, thaw it safely in the refrigerator overnight or under cold running water in a sealed bag. Remove the shells and tails if they are still attached, then devein the shrimp if needed.

Pat the shrimp dry with paper towels before seasoning. Removing excess moisture helps the shrimp cook evenly and prevents too much liquid from collecting in the pan.

Place the prepared shrimp in a mixing bowl and set it aside.

Step 2: Season the Shrimp

Add paprika, red pepper flakes, onion powder, salt, and black pepper to the shrimp. Toss gently until every piece is coated with the seasoning.

Make sure the spices are distributed evenly so each bite has a balanced flavor. If you prefer a milder filling, reduce the red pepper flakes to ¼ teaspoon.

Let the seasoned shrimp rest for about 5 minutes while you prepare the other ingredients.
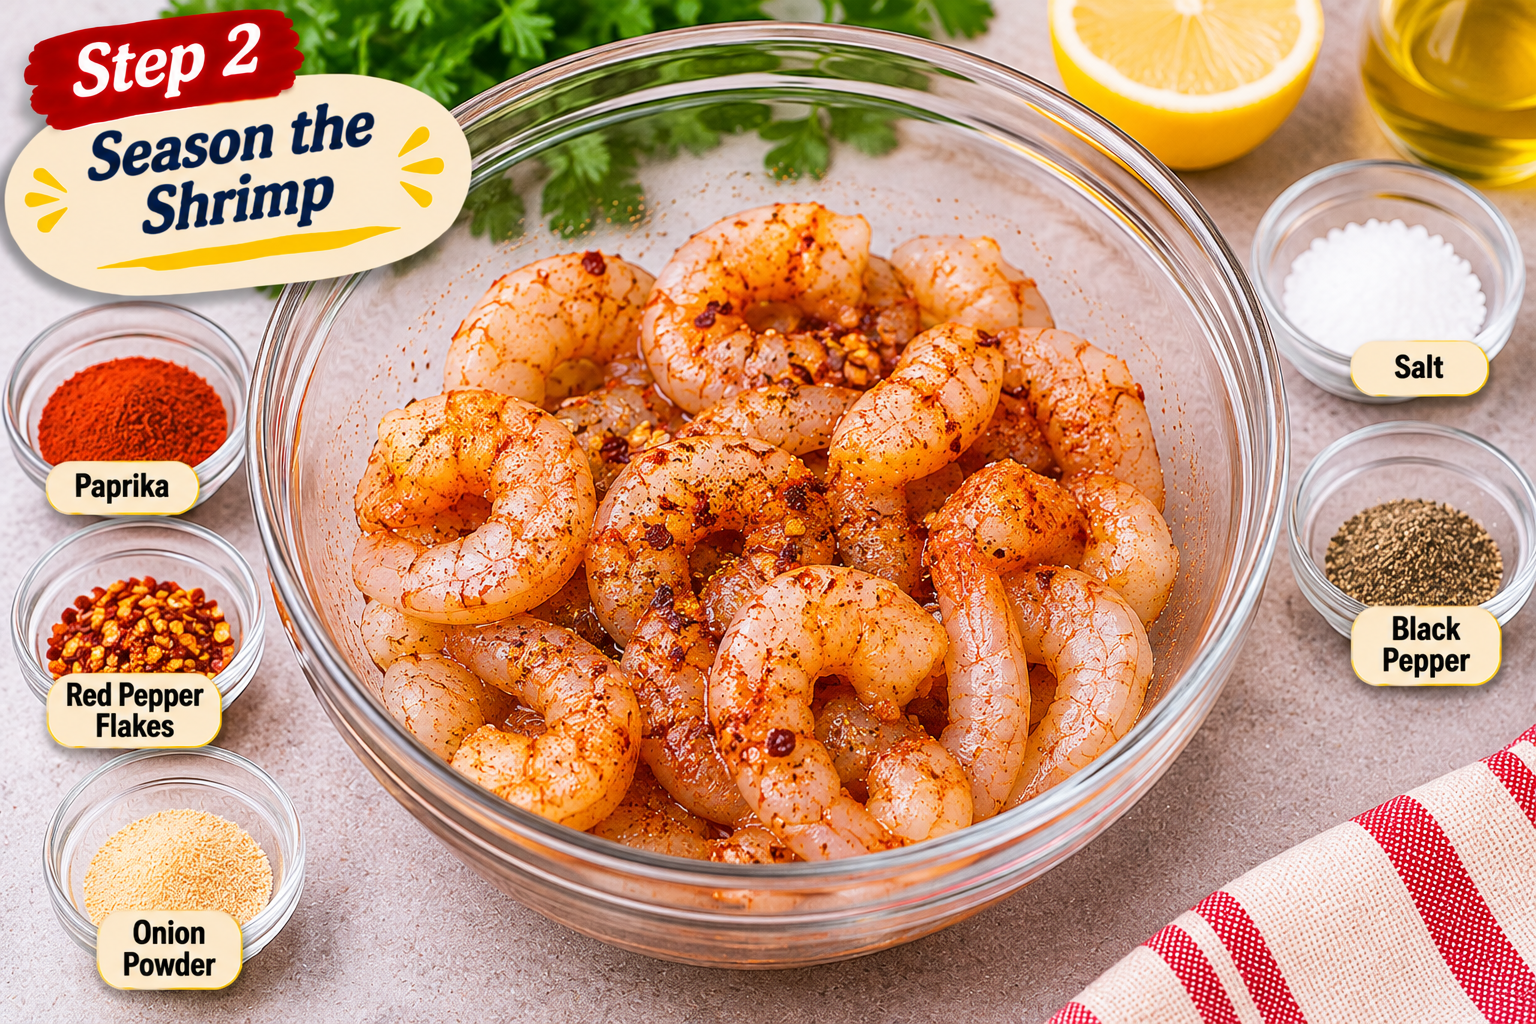
Raw peeled shrimp coated with paprika, red pepper flakes, onion powder, salt, and black pepper in a glass mixing bowl for spicy garlic butter lettuce boats.

Step 3: Prepare the Lettuce and Vegetables

Separate 8 large lettuce leaves and rinse them under cool running water. Check the inner folds for dirt, then dry each leaf carefully with a clean kitchen towel or paper towels.

Arrange the leaves on a serving plate with the curved sides facing upward. They should look like small natural bowls that can hold the shrimp filling.

Dice the cucumber, red bell pepper, and red onion into small pieces. Keep the vegetable pieces similar in size so they are easy to distribute between the lettuce boats.

Step 4: Heat the Butter and Olive Oil

Place a large skillet over medium heat. Add 1 tablespoon olive oil and 3 tablespoons unsalted butter.

Allow the butter to melt gently and combine with the oil. Swirl the pan lightly to coat the bottom.

Keep the heat at medium because butter can brown or burn quickly at high temperatures. A gentle heat also helps the garlic release its flavor without becoming bitter.

Step 5: Cook the Garlic in butter

Add the minced garlic to the melted butter mixture. Stir continuously for about 30–45 seconds until the garlic becomes fragrant.

Do not let the garlic turn dark brown because burnt garlic can make the sauce bitter. Keep the ingredients moving with a wooden spoon or spatula.

The garlic should smell fresh and aromatic before you add the shrimp.
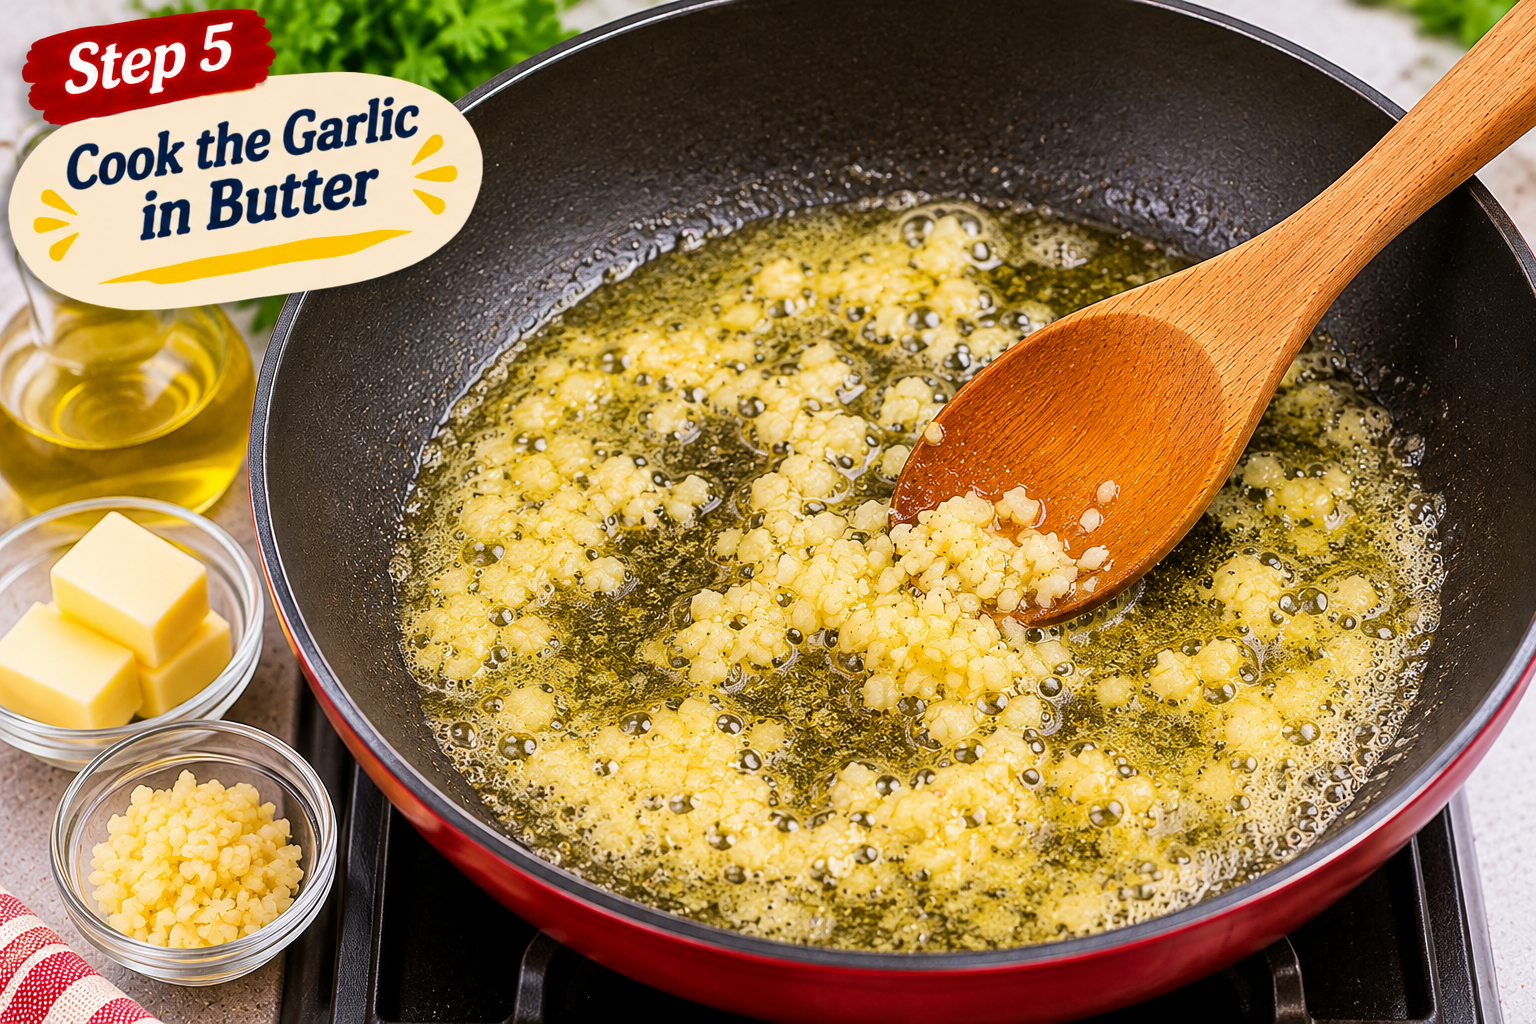
Minced garlic gently sautéing in melted butter and olive oil in a skillet, stirred with a wooden spoon to prepare spicy garlic butter shrimp.

Step 6: Cook the Seasoned Shrimp

Add the seasoned shrimp to the skillet in a single layer. Leave a little space between the pieces so they cook evenly.

Cook for approximately 2–3 minutes on the first side, then turn each shrimp and cook for another 2–3 minutes. The exact time depends on the shrimp size and pan temperature.

The shrimp should turn pink and opaque with a firm texture. For food safety, cook shrimp to an internal temperature of 145°F (63°C), measured with a food thermometer.

Avoid overcooking because shrimp can become tough and rubbery.

Step 7: Finish with Lemon Juice and Parsley

Turn the heat to low and add 1 tablespoon fresh lemon juice to the skillet. Stir gently so the lemon juice combines with the garlic butter.

Add the chopped fresh parsley and toss the shrimp until every piece is coated with the sauce.

Taste one piece and adjust the seasoning if needed. Add a small pinch of red pepper flakes for extra heat or another squeeze of lemon for a brighter flavor.

Remove the skillet from the heat once the shrimp is fully cooked.
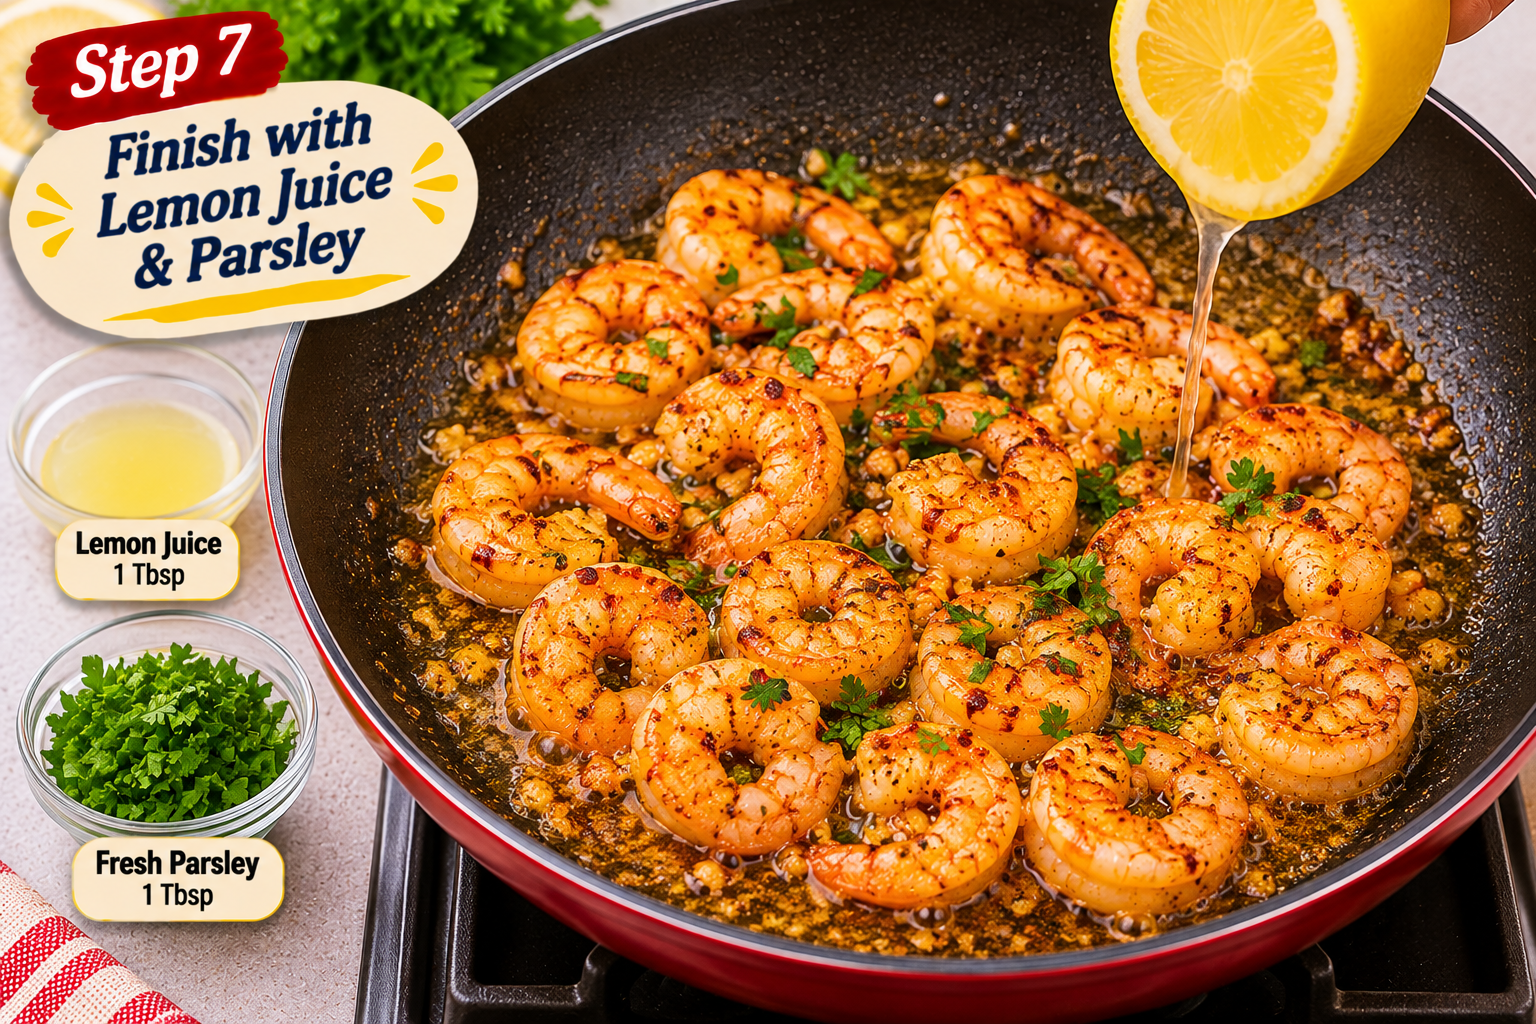
Cooked spicy garlic butter shrimp tossed with fresh lemon juice, chopped parsley, and a glossy garlic butter sauce in a skillet.

Step 8: Fill the Lettuce Leaves

Arrange the prepared lettuce leaves on a large serving platter. Divide the diced cucumber, red bell pepper, and red onion between the leaves.

Place 2–3 garlic butter shrimp in each lettuce boat, depending on their size. Spoon a little of the remaining garlic butter sauce over the shrimp for extra flavor.

Avoid adding too much sauce because excess liquid can make the lettuce leaves soft.

Step 9: Add Toppings and Serve

Finish each lettuce boat with chopped cilantro or parsley. Add a few red pepper flakes if you enjoy extra spice.

Serve with fresh lemon wedges on the side. These lettuce boats taste best immediately while the shrimp is warm and the lettuce is crisp.

Tips for the Best Spicy Garlic Butter Prawn Lettuce Boats

  • Use large shrimp: Large shrimp are easier to arrange inside lettuce leaves and stay juicy when cooked correctly.
  • Dry the shrimp first: Removing excess moisture helps the butter sauce coat the shrimp instead of becoming watery.
  • Do not burn the garlic: Cook it briefly over medium heat to keep its flavor pleasant.
  • Avoid overcrowding the skillet: Cook the shrimp in batches if necessary so they sear rather than steam.
  • Choose strong lettuce leaves: Butter lettuce and romaine both work well because their leaves can hold the filling.
  • Control the heat: Start with less red pepper flakes and add more after tasting.
  • Prepare the vegetables ahead: Chop the toppings before cooking the shrimp to make assembly quicker.
  • Serve immediately: Add the shrimp shortly before serving to keep the lettuce fresh and crunchy.

Easy Variations to Try Spicy Garlic Butter Prawn Lettuce Boats

Make It Extra Spicy

Add another ¼ teaspoon of red pepper flakes or a small amount of cayenne pepper to the seasoning mixture. You can also serve hot sauce on the side.

Add an Avocado Topping

Dice one ripe avocado and add it to the lettuce boats just before serving. Its creamy texture balances the spicy garlic butter shrimp.

Use Romaine Lettuce

If butter lettuce is unavailable, use large romaine leaves. Their firm shape provides a sturdy base for the shrimp and chopped vegetables.

Add a Creamy Sauce

Mix ¼ cup plain Greek yogurt with 1 teaspoon lemon juice, a little minced garlic, and a pinch of salt. Drizzle a small amount over the finished lettuce boats.

Make Them Dairy-Free

Replace the butter with a plant-based butter alternative or use additional olive oil. The garlic, paprika, and lemon still create a flavorful shrimp filling.

What to Serve with Spicy Garlic Butter Prawn Lettuce Boats

These lettuce boats are satisfying on their own, but a few simple sides can turn them into a more complete meal.

  • Garlic roasted potatoes: Add a warm, crispy side that pairs well with the buttery shrimp.
  • Fresh cucumber salad: Provides extra crunch and a cool contrast to the spicy filling.
  • Steamed rice: Makes the meal more filling and absorbs the extra garlic butter sauce.
  • Grilled corn: Adds a touch of natural sweetness to balance the chili seasoning.
  • Fresh avocado salad: Complements the shrimp with a creamy texture.
  • Lemon herb quinoa: Offers a light side with fresh herbs and a bright citrus flavor.

How to Store and Reheat Leftovers Spicy Garlic Butter Prawn Lettuce Boats

For the best texture, store the cooked shrimp separately from the lettuce and fresh vegetables. Transfer leftover shrimp to an airtight container and refrigerate it within 2 hours of cooking at 40°F (4°C) or below.

Use refrigerated cooked shrimp within 3–4 days. Keep the washed lettuce and chopped vegetables in separate airtight containers so they stay crisp.

To reheat the shrimp, place it in a skillet over low heat with a small splash of water or a little butter. Warm it gently until heated through, stirring occasionally. Avoid prolonged heating because shrimp can become tough.

Do not assemble the lettuce boats until you are ready to serve. Freezing is not recommended for assembled lettuce boats because lettuce loses its crisp texture after thawing.

Helpful Cooking and Food Safety Resources

Want to make your favorite recipes with greater confidence? Following reliable food preparation and safety guidance can help you handle ingredients properly and prepare meals safely at home. Visit the FoodSafety.gov – Safe Minimum Internal Temperatures for practical food safety tips and helpful guidance to support your everyday cooking.

Frequently Asked Questions About Spicy Garlic Butter Prawn Lettuce Boats

1. What type of lettuce is best for shrimp lettuce boats?

Butter lettuce is soft and naturally cup-shaped, while romaine provides firmer leaves that hold larger shrimp portions.

2. Can I use frozen shrimp for this recipe?

Yes, thaw frozen shrimp safely, remove excess moisture, and pat it dry before seasoning and cooking.

3. How do I know when shrimp is fully cooked?

Shrimp should become opaque and firm, with an internal temperature of 145°F (63°C) when checked with a food thermometer.

4. Can I make garlic butter shrimp ahead of time?

You can prepare the vegetables and seasoning ahead, but cook the shrimp close to serving time for the best texture.

5. How can I make these lettuce boats less spicy?

Reduce or leave out the red pepper flakes and use mild paprika instead of hot paprika.

6. Can I use chicken instead of shrimp?

Yes, use small chicken pieces, but cook them separately until they reach a safe internal temperature of 165°F (74°C).

7. Are shrimp lettuce boats good for meal prep?

Yes, store the shrimp, lettuce, and vegetables separately and assemble the boats just before eating.

8. What can I use instead of butter lettuce?

Romaine, iceberg, and other large crisp lettuce leaves are suitable alternatives for holding the shrimp filling.
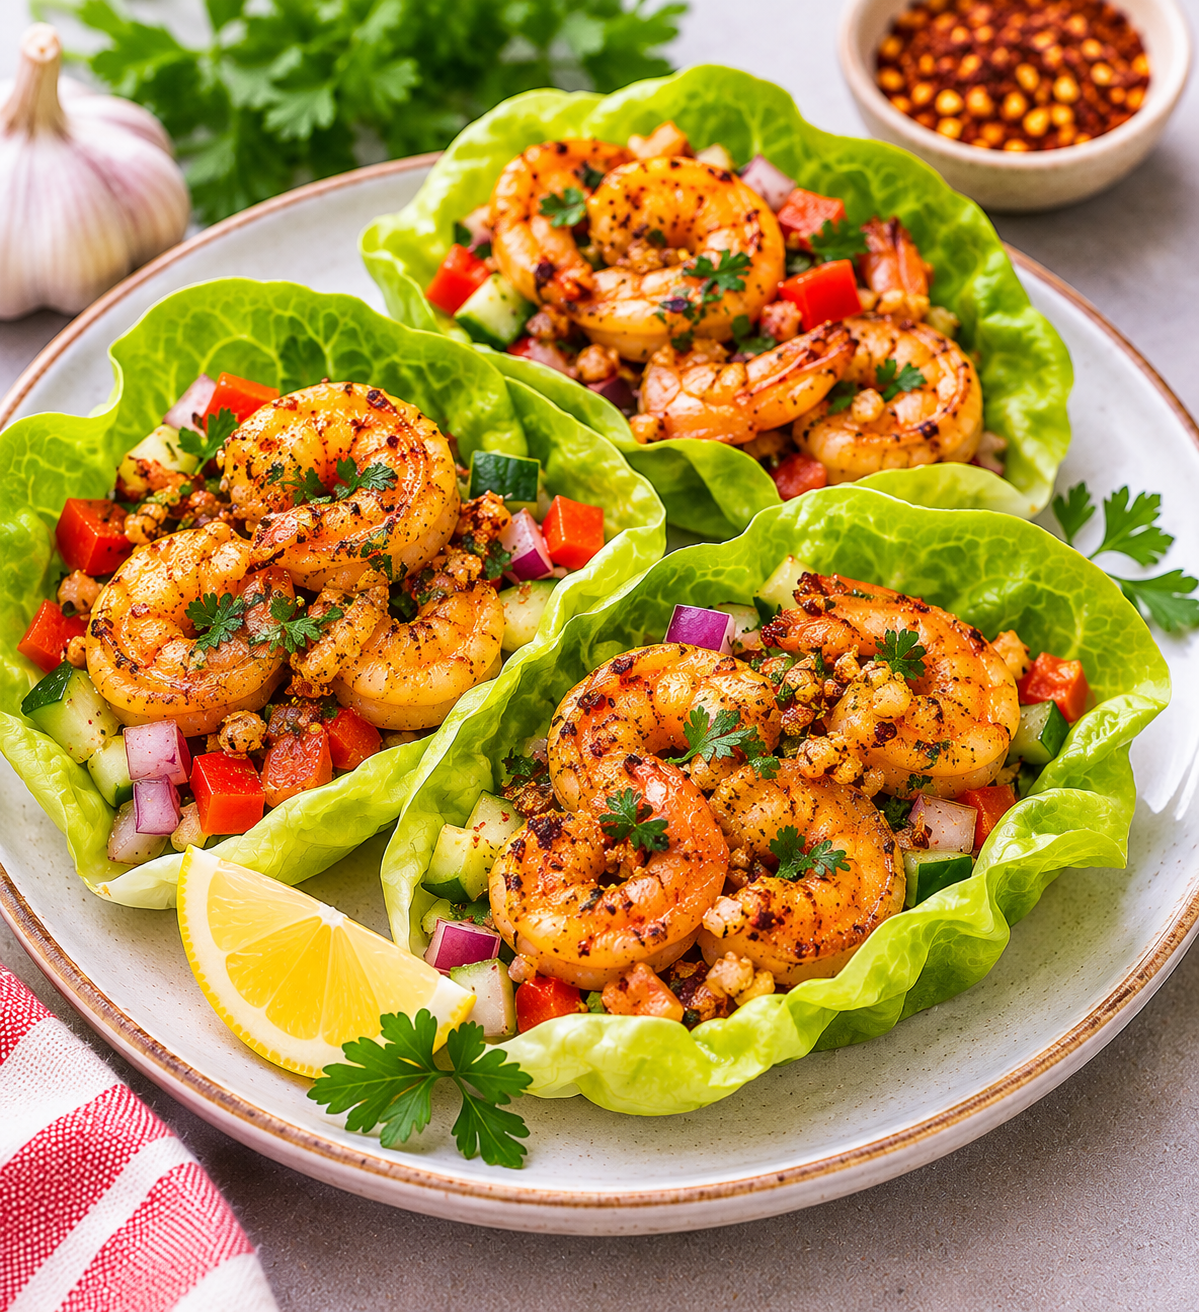
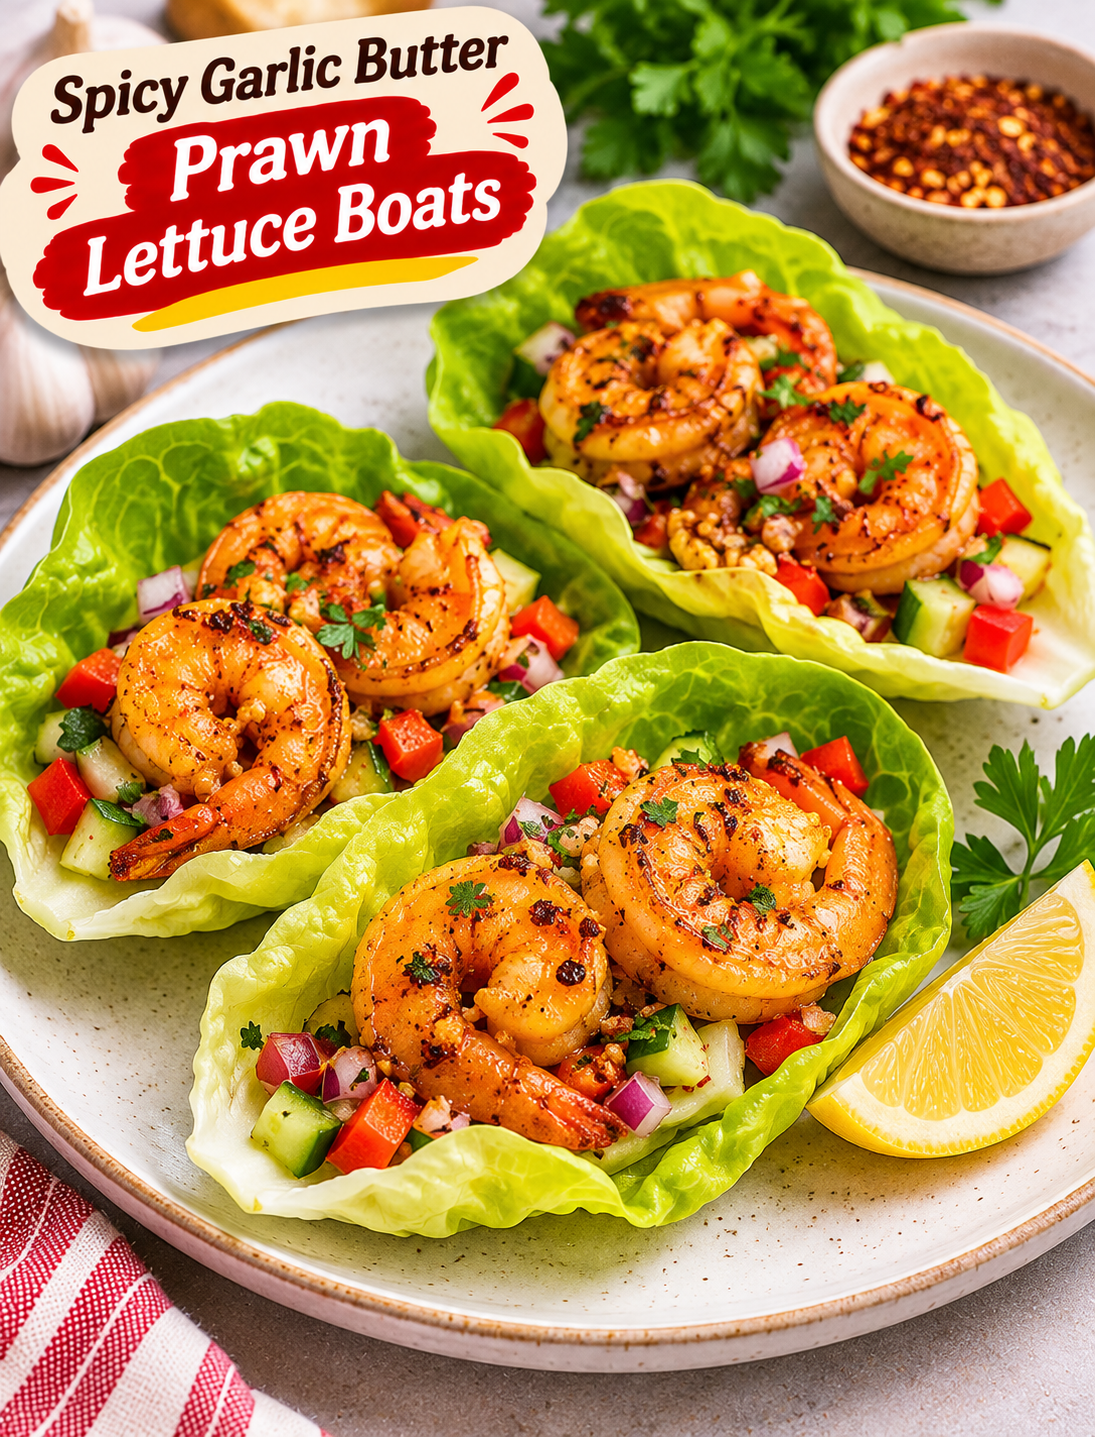
Spicy garlic butter shrimp lettuce boats filled with juicy seasoned prawns, fresh cucumber, red bell pepper, red onion, and parsley, served with lemon wedges.

Final Thoughts of Spicy Garlic Butter Prawn Lettuce Boats

Spicy Garlic Butter Prawn Lettuce Boats bring together juicy shrimp, fragrant garlic butter, fresh vegetables, and crisp lettuce in one easy meal. The combination of warm spices, lemon juice, and fresh herbs creates a balanced flavor without requiring complicated cooking techniques.

Whether you serve them for a quick lunch, a light dinner, or a party appetizer, these lettuce boats are easy to customize and simple to prepare. Adjust the spice level, add your favorite toppings, and serve them fresh for the best taste and texture.

Discover More Delicious Recipes

Love trying simple, flavorful recipes at home? Explore more delicious ideas at The Protein Blogger, where you can find easy recipes, satisfying meals, and inspiration for your everyday cooking. Try our Crispy Air Fryer Parmesan Chicken Bites next and discover another tasty dish to add to your meal plan!
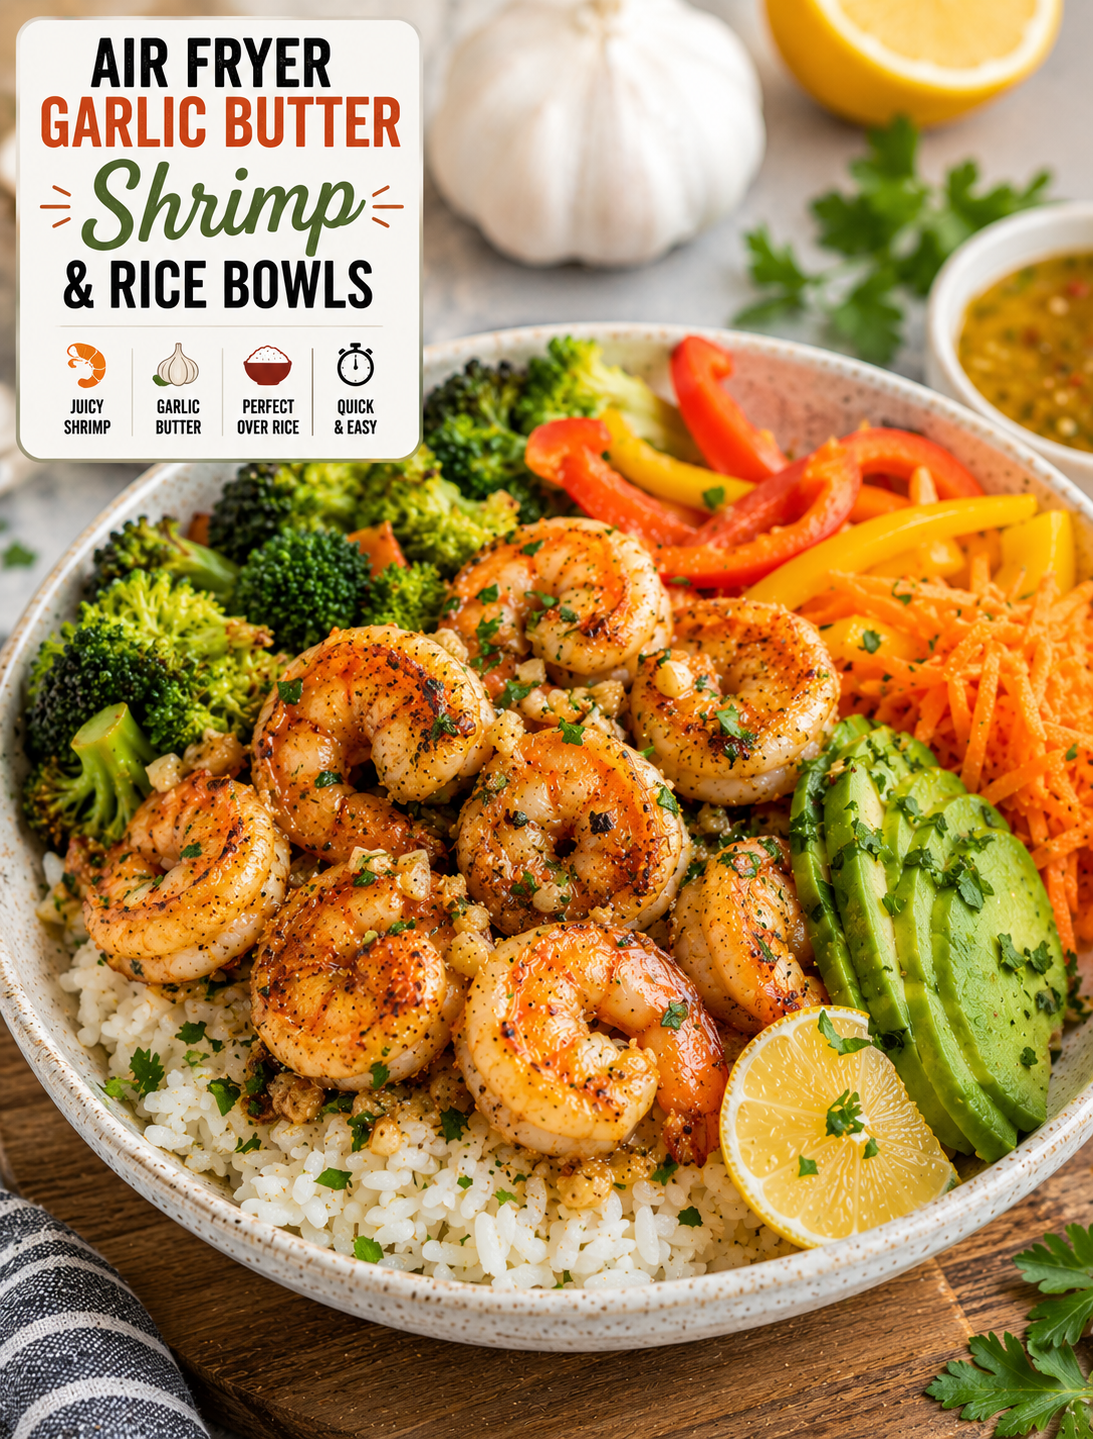
Air Fryer Garlic Butter Shrimp & Rice Bowls

Air fryer garlic butter shrimp served over fluffy rice with broccoli, bell peppers, carrots, avocado, lemon, and fresh parsley

Air Fryer Garlic Butter Shrimp & Rice Bowls

When you want a quick dinner that feels special without spending hours in the kitchen, these Air Fryer Garlic Butter Shrimp & Rice Bowls are an easy choice. Juicy shrimp are coated in melted butter, fresh garlic, lemon juice, and simple seasonings, then air-fried until tender with lightly crisp edges.

The shrimp are served over fluffy rice with fresh vegetables and a spoonful of the buttery garlic sauce. Every bite combines savory shrimp, bright lemon, warm garlic, and soft rice for a balanced meal that works well for busy weeknights.

This recipe uses simple ingredients and takes only a short time to cook. It is also easy to customize with your favorite vegetables, grains, or toppings.

Why You’ll Love This Recipe

These shrimp rice bowls are designed for fast and flavorful home cooking. The air fryer cooks the shrimp quickly while helping the outside develop a lightly roasted texture.

Garlic butter gives the shrimp a rich, savory flavor without needing a long marinade. Fresh lemon juice adds acidity that keeps the dish from tasting too heavy.

The rice makes the bowl filling, while vegetables add color, crunch, and freshness. You can use white rice, brown rice, jasmine rice, basmati rice, or cauliflower rice depending on what you have available.

Another benefit is easy cleanup. The shrimp cook in the air fryer basket instead of a skillet filled with oil, making this recipe convenient for a weeknight meal.

Ingredients You’ll Need

For the Garlic Butter Shrimp

  • 1 pound large shrimp, peeled and deveined
  • 3 tablespoons unsalted butter, melted
  • 3 cloves garlic, finely minced
  • 1 tablespoon fresh lemon juice
  • 1 teaspoon paprika
  • ½ teaspoon Italian seasoning
  • ¼ teaspoon black pepper
  • ¼ teaspoon salt
  • ¼ teaspoon red pepper flakes, optional
  • 1 tablespoon chopped fresh parsley

For the Rice Bowls

  • 3 cups cooked rice
  • 1 cup broccoli florets
  • 1 cup sliced bell peppers
  • ½ cup shredded carrots
  • ½ cup cucumber slices
  • 1 avocado, sliced
  • Lemon wedges for serving
  • Extra parsley for garnish

Large shrimp work especially well because they stay juicy during air frying. Fresh or thawed frozen shrimp can be used as long as they are properly drained before seasoning.

How to Make Air Fryer Garlic Butter Shrimp & Rice Bowls

Prepare the Shrimp

Pat the shrimp dry with paper towels before seasoning. Removing excess moisture helps the garlic butter coating cling to the shrimp and improves browning.

Place the shrimp in a bowl and add melted butter, minced garlic, lemon juice, paprika, Italian seasoning, black pepper, salt, and red pepper flakes if using.

Toss gently until every shrimp is evenly coated. Let the mixture sit for about 5 minutes while the air fryer heats.

Preheat the Air Fryer

Preheat the air fryer to 400°F for about 3 minutes.

A hot cooking basket helps the shrimp begin cooking immediately and encourages lightly browned edges.

Avoid overcrowding the basket. Arrange the shrimp in a single layer so hot air can circulate around each piece.

Air Fry the Shrimp

Place the seasoned shrimp in the air fryer basket in a single layer.

Cook at 400°F for about 5–7 minutes, depending on the size of the shrimp. Shake the basket or turn the shrimp halfway through cooking for even browning.

Shrimp are ready when they are opaque, firm, and cooked through. For food safety, shrimp should reach 145°F internally.

Do not overcook them. Shrimp can become rubbery when left in the air fryer too long.

Remove the cooked shrimp and sprinkle with fresh parsley.

Build the Rice Bowls

Divide the warm cooked rice between four serving bowls.

Add broccoli, bell peppers, carrots, cucumber, and avocado around the rice. You can lightly steam the broccoli first or leave it crisp for extra texture.

Place the garlic butter shrimp on top of each bowl.

Finish with fresh lemon juice, chopped parsley, and a small drizzle of any remaining garlic butter from the cooking bowl.

Serve immediately while the shrimp and rice are warm.

Tips for Juicy Air Fryer Shrimp

Dry shrimp cook better than wet shrimp because excess water can prevent proper browning. Pat them thoroughly before adding the butter mixture.

Use shrimp that are similar in size so they finish cooking at about the same time. Smaller shrimp may need less cooking time.

Fresh garlic gives the strongest flavor, but jarred minced garlic can work when needed.

Do not add too much butter. A light coating is enough to flavor the shrimp while allowing the air fryer to brown the edges.

Keep the shrimp in one layer. Overlapping pieces can steam instead of roasting, which reduces the crisp texture.

Check the shrimp early because air fryer models vary. A few extra minutes can make a noticeable difference in texture.

Best Rice Options for Shrimp Bowls

Jasmine rice is a great choice when you want soft, fragrant rice with a slightly sweet flavor. It pairs especially well with garlic butter.

Brown rice adds a firmer texture and a nutty flavor. It also works well for meal-prep bowls because it holds its texture after refrigeration.

Basmati rice gives the bowl a light, fluffy texture and pairs nicely with lemon and herbs.

Cauliflower rice is a useful low-carb alternative when you want more vegetables in the bowl.

You can also use leftover cooked rice to make this dinner even faster. Reheat the rice thoroughly before assembling the bowls.

Easy Vegetable Add-Ins

The vegetables can be changed based on what is available in your refrigerator.

Try steamed green beans, roasted zucchini, corn, spinach, edamame, snap peas, cabbage, or cherry tomatoes.

For more crunch, add shredded red cabbage or sliced radishes. For a sweeter flavor, roasted carrots or corn are excellent choices.

If you prefer a simple bowl, use rice, shrimp, avocado, and fresh cucumber with lemon. The garlic butter shrimp provide enough flavor that you do not need a complicated sauce.

Flavor Variations

For a spicy version, increase the red pepper flakes or add a small amount of cayenne pepper to the seasoning mixture.

For a Mediterranean-style bowl, use oregano, parsley, cucumber, tomatoes, and a spoonful of plain Greek yogurt.

For a tropical twist, replace some of the vegetables with pineapple, mango, and shredded cabbage.

For a creamy bowl, add a small drizzle of avocado-lime dressing or a light garlic yogurt sauce.

You can also replace the rice with quinoa, couscous, or another cooked grain.

What to Serve With Garlic Butter Shrimp Bowls

These bowls are filling enough to serve as a complete meal, but a few simple sides can make dinner more substantial.

Serve them with a fresh green salad, roasted vegetables, garlic bread, or a light cucumber salad.

A simple lemon wedge is one of the best finishing touches because its acidity balances the richness of the butter.

For extra flavor, sprinkle the finished bowl with fresh parsley, green onions, toasted sesame seeds, or a little Parmesan cheese.

Meal Prep and Storage

These shrimp bowls are best when the shrimp are freshly cooked, but they can also be prepared ahead for quick lunches.

Store cooked shrimp, rice, and vegetables in separate airtight containers when possible. Refrigerate leftovers promptly and use them within 3–4 days.

For meal prep, keep avocado and fresh toppings separate until serving. This helps prevent them from becoming soft or watery.

Reheat the rice and shrimp until hot. Avoid repeatedly reheating the shrimp because this can make them tough.

If you are preparing several bowls for the week, slightly undercook vegetables that will be reheated so they retain some texture.

Common Mistakes to Avoid

One common mistake is putting wet shrimp directly into the air fryer. Excess moisture can reduce browning and make the seasoning slide off.

Another mistake is overcrowding the basket. Give the shrimp enough room for hot air to circulate.

Overcooking is also easy to do with shrimp because they cook quickly. Start checking them around the five-minute mark.

Using cold, dry rice without reheating it can make the finished bowl less enjoyable. Warm the rice before assembling.

Finally, do not skip the lemon. Its fresh acidity brings the garlic, butter, and shrimp flavors together.

Frequently Asked Questions

Can I use frozen shrimp for this recipe?

Yes, thaw frozen shrimp completely, drain them well, and pat them dry before adding the garlic butter seasoning.

How long do shrimp take in an air fryer?

Large shrimp generally take about 5–7 minutes at 400°F, but cooking time varies by shrimp size and air fryer model.

What rice is best for shrimp bowls?

Jasmine, basmati, brown rice, and cauliflower rice all work well; choose based on your preferred texture and flavor.

Can I make these shrimp bowls spicy?

Yes, add red pepper flakes, cayenne pepper, or your favorite hot sauce to give the garlic butter shrimp extra heat.

Can I prepare these bowls for meal prep?

Yes, refrigerate cooked shrimp, rice, and vegetables in airtight containers and use the prepared bowls within 3–4 days.

How do I keep air fryer shrimp from getting rubbery?

Cook shrimp just until opaque and firm, then remove them promptly; overcooking is the main cause of rubbery shrimp.

Can I use brown butter instead of regular melted butter?

Yes, brown butter adds a deeper nutty flavor, but watch it closely because browned milk solids can burn during cooking.

What vegetables go well with garlic butter shrimp?

Broccoli, bell peppers, carrots, cucumber, avocado, green beans, corn, zucchini, and cabbage all pair well with the shrimp and rice.

Final Thoughts

These Air Fryer Garlic Butter Shrimp & Rice Bowls bring together tender shrimp, fragrant garlic butter, fluffy rice, fresh vegetables, and bright lemon in one easy meal. The air fryer keeps the shrimp cooking time short while giving them flavorful, lightly browned edges.

The recipe is flexible enough for weeknight dinners, quick lunches, and meal prep. Change the vegetables, switch the rice, or increase the spice to create a bowl that fits your taste.

For the best results, start with dry shrimp, avoid overcrowding the air fryer, and watch the cooking time closely. Fresh lemon and parsley at the end add the finishing touch that makes this simple bowl taste fresh and complete.

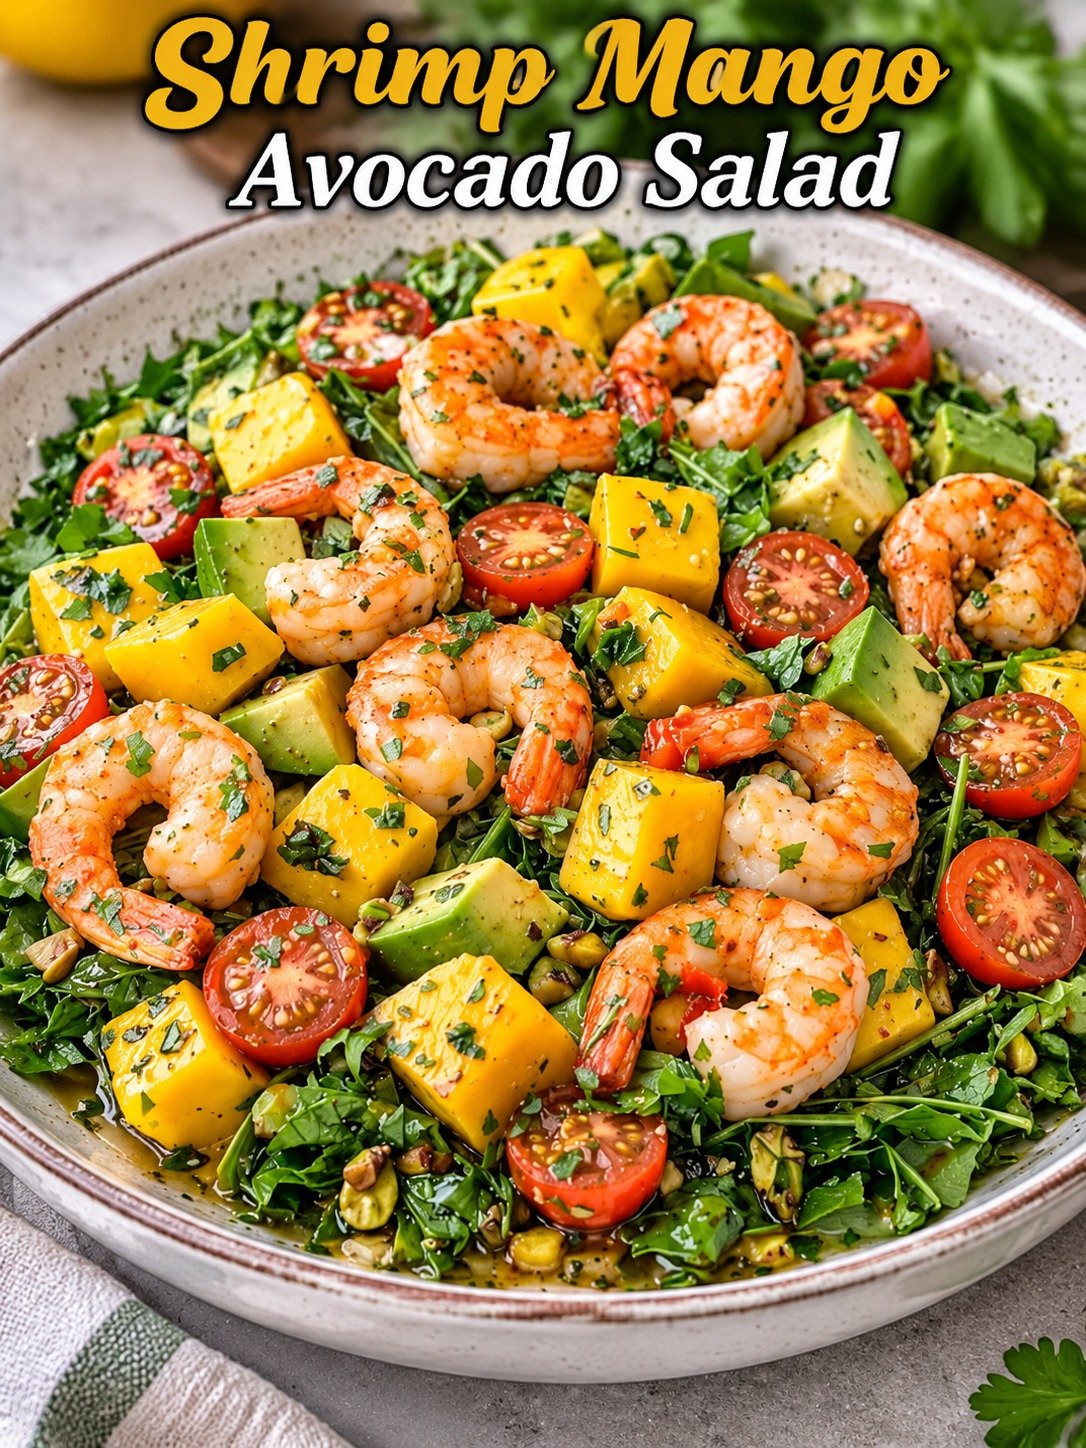
Shrimp Mango Avocado Salad

Shrimp Mango Avocado Salad

A Fresh 20-Minute Tropical Salad

Make this easy Shrimp Mango Avocado Salad with juicy shrimp, sweet mango, creamy avocado, crunchy pistachios, and honey-lime dressing in just 20 minutes.

Introduction

If you’re looking for a quick, colorful, and satisfying meal, this Shrimp Mango Avocado Salad is an excellent choice. It combines tender seasoned shrimp with sweet ripe mango, creamy avocado, crisp greens, juicy cherry tomatoes, red onion, and crunchy pistachios.

A fresh honey-lime vinaigrette ties everything together with a bright balance of citrus, sweetness, herbs, and mild seasoning. The recipe takes about 20 minutes from start to finish, making it ideal for a quick lunch, light dinner, summer meal, or casual gathering.

The ingredients also offer a variety of textures and flavors, so every bite feels fresh without being overly heavy.

Prep Time: 15 minutes
Cook Time: 5 minutes
Total Time: 20 minutes
Servings: 4

Why You’ll Love This Shrimp Mango Avocado Salad

Ready in about 20 minutes

Packed with flavorful, pan-seared shrimp

Naturally colorful and refreshing

Combines sweet, creamy, crunchy, and savory ingredients

Easy to customize with your favorite vegetables or nuts

Great as a light lunch or dinner

The honey-lime dressing can be prepared ahead of time

Ingredients

Prep Salad
  • 1 pound raw shrimp, peeled, deveined, and tails removed
  • 1–2 large ripe mangoes, peeled and diced
  • 1–2 large ripe Hass avocados, cubed
  • 1 cup cherry tomatoes, halved
  • 2–4 cups arugula, romaine, or mixed greens
  • ¼ cup thinly sliced or finely diced red onion
  • ⅓ cup shelled pistachios, roughly chopped
Shrimp Prep
  • 1 tablespoon olive oil
  • ½ teaspoon smoked paprika
  • ½ teaspoon garlic powder
  • Pinch of chili powder or cayenne pepper
  • Salt, to taste
  • Freshly ground black pepper, to taste
For the Honey-Lime Dressing
  • ¼ cup extra-virgin olive oil
  • 3 tablespoons fresh lime juice
  • 1 tablespoon honey or maple syrup
  • ¼ cup finely chopped fresh cilantro
  • Pinch of salt
  • Pinch of black pepper

How to Make Shrimp Mango Avocado Salad

1. Prepare the Shrimp

If using frozen shrimp, thaw them completely and drain well. Pat them dry with paper towels. Removing surface moisture helps the shrimp brown more effectively in the skillet.

Place the shrimp in a bowl and add olive oil, smoked paprika, garlic powder, chili powder or cayenne, salt, and black pepper. Toss until evenly coated.

2. Cook the Shrimp

Heat a large skillet over medium-high heat. Add the seasoned shrimp in a single layer.

Cook for approximately 2 minutes, then turn the shrimp and cook for another 1–2 minutes. They should become pink, opaque, and curled into a loose C shape.

Transfer the shrimp to a clean plate and allow them to cool slightly.

Food-safety note: Shrimp should be cooked until opaque and should reach a safe internal temperature of 145°F (63°C) when measured with a food thermometer.

3. Make the Honey-Lime Dressing

Add olive oil, fresh lime juice, honey, cilantro, salt, and black pepper to a small bowl or jar.

Whisk or shake until the dressing is well combined. Taste and adjust the sweetness, acidity, or seasoning if necessary.

4. Prepare the Salad

Wash and thoroughly dry the greens. Add them to a large serving bowl.

Add diced mango, cubed avocado, halved cherry tomatoes, red onion, and chopped pistachios.

5. Assemble and Serve

Arrange the cooked shrimp over the salad. Drizzle with some of the honey-lime vinaigrette.

Gently toss using salad tongs or large spoons. Avoid vigorous mixing because ripe avocado and mango can easily break apart.

Taste and add more dressing, lime juice, salt, or black pepper if desired. Serve immediately.

Tips for the Best Shrimp Mango Avocado Salad

Use ripe but firm mangoes: Choose mangoes that are fragrant and sweet but still firm enough to dice cleanly.

Choose firm-ripe avocados: A slightly firm avocado holds its shape better when tossed into the salad.

Dry shrimp before cooking: Excess moisture can cause shrimp to steam instead of sear.

Avoid overcooking: Shrimp become tough when cooked for too long. Remove them from the heat as soon as they are opaque and properly cooked.

Use fresh lime juice: Freshly squeezed lime gives the dressing a brighter flavor.

Dress just before serving: Adding the vinaigrette at the last minute helps preserve the crispness of the greens.

Toast the pistachios: Briefly toasting them in a dry skillet can enhance their nutty flavor. Let them cool before adding them.

Start with less dressing: Add about half first, toss, then add more according to taste.

Recipe Variations

Spicy Shrimp Mango Salad

Increase the cayenne or chili powder and add thinly sliced jalapeño for extra heat.

Tropical Shrimp Salad

Add diced pineapple or toasted unsweetened coconut for even more tropical flavor.

Shrimp Mango Avocado Salad with Black Beans

Add ½–1 cup rinsed black beans to make the salad more substantial.

Grilled Shrimp Mango Salad

Season the shrimp as directed and grill them instead of cooking them in a skillet for a smoky variation.

Shrimp Salad with Feta

Sprinkle crumbled feta over the finished salad for a salty contrast to the sweet mango.

Grain Bowl Version

Serve the salad over quinoa, brown rice, or couscous when you want a more filling meal.

Storage and Make-Ahead Instructions

For the best quality, assemble this salad shortly before serving. The shrimp, dressing, chopped vegetables, mango, and pistachios can be prepared several hours ahead and refrigerated separately.

For optimal texture, wait to cut the avocado and add the dressing until just before serving.

Leftover dressed salad is best consumed promptly because the greens and avocado can soften and lose their fresh appearance.

Frequently Asked Questions

Can I use frozen shrimp?

Yes. Frozen shrimp are convenient and work well in this recipe. Thaw them completely, drain them, and pat them dry before seasoning.

Can I use cooked shrimp?

Yes. Fully cooked shrimp can be used instead. Skip the cooking step and add them directly to the salad after cooling them if necessary.

Can I make this salad ahead of time?

Yes, but keep the components separate whenever possible. Prepare the shrimp and dressing ahead, then add the avocado and dressing shortly before serving.

What greens are best?

Arugula adds a peppery flavor, romaine provides crunch, and mixed greens offer a milder texture. Any fresh salad greens can work.

Can I replace lime juice with lemon juice?

Yes. Lemon juice works as a substitute, although lime gives the salad a more distinctive tropical flavor.

How do I stop the avocado from browning?

Cut the avocado shortly before serving. The lime juice in the dressing can also help slow browning, although it will not completely prevent it.

Can I make the dressing without honey?

Yes. Maple syrup can replace honey, or you can reduce or omit the sweetener depending on how sweet your mango is.

What can I serve with this salad?

It can be served on its own as a light meal or alongside quinoa, rice, roasted potatoes, grilled vegetables, or crusty bread.

Nutrition Facts

Approximate nutrition per serving:

Calories: 430

Protein: 29g

Carbohydrates: 28g

Fiber: 7g

Sugar: 17g

Total Fat: 27g

Saturated Fat: 4g

Sodium: 470mg

Calcium: 8% DV

Iron: 12% DV

Nutrition values are estimates and can vary depending on ingredient brands, shrimp size, mango and avocado size, dressing quantity, and serving portions.

Final Thoughts:

This Shrimp Mango Avocado Salad brings together juicy seasoned shrimp, sweet mango, creamy avocado, crisp greens, tomatoes, red onion, and crunchy pistachios in one vibrant meal. The fresh honey-lime vinaigrette adds a bright sweet-and-tangy finish that complements every ingredient.

With simple preparation and approximately 20 minutes of cooking time, it is an easy option for busy weekdays, warm-weather lunches, light dinners, and entertaining. For the freshest texture, prepare the ingredients ahead but assemble and dress the salad just before serving.