Air Fryer Chocolate Banana Breakfast Roll-Ups

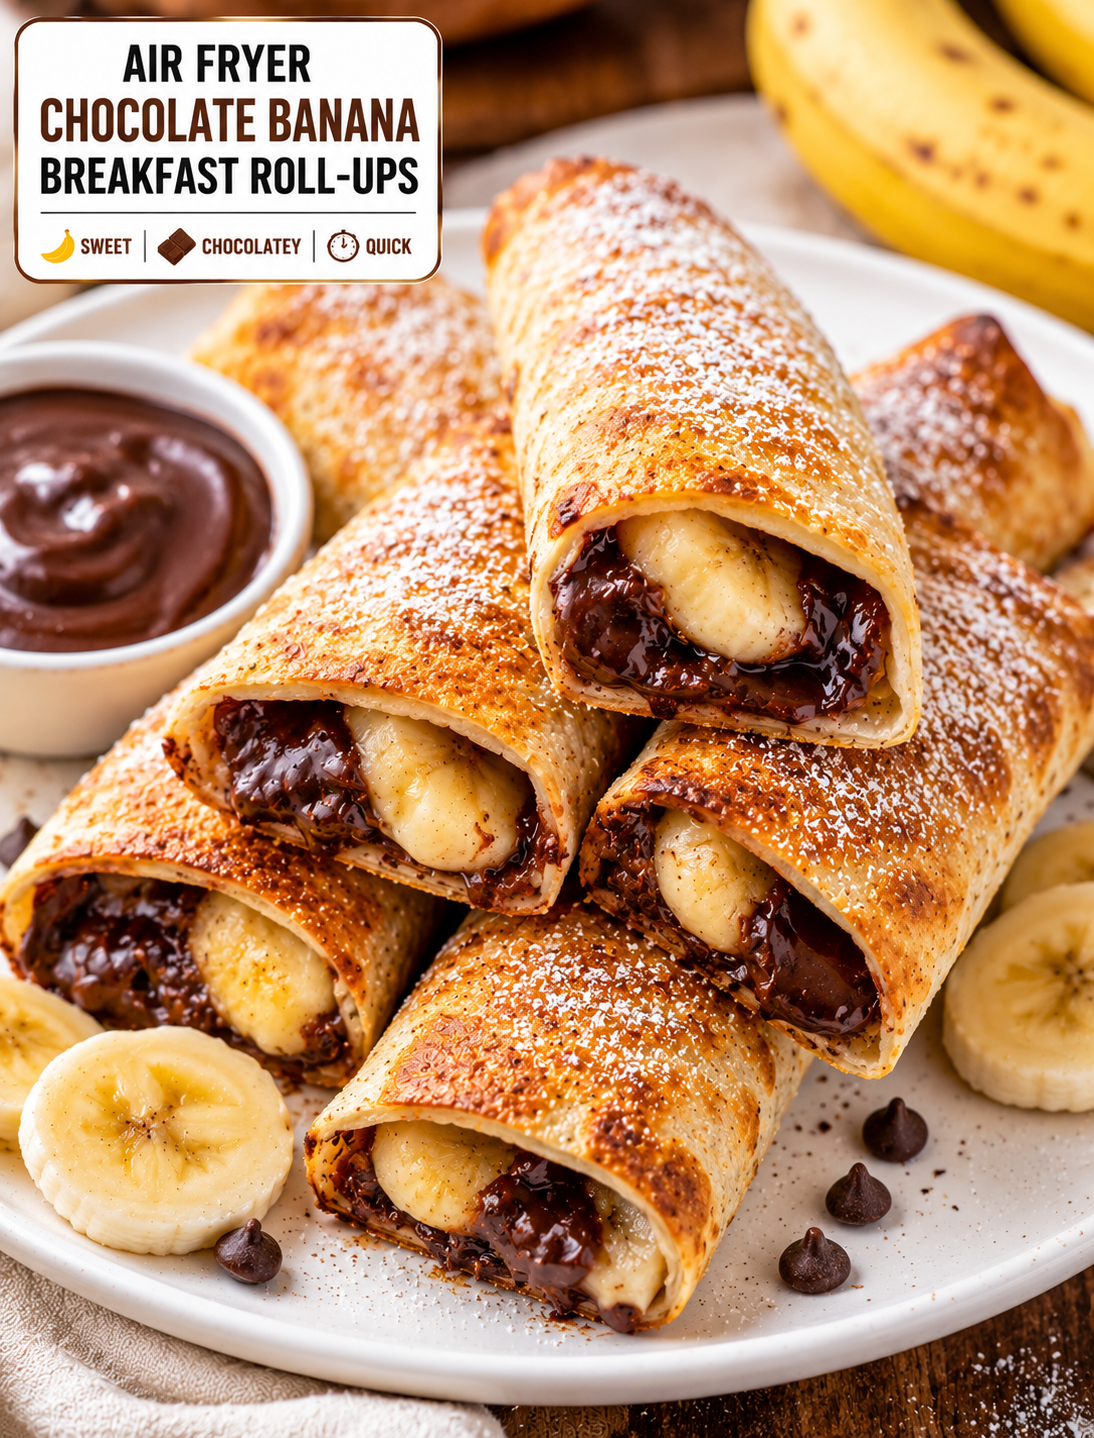
Golden air fryer chocolate banana breakfast roll-ups dusted with powdered sugar, showing melted chocolate and warm banana filling

Air Fryer Chocolate Banana Breakfast Roll-Ups

These Air Fryer Chocolate Banana Breakfast Roll-Ups are a fun way to start the morning with warm bananas, melted chocolate, and a golden crispy tortilla. They use simple ingredients and take only a few minutes to prepare.

Soft flour tortillas are filled with banana slices and chocolate, rolled tightly, lightly brushed with butter, and air fried until golden. The outside becomes crisp while the chocolate melts around the warm banana.

This easy breakfast recipe also works as a quick snack or simple dessert. You can prepare a batch for busy mornings, weekend brunch, after-school treats, or family gatherings.

A little powdered sugar on top gives the roll-ups a sweet finish. You can also serve them with Greek yogurt, fresh berries, peanut butter, or a small drizzle of honey.

Why You’ll Love These Breakfast Roll-Ups

These roll-ups combine a few ingredients into a warm and satisfying treat.

The banana provides natural sweetness and a soft texture, while chocolate adds a rich flavor that melts during air frying. The tortilla creates a crisp outer layer that contrasts with the warm filling.

The air fryer makes this recipe especially convenient. You do not need a frying pan filled with oil, and the roll-ups cook quickly.

They are also easy to customize. Use dark chocolate for a deeper flavor, milk chocolate for a sweeter version, or chocolate chips when you want a quick filling.

Peanut butter, almond butter, cinnamon, coconut, and chopped nuts can also be added for different flavors and textures.

Because the roll-ups are individually portioned, they are easy to serve and share.

Ingredients You’ll Need

  • 4 medium flour tortillas
  • 2 ripe bananas
  • ½ cup semi-sweet chocolate chips
  • 2 tablespoons creamy peanut butter, optional
  • 1 tablespoon melted butter
  • ½ teaspoon ground cinnamon
  • 1 tablespoon granulated sugar, optional
  • Powdered sugar for serving

Optional Toppings

  • Fresh strawberries
  • Blueberries
  • Greek yogurt
  • Honey
  • Maple syrup
  • Chopped walnuts
  • Chopped pecans
  • Shredded coconut
  • Extra melted chocolate

Use ripe but firm bananas. Very soft bananas can release too much moisture and make the tortillas harder to crisp.

Semi-sweet chocolate gives the roll-ups a balanced flavor. Dark or milk chocolate can be used depending on your preference.

Medium flour tortillas are flexible enough to roll without tearing. Avoid tortillas that are dry or cracked.

How to Make Air Fryer Chocolate Banana Breakfast Roll-Ups

1. Prepare the Bananas

Peel the bananas and slice them lengthwise or into thin rounds.

If using very large bananas, cut the slices into smaller pieces so they fit neatly inside the tortillas.

Set the banana pieces aside while preparing the tortillas.

2. Prepare the Tortillas

Place the tortillas on a clean work surface.

Warm each tortilla in the microwave for about 10–15 seconds.

This makes the tortillas softer and easier to roll.

Do not overheat them because very hot tortillas can become sticky or difficult to handle.

3. Add the Filling

Spread a thin layer of peanut butter across the center of each tortilla if using it.

Arrange banana slices over the peanut butter.

Sprinkle chocolate chips evenly over the banana.

Add a small pinch of cinnamon.

Do not spread the filling all the way to the edges. Leaving space around the outside makes the roll-up easier to seal.

Avoid adding too much filling because excess chocolate or banana can leak during cooking.

4. Roll the Tortillas

Fold the sides of the tortilla inward.

Fold the bottom edge over the filling and roll upward tightly.

Keep the roll compact without squeezing the filling out.

Place each finished roll-up seam-side down while you prepare the remaining pieces.

Keeping the seam underneath helps the tortilla stay closed during air frying.

5. Add the Butter Coating

Brush each roll-up lightly with melted butter.

Mix the cinnamon with sugar if you want a lightly sweet crust, then sprinkle a small amount over the buttered surface.

You can also use cooking spray instead of butter.

A thin coating is enough to help the tortilla develop a golden finish.

6. Air Fry Until Golden

Preheat your air fryer to 375°F if your model requires preheating.

Place the roll-ups in the basket with the seam-side down.

Leave a little space between each piece so hot air can circulate.

Air fry for approximately 5–8 minutes, turning them carefully halfway through cooking.

The roll-ups should be golden brown and crisp on the outside.

Check them early because tortillas can brown quickly.

Cooking time may vary depending on the air fryer model and the size of the roll-ups.

7. Finish and Serve

Carefully remove the hot roll-ups from the air fryer.

Allow them to cool for 1–2 minutes before serving.

Dust them lightly with powdered sugar.

Cut them in half diagonally to reveal the warm banana and melted chocolate inside.

Serve with fresh berries, Greek yogurt, peanut butter, or a small drizzle of honey.

How to Make Them Extra Crispy

The texture depends on keeping the tortilla relatively dry.

Use only a small amount of filling so the tortilla can crisp properly.

Avoid using overly ripe bananas that release a lot of moisture.

Do not add too much peanut butter because a thick layer can soften the tortilla.

Keep space between the roll-ups in the air fryer basket.

Turn them halfway through cooking for more even browning.

A light butter coating helps create a golden exterior without making the roll-ups greasy.

For the best texture, serve them soon after cooking.

Best Chocolate to Use

Semi-sweet chocolate chips are a simple choice because they provide enough sweetness without overpowering the banana.

Dark chocolate works well when you prefer a richer, less sweet flavor.

Milk chocolate creates a sweeter and creamier filling.

Mini chocolate chips are useful because they spread evenly throughout the roll-up.

Chocolate chunks can also be used, but large pieces may create uneven melting.

White chocolate provides a sweeter flavor and pairs well with banana and cinnamon.

You can even combine two types of chocolate for a more interesting filling.

Easy Flavor Variations

There are several ways to change these roll-ups.

Peanut butter banana version, spread a thin layer of peanut butter beneath the banana.

A cinnamon banana version, increase the cinnamon and add a small amount of brown sugar.

Chocolate coconut version, sprinkle unsweetened shredded coconut over the chocolate.

Nutty version, add finely chopped walnuts or pecans.

Berry version, add a few thin strawberry slices with the banana.

For a s’mores-inspired version, add mini marshmallows and crushed graham crackers, using a small amount to prevent leaking.

For a breakfast-style version, serve the finished roll-ups with Greek yogurt and fresh berries.

How to Prevent Chocolate From Leaking

Chocolate can melt quickly during air frying, so the filling needs to be placed carefully.

Keep chocolate away from the outer edges of the tortilla.

Do not overfill the roll-ups.

Roll the tortilla tightly so there are no large gaps around the filling.

Place the seam underneath when cooking.

If you notice a small amount of chocolate escaping, reduce the filling slightly in the next batch.

A few melted chocolate spots are normal and can add to the caramelized appearance of the finished roll-ups.

What to Serve With Chocolate Banana Roll-Ups

These roll-ups can be served on their own or paired with simple sides.

Fresh strawberries, blueberries, and raspberries add a bright fruit flavor.

Greek yogurt provides a cool contrast to the warm roll-ups.

Peanut butter or almond butter works well for dipping.

A small drizzle of maple syrup adds extra sweetness.

For brunch, serve the roll-ups with scrambled eggs, fresh fruit, and coffee.

A dessert-style plate, add vanilla ice cream and a little chocolate drizzle.

Children, cut the roll-ups into smaller pieces after they have cooled enough to handle.

Can You Make Them Ahead?

You can prepare the filling and assemble the roll-ups a short time before cooking.

For the best texture, keep the uncooked roll-ups covered and refrigerated until you are ready to air fry them.

Avoid assembling them too far in advance because the banana can release moisture into the tortilla.

If you are preparing breakfast for several people, assemble the roll-ups while the air fryer preheats.

Cook them in batches if your basket cannot hold all the pieces in one layer.

Freshly air-fried roll-ups have the best crisp texture.

Can You Freeze Them?

These roll-ups can be frozen, but the tortilla may not be quite as crisp after freezing and reheating.

To freeze, prepare the roll-ups without powdered sugar and place them in a single layer on a parchment-lined tray.

Freeze until firm, then transfer them to a freezer-safe container.

When ready to cook, air fry from frozen at about 350°F, adding a few extra minutes as needed.

Check the center before serving because the banana and chocolate should be warm.

Avoid thawing the roll-ups at room temperature because moisture can soften the tortillas.

Storage and Reheating

Store leftover roll-ups in an airtight container in the refrigerator.

For the best texture, reheat them in the air fryer at 350°F for 2–4 minutes.

The air fryer helps restore some of the crisp exterior while warming the chocolate and banana.

Avoid using the microwave if you want a crisp tortilla because microwave heating can make the exterior soft.

Allow the roll-ups to cool slightly before eating because melted chocolate can be very hot.

Discard leftovers that have an unusual smell, appearance, or texture.

Tips for the Best Results

Use ripe but firm bananas.

Warm the tortillas before rolling.

Keep the filling in the center.

Do not overfill each tortilla.

Roll the tortillas tightly.

Keep the seam facing down during cooking.

Use a light coating of butter or cooking spray.

Avoid overcrowding the air fryer basket.

Turn the roll-ups halfway through cooking.

Check them early because tortillas brown quickly.

Allow them to cool briefly before serving.

Add powdered sugar and toppings after cooking.

The Bottom Line

Air Fryer Chocolate Banana Breakfast Roll-Ups are a simple way to turn bananas, chocolate, and tortillas into a warm, crispy treat.

The air fryer creates a golden exterior while the banana softens and the chocolate melts inside. A little cinnamon and powdered sugar add extra flavor without requiring a complicated recipe.

These roll-ups work well for breakfast, brunch, snacks, and simple desserts. You can also customize them with peanut butter, nuts, berries, coconut, or different types of chocolate.

For the best results, use firm ripe bananas, avoid overfilling the tortillas, and serve the roll-ups soon after cooking.

Frequently Asked Questions

1. How long do chocolate banana roll-ups take in the air fryer?

Air fry them at 375°F for about 5–8 minutes, turning halfway, until the tortillas are golden and crisp.

2. Can I use corn tortillas?

Flour tortillas work best because they are flexible and easier to roll without cracking.

3. What chocolate works best with bananas?

Semi-sweet chocolate chips are a balanced choice, but milk, dark, or white chocolate can also be used.

4. Can I make these without peanut butter?

Yes. Simply fill the tortillas with banana, chocolate, and cinnamon without adding peanut butter.

5. How do I keep the roll-ups from opening?

Roll them tightly and place them seam-side down in the air fryer basket before cooking.

6. Can I use frozen bananas?

Fresh bananas work better because thawed frozen bananas release extra moisture that can soften the tortilla.

7. Can I freeze chocolate banana roll-ups?

Yes. Freeze assembled roll-ups in a single layer and air fry them from frozen, adding extra cooking time as needed.

8. How do I reheat leftover roll-ups?

Reheat them in the air fryer at 350°F for about 2–4 minutes to restore some of the crisp texture.

Final Thoughts

Air Fryer Chocolate Banana Breakfast Roll-Ups are an easy recipe for mornings when you want something warm, sweet, and satisfying without spending a lot of time in the kitchen.

The combination of crispy tortilla, soft banana, melted chocolate, and cinnamon creates a simple treat that can work for breakfast or dessert.

Keep the filling light, seal the tortillas tightly, and avoid overcrowding the air fryer for the best golden finish.

Serve them with fresh berries, yogurt, peanut butter, or a light dusting of powdered sugar.

Crispy, chocolatey, and packed with banana flavor, these roll-ups are a simple treat that can make an ordinary morning feel a little more special.
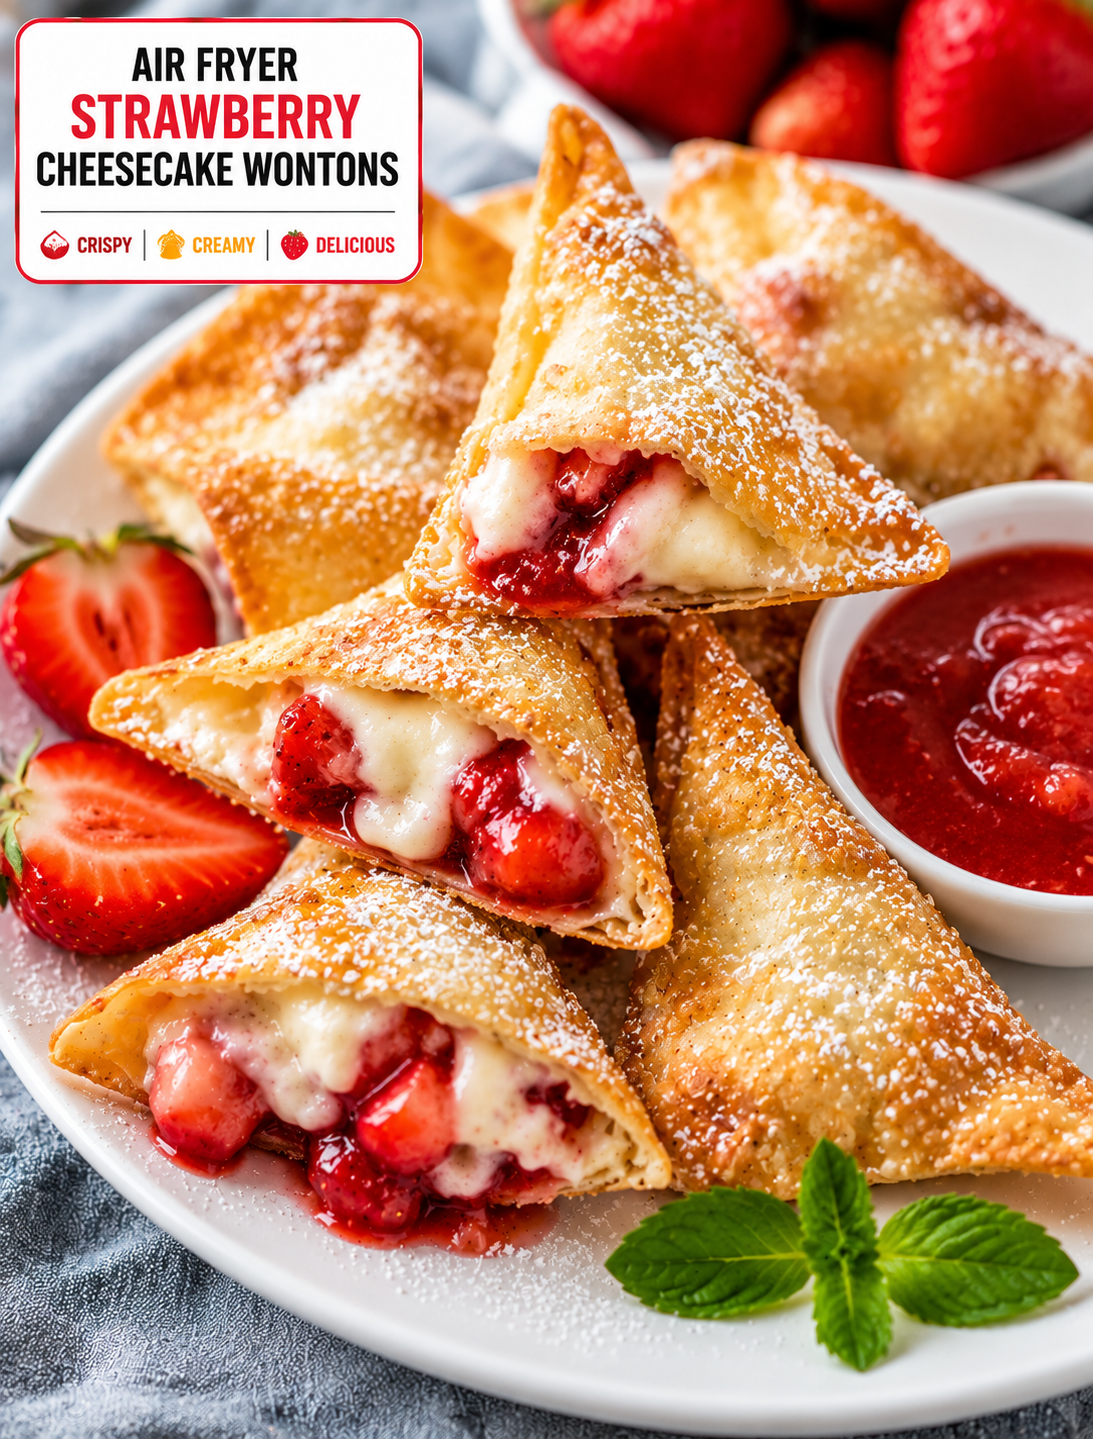
Air Fryer Strawberry Cheesecake Wontons

Golden air fryer strawberry cheesecake wontons filled with creamy strawberry cheesecake, dusted with powdered sugar and served with berries

Air Fryer Strawberry Cheesecake Wontons

Crispy on the outside and creamy on the inside, these Air Fryer Strawberry Cheesecake Wontons are an easy dessert that feels special without requiring complicated baking.

Each wonton wrapper holds a sweet cheesecake filling and juicy strawberry pieces. The air fryer cooks the wrappers until golden and crisp while the cream cheese filling becomes smooth and warm.

A light dusting of powdered sugar adds a classic cheesecake finish. You can also serve these dessert wontons with strawberry sauce, chocolate drizzle, or vanilla ice cream.

This recipe is perfect for parties, family desserts, date nights, holiday gatherings, or a quick sweet treat when you want something different from traditional cheesecake.

Why You’ll Love These Strawberry Cheesecake Wontons

These dessert wontons combine the flavor of strawberry cheesecake with the crisp texture of an air-fried wrapper.

The filling uses simple ingredients, including cream cheese, powdered sugar, vanilla, and fresh strawberries. The wonton wrappers create a thin exterior that becomes golden and crunchy during cooking.

Air frying also keeps the preparation simple. You do not need to heat a large pot of oil or spend time making a traditional cheesecake crust.

The small size makes these treats easy to serve. They can be arranged on a platter and enjoyed as finger food, making them especially useful for parties and gatherings.

You can also customize the filling with other berries, chocolate chips, lemon zest, or different toppings.

Ingredients You’ll Need

  • 24 square wonton wrappers
  • 8 ounces cream cheese, softened
  • ⅓ cup powdered sugar
  • 1 teaspoon vanilla extract
  • ½ cup finely diced fresh strawberries
  • 1 tablespoon strawberry jam
  • 1 teaspoon fresh lemon juice
  • 1 tablespoon melted butter
  • Cooking spray
  • Powdered sugar for dusting

Optional Toppings

  • Strawberry sauce
  • Chocolate syrup
  • White chocolate drizzle
  • Fresh sliced strawberries
  • Whipped cream
  • Vanilla ice cream
  • Crushed graham crackers
  • Mint leaves

Use full-fat or reduced-fat cream cheese based on your preference. Full-fat cream cheese usually gives the filling a richer and creamier texture.

Fresh strawberries work best because they provide a bright fruit flavor. Make sure they are finely diced so the filling stays easy to seal inside the wrappers.

How to Make Air Fryer Strawberry Cheesecake Wontons

1. Prepare the Cheesecake Filling

Place the softened cream cheese in a medium bowl.

Add powdered sugar, vanilla extract, strawberry jam, and lemon juice.

Mix until the filling is smooth and creamy.

Gently fold in the finely diced strawberries.

Do not overmix the strawberries because too much liquid can make the filling watery.

If your strawberries are very juicy, pat them dry with a paper towel before adding them.

2. Prepare the Wonton Wrappers

Place the wonton wrappers on a clean work surface.

Keep the unused wrappers covered with a slightly damp kitchen towel so they do not dry out while you work.

Place about 1 tablespoon of cheesecake filling in the center of each wrapper.

Avoid adding too much filling because an overfilled wonton can burst during cooking.

3. Seal the Wontons

Dip your fingertip in water and lightly moisten the edges of the wrapper.

Fold the wrapper diagonally over the filling to create a triangle.

Press the edges firmly together to seal the filling inside.

For an extra-secure seal, gently press around the entire edge with your fingers.

Make sure there are no open gaps.

Repeat with the remaining wrappers and filling.

4. Brush With Butter

Lightly brush the outside of each sealed wonton with melted butter.

You can also use cooking spray if you prefer.

A thin coating is enough to help the wrappers develop a golden color.

Avoid soaking the wrappers because excess butter can make them greasy and may cause uneven browning.

5. Preheat the Air Fryer

Preheat your air fryer to 350°F if your model requires preheating.

Lightly spray the basket with cooking spray.

Arrange the wontons in a single layer.

Leave space between each piece so the hot air can circulate around the wrappers.

Depending on the size of your air fryer, you may need to cook the wontons in several batches.

6. Air Fry Until Golden

Air fry the wontons at 350°F for about 5–7 minutes.

Check them after about 4 minutes because wonton wrappers can brown quickly.

Turn them carefully halfway through cooking if your air fryer model does not brown both sides evenly.

The wontons are ready when the wrappers are golden and crisp.

Do not overcook them because the edges can become hard and the filling may begin to leak.

7. Cool and Add Toppings

Carefully remove the hot wontons from the air fryer.

Allow them to cool for about 2–3 minutes.

Dust them lightly with powdered sugar.

Add fresh strawberry slices, a drizzle of strawberry sauce, or melted white chocolate if desired.

For a restaurant-style dessert, arrange the wontons around a scoop of vanilla ice cream and finish with fresh berries.

How to Keep the Filling From Leaking

The most important step is not overfilling the wonton wrappers.

About one tablespoon of filling is usually enough for a standard wrapper.

Make sure the edges are clean before sealing. Cream cheese filling on the edge can prevent the wrapper from sticking properly.

Moisten the edges lightly with water and press firmly to create a secure seal.

Do not use too much water because overly wet wrappers can become difficult to handle.

Keep the assembled wontons covered until they are ready to cook so the wrappers do not dry out.

If one wrapper develops a tear, replace it rather than trying to cook it with an exposed filling.

How to Make Extra Crispy Wontons

Use a single layer in the air fryer basket.

Do not stack the wontons because the hot air needs to reach the entire surface.

A light butter coating helps the wrappers brown, but too much fat can make them greasy.

Cook the wontons in batches if necessary.

Check them early because different air fryer models can cook at different speeds.

For the crispest texture, serve the wontons soon after cooking.

The wrappers can soften slightly as they sit because the warm cheesecake filling releases moisture.

Best Strawberries to Use

Fresh, ripe strawberries give these wontons their best flavor.

Choose berries that are bright red, firm, and free from soft spots.

Wash the strawberries before preparing them and dry them thoroughly.

Cut the berries into very small pieces so they mix evenly with the cheesecake filling.

Avoid using large strawberry chunks because they can make the filling harder to seal.

Frozen strawberries can release extra moisture as they thaw, so fresh berries are the better choice for this recipe.

Easy Flavor Variations

These strawberry cheesecake wontons can be changed in several ways.

For a chocolate version, add a few mini chocolate chips to the filling.

For a lemon cheesecake flavor, add extra lemon zest and a small amount of lemon juice.

For a mixed berry version, combine finely diced strawberries with blueberries or raspberries.

For a cinnamon cheesecake variation, add a pinch of cinnamon to the cream cheese mixture.

For a chocolate-covered strawberry version, drizzle melted chocolate over the cooked wontons.

You can also sprinkle crushed graham crackers over the top to create a flavor similar to classic cheesecake crust.

What to Serve With Cheesecake Wontons

These crispy dessert bites taste great on their own, but a few simple additions can make them even more special.

Serve them with warm strawberry sauce for extra fruit flavor.

Vanilla ice cream adds a cool and creamy contrast to the warm wontons.

Whipped cream provides a light topping that works well with strawberries.

Melted white chocolate adds sweetness and a smooth finish.

Dark chocolate drizzle creates a richer flavor combination.

Fresh mint leaves can add a bright visual and herbal touch.

For a party, arrange several sauces in small bowls so guests can choose their favorite combination.

Can You Make Them Ahead?

Yes, you can prepare the cheesecake filling ahead of time and keep it refrigerated.

You can also assemble the wontons shortly before cooking.

For the best texture, air fry them close to serving time.

If you assemble them too far in advance, moisture from the filling may soften the wrappers.

Keep prepared uncooked wontons covered and refrigerated until you are ready to cook them.

Do not leave cream cheese-filled wontons at room temperature for an extended period.

Can You Freeze Strawberry Cheesecake Wontons?

Yes, these wontons can be frozen before air frying.

Place the assembled wontons on a parchment-lined tray in a single layer and freeze until firm.

Once frozen, transfer them to a freezer-safe container or bag.

When ready to cook, air fry them from frozen at about 350°F, adding a few extra minutes as needed.

Check the wrappers frequently during cooking because frozen wontons can brown before the filling becomes fully warm.

Avoid thawing them at room temperature before cooking because the wrappers can become soft and sticky.

Storage and Reheating

Store leftover cooked wontons in an airtight container in the refrigerator.

For the best texture, reheat them in the air fryer at 325°F–350°F for 2–4 minutes.

The air fryer helps restore some of the crisp texture.

Avoid using the microwave when possible because it can make the wonton wrappers soft.

Let reheated wontons cool briefly before serving because the cream cheese filling can remain very hot.

Discard leftovers that show signs of spoilage or have an unusual smell, appearance, or texture.

Tips for the Best Results

Soften the cream cheese before mixing the filling.

Dice the strawberries very finely.

Pat juicy strawberries dry before adding them to the filling.

Do not overfill the wrappers.

Keep the edges clean before sealing.

Use only a small amount of water to seal each wonton.

Press the edges firmly to prevent leaks.

Cook in a single layer.

Check the wontons early because they brown quickly.

Serve them shortly after cooking for the best crisp texture.

The Bottom Line

Air Fryer Strawberry Cheesecake Wontons are a simple dessert that turns classic cheesecake flavors into crispy, bite-sized treats.

The creamy strawberry filling pairs beautifully with golden wonton wrappers, while powdered sugar and fresh berries provide a simple finishing touch.

The recipe is easy enough for a weeknight dessert but special enough for parties and celebrations. You can also change the filling and toppings to create chocolate, lemon, mixed berry, or cinnamon versions.

For the best results, keep the filling controlled, seal the wrappers well, and watch the air fryer closely during the final minutes.

Frequently Asked Questions

1. How long do strawberry cheesecake wontons take in the air fryer?

Air fry them at 350°F for about 5–7 minutes, checking early because wonton wrappers brown quickly.

2. Can I use frozen strawberries?

Fresh strawberries work best because frozen berries release more moisture and can make the cheesecake filling difficult to seal.

3. How do I stop cheesecake wontons from leaking?

Avoid overfilling them, keep the wrapper edges clean, and firmly seal the edges with a small amount of water.

4. Can I freeze cheesecake wontons?

Yes. Freeze assembled wontons in a single layer before transferring them to a freezer-safe container for later cooking.

5. Can I use egg roll wrappers?

Yes, but egg roll wrappers are larger and thicker, so the cooking time and filling amount may need adjustment.

6. What temperature should I use for air frying wontons?

A temperature of 350°F works well for creating a crisp, golden wrapper without browning it too quickly.

7. What toppings go well with strawberry cheesecake wontons?

Powdered sugar, strawberry sauce, chocolate drizzle, whipped cream, fresh berries, and vanilla ice cream all pair well with them.

8. Can I make these without butter?

Yes. Lightly spray the wrappers with cooking spray instead of brushing them with melted butter.

Final Thoughts

Air Fryer Strawberry Cheesecake Wontons are a fun twist on traditional cheesecake that delivers a crisp, golden shell and creamy strawberry center in every bite.

They require simple ingredients, short cooking time, and very little preparation. That makes them a practical dessert for busy evenings, family treats, and entertaining.

For the best results, use fresh strawberries, keep the filling portions small, seal the wrappers carefully, and avoid overcrowding the air fryer.

Finish them with powdered sugar, strawberry sauce, or a little chocolate drizzle for an extra-special presentation.

Crispy, creamy, fruity, and easy—these strawberry cheesecake wontons are a dessert everyone will want to grab before they’re gone.

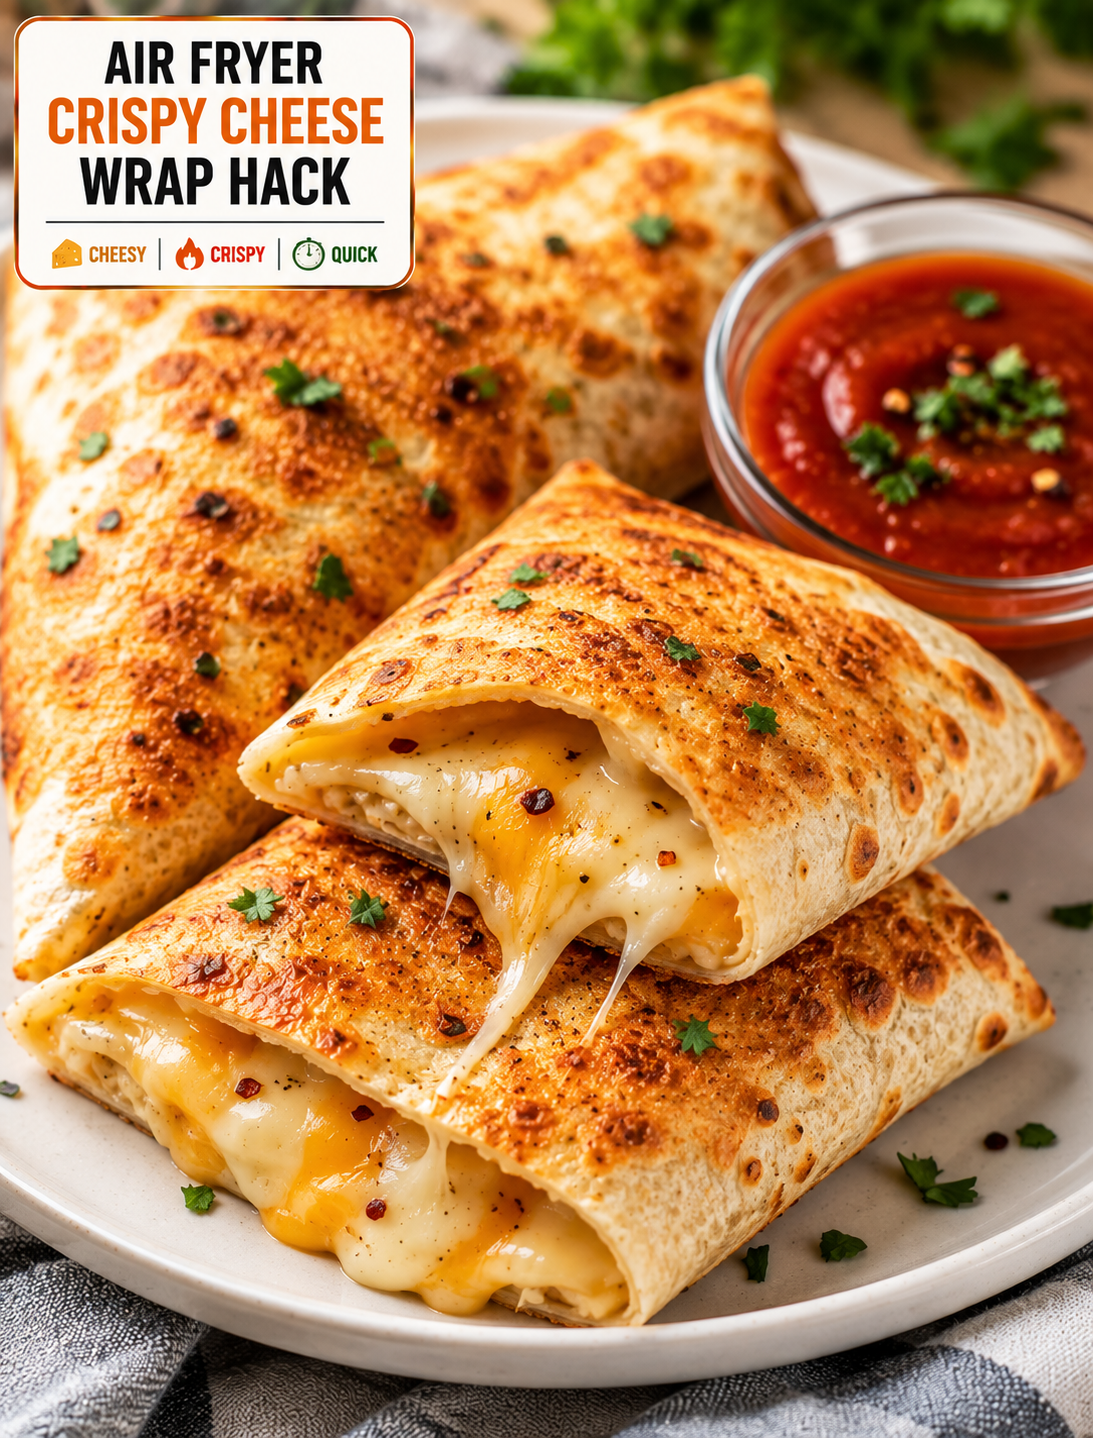
Air Fryer Crispy Cheese Wrap Hack

Golden crispy air fryer cheese wrap sliced open to reveal gooey melted cheese, served with dipping sauce and fresh herbs

Air Fryer Crispy Cheese Wrap Hack

Want a quick snack that turns a few simple ingredients into something crispy, cheesy, and seriously satisfying? This Air Fryer Crispy Cheese Wrap Hack is an easy recipe for busy days, quick lunches, after-school snacks, and casual gatherings.

A soft flour tortilla is filled with shredded cheese and simple seasonings, folded into a compact wrap, and cooked in the air fryer until the outside becomes golden and crisp. Inside, the cheese melts into a warm, gooey filling.

The recipe is easy to change based on what you already have in the refrigerator. Add cooked chicken, turkey, vegetables, jalapeños, or leftover taco meat for a more filling version.

The air fryer is the key to getting a crisp finish without deep frying. A light coating of oil or cooking spray is enough to help the tortilla brown evenly.

Why You’ll Love This Crispy Cheese Wrap

This recipe is fast, simple, and made with everyday ingredients.

The tortilla becomes crisp around the edges while the cheese melts inside. That combination gives the wrap a texture similar to a crispy quesadilla but with a tighter, snack-friendly shape.

You can prepare one wrap when you are hungry or make several for a family snack.

The recipe is also budget-friendly because it does not require expensive ingredients. Basic flour tortillas, shredded cheese, and seasonings are enough to make a tasty snack.

Another advantage is flexibility. Use cheddar for a sharp flavor, Monterey Jack for a smooth melt, or pepper Jack for extra heat.

You can also use small tortillas for snack-size wraps or larger tortillas when you want a more filling meal.

Ingredients You’ll Need

  • 4 large flour tortillas
  • 1½ cups shredded cheddar cheese
  • 1 cup shredded Monterey Jack cheese
  • Melted butter or olive oil 1 tablespoon
  • Garlic powder ½ teaspoon
  • Smoked paprika ½ teaspoon
  • ¼ teaspoon black pepper
  • Dried oregano ¼ teaspoon
  • 2 tablespoons chopped green onions
  • 1 small jalapeño, finely sliced, optional
  • Cooking spray

Optional Add-Ins

  • 1 cup cooked shredded chicken
  • Cooked taco meat ½ cup
  • Diced bell peppers ½ cup
  • ½ cup cooked corn
  • ¼ cup chopped black olives
  • 2 tablespoons chopped fresh cilantro
  • Sliced turkey

For the best texture, avoid adding too many wet ingredients. Excess moisture can make the tortilla soft instead of crisp.

Freshly shredded cheese usually melts smoothly and evenly. You can also use a pre-shredded blend when convenience matters.

How to Make the Air Fryer Cheese Wrap

1. Prepare the Cheese Filling

Add the cheddar and Monterey Jack cheese to a bowl.

Mix in garlic powder, smoked paprika, black pepper, oregano, and chopped green onions.

If you want extra heat, add finely sliced jalapeño.

Stir everything together so the seasonings are distributed throughout the cheese.

If you are adding chicken or taco meat, make sure it is already cooked and not overly wet.

2. Warm the Tortillas

Place the tortillas on a microwave-safe plate.

Warm them for about 10–15 seconds.

This makes the tortillas more flexible and helps prevent cracking when you fold them.

Keep the remaining tortillas covered with a clean kitchen towel while working.

3. Fill the Tortilla

Place one tortilla on a clean work surface.

Add about ¾ cup of the cheese mixture near the center.

Leave a border around the edges so the cheese does not spill out during cooking.

If adding chicken, vegetables, or meat, use a small amount so the wrap remains easy to fold.

Do not overfill the tortilla because a thick wrap takes longer to crisp and may open during cooking.

4. Fold the Wrap

Left side fold and right sides of the tortilla toward the center.

Fold the bottom edge over the filling.

Roll the tortilla upward tightly until the filling is enclosed.

Place the finished wrap seam-side down while you prepare the remaining wraps.

Keeping the seam underneath helps prevent the tortilla from opening in the air fryer.

5. Brush With Oil

Lightly brush the outside of each wrap with melted butter or olive oil.

You can also use cooking spray.

A thin coating is enough. Too much oil can make the tortilla greasy instead of crisp.

For extra flavor, mix a pinch of garlic powder and smoked paprika into the melted butter before brushing.

6. Air Fry Until Golden

Preheat your air fryer to 375°F if your model requires preheating.

Place the wraps seam-side down in the basket.

Leave space between each wrap so hot air can circulate properly.

Air fry for about 6–9 minutes, turning carefully halfway through.

The wraps are ready when the tortillas are golden brown and crisp and the cheese is fully melted.

Air fryer models vary, so begin checking around the six-minute mark.

7. Rest and Slice

Carefully remove the hot wraps from the basket.

Let them rest for about 1–2 minutes.

This gives the melted cheese time to settle slightly.

Slice each wrap diagonally and serve immediately.

The contrast between the crisp tortilla and warm melted cheese is best when the wraps are fresh.

The Best Cheese for Crispy Wraps

Cheese choice can change the texture and flavor of the finished wrap.

Cheddar provides a rich, slightly sharp flavor and melts well.

Monterey Jack has a mild taste and creates a smooth, creamy filling.

Pepper Jack adds both creaminess and a noticeable spicy kick.

Mozzarella creates a stretchy cheese center with a mild flavor.

Colby Jack is another good option because it melts easily and has a balanced taste.

For the best result, combine two cheeses. A sharp cheese paired with a mild melting cheese creates more flavor without becoming overpowering.

How to Make the Wrap Extra Crispy

The biggest mistake is adding too much filling.

A thinner layer of cheese allows the tortilla to cook evenly and become crisp.

Keep the outside of the tortilla relatively dry before adding the light oil coating.

Do not overcrowd the air fryer basket.

Leave enough space around each wrap for hot air to circulate.

Turn the wraps halfway through cooking to brown both sides.

For an even crunchier finish, add another 1–2 minutes of cooking time, but watch closely because tortillas can brown quickly.

Serve the wraps soon after cooking because steam from the hot filling can soften the exterior if they sit too long.

Easy Add-Ins to Try

This recipe is a great way to use small amounts of leftovers.

Add cooked shredded chicken for a simple chicken cheese wrap.

Use leftover taco meat with cheddar and jalapeño for a Tex-Mex version.

Add cooked bell peppers and onions for extra flavor and texture.

Corn adds a mild sweetness that works well with pepper Jack.

Chopped spinach can add color without changing the recipe very much.

For a breakfast version, add scrambled eggs, cooked bacon, and cheddar.

Deli-style wrap, use sliced turkey, Swiss cheese, and a little mustard.

Keep add-ins fairly dry so the tortilla can still become crisp.

Dipping Sauces for Cheese Wraps

A crispy cheese wrap becomes even better with the right dipping sauce.

Ranch dressing provides a cool and creamy contrast.

Salsa adds fresh tomato flavor and a little acidity.

Guacamole works well with Tex-Mex versions.

Quest creates an extra-cheesy combination for serious cheese lovers.

Hot sauce is an easy choice when you want more heat.

Chipotle mayo adds smoky spice and creaminess.

For kids, ketchup or a mild creamy dip can be served on the side.

Place several sauces on the table when serving a group so everyone can choose a favorite.

What to Serve With Crispy Cheese Wraps

These wraps can be served as a snack or as part of a larger meal.

Pair them with a fresh green salad for a simple lunch.

Serve them with tomato soup for a comforting combination.

For a Tex-Mex meal, add black beans, corn salsa, guacamole, and fresh pico de gallo.

Air fryer potato wedges also make a great side.

For breakfast, serve a cheese and egg version with fresh fruit.

For game day, cut the wraps into smaller pieces and serve them with several dipping sauces.

Can You Make These Wraps Ahead?

Yes, you can prepare the wraps ahead of time.

Assemble them and place them in the refrigerator in a covered container.

For the best texture, air fry them shortly before serving.

Avoid leaving assembled wraps at room temperature for long periods when they contain cooked meat or other perishable ingredients.

If you are preparing several wraps for a gathering, make the filling ahead and assemble the tortillas closer to cooking time.

This helps prevent moisture from softening the tortillas.

Storage and Reheating

Store leftover cooked wraps in an airtight container in the refrigerator.

For the best texture, reheat them in the air fryer at 350°F for about 3–5 minutes.

The air fryer helps bring back some of the crisp texture while warming the cheese.

Avoid using the microwave when possible because microwave heating can make the tortilla soft.

If you are reheating a wrap containing chicken or other cooked meat, make sure the filling is heated thoroughly before serving.

Discard leftovers that have an unusual smell, appearance, or texture.

Simple Variations

Spicy Jalapeño Cheese Wrap

Add sliced jalapeños, pepper Jack cheese, and a pinch of crushed red pepper.

Chicken Ranch Wrap

Add shredded cooked chicken, cheddar cheese, and ranch seasoning.

Taco Cheese Wrap

Combine cooked taco meat, cheddar, Monterey Jack, and a little salsa.

Breakfast Cheese Wrap

Fill the tortilla with scrambled eggs, cheddar, and cooked bacon.

Pizza Cheese Wrap

Add mozzarella, a small amount of pizza sauce, and Italian seasoning.

BBQ Chicken Wrap

Combine shredded chicken, cheddar, and a small amount of barbecue sauce.

These variations allow you to use the same basic air fryer method while creating completely different flavors.

Tips for the Best Results

Use soft flour tortillas that fold without cracking.

Warm the tortillas briefly before filling them.

Do not overfill the wraps.

Keep wet ingredients to a minimum.

Use a light layer of oil or cooking spray.

Place the wraps seam-side down in the basket.

Leave space between the wraps.

Turn them halfway through cooking.

Watch carefully during the final minutes because tortillas can brown quickly.

Allow the wraps to rest briefly before slicing.

Serve them while warm for the best crisp texture.

The Bottom Line

Air Fryer Crispy Cheese Wraps are an easy solution when you want something quick, cheesy, and crunchy without complicated preparation.

A few basic ingredients turn into a golden snack with a crisp tortilla and warm, melted cheese. The recipe is flexible enough to include chicken, taco meat, vegetables, eggs, or whatever leftovers you have available.

The air fryer makes the process especially simple. A light coating of oil, enough space in the basket, and a short cooking time are all you need for a delicious result.

Serve these wraps with ranch, salsa, guacamole, hot sauce, or your favorite dip.

Frequently Asked Questions

1. How long do cheese wraps take in the air fryer?

Cook them at 375°F for about 6–9 minutes, turning halfway, until the tortilla is golden and the cheese has melted.

2. What tortillas work best for this recipe?

Soft flour tortillas are ideal because they fold easily and become crisp without breaking.

3. How do I stop the cheese from leaking out?

Avoid overfilling the tortilla, leave a border around the filling, and roll the wrap tightly with the seam underneath.

4. Can I add chicken to the cheese wrap?

Yes. Add a small amount of fully cooked shredded chicken for a more filling chicken and cheese version.

5. Can I make these wraps spicy?

Yes. Use pepper Jack cheese, jalapeños, hot sauce, or crushed red pepper for extra heat.

6. Can I prepare cheese wraps ahead of time?

Yes. Assemble them ahead and refrigerate them, then air fry shortly before serving for the best crisp texture.

7. What dipping sauce goes with crispy cheese wraps?

Ranch, salsa, guacamole, quest, chipotle mayo, and hot sauce are all excellent choices.

8. Can I reheat leftover cheese wraps?

Yes. Reheat them in the air fryer at about 350°F for 3–5 minutes to restore some of the crisp texture.

Final Thoughts

This Air Fryer Crispy Cheese Wrap Hack proves that you do not need a complicated recipe to make something seriously satisfying.

The tortilla turns golden and crunchy while the cheese melts into a warm, gooey center. With a few simple add-ins, the same recipe can become a chicken wrap, taco wrap, breakfast wrap, or spicy snack.

For the crispiest result, keep the filling light, use a small amount of oil, and give each wrap enough room in the air fryer.

Crispy outside, melty inside, and ready in minutes—this is an easy recipe to keep in your back pocket for those cheesy cravings.

Air Fryer Crispy Chicken Hummus Bowls

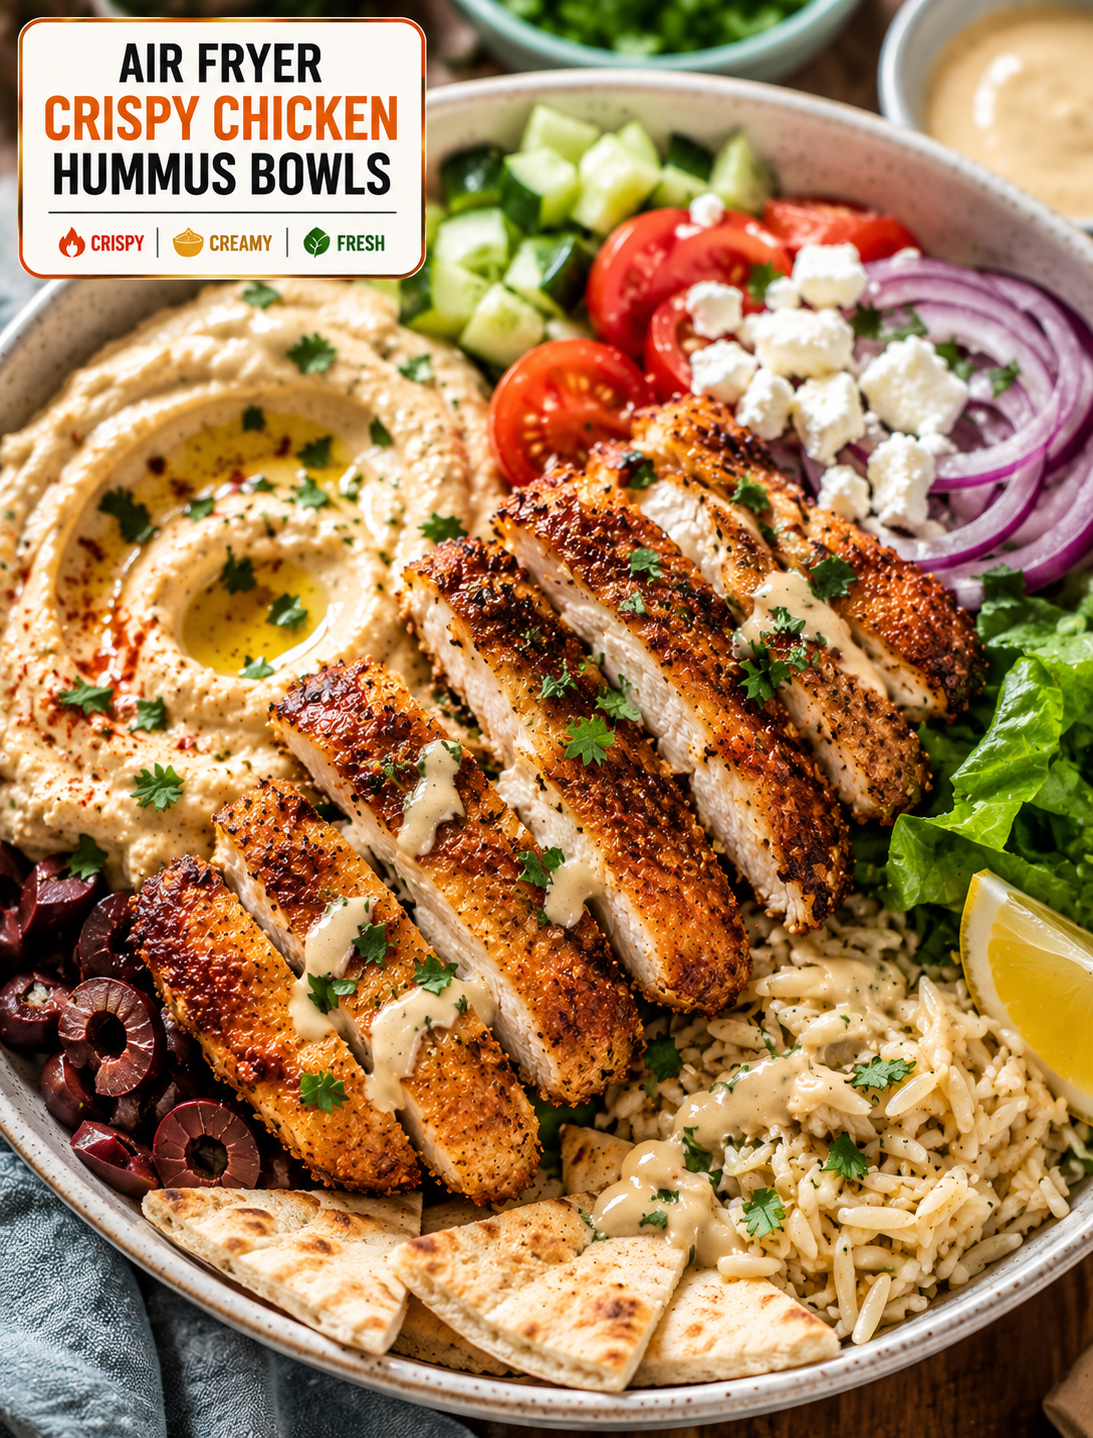
Air fryer crispy chicken hummus bowl with golden chicken, creamy hummus, cucumber, tomatoes, feta, greens, herbs, and lemon

Air Fryer Crispy Chicken Hummus Bowls

Looking for a quick meal that is crispy, creamy, fresh, and filling? These Air Fryer Crispy Chicken Hummus Bowls bring together golden chicken, smooth hummus, crunchy vegetables, and warm pita in one easy meal.

The chicken is coated with a simple blend of spices and cooked in the air fryer until the outside is golden and crisp. It stays tender inside while the seasoning adds plenty of savory flavor.

A generous spoonful of creamy hummus forms the base of each bowl. Fresh cucumber, tomatoes, red onion, leafy greens, and herbs add color and crunch. A drizzle of lemon-tahini dressing brings everything together.

This recipe is inspired by Mediterranean-style flavors but uses simple ingredients that are easy to find at most U.S. grocery stores.

It works well for lunch, dinner, meal prep, or a casual weekend meal when you want something satisfying without spending hours in the kitchen.

Why You’ll Love These Hummus Bowls

These bowls offer a great mix of textures in every bite.

The chicken is crisp and seasoned, while the hummus is smooth and creamy. Fresh vegetables add crunch, and lemon gives the bowl a bright finish.

The air fryer also makes the chicken without the need for deep frying. A small amount of oil helps the coating brown while the circulating hot air creates a crisp exterior.

Another benefit is flexibility. You can change the vegetables, add grains, use different seasonings, or adjust the dressing to suit your taste.

The bowls can also be prepared ahead of time. Keep the chicken, hummus, vegetables, and dressing separate until serving to maintain the best texture.

Ingredients You’ll Need

Crispy Chicken

  • 1½ pounds boneless, skinless chicken breasts
  • Olive oil 1 tablespoon
  • 1 teaspoon paprika
  • 1 teaspoon garlic powder
  • ½ teaspoon ground cumin
  • ½ teaspoon onion powder
  • ½ teaspoon dried oregano
  • ½ teaspoon black pepper
  • ½ teaspoon salt
  • 2 tablespoons cornstarch

For the Bowls

  • Hummus 2 cups
  • 2 cups cooked quinoa or rice, optional
  • Cucumber 1 , diced
  • 1 cup cherry tomatoes, halved
  • Red onion ½ small , thinly sliced
  • 2 cups chopped romaine or mixed greens
  • ½ cup crumbled feta cheese
  • ¼ cup fresh parsley, chopped
  • Kalamata olives ¼ cup , optional
  • 2 whole wheat or regular pita breads
  • Lemon wedges for serving

Lemon-Tahini Dressing

  • ¼ cup tahini
  • 2 tablespoons fresh lemon juice
  • 1 tablespoon olive oil
  • Honey 1 teaspoon
  • 1 small garlic clove, finely minced
  • 2–3 tablespoons warm water
  • Pinch of salt
  • Pinch of black pepper

You can use store-bought hummus to save time or make your own if you prefer.

Chicken breasts create lean, tender pieces, while boneless chicken thighs provide a richer texture.

Quinoa or rice is optional, but either one makes the bowl more filling and works well as a meal-prep base.

How to Make Air Fryer Crispy Chicken Hummus Bowls

1. Prepare the Chicken

Pat the chicken dry with paper towels.

Cut it into bite-sized pieces that are similar in size so they cook evenly.

Place the chicken in a large bowl and add olive oil, paprika, garlic powder, cumin, onion powder, oregano, black pepper, salt, and cornstarch.

Toss until each piece is evenly coated.

The cornstarch creates a light coating that helps the chicken develop a crisp exterior in the air fryer.

2. Preheat the Air Fryer

Preheat the air fryer to 400°F if your model requires preheating.

Lightly spray the basket with cooking spray.

Arrange the chicken pieces in a single layer. Avoid stacking or overcrowding them because the hot air needs room to circulate.

Cook in batches if necessary.

3. Air Fry the Chicken

Cook the chicken at 400°F for about 10–14 minutes.

Shake the basket or turn the chicken halfway through cooking.

The outside should become golden and lightly crisp.

Use a food thermometer to check the thickest piece. Chicken should reach an internal temperature of 165°F for food safety.

Cooking time may vary depending on the size of the chicken pieces and your air fryer model.

Allow the chicken to rest for a few minutes before assembling the bowls.

4. Prepare the Vegetables

While the chicken cooks, prepare the vegetables.

Dice the cucumber and tomatoes, slice the red onion, and chop the greens.

Wash and dry the vegetables thoroughly before assembling the bowls.

Fresh parsley adds a bright herbal flavor, while Kalamata olives provide a salty Mediterranean-style touch.

You can remove the onion if you prefer a milder bowl.

5. Make the Lemon-Tahini Dressing

Add tahini, lemon juice, olive oil, honey, garlic, salt, and black pepper to a small bowl.

Whisk until combined.

The tahini will initially become thick when mixed with lemon juice.

Add warm water one tablespoon at a time while whisking until the dressing reaches a smooth, pourable consistency.

Taste and adjust the lemon juice or salt according to your preference.

6. Warm the Pita

Cut the pita into wedges.

Warm the pieces in the air fryer for about 1–2 minutes at 350°F or heat them briefly in a dry skillet.

Keep a close eye on them because pita can become crisp quickly.

You can also skip this step and serve the pita at room temperature.

7. Assemble the Bowls

Spread about ½ cup of hummus into each bowl.

Add cooked quinoa or rice if using.

Arrange the crispy chicken over the hummus.

Add cucumber, tomatoes, red onion, greens, feta, parsley, and olives.

Drizzle with lemon-tahini dressing.

Finish with a squeeze of fresh lemon and serve with warm pita wedges.

How to Make Extra Crispy Chicken

The key to crisp chicken starts with removing excess moisture.

Pat the chicken dry before adding the seasoning.

Cut the chicken into small, even pieces so more surface area can brown.

Use a thin coating of cornstarch rather than a heavy layer.

Do not overcrowd the air fryer basket.

Turn the chicken halfway through cooking so the pieces brown evenly.

For the best texture, assemble the bowl shortly after the chicken finishes cooking.

Adding dressing directly onto the chicken can soften the crispy coating, so drizzle it around the bowl or add it just before eating.

Best Hummus for Chicken Bowls

Classic hummus works well because its mild chickpea and tahini flavor complements the seasoned chicken.

Roasted garlic hummus adds a deeper savory taste.

Red pepper hummus gives the bowl a slightly sweet and smoky flavor.

For a spicy version, use jalapeño or chili hummus.

You can also mix a spoonful of harissa into plain hummus for extra heat.

Choose a hummus with a smooth texture if you want an easy-to-spread bowl base.

What Vegetables Work Best?

Fresh vegetables make these bowls colorful and crunchy.

Cucumber provides a cool, crisp texture.

Cherry tomatoes add juicy sweetness.

Red onion gives a sharp bite that balances the creamy hummus.

Romaine lettuce provides crunch without overpowering the other ingredients.

You can also add shredded carrots, bell peppers, radishes, cabbage, or spinach.

For a roasted version, add air-fried zucchini, bell peppers, or cauliflower.

Using a mix of raw and cooked vegetables gives the bowl more variety.

Easy Bowl Variations

There are many ways to customize this meal.

A spicy bowl, add crushed red pepper, hot sauce, or harissa.

Extra freshness, add mint, parsley, or cilantro.

More crunch, sprinkle roasted chickpeas or pumpkin seeds over the top.

Dairy-free bowl, leave out the feta cheese.

Low-carb option, skip the rice and pita and add extra greens and vegetables.

Heartier meal, add quinoa, brown rice, or roasted potatoes.

You can also replace chicken with air-fried chickpeas if you want a vegetarian version.

How to Make These Bowls for Meal Prep

These bowls are easy to prepare ahead of time.

Cook the chicken and grain base in advance and allow them to cool before storing.

Place the hummus in separate containers or small compartments.

Keep fresh vegetables separate from the warm ingredients when possible.

Store the dressing in a small sealed container and add it just before eating.

Keep pita separate so it does not become soft from moisture.

When ready to eat, reheat the chicken and grains, then add the chilled vegetables, hummus, dressing, and herbs.

This method keeps the different textures fresh and prevents the bowl from becoming soggy.

What to Serve With Hummus Bowls

These bowls are filling on their own, but several simple sides work well.

Serve them with warm pita, roasted vegetables, cucumber salad, or a simple tomato salad.

A small bowl of olives or pickled vegetables adds a salty and tangy contrast.

For a larger meal, add lentil soup or a light vegetable soup.

You can also serve the chicken and hummus separately as a platter for family-style dining.

Tips for the Best Results

Dry the chicken before seasoning it.

Keep chicken pieces similar in size.

Use a light layer of cornstarch for better browning.

Avoid overcrowding the air fryer basket.

Check the chicken with a food thermometer before serving.

Use fresh lemon juice for the dressing.

Thin tahini gradually with warm water.

Keep dressing separate during meal prep.

Add fresh vegetables shortly before eating.

Serve the chicken warm for the best contrast with cool hummus and vegetables.

Storage and Reheating

Store cooked chicken and grains in airtight containers in the refrigerator.

Keep fresh vegetables, hummus, and dressing in separate containers.

Reheat the chicken in the air fryer at about 350°F for 3–5 minutes until hot.

Avoid microwaving the chicken if you want to maintain its crisp texture.

Add fresh hummus and vegetables after reheating.

Use refrigerated leftovers within a safe storage period and discard food that develops an unusual smell, appearance, or texture.

The Bottom Line

Air Fryer Crispy Chicken Hummus Bowls combine golden seasoned chicken, creamy hummus, fresh vegetables, herbs, and a bright lemon-tahini dressing for a satisfying meal.

The air fryer gives the chicken a crisp exterior without deep frying, while hummus provides a creamy base that brings all the ingredients together.

The recipe is flexible enough for weeknight dinners, meal prep, lunches, and casual entertaining. You can add grains for extra substance or keep the bowl lighter with more greens and vegetables.

With simple ingredients and easy preparation, this is a practical way to bring Mediterranean-inspired flavors into your everyday kitchen.

Frequently Asked Questions

1. How long should chicken cook in the air fryer?

Bite-sized chicken pieces usually take about 10–14 minutes at 400°F, depending on their size and your air fryer.

2. What temperature should the chicken reach?

Chicken should reach an internal temperature of 165°F in the thickest piece for safe consumption.

3. Can I use chicken thighs instead of chicken breast?

Yes. Boneless, skinless chicken thighs work well and provide a richer, more tender texture.

4. Can I make these hummus bowls dairy-free?

Yes. Simply leave out the feta or replace it with a dairy-free alternative.

5. What hummus tastes best with crispy chicken?

Classic hummus, roasted garlic hummus, red pepper hummus, and spicy hummus all pair well with seasoned chicken.

6. Can I prepare these bowls ahead of time?

Yes. Prepare the chicken and grains ahead, but keep hummus, vegetables, and dressing separate until serving.

7. How can I make the chicken extra crispy?

Pat the chicken dry, use a light cornstarch coating, avoid overcrowding the basket, and turn the pieces halfway through cooking.

8. What can I use instead of tahini?

You can make a simple lemon dressing with olive oil, lemon juice, garlic, and a little honey if tahini is unavailable.

Final Thoughts

Air Fryer Crispy Chicken Hummus Bowls are a simple combination of bold flavor, fresh ingredients, and satisfying textures.

The crispy seasoned chicken pairs beautifully with creamy hummus, crunchy vegetables, salty feta, and bright lemon-tahini dressing. Every component adds something different without making the recipe complicated.

Make the bowls your own by changing the vegetables, adding grains, increasing the spice, or switching the hummus flavor.

For the best results, keep the chicken crisp, the vegetables fresh, and the dressing separate until the moment you serve.

A colorful bowl, crispy chicken, creamy hummus, and plenty of fresh flavor make this an easy meal worth adding to your weekly rotation.

Air Fryer Cheesy Chicken Ranch Bombs

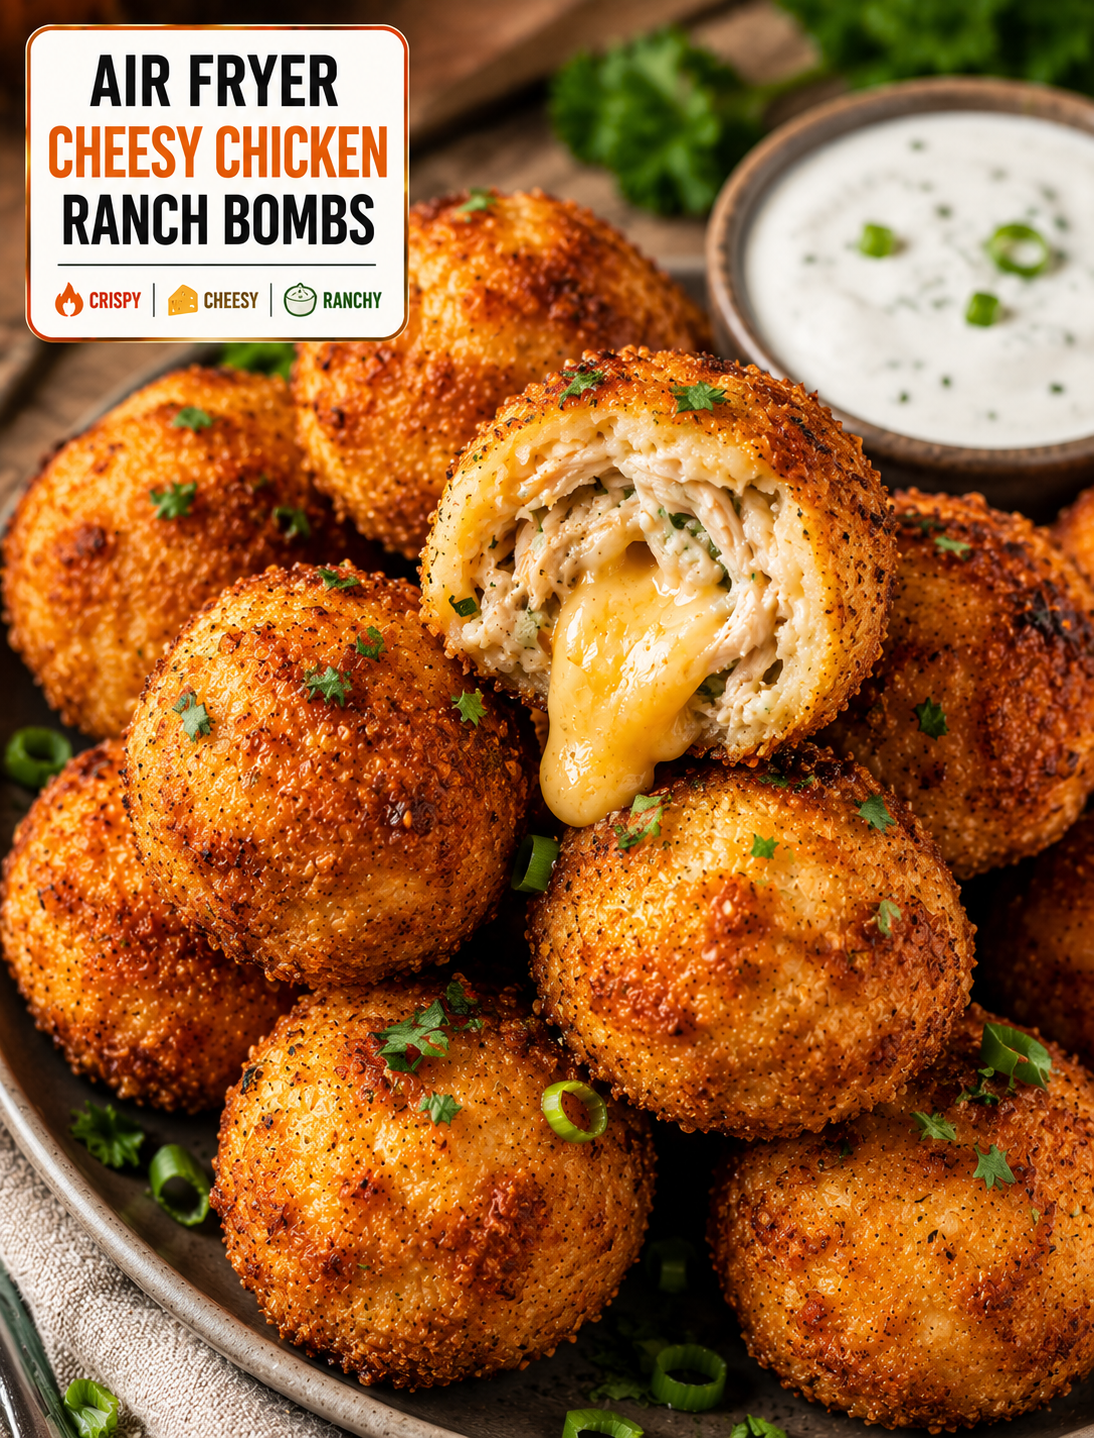
Crispy air fryer cheesy chicken ranch bombs with melted cheese inside, golden breadcrumbs, ranch dip, and fresh green onions

Air Fryer Cheesy Chicken Ranch Bombs

If you love crispy chicken, melted cheese, and ranch flavor, these Air Fryer Cheesy Chicken Ranch Bombs are about to become a favorite. Each bite has a golden, crispy outside with juicy chicken, creamy ranch seasoning, and gooey cheese inside.

These bite-sized chicken bombs are easy to prepare and cook quickly in the air fryer. They make a fun appetizer for game day, a family-friendly snack, or a simple dinner when you want something different from regular chicken.

The best part is the texture. The outside becomes golden and lightly crisp while the cheese melts into the seasoned chicken filling. A sprinkle of ranch seasoning gives every bite a familiar savory flavor.

Serve them with ranch dressing, buffalo sauce, honey mustard, or your favorite dipping sauce for an extra flavorful finish.

Why You’ll Love These Chicken Ranch Bombs

These cheesy chicken bites combine several flavors that work naturally together.

Chicken provides a hearty protein base, while shredded cheese adds a creamy, melty center. Ranch seasoning brings garlic, herbs, and savory flavor without requiring a long list of spices.

The air fryer makes the cooking process simple. Hot circulating air helps create a crisp exterior while using much less oil than traditional deep frying.

These chicken bombs are also easy to customize. You can make them mild, spicy, extra cheesy, or even add chopped vegetables to the filling.

They are small enough to serve as appetizers but filling enough to become part of a casual meal.

Ingredients You’ll Need

Chicken Filling

  • 2 cups cooked shredded chicken
  • 4 ounces cream cheese, softened
  • 1 cup shredded cheddar cheese
  • ½ cup shredded Monterey Jack cheese
  • 2 tablespoons ranch seasoning mix
  • Green 2 onions, finely sliced
  • Garlic powder ½ teaspoon
  • Smoked paprika ½ teaspoon
  • Black pepper ¼ teaspoon
  • Salt ¼ teaspoon , optional

For the Coating

  • 1 cup all-purpose flour
  • 2 large eggs
  • 1½ cups seasoned breadcrumbs
  • Garlic powder ½ teaspoon
  • Paprika ½ teaspoon
  • Cooking spray

Serving

  • Ranch dressing
  • Buffalo sauce
  • Honey mustard
  • Chopped green onions
  • Fresh parsley, optional

Use freshly shredded cheese when possible because it melts smoothly and creates a creamy center.

If your ranch seasoning mix contains plenty of salt, taste the filling before adding extra salt.

Rotisserie chicken is a convenient choice for this recipe, but leftover baked or roasted chicken also works well.

How to Make Air Fryer Cheesy Chicken Ranch Bombs

1. Prepare the Chicken Filling

Place the shredded cooked chicken in a large mixing bowl.

Add softened cream cheese, cheddar cheese, Monterey Jack cheese, ranch seasoning, green onions, garlic powder, smoked paprika, and black pepper.

Mix until the ingredients are evenly combined.

The cream cheese should be soft enough to blend easily with the chicken. If it is too cold, let it sit at room temperature for several minutes before mixing.

The finished mixture should hold together when pressed between your fingers.

2. Shape the Chicken Bombs

Scoop about 1½ tablespoons of the chicken mixture into your hands.

Roll it into a compact ball, making sure the cheese is enclosed inside the chicken mixture.

Repeat until all the filling has been used.

Place the shaped balls on a parchment-lined plate or tray.

If the mixture feels too soft to shape, refrigerate it for about 15–20 minutes before continuing.

3. Prepare the Coating

Place the flour in one shallow bowl.

Beat the eggs in a second bowl.

Add the seasoned breadcrumbs, garlic powder, and paprika to a third bowl and mix well.

Take each chicken ball and coat it lightly in flour.

Dip it into the beaten egg, allowing excess egg to drip away.

Finally, roll it through the seasoned breadcrumbs until completely coated.

Press the breadcrumbs gently onto the surface so they stay attached during cooking.

4. Chill Before Air Frying

Place the coated chicken bombs in the refrigerator for about 10 minutes.

This short chilling step helps the coating firm up and can make the balls easier to cook without opening.

While they chill, preheat the air fryer to 375°F if your model requires preheating.

5. Air Fry the Chicken Bombs

Lightly spray the air fryer basket with cooking spray.

Arrange the chicken bombs in a single layer, leaving a little space between each piece.

Lightly spray the tops with cooking spray.

Air fry at 375°F for about 10–14 minutes, turning them carefully halfway through cooking.

The outside should be golden brown and crisp.

Because the filling contains cooked chicken, the main goal is to heat the center thoroughly and melt the cheese. For food safety, make sure the center reaches 165°F.

Cooking time can vary depending on the size of the chicken bombs and your air fryer model.

6. Serve Immediately

Carefully remove the chicken bombs from the air fryer.

Allow them to rest for about 2 minutes before serving.

This short resting period lets the melted cheese settle slightly and reduces the chance of burning your mouth.

Transfer them to a serving plate and sprinkle with sliced green onions or fresh parsley.

Serve warm with ranch dressing, buffalo sauce, or honey mustard.

How to Get a Crispy Coating

A good coating makes these chicken bombs especially satisfying.

Start by keeping the chicken mixture compact. Loose balls can crack while cooking and allow the cheese to escape.

Coat each piece evenly with flour, egg, and breadcrumbs.

Do not skip the flour because it gives the egg a surface to cling to.

Shake off excess flour and egg before moving to the next coating.

Use a light spray of oil on the finished coating to encourage even browning.

Most importantly, avoid overcrowding the air fryer basket. Space allows hot air to move around each chicken bomb and helps the coating become crisp.

Best Cheese for Chicken Bombs

Cheddar gives the filling a rich, familiar flavor and melts well.

Monterey Jack creates a softer, creamier texture and pairs naturally with ranch seasoning.

Pepper Jack is an excellent choice if you want a little heat.

Mozzarella can be added for extra stretch, while Colby Jack provides a mild and creamy option.

For the best result, combine two cheeses instead of relying on only one. A sharper cheese and a mild melting cheese create a balanced filling.

How to Make Them Spicy

These chicken bombs are easy to turn into a spicy appetizer.

Add ½ teaspoon of cayenne pepper to the chicken mixture for noticeable heat.

You can also mix in finely chopped jalapeños or a few tablespoons of buffalo sauce.

Pepper Jack cheese works especially well in a spicy version.

For a milder batch, leave out the cayenne and serve buffalo sauce on the side.

This lets everyone choose how much heat they want.

What to Serve With Cheesy Chicken Bombs

Ranch dressing is the classic dipping sauce for this recipe.

Buffalo sauce adds extra heat and gives the chicken bombs a game-day flavor.

Honey mustard provides a sweet and tangy contrast to the savory filling.

For a complete meal, serve them with a crisp green salad, roasted vegetables, coleslaw, or air fryer potato wedges.

For parties, place the chicken bombs on a large platter with several dipping sauces in small bowls.

You can also serve them alongside celery and carrot sticks for a fresh crunchy side.

Can You Use Raw Chicken?

This recipe is designed for cooked shredded chicken because it makes preparation faster and helps the filling cook evenly.

Using raw chicken inside a thick breaded ball can make it harder to determine when the center is safely cooked.

If you want to use raw chicken, the recipe and cooking method should be adjusted so the chicken reaches 165°F throughout without burning the coating.

For the easiest and most consistent results, use fully cooked chicken.

Can You Make These Ahead?

Yes. The chicken filling can be prepared several hours ahead and stored in the refrigerator.

You can also shape and coat the chicken bombs in advance.

Keep them covered and refrigerated until you are ready to air fry them.

For the best texture, cook them shortly before serving.

If preparing them for a party, you can make the filling earlier in the day and complete the coating shortly before guests arrive.

Avoid leaving prepared chicken at room temperature for an extended period.

Storage and Reheating

Place leftover chicken bombs in an airtight container and refrigerate them promptly.

For the best texture, reheat them in the air fryer at 350°F for about 4–6 minutes, or until heated through.

Avoid reheating them in the microwave if you want the coating to remain crisp.

If the cheese has hardened after refrigeration, a short air fryer reheat will help soften the center while restoring some of the exterior crunch.

Discard leftovers that have an unusual smell, appearance, or texture.

Easy Recipe Variations

There are several ways to change the flavor without changing the basic method.

Buffalo chicken bombs, mix buffalo sauce into the filling and serve with ranch.

Jalapeño ranch bombs, add diced jalapeños and use pepper Jack cheese.

Garlic Parmesan bombs, replace some of the cheddar with Parmesan and add extra garlic powder.

Barbecue chicken bombs, mix a small amount of barbecue sauce into the filling and use cheddar cheese.

You can also add finely chopped spinach, bell peppers, or green onions for extra color and flavor.

Tips for the Best Results

Use softened cream cheese so the filling mixes evenly.

Keep the chicken pieces finely shredded so the bombs hold their shape.

Do not overfill each ball with cheese because excess filling can leak during cooking.

Chill the shaped bombs briefly before air frying.

Coat each piece evenly with flour, egg, and breadcrumbs.

Leave space between the chicken bombs in the air fryer.

Turn them halfway through cooking for even browning.

Use a food thermometer to confirm the center reaches 165°F.

Let them rest for a couple of minutes before serving.

Serve with dipping sauces while the coating is still crisp.

The Bottom Line

Air Fryer Cheesy Chicken Ranch Bombs are a fun way to turn simple cooked chicken into crispy, bite-sized comfort food.

The combination of seasoned chicken, creamy cheese, ranch flavor, and crunchy breadcrumbs creates a satisfying appetizer that works for game day, family dinners, parties, and casual snacking.

The air fryer keeps the preparation simple while giving the coating a golden finish. You can also change the cheese, spice level, and dipping sauce to create a version that matches your taste.

For the best results, keep the filling compact, avoid overcrowding the basket, and serve the chicken bombs warm.

Frequently Asked Questions

1. How long do chicken ranch bombs take in the air fryer?

Air fry them at 375°F for about 10–14 minutes, turning halfway, until golden and heated through.

2. What temperature should chicken bombs reach?

The center should reach 165°F for safe consumption when using cooked or raw chicken.

3. Can I use rotisserie chicken?

Yes. Shredded rotisserie chicken is convenient and works very well in the cheesy ranch filling.

4. What cheese is best for these chicken bombs?

Cheddar and Monterey Jack make an excellent combination, while Pepper Jack works well for a spicy version.

5. Why are my chicken bombs opening?

Overfilling, loose shaping, or skipping the chilling step can cause the filling to break open during cooking.

6. Can I freeze cheesy chicken bombs?

Yes. Freeze them in a single layer until firm, then transfer them to a freezer-safe container and reheat thoroughly before serving.

7. What dipping sauce goes with chicken ranch bombs?

Ranch, buffalo sauce, honey mustard, barbecue sauce, and garlic aioli all pair well with the crispy chicken bites.

8. Can I make these chicken bombs spicy?

Yes. Add cayenne, jalapeños, buffalo sauce, or Pepper Jack cheese to increase the heat.

Final Thoughts

Air Fryer Cheesy Chicken Ranch Bombs bring together everything people love about a great snack: crispy texture, juicy chicken, melted cheese, and bold ranch flavor.

They are simple enough for a weeknight meal but fun enough for a party or game-day spread. You can keep them classic with cheddar and ranch or customize them with  jalapeños, buffalo sauce, or your favorite cheese.

For the best bite, serve them hot with a creamy dipping sauce on the side.

Crispy outside, cheesy inside, and loaded with ranch flavor—these little chicken bombs are made for sharing.

Air Fryer Sticky Honey Sriracha Chicken Bites

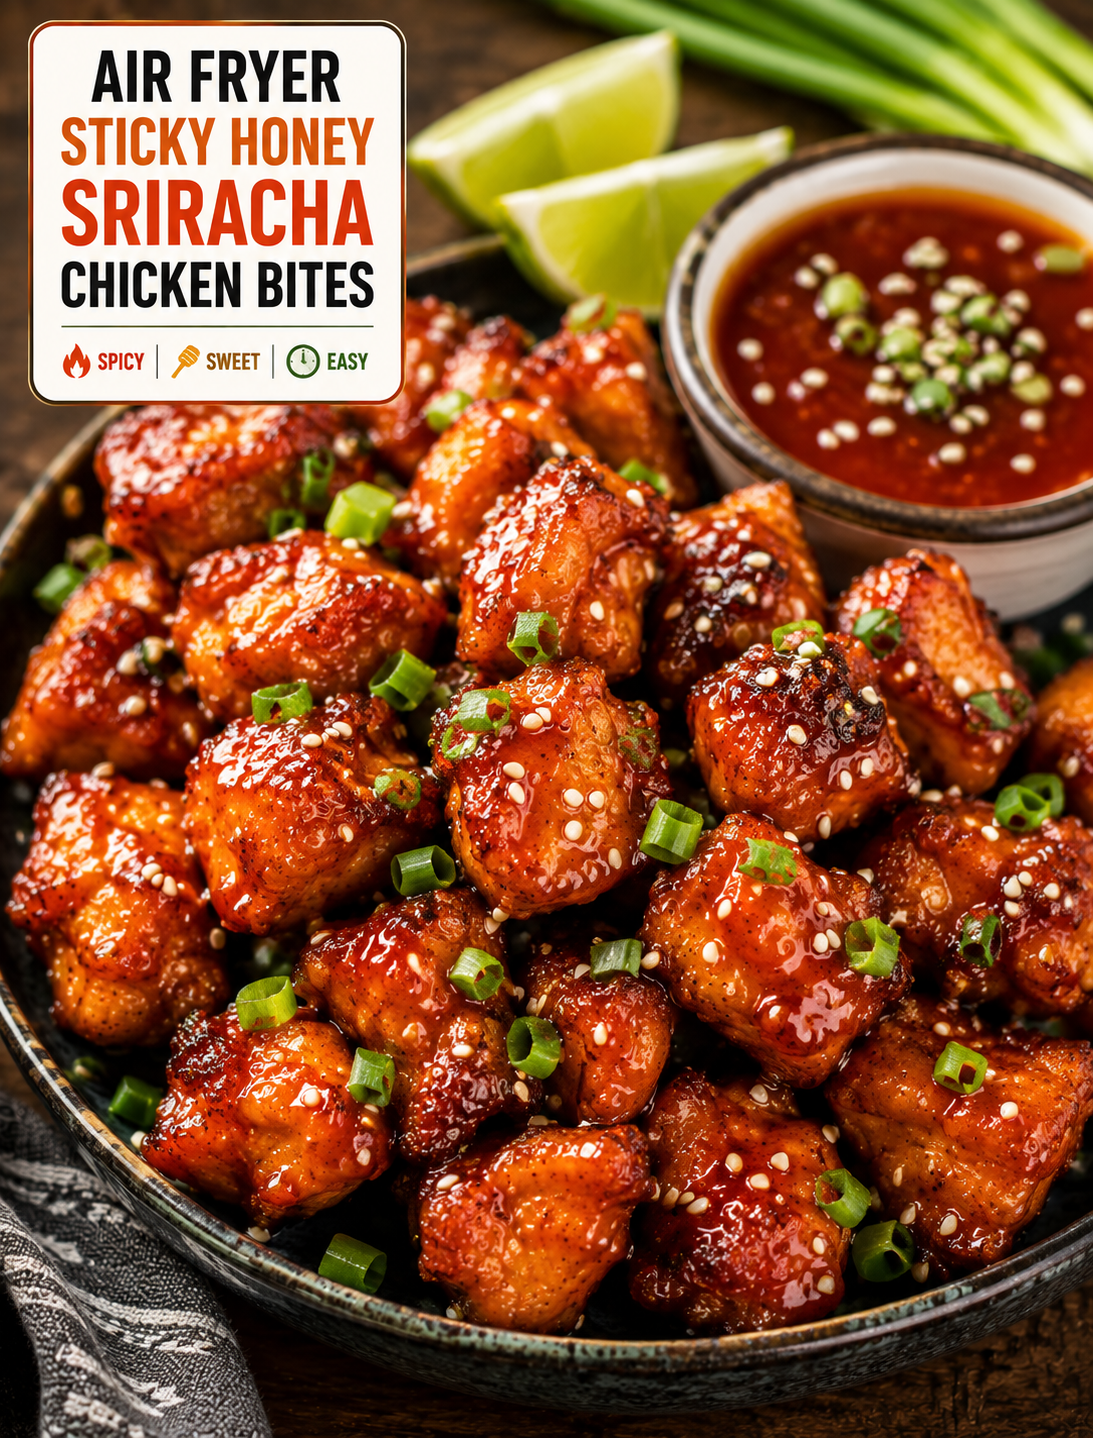
Crispy air fryer honey Sriracha chicken bites coated in glossy sauce with sesame seeds, green onions, lime, and dipping sauce

Air Fryer Sticky Honey Sriracha Chicken Bites

Sweet, spicy, sticky, and crispy, these Air Fryer Sticky Honey Sriracha Chicken Bites are an easy way to turn simple chicken into a crowd-pleasing meal or appetizer. Tender chicken pieces are seasoned, air fried until golden, and coated in a glossy honey Sriracha sauce.

The air fryer creates a crisp outside without deep frying. The homemade sauce brings together honey, Sriracha, garlic, and soy sauce for a balanced mix of sweetness, heat, and savory flavor.

These chicken bites are perfect for busy weeknight dinners, game-day parties, family snacks, or casual gatherings. Serve them with rice and vegetables for a complete meal, or place them on a platter with dipping sauces for an easy appetizer.

Why You’ll Love These Chicken Bites

This recipe is all about contrast. The chicken develops lightly crisp edges in the air fryer, while the sticky sauce adds a smooth, glossy coating.

Honey gives the sauce a natural sweetness that helps balance the heat from Sriracha. Garlic adds savory depth, while soy sauce provides a salty umami flavor.

Another reason to love this recipe is its flexibility. You can make the sauce milder for kids, increase the Sriracha for spice lovers, or add extra garlic and lime for a brighter finish.

The chicken bites also cook quickly because they are cut into small, even pieces. Smaller pieces create more seasoned surface area, which means every bite gets plenty of flavor.

Ingredients You’ll Need

 The Chicken

  • 1½ pounds boneless, skinless chicken breasts
  • Olive oil 1 tablespoon
  • Garlic powder 1 teaspoon
  • 1 teaspoon smoked paprika
  • Onion powder ½ teaspoon
  • Black pepper ½ teaspoon
  • Salt ½ teaspoon
  • 2 tablespoons cornstarch
  • Cooking spray

Honey Sriracha Sauce

  • ¼ cup honey
  • 2 tablespoons Sriracha sauce
  • Low-sodium soy sauce 1 tablespoon
  • Cloves 2 garlic , finely minced
  • 1 tablespoon rice vinegar
  • Sesame oil 1 teaspoon
  • Fresh lime juice 1 teaspoon

Serving

  • 1 tablespoon sesame seeds
  • 2 green onions, thinly sliced
  • Fresh cilantro, optional
  • Lime wedges
  • Cooked white or brown rice, optional
  • Steamed broccoli or vegetables, optional

Cornstarch helps create a lightly crisp coating around the chicken. If you prefer a softer exterior, you can reduce the amount or leave it out.

Use low-sodium soy sauce if you want more control over the salt level.

How to Make Air Fryer Sticky Honey Sriracha Chicken Bites

1. Cut the Chicken

Pat the chicken breasts dry with paper towels.

Cut them into bite-sized pieces that are approximately 1 to 1½ inches thick.

Try to keep the pieces similar in size so they cook evenly.

Avoid making some pieces very large and others very small because the smaller pieces may become dry before the larger pieces are fully cooked.

2. Season the Chicken

Place the chicken pieces in a large mixing bowl.

Add olive oil, garlic powder, smoked paprika, onion powder, black pepper, salt, and cornstarch.

Toss everything together until the chicken is evenly coated.

The cornstarch should create a thin layer around the chicken rather than a thick breading.

Let the seasoned chicken rest for about 5–10 minutes while you prepare the sauce.

3. Make the Sticky Sauce

Add honey, Sriracha, soy sauce, minced garlic, rice vinegar, sesame oil, and lime juice to a small saucepan.

Whisk the ingredients together over low heat.

Simmer gently for about 2–3 minutes, stirring often.

The sauce should become slightly thicker and glossy.

Do not cook it over high heat because honey can burn quickly.

Remove the sauce from the heat and set it aside.

4. Air Fry the Chicken

Preheat your air fryer to 400°F if your model requires preheating.

Lightly spray the basket with cooking spray.

Arrange the chicken pieces in a single layer. Leave some space between the pieces so hot air can circulate around them.

Air fry for approximately 10–14 minutes, turning the pieces halfway through.

The chicken should become golden on the outside and reach 165°F internally for food safety.

Cooking time can vary depending on the size of the chicken pieces and the air fryer model.

5. Coat the Chicken

Transfer the hot chicken bites to a large bowl.

Pour the warm honey Sriracha sauce over the chicken.

Toss gently until every piece is covered with the glossy sauce.

For an extra sticky finish, return the coated chicken to the air fryer for about 1–2 minutes at 375°F.

Watch closely during this step because the honey-based sauce can darken quickly.

6. Garnish and Serve

Transfer the finished chicken bites to a serving plate.

Sprinkle with sesame seeds and sliced green onions.

Add fresh cilantro if desired and serve with lime wedges.

The chicken is best served immediately while the outside is still slightly crisp and the sauce is warm and glossy.

How to Adjust the Spice Level

Sriracha provides most of the heat in this recipe, so the spice level is easy to control.

Mild version, reduce the Sriracha to 1 tablespoon and add an extra tablespoon of honey.

Medium heat, use the recommended 2 tablespoons.

A spicy version, increase the Sriracha or add a small pinch of cayenne pepper.

You can also serve extra Sriracha on the side so everyone can customize their own portion.

A little lime juice can help brighten the flavor when the sauce feels especially spicy.

How to Get Crispy Chicken in the Air Fryer

The secret to crisp chicken bites starts with dry chicken.

Pat the chicken thoroughly before seasoning because excess moisture can interfere with browning.

Cut the chicken into evenly sized pieces so they cook at the same rate.

Use a light coating of cornstarch rather than a thick layer.

Avoid overcrowding the air fryer basket because crowded chicken tends to steam instead of crisp.

Cook in batches if necessary.

Turn the pieces halfway through cooking to encourage even browning.

For the crispiest texture, add the sticky sauce after the chicken has already developed a golden exterior.

What Makes the Honey Sriracha Sauce So Good?

The sauce works because each ingredient has a specific role.

Honey adds sweetness and creates the sticky texture.

Sriracha provides heat and a mild garlic-chili flavor.

Soy sauce adds saltiness and savory depth.

Rice vinegar gives the sauce acidity, which prevents the sweetness from becoming too heavy.

Garlic adds a strong savory note.

Sesame oil contributes a toasted aroma, while lime juice provides a fresh finish.

The result is a sauce that is sweet, spicy, tangy, and savory at the same time.

What to Serve With Chicken Bites

These chicken bites can be served in several ways.

For a complete dinner, serve them over steamed white rice, brown rice, or jasmine rice.

Add roasted or steamed broccoli, green beans, carrots, or bell peppers for color and crunch.

For an appetizer, arrange the chicken on a large platter with toothpicks and dipping sauces.

A cool ranch-style dip can provide contrast against the spicy sauce.

For a fresh option, serve the chicken with a simple cabbage slaw made with shredded cabbage, carrots, lime juice, and a light dressing.

You can also turn the chicken into rice bowls by adding avocado, cucumber, shredded carrots, and green onions.

Easy Ways to Customize the Recipe

There are many ways to make this recipe your own.

Use boneless chicken thighs instead of chicken breasts for a richer, more tender bite.

Add grated ginger to the sauce for extra warmth.

Mix in a little orange zest for a sweet citrus note.

Add crushed red pepper if you want additional heat.

Sprinkle chopped peanuts or cashews over the finished chicken for crunch.

For a fresh finish, add cilantro, green onions, or extra lime juice.

You can also place the chicken inside lettuce cups for a lighter serving option.

Can You Make These Chicken Bites Ahead?

Yes. You can prepare the seasoned chicken and sauce separately ahead of time.

Keep the raw seasoned chicken refrigerated until you are ready to cook it.

The sauce can be prepared earlier and stored in a covered container in the refrigerator.

When ready to serve, air fry the chicken until it reaches 165°F, warm the sauce gently, and combine them just before eating.

For the best texture, avoid coating the chicken with sauce too far in advance because the moisture can soften the crispy exterior.

How to Store Leftovers

Place leftover chicken bites in an airtight container and refrigerate them promptly.

For the best texture, reheat them in the air fryer at 350°F for about 3–5 minutes, or until heated through.

You can add a small amount of fresh sauce after reheating to restore some of the sticky flavor.

Avoid repeatedly reheating the same portion because the chicken can become dry.

Discard leftovers that have an unusual smell, appearance, or texture.

Tips for the Best Results

Use chicken pieces that are similar in size for even cooking.

Pat the chicken dry before adding the seasoning.

Do not overcrowd the air fryer basket.

Turn the chicken halfway through cooking.

Cook the sauce gently so the honey does not burn.

Add the sauce after air frying for a crispier coating.

Check the chicken with a food thermometer and make sure it reaches 165°F.

Garnish immediately before serving for the freshest appearance.

Serve the chicken while warm for the best combination of crisp edges and sticky sauce.

The Bottom Line

Air Fryer Sticky Honey Sriracha Chicken Bites combine crispy chicken with a glossy sauce that delivers sweet, spicy, tangy, and savory flavor in every bite.

The air fryer keeps the cooking process simple while helping the chicken develop golden edges. The homemade honey Sriracha sauce takes only a few minutes to prepare and can easily be adjusted to suit different spice preferences.

Serve these chicken bites as an appetizer, game-day snack, lunch, or weeknight dinner. Pair them with rice and vegetables for a filling meal, or serve them with dipping sauces for a party-friendly platter.

For the best results, cook the chicken in a single layer, add the sauce after the chicken is crisp, and serve immediately.

Frequently Asked Questions

1. How long do chicken bites take in the air fryer?

Chicken bites generally take 10–14 minutes at 400°F, depending on their size and your air fryer model.

2. What temperature should chicken bites reach?

Chicken should reach an internal temperature of 165°F in the thickest piece for safe consumption.

3. Can I use chicken thighs instead of chicken breast?

Yes. Boneless, skinless chicken thighs work well and provide a slightly richer, more tender texture.

4. How do I make honey Sriracha chicken less spicy?

Reduce the Sriracha and increase the honey slightly to create a sweeter, milder sauce.

5. Why use cornstarch on the chicken?

A light coating of cornstarch helps create a drier surface that can become crisp in the air fryer.

6. Can I make these chicken bites ahead of time?

Yes. Prepare the chicken and sauce separately, then cook and combine them shortly before serving for the best texture.

7. What can I serve with honey Sriracha chicken?

Rice, broccoli, cucumber, cabbage slaw, roasted vegetables, avocado, and lime all pair well with the sweet-spicy chicken.

8. Can I reheat leftover chicken bites?

Yes. Reheat them in the air fryer at about 350°F for 3–5 minutes until hot, then add a little fresh sauce if desired.

Final Thoughts

Air Fryer Sticky Honey Sriracha Chicken Bites are an easy recipe for anyone who loves the combination of sweet heat and crispy chicken.

The air fryer gives the chicken golden edges, while the homemade honey Sriracha sauce adds a glossy coating packed with bold flavor. The recipe is also easy to adjust, so you can make it mild, spicy, extra garlicky, or citrusy.

Serve these bites with rice and vegetables for dinner, or put them on a platter for your next game-day gathering.

Crispy chicken, sticky sauce, and just the right kick—this is one air fryer recipe that deserves a spot in your regular rotation.