Air Fryer Honey Garlic Glazed Salmon Bites

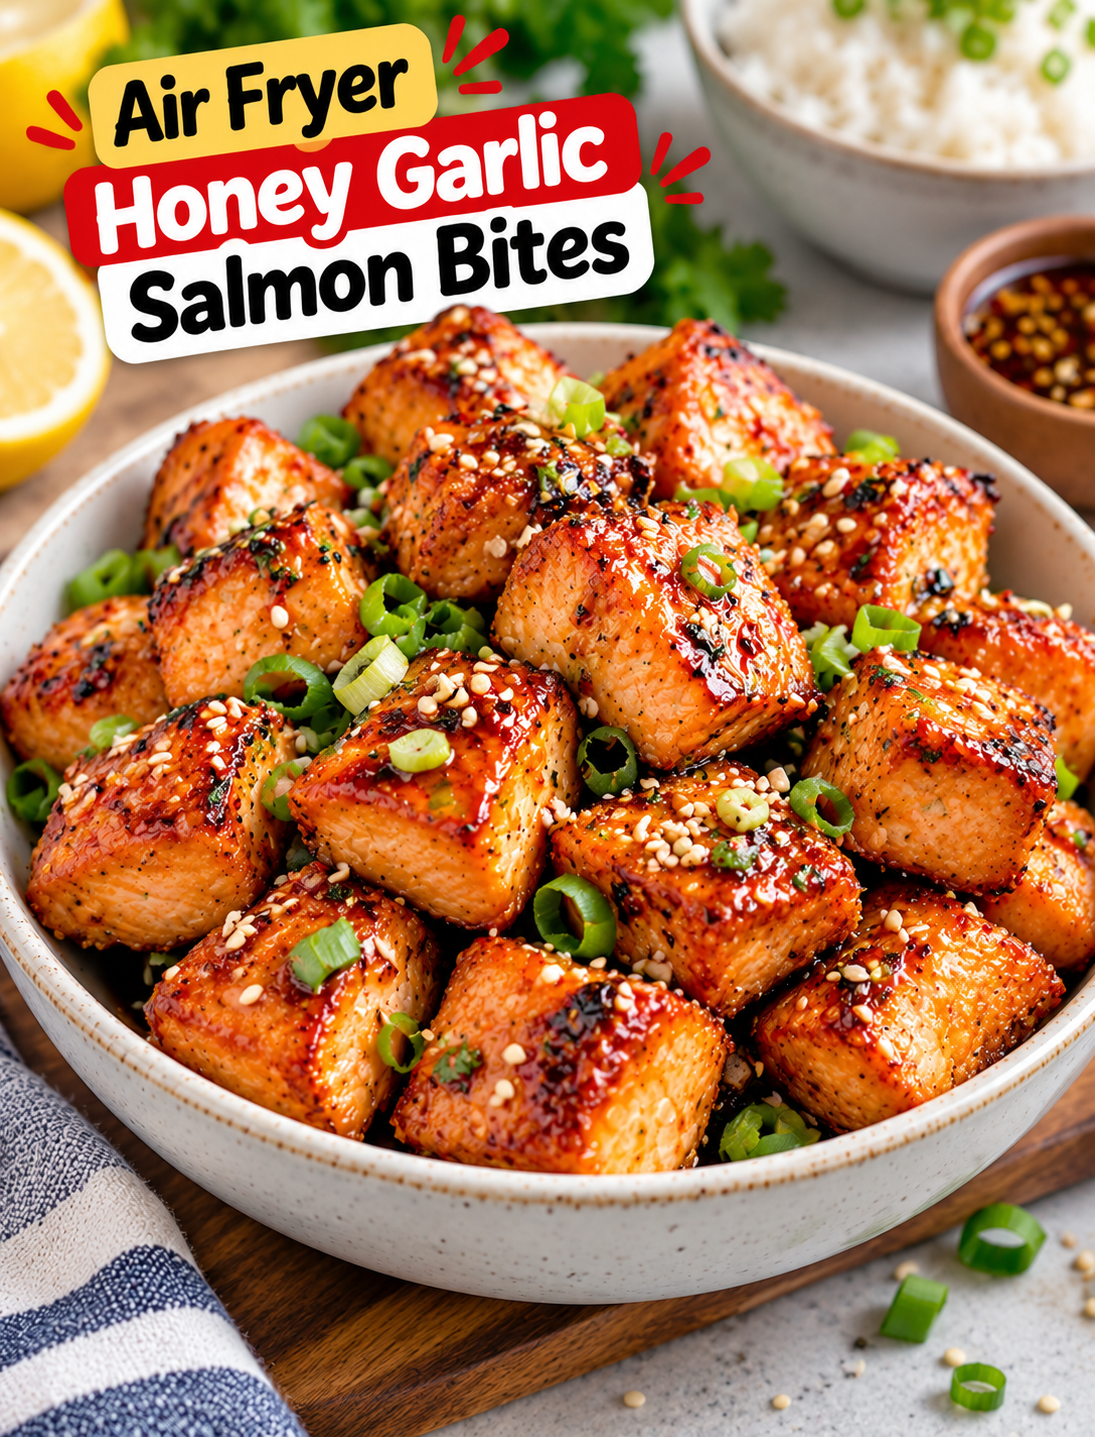
Air Fryer Honey Garlic Glazed Salmon Bites topped with green onions and sesame seeds

Air Fryer Honey Garlic Glazed Salmon Bites

These Air Fryer Honey Garlic Glazed Salmon Bites are a quick way to turn fresh salmon into tender, bite-sized pieces with golden edges and a sweet, savory garlic glaze. The air fryer cooks the salmon quickly while the honey garlic sauce adds rich flavor without requiring a long marinade.

This recipe is ideal for busy weeknights because the salmon cooks in small pieces rather than as one large fillet. The bite-sized pieces also make the dish easy to serve over rice, vegetables, noodles, or a fresh salad.

The glaze combines honey, garlic, soy sauce, lemon juice, and a little sesame oil. It creates a balanced mix of sweetness, saltiness, acidity, and savory flavor. For the best texture, the glaze is added near the end of cooking so the honey can caramelize without burning.

Why You’ll Love These Salmon Bites

This recipe brings together simple ingredients and fast air fryer cooking.

  • Quick cooking: Small salmon pieces cook much faster than a whole fillet.
  • Sweet and savory flavor: Honey balances the salty soy sauce and fresh garlic.
  • Tender texture: Salmon stays moist when it is not overcooked.
  • Golden edges: High air fryer heat helps brown the outside.
  • Easy cleanup: The air fryer keeps cooking contained to one basket.
  • Flexible serving: Pair the salmon with rice, vegetables, salad, or noodles.
  • Weeknight friendly: Most of the preparation can be done while the air fryer preheats.
  • Easy to customize: Adjust the garlic, spice, sweetness, or acidity to suit your taste.

The most important detail is to avoid adding the honey glaze too early. Honey contains natural sugars that can darken quickly at high temperatures, so brushing it on during the final minutes helps create a glossy coating without excessive browning.

Ingredients You’ll Need

For the Salmon

  • 1 1/4 pounds skinless salmon fillet
  • 1 tablespoon olive oil
  • 1/2 teaspoon garlic powder
  • 1/2 teaspoon paprika
  • 1/2 teaspoon salt
  • 1/4 teaspoon black pepper

Choose a firm salmon fillet and remove any remaining pin bones before cutting it into pieces. Skinless salmon makes this recipe easier to prepare, but skin-on salmon can also be used if the skin is removed before cutting.

For the Honey Garlic Glaze

  • 3 tablespoons honey
  • 2 tablespoons low-sodium soy sauce
  • 2 garlic cloves, finely minced
  • 1 tablespoon fresh lemon juice
  • 1 teaspoon sesame oil
  • 1/2 teaspoon grated fresh ginger, optional
  • 1/4 teaspoon red pepper flakes, optional

The honey provides sweetness and helps the glaze develop a shiny finish. Soy sauce adds savory depth, while lemon juice keeps the sauce from tasting too heavy.

Fresh garlic gives the glaze a stronger flavor than garlic powder. If you prefer a milder garlic taste, start with one clove and add more if needed.

For Garnishing

  • 1 tablespoon sliced green onions
  • 1 teaspoon sesame seeds
  • Lemon wedges
  • Fresh cilantro, optional
  • Red pepper flakes, optional

These toppings add freshness, color, and a little crunch to the finished dish.

How to Make Air Fryer Honey Garlic Glazed Salmon Bites

Step 1: Prepare the Salmon

Pat the salmon dry with paper towels.

Check the fillet for pin bones and remove any you find with clean kitchen tweezers.

Cut the salmon into approximately 1-inch bite-sized cubes. Try to keep the pieces similar in size so they cook at the same rate.

Do not cut the pieces too small because they can become dry before the glaze is ready.

Step 2: Season the Salmon

Place the salmon pieces in a medium bowl.

Add olive oil, garlic powder, paprika, salt, and black pepper.

Gently toss until the seasoning coats the salmon evenly.

Use a light hand when mixing because salmon can break apart easily.

Step 3: Preheat the Air Fryer

Preheat the air fryer to 400°F (200°C) for about 3 minutes if your model recommends preheating.

A hot cooking basket helps the salmon begin browning immediately.

Step 4: Arrange the Salmon

Place the seasoned salmon pieces in the air fryer basket in a single layer.

Leave a small amount of space between the pieces.

Avoid stacking the salmon because crowded pieces can release steam instead of developing browned edges.

If necessary, cook in two batches.

Step 5: Air Fry the Salmon

Cook the salmon at 400°F for about 5–7 minutes.

Shake the basket gently or turn the pieces around halfway through cooking.

The exact time depends on the size of the salmon pieces and the air fryer model.

Step 6: Prepare the Honey Garlic Glaze

While the salmon cooks, add honey, soy sauce, minced garlic, lemon juice, sesame oil, and optional ginger and red pepper flakes to a small bowl.

Whisk until the ingredients are evenly combined.

If the honey is thick, warm the mixture very briefly so it becomes easier to brush, but do not boil it.

Step 7: Add the Glaze

After the initial cooking period, carefully brush the honey garlic mixture over the salmon pieces.

Return the basket to the air fryer and cook for another 1–2 minutes.

Watch closely because the sugars in the honey can brown quickly.

The glaze should look glossy and lightly caramelized rather than dark or burnt.

Step 8: Check for Doneness

Check the thickest salmon piece with an instant-read thermometer.

For food safety, salmon should reach an internal temperature of 145°F.

If the salmon needs more time, continue cooking in short 30–60 second intervals and check again.

Avoid prolonged cooking because salmon can become dry when overcooked.

Step 9: Garnish and Serve

Transfer the glazed salmon bites to a serving plate.

Sprinkle with green onions and sesame seeds.

Add a squeeze of fresh lemon juice for a bright finish.

Serve immediately while the glaze is warm and glossy.

Tips for Perfect Honey Garlic Salmon Bites

A few simple techniques can make the finished salmon more flavorful and tender.

Dry the Salmon First

Patting the salmon dry removes excess moisture from the surface. This helps the seasoning stick and encourages better browning.

Cut the Pieces Evenly

Similar-sized pieces cook more evenly. If some pieces are much larger than others, the smaller ones may overcook before the larger pieces are done.

Don’t Overcrowd the Basket

Air needs to circulate around each piece. A crowded basket can create a steamed texture instead of browned edges.

Add Honey Near the End

The glaze contains sugar, so applying it during the final minutes reduces the chance of burning.

Use Fresh Garlic

Freshly minced garlic gives the glaze a stronger and more aromatic flavor than garlic powder.

Don’t Overcook the Salmon

Salmon continues to cook slightly after leaving the air fryer. Remove it once it reaches the safe internal temperature rather than cooking it far beyond that point.

What to Serve With Honey Garlic Salmon Bites

These glazed salmon pieces can become a complete meal with a few simple sides.

Serve them over steamed jasmine rice or brown rice to soak up the extra glaze.

For a lighter option, pair the salmon with roasted broccoli, asparagus, green beans, or a crisp cucumber salad.

You can also build a simple salmon bowl with:

  • Steamed rice
  • Avocado
  • Cucumber
  • Edamame
  • Shredded carrots
  • Green onions
  • Sesame seeds
  • Extra honey garlic sauce

For a lower-carb meal, serve the salmon over cauliflower rice with roasted vegetables.

Easy Flavor Variations

The basic honey garlic glaze is easy to change depending on what you have in your kitchen.

Spicy Honey Garlic Salmon

Add extra red pepper flakes or a small amount of sriracha to the glaze for a sweet and spicy finish.

Lemon Herb Salmon

Increase the lemon juice slightly and add fresh parsley or dill after cooking.

Teriyaki-Style Salmon Bites

Replace part of the honey with a small amount of brown sugar and add grated ginger to the sauce.

Garlic Butter Salmon

Replace the olive oil seasoning with melted butter and finish the cooked salmon with a small spoonful of garlic butter.

Sesame Ginger Salmon

Add extra grated ginger and sesame oil, then finish with toasted sesame seeds and green onions.

How to Store Leftover Salmon

Allow leftover salmon to cool before placing it in an airtight container.

Refrigerate cooked salmon promptly and use it within 3–4 days.

For the best texture, store the salmon separately from rice or vegetables when possible.

Avoid leaving cooked salmon at room temperature for extended periods.

How to Reheat Salmon Bites

The air fryer works well for reheating these salmon pieces.

Preheat the air fryer to 325°F and heat the salmon for about 2–3 minutes.

Check the pieces early because small salmon bites can dry out quickly during reheating.

You can brush a small amount of leftover glaze over the salmon before reheating, but avoid adding too much because the honey can darken quickly.

Frequently Asked Questions

How long do salmon bites take in the air fryer?

Small salmon pieces generally take about 5–7 minutes at 400°F, followed by another 1–2 minutes with the glaze.

What temperature should salmon reach?

For food safety, salmon should reach an internal temperature of 145°F at the thickest part.

Can I use frozen salmon?

Yes, but thaw the salmon completely and pat it dry before cutting and seasoning for the most even cooking.

Why did my honey glaze burn?

Honey contains sugar that can brown quickly, so apply the glaze during the final 1–2 minutes rather than at the beginning.

Can I use skin-on salmon?

Yes, but remove the skin before cutting the fillet into bite-sized pieces for an easier glazed preparation.

Can I make these salmon bites spicy?

Yes, add red pepper flakes, sriracha, or a small amount of cayenne pepper to the honey garlic glaze.

Can I use chicken instead of salmon?

Yes, but chicken requires a different cooking time and must reach 165°F internally before serving.

What is the best salmon for this recipe?

Fresh or properly thawed skinless salmon fillets with firm flesh work well because they hold their shape when cut into bite-sized pieces.

Final Thoughts

These Air Fryer Honey Garlic Glazed Salmon Bites are a simple way to make a flavorful seafood dinner without spending a long time in the kitchen.

The combination of tender salmon, fresh garlic, honey, soy sauce, lemon, and sesame oil creates a balanced sweet and savory glaze. Air frying keeps the cooking process quick while giving the salmon lightly browned edges.

For the best results, cut the salmon into even pieces, avoid overcrowding the basket, and add the glaze near the end of cooking. Always check the internal temperature before serving.

Serve the salmon over rice, add it to a colorful grain bowl, or pair it with roasted vegetables for an easy weeknight meal. Once you have the basic recipe down, you can adjust the sweetness, spice, garlic, and citrus to create a version that fits your taste.
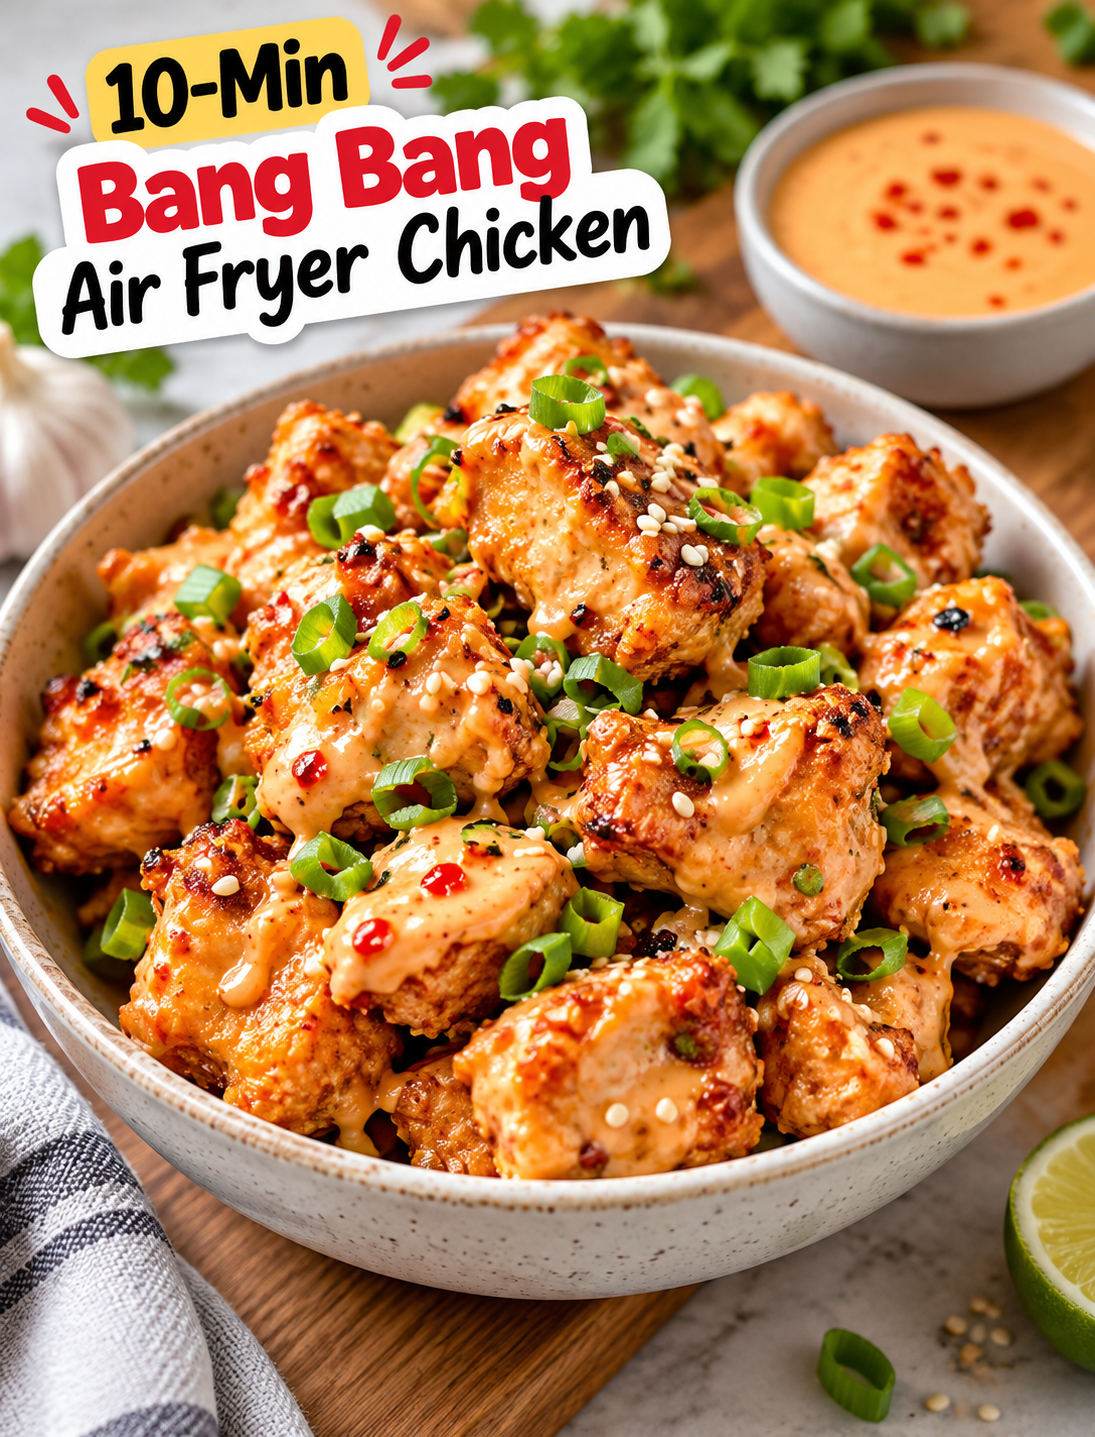
10-Min Bang Bang Air Fryer Chicken

10-Min Bang Bang Air Fryer Chicken with crispy chicken pieces and creamy spicy sauce

10-Min Bang Bang Air Fryer Chicken

Need a fast dinner that tastes like your favorite takeout but takes less time to make? This 10-Min Bang Bang Air Fryer Chicken is crispy, juicy, creamy, sweet, and slightly spicy all at once.

Small pieces of chicken are coated with a light seasoned crust, cooked in the air fryer until golden, and tossed in a creamy Bang Bang sauce. The result is a quick meal that works for busy weeknights, game-day snacks, or an easy lunch.

The air fryer gives the chicken a crisp outside without deep frying it in a large amount of oil. The sauce takes less than a minute to mix, so the whole recipe stays simple from start to finish.

Why You’ll Love This Bang Bang Chicken

This recipe is designed for busy cooks who want bold flavor without a long ingredient list or complicated cooking process.

  • Fast cooking: Small chicken pieces can cook in about 8–10 minutes at high heat.
  • Crispy texture: The air fryer creates a golden coating while keeping the chicken tender.
  • Creamy sauce: The Bang Bang sauce combines mayonnaise, sweet chili sauce, and sriracha for a balanced flavor.
  • Easy ingredients: Most of the ingredients are common pantry and refrigerator staples.
  • Flexible serving options: Serve it over rice, inside wraps, with salad, or as an appetizer.
  • Less mess: Air frying avoids the splatter and cleanup that comes with deep frying.
  • Easy to customize: You can make the sauce milder or spicier based on your preference.

The key to quick cooking is cutting the chicken into small, even pieces. Similar-sized pieces cook at roughly the same rate and are easier to check for doneness.

Ingredients You’ll Need

For the Chicken

  • 1 pound boneless, skinless chicken breasts, cut into 1-inch pieces
  • 1 tablespoon olive oil
  • 1/2 cup cornstarch
  • 1/2 teaspoon garlic powder
  • 1/2 teaspoon paprika
  • 1/2 teaspoon onion powder
  • 1/2 teaspoon salt
  • 1/4 teaspoon black pepper

Cornstarch helps create a light, crisp coating around the chicken. Chicken breast works well because it cooks quickly when cut into small pieces, but boneless chicken thighs can also be used.

For the Bang Bang Sauce

  • 1/3 cup mayonnaise
  • 2 tablespoons sweet chili sauce
  • 1 tablespoon sriracha
  • 1 teaspoon honey
  • 1 teaspoon fresh lime juice

The mayonnaise creates the creamy base, while sweet chili sauce adds sweetness and a mild chili flavor. Sriracha brings heat, and lime juice adds acidity to balance the richness.

For a milder sauce, reduce the sriracha to 1 teaspoon. For more heat, add another 1/2 teaspoon at a time until it reaches your preferred level.

For Garnishing

  • 1 tablespoon sliced green onions
  • 1 teaspoon sesame seeds
  • Chopped cilantro, optional
  • Lime wedges, optional

These toppings add fresh flavor, color, and a little crunch without making the recipe more complicated.

How to Make 10-Min Bang Bang Air Fryer Chicken

Step 1: Cut the Chicken

Pat the chicken breasts dry with paper towels.

Cut them into approximately 1-inch bite-sized pieces. Try to keep the pieces similar in size so they cook evenly.

Avoid cutting the chicken into very large chunks because the outside may brown before the center reaches a safe temperature.

Step 2: Season the Chicken

Add the chicken pieces to a bowl.

Drizzle with olive oil and toss to coat lightly. Add cornstarch, garlic powder, paprika, onion powder, salt, and black pepper.

Toss until each piece has a thin, even coating.

The cornstarch should cling to the chicken without forming a thick paste. If the pieces look heavily coated, gently shake off any excess.

Step 3: Preheat the Air Fryer

Preheat your air fryer to 400°F (200°C) for about 3 minutes if your model recommends preheating.

A hot basket helps the coating begin crisping as soon as the chicken goes in.

Step 4: Arrange the Chicken

Place the chicken pieces in the air fryer basket in a single layer.

Leave a little space between the pieces so hot air can circulate around them.

Do not pile the chicken on top of itself. If your basket is small, cook in two batches.

Step 5: Air Fry the Chicken

Cook at 400°F for about 8–10 minutes, turning or shaking the basket halfway through.

The exact time depends on the size of the chicken pieces and the performance of your air fryer.

Check the thickest piece with an instant-read thermometer. Chicken should reach a minimum internal temperature of 165°F before serving.

If the chicken needs more time, continue cooking for 1–2 minutes and check again.

Step 6: Make the Bang Bang Sauce

While the chicken cooks, add mayonnaise, sweet chili sauce, sriracha, honey, and lime juice to a small bowl.

Whisk until the sauce is smooth and evenly combined.

Taste the sauce and adjust the heat or sweetness if needed.

Step 7: Coat the Chicken

Transfer the hot cooked chicken to a clean bowl.

Pour the Bang Bang sauce over the chicken and gently toss until the pieces are evenly coated.

For extra crispiness, drizzle the sauce over the chicken instead of fully coating every piece. This keeps more of the crunchy exterior exposed.

Step 8: Garnish and Serve

Sprinkle the chicken with sliced green onions and sesame seeds.

Add fresh cilantro or a squeeze of lime if desired.

Serve immediately while the chicken is warm and crisp.

Tips for Extra Crispy Air Fryer Chicken

A few small changes can make a big difference in the texture.

  • Dry the chicken first: Excess moisture can prevent the coating from becoming crisp.
  • Use cornstarch: It creates a lighter, crispier coating than a thick flour crust.
  • Don’t overcrowd the basket: Crowding traps moisture and can make the chicken less crisp.
  • Turn halfway through: This helps the coating brown more evenly.
  • Serve soon after saucing: The sauce naturally softens the crispy coating over time.
  • Cook in batches when needed: Two small batches can produce better results than one overcrowded batch.
  • Use a thermometer: Color alone cannot confirm that chicken is safely cooked.

If you want maximum crunch, serve the sauce on the side and dip each piece just before eating.

How to Make Bang Bang Sauce Less Spicy

The classic sauce has a sweet, creamy, and spicy flavor, but you can easily adjust the heat.

Start with only 1 teaspoon of sriracha and increase it gradually. Adding more sweet chili sauce can also soften the heat while keeping the sauce flavorful.

For a very mild version, leave out the sriracha and use sweet chili sauce as the main source of chili flavor.

For extra heat, add more sriracha or a small pinch of cayenne pepper.

What to Serve With Bang Bang Chicken

This chicken works as both a main dish and an appetizer.

For a complete dinner, serve it over steamed white rice, brown rice, or jasmine rice. Add broccoli, snap peas, cucumber, or a simple green salad for a fresh side.

You can also turn the chicken into:

  • Rice bowls
  • Lettuce wraps
  • Chicken tacos
  • Tortilla wraps
  • Salad bowls
  • Sandwiches
  • Game-day appetizers

For a restaurant-style presentation, add sliced green onions, sesame seeds, lime wedges, and a small bowl of extra Bang Bang sauce.

How to Store Leftovers

Allow leftover chicken to cool before transferring it to an airtight container.

Refrigerate it promptly and use refrigerated cooked chicken within 3–4 days.

For the best texture, store the chicken and sauce separately when possible. This prevents the coating from becoming soft while sitting in the refrigerator.

How to Reheat Bang Bang Chicken

The air fryer is the easiest way to bring back some of the crisp texture.

Preheat the air fryer to 350°F and heat the chicken for several minutes until warmed through.

Avoid adding extra sauce before reheating because it can make the coating softer.

Once the chicken is hot, add fresh Bang Bang sauce, green onions, and sesame seeds.

Can You Use Chicken Thighs?

Yes. Boneless, skinless chicken thighs are an excellent alternative because they stay moist and have a richer flavor.

Cut them into the same small pieces used for chicken breast and cook until the thickest pieces reach 165°F internally.

Thigh meat can vary in size and thickness, so use a thermometer rather than relying only on the recipe’s suggested cooking time.

Easy Variations

Honey Bang Bang Chicken

Add another teaspoon of honey to the sauce for a sweeter finish.

Extra-Spicy Bang Bang Chicken

Increase the sriracha and add a small pinch of cayenne pepper to the chicken seasoning.

Garlic Bang Bang Chicken

Add 1/2 teaspoon of garlic powder to the sauce for a stronger savory flavor.

Lime Bang Bang Chicken

Increase the fresh lime juice slightly and finish the dish with fresh lime zest.

Sesame Bang Bang Chicken

Add toasted sesame seeds and sliced green onions just before serving for extra texture.

Frequently Asked Questions

Can I make Bang Bang chicken without mayonnaise?

Yes, you can use plain Greek yogurt for a lighter creamy sauce, although the flavor and texture will be slightly different.

How long does Bang Bang chicken take in the air fryer?

Small chicken pieces usually take about 8–10 minutes at 400°F, but always verify that the center reaches 165°F.

Why is my air fryer chicken not crispy?

Overcrowding, excess moisture, or too much sauce can reduce crispiness; use a single layer and sauce the chicken just before serving.

Can I use frozen chicken for this recipe?

Fresh or fully thawed chicken works best because frozen pieces can release excess moisture and cook unevenly.

Can I make the Bang Bang sauce ahead?

Yes, prepare the sauce up to 2–3 days ahead and keep it refrigerated in an airtight container.

How can I make the sauce less spicy?

Reduce or omit the sriracha and adjust the sweet chili sauce to taste.

Can I use chicken thighs instead of chicken breast?

Yes, boneless skinless chicken thighs work well and should also reach 165°F internally.

Can I make this recipe gluten-free?

Yes, use certified gluten-free ingredients and check the labels of your sweet chili sauce, seasonings, and other packaged ingredients.

Final Thoughts

This 10-Min Bang Bang Air Fryer Chicken is a simple way to turn everyday chicken into a flavorful meal with a crisp coating and creamy sweet-spicy sauce.

The most important steps are cutting the chicken evenly, keeping the air fryer basket uncrowded, and checking the internal temperature before serving. Making the sauce while the chicken cooks also keeps the total preparation quick.

Serve it over rice for an easy dinner, place it in lettuce wraps for a lighter meal, or serve the crispy pieces with extra sauce as a party appetizer.

Once you have the basic method down, adjust the sauce to your taste. Make it sweeter, spicier, tangier, or milder and create your own version of this quick air fryer favorite.

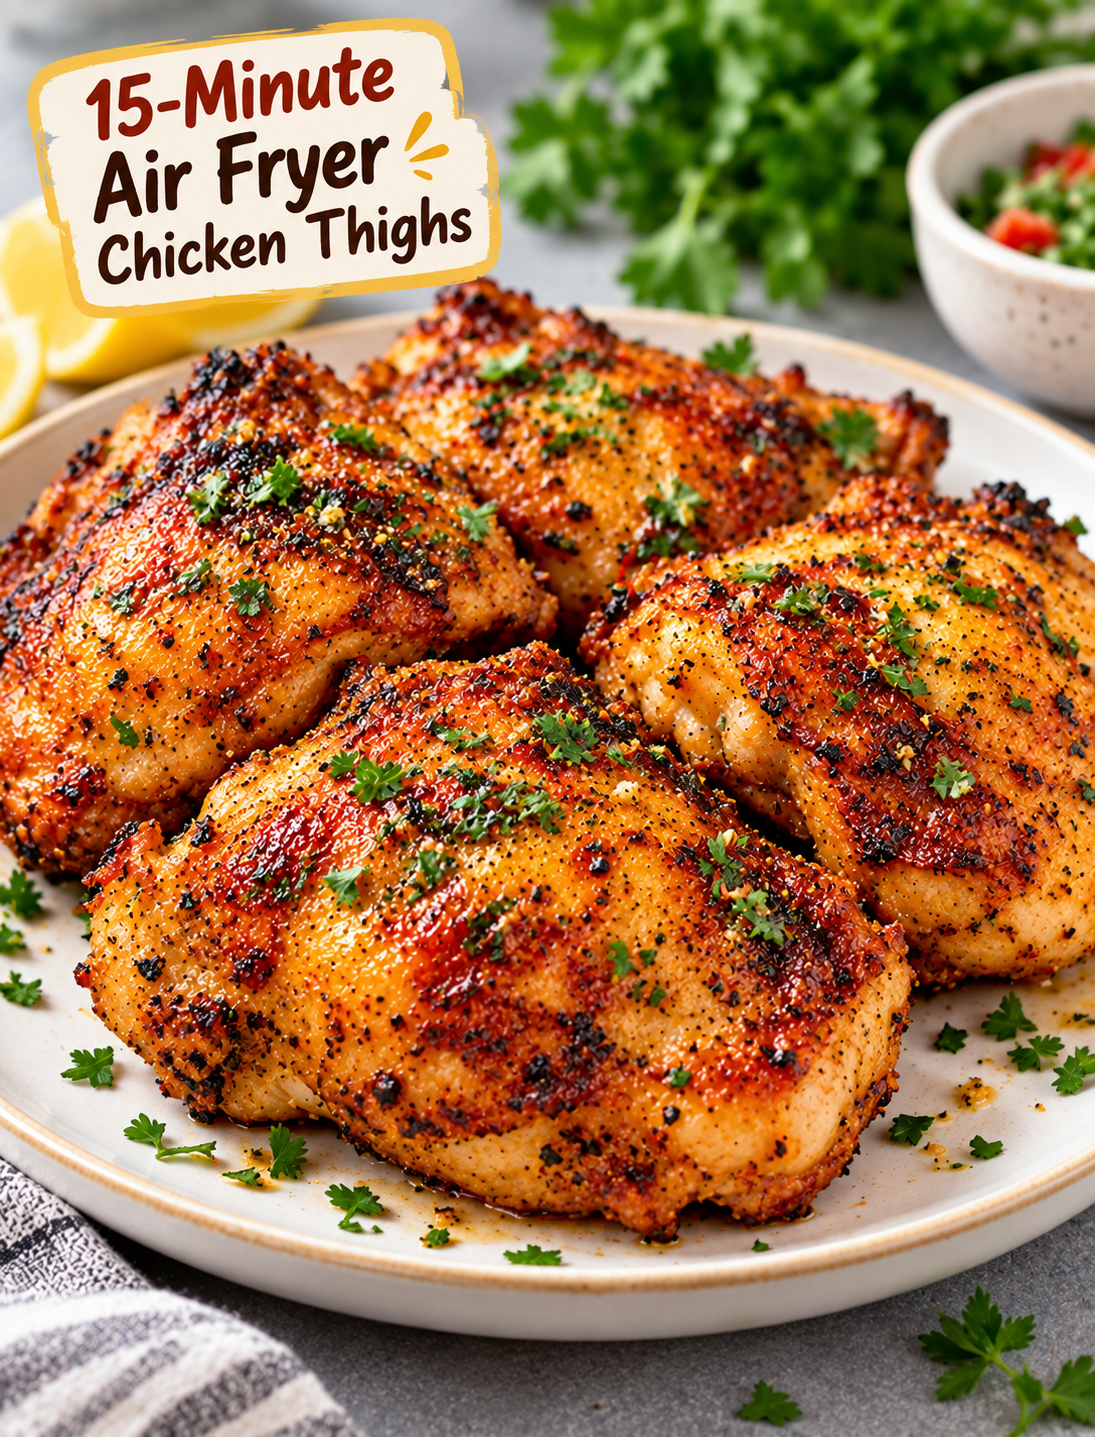
15-Minute Air Fryer Chicken Thighs

15-Minute Air Fryer Chicken Thighs with crispy seasoned exterior

15-Minute Air Fryer Chicken Thighs

These 15-Minute Air Fryer Chicken Thighs are a quick way to put juicy, flavorful chicken on the table without turning on the oven. The outside develops a seasoned, golden crust while the hot circulating air keeps the meat tender inside.

This recipe works well for busy weeknights because the ingredient list is short and the cooking process is simple. Boneless, skinless chicken thighs cook especially fast in an air fryer, making them a practical choice when dinner needs to be ready in minutes.

The seasoning uses common pantry ingredients, including paprika, garlic powder, onion powder, salt, and black pepper. You can serve the cooked chicken with rice, roasted vegetables, potatoes, salad, or your favorite dipping sauce.

Why You’ll Love These 15-Minute Air Fryer Chicken Thighs

There are plenty of reasons to keep this easy chicken thigh recipe in your weekly dinner rotation.

  • Fast cooking: Boneless chicken thighs can cook in about 15 minutes, depending on their thickness and your air fryer.
  • Simple ingredients: The recipe uses chicken, oil, and everyday seasonings.
  • Juicy texture: Chicken thighs contain more fat than chicken breasts, which helps them stay moist during high-heat cooking.
  • Minimal cleanup: You only need a bowl, tongs, and your air fryer basket.
  • Easy to customize: Change the spice blend to make the chicken smoky, spicy, herby, or mild.
  • Meal-prep friendly: Leftovers work well in salads, wraps, grain bowls, and sandwiches.
  • No oven required: The air fryer is useful when you want a quick meal without heating the whole kitchen.

The key is to avoid overcrowding the basket. Leaving space between each piece allows hot air to move around the chicken and promotes more even browning.

Ingredients for Air Fryer Chicken Thighs

You only need a few ingredients to prepare these juicy air fryer chicken thighs.

  • 1 1/2 pounds boneless, skinless chicken thighs: Choose pieces that are similar in size so they finish cooking at about the same time.
  • 1 tablespoon olive oil: A light coating helps the seasoning stick and encourages browning.
  • 1 teaspoon paprika: Adds mild flavor and gives the chicken a deeper golden color.
  • 1 teaspoon garlic powder: Provides savory garlic flavor without fresh garlic burning at high heat.
  • 1/2 teaspoon onion powder: Adds another layer of savory flavor.
  • 1/2 teaspoon dried oregano: Gives the chicken a light herbal note.
  • 3/4 teaspoon kosher salt: Seasons the chicken throughout.
  • 1/4 teaspoon ground black pepper: Adds mild heat and balances the other seasonings.
  • 1/4 teaspoon smoked paprika, optional: Use this if you prefer a slightly smoky flavor.

Best Chicken Thighs to Use

Boneless, skinless thighs are the best choice when the goal is a fast cooking time. Their smaller size and lack of bone allow heat to reach the center more quickly.

Try to buy thighs with a similar thickness. One very thick piece may need several extra minutes even when the smaller pieces are already cooked.

Bone-in, skin-on chicken thighs can also be prepared in an air fryer, but they usually require a longer cooking time. They should not be treated as a direct 15-minute substitute for boneless thighs.

How to Make 15-Minute Air Fryer Chicken Thighs

The exact cooking time can vary by air fryer model and the thickness of the meat. Always use the internal temperature rather than cooking time alone to decide when chicken is ready.

Step 1: Preheat the Air Fryer

Preheat the air fryer to 400°F for about 3 minutes.

Preheating gives the chicken immediate contact with high heat and can help the surface start browning sooner. If your air fryer does not require preheating, follow the manufacturer’s directions.

Step 2: Prepare the Chicken

Remove the chicken thighs from the package and pat them dry with paper towels.

Removing excess surface moisture helps the oil and dry seasonings coat the chicken more evenly. It also reduces steaming on the surface during cooking.

Trim away any large pieces of excess fat if needed.

Step 3: Season the Chicken Thighs

Place the chicken in a medium bowl.

Add olive oil, paprika, garlic powder, onion powder, oregano, salt, black pepper, and smoked paprika if using.

Toss until every piece has a thin, even coating of oil and seasoning. Check the folded areas of each thigh because seasoning can easily miss those spots.

Step 4: Arrange Chicken in the Air Fryer

Place the seasoned chicken thighs in the preheated basket in a single layer.

Leave a small amount of space between the pieces. Do not stack the chicken or pack the basket tightly.

If your air fryer is small, cook the chicken in two batches rather than overcrowding it.

Step 5: Air Fry for 15 Minutes

Air fry the chicken at 400°F for about 15 minutes.

Flip each thigh after about 7–8 minutes so both sides have a chance to brown.

Very small or thin thighs may finish sooner, while thick pieces may need a few additional minutes.

Step 6: Check the Internal Temperature

Insert an instant-read meat thermometer into the thickest part of the largest chicken thigh.

Chicken is considered safely cooked when it reaches a minimum internal temperature of 165°F, according to USDA food-safety guidance.

If the chicken has not reached 165°F, return it to the air fryer and cook for another 1–2 minutes before checking again.

Step 7: Rest and Serve

Transfer the cooked thighs to a clean plate and let them rest for about 3–5 minutes.

A short resting period allows the hot juices inside the meat to settle before slicing.

Slice the chicken or serve each thigh whole with your preferred side dishes.

Tips for Juicy and Crispy Air Fryer Chicken Thighs

Small preparation details can make a noticeable difference in the finished chicken.

Pat the Chicken Dry

Moisture on the surface can create steam. Patting the thighs dry before seasoning helps them brown more effectively.

Don’t Overcrowd the Basket

Hot air needs room to circulate around each piece. A tightly packed basket can lead to uneven cooking and less browning.

Use Similar-Sized Chicken Thighs

Pieces with similar thickness cook more evenly. If one thigh is much thicker than the others, check its internal temperature separately.

Flip Halfway Through Cooking

Turning the chicken helps expose both sides to the strongest circulating heat and promotes more even browning.

Use a Meat Thermometer

Air fryers vary in size, wattage, and airflow. A thermometer is more reliable than judging doneness by color or time alone.

Avoid Too Much Oil

Chicken thighs naturally contain some fat. A small amount of oil is enough to help the spices stick and promote browning.

Adjust the Time When Needed

Fifteen minutes is a useful target for average boneless thighs, not a guarantee for every piece. Thickness, starting temperature, and air fryer performance can change the total cooking time.

What to Serve With Air Fryer Chicken Thighs

These seasoned chicken thighs work with many familiar side dishes, so you can build a different meal each time.

For a simple weeknight dinner, serve the chicken with roasted broccoli, green beans, asparagus, or a mixed green salad.

For a more filling meal, pair it with mashed potatoes, air fryer potato wedges, brown rice, white rice, quinoa, or pasta.

You can also slice leftover chicken and use it in:

  • Chicken wraps
  • Caesar salads
  • Grain bowls
  • Tacos
  • Sandwiches
  • Meal-prep lunch boxes

For dipping, ranch dressing, garlic sauce, honey mustard, barbecue sauce, and buffalo sauce all pair well with the basic seasoning blend.

How to Store and Reheat Leftovers

Proper storage keeps leftover chicken useful for quick meals later in the week.

Allow the chicken to cool, then place it in an airtight container. Refrigerate cooked chicken within two hours of cooking and use it within 3–4 days.

For longer storage, place cooled thighs in a freezer-safe container or freezer bag. Remove as much excess air as possible before freezing.

Reheating in the Air Fryer

Preheat the air fryer to about 350°F.

Place the leftover chicken in a single layer and heat for a few minutes until it is hot throughout. The exact time depends on the size and temperature of the pieces.

Avoid reheating longer than necessary because already-cooked chicken can become dry.

Easy Seasoning Variations

The basic seasoning blend is flexible enough to match several different meals.

Spicy Chicken Thighs

Add cayenne pepper or crushed red pepper to the seasoning mixture. Start with a small amount and increase it based on your preferred heat level.

Garlic Parmesan Chicken

Add extra garlic powder before cooking, then sprinkle freshly grated Parmesan over the hot chicken after it leaves the air fryer.

BBQ Chicken Thighs

Season the chicken lightly with salt, pepper, garlic powder, and smoked paprika. Brush on a thin layer of barbecue sauce during the final few minutes so the sauce does not burn.

Lemon Herb Chicken

Use oregano, garlic powder, black pepper, and a little lemon zest. Add fresh lemon juice after cooking for a brighter flavor.

Frequently Asked Questions About 15-Minute Air Fryer Chicken Thighs

How long do chicken thighs take in the air fryer?

Boneless, skinless chicken thighs often take about 15 minutes at 400°F, but thick pieces may require additional cooking time.

What temperature should chicken thighs reach?

Chicken should reach a minimum internal temperature of 165°F at the thickest part before serving.

Do I need to flip chicken thighs in the air fryer?

Flipping halfway through cooking helps both sides brown and cook more evenly.

Can I cook frozen chicken thighs in the air fryer?

Yes, but frozen thighs require more time than this 15-minute method and should still reach 165°F internally before serving.

Can I use bone-in chicken thighs?

Yes, but bone-in thighs generally take longer to cook, so adjust the cooking time and verify doneness with a thermometer.

Why are my air fryer chicken thighs not crispy?

Excess moisture or an overcrowded basket can reduce browning. Pat the chicken dry and leave space around each piece.

Do I need to preheat the air fryer?

Preheating can help the chicken begin browning quickly, although requirements vary by air fryer model.

How do I keep chicken thighs juicy in the air fryer?

Avoid overcooking them, check the internal temperature with a thermometer, and let the cooked thighs rest for a few minutes before slicing.

Final Thoughts

These 15-Minute Air Fryer Chicken Thighs make a practical dinner when you need something fast, flavorful, and easy to pair with everyday sides. Boneless chicken thighs cook quickly, while a simple blend of paprika, garlic, onion, oregano, salt, and pepper provides plenty of flavor without a complicated marinade.

For the best results, pat the chicken dry, arrange it in one layer, flip it halfway through cooking, and check the thickest piece with an instant-read thermometer. The chicken should reach at least 165°F before serving.

Once you learn the basic method, you can change the seasoning to fit the rest of your meal. Serve the thighs with vegetables and rice for dinner, or slice leftovers for wraps, salads, sandwiches, and meal-prep bowls.

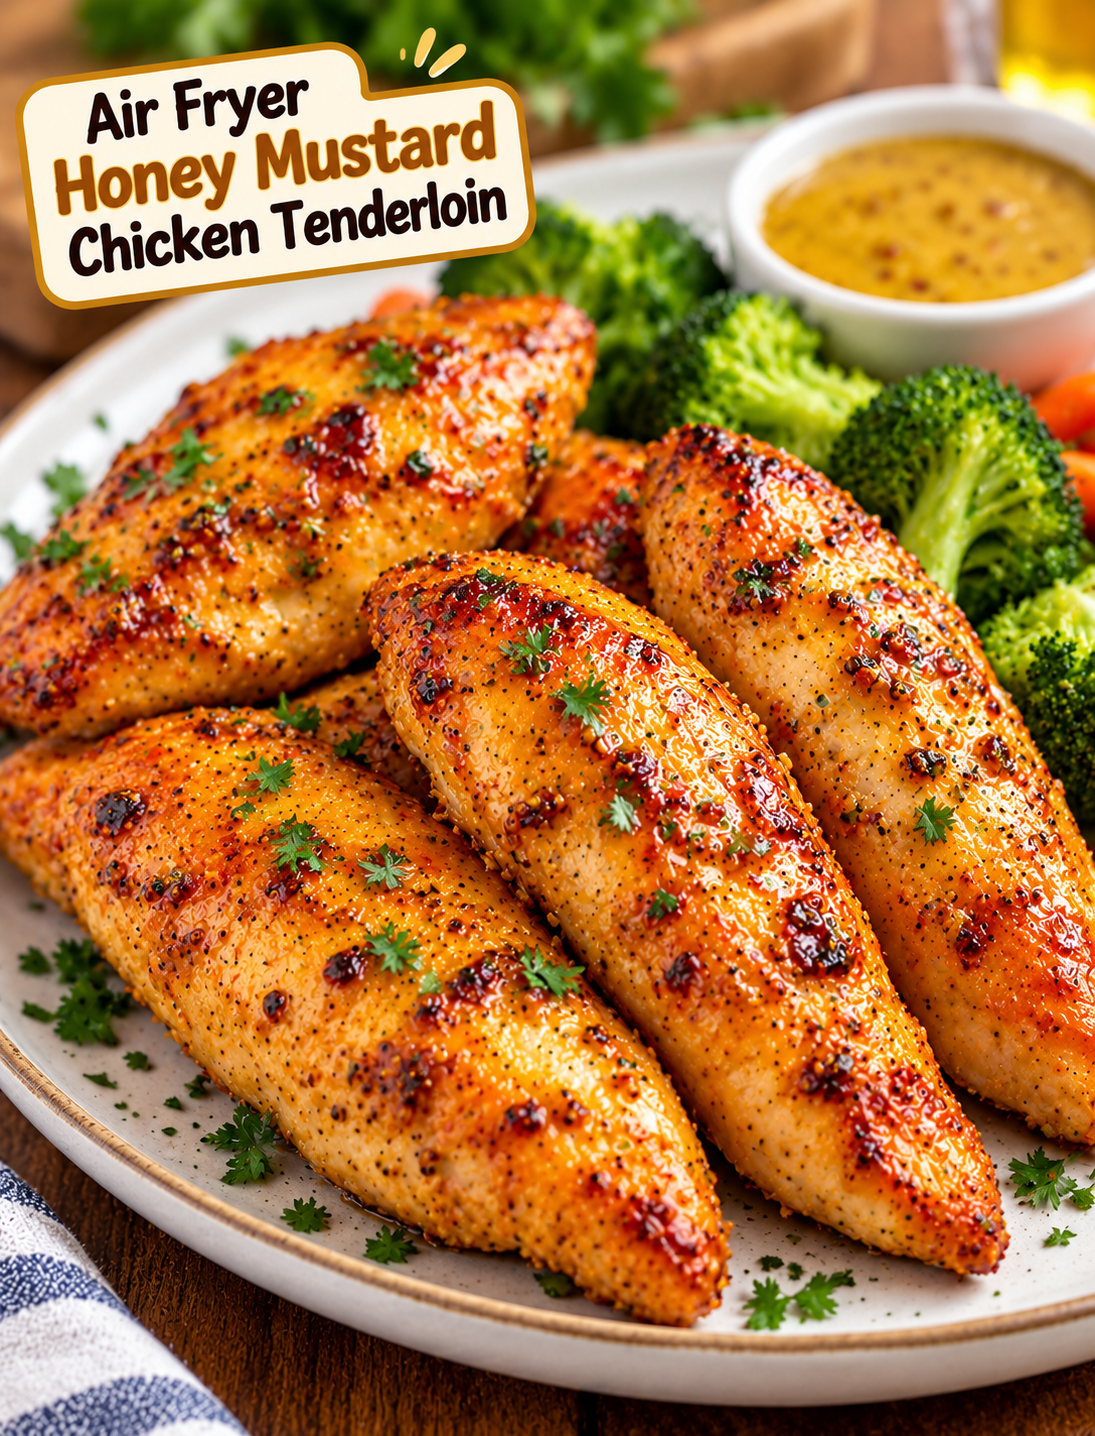
Air Fryer Honey Mustard Chicken Tenderloin

Air fryer honey mustard chicken tenderloins with a golden glaze served with vegetables

Air Fryer Honey Mustard Chicken Tenderloin

If you need a fast dinner that tastes like you spent much longer in the kitchen, Air Fryer Honey Mustard Chicken Tenderloin is a great choice. The chicken cooks quickly, stays tender, and develops a lightly browned outside covered in a sweet and tangy honey mustard glaze.

Chicken tenderloins are naturally lean and cook faster than larger chicken cuts. The air fryer uses circulating hot air to brown the outside while the honey mustard coating adds plenty of flavor.

This recipe is simple enough for a busy weeknight but flavorful enough for a family dinner. Serve the chicken with roasted vegetables, mashed potatoes, rice, a crisp salad, or your favorite side dish.

Why You’ll Love This Recipe

This chicken dinner has several features that make it easy to add to your weekly meal plan.

  • Quick cooking: Chicken tenderloins cook faster than whole chicken breasts.
  • Big flavor: Honey, Dijon mustard, and garlic create a balanced sweet and savory glaze.
  • Simple preparation: The chicken needs only basic seasoning and a quick sauce.
  • Less oil: The air fryer needs only a small amount of oil for browning.
  • Family-friendly: The mild sweetness makes the chicken appealing to both kids and adults.
  • Easy cleanup: Cooking everything in the air fryer keeps the process simple.
  • Flexible sides: Pair the chicken with vegetables, potatoes, rice, pasta, or salad.

Ingredients You’ll Need

For the Chicken

  • 1½ pounds chicken tenderloins
  • 1 tablespoon olive oil
  • ½ teaspoon garlic powder
  • ½ teaspoon paprika
  • ½ teaspoon onion powder
  • ½ teaspoon kosher salt
  • ¼ teaspoon black pepper

For the Honey Mustard Sauce

  • 3 tablespoons Dijon mustard
  • 2 tablespoons honey
  • 1 tablespoon whole-grain mustard
  • 1 teaspoon apple cider vinegar
  • 1 teaspoon olive oil
  • ½ teaspoon garlic powder
  • ¼ teaspoon smoked paprika
  • ¼ teaspoon black pepper

Dijon mustard gives the sauce a sharp, savory flavor, while honey adds sweetness without making the glaze overly heavy. Whole-grain mustard adds a little texture and extra mustard flavor.

How to Prepare the Chicken

Step 1: Pat the Chicken Dry

Remove the chicken tenderloins from the package and pat them dry with paper towels.

Removing excess moisture helps the seasoning stick and allows the chicken to brown better during air frying.

Step 2: Season the Tenderloins

Place the chicken in a bowl.

Add olive oil, garlic powder, paprika, onion powder, salt, and black pepper.

Toss until every piece is evenly coated.

Let the seasoned chicken sit for about 5 minutes while you prepare the honey mustard sauce.

Step 3: Make the Honey Mustard Sauce

Add Dijon mustard, honey, whole-grain mustard, apple cider vinegar, olive oil, garlic powder, smoked paprika, and black pepper to a small bowl.

Whisk until the sauce becomes smooth and evenly combined.

Set aside about 1 tablespoon of the finished sauce for serving.

How to Cook Air Fryer Honey Mustard Chicken Tenderloin

Step 4: Preheat the Air Fryer

Preheat your air fryer to 390°F (200°C) for about 3 minutes.

A preheated basket helps the chicken begin browning quickly instead of slowly warming from a cold basket.

Step 5: Add the Chicken

Lightly spray the air fryer basket with cooking spray if needed.

Arrange the chicken tenderloins in a single layer.

Leave a little space between each piece so the hot air can circulate around the chicken.

Brush the top of each tenderloin with the honey mustard sauce.

Step 6: Air Fry

Air fry the chicken at 390°F for 10–14 minutes, depending on the thickness of the tenderloins.

After about 6–7 minutes, carefully flip the chicken.

Brush the second side with the remaining sauce and continue cooking.

The chicken is ready when the thickest piece reaches an internal temperature of 165°F (74°C).

Because chicken tenderloins vary in size, use a meat thermometer rather than relying only on cooking time.

Step 7: Rest the Chicken

Transfer the cooked chicken to a clean plate.

Let it rest for 3–5 minutes before serving.

This short resting period allows the juices to settle and keeps the chicken tender when sliced.

Step 8: Serve

Arrange the chicken tenderloins on a serving plate.

Drizzle with the reserved honey mustard sauce.

For a fresh finish, sprinkle with chopped parsley or green onions.

Serve immediately while the chicken is warm and the glaze is flavorful.

Tips for Juicy Chicken Tenderloins

Small changes can help you get better results every time.

  • Don’t overcrowd the basket: Air needs to move around each tenderloin for even browning.
  • Use a thermometer: Chicken is safely cooked when the center reaches 165°F.
  • Avoid overcooking: Tenderloins are lean and can dry out if left in the air fryer too long.
  • Pat the chicken dry: Less surface moisture helps create better browning.
  • Apply the sauce evenly: A thin, even layer gives every piece a balanced flavor.
  • Flip halfway: Turning the chicken helps both sides cook and brown evenly.
  • Rest before serving: A few minutes of resting helps maintain a juicy texture.

What to Serve With Honey Mustard Chicken

This chicken works with many classic American side dishes.

For a simple weeknight dinner, serve it with roasted broccoli and crispy air fryer potatoes. The savory vegetables balance the sweet and tangy glaze.

For a lighter plate, pair the chicken with a green salad, cucumber, tomatoes, and a simple vinaigrette.

Rice, quinoa, steamed green beans, roasted carrots, corn, and sweet potatoes are also excellent choices.

You can also slice the cooked chicken and use it in wraps, sandwiches, grain bowls, or salads for an easy lunch the next day.

Recipe Variations

Make It Spicy

Add ¼ teaspoon of cayenne pepper or a pinch of crushed red pepper flakes to the honey mustard sauce.

Add Lemon

Add 1 teaspoon of fresh lemon juice to the sauce for a brighter, more refreshing flavor.

Use Maple Syrup

Replace the honey with pure maple syrup for a slightly deeper sweetness.

Add Fresh Herbs

Stir chopped rosemary, thyme, or parsley into the sauce before coating the chicken.

Make It Extra Crispy

Lightly spray the chicken with cooking oil before air frying. Avoid using too much oil because the honey glaze already contains natural sugar that promotes browning.

How to Store Leftovers

Allow leftover chicken to cool before placing it in an airtight container.

Refrigerate the cooked chicken for up to 3–4 days.

For the best texture, reheat the tenderloins in an air fryer at 350°F for 3–5 minutes.

Avoid reheating them for too long because chicken tenderloins can become dry when overheated.

Leftover chicken can also be sliced and added to salads, wraps, sandwiches, rice bowls, or meal-prep containers.

Frequently Asked Questions

Can I use chicken breast instead of tenderloins?

Yes, cut boneless chicken breast into evenly sized strips and adjust the cooking time based on thickness.

How do I know when chicken tenderloins are done?

Use an instant-read thermometer and remove the chicken when the thickest piece reaches 165°F (74°C).

Can I make the honey mustard sauce ahead?

Yes, prepare the sauce up to 2 days ahead and keep it covered in the refrigerator.

Can I use yellow mustard?

Yes, but Dijon mustard provides a sharper and more balanced flavor for this glaze.

Why did my chicken turn dry?

Chicken tenderloins can dry out when overcooked, so check the internal temperature early rather than relying only on the timer.

Can I use frozen chicken tenderloins?

For the best texture, thaw the chicken completely before seasoning and cooking it with the glaze.

How long should chicken tenderloins rest?

Let the cooked chicken rest for about 3–5 minutes before serving.

Can I make this recipe spicy?

Yes, add cayenne pepper, hot honey, or crushed red pepper flakes to the sauce for extra heat.

Final Thoughts

Air Fryer Honey Mustard Chicken Tenderloin is an easy way to turn simple chicken into a flavorful family dinner. The combination of Dijon mustard, honey, garlic, and mild spices creates a glaze that is sweet, tangy, and savory.

The air fryer keeps the cooking process quick while giving the chicken a lightly browned exterior. For the juiciest result, avoid overcooking the tenderloins and always check the thickest piece with a meat thermometer.

Pair the chicken with roasted vegetables, potatoes, rice, or a fresh salad, and you have a simple meal that works for busy weeknights, family dinners, and meal prep.

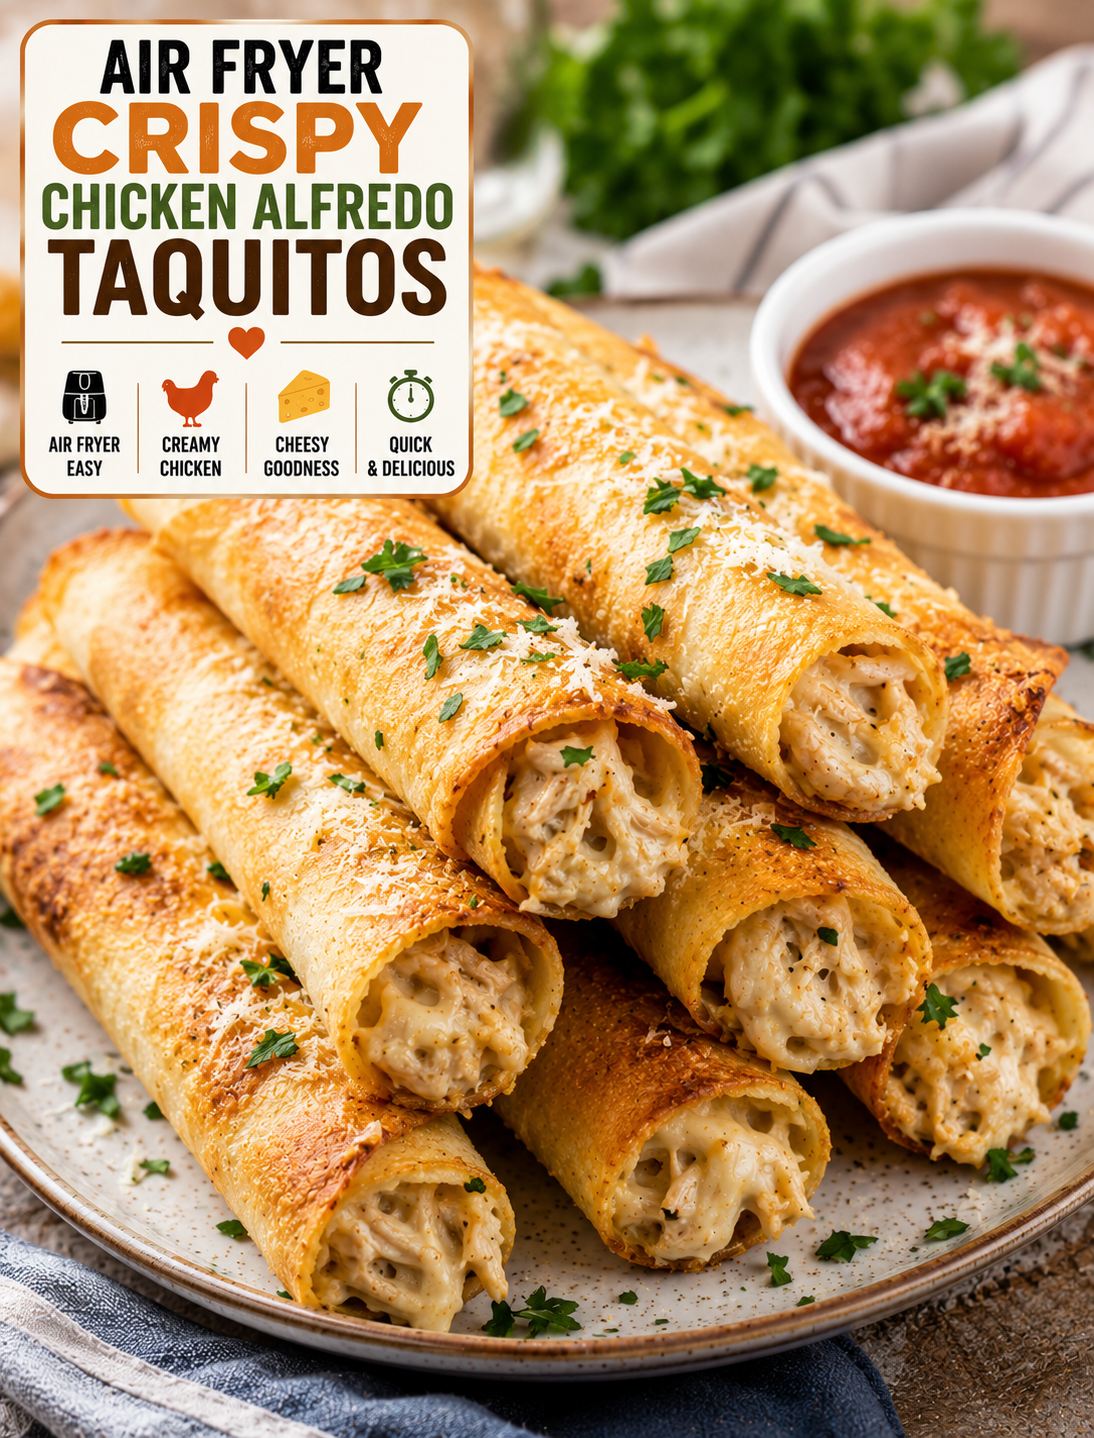
Air Fryer Crispy Chicken Alfredo Taquitos

Crispy air fryer chicken Alfredo taquitos filled with creamy chicken, mozzarella, and Parmesan, served with marinara dipping sauce

Air Fryer Crispy Chicken Alfredo Taquitos

These Air Fryer Crispy Chicken Alfredo Taquitos turn creamy chicken Alfredo into a crunchy, handheld snack or easy dinner. Shredded chicken, rich Alfredo sauce, mozzarella, and Parmesan are wrapped in small flour tortillas and air-fried until golden and crisp.

The filling stays creamy while the tortilla develops a light crunch around the edges. A quick dip in warm marinara, extra Alfredo sauce, or ranch dressing makes these taquitos even more satisfying.

This recipe is a great way to use leftover cooked chicken. It comes together with simple ingredients and needs only a few minutes in the air fryer, making it useful for busy weeknights, game-day snacks, family lunches, or casual gatherings.

Why You’ll Love This Recipe

These chicken taquitos combine two comfort-food favorites in one easy recipe. The creamy Alfredo filling gives every bite a rich, cheesy flavor, while the air fryer creates the crisp texture you want without deep frying.

The recipe is also flexible. You can use rotisserie chicken, leftover baked chicken, or freshly cooked chicken breast. Flour tortillas work especially well because they roll tightly and become golden in the air fryer.

Another benefit is portion control. Instead of making a large pasta dish, you can prepare individual taquitos that are easy to serve and share.

They are also freezer-friendly when prepared correctly, so you can make a larger batch and save some for another meal.

Ingredients You’ll Need

For the Chicken Alfredo Filling

  • 2 cups cooked shredded chicken
  • ½ cup Alfredo sauce
  • ¾ cup shredded mozzarella cheese
  • ¼ cup grated Parmesan cheese
  • 2 cloves garlic, minced
  • 1 tablespoon chopped fresh parsley
  • ½ teaspoon Italian seasoning
  • ¼ teaspoon black pepper
  • ¼ teaspoon salt, or to taste
  • ¼ teaspoon red pepper flakes, optional

For the Taquitos

  • 10 small flour tortillas
  • 1 tablespoon melted butter or olive oil
  • 2 tablespoons grated Parmesan cheese
  • Fresh parsley for garnish

For the best texture, use cooked chicken that is tender and finely shredded. Rotisserie chicken is convenient because it already has plenty of flavor and saves preparation time.

Choose a thick Alfredo sauce rather than a very thin sauce. A thick filling stays inside the tortillas better and reduces the chance of soggy taquitos.

How to Make Air Fryer Crispy Chicken Alfredo Taquitos

Prepare the Chicken Filling

Add the shredded chicken to a medium mixing bowl.

Stir in Alfredo sauce, mozzarella, Parmesan, minced garlic, Italian seasoning, black pepper, salt, and red pepper flakes if you want some heat.

Mix until the chicken is evenly coated and the cheese is distributed throughout the filling.

Fold in the chopped parsley at the end. The filling should be creamy but thick enough to hold its shape when scooped.

Avoid adding too much Alfredo sauce. An overly wet filling can make the tortillas difficult to roll and may prevent them from becoming crisp.

Warm the Tortillas

Warm the tortillas for about 15–20 seconds in the microwave, covering them with a slightly damp paper towel.

Soft tortillas are easier to roll without cracking. This small step is especially helpful when using tortillas that have been refrigerated.

Keep the warmed tortillas covered while you assemble the taquitos so they remain flexible.

Fill and Roll the Taquitos

Place one tortilla on a clean work surface.

Add about 2 tablespoons of chicken Alfredo filling in a line slightly below the center of the tortilla. Do not overfill it because excess filling can escape during cooking.

Fold the bottom edge tightly over the filling.

Continue rolling the tortilla into a firm cylinder.

Place the taquito seam-side down while you prepare the remaining tortillas. Keeping the seam underneath helps prevent the rolls from opening before they reach the air fryer.

Prepare the Air Fryer

Preheat the air fryer to 375°F for about 3 minutes.

Lightly brush or spray the air fryer basket with oil if needed.

Arrange the taquitos seam-side down in a single layer. Leave a little space between each one so hot air can circulate evenly.

Avoid stacking the taquitos because overlapping tortillas will not crisp properly.

Air Fry Until Golden

Lightly brush the tops of the taquitos with melted butter or olive oil.

Air fry at 375°F for 7–10 minutes, turning them carefully halfway through cooking.

Continue cooking until the tortillas are golden brown and crisp.

Cooking time can vary between air fryer models and tortilla sizes, so start checking around the 7-minute mark.

Sprinkle the finished taquitos with Parmesan and fresh parsley before serving.

Tips for Extra Crispy Taquitos

The key to crisp taquitos is controlling moisture. Use just enough Alfredo sauce to coat the chicken without making the mixture runny.

Warm the tortillas before rolling. Cold tortillas are more likely to crack, which can cause the filling to leak.

Do not overcrowd the basket. Air needs room to move around each taquito to create an even golden crust.

A very light coating of oil or melted butter helps the tortillas brown beautifully. Too much oil can make them greasy instead of crisp.

Place the taquitos seam-side down before cooking. This helps keep their shape during the first few minutes of air frying.

Let the cooked taquitos rest for 1–2 minutes before serving. The filling will settle slightly, making them easier to handle.

Best Chicken to Use

Rotisserie chicken is one of the easiest options for this recipe. Remove the skin and bones, then shred the meat into small pieces.

Leftover roasted chicken also works well. Make sure it is fully cooked and refrigerated properly before using.

You can use chicken breast for a leaner filling or chicken thighs for a richer texture.

If cooking chicken specifically for the taquitos, season it simply with salt, pepper, garlic powder, and Italian seasoning. Cook until the chicken reaches 165°F internally, then shred it after resting.

Avoid using large chunks of chicken because they can make the tortillas difficult to roll evenly.

Easy Flavor Variations

For spicy chicken Alfredo taquitos, add diced jalapeños, cayenne pepper, or extra red pepper flakes to the filling.

For a spinach version, mix in finely chopped cooked spinach after squeezing out excess moisture.

For a bacon Alfredo variation, add a small amount of cooked and crumbled bacon to the chicken mixture.

You can also add finely chopped sun-dried tomatoes for a slightly sweet and tangy flavor.

For extra cheesiness, replace part of the mozzarella with provolone or Monterey Jack.

If you prefer a stronger garlic flavor, add roasted garlic instead of fresh minced garlic.

What to Serve With Chicken Alfredo Taquitos

These crispy rolls make an excellent appetizer, snack, or main dish when paired with simple sides.

Serve them with warm marinara sauce for dipping. The tomato flavor provides a bright contrast to the creamy Alfredo filling.

Ranch dressing, garlic aioli, or extra Alfredo sauce can also work as dipping options.

For a complete dinner, serve the taquitos with a green salad, roasted broccoli, steamed vegetables, or a simple Caesar salad.

Fresh parsley and a small sprinkle of Parmesan add a finished look without overpowering the chicken and cheese.

Make-Ahead and Storage Tips

You can prepare the chicken Alfredo filling several hours ahead and refrigerate it in an airtight container.

For assembled taquitos, place them in a covered container and refrigerate them until you are ready to cook. For the best texture, cook them within a day.

Store leftover cooked taquitos in the refrigerator and use them within 3–4 days.

Reheat them in the air fryer at 350°F for about 3–5 minutes. Air frying helps restore the crisp tortilla better than microwaving.

For freezing, assemble the uncooked taquitos and place them in a single layer on a tray until firm. Transfer them to a freezer-safe container or bag.

Frozen taquitos can be air-fried without thawing, although they may need several additional minutes of cooking time.

Common Mistakes to Avoid

Using too much filling is one of the most common problems. A small amount creates a tighter roll and reduces leaking.

Avoid using watery Alfredo sauce because excess moisture can soften the tortilla.

Do not skip preheating if your air fryer benefits from it. Starting with a hot basket helps the tortillas crisp faster.

Do not overcrowd the basket. Cook in batches when necessary to maintain good airflow.

Another mistake is overcooking the taquitos. Once the tortillas are golden and crisp, remove them to prevent the edges from becoming too hard.

Finally, let the filling cool slightly before eating. Melted cheese and hot Alfredo sauce can stay very hot inside the crispy shell.

Frequently Asked Questions

Can I use rotisserie chicken for these taquitos?

Yes, shredded rotisserie chicken is an easy option and adds plenty of flavor without requiring extra cooking.

What tortillas work best for chicken Alfredo taquitos?

Small flour tortillas work best because they roll easily and become crisp and golden in the air fryer.

How long should I air fry these taquitos?

Air fry them at 375°F for about 7–10 minutes, turning halfway, until the tortillas are crisp and golden.

Can I make these taquitos with leftover Alfredo chicken?

Yes, finely chop leftover chicken Alfredo and use it as the filling, adding cheese if the mixture needs more moisture or flavor.

Can I freeze chicken Alfredo taquitos?

Yes, freeze assembled uncooked taquitos in a single layer, then transfer them to a freezer-safe container for longer storage.

How do I reheat leftover taquitos?

Reheat refrigerated taquitos at 350°F for 3–5 minutes in the air fryer until the outside is crisp and the filling is hot.

Why are my taquitos not crispy?

Excess sauce, overcrowding, or too little cooking time can prevent crisping; use a thick filling and leave space between the rolls.

What can I use for dipping?

Marinara, ranch, garlic aioli, or warm Alfredo sauce all pair well with the creamy chicken and crispy tortilla.

Final Thoughts

Air Fryer Crispy Chicken Alfredo Taquitos are an easy way to turn familiar comfort-food flavors into a crunchy handheld meal. Creamy chicken, garlic, mozzarella, and Parmesan create a rich filling, while the air fryer gives the tortillas a golden finish.

The recipe is simple enough for a weeknight dinner but fun enough for parties, game days, and family gatherings. Rotisserie chicken makes preparation even faster, while different cheeses, vegetables, and seasonings let you create your own version.

For the crispiest results, keep the filling thick, warm the tortillas before rolling, avoid overcrowding the air fryer, and cook until the shells are lightly golden. Serve them hot with your favorite dipping sauce for an easy meal everyone can grab and enjoy.

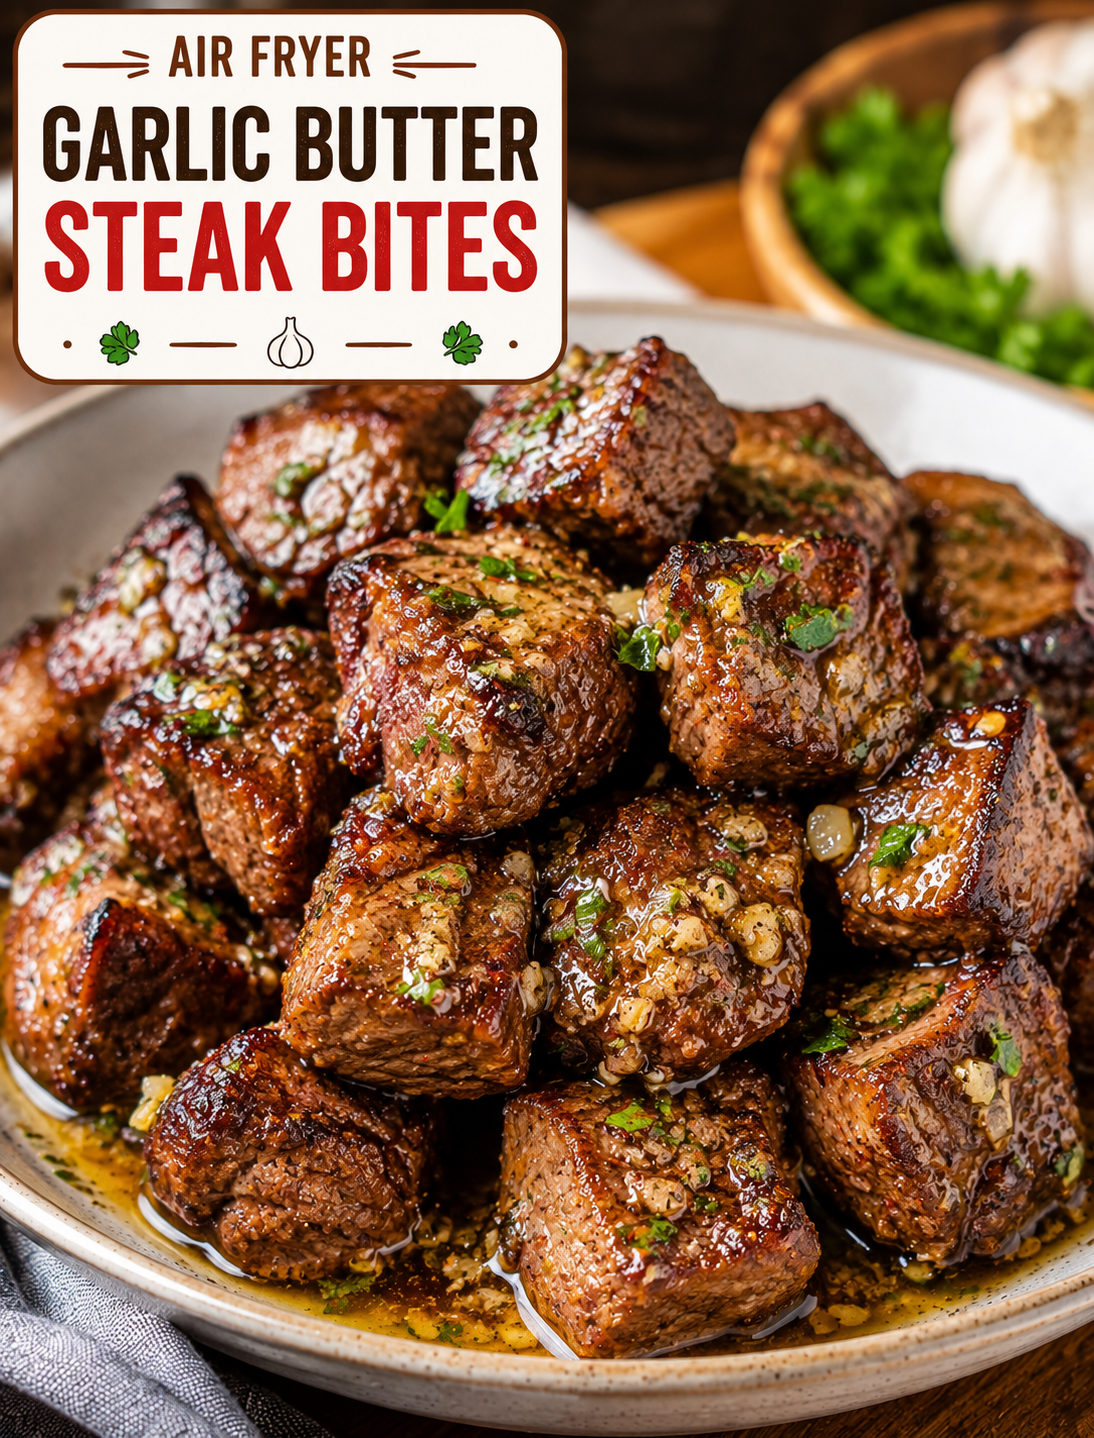
Air Fryer Garlic Butter Steak Bites

Air Fryer Garlic Butter Steak Bites with browned edges, melted garlic butter, fresh parsley, and herbs

Air Fryer Garlic Butter Steak Bites

Air Fryer Garlic Butter Steak Bites are tender, juicy, and packed with rich garlic butter flavor. Small pieces of steak cook quickly in the air fryer, creating browned edges while keeping the center juicy and flavorful.

This easy steak recipe is perfect for a quick weeknight dinner, game-day snack, party appetizer, or hearty side dish. The garlic butter sauce adds a savory finish without requiring a long list of ingredients.

Using the air fryer also makes this recipe simple and convenient. There is no need to stand over a hot skillet while the steak cooks. Once the steak is seasoned and the air fryer is hot, dinner can be ready in minutes.

Why You’ll Love This Recipe

  • Fast cooking: Small steak pieces cook much faster than a whole steak.
  • Big flavor: Garlic, butter, and herbs create a rich savory coating.
  • Tender texture: High heat quickly browns the outside while the center stays juicy.
  • Easy preparation: The recipe uses simple ingredients and basic kitchen tools.
  • Perfect for sharing: Serve the bites as an appetizer with toothpicks and dipping sauce.
  • Great for dinner: Pair them with potatoes, vegetables, rice, or a fresh salad.
  • Easy to customize: Add chili flakes, Parmesan, fresh herbs, or your favorite steak seasoning.

Ingredients

For the Steak Bites

  • 1 pound sirloin steak or another tender steak
  • 1 tablespoon olive oil
  • 1 teaspoon garlic powder
  • 1/2 teaspoon smoked paprika
  • 1/2 teaspoon onion powder
  • 1/2 teaspoon salt
  • 1/4 teaspoon black pepper

For the Garlic Butter

  • 3 tablespoons unsalted butter
  • 3 cloves fresh garlic, finely minced
  • 1 tablespoon chopped fresh parsley
  • 1/2 teaspoon Italian seasoning
  • 1 teaspoon lemon juice, optional

Optional Garnishes

  • Fresh parsley
  • Grated Parmesan cheese
  • Red pepper flakes
  • Extra black pepper
  • Lemon wedges

How to Make Air Fryer Garlic Butter Steak Bites

Step 1: Choose and Prepare the Steak

Sirloin is an excellent choice because it is tender, flavorful, and widely available in U.S. grocery stores.

Trim away large pieces of excess fat or tough connective tissue.

Cut the steak into bite-sized pieces that are roughly 1 to 1½ inches thick.

Try to keep the pieces similar in size so they cook evenly.

Pat the steak dry with paper towels before seasoning. Removing surface moisture helps the meat brown better in the air fryer.

Step 2: Season the Steak

Place the steak pieces in a large bowl.

Add olive oil, garlic powder, smoked paprika, onion powder, salt, and black pepper.

Toss until every piece is lightly coated with the seasoning mixture.

Do not add the garlic butter yet. The fresh garlic is added after cooking to prevent it from burning during the high-heat air-frying process.

Step 3: Preheat the Air Fryer

Preheat the air fryer to 400°F for about 3–5 minutes.

A hot cooking basket helps the steak begin browning as soon as it is added.

If your air fryer model does not require preheating, you can skip this step, but cooking time may vary slightly.

Step 4: Arrange the Steak

Place the seasoned steak bites in the air fryer basket in a single layer.

Leave some space between the pieces so hot air can circulate around them.

Avoid stacking the steak because crowded pieces can release moisture and steam instead of developing browned edges.

For a large batch, cook the steak in two rounds.

Step 5: Air Fry the Steak Bites

Cook the steak at 400°F for approximately 7–10 minutes, shaking the basket or turning the pieces halfway through.

The exact time depends on the size of the steak pieces and your preferred level of doneness.

Use an instant-read thermometer for the most accurate result. The USDA recommends a minimum internal temperature of 145°F with a three-minute rest for whole cuts of beef.

For steak bites cooked beyond medium, continue cooking for another minute or two and check the temperature again.

Step 6: Make the Garlic Butter

While the steak cooks, melt the butter in a small saucepan over low heat.

Add the minced garlic and Italian seasoning.

Cook for about 30–60 seconds, just until the garlic becomes fragrant.

Remove the pan from the heat and stir in the parsley and optional lemon juice.

Do not brown the garlic heavily because burnt garlic can taste bitter.

Step 7: Toss With Garlic Butter

Transfer the hot steak bites to a clean bowl.

Pour the warm garlic butter over the steak.

Toss gently until every piece is coated.

Let the steak rest for about 2 minutes before serving so the juices can settle.

Finish with fresh parsley, Parmesan, red pepper flakes, or a squeeze of lemon if desired.

Tips for Tender Steak Bites

The quality of the steak and the cooking method both affect the final texture.

  • Choose a tender cut: Sirloin, ribeye, strip steak, and tenderloin can all work well.
  • Cut evenly: Similar-sized pieces cook at the same rate.
  • Dry the steak first: Excess moisture can reduce browning.
  • Do not overcrowd: Space allows hot air to circulate around the meat.
  • Preheat the basket: Starting with high heat helps create browned edges.
  • Avoid overcooking: Small pieces can become dry quickly.
  • Rest briefly: A short rest helps retain moisture.
  • Add garlic butter after cooking: This protects the fresh garlic from burning.

Best Steak Cuts to Use

Sirloin is one of the best choices for this recipe because it offers a good balance of tenderness, flavor, and price.

Ribeye gives the bites a richer flavor because of its higher fat content.

New York strip provides a firm, beefy texture with enough marbling to stay flavorful.

Tenderloin creates very tender bites but is usually more expensive than sirloin.

Avoid very tough cuts unless they are properly prepared for a longer cooking method. Quick air frying works best with naturally tender cuts.

Easy Flavor Variations

Spicy Garlic Butter

Add 1/4 teaspoon of red pepper flakes or a small amount of cayenne pepper to the seasoning.

Parmesan Steak Bites

Sprinkle grated Parmesan over the hot steak immediately after tossing it with garlic butter.

Herb Butter Steak Bites

Add fresh rosemary, thyme, or parsley to the melted butter for a fresh herb flavor.

Cajun Steak Bites

Replace the regular seasoning with your favorite Cajun seasoning for a spicy Southern-style version.

Lemon Garlic Steak Bites

Add fresh lemon juice and a little lemon zest to the finished garlic butter for a brighter flavor.

What to Serve With Steak Bites

These flavorful bites pair well with classic American side dishes.

Serve them with mashed potatoes, roasted vegetables, baked potatoes, air fryer fries, rice, or a crisp green salad.

For an appetizer, place the steak bites on a serving platter with toothpicks and a small bowl of garlic butter, ranch dressing, or creamy horseradish sauce.

For a low-carb meal, serve them with steamed broccoli, asparagus, cauliflower, or a simple cucumber salad.

Storage and Reheating

Allow leftover steak bites to cool before placing them in an airtight container.

Refrigerate leftovers for up to 3–4 days.

To reheat, place the steak in the air fryer at 350°F for 2–4 minutes. Check frequently because reheating for too long can make the meat tough.

You can also reheat the bites in a skillet over medium-low heat with a small amount of butter.

For the best texture, avoid repeatedly reheating the same portion.

Make-Ahead Instructions

You can season and cut the steak several hours before cooking.

Keep the prepared steak covered in the refrigerator until you are ready to air fry it.

Prepare the garlic butter shortly before serving for the freshest garlic flavor.

Do not leave raw steak at room temperature for extended periods before cooking.

Common Mistakes to Avoid

  • Cutting the steak too small: Tiny pieces can overcook quickly.
  • Using wet steak: Surface moisture can prevent proper browning.
  • Overcrowding the basket: Crowding reduces airflow and can lead to steaming.
  • Adding fresh garlic too early: Garlic can burn at high air fryer temperatures.
  • Ignoring internal temperature: Cooking time alone does not guarantee the desired doneness.
  • Overcooking: Small steak pieces lose moisture quickly.
  • Skipping the rest: A brief rest helps the meat remain juicy.

Nutrition Facts

Approximate nutrition per serving will vary according to the steak cut, butter, and serving size.

  • Calories: 365
  • Protein: 30g
  • Carbohydrates: 3g
  • Fat: 27g
  • Saturated Fat: 11g
  • Fiber: 0g
  • Sugar: 1g
  • Sodium: 520mg

These values are estimates and can change based on the exact ingredients and brands used.

Frequently Asked Questions

What is the best steak for air fryer steak bites?

Sirloin is a great choice because it is tender, flavorful, and affordable, while ribeye provides a richer result.

How long should steak bites cook in an air fryer?

At 400°F, bite-sized pieces usually take about 7–10 minutes, depending on their size and desired doneness.

Should I marinate the steak first?

Marinating is optional because the seasoning and garlic butter provide plenty of flavor without a long marinade.

Why are my steak bites tough?

Overcooking, very small pieces, or using a tough cut can make the meat chewy or dry.

Can I use frozen steak?

Fresh or fully thawed steak is best because it cooks more evenly and develops better browning.

When should I add the garlic butter?

Add the garlic butter after air frying so the fresh garlic stays fragrant instead of burning.

Can I use garlic powder instead of fresh garlic?

Yes, but fresh minced garlic gives the butter sauce a stronger and more aromatic flavor.

How should I reheat leftover steak bites?

Reheat them at 350°F in the air fryer for about 2–4 minutes, checking often to prevent overcooking.

Final Thoughts

Air Fryer Garlic Butter Steak Bites are a simple way to enjoy tender, flavorful beef without spending a long time in the kitchen. The air fryer creates browned edges quickly, while homemade garlic butter adds a rich finish.

For the best results, use a tender steak, cut the pieces evenly, avoid overcrowding the basket, and check the internal temperature before serving. Pair the finished bites with potatoes, vegetables, rice, or your favorite dipping sauce for an easy meal or crowd-pleasing appetizer.