Mediterranean Chickpea and Feta Salad Board

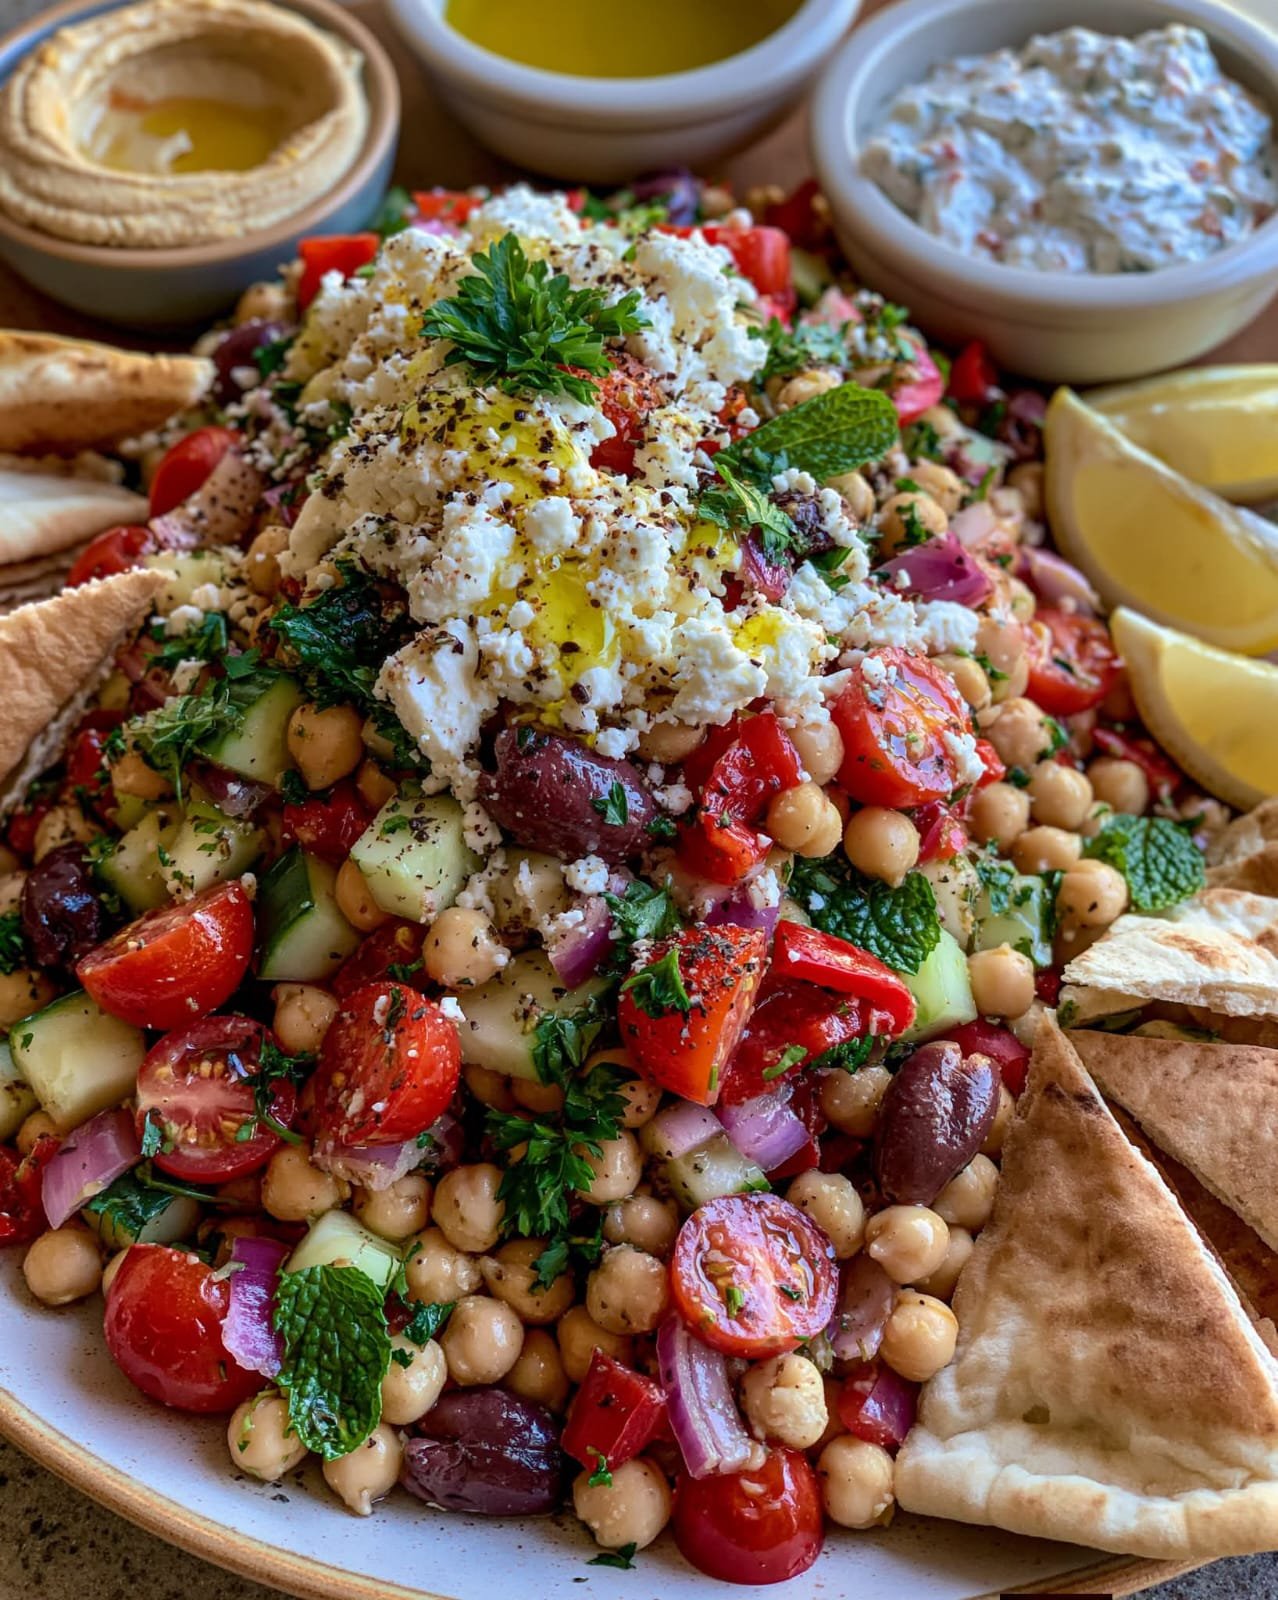
Mediterranean Chickpea Feta Salad with chickpeas, feta, cucumber, tomatoes, olives, fresh herbs, and lemon dressing

Mediterranean Chickpea and Feta Salad Board

Mediterranean Chickpea Feta Salad is a colorful, fresh, and satisfying recipe built around chickpeas, creamy feta, crisp cucumbers, juicy tomatoes, olives, herbs, and a bright lemon-olive oil dressing. Instead of tossing everything into a single bowl, the ingredients are arranged beautifully on a large serving board, making this dish perfect for lunches, gatherings, potlucks, or easy Mediterranean-style dinners.

This Mediterranean Chickpea Feta Salad is simple to prepare, naturally full of texture, and easy to customize with extra vegetables, dips, grains, or pita. The combination of chickpeas and feta makes the board hearty enough to serve as a light meal, while the fresh vegetables and herbs keep every bite bright and refreshing.

Prep Time: 20 minutes
Cook Time: 0 minutes
Total Time: 20 minutes
Servings: 6

Ingredients

For the Salad Board

  • 2 cans chickpeas, drained and rinsed
  • 1 large cucumber, sliced
  • 2 cups cherry tomatoes, halved
  • 1 red bell pepper, sliced
  • 1/2 small red onion, thinly sliced
  • 1 cup crumbled feta cheese
  • 1/2 cup Kalamata olives
  • 1/4 cup chopped fresh parsley
  • 2 tablespoons chopped fresh mint
  • 2 tablespoons chopped fresh dill
  • 1 cup baby arugula or mixed greens, optional
  • 1 cup pita chips or warm pita wedges, optional

Ingredients For the Dressing

  • 1/4 cup extra virgin olive oil
  • 3 tablespoons fresh lemon juice
  • 1 teaspoon lemon zest
  • 1 small garlic clove, finely minced
  • 1 teaspoon dried oregano
  • 1/2 teaspoon Dijon mustard
  • 1/2 teaspoon salt
  • 1/4 teaspoon black pepper

Optional Extras

  • Hummus
  • Tzatziki
  • Roasted red peppers
  • Marinated artichokes
  • Toasted pine nuts
  • Cooked quinoa or farro

Why You’ll Love This Recipe

Mediterranean Chickpea Feta Salad is easy, colorful, and naturally impressive on the table. Because the ingredients are arranged rather than mixed, everyone can choose the vegetables, cheese, herbs, and extras they like best.

Another reason to love Mediterranean Chickpea Feta Salad is its balance of textures. Chickpeas are tender and hearty, cucumbers and peppers are crisp, tomatoes are juicy, olives are briny, and feta is creamy and salty. The lemon dressing ties everything together without making the board heavy.

How to Make Mediterranean Chickpea Feta Salad

Step 1: Rinse and Dry the Chickpeas

Drain the chickpeas in a colander and rinse them well under cool water.

Shake off as much water as possible, then spread the chickpeas on a clean towel and pat them dry.

Dry chickpeas help Mediterranean Chickpea Feta Salad stay fresh and prevent excess water from collecting on the serving board.

Step 2: Prepare the Vegetables

Slice the cucumber into rounds or half-moons.

Halve the cherry tomatoes, slice the bell pepper into thin strips, and cut the red onion very thinly.

Step 3: Prepare the Herbs

Chop the parsley, mint, and dill.

Fresh herbs are especially important in Mediterranean Chickpea Feta Salad because they add brightness and keep the dish tasting fresh.

Step 4: Make the Dressing

Add olive oil, lemon juice, lemon zest, garlic, oregano, Dijon mustard, salt, and black pepper to a small jar.

Close the jar and shake until the dressing looks lightly emulsified.

Step 5: Season the Chickpeas

Place the chickpeas in a bowl and add two tablespoons of the dressing.

Toss gently until coated and let them sit for 5 minutes.

Seasoning the chickpeas separately helps Mediterranean Chickpea Feta Salad taste flavorful in every bite.

Step 6: Choose a Large Board or Platter

Use a large serving board, rimmed platter, or shallow tray.

Step 7: Arrange the Greens and Chickpeas

Scatter arugula or mixed greens across part of the board if using.

Spoon the seasoned chickpeas into one or two generous sections.

Keeping ingredients in separate clusters gives Mediterranean Chickpea Feta Salad its attractive board-style presentation.

Step 8: Add the Fresh Vegetables

Arrange the cucumber, tomatoes, peppers, and red onion around the chickpeas.

Step 9: Add Feta and Olives

Place crumbled feta in the center or in a few small piles across the board.

Add Kalamata olives beside the cheese.

The salty feta and olives create the classic Mediterranean flavor that makes Mediterranean Chickpea Feta Salad especially satisfying.

Step 10: Finish with Herbs and Dressing

Scatter parsley, mint, and dill over the board.

Drizzle some of the remaining dressing over the chickpeas and vegetables.

Serve the extra dressing on the side.

Step 11: Add Optional Extras

Fill empty spaces with pita chips, warm pita wedges, roasted peppers, artichokes, or toasted pine nuts.

If serving the board as a full meal, add cooked quinoa, farro, grilled chicken, tuna, or another protein around the edges.

Step 12: Serve Immediately

Bring Mediterranean Chickpea Feta Salad to the table while the vegetables are crisp and the herbs look fresh.

Serving Suggestions

Mediterranean Chickpea Feta Salad works beautifully as a light lunch, appetizer board, or colorful side dish.

Serve it with warm pita, pita chips, hummus, tzatziki, or baba ganoush for a Mediterranean-style spread.

For dinner, pair it with grilled chicken, baked fish, lamb, roasted vegetables, lemon rice, couscous, quinoa, or a simple soup.

For a protein-rich main dish, try our Lemon & Garlic Chicken Bites with tender chicken, fresh lemon, garlic, herbs, and olive oil.

Recipe Tips

Dry the chickpeas thoroughly so the platter does not become watery.

Use block feta and crumble it yourself for the best texture.

Slice the red onion thinly so it does not overpower the other ingredients.

Use ripe but firm tomatoes so they hold their shape.

For the brightest Mediterranean Chickpea Feta Salad, add the herbs and dressing shortly before serving.

Keep pita or crackers separate until serving so they remain crisp.

Easy Variations

Mediterranean Chickpea Feta Salad can be adapted in many different ways.

Add avocado for extra creaminess, roasted red peppers for sweetness, or toasted almonds, walnuts, pistachios, or pine nuts for crunch.

A grain-based version can include quinoa, bulgur, couscous, or farro.

For extra protein, add grilled chicken, salmon, shrimp, tuna, or hard-boiled eggs.

You can also turn Mediterranean Chickpea Feta Salad into individual lunch boxes by dividing the ingredients among meal-prep containers and storing the dressing separately.

If you enjoy crispy Mediterranean-style appetizers, you may also like our Air Fryer Crispy Feta Bites with Hot Honey.

Make-Ahead Instructions

Mediterranean Chickpea Feta Salad is easy to prepare ahead as long as the ingredients are stored separately.

Rinse and dry the chickpeas up to 2 days ahead.

Slice the cucumber, pepper, and onion one day in advance and refrigerate them in separate airtight containers.

The dressing can be made up to 4 days ahead. Bring it to room temperature and shake well before serving.

Wait to cut the tomatoes, crumble the feta, and chop the herbs until closer to serving.

Storage

Store leftover Mediterranean Chickpea Feta Salad in an airtight container in the refrigerator for up to 3 days.

If the salad has already been dressed, the vegetables will gradually soften, but the flavors will still be delicious.

For the best meal-prep texture, keep the dressing, pita, and crunchy toppings separate.

Do not freeze the assembled salad because cucumber, tomato, herbs, and feta change texture after thawing.

Nutrition Information

Approximate nutrition per serving without pita or optional extras:

Calories: 310
Protein: 12 g
Carbohydrates: 31 g
Fat: 17 g
Saturated Fat: 6 g
Fiber: 8 g
Sugar: 7 g
Sodium: 670 mg

Nutrition values are estimates and may vary depending on the feta, chickpeas, olives, dressing, and portion size.

Frequently Asked Questions

Can I use another type of bean?

Yes. White beans, cannellini beans, or butter beans can replace the chickpeas, although the texture will be slightly different.

Can I make this dairy-free?

Yes. Leave out the feta or use a dairy-free feta-style alternative.

Can I use canned chickpeas?

Yes. Canned chickpeas are perfect for Mediterranean Chickpea Feta Salad. Just rinse and dry them thoroughly before using.

Can I prepare the whole board ahead?

You can prepare most components in advance, but assemble the board shortly before serving so the vegetables and herbs stay fresh.

What can I use instead of Kalamata olives?

Green olives, Castelvetrano olives, or another favorite variety will work.

Is this recipe good for meal prep?

Yes. Store the ingredients in separate sections and keep the dressing in a small container until ready to eat.

Can I add meat?

Yes. Grilled chicken, lamb, turkey, or tuna can all be added when you want a more filling main dish.

Final Thoughts

Mediterranean Chickpea Feta Salad is an easy way to turn chickpeas, feta, fresh vegetables, herbs, and lemon dressing into a colorful board that feels both casual and special.

Because Mediterranean Chickpea Feta Salad can be customized with dips, grains, proteins, and crunchy extras, it works well for lunches, potlucks, parties, family dinners, and meal prep.

Keep this recipe handy whenever you want something fresh, satisfying, and easy to assemble.

With creamy feta, hearty chickpeas, crisp vegetables, briny olives, and plenty of fresh herbs, this board delivers classic Mediterranean flavor in a fun, shareable presentation.


Air Fryer Crispy Feta Bites with Hot Honey

Feta Bites with crispy golden panko coating, creamy feta cheese, fresh herbs, and a drizzle of hot honey

Air Fryer Crispy Feta Bites with Hot Honey

Feta Bites are crispy, creamy, and full of bold flavor, with a crunchy golden coating wrapped around warm feta cheese and finished with a sweet-spicy drizzle of hot honey. They are easy to make in the air fryer and work beautifully as an appetizer, party snack, or Mediterranean-style bite.

These Feta Bites come together with simple ingredients including feta, flour, eggs, panko breadcrumbs, herbs, and a little olive oil spray. The contrast between salty feta and warm honey makes every bite rich, crisp, and satisfying without requiring deep frying.

Prep Time: 20 minutes
Chill Time: 20 minutes
Air Fry Time: 8–10 minutes
Total Time: About 50 minutes
Servings: 4

Ingredients

For the Feta

  • 8 ounces block feta cheese
  • 1/3 cup all-purpose flour
  • 2 large eggs
  • 1 tablespoon milk
  • 1 cup panko breadcrumbs
  • 1/2 teaspoon dried oregano
  • 1/2 teaspoon garlic powder
  • 1/4 teaspoon smoked paprika
  • 1/4 teaspoon black pepper
  • Olive oil spray

Ingredients For the Hot Honey

  • 1/4 cup honey
  • 1/2 teaspoon red pepper flakes
  • 1 teaspoon lemon juice
  • Pinch of salt

For Serving

  • Chopped fresh parsley
  • Sesame seeds, optional
  • Lemon wedges
  • Extra hot honey

Why You’ll Love This Recipe

Feta Bites have everything you want in an easy appetizer: crisp texture, creamy cheese, bold seasoning, and a sweet-spicy finish. The air fryer gives the coating a golden crunch while keeping the feta soft and warm inside.

Another reason to love Feta Bites is how quickly they cook. Once the pieces are coated and chilled, they need only a few minutes in the air fryer.

They are also easy to serve with a mezze board, salad, or extra hot honey.

How to Make Feta Bites

Step 1: Cut the Feta

Remove the feta block from its package and pat it dry with paper towels.

Cut the cheese into bite-size cubes or small rectangles, about 1 to 1 1/2 inches each.

Keeping the pieces similar in size helps Feta Bites cook evenly and prevents smaller pieces from becoming too soft before the larger ones are heated through.

Step 2: Prepare the Breading Station

Place the flour in one shallow bowl.

In a second bowl, whisk together the eggs and milk.

In a third bowl, combine panko breadcrumbs, oregano, garlic powder, smoked paprika, and black pepper.

Arrange the bowls in order so coating the cheese is quick and easy.

Step 3: Coat the Feta

Dip each piece of feta into the flour and shake off the excess.

Next, dip it into the egg mixture, making sure every side is coated.

Finally, press the cheese into the seasoned panko until fully covered.

For an extra-crispy shell, repeat the egg and panko steps once more. Double coating gives Feta Bites a sturdier exterior and helps keep the cheese inside during air frying.

Step 4: Chill the Coated Pieces

Place the coated feta pieces on a parchment-lined plate or tray.

Refrigerate for at least 20 minutes.

Chilling helps the breading firm up and reduces the chance of the cheese softening too quickly in the air fryer.

Step 5: Make the Hot Honey

While the feta chills, place honey and red pepper flakes in a small saucepan over low heat.

Warm gently for 2 to 3 minutes. Do not boil.

Remove from the heat and stir in lemon juice and a tiny pinch of salt.

Let the mixture rest so the pepper flakes can infuse the honey.

Step 6: Preheat the Air Fryer

Preheat the air fryer to 390°F or 200°C for about 3 minutes.

A hot basket helps Feta Bites start crisping immediately and gives the coating a better golden finish.

Step 7: Arrange in the Basket

Lightly spray the air fryer basket with olive oil.

Arrange the chilled pieces in a single layer, leaving a little space between each one.

Lightly spray the tops with olive oil.

Do not overcrowd the basket because air needs to circulate around each piece.

Step 8: Air Fry Until Golden

Air fry for 4 to 5 minutes.

Carefully flip the pieces, spray lightly again, and continue cooking for another 3 to 5 minutes.

Feta Bites are ready when the coating is golden and crisp and the cheese inside is warm.

Watch closely near the end because feta can soften quickly once heated.

Step 9: Rest Briefly

Transfer the cooked bites to a plate and let them rest for 2 minutes.

This short rest helps the coating firm slightly.

Step 10: Drizzle and Serve

Arrange the warm Feta Bites on a serving plate.

Drizzle with hot honey, sprinkle with chopped parsley and sesame seeds if desired, and serve with lemon wedges.

Serve immediately for the best contrast between crisp coating and creamy cheese.

Serving Suggestions

Feta Bites are excellent as part of a Mediterranean appetizer spread.

Serve them with olives, cucumber slices, cherry tomatoes, hummus, pita wedges, roasted peppers, or a simple chopped salad.

They also pair well with grilled chicken, roasted vegetables, or a grain bowl.

Serve Feta Bites on a party platter with a small bowl of extra hot honey in the center for dipping.

For a lighter, fresher contrast, place them over arugula and finish with a squeeze of lemon.

For another savory and cheesy snack, try our Broccoli & Cheddar Savory Muffins with tender broccoli, cheddar, herbs, and a soft golden crumb.

Recipe Tips

Use a firm block of feta rather than crumbled feta.

Pat the cheese dry before breading so the coating sticks better.

Double coating is helpful if your feta is especially soft.

Chill the breaded pieces before air frying.

Do not overcrowd the basket.

Use panko breadcrumbs for a lighter, crunchier texture than regular breadcrumbs.

Spray lightly with oil instead of pouring oil over the breading.

For the best texture, serve them soon after air frying.

If the honey is too spicy, add more plain honey. If it is not spicy enough, stir in extra red pepper flakes.

Easy Variations

Feta Bites are easy to customize with different flavors.

Add dried thyme, rosemary, or parsley to the breadcrumbs for a more herb-forward flavor.

Turn up the heat by mixing cayenne pepper into the panko or adding extra chili flakes to the honey.

Create a nutty sesame crust by replacing part of the panko with sesame seeds.

You can also make Feta Bites with a lemon-herb honey by omitting the chili flakes and adding extra lemon zest.

For a sweeter finish, add a tiny amount of orange zest to the honey.

If you enjoy crispy, cheesy comfort food, you may also like our Taco Bell Mexican Pizza with seasoned beef, refried beans, taco sauce, and melted cheese.

Make-Ahead Instructions

The bites can be breaded several hours ahead.

Place the coated pieces on a tray, cover loosely, and refrigerate until ready to cook.

The hot honey can also be prepared in advance and stored in a small covered jar at room temperature for the day.

Air fry just before serving so the coating stays crisp.

Storage and Reheating

Store leftovers in an airtight container in the refrigerator for up to 2 days.

To reheat, place them back in the air fryer at 350°F or 175°C for 3 to 4 minutes.

Avoid microwaving if possible because the breading can become soft.

The hot honey can be stored separately and added after reheating.

Freezing is not ideal because feta can change texture after thawing.

Nutrition Information

Approximate nutrition per serving:

Calories: 320
Protein: 12 g
Carbohydrates: 32 g
Fat: 17 g
Saturated Fat: 9 g
Fiber: 1 g
Sugar: 16 g
Sodium: 720 mg

Nutrition values are estimates and will vary depending on the feta, breadcrumbs, honey, and serving size.

Frequently Asked Questions

Can I use crumbled feta?

No. A firm block works best because it can be cut into pieces and breaded easily.

Can I make these without an air fryer?

Yes. Bake them in a 425°F or 220°C oven for about 12 to 15 minutes, turning once.

Why did the feta leak out?

The cheese may have been too soft, the coating too thin, or the pieces may have cooked too long. Chilling and double coating can help.

Can I make the hot honey less spicy?

Yes. Reduce the red pepper flakes or mix the finished honey with extra plain honey.

Can I use regular breadcrumbs?

Yes, but panko gives Feta Bites a lighter and crunchier coating.

Can I prepare them ahead?

Yes. Bread and chill the pieces a few hours before cooking.

What can I serve with them?

They pair well with salads, roasted vegetables, hummus, pita, grilled chicken, and Mediterranean-style appetizer boards.

Final Thoughts

Feta Bites are a simple air fryer appetizer that combines salty feta, crisp seasoned breadcrumbs, fresh herbs, and sweet-spicy hot honey.

Because Feta Bites cook quickly and can be breaded ahead, they are useful for parties, casual entertaining, and easy weeknight snacks.

Keep this Feta Bites recipe handy whenever you want a crispy appetizer with a creamy center and bold Mediterranean-inspired flavor.

With golden panko, warm feta, and a glossy drizzle of hot honey, Feta Bites are an easy snack that looks impressive while requiring only a short cooking time.

Air Fryer Crispy Feta & Onion Stuffed Jalapeño Poppers

Air fryer crispy feta and onion stuffed jalapeño poppers with golden panko breadcrumbs and creamy cheese filling, served with ranch dipping sauce.
Air Fryer Crispy Feta & Onion Stuffed Jalapeño Poppers

Want a party snack with a crispy coating, creamy cheese filling, and a little spicy kick? These Air Fryer Crispy Feta & Onion Stuffed Jalapeño Poppers bring together fresh jalapeños, tangy feta cheese, sweet onion, and a crunchy golden crust. They are easy to prepare and make a tasty addition to game-day spreads, backyard cookouts, family gatherings, and casual movie nights.

Each jalapeño is filled with a savory cheese mixture that balances the pepper’s heat. Crumbled feta adds a salty, tangy flavor, while cream cheese makes the filling smooth and creamy. Finely chopped onion adds a little sweetness, and a crisp breadcrumb coating creates a satisfying crunch.

Using an air fryer gives these stuffed jalapeños a golden exterior without deep-frying them in a pot of oil. Serve them hot with ranch dressing, garlic yogurt dip, or your favorite dipping sauce. If you enjoy easy appetizers with bold flavor, this recipe is worth adding to your snack menu.

Why You’ll Love These Air Fryer Crispy Feta & Onion Stuffed Jalapeño Poppers

  • Crispy outside: A seasoned breadcrumb coating creates a crunchy finish in the air fryer.
  • Creamy cheese filling: Feta and cream cheese make a smooth, tangy center.
  • Balanced flavor: Onion adds mild sweetness that complements the spicy peppers.
  • Less oil needed: Air frying uses much less oil than traditional deep-frying.
  • Easy to customize: Adjust the heat, herbs, and cheese to suit your taste.
  • Great for sharing: Serve these bite-sized appetizers at parties, game nights, or family dinners.

Recipe Overview

  • Prep Time: 20 minutes
  • Cook Time: 8–12 minutes per batch
  • Total Time: Approximately 30–40 minutes
  • Servings: 4
  • Yield: 12 jalapeño poppers
  • Course: Appetizer, Snack
  • Cuisine: American-Inspired
  • Cooking Method: Air Fryer
  • Difficulty: Easy

Cooking time may vary depending on the size of the peppers, the thickness of the coating, and your air fryer model.

Ingredients for Air Fryer Crispy Feta & Onion Stuffed Jalapeño Poppers

Use fresh jalapeños and a thick cheese filling for the best texture. The quantities below make approximately 12 poppers.

For the Jalapeño Poppers

  • 6 medium fresh jalapeño peppers
  • 4 ounces cream cheese, softened
  • 1/2 cup crumbled feta cheese
  • 1/4 cup finely chopped yellow or red onion
  • 1 garlic clove, minced
  • 1 tablespoon chopped fresh parsley
  • 1/4 teaspoon smoked paprika
  • 1/4 teaspoon black pepper

For the Crispy Coating

  • 1/2 cup all-purpose flour
  • 1 large egg
  • 1 tablespoon water
  • 3/4 cup panko breadcrumbs
  • 1/2 teaspoon garlic powder
  • 1/2 teaspoon paprika
  • Olive oil spray suitable for air fryers

Serving

  • Ranch dressing
  • Garlic yogurt dip
  • Marinara sauce, optional
  • Fresh parsley, optional

Ingredient tip: Feta is naturally salty, so taste the filling before adding extra salt. Finely chop the onion to help the filling hold together, and choose jalapeños that are similar in size so they cook evenly.

How to Make Air Fryer Crispy Feta & Onion Stuffed Jalapeño Poppers

Follow these steps to prepare the peppers, mix the filling, create a crunchy coating, and air fry the poppers until golden.

Step 1: Prepare the Jalapeños

Wash the jalapeños and dry them with a clean towel. Slice each pepper in half lengthwise, then use a small spoon to remove the seeds and pale inner membranes.

Wear food-safe gloves while handling the peppers, especially if you have sensitive skin. Avoid touching your eyes or face, and wash your hands and utensils thoroughly after preparation.

Removing the seeds and membranes reduces some of the heat, but the peppers may still be spicy. Leave a small amount of membrane inside if you prefer a hotter appetizer.

Step 2: Mix the Feta and Onion Filling

Place the softened cream cheese in a medium bowl. Add the crumbled feta, finely chopped onion, minced garlic, parsley, smoked paprika, and black pepper.

Stir until the ingredients form a thick, evenly mixed filling. Break up large feta pieces so they distribute well throughout the mixture.

If the filling seems too loose, refrigerate it for 10–15 minutes before stuffing the peppers. A firmer filling is easier to portion and less likely to spill out during cooking.

Step 3: Fill the Jalapeño Halves

Arrange the pepper halves on a clean tray with the cut sides facing up. Spoon the cheese mixture into each half, spreading it evenly from end to end.

Keep the filling level with the pepper edges rather than piling it too high. Excess filling can leak during air frying and make the coating less crisp.

If you have a small piping bag or a zip-top bag with a corner snipped off, use it to fill the peppers neatly.

Step 4: Prepare the Breading Station

Place the flour in one shallow bowl. In a second bowl, whisk the egg with 1 tablespoon of water until smooth.

In a third bowl, combine the panko breadcrumbs, garlic powder, and paprika. Panko creates a light, crunchy crust, while the seasonings add extra flavor.

Arrange the bowls in order so you can coat each stuffed pepper without making a mess.

Step 5: Coat Each Stuffed Pepper

Dip the outside and sides of each filled pepper into the flour, shaking off any excess. Brush or lightly dip the coated pepper into the egg mixture, then press it gently into the seasoned breadcrumbs.

Keep the cut side and filling covered with a light, even layer of crumbs. Press gently so the coating sticks without squeezing the cheese mixture out.

For a thicker crust, repeat the egg and breadcrumb steps once. Avoid making the coating too thick, as it may brown before the pepper becomes tender.

Step 6: Preheat the Air Fryer

Preheat your air fryer to 375°F for about 3 minutes, following your appliance instructions.

Lightly spray the basket with an air-fryer-safe oil if needed. Arrange the poppers in a single layer with space between them.

If your basket is small, cook in batches rather than stacking the peppers. Good airflow helps the breadcrumb coating become crisp and golden.

Step 7: Air Fry Until Golden and Crispy

Place the stuffed jalapeños in the basket with the cut side facing up. Lightly spray the breadcrumb coating with oil to encourage even browning.

Air fry at 375°F for approximately 8–12 minutes. Begin checking at 8 minutes and continue cooking until the coating is golden and crisp and the peppers are tender.

The filling should be hot throughout. If your poppers are large or heavily coated, they may need a few extra minutes.

Avoid turning them if the filling is loose, because moving them can cause the cheese mixture to spill. If your air fryer browns unevenly, carefully rotate the basket or rearrange the poppers midway through cooking.

Step 8: Let the Poppers Rest

Transfer the cooked poppers to a plate using tongs or a spatula. Let them rest for 2–3 minutes before serving.

The cheese filling can be extremely hot immediately after cooking. A short rest also helps the coating firm up, making the poppers easier to pick up.

Sprinkle with fresh parsley or a small amount of crumbled feta for extra flavor.

Step 9: Serve with Your Favorite Dip

Arrange the crispy jalapeño poppers on a serving platter. Add small bowls of ranch dressing, garlic yogurt dip, or marinara sauce.

For a fresh contrast, serve them with cucumber slices, cherry tomatoes, or a simple green salad. These poppers are best served warm while the coating is crisp and the filling is creamy.

Tips for Perfectly Crispy Jalapeño Poppers

Use these simple techniques to improve the texture and reduce filling leaks.

  • Dry the peppers thoroughly: Excess water can prevent the coating from sticking.
  • Chop the onion finely: Small pieces blend into the filling and help it stay in place.
  • Soften the cream cheese: Room-temperature cream cheese mixes more smoothly with feta.
  • Use panko breadcrumbs: Their larger flakes help create a crunchy exterior.
  • Coat evenly: Cover the sides and edges without adding too much breading.
  • Spray lightly with oil: A thin coating helps the crumbs brown in the air fryer.
  • Avoid overcrowding: Cook in batches so hot air can circulate around the peppers.
  • Check early: Air fryers differ in heat output, so begin checking at 8 minutes.

Easy Variations to Try

You can change the cheese, herbs, or coating to create different flavors without changing the basic preparation method.

Bacon and Feta Jalapeño Poppers

Add 2 tablespoons of finely chopped, fully cooked bacon to the filling. The smoky, savory flavor complements the tangy feta and creamy cheese.

Extra-Cheesy Jalapeño Poppers

Mix 2 tablespoons of shredded mozzarella into the filling. Mozzarella creates a milder cheese flavor and a softer, stretchy texture.

Mediterranean Herb Poppers

Add chopped fresh dill or oregano, a little lemon zest, and extra parsley to the cheese mixture. These ingredients bring a fresh Mediterranean-inspired flavor to the appetizer.

Spicy Jalapeño Poppers

Mix a pinch of red pepper flakes into the filling or leave some of the jalapeño membranes intact. Taste carefully because the heat level varies from pepper to pepper.

Gluten-Free Jalapeño Poppers

Use a gluten-free all-purpose flour blend and gluten-free panko breadcrumbs. Check all ingredient labels to ensure the products meet your dietary needs.

What to Serve with Crispy Feta and Onion Jalapeño Poppers

These stuffed peppers pair well with creamy dips, fresh vegetables, and other party snacks.

  • Ranch dressing: Its cool, creamy flavor balances the jalapeño heat.
  • Garlic yogurt dip: Adds a fresh, tangy contrast to the salty feta.
  • Marinara sauce: Provides a tomato-based dip with mild acidity.
  • Fresh vegetable sticks: Carrots, celery, and cucumber add crunch and freshness.
  • Chicken wings: Serve both appetizers together for a game-day spread.
  • Loaded potato wedges: Create a more filling snack platter with potatoes and dipping sauce.

For a party, offer two dipping sauces with different flavors so guests can choose their favorite.

Storage and Reheating Instructions

How to Store Leftover Jalapeño Poppers

Allow the poppers to cool slightly, then place them in an airtight container. Refrigerate within 2 hours of cooking and eat within 3–4 days.

Store the dipping sauces separately to help preserve the breadcrumb coating.

How to Reheat Jalapeño Poppers in the Air Fryer

Preheat the air fryer to 350°F. Arrange the refrigerated poppers in a single layer and heat for approximately 3–5 minutes, checking that the filling is hot throughout.

Add another minute if needed, but watch the coating closely to prevent over-browning.

Can You Freeze Stuffed Jalapeño Poppers?

Yes. For better texture, freeze the filled and breaded poppers before cooking on a lined tray until firm, then transfer them to a freezer-safe container.

Cook from frozen at 375°F, allowing extra time and checking that the filling is hot throughout. For best quality, use within 2 months.

Common Mistakes to Avoid

  • Leaving too much moisture on the peppers: Wet surfaces make breading less likely to stick.
  • Using large onion pieces: Large pieces can make the filling uneven and difficult to portion.
  • Overfilling the peppers: Excess filling may leak during cooking.
  • Skipping the oil spray: The breadcrumbs may stay pale and dry without a little oil.
  • Crowding the air fryer: Packed peppers can brown unevenly.
  • Cooking at too high a temperature: The coating may brown before the peppers soften.
  • Serving immediately: The hot cheese filling can burn your mouth, so allow a short resting period.

Frequently Asked Questions

1. How long do jalapeño poppers take in the air fryer?

Most breaded jalapeño poppers take 8–12 minutes at 375°F, depending on pepper size, filling quantity, and your air fryer.

2. Can I make jalapeño poppers without cream cheese?

Yes. Use a thick soft cheese such as ricotta, or increase the feta slightly, keeping the filling firm enough to stay inside the peppers.

3. How do I make jalapeño poppers less spicy?

Remove the seeds and inner membranes before filling the peppers, and serve them with a cool ranch or yogurt dip.

4. Why is my breadcrumb coating not crispy?

Dry the peppers well, coat them evenly, use panko breadcrumbs, and apply a light spray of oil before air frying.

5. Can I prepare these poppers ahead of time?

Yes. Fill and bread the peppers, cover them, and refrigerate for several hours before cooking for easier party preparation.

6. Can I use regular breadcrumbs instead of panko?

Yes. Regular breadcrumbs work, but the coating may be finer and less crunchy than panko.

7. Do I need to turn jalapeño poppers while air frying?

Usually not. Cook them cut-side up, and rotate the basket or carefully rearrange them only if your air fryer browns unevenly.

8. Can I make these jalapeño poppers gluten-free?

Yes. Replace the regular flour and panko with certified gluten-free alternatives and check the labels on all other ingredients.

Final Thoughts

Air Fryer Crispy Feta & Onion Stuffed Jalapeño Poppers combine spicy peppers, tangy feta, creamy cheese, and a crunchy breadcrumb coating in one easy appetizer. They are a practical choice for game-day gatherings, family snack nights, and casual parties.

For the best results, dry the peppers, keep the filling thick, coat each piece evenly, and leave enough space in the air fryer basket. Serve the poppers warm with your favorite dipping sauce for a flavorful snack with a satisfying crunch.

Ready to make these crispy bites? Save this recipe for your next gathering and tell us in the comments: would you add bacon, mozzarella, or extra garlic to your jalapeño poppers?

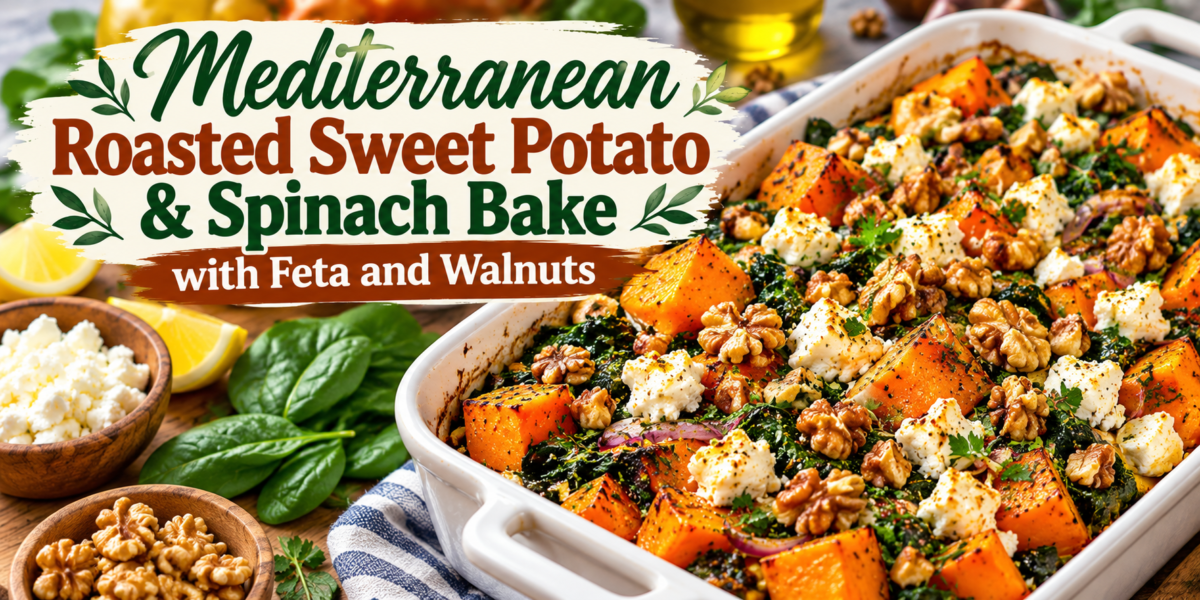
Mediterranean Roasted Sweet Potato & Spinach Bake with Feta and Walnuts

Mediterranean Sweet Potato Spinach Bake with feta, walnuts, garlic, lemon, and fresh herbs

Mediterranean Roasted Sweet Potato & Spinach Bake with Feta and Walnuts

Sweet Potato Spinach Bake is a colorful Mediterranean-inspired dish made with roasted sweet potatoes, fresh spinach, feta cheese, crunchy walnuts, garlic, herbs, and olive oil. It works beautifully as a vegetarian main dish, hearty side, or meal-prep option. The combination of naturally sweet potatoes, savory feta, and earthy spinach creates a balanced flavor that feels comforting without being too heavy.

This Sweet Potato Spinach Bake is especially useful when you want a simple oven meal made with wholesome ingredients. The roasted vegetables develop deep flavor, while the walnuts add crunch and the feta adds a creamy, salty finish.

Prep Time: 20 minutes
Cook Time: 40 minutes
Total Time: 1 hour
Servings: 6

Ingredients

For the Sweet Potatoes

3 medium sweet potatoes, peeled and cut into 1-inch cubes

2 tablespoons extra virgin olive oil

1/2 teaspoon garlic powder

1 teaspoon smoked paprika

1/2 teaspoon ground cumin

1/2 teaspoon salt

1 teaspoon dried oregano

1/4 teaspoon black pepper

For the Spinach Mixture

1 tablespoon olive oil

3 cloves garlic, minced

1 small red onion, thinly sliced

6 cups fresh baby spinach

1 tablespoon fresh lemon juice

1 teaspoon lemon zest

1/4 teaspoon red pepper flakes, optional

For the Topping

1 cup crumbled feta cheese

1/2 cup chopped walnuts

2 tablespoons chopped fresh parsley

1 tablespoon chopped fresh dill

1 tablespoon extra virgin olive oil

Fresh black pepper, to taste

Why You’ll Love This Recipe

Sweet Potato Spinach Bake combines several textures in one simple dish. The sweet potatoes become tender and lightly caramelized, the spinach stays soft and savory, and the walnuts provide a satisfying crunch.

It is also easy to adapt. You can add chickpeas for extra protein, change the cheese, or include more vegetables depending on what you already have.

Another reason to love Sweet Potato Spinach Bake is that it works for several occasions. Serve it for a weeknight dinner, bring it to a potluck, or prepare portions ahead for lunches.

How to Make Mediterranean Roasted Sweet Potato & Spinach Bake

Step 1: Roast the Sweet Potatoes

Preheat the oven to 425°F or 220°C.

Place the cubed sweet potatoes on a large baking sheet.

Drizzle with olive oil and sprinkle with smoked paprika, oregano, garlic powder, cumin, salt, and black pepper.

Toss until every piece is evenly coated.

Spread the potatoes into a single layer and roast for about 25 minutes, turning once halfway through.

Roasting first gives Sweet Potato Spinach Bake a deeper flavor and prevents the sweet potatoes from becoming overly soft in the finished dish.

Step 2: Prepare the Spinach

While the sweet potatoes roast, heat olive oil in a large skillet over medium heat.

Add the red onion and cook for 3 to 4 minutes until slightly softened.

Stir in the garlic and cook for about 30 seconds.

Add the spinach in batches, stirring until each handful wilts before adding more.

This step removes excess moisture and keeps Sweet Potato Spinach Bake from becoming watery.

Step 3: Season the Spinach Mixture

Once the spinach has wilted, remove the skillet from the heat.

Stir in lemon juice, lemon zest, and red pepper flakes if using.

Season lightly with black pepper.

You may not need much salt because the feta will add plenty of savory flavor later.

Step 4: Assemble the Bake

Reduce the oven temperature to 400°F or 200°C.

Lightly grease a medium baking dish.

Add the roasted sweet potatoes and spread them evenly across the bottom.

Spoon the spinach and onion mixture over the potatoes.

Gently toss or layer the ingredients so the spinach is distributed throughout.

This creates an even base for Sweet Potato Spinach Bake and helps every serving contain both vegetables.

Step 5: Add Feta and Walnuts

Sprinkle the crumbled feta evenly over the top.

Add the chopped walnuts.

Drizzle lightly with extra virgin olive oil.

The feta will soften and lightly brown in the oven, while the walnuts become more fragrant and crisp.

These toppings give Sweet Potato Spinach Bake its signature Mediterranean-style flavor and texture.

Step 6: Bake

Place the dish in the oven and bake uncovered for 12 to 15 minutes.

The feta should be warm and slightly golden, and the walnuts should smell toasted.

Avoid baking for too long because the spinach can dry out.

Step 7: Garnish and Serve

Remove the dish from the oven and let it rest for about 5 minutes.

Sprinkle with fresh parsley, dill, and extra black pepper.

Serve Sweet Potato Spinach Bake warm with lemon wedges if desired.

Serving Suggestions

Sweet Potato Spinach Bake can be served as a vegetarian main dish with a simple salad, hummus, or warm pita bread.

For a more filling meal, pair it with quinoa, couscous, lentils, or chickpeas.

It also works well alongside grilled chicken, baked salmon, roasted turkey, or white fish.

For brunch, serve Sweet Potato Spinach Bake with poached eggs or scrambled eggs for extra protein.

Recipe Tips

Cut the sweet potatoes into similar-sized cubes so they roast evenly.

Do not overcrowd the baking sheet, or the potatoes may steam instead of caramelizing.

Cook the spinach before adding it to the baking dish to remove excess moisture.

Use good-quality feta for the best salty and creamy flavor.

Toast the walnuts lightly if you want an even stronger nutty flavor.

Fresh lemon juice brightens Sweet Potato Spinach Bake and balances the sweetness of the potatoes.

Add herbs after baking so they keep their fresh flavor and color.

Let the dish rest briefly before serving so the layers settle.

Easy Variations

For extra protein, add one can of drained chickpeas before baking.

You can make Sweet Potato Spinach Bake with goat cheese instead of feta for a softer, tangier flavor.

For more vegetables, add roasted bell peppers, zucchini, mushrooms, or artichoke hearts.

Pecans or almonds can replace the walnuts.

If you like sweeter Mediterranean flavors, add a small handful of dried cranberries or chopped dates.

For extra heat, increase the red pepper flakes or add a pinch of cayenne.

For another hearty low-carb bake, try our Low-Carb Zucchini, Mushroom, and Ground Meat Casserole.

Make-Ahead Instructions

Sweet Potato Spinach Bake can be prepared ahead, making it useful for busy days.

Roast the sweet potatoes and cook the spinach mixture up to one day in advance.

Store both components separately in airtight containers in the refrigerator.

When ready to bake, assemble the dish, add feta and walnuts, and cook until everything is heated through.

You may need a few extra minutes if the ingredients are cold.

Storage and Reheating

Store leftover Sweet Potato Spinach Bake in an airtight container in the refrigerator for up to 3 days.

Reheat individual portions in the microwave, or warm the whole dish in a 350°F oven until heated through.

For the best texture, add a few fresh walnuts after reheating.

Freezing is possible, but the spinach and feta may become slightly softer after thawing.

For best quality, refrigerate and enjoy within a few days.

Nutrition Information

Approximate nutrition per serving:

Calories: 330
Protein: 10 g
Carbohydrates: 35 g
Fat: 18 g
Saturated Fat: 6 g
Fiber: 7 g
Sugar: 9 g
Sodium: 470 mg

Nutrition values are estimates and may vary depending on the size of the sweet potatoes and the amount of feta, walnuts, and olive oil used.

Frequently Asked Questions

Can I use frozen spinach?

Yes. Thaw it completely and squeeze out as much liquid as possible before adding it to the recipe. Fresh spinach usually gives Sweet Potato Spinach Bake a lighter texture, but frozen spinach works well.

Can I make this vegan?

Yes. Replace the feta with a dairy-free feta alternative or leave it out entirely.

Can I add protein?

Absolutely. Chickpeas, lentils, shredded chicken, or white beans are all good additions.

Can I use another cheese?

Yes. Goat cheese, ricotta, Parmesan, or mozzarella can be used depending on the flavor you want.

Can I prepare the dish the night before?

Yes. Assemble everything except the walnuts, cover, and refrigerate. Add the walnuts just before baking for better crunch.

What can I use instead of walnuts?

Pecans, almonds, pumpkin seeds, or sunflower seeds are all good substitutes.

Is this recipe good for meal prep?

Yes. Sweet Potato Spinach Bake stores well and can be divided into containers for easy lunches or dinners.

Final Thoughts

Mediterranean Roasted Sweet Potato & Spinach Bake with Feta and Walnuts is a flavorful way to combine simple vegetables with classic Mediterranean ingredients. Roasted sweet potatoes bring natural sweetness, while spinach, feta, walnuts, garlic, herbs, and lemon add savory contrast.

Sweet Potato Spinach Bake is versatile enough to serve as a vegetarian main course or as a hearty side dish with chicken, fish, or grains. It also works well for meal prep because the ingredients hold up nicely after reheating.

Whether you make Sweet Potato Spinach Bake for a weeknight dinner, brunch, or gathering, the combination of roasted vegetables, creamy feta, and crunchy walnuts makes it an easy recipe worth repeating.

If you enjoy easy low-carb comfort food, you may also like our Low-Carb Crustless Pizza Bowl.

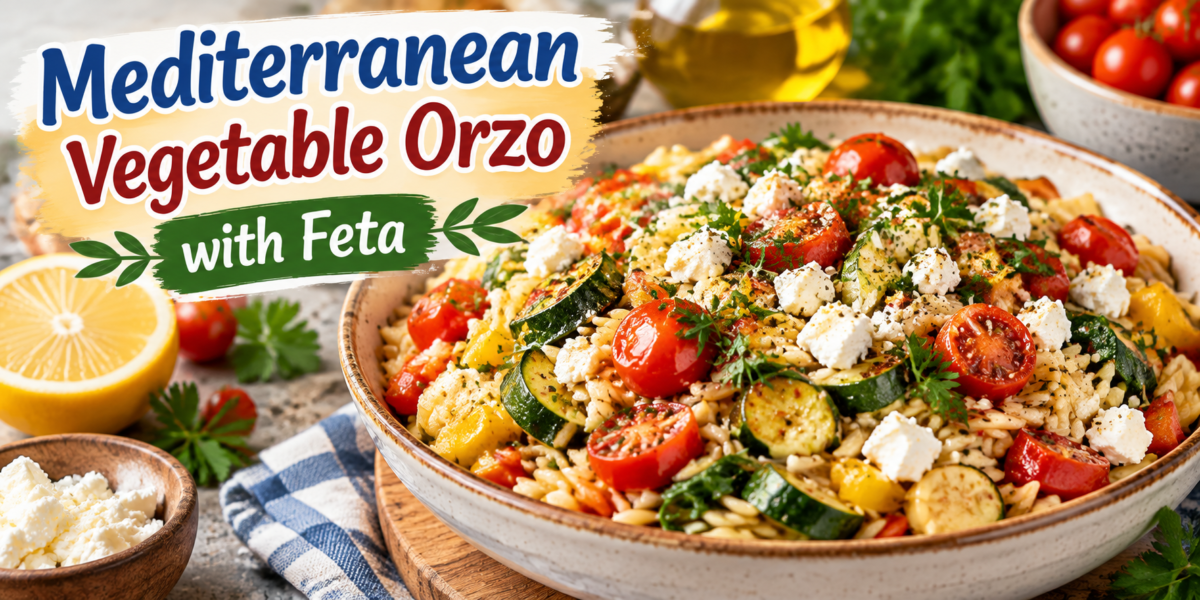
Mediterranean Vegetable Orzo with Feta

Mediterranean Vegetable Orzo with Feta topped with roasted vegetables, herbs, and fresh Mediterranean flavors

Mediterranean Vegetable Orzo with Feta

Mediterranean Vegetable Orzo is a colorful, flavorful, and wholesome dish inspired by the fresh ingredients commonly found in Mediterranean cuisine. This recipe combines tender orzo pasta with roasted vegetables, creamy feta cheese, fresh herbs, and a delicious blend of Mediterranean flavors. It is a perfect choice for lunch, dinner, meal preparation, or a light family meal.

This Mediterranean Vegetable Orzo recipe brings together simple ingredients that create a satisfying combination of textures and flavors. The soft orzo absorbs the rich flavors of olive oil, garlic, herbs, and vegetables, while feta cheese adds a creamy and slightly tangy finish.

Unlike heavy pasta dishes, this recipe focuses on fresh vegetables, balanced seasoning, and nourishing ingredients. Colorful bell peppers, zucchini, cherry tomatoes, and spinach provide natural flavors, while herbs like parsley and basil create a refreshing taste.

Mediterranean Vegetable Orzo is also a versatile dish that can be enjoyed warm or cold. It works beautifully as a main meal, a side dish for gatherings, or a convenient make-ahead lunch. The combination of vegetables, grains, and cheese makes it filling while still keeping the meal light and refreshing.

Whether you are looking for a healthy weeknight dinner or a flavorful dish for entertaining guests, this Mediterranean-inspired recipe delivers a restaurant-quality experience using simple homemade ingredients.

Preparation Time: 15 minutes

Cooking Time: 30 minutes

Total Time: 45 minutes

Servings: 6 people


Ingredients

2 cups orzo pasta

3 tablespoons extra virgin olive oil

3 cloves minced garlic

1 medium onion, finely chopped

1 red bell pepper, sliced

1 yellow bell pepper, sliced

1 medium zucchini, chopped

1 cup cherry tomatoes, halved

2 cups vegetable broth

2 cups fresh spinach

1 teaspoon dried oregano

1 teaspoon dried basil

1/2 teaspoon red pepper flakes

Salt, according to taste

Freshly ground black pepper, according to taste

3/4 cup crumbled feta cheese

1/4 cup fresh parsley, chopped

2 tablespoons fresh lemon juice

Lemon zest, for extra freshness

Sliced black olives (optional)

Toasted pine nuts (optional)

Chickpeas (optional)

Extra fresh herbs (optional)

Step-by-Step Instructions

To prepare Mediterranean Vegetable Orzo, begin by washing and preparing all vegetables. Chop the zucchini, slice the bell peppers, cut the cherry tomatoes in half, and finely chop the onion and garlic.

Heat olive oil in a large skillet or deep pan over medium heat. Add the chopped onion and cook for 2–3 minutes until it becomes soft and slightly translucent. Add minced garlic and cook for another 30 seconds until fragrant.

Add the sliced bell peppers and zucchini to the pan. Cook the vegetables for 5–7 minutes until they become tender while still maintaining some texture. Add cherry tomatoes and cook for another few minutes until they soften and release their natural juices.

Stir in the dried oregano, basil, red pepper flakes, salt, and black pepper. These seasonings create the signature Mediterranean flavor that makes this Mediterranean Vegetable Orzo so delicious.

Add the dry orzo pasta to the vegetables and mix well so the pasta absorbs the flavors. Pour in vegetable broth and bring the mixture to a gentle boil.

Reduce the heat, cover the pan, and allow the orzo to cook for about 10–12 minutes. Stir occasionally to prevent sticking and ensure even cooking.

When the orzo becomes tender and absorbs most of the liquid, add fresh spinach and stir until it wilts completely. The spinach adds color, nutrients, and a fresh taste to the dish.

Remove the pan from heat and add lemon juice, lemon zest, chopped parsley, and crumbled feta cheese. Gently mix everything together while keeping some feta pieces visible for a beautiful presentation.

Allow the dish to rest for a few minutes before serving. This helps the flavors combine and creates the perfect texture.

Tips for Perfect Orzo

For the best Mediterranean Vegetable Orzo, use fresh vegetables whenever possible because they provide better flavor and texture.

Do not overcook the orzo because it can become too soft. Cook until it is tender but still has a slight bite.

Using vegetable broth instead of water adds much more flavor to the dish. The orzo absorbs the broth while cooking, creating a richer taste.

Add feta cheese at the end of cooking to maintain its creamy texture and prevent it from completely melting into the dish.

For extra flavor, use good quality extra virgin olive oil and fresh herbs. These ingredients make a noticeable difference in Mediterranean recipes.

If preparing this recipe ahead of time, add a small drizzle of olive oil before serving to refresh the texture.

Variations

Mediterranean Vegetable Orzo can easily be customized based on your taste and available ingredients.

For a protein-rich version, add grilled chicken, shrimp, chickpeas, or white beans. These additions make the dish more filling while keeping the Mediterranean style.

For a vegan option, replace feta cheese with vegan cheese or nutritional yeast. The vegetables and herbs will still create a flavorful meal.

You can create a roasted vegetable version by baking zucchini, peppers, and tomatoes before mixing them with cooked orzo.

For extra creaminess, add a spoonful of Greek yogurt before serving. This creates a creamy Mediterranean-style pasta dish.

You can also add artichoke hearts, olives, sun-dried tomatoes, or mushrooms for different flavor combinations.

A spicy version can be made by increasing red pepper flakes or adding fresh chili peppers.

Serving Suggestions

Mediterranean Vegetable Orzo can be served in many delicious ways. It makes an excellent main course when paired with a fresh green salad and a glass of refreshing drink.

For family dinners, serve it alongside grilled vegetables, roasted chicken, or baked fish. The fresh Mediterranean flavors complement many dishes.

This recipe is also perfect for meal preparation. Store portions in airtight containers and enjoy them throughout the week for quick lunches.

Serve Mediterranean Vegetable Orzo warm with extra feta cheese, fresh parsley, and a drizzle of olive oil on top for an attractive presentation.

It can also be served chilled as a pasta salad during summer gatherings, picnics, or outdoor events.

Health Benefits

Mediterranean Vegetable Orzo provides a variety of nutritional benefits because it combines vegetables, herbs, olive oil, and balanced carbohydrates.

The vegetables in this recipe provide important vitamins, minerals, antioxidants, and dietary fiber. Bell peppers contain vitamin C, while spinach provides iron and other essential nutrients.

Olive oil is a traditional ingredient in Mediterranean cooking and contains healthy fats that support a balanced diet.

Feta cheese adds protein and calcium, which are important for maintaining healthy bones and muscles.

The herbs used in Mediterranean Vegetable Orzo provide natural flavor without needing excessive salt or processed seasonings.

Including a variety of colorful vegetables in your meals can support overall wellness and help create a balanced eating pattern.

Questions and Answers

What is orzo pasta?

Orzo is a small rice-shaped pasta made from wheat. Although it looks similar to rice, it is actually pasta and cooks quickly.

Can I make this recipe ahead of time?

Yes, Mediterranean Vegetable Orzo is excellent for meal preparation. Store it in the refrigerator and reheat gently before serving.

Can I use different vegetables?

Yes, you can replace or add vegetables such as mushrooms, broccoli, carrots, peas, or asparagus.

How long does this dish stay fresh?

It can stay fresh in an airtight container in the refrigerator for up to four days.

Can I freeze vegetable orzo?

Yes, you can freeze it, although the texture of feta cheese may slightly change after freezing.

Is this recipe suitable for vegetarians?

Yes, this recipe is vegetarian-friendly when prepared with vegetable broth and feta cheese.

Nutrition Information

Approximate nutrition per serving:

Calories: 390

Protein: 12 grams

Carbohydrates: 55 grams

Fiber: 6 grams

Fat: 14 grams

Calcium: 180 mg

The nutritional values may vary depending on the exact ingredients and portion sizes used.

Storage and Reheating Tips

Proper storage helps maintain the freshness and delicious flavor of Mediterranean Vegetable Orzo for several days. After cooking, allow the dish to cool completely before transferring it into an airtight container. Store it in the refrigerator where it can stay fresh for up to four days.

When reheating Mediterranean Vegetable Orzo, add a small splash of vegetable broth or water before warming it. This helps restore the creamy texture and prevents the orzo from becoming dry. You can reheat it on the stovetop over low heat or use a microwave until warmed through.

This recipe is also a great option for weekly meal preparation. Prepare a large batch during the weekend and divide it into individual portions for quick lunches or dinners. The flavors often become even better after resting because the herbs, vegetables, and seasonings have more time to combine.

Why This Recipe Is Perfect for Busy Days

Mediterranean Vegetable Orzo is an ideal choice for busy families because it requires simple ingredients and minimal cooking effort. Everything cooks together in one pan, which means less cleanup and more convenience.

The recipe is also easy to adjust according to what you already have in your kitchen. If you have extra vegetables available, you can add them without changing the overall cooking method. This makes it a practical recipe for reducing food waste while creating a delicious meal.

Another reason to love Mediterranean Vegetable Orzo is its balance of flavors. The sweetness of roasted vegetables, the creaminess of feta cheese, the freshness of herbs, and the richness of olive oil come together to create a satisfying dish that does not feel heavy.

Cooking Notes for Best Results

For the most flavorful Mediterranean Vegetable Orzo, allow the vegetables to cook properly before adding the orzo. This helps develop deeper flavors and creates a more enjoyable texture.

Fresh herbs can make a big difference in the final taste. Adding parsley, basil, or mint just before serving gives the dish a bright and refreshing finish.

If you prefer a stronger Mediterranean flavor, increase the amount of lemon juice, herbs, or feta cheese according to your taste. These ingredients enhance the fresh and vibrant character of the recipe.

Serving the dish immediately after preparation provides the best texture, but leftovers remain delicious and convenient for future meals

Final Thoughts

Mediterranean Vegetable Orzo is a wonderful recipe that proves healthy meals can also be full of flavor and comfort. The combination of fresh vegetables, creamy feta, herbs, and perfectly cooked orzo creates a satisfying dish suitable for any occasion.

This recipe is easy enough for busy weeknights but impressive enough for serving guests. With simple ingredients and flexible variations, it can become a regular favorite in your kitchen.

Whether enjoyed warm for dinner or chilled as a refreshing lunch, Mediterranean Vegetable Orzo delivers delicious Mediterranean flavors in every bite. It is a perfect example of how fresh ingredients and simple cooking techniques can create a memorable homemade meal.

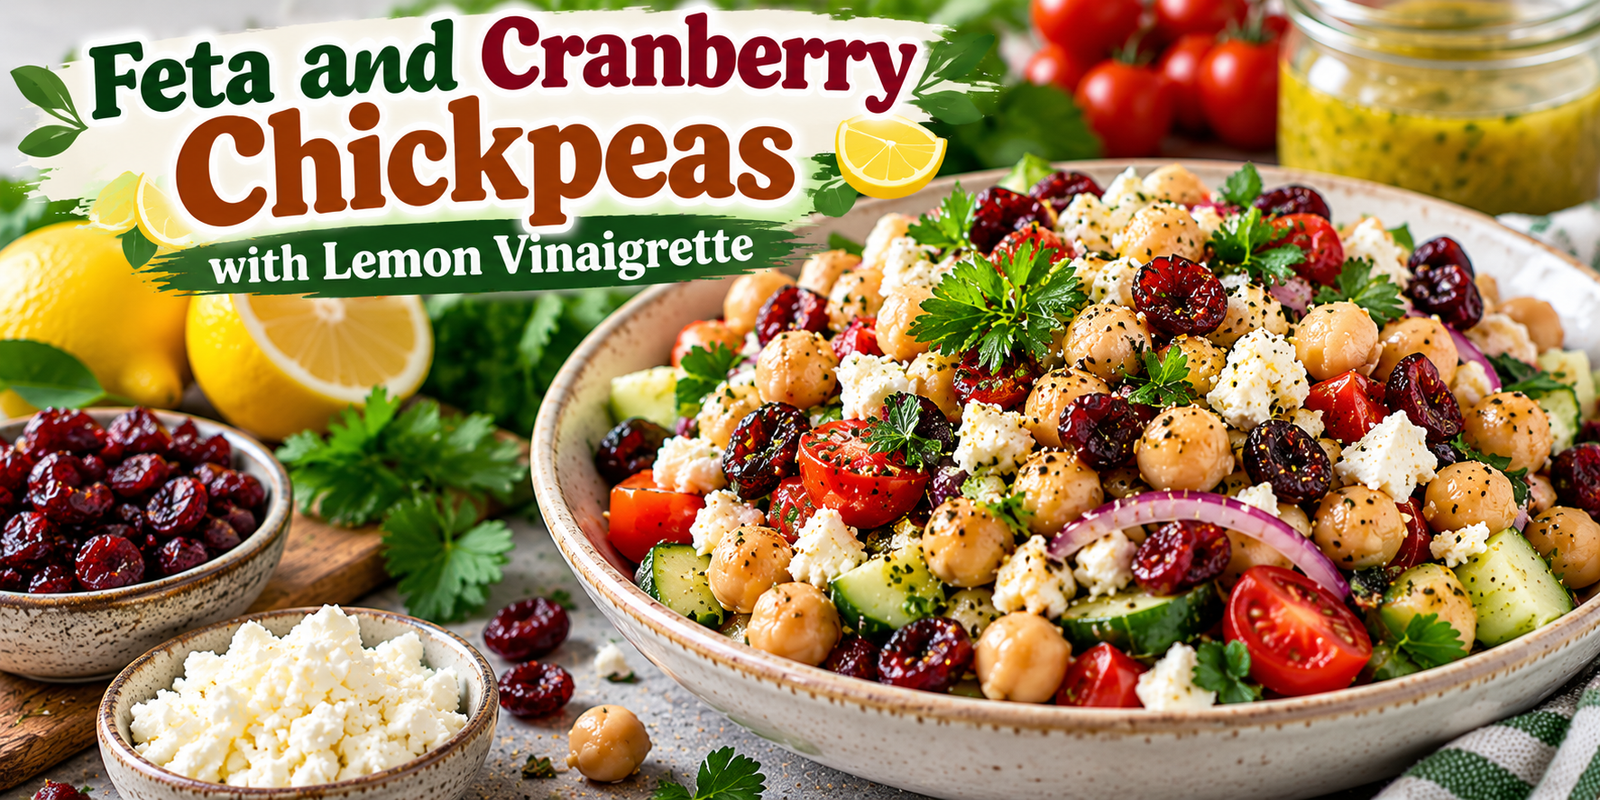
Feta and Cranberry Chickpeas with Lemon Vinaigrette

Feta and Cranberry Chickpeas with lemon vinaigrette, cucumber, tomatoes, fresh herbs, and feta cheese

Feta and Cranberry Chickpeas with Lemon Vinaigrette

These Cranberry Chickpeas combine creamy chickpeas, tangy feta, sweet dried cranberries, fresh herbs, crisp vegetables, and a bright lemon vinaigrette. The result is a colorful Mediterranean-inspired salad that is easy enough for a weekday lunch but attractive enough for a family gathering.

The contrast between savory chickpeas, salty feta, and sweet-tart cranberries makes Cranberry Chickpeas especially satisfying. A simple lemon vinaigrette adds acidity and ties all the ingredients together without making the salad heavy.

This recipe can be served chilled or at room temperature. Cranberry Chickpeas are also convenient for meal preparation because the salad can be assembled ahead of time and stored in the refrigerator.

Prep Time: 15 minutes
Cook Time: 0 minutes
Total Time: 15 minutes
Servings: 6

Ingredients

For the Chickpea Salad

3 cups cooked chickpeas, drained and rinsed

¾ cup dried cranberries

1 cup crumbled feta cheese

1 medium cucumber, diced

1 cup cherry tomatoes, halved

½ small red onion, finely sliced

¼ cup fresh parsley, chopped

2 tablespoons fresh mint, chopped

2 tablespoons toasted pumpkin seeds or sunflower seeds

¼ teaspoon black pepper

¼ teaspoon sea salt, or to taste

For the Lemon Vinaigrette

¼ cup extra virgin olive oil

3 tablespoons fresh lemon juice

1 teaspoon lemon zest

1 tablespoon red wine vinegar

1 teaspoon Dijon mustard

1 teaspoon honey or maple syrup

1 small garlic clove, finely grated

½ teaspoon dried oregano

¼ teaspoon black pepper

Pinch of sea salt

Ingredient Notes

For Cranberry Chickpeas, use chickpeas that are tender but still firm enough to hold their shape. Canned chickpeas are convenient, but freshly cooked chickpeas can also be used.

Choose dried cranberries that are soft and slightly tart. If they feel very dry, soaking them briefly in warm water can improve their texture.

For the feta, a creamy crumbly variety works particularly well. The salty cheese creates a delicious contrast with the sweet cranberries.

Fresh lemon juice is strongly recommended for the vinaigrette because bottled lemon juice may not provide the same bright flavor.

Step-by-Step Instructions

1. Prepare the Chickpeas

Drain the chickpeas thoroughly and rinse them under cool running water. Allow them to drain for a few minutes, then pat them gently with a clean kitchen towel.

Removing excess water helps the vinaigrette cling to the chickpeas instead of becoming diluted. If you are using canned chickpeas, choose plain chickpeas without added flavors and rinse them well.

For Cranberry Chickpeas, you can use either canned chickpeas or chickpeas cooked from dry. If cooking from dry, allow them to cool completely before preparing the salad.

2. Prepare the Vegetables

Dice the cucumber into small, even pieces. Halve the cherry tomatoes and thinly slice the red onion.

Place the vegetables in a large mixing bowl. Add the chopped parsley and fresh mint.

The combination of crisp cucumber, juicy tomatoes, sharp red onion, and fresh herbs gives Cranberry Chickpeas plenty of texture and freshness.

3. Add the Cranberries and Feta

Add the dried cranberries and crumbled feta to the bowl.

Choose soft dried cranberries for the best texture. If your cranberries are especially dry, soak them in warm water for five minutes, then drain and pat them dry before adding them.

Crumble the feta into medium-sized pieces rather than making it too fine. This allows little pockets of salty cheese to stand out in every bite of Cranberry Chickpeas.

4. Make the Lemon Vinaigrette

In a small bowl or jar, combine extra virgin olive oil, fresh lemon juice, lemon zest, red wine vinegar, Dijon mustard, honey or maple syrup, grated garlic, dried oregano, black pepper, and a small pinch of sea salt.

Whisk vigorously until the dressing becomes slightly creamy and well combined.

Taste the vinaigrette. If you prefer a sharper flavor, add a little more lemon juice. For a softer flavor, add another small drizzle of olive oil.

Fresh lemon is especially important because it keeps the Cranberry Chickpeas bright and balanced.

5. Combine Everything

Pour approximately two-thirds of the vinaigrette over the chickpea mixture.

Use a large spoon to gently toss everything together. Make sure the chickpeas, vegetables, cranberries, feta, and herbs are evenly coated.

Add the remaining vinaigrette only if needed. You want the salad to be moist and flavorful without becoming watery.

At this stage, the Cranberry Chickpeas can be served immediately, but allowing the mixture to rest for 10–15 minutes gives the flavors more time to blend.

6. Add the Seeds

Just before serving, sprinkle the toasted pumpkin seeds or sunflower seeds over the salad.

Seeds add a pleasant crunch that contrasts with the creamy feta and tender chickpeas.

For an especially fresh presentation, finish the Cranberry Chickpeas with extra parsley, mint, lemon zest, and a light drizzle of olive oil.

Tips for the Best Results

Use Well-Drained Chickpeas

Excess liquid can dilute the dressing and make the salad watery. Drain and rinse canned chickpeas thoroughly, then allow them to dry for a few minutes.

For the best texture, the chickpeas should be tender but still firm enough to hold their shape when tossed.

Balance Sweet and Savory Flavors

The dried cranberries provide sweetness while feta brings saltiness. The lemon vinaigrette adds acidity to balance both flavors.

If your feta is very salty, reduce the added salt in the dressing. If your cranberries are very sweet, increase the lemon juice slightly.

This balance is what makes Cranberry Chickpeas taste fresh rather than overly sweet.

Cut Vegetables Evenly

Small, similar-sized pieces make the salad easier to eat and help distribute the ingredients evenly.

Try to cut the cucumber and tomatoes into pieces that are similar in size to the chickpeas. Thinly sliced onion also spreads its flavor throughout the salad.

Let the Salad Rest

Although the salad can be eaten immediately, a short resting period improves the flavor.

After tossing, let Cranberry Chickpeas sit for 10–15 minutes at room temperature. The chickpeas absorb some of the lemon vinaigrette while the herbs release their aroma.

Add Crunch at the End

Seeds can soften when they sit in dressing for too long. Add them immediately before serving if you want maximum crunch.

Toasted pumpkin seeds, sunflower seeds, chopped almonds, or walnuts can all work well.

Serving Suggestions

Serve Cranberry Chickpeas as a light lunch with warm pita, whole-grain bread, or a simple vegetable soup.

The salad also makes an excellent side dish for grilled chicken, baked salmon, roasted vegetables, or grilled halloumi.

For a Mediterranean-inspired dinner, place it alongside hummus, olives, cucumber, tomatoes, and warm flatbread.

You can also spoon Cranberry Chickpeas over cooked quinoa, couscous, bulgur, or brown rice. The grains make the meal more substantial while absorbing the lemon dressing.

Recipe Variations

Add Avocado

Diced avocado creates a creamy texture that works beautifully with feta and lemon. Add it immediately before serving so it remains fresh.

Add Roasted Peppers

Chopped roasted red peppers bring sweetness and a mild smoky flavor. They also make Cranberry Chickpeas even more colorful.

Add Greens

Baby spinach, arugula, chopped romaine, or mixed greens can be added to create a larger salad. If using delicate greens, toss them in immediately before serving.

Add Grilled Chicken

For a higher-protein meal, top the salad with sliced grilled chicken seasoned with lemon, garlic, oregano, and black pepper.

Make It Spicy

Add a pinch of crushed red pepper flakes to the vinaigrette. A little chili heat creates a nice contrast with the sweet cranberries.

Change the Cheese

If feta is unavailable, goat cheese can provide a similar creamy and tangy character. For a dairy-free version, omit the cheese and add toasted nuts or seeds.

Make-Ahead Instructions

The chickpeas, vegetables, cranberries, and herbs can be combined several hours ahead of serving.

For the best texture, prepare the vinaigrette separately and toss it with the salad shortly before serving.

If preparing Cranberry Chickpeas the night before, keep the seeds separate and add them just before eating.

The salad can be served cold directly from the refrigerator or allowed to sit at room temperature for about 15 minutes.

Storage Instructions

Store leftovers in an airtight container in the refrigerator for up to three days.

The vegetables may release a little liquid as they sit, so gently stir the salad before serving.

If the flavors seem less bright after refrigeration, add a small squeeze of fresh lemon juice.

For the best texture, Cranberry Chickpeas should not be frozen because cucumber and fresh herbs can become watery and soft after thawing.

Frequently Asked Questions

Can I Use Dried Chickpeas?

Yes. Cook dried chickpeas until tender, drain them well, and allow them to cool completely before using them.

Can I Use Another Dried Fruit?

Yes. Dried cherries, chopped dates, raisins, or golden raisins can replace cranberries. Cranberries provide a particularly nice sweet-tart contrast with feta.

Can I Make the Vinaigrette Without Honey?

Absolutely. Use maple syrup for a plant-based option, or omit the sweetener if you prefer a sharper lemon dressing.

Can I Make This Salad Dairy-Free?

Yes. Omit the feta and add toasted almonds, pumpkin seeds, or sunflower seeds for extra richness and texture.

Is This Recipe Good for Meal Prep?

Yes. Keep the dressing and crunchy toppings separate when possible. This helps Cranberry Chickpeas stay fresh and prevents the seeds from becoming soft.

Can I Serve It Warm?

Yes. Gently warming the chickpeas before combining them with the other ingredients can create a slightly different texture. However, avoid heating the cucumber, feta, and herbs because they are best fresh.

Nutrition Information

Approximate nutrition per serving:

Calories: 330 kcal

Protein: 10g

Carbohydrates: 35g

Fat: 17g

Fiber: 8g

Sugar: 12g

Sodium: 470mg

Nutrition values are estimates and can vary according to ingredient brands, serving sizes, and optional additions.

Final Thoughts

This Cranberry Chickpeas recipe brings together creamy chickpeas, tangy feta, sweet-tart cranberries, crisp vegetables, fresh herbs, crunchy seeds, and a bright lemon vinaigrette.

The recipe is simple enough for everyday lunches but colorful enough for entertaining. It requires no complicated cooking and can be prepared in about 15 minutes when using ready-to-eat chickpeas.

For the freshest result, use firm cucumber, ripe cherry tomatoes, good-quality feta, fresh lemon juice, and extra virgin olive oil. Fresh herbs make a noticeable difference, while toasted seeds provide a satisfying crunch.

You can easily adapt Cranberry Chickpeas with avocado, roasted peppers, leafy greens, grilled chicken, or different nuts and seeds.

The sweet-and-savory combination makes this salad especially versatile. Serve it as a side, pack it for lunch, or turn it into a complete meal by adding quinoa or grilled protein.

With its bright flavors and simple preparation, Cranberry Chickpeas is an easy recipe to keep in your regular meal rotation.