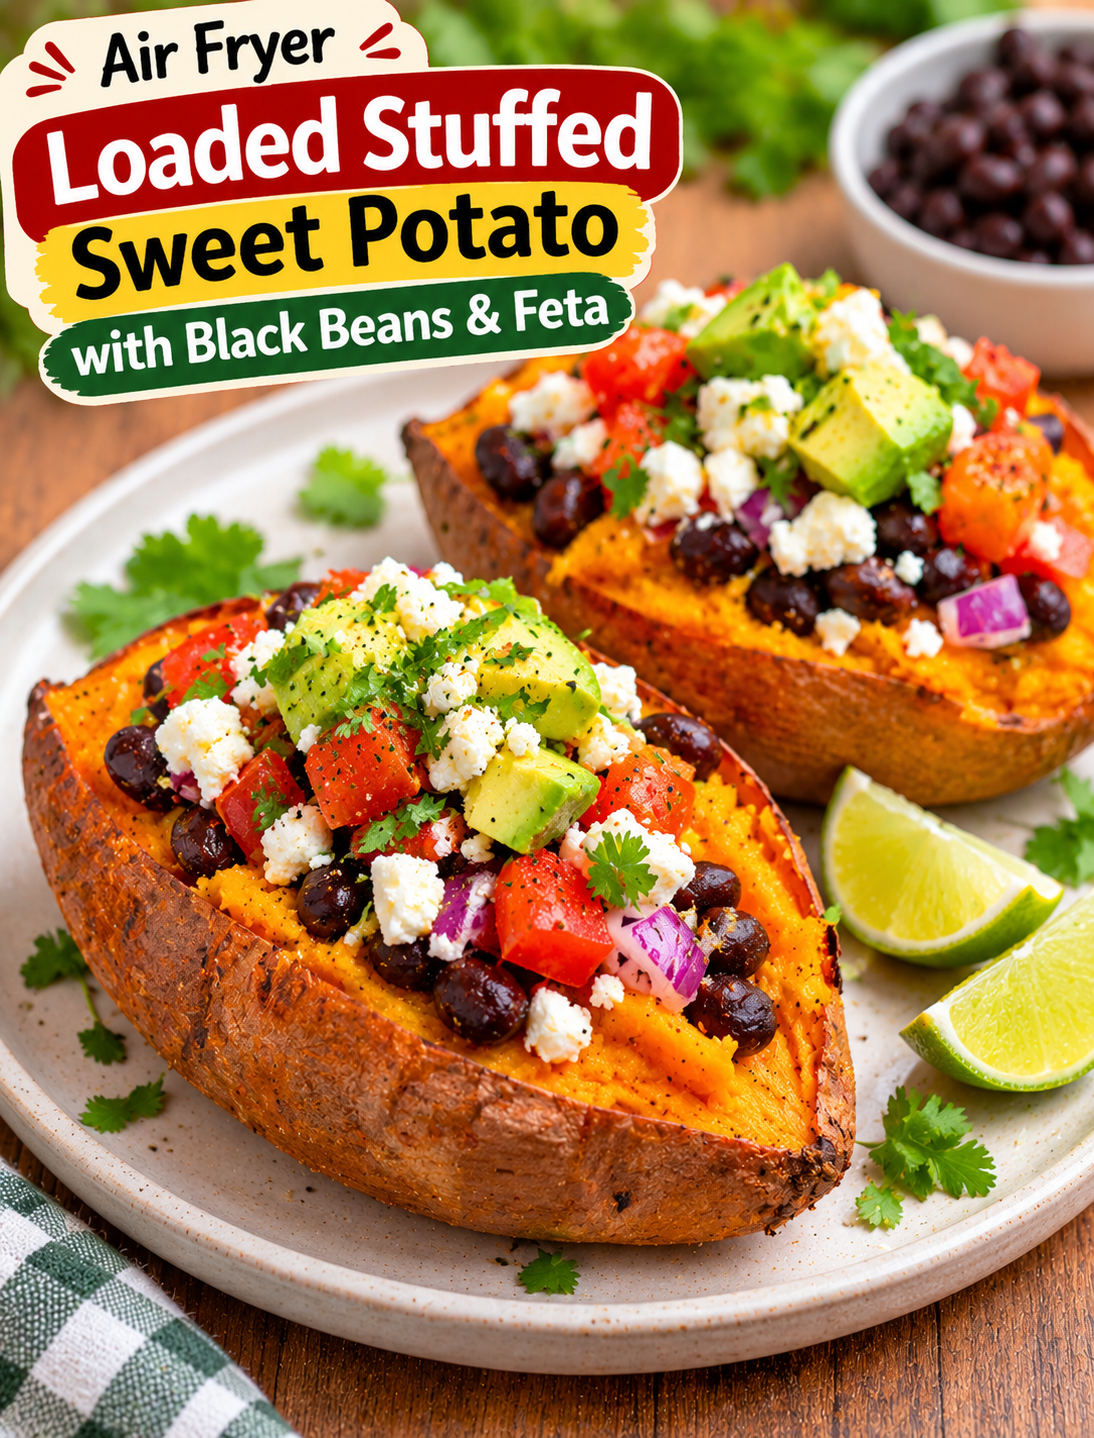
Air Fryer Loaded Stuffed Sweet Potato with Black Beans & Feta is a delicious, colorful meal packed with bold flavors and satisfying ingredients. Sweet potatoes become tender on the inside with lightly crisp skins, while black beans, creamy feta cheese, and fresh toppings create a filling combination in every bite.
This easy recipe is perfect for busy weeknight dinners, healthy lunches, or meatless meal days. The air fryer cooks sweet potatoes faster than a traditional oven, making it a convenient choice when you want a homemade meal without spending hours in the kitchen.
The filling combines seasoned black beans, crumbled feta, fresh tomatoes, red onion, and a squeeze of lime juice. Each ingredient adds a different texture and flavor, from the creamy saltiness of feta to the fresh, zesty taste of lime.
You can also customize the toppings with avocado, fresh cilantro, jalapeños, or your favorite vegetables. Whether you serve these stuffed sweet potatoes as a main dish or a hearty side, they are easy to prepare and simple to enjoy.
Why You’ll Love This Recipe
- Easy preparation: Simple ingredients and straightforward steps make this recipe beginner-friendly.
- Quick cooking: The air fryer helps cook sweet potatoes without heating up your entire kitchen.
- Plant-based protein: Black beans provide plant-based protein and fiber.
- Naturally flavorful: Sweet potatoes, feta, beans, and lime create a delicious balance of flavors.
- Easy to customize: Add avocado, corn, salsa, or fresh herbs to change the toppings.
- Great for meal prep: Prepare the potatoes and filling ahead of time for convenient meals.
- Naturally gluten-free: The basic ingredients are gluten-free, but check packaged seasonings and toppings for cross-contact or added ingredients.
Ingredients for Air Fryer Loaded Stuffed Sweet Potato
You only need a few everyday ingredients to prepare these loaded sweet potatoes. Choose fresh vegetables and good-quality feta for the best flavor.
Main Ingredients
1. Sweet Potatoes
Choose 2 medium-sized sweet potatoes of similar size. They provide a naturally sweet, soft center and hold the toppings well after cooking.
2. Black Beans
Use 1 cup of cooked black beans or canned black beans that have been rinsed and drained. They add a hearty texture and make the filling more satisfying.
3. Feta Cheese
Use ½ cup of crumbled feta cheese. Its salty, tangy flavor balances the natural sweetness of the potatoes.
4. Olive Oil
Use 1 tablespoon of olive oil to coat the sweet potato skins. It helps the outside develop a lightly crisp texture.
5. Cherry Tomatoes
Add ½ cup of chopped cherry tomatoes for freshness, color, and juicy flavor.
6. Red Onion
Use ¼ cup of finely chopped red onion. It adds a mild sharpness that works well with the creamy feta.
7. Fresh Cilantro
Add 2 tablespoons of chopped cilantro for a fresh, herbal finish.
8. Lime Juice
Use 1 tablespoon of fresh lime juice to brighten the bean filling and balance the other ingredients.
Seasonings
- ½ teaspoon garlic powder
- ½ teaspoon smoked paprika
- ¼ teaspoon ground cumin
- ¼ teaspoon salt, or to taste
- ⅛ teaspoon black pepper
Optional Toppings
- ½ ripe avocado, diced
- 1 small jalapeño, thinly sliced
- 2 tablespoons plain Greek yogurt
- Extra crumbled feta
- Fresh cilantro leaves
- Lime wedges
Step-by-Step Instructions
Follow these simple steps to make perfectly cooked sweet potatoes with a flavorful black bean and feta filling.
Prepare the Sweet Potatoes
- Wash the sweet potatoes thoroughly under running water.
- Scrub away any dirt from the skins.
- Pat them completely dry with a clean kitchen towel.
- Trim any damaged areas if needed.
- Pierce each potato 5–6 times with a fork to allow steam to escape.
- Rub the skins with olive oil.
- Sprinkle lightly with salt and black pepper.
Preheat the Air Fryer
- Preheat your air fryer to 380°F for approximately 3 minutes.
- Check that the air fryer basket is clean and dry.
- Arrange the sweet potatoes in a single layer.
- Leave enough space between them for hot air to circulate.
Air Fry the Sweet Potatoes
- Place the prepared potatoes in the air fryer basket.
- Cook at 380°F for approximately 35–45 minutes.
- Turn the potatoes halfway through cooking.
- Check their tenderness by inserting a fork or small knife into the thickest part.
- Continue cooking in 5-minute intervals if the centers are still firm.
- Remove the potatoes once the flesh is soft and easily pierced.
Cooking time depends on the size and thickness of your sweet potatoes. Larger potatoes may need additional time.
Prepare the Black Bean Filling
While the potatoes cook, prepare the filling.
- Add the rinsed and drained black beans to a medium mixing bowl.
- Add smoked paprika, garlic powder, ground cumin, salt, and black pepper.
- Pour in the fresh lime juice.
- Add the chopped red onion and cherry tomatoes.
- Add the chopped cilantro.
- Gently mix until the ingredients are evenly combined.
- Taste the mixture and adjust the seasoning if needed.
Avoid mashing the beans completely because keeping them whole gives the filling a better texture.
Prepare the Sweet Potatoes for Stuffing
- Carefully remove the cooked potatoes from the air fryer.
- Allow them to cool for 3–5 minutes.
- Place each potato on a serving plate or cutting board.
- Slice lengthwise down the center without cutting all the way through.
- Gently press both ends to open the potato.
- Use a fork to fluff the soft flesh inside.
- Keep the potato skins intact so they can hold the filling.
Add the Black Bean Mixture
- Spoon the seasoned black bean mixture into each potato.
- Divide the filling evenly between the two potatoes.
- Spread the beans and vegetables over the fluffy sweet potato flesh.
- Avoid pressing the filling too firmly.
- Add a little extra filling on top if desired.
Add Feta Cheese and Toppings
- Sprinkle crumbled feta cheese generously over the filling.
- Add diced avocado if using.
- Sprinkle fresh cilantro over the top.
- Add sliced jalapeños for extra heat.
- Finish with a little fresh lime juice.
- Add a spoonful of Greek yogurt for a creamy topping if desired.
Serve and Enjoy
- Serve the stuffed sweet potatoes while warm.
- Add extra lime wedges on the side.
- Sprinkle additional feta over the top if desired.
- Serve immediately for the best texture and flavor.
Your air fryer stuffed sweet potatoes are ready to enjoy!
Best Tips for Perfect Stuffed Sweet Potatoes
A few simple techniques can make a big difference in the final result.
1. Choose Similar-Sized Potatoes
Use sweet potatoes with similar thickness so they cook at roughly the same rate. Very large potatoes may require more cooking time.
2. Dry the Potato Skins
After washing, dry the potatoes thoroughly before adding olive oil. Dry skins help develop a better exterior texture.
3. Do Not Skip Fork Punctures
Piercing the potatoes allows steam to escape during cooking. This helps prevent pressure from building inside the skins.
4. Drain the Black Beans
Excess liquid from canned beans can make the filling watery. Rinse and drain them before mixing with the seasonings.
5. Add Feta at the End
Sprinkle feta over the filling just before serving. This keeps its crumbly texture and fresh flavor.
6. Adjust the Seasoning
Taste the black bean mixture before stuffing the potatoes. Add extra lime, cumin, or black pepper to suit your preference.
7. Avoid Overcrowding
Keep the potatoes in a single layer in the air fryer basket. Proper airflow helps them cook evenly.
Variations and Substitutions
This recipe is easy to customize with ingredients you already have in your kitchen.
1. Black Bean and Corn Stuffed Sweet Potatoes
Add ½ cup of cooked sweet corn to the black bean mixture. Corn adds a pleasant sweetness and a slightly crunchy texture.
2. Mexican-Style Stuffed Sweet Potatoes
Add taco seasoning, diced avocado, salsa, and fresh jalapeños. Finish with lime juice for a bold Mexican-inspired flavor.
3. Mediterranean Stuffed Sweet Potatoes
Add chopped cucumber, Kalamata olives, red onion, parsley, and feta cheese. This combination creates a fresh Mediterranean-style filling.
4. Spicy Black Bean Sweet Potatoes
Mix in chili powder, cayenne pepper, or chopped jalapeños. Adjust the amount depending on how spicy you like your food.
5. Creamy Avocado Stuffed Sweet Potatoes
Top each potato with mashed avocado and a spoonful of plain Greek yogurt. Add lime juice and black pepper for extra flavor.
6. Extra Protein Version
Add cooked shredded chicken or extra black beans to make the filling more substantial. Season the chicken with cumin, garlic, and paprika before adding it.
What to Serve with Loaded Stuffed Sweet Potatoes
These stuffed potatoes can work as a complete meal, but simple sides make them even more satisfying.
- Fresh green salad: Serve with lettuce, cucumber, tomatoes, and a light lemon dressing.
- Grilled vegetables: Zucchini, bell peppers, and asparagus complement the sweet potato filling.
- Avocado salad: Fresh avocado with lime and cilantro adds a creamy, refreshing side.
- Brown rice: A small serving of brown rice makes the meal more filling.
- Homemade salsa: Fresh tomato salsa adds extra flavor without making the meal heavy.
- Greek yogurt dip: A simple yogurt dip with garlic and lemon works well with the seasoned beans.
How to Store Leftover Stuffed Sweet Potatoes
Proper storage helps maintain the flavor and quality of your leftovers.
Refrigerator Storage
- Allow the cooked potatoes to cool completely.
- Store them in an airtight food storage container.
- Refrigerate for up to 3–4 days.
- Keep fresh toppings such as avocado and cilantro separate.
- Store leftover black bean filling in a separate airtight container when possible.
Freezer Storage
- Allow the cooked sweet potatoes to cool completely.
- Remove fresh toppings and store them separately.
- Wrap each potato individually or place them in a freezer-safe container.
- Freeze for up to 2–3 months for best quality.
- Thaw overnight in the refrigerator before reheating.
For the best texture, add fresh feta, tomatoes, avocado, and cilantro after reheating.
How to Reheat Stuffed Sweet Potatoes
The air fryer is a convenient way to reheat leftover sweet potatoes without making the skins too soft.
Reheating in the Air Fryer
- Preheat the air fryer to 350°F.
- Place refrigerated stuffed potatoes in the basket.
- Heat for approximately 5–8 minutes.
- Check that the center is heated through.
- Add fresh toppings after reheating.
Reheating in the Microwave
- Place the potato on a microwave-safe plate.
- Cover loosely with a microwave-safe cover.
- Heat for 1–2 minutes.
- Continue in short intervals until heated through.
- Add fresh feta, avocado, and cilantro before serving.
Always reheat leftovers to an internal temperature of 165°F.
Common Mistakes to Avoid
Avoid these mistakes to get better results from your air fryer recipe.
- Using very large potatoes: Extra-large potatoes need more cooking time and may cook unevenly.
- Not drying the potatoes: Wet skins may not become as crisp.
- Adding wet beans: Undrained beans can make the filling watery.
- Overloading the potatoes: Too much filling can make them difficult to serve.
- Adding feta too early: Fresh feta tastes best when added after the potatoes are cooked.
- Skipping the temperature check: Always make sure the potatoes are soft in the center.
- Adding avocado before storage: Avocado can brown and lose its fresh texture.
Frequently Asked Questions
1. How long do sweet potatoes take in an air fryer?
Medium sweet potatoes usually take 35–45 minutes at 380°F, depending on their size and thickness.
2. Do I need to peel sweet potatoes before air frying?
No, you can leave the skins on because they become tender and help hold the black bean and feta filling.
3. Can I use canned black beans?
Yes, canned black beans work perfectly; rinse and drain them before adding the seasonings.
4. Can I make stuffed sweet potatoes ahead of time?
Yes, cook the potatoes and prepare the filling separately, then refrigerate and assemble when ready to serve.
5. Can I replace feta cheese with another cheese?
Yes, goat cheese, queso fresco, or crumbled cotija can replace feta, although the flavor will be slightly different.
6. Why are my air fryer sweet potatoes still hard?
They may need more cooking time, especially if they are large or thick; continue cooking in 5-minute intervals.
7. Are stuffed sweet potatoes good for meal prep?
Yes, store the cooked potatoes and black bean filling separately and add fresh toppings just before serving.
8. Can I make this recipe without an air fryer?
Yes, bake the sweet potatoes in a conventional oven at 400°F for approximately 45–60 minutes or until fork-tender.
Final Thoughts
Air Fryer Loaded Stuffed Sweet Potato with Black Beans & Feta is a simple, flavorful meal that combines naturally sweet potatoes with seasoned beans, tangy feta, and fresh vegetables.
The recipe is easy to prepare, flexible enough for different toppings, and convenient for busy weeknights or meal prep. You can keep it simple with black beans and feta or add avocado, corn, salsa, and fresh herbs to create your own combination.
Serve these loaded sweet potatoes warm with fresh lime wedges and enjoy a satisfying homemade meal that brings together delicious flavors and textures.