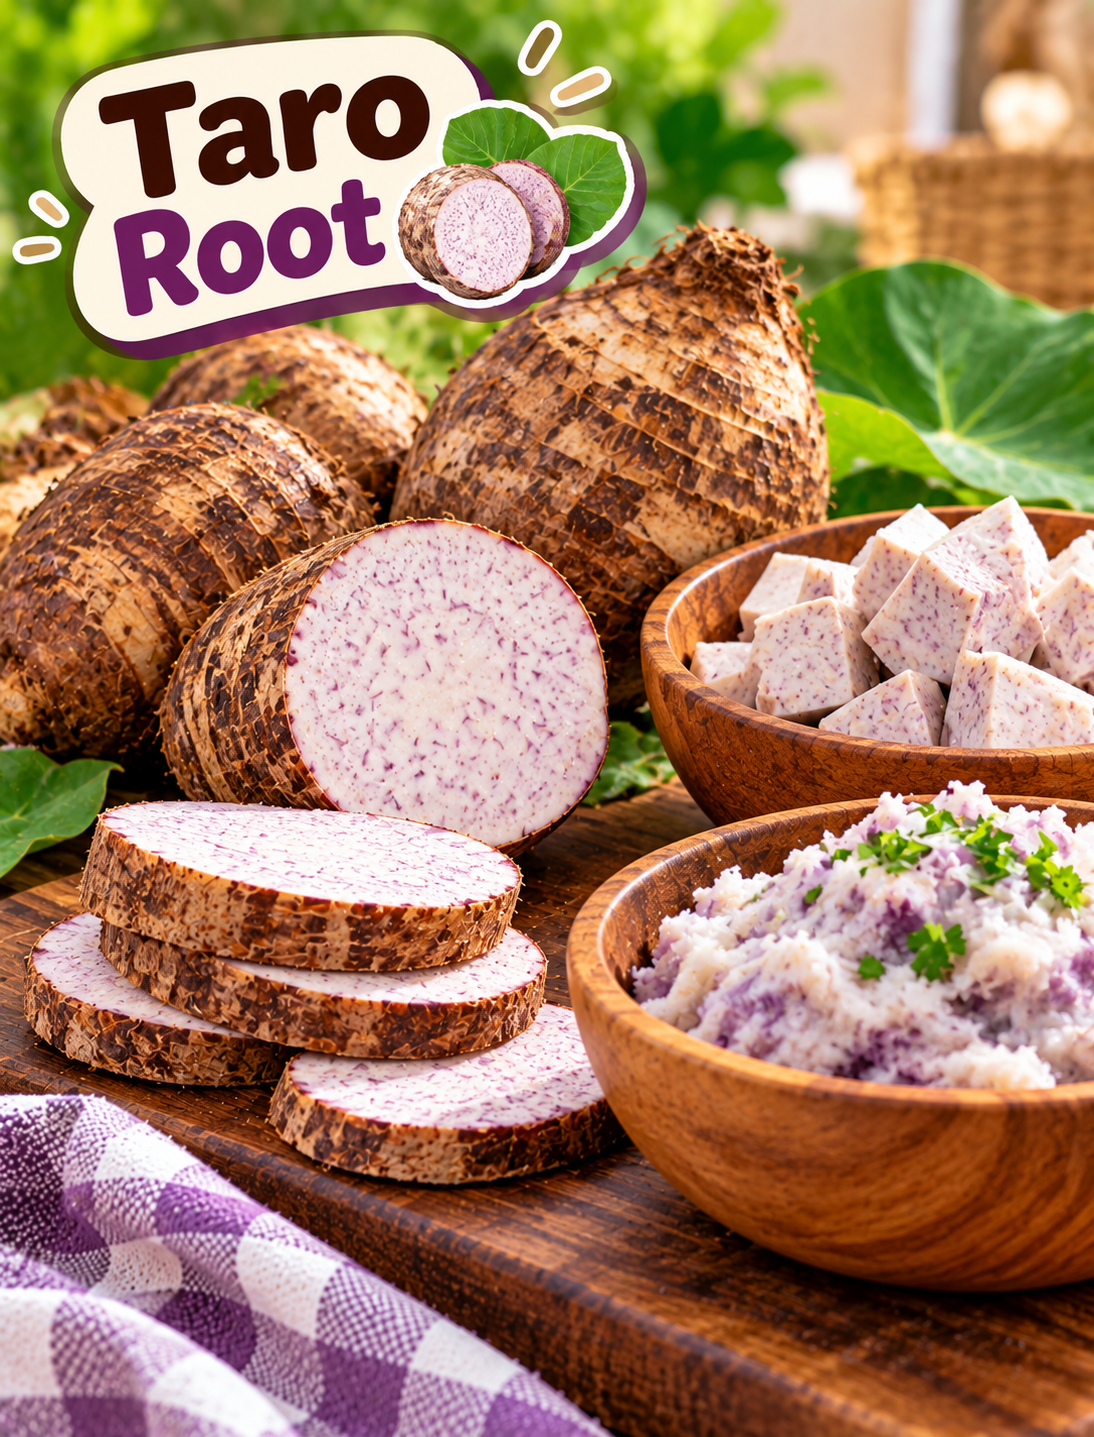
Taro Root Benefits: Nutrition, Uses & How to Cook It Safely

Fresh and cooked taro root showing its nutrition, traditional food uses, and safe cooking preparation

Taro Root: Nutrition, Traditional Uses & How to Prepare It Safely

Taro root looks a little like a potato, but this starchy root has its own texture, flavor, and cooking traditions. 🌿

Used in many Asian, Pacific Island, Caribbean, African, and Latin American cuisines, taro can be boiled, steamed, roasted, mashed, or added to soups and stews.

It also provides carbohydrates, fiber, potassium, vitamin B6, and manganese. But there is one important rule: taro should be properly cooked before eating because raw taro can irritate the mouth and throat.

This guide explains what taro is, how to prepare it, its nutritional value, traditional food uses, and simple ways to add it to meals.

What Is Taro Root?

Taro is the underground corm of the Colocasia esculenta plant.

Although it is often called a root, botanically it is a corm. It usually has rough brown or gray skin with white, cream, or purple-flecked flesh inside.

Taro has a mild, nutty flavor and a soft, starchy texture when cooked.

You may find taro sold as:

  • Fresh whole corms
  • Peeled pieces
  • Frozen chunks
  • Taro flour
  • Taro paste
  • Taro-based snacks and desserts

Different varieties can vary in size, color, texture, and flavor.

Why Is Taro Popular?

Taro has been eaten for generations because it is versatile, filling, and easy to use in many traditional dishes.

Its mild flavor allows it to work with both savory and sweet ingredients.

Common preparations include:

  • Boiled taro
  • Steamed taro
  • Roasted taro
  • Mashed taro
  • Taro soup
  • Taro stew
  • Taro chips
  • Taro flour
  • Taro-based desserts

In some cultures, taro leaves are also eaten, but they require proper preparation and cooking as well.

What Nutrients Does Taro Provide?

Taro is mainly a carbohydrate-rich food, making it a useful source of energy.

It also provides several nutrients, including:

  • Dietary fiber for digestive health
  • Potassium for normal muscle and nerve function
  • Vitamin B6 for normal metabolism and nervous-system function
  • Manganese for normal nutrient metabolism and antioxidant defenses
  • Small amounts of other vitamins and minerals

The exact nutrition depends on the variety, serving size, and cooking method.

Plain boiled or steamed taro is different nutritionally from fried taro chips or heavily sweetened taro desserts.

What Are the Potential Benefits of Taro?

1. It Provides Energy

The starch in taro supplies carbohydrates that the body can use for energy.

This makes cooked taro useful as a meal carbohydrate alongside protein and vegetables.

2. It Provides Dietary Fiber

Taro contains dietary fiber, which contributes to a balanced eating pattern and normal digestive function.

Adding fiber-rich foods gradually can be helpful if your current diet is low in fiber.

3. It Provides Potassium

Potassium is an essential mineral involved in normal muscle contraction, nerve signaling, and fluid balance.

Taro can contribute to daily potassium intake when included as part of a varied diet.

4. It Adds Variety to Meals

Using different whole or minimally processed foods can make a balanced diet more enjoyable.

Taro can replace potatoes, rice, or other starchy foods in many meals.

5. It Works in Many Different Dishes

Its soft texture after cooking makes taro useful for soups, mashes, stews, side dishes, and other recipes.

Can You Eat Taro Raw?

No. Raw taro should not be eaten.

Raw taro contains microscopic calcium oxalate crystals that can cause intense irritation or a burning sensation in the mouth and throat.

Proper cooking helps reduce this problem and makes the corm suitable for eating.

Do not taste raw taro to check whether it is ready.

How to Prepare Taro Safely

Follow these simple steps when cooking fresh taro.

Step 1: Wash the Corm

Rinse the outside under clean running water to remove dirt and surface debris.

Step 2: Peel Carefully

Use a clean vegetable peeler or knife to remove the tough outer skin.

Some people prefer wearing gloves because raw taro can irritate sensitive skin.

Step 3: Cut Into Even Pieces

Cut the peeled corm into similarly sized pieces so they cook evenly.

Step 4: Cook Thoroughly

Boil, steam, or cook the pieces until they are completely tender.

A fork should pass easily through the center.

Step 5: Drain and Serve

Once fully cooked, drain excess water and use the taro in your chosen recipe.

Step 6: Never Serve It Undercooked

If the texture is still firm or the food causes mouth irritation, do not continue eating it.

Cook it thoroughly before serving.

How Can You Cook Taro?

There are several simple cooking methods.

Boiled Taro

Peel and cut the corm into chunks, then boil until fork-tender.

Serve it as a side dish with vegetables, beans, chicken, fish, or another protein.

Steamed Taro

Steaming gives taro a soft texture while keeping the preparation simple.

Season cooked pieces with herbs, spices, or a small amount of olive oil.

Roasted Taro

Cut cooked or properly prepared taro into chunks and roast until the outside becomes lightly crisp.

Pair it with vegetables and a protein for a complete meal.

Mashed Taro

Cook taro until soft, then mash it with a little milk or another suitable liquid.

Add herbs, garlic, or mild seasoning for a savory side dish.

Taro Soup

Cook cubed taro with vegetables, broth, and your choice of protein.

Its starch can give soup a naturally thicker texture.

When Is the Best Time to Eat Taro?

There is no special time of day when you must eat taro.

You can include properly cooked taro at:

  • Breakfast
  • Lunch
  • Dinner
  • As part of a snack or side dish

The more important factor is how much you eat and what you serve with it.

For a balanced meal, combine taro with a protein source, vegetables, and a healthy fat.

Taro Root and Weight Management

Taro can fit into a weight-conscious eating pattern, but it is not a weight-loss food by itself.

Because it is rich in carbohydrates, portion size matters.

A practical plate can include:

  • A moderate portion of cooked taro
  • A protein such as fish, chicken, eggs, beans, or tofu
  • Plenty of non-starchy vegetables
  • A small amount of healthy fat

This combination can make a meal more balanced and satisfying.

Avoid assuming that taro-based chips, fries, bubble tea, or sugary desserts have the same nutritional profile as plain cooked taro.

Taro vs. Potato

Taro and potatoes are both starchy foods, but they have different textures and nutritional profiles.

  • Creamy texture when cooked
  • Mild, slightly nutty flavor
  • Contains dietary fiber
  • Provides potassium and vitamin B6
  • Must be thoroughly cooked

  • Wider range of varieties
  • Can be baked, boiled, roasted, or mashed
  • Provides carbohydrates, potassium, and other nutrients
  • Can also be part of a balanced meal

Neither food needs to be completely avoided.

The better choice depends on your meal, preparation method, portion, and personal dietary needs.

What About Taro Leaves?

Taro leaves are used as food in several traditional cuisines.

However, raw taro leaves should not be eaten because they can also contain calcium oxalate crystals.

They need appropriate preparation and thorough cooking before consumption.

If you are unfamiliar with preparing taro leaves, use a reliable recipe from a trusted culinary source rather than improvising.

Important Taro Safety Tips

Keep these points in mind when preparing taro at home:

  • Never eat raw taro.
  • Cook the corm thoroughly.
  • Wash fresh taro before peeling.
  • Wear gloves if your skin is sensitive.
  • Avoid tasting it while raw or partially cooked.
  • Use clean utensils and cookware.
  • Follow reliable cooking instructions for taro leaves.
  • Be cautious with packaged taro products containing added sugar, salt, or fat.
  • If you experience significant irritation after eating taro, stop eating it and seek appropriate medical advice.

Best Ways to Add Taro to Your Diet

If you are trying taro for the first time, keep the preparation simple, Options

1: Simple Side Dish

  1. Peel the taro.
  2. Cut it into chunks.
  3. Boil until tender.
  4. Drain well.
  5. Add herbs and a small amount of olive oil.
  6. Serve with vegetables and protein.

2: Roasted Taro

  1. Peel and cut taro into cubes.
  2. Cook it thoroughly first if following a recipe that requires pre-cooking.
  3. Toss with a small amount of oil and seasoning.
  4. Roast until tender and lightly browned.
  5. Serve immediately.

3: Taro Mash

  1. Peel and cut the corm.
  2. Boil until very soft.
  3. Drain completely.
  4. Mash until smooth.
  5. Add a small amount of milk or another suitable liquid.
  6. Season with herbs or spices.

Common Mistakes to Avoid

Mistake 1: Eating It Raw

Raw taro can cause mouth and throat irritation.

Mistake 2: Undercooking It

Do not assume that lightly heated taro is ready.

Mistake 3: Focusing Only on “Taro Superfood” Claims

Taro is nutritious, but no single food provides everything your body needs.

Mistake 4: Ignoring the Preparation Method

Deep-fried taro and sugary taro desserts can be much higher in calories than plain cooked taro.

Mistake 5: Forgetting Portion Size

Even nutritious carbohydrate foods can contribute significant calories when eaten in very large portions.

The Bottom Line

Taro is a versatile traditional food that can add carbohydrates, fiber, potassium, vitamin B6, and variety to meals.

Its creamy texture makes it useful in soups, stews, mashed dishes, roasted sides, and many traditional recipes.

The most important safety rule is simple: never eat taro raw or undercooked.

Cook the corm thoroughly, choose simple preparations when possible, and pair it with vegetables and a protein source for a balanced meal.

Taro does not need exaggerated “superfood” claims to be useful. It is simply a versatile starchy food that can have a place in a varied diet when prepared properly.

Frequently Asked Questions

Is taro root healthy?

Taro can be part of a balanced diet because it provides carbohydrates, fiber, potassium, vitamin B6, and other nutrients.

Can you eat taro raw?

No. Raw taro can cause mouth and throat irritation from calcium oxalate crystals, so it should be thoroughly cooked.

Does taro help with digestion?

Taro provides dietary fiber, which supports normal digestive function as part of an overall fiber-rich diet.

Is taro better than potatoes?

Neither is automatically better; both can fit into a balanced diet depending on portion size and preparation.

Can you eat taro leaves?

Yes, taro leaves are eaten in some cuisines, but they must be properly prepared and thoroughly cooked.

Is taro good for weight loss?

Taro can fit into a weight-management diet, but it does not directly cause weight loss and portion size still matters.

What does cooked taro taste like?

Cooked taro has a mild, slightly nutty flavor with a soft, creamy, and starchy texture.

How do you know when taro is fully cooked?

Taro is ready when it is completely tender and a fork passes easily through the center without resistance.
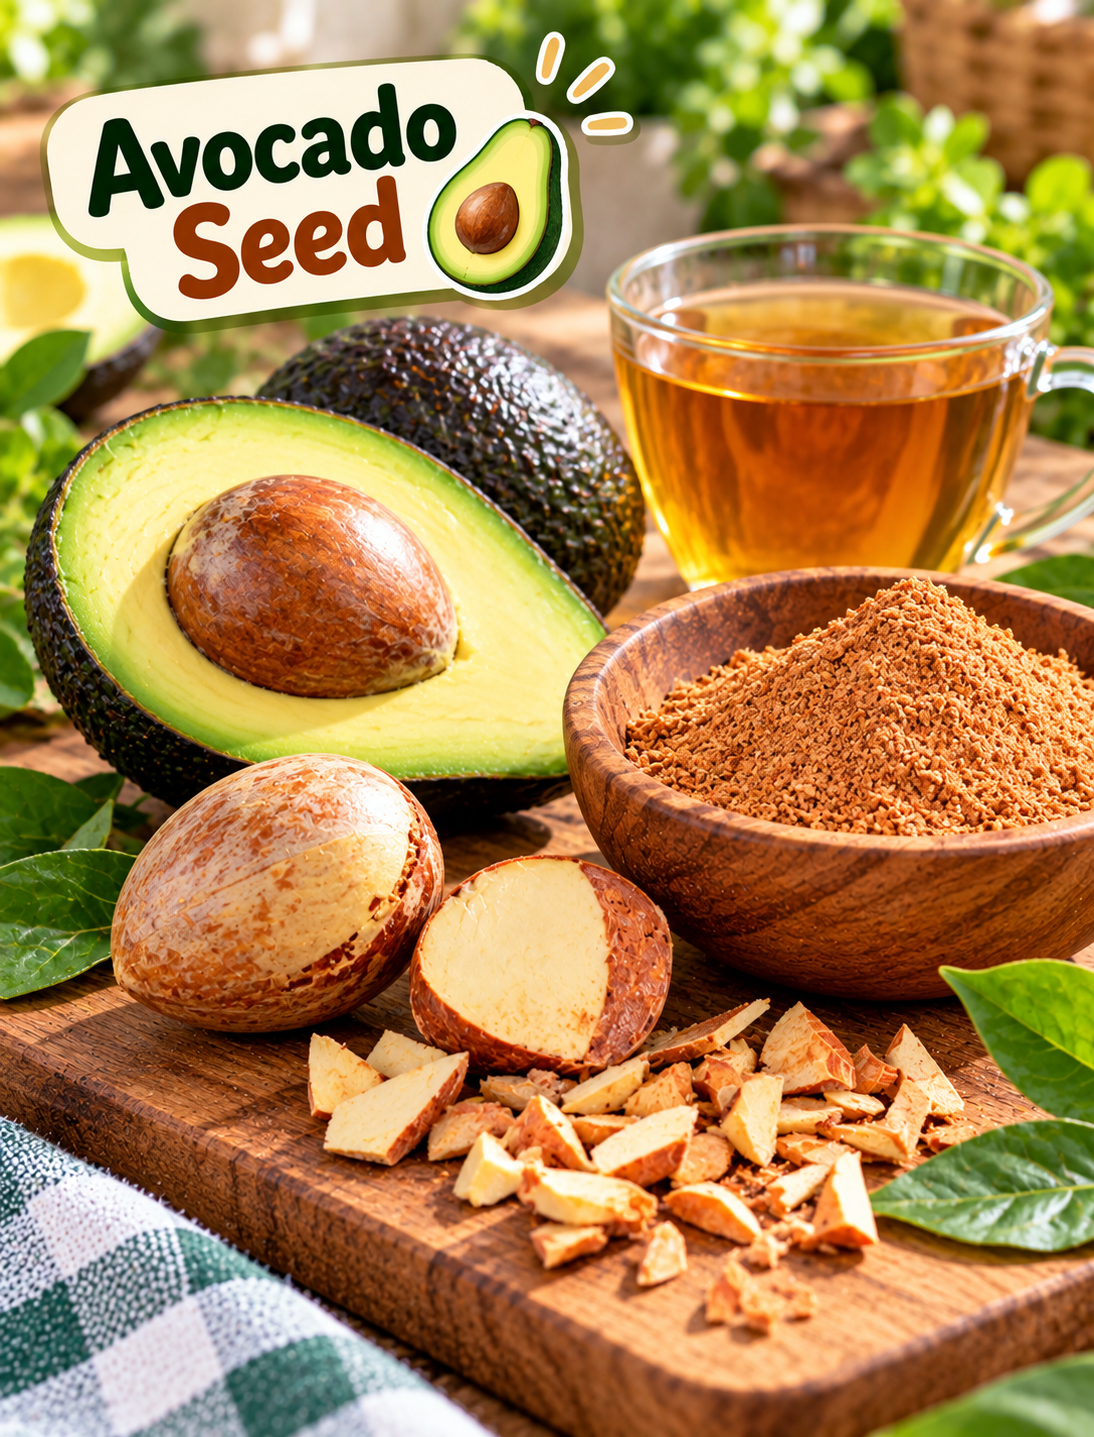
Avocado Seed Benefits: Powder, Tea, Uses & Safety Facts

Avocado seed with fresh avocado, seed powder, and tea explaining traditional uses and safety

Avocado Seed: Traditional Uses, Powder, Tea & What We Actually Know

That avocado pit you usually throw away is getting a lot of attention online. 🥑👀 But is avocado seed powder or tea actually good for you, or is the hype ahead of the evidence?

Avocado seeds are often discarded after the edible flesh is removed, but they have attracted interest because they contain starch, fiber-related components, phenolic compounds, and other plant chemicals. Researchers have studied avocado seed extracts for antioxidant and other biological activity, but most of this work is still early-stage rather than strong human clinical evidence.

This matters because social media often turns laboratory findings into claims about weight loss, cholesterol, blood sugar, inflammation, or “detoxing.” Those claims should not be treated as established health benefits.

What Is an Avocado Seed?

The avocado seed, also called the avocado pit, is the large hard seed found in the center of the fruit.

It contains several types of compounds that have attracted scientific interest, including:

  • Starch and carbohydrates
  • Plant phenolic compounds
  • Fiber-related components
  • Lipids and proteins
  • Other phytochemicals

Researchers are investigating ways to use avocado seeds as food ingredients, functional materials, and sources of plant compounds. However, the scientific literature describes the seed as an underused by-product, and its safety and usefulness as a regular human food still need more research.

Why Are People Using Avocado Seed?

Interest in avocado seed has grown because people have seen recipes for:

  • Avocado-seed powder
  • Avocado-seed tea
  • Ground avocado seed
  • Smoothie additions
  • Homemade herbal drinks

Online claims sometimes suggest that the seed can support digestion, lower cholesterol, control blood sugar, reduce inflammation, promote weight loss, or “clean the body.”

The problem is that potential biological activity is not the same as a proven health effect in humans.

A 2022 review noted that research into food and cosmetic applications of avocado seed is developing, while also highlighting questions about safety and the need for further investigation.

What Does the Research Actually Say?

Research on avocado seed is interesting, but it is still limited compared with research on the edible avocado flesh.

Laboratory and experimental studies have identified phenolic compounds and antioxidant activity in seed extracts. Researchers have also investigated possible antimicrobial, anti-inflammatory, glucose-related, and cholesterol-related effects.

However, these findings do not prove that eating avocado-seed powder or drinking avocado-seed tea produces the same effects in people.

A major limitation is the lack of strong human clinical evidence using standardized amounts of avocado seed.

The evidence can be understood this way:

  1. Plant compounds have been identified.
  2. Laboratory activity has been observed.
  3. Some animal or experimental research exists.
  4. Reliable human evidence is still limited.
  5. There is no established dose for using the seed as a health remedy.

That distinction is important when evaluating natural-health claims online.

Can Avocado Seed Help Lower Cholesterol?

This is one of the more common claims surrounding avocado pits.

Some experimental research has investigated avocado-seed extracts for cholesterol-related effects. However, these studies do not establish that homemade avocado-seed powder or tea lowers cholesterol in people.

There is considerably more human research on eating avocado flesh than consuming the seed. Reviews of avocado consumption have examined cardiovascular and metabolic outcomes in human studies, but those findings should not be transferred to the pit.

So:

Avocado may be part of a healthy eating pattern, but that does not mean avocado seed has the same proven benefits.

Can Avocado Seed Help With Weight Loss?

There is no good evidence showing that avocado-seed tea or powder directly causes weight loss.

Weight management depends on overall food intake, physical activity, sleep, dietary patterns, and other individual factors.

A plant extract should not be described as a fat burner, metabolism booster, or belly-fat remedy without strong human evidence.

If you enjoy avocado, the edible flesh provides unsaturated fats, fiber, and other nutrients and has been studied much more extensively in humans.

What About Avocado Seed Tea?

Avocado-seed tea is usually made by drying or preparing the seed and then using pieces or powder in hot water.

This sounds simple, but there is an important problem: there is no well-established medicinal preparation or standard dose for avocado-seed tea.

Different homemade recipes can vary greatly in:

  • Seed size
  • Variety of avocado
  • Drying method
  • Amount used
  • Preparation time
  • Concentration of the drink

Because these factors can change the final preparation, one internet recipe cannot be assumed to be medically appropriate for everyone.

For that reason, avocado-seed tea should not be presented as a proven treatment for any disease.

What About Avocado-Seed Powder?

Powdering the seed makes it easier to add to foods or drinks, but grinding does not automatically make the ingredient safer.

The powder can also make it easier to consume a larger amount than intended.

Before using a homemade powder, consider:

  • How the seed was cleaned
  • Whether it was dried properly
  • How it was processed
  • How much was consumed
  • Whether the preparation contains other ingredients
  • Whether you take medications or have a medical condition

A University of California Agriculture and Natural Resources article notes that there is not enough research to support eating avocado seeds and that their potential benefits and risks remain poorly characterized.

Is Avocado Seed Safe to Eat?

This is where caution is especially important.

The California Avocado Commission has stated that it does not recommend eating avocado seeds because research is insufficient to establish their safety and benefits for human consumption.

Scientific reviews also point out that avocado seeds contain phytochemicals and antinutritional compounds and that more work is needed to understand safety, bioavailability, and appropriate use.

Some research has detected persin in raw avocado fruit components, including the pit, but information about how processing changes exposure and what this means for routine human consumption remains incomplete.

This is why “natural” should not automatically be interpreted as “safe to consume regularly.”

How Should You Handle an Avocado Seed?

If your goal is simply to reduce kitchen waste, the safest practical approach is not to turn the pit into a homemade medicine.

Instead:

  1. Remove the seed after eating the avocado.
  2. Rinse it if you plan to use it for a non-food project.
  3. Allow it to dry if using it for crafts or gardening.
  4. Keep it away from young children and pets.
  5. If you want to experiment with growing an avocado plant, use the seed for propagation rather than consumption.

Avocado seeds can be used for growing plants, although seed-grown avocado trees may not produce fruit identical to the parent variety.

Are There Traditional Uses for Avocado Seed?

Avocado seeds have a history of traditional and ethnobotanical interest, particularly in regions where avocados originated or have long been cultivated.

Historical uses have included preparations made from the seed and other parts of the plant. Researchers continue to investigate these practices and the compounds involved.

Traditional use can provide useful clues for research, but it does not automatically establish effectiveness or safety.

A traditional preparation should therefore be described as a traditional practice, not as a clinically proven remedy.

What Are the Potential Benefits?

Avocado seed contains plant compounds that researchers are studying for their potential biological properties.

Potential areas of research include:

  • Antioxidant activity
  • Phenolic compounds
  • Food-ingredient applications
  • Fiber-related uses
  • Natural colorants
  • Cosmetic applications
  • Agricultural and industrial uses

Some experimental studies have reported promising biological activity, but these findings do not establish that consuming avocado seed provides those same benefits.

The strongest current takeaway is that avocado seed is scientifically interesting, but its health benefits for routine human consumption remain uncertain.

Avocado Flesh vs. Avocado Seed

It is important not to confuse the evidence for the whole fruit with evidence for the pit.

Avocado flesh

Human studies have examined avocado consumption in relation to:

  • Cardiometabolic health
  • Blood lipids
  • Dietary patterns
  • Nutrient intake
  • Body composition

A 2025 evidence map identified dozens of human studies on avocado consumption and health outcomes.

Avocado seed

Research is much more preliminary and often focuses on:

  • Extracts
  • Laboratory experiments
  • Chemical composition
  • Antioxidant activity
  • Potential food applications

Therefore, evidence about eating avocado does not automatically apply to eating the seed.

Who Should Be Especially Careful?

Avoid experimenting with avocado-seed preparations if you:

  • Are pregnant or breastfeeding
  • Have a chronic medical condition
  • Take prescription medications
  • Have known food allergies
  • Are preparing the product for a child
  • Are unsure about the amount or preparation

There is not enough standardized human safety information to establish a reliable medicinal dose.

If you have a health condition and are considering an herbal or plant-based preparation, discuss it with a healthcare professional before using it regularly.

What Is the Best Practice?

If you see a viral post claiming that avocado seed can cure or prevent a disease, use this simple checklist.

Step 1: Look for Human Studies

Check whether the claim comes from actual human trials rather than cell or animal research.

Step 2: Check the Dose

A laboratory extract may be far more concentrated than a homemade tea or powder.

Step 3: Look for Safety Information

A substance can show interesting biological activity while still having uncertain safety for regular consumption.

Step 4: Separate the Fruit From the Seed

Do not assume research on avocado flesh proves the same effect from the pit.

Step 5: Avoid Miracle Claims

Be skeptical of claims involving:

  • Rapid weight loss
  • “Kidney detox”
  • Cancer treatment
  • Diabetes cures
  • Guaranteed cholesterol reduction
  • Permanent inflammation relief

These claims require strong clinical evidence.

The Bottom Line

Avocado seed is more than just kitchen waste from a research perspective. It contains interesting plant compounds and is being studied for potential food, cosmetic, and functional applications.

But avocado-seed powder and tea are not established treatments for common health conditions, and there is not enough human evidence to recommend routine consumption as a health remedy.

For now, the better-supported choice is to enjoy the edible avocado flesh as part of a balanced diet while treating avocado-seed health claims with caution.

If you are considering avocado seed because of a specific medical problem, address the underlying condition with appropriate professional care rather than relying on an unproven homemade preparation.

Frequently Asked Questions

Is avocado seed safe to eat?

Safety for routine human consumption has not been established well enough to recommend eating the seed regularly.

Can avocado-seed tea lower cholesterol?

There is experimental research, but no strong human evidence showing that homemade avocado-seed tea reliably lowers cholesterol.

Does avocado seed help with weight loss?

There is no reliable human evidence that avocado-seed powder or tea directly causes weight loss.

Can I add avocado-seed powder to smoothies?

Although this is promoted online, routine human consumption has not been adequately studied, so it should not be treated as a proven supplement.

Does avocado seed contain antioxidants?

Yes, avocado seeds contain phenolic compounds and have shown antioxidant activity in experimental research.

Is avocado seed better than avocado flesh?

No such conclusion is supported; avocado flesh has substantially more human research behind its nutritional and health effects.

Can avocado seed cure diabetes?

No. Experimental findings do not establish avocado seed as a diabetes treatment.

What is the safest use for an avocado seed?

Using the pit for gardening or composting avoids making an unproven food or medicinal preparation from it.

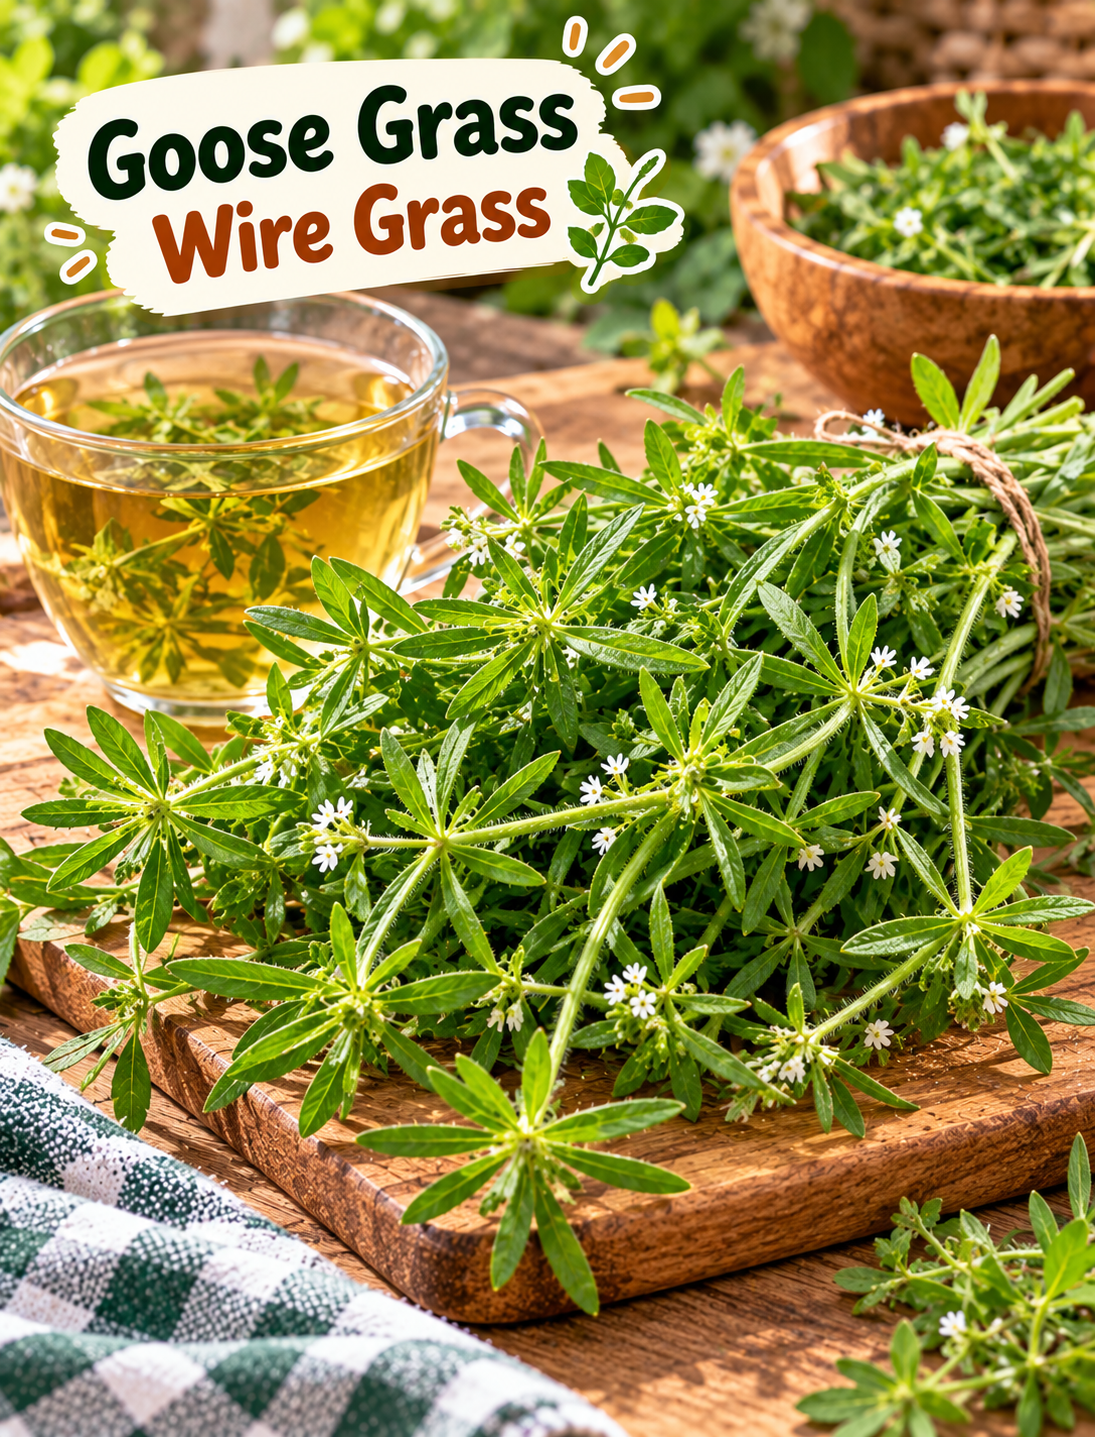
Goose Grass for Kidney Health: Myth or Fact

Goose grass cleavers herb with traditional urinary and kidney health information

Goose Grass / Wire Grass for Kidney & Urinary Complaints — Myth or Fact?

“Goose grass is sometimes called a traditional ‘kidney-cleansing’ herb—but can it really help urinary problems? 🌿👀 Let’s separate the old remedy from what modern evidence actually shows.”

Goose grass, often called cleavers or Galium aparine, is a climbing plant found in many regions. Traditional herbal practices have used it for urinary and other health complaints, which is why you may see it described online as a natural kidney remedy.

But traditional use is not the same as proven treatment. Current evidence does not establish goose grass as a reliable treatment for kidney stones, urinary tract infections, or kidney disease. Research on plants used traditionally for urinary problems is still limited, and clinical effectiveness and safety can be uncertain.

What Is Goose Grass / Wire Grass?

Goose grass (Galium aparine) is an annual herb that is also known by names such as cleavers, catchweed, bedstraw, and goosegrass.

It typically has:

  • Long, weak, scrambling stems
  • Small leaves arranged around the stem
  • Tiny white flowers
  • Tiny hooked hairs that allow the plant to cling to clothing and other plants
  • A preference for disturbed areas, gardens, fields, and partially shaded locations

One important point is that common plant names can vary by region. “Wire grass” can refer to different plants, so never consume a wild plant based only on a common name or a social-media photo.

Why Is Goose Grass Associated With Kidney Health?

The kidney connection comes mainly from traditional herbal practice.

Historical and ethnobotanical records describe Galium aparine being used as a diuretic and for urinary complaints. Some traditional systems used preparations of the plant with the goal of increasing urine flow or supporting urinary elimination.

Traditional use does not prove that the plant can:

  • Dissolve kidney stones
  • Remove kidney stones
  • Cure a UTI
  • Clean or “detox” the kidneys
  • Repair damaged kidneys
  • Prevent kidney disease

Those claims require reliable human clinical evidence, and that evidence is not currently established for goose grass.

Goose Grass for Kidney Problems: Myth or Fact?

The Traditional Claim

The traditional claim is that goose grass may support urinary flow and help the body eliminate unwanted substances through urine.

There is a historical basis for this use, including ethnobotanical reports describing Galium aparine for urinary complaints.

What Modern Evidence Says

The evidence is much more limited than many online posts suggest.

Laboratory research has investigated extracts of Galium aparine for antioxidant and other biological activity, but laboratory findings do not automatically mean that drinking the plant treats a human urinary condition.

Bottom line: Goose grass has a traditional history, but it should not be presented as a proven kidney or urinary treatment.

Can Goose Grass Dissolve Kidney Stones?

There is not enough reliable clinical evidence to say that goose grass dissolves kidney stones.

Kidney stones form from minerals in urine, and their treatment depends on factors such as the stone’s size, location, and composition. Some small stones can pass naturally, while larger or obstructing stones may require medical treatment.

If you suspect a kidney stone, don’t delay evaluation while trying an herbal preparation.

Common Kidney Stone Symptoms

Watch for:

  • Sharp pain in the back or side
  • Pain that moves toward the lower abdomen or groin
  • Blood in the urine
  • Painful urination
  • Frequent urination
  • Cloudy or bad-smelling urine
  • Nausea or vomiting

Severe pain, blood in the urine, difficulty urinating, fever, or chills deserves prompt medical attention.

Can Goose Grass Treat a Urinary Tract Infection?

This is another claim that needs caution.

A urinary tract infection is commonly caused by bacteria. Symptoms can include burning during urination, frequent or urgent urination, lower abdominal discomfort, and cloudy, bloody, or strong-smelling urine.

Goose grass should not replace medical evaluation or prescribed treatment for a suspected UTI.

An untreated infection can move from the bladder to the kidneys and become much more serious. Kidney infection symptoms can include fever, chills, painful urination, nausea, vomiting, and pain in the back, side, or groin.

How Was Goose Grass Traditionally Prepared?

Traditional preparations have included infusions or decoctions made from the aerial parts of the plant.

Because there is no standardized, well-established medical dose for treating kidney or urinary conditions, it is not appropriate to present a homemade recipe as a proven treatment.

If someone is interested in traditional herbal use, the safer approach is:

  1. Confirm the plant identity.
  2. Make sure it was grown in a clean location.
  3. Avoid plants exposed to pesticides or other chemicals.
  4. Do not use an unknown plant based only on an online photograph.
  5. Ask a qualified healthcare professional before using it medicinally.
  6. Never use it instead of evaluation for urinary symptoms.

What Are the Traditional Uses of Goose Grass?

Beyond urinary traditions, historical herbal practices have associated cleavers with several other uses.

Traditional records have included:

  • Herbal infusions
  • Traditional diuretic preparations
  • Topical herbal applications
  • Traditional skin-care preparations
  • Folk remedies for various minor complaints

Research has also examined Galium aparine extracts for antioxidant and immunomodulatory activity in laboratory settings. However, these findings should not be turned into claims that the plant treats disease in humans.

What Are the Potential Benefits?

When discussing goose grass, it is useful to separate traditional uses from proven health benefits.

Traditional Interest

The plant has historical interest because it was traditionally used in herbal preparations associated with:

  • Urinary support
  • Fluid elimination
  • Skin applications
  • General herbal wellness

What Has Actually Been Demonstrated?

Laboratory studies have identified plant compounds and biological activity in Galium aparine extracts, but this is not enough to establish a clinical treatment for kidney stones, UTIs, or kidney disease.

So the most accurate statement is:

Goose grass has traditional herbal uses, but its medical benefits for kidney and urinary conditions remain unproven.

Safety Precautions Before Using Goose Grass

Natural does not automatically mean risk-free.

Before considering any herbal preparation:

  • Confirm the plant’s identity.
  • Avoid plants collected from roadsides or chemically treated areas.
  • Do not use unknown wild plants.
  • Be especially cautious if you take prescription medications.
  • Ask your healthcare professional if you have kidney disease.
  • Ask before using herbal products during pregnancy or breastfeeding.
  • Stop using the preparation if you develop an unexpected reaction.

Herbal products can vary in strength and composition, and evidence about their interactions and long-term safety may be limited.

What Should You Do If You Have Urinary Symptoms?

Instead of trying to treat the symptom yourself, use this simple step-by-step approach.

Step 1: Identify the Symptom

Notice whether you have:

  • Burning while urinating
  • Frequent urination
  • Blood in urine
  • Cloudy or strong-smelling urine
  • Side or back pain
  • Lower abdominal pain

Step 2: Don’t Assume It’s “Kidney Toxins”

Urinary symptoms can have several causes, including infections and kidney stones. Testing may be needed to determine what is actually happening.

Step 3: Get Medical Advice When Symptoms Persist

A healthcare professional can use urine tests, blood tests, and sometimes imaging to investigate kidney stones or urinary infections.

Step 4: Don’t Delay Care for Red Flags

Seek prompt medical attention for:

  • Severe or worsening pain
  • Fever or chills
  • Blood in the urine
  • Vomiting
  • Difficulty passing urine
  • Pain in the back or side with urinary symptoms

These symptoms can indicate a kidney stone, infection, blockage, or another condition requiring treatment.

Goose Grass vs. Proven Kidney Care

Goose grass can be discussed as a traditional herb, but it should not be confused with evidence-based kidney care.

For people concerned about kidney stones, NIDDK notes that adequate fluid intake, unless restricted by a healthcare professional, can help with prevention, while dietary changes may depend on the type of stone.

For suspected urinary infections, professional evaluation is important because bacterial infections may require appropriate treatment.

The Bottom Line

Goose grass, or Galium aparine, has a genuine history in traditional herbal practices, including traditional use for urinary complaints.

However, that history does not prove that goose grass can dissolve kidney stones, cure UTIs, detox the kidneys, or treat kidney disease.

The safest way to view this plant is as a traditional herbal subject worth learning about—not as a replacement for diagnosis or medical treatment.

If you have persistent urinary symptoms, severe pain, blood in your urine, fever, or difficulty urinating, seek professional care rather than relying on a homemade herbal remedy.

Frequently Asked Questions

Is goose grass the same as cleavers?

Yes. Galium aparine is commonly known as cleavers, goose grass, catchweed, and bedstraw.

Can goose grass dissolve kidney stones?

There is not enough reliable human evidence to show that goose grass dissolves kidney stones.

Can goose grass cure a UTI?

No established evidence shows that goose grass cures urinary tract infections, which can require medical evaluation and treatment.

Why is goose grass associated with the kidneys?

Traditional herbal practices used Galium aparine in preparations associated with urinary flow and elimination.

Can I make goose grass tea at home?

Traditional infusions exist, but there is no established medicinal dose for treating kidney or urinary disease.

Is goose grass safe for everyone?

Not necessarily; plant identity, preparation, medications, medical conditions, pregnancy, and breastfeeding can all affect safety.

When should I see a doctor for urinary symptoms?

Seek care for blood in urine, severe pain, fever, chills, vomiting, or difficulty urinating.

Can natural herbs replace kidney treatment?

No. Traditional herbs may be discussed as complementary practices, but they should not replace diagnosis or evidence-based treatment.

Honey Cranberry Chicken with Roasted Apples, Sweet Potatoes & Brie

Cranberry Chicken with roasted apples, sweet potatoes, Brie, walnuts, and honey cranberry glaze

Honey Cranberry Chicken with Roasted Apples, Sweet Potatoes & Brie

Honey Cranberry Chicken is a cozy, colorful dinner that combines golden chicken with roasted apples, tender sweet potatoes, creamy Brie, and a glossy cranberry honey glaze. The dish brings together savory, sweet, tangy, and creamy flavors in one skillet-style meal.

This Honey Cranberry Chicken is especially comforting during the cooler months, yet it is simple enough for a weeknight dinner. The chicken is seasoned with garlic, thyme, paprika, and black pepper before being seared until golden. Sweet potatoes and apples roast until tender, while cranberries simmer with honey and orange juice to create a bright finishing glaze.

The Brie melts gently over the warm chicken and vegetables, creating a delicious contrast of textures.

Prep Time: 20 minutes
Cook Time: 35 minutes
Total Time: About 55 minutes
Servings: 6

Ingredients

Seasoned Chicken

2 pounds boneless, skinless chicken breasts or thighs

1½ tablespoons extra virgin olive oil

½ teaspoon ground cumin

1 teaspoon garlic powder

½ teaspoon dried thyme

1 teaspoon smoked paprika

½ teaspoon sea salt

½ teaspoon black pepper

Roasted Sweet Potatoes and Apples

3 medium sweet potatoes, peeled and cut into ¾-inch cubes

2 medium firm apples, cored and cut into wedges

¼ teaspoon sea salt

1 tablespoon olive oil

¼ teaspoon smoked paprika

½ teaspoon cinnamon

¼ teaspoon black pepper

Cranberry Honey Glaze

1 cup fresh or frozen cranberries

⅓ cup orange juice

2 tablespoons honey

1 tablespoon maple syrup

1 tablespoon balsamic vinegar

½ teaspoon orange zest

½ teaspoon fresh thyme leaves

¼ teaspoon cinnamon

Pinch of salt

For Finishing

5 ounces Brie cheese, sliced

¼ cup toasted walnuts, roughly chopped

2 tablespoons fresh parsley

Fresh thyme for garnish

Orange zest, optional

Lemon or orange wedges, optional

Step-by-Step Instructions

1. Prepare the Oven

Preheat the oven to 425°F (220°C). Line a large baking sheet with parchment paper or lightly grease a large oven-safe skillet.

A hot oven helps the sweet potatoes caramelize while keeping the apples tender. Give them enough room to prevent steaming and encourage browning.

2. Season the Sweet Potatoes and Apples

Place the sweet potato cubes and apple wedges in a large bowl. Add olive oil, cinnamon, smoked paprika, salt, and black pepper.

Toss gently until the fruit and vegetables are evenly coated. Spread everything in a single layer on the prepared baking sheet.

Roast for 20–25 minutes. Turn the sweet potatoes halfway through cooking. Keep the apple wedges together as much as possible so they retain their shape.

The vegetables in Honey Cranberry Chicken are ready when the potatoes are fork-tender and golden around the edges. The apples should be soft but not falling apart.

3. Season the Chicken

While the sweet potatoes roast, pat the chicken dry with paper towels. This helps the seasoning stick and encourages a golden crust during searing.

Place the chicken in a bowl. Add olive oil, garlic powder, smoked paprika, thyme, cumin, salt, and black pepper. Rub the seasoning over every piece.

If using chicken breasts, pound thicker sections gently so the pieces have a more even thickness. This helps them cook at the same rate.

For Honey Cranberry Chicken, boneless chicken thighs are also an excellent option because they stay juicy and work well with the sweet-tart glaze.

4. Sear the Chicken

Heat a large oven-safe skillet over medium-high heat. Add a small amount of olive oil.

Place the chicken in the hot skillet without overcrowding it. Sear for 3–4 minutes on the first side until golden brown. Turn the pieces and sear for another 2–3 minutes.

The chicken will finish cooking in the oven after the glaze and vegetables are combined.

5. Prepare the Cranberry Glaze

While the chicken is cooking, add cranberries, orange juice, honey, maple syrup, balsamic vinegar, orange zest, thyme, cinnamon, and salt to a small saucepan.

Bring the mixture to a gentle simmer over medium heat. Cook for 8–10 minutes, stirring occasionally.

Press some softened cranberries with the back of a spoon, leaving a few whole for texture.

The Honey Cranberry Chicken sauce should become glossy and slightly thick. If it becomes too thick, add a tablespoon of orange juice. If it is too thin, simmer it for another minute or two.

This glaze gives Honey Cranberry Chicken its signature balance of sweet, tangy, and fruity flavors.

6. Combine the Chicken and Vegetables

Once the chicken has been seared, arrange the roasted sweet potatoes and apples around it in the skillet.

Pour most of the cranberry glaze over the chicken. Leave a little glaze aside for serving.

Transfer the skillet to the oven and bake for approximately 15–20 minutes, depending on the thickness of the chicken.

Check the thickest part with an instant-read thermometer. Chicken should reach 165°F (74°C) for food safety.

7. Add the Brie

Once the chicken is fully cooked, carefully remove the skillet from the oven.

Place slices of Brie over the chicken and around the warm vegetables. Return the skillet to the oven for 2–3 minutes, just until the cheese becomes soft and slightly melted.

Avoid leaving the Brie in the oven for too long. You want it creamy and soft rather than completely melted into the pan.

8. Finish the Dish

Remove the skillet from the oven and let the chicken rest for 5 minutes.

Spoon the remaining cranberry glaze over the chicken and roasted vegetables. Sprinkle toasted walnuts, fresh parsley, and thyme over the top.

For an extra bright finish, add a little fresh orange zest.

The finished Honey Cranberry Chicken should have golden chicken, caramelized sweet potatoes, tender apples, creamy Brie, and glossy cranberries throughout the dish.

Tips for the Best Results

Choose Firm Apples

Use apples that hold their shape during roasting. Honeycrisp, Pink Lady, Gala, or firm Fuji apples are good choices.

Avoid very soft apples because they can become mushy before the sweet potatoes are finished.

Cut the Sweet Potatoes Evenly

Keep the sweet potato cubes close to the same size. This helps them roast evenly and prevents smaller pieces from burning.

Evenly roasted potatoes also create a better presentation.

Do Not Overcrowd the Pan

Give the sweet potatoes and apples enough space. Crowding traps moisture and prevents the edges from becoming caramelized.

If necessary, roast the vegetables on a separate tray while the chicken cooks in the skillet.

Control the Glaze

Honey and maple syrup contain natural sugars, so the cranberry glaze can darken quickly over high heat.

Keep the glaze at a gentle simmer. Stir regularly and remove it from the heat as soon as it reaches a spoon-coating consistency.

Use a Thermometer

Chicken is safely cooked when the thickest part reaches 165°F (74°C).

Avoid relying only on the outside color because thicker pieces can take longer to cook than thinner ones.

Let the Chicken Rest

Resting for about five minutes allows the juices to settle. It also gives the Brie a moment to soften without becoming completely runny.

Serving Suggestions

Serve Honey Cranberry Chicken directly from the skillet for a rustic family-style presentation. This serving style keeps the glaze warm and the Brie soft.

For a complete Honey Cranberry Chicken meal, pair it with a simple green salad dressed with lemon and olive oil. The fresh greens provide a pleasant contrast to the sweet glaze and creamy Brie.

Wild rice, quinoa, couscous, or brown rice also work well with Honey Cranberry Chicken.

For a holiday table, serve Honey Cranberry Chicken with roasted Brussels sprouts, green beans, or asparagus. The vegetables pair beautifully with the apples, sweet potatoes, and cranberry flavors.

A warm loaf of crusty bread also pairs well with Honey Cranberry Chicken.

Make-Ahead Instructions

Several components can be prepared ahead of time. Cut the sweet potatoes and apples a few hours before cooking and store them covered in the refrigerator.

The cranberry glaze can be made one or two days ahead. Store it in a sealed container and warm it gently before using.

The chicken can be seasoned several hours before cooking. Keep it refrigerated until you are ready to sear it.

For entertaining, prepare the glaze and vegetables in advance. Then finish Honey Cranberry Chicken shortly before serving.

Storage and Reheating

Store leftover Honey Cranberry Chicken in an airtight container in the refrigerator for up to three days.

Keep extra glaze in a separate container if possible. This makes reheating easier and helps maintain the texture of the chicken and vegetables.

To reheat, place the chicken and vegetables in a covered oven-safe dish. Add a small splash of chicken broth or orange juice and warm at 325°F (165°C) until heated through.

You can also reheat individual portions in a microwave using short intervals.

Avoid overheating the Brie because it can separate when exposed to high heat for too long.

Frequently Asked Questions

Can I use chicken thighs?

Yes. Boneless, skinless chicken thighs are an excellent choice for Honey Cranberry Chicken. They are naturally juicy and pair well with the sweet cranberry glaze.

Which apples work best?

Yes. Firm apples such as Honeycrisp, Pink Lady, Gala, or Fuji hold their shape well in Honey Cranberry Chicken. Their natural sweetness also complements the tart cranberries.

Can I use dried cranberries?

Fresh or frozen cranberries are best for the glaze because they create a naturally thick sauce. Dried cranberries can be used, but the result will be sweeter and less tart.

Can I replace Brie?

Yes. Camembert, goat cheese, or another mild soft cheese can replace Brie. Keep in mind that each cheese will change the final flavor slightly.

Can I make the recipe dairy-free?

Yes. Simply omit the Brie or use a suitable dairy-free soft cheese alternative.

Can I make it gluten-free?

The main ingredients are naturally gluten-free. However, check packaged products such as broth and seasonings to make sure they are certified gluten-free if needed.

Can I add more vegetables?

Absolutely. Brussels sprouts, carrots, parsnips, or red onion can be roasted alongside the sweet potatoes and apples.

How can I make the glaze less sweet?

Reduce the honey or maple syrup slightly and add a little extra balsamic vinegar or orange juice. Taste as you go to find the balance you prefer.

Nutrition Information

Approximate nutrition per serving:

Calories: 525 kcal
Protein: 42g
Carbohydrates: 46g
Fat: 22g
Fiber: 7g
Sugar: 22g
Sodium: 650mg

Nutrition values are estimates and can vary according to ingredient brands, portion sizes, chicken cuts, and the amount of Brie or glaze served.

Flavor Variations

For a stronger citrus flavor in Honey Cranberry Chicken, add extra orange zest to the cranberry glaze and finish the dish with fresh orange slices.

A little fresh rosemary can replace some of the thyme for a deeper herb flavor.

For extra crunch, add toasted pecans instead of walnuts. Almonds also work well with the sweet potatoes and apples.

If you enjoy spicy food, add a pinch of red pepper flakes to the chicken seasoning or cranberry glaze.

For a Mediterranean-inspired version, add chopped parsley, a little oregano, and crumbled feta instead of Brie.

You can also add roasted carrots or parsnips for more autumn flavor.

Final Thoughts

Honey Cranberry Chicken brings together tender seasoned chicken, roasted sweet potatoes, caramelized apples, creamy Brie, and a glossy cranberry glaze. Each ingredient adds something different, creating a meal that feels comforting and special.

The sweet potatoes provide a hearty base, while roasted apples add natural sweetness and a soft texture. Cranberries bring acidity and color, and the Brie creates a rich creamy finish.

Honey Cranberry Chicken is flexible enough for both weeknight dinners and holiday gatherings. Most components can be prepared ahead, making the final cooking process easier.

For the best results, choose firm apples, cut the sweet potatoes evenly, and avoid overcrowding the roasting pan. Keep the cranberry glaze at a gentle simmer so it thickens without burning.

The final Honey Cranberry Chicken should be served warm with the Brie slightly softened. Add fresh herbs, toasted walnuts, and extra cranberry glaze just before serving.

Whether you are preparing a family dinner or planning a festive meal, this recipe offers a beautiful combination of sweet, savory, creamy, tangy, and nutty flavors.

Serve Honey Cranberry Chicken with wild rice, roasted vegetables, or a fresh green salad for a complete meal. The colorful presentation also makes it a natural centerpiece for a seasonal table.

With its tender chicken, roasted fruit, caramelized sweet potatoes, creamy cheese, and bright cranberry glaze, Honey Cranberry Chicken is a comforting dish that looks impressive without requiring complicated cooking techniques.

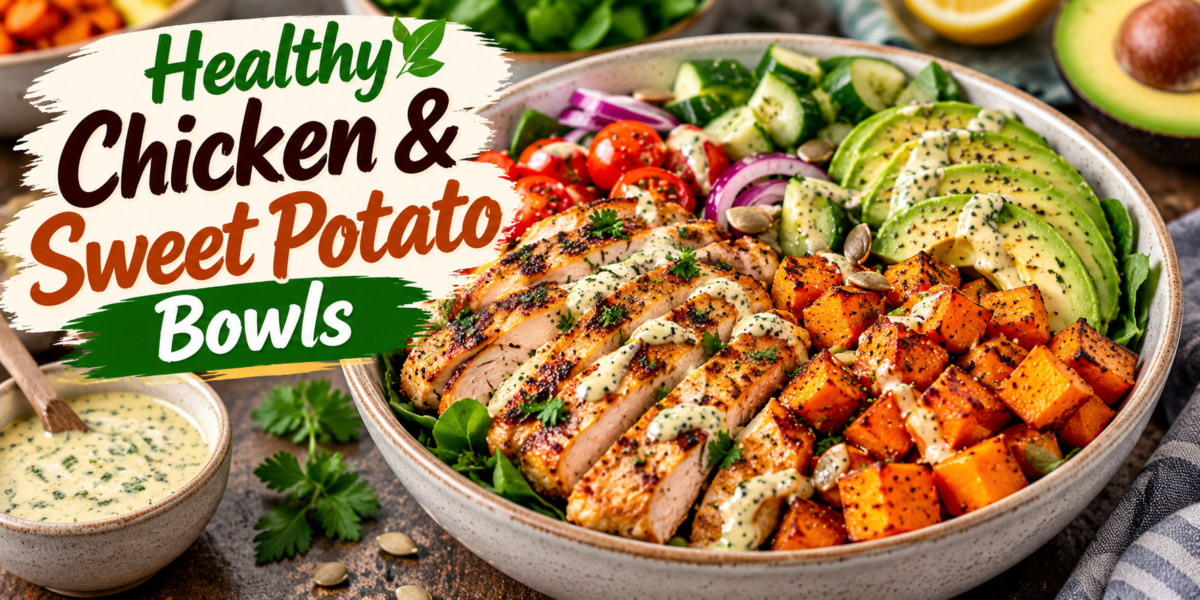
Healthy Chicken & Sweet Potato Bowls

Healthy Chicken Bowls with grilled chicken, roasted sweet potatoes, avocado, cucumber, tomatoes, greens, and herb dressing

Healthy Chicken & Sweet Potato Bowls

Chicken Bowls are a colorful and satisfying meal made with tender roasted chicken, caramelized sweet potatoes, fresh greens, creamy avocado, and a simple lemon herb dressing. The combination provides a delicious balance of protein, vegetables, complex carbohydrates, and healthy fats in one easy meal.

These Chicken Bowls are perfect for lunch, dinner, meal prep, or a quick family meal. The chicken is seasoned with garlic, paprika, cumin, oregano, and lemon, while the sweet potatoes roast until tender with golden edges. Fresh spinach, cucumber, tomatoes, avocado, and herbs add brightness and crunch.

These Chicken Bowls can also be served with quinoa, brown rice, or your favorite whole grain. Best of all, most of the ingredients can be prepared ahead, making this recipe practical for busy weekdays.

Prep Time: 20 minutes
Cook Time: 30–35 minutes
Total Time: About 55 minutes
Servings: 4

Ingredients

 Seasoned Chicken

1½ pounds boneless, skinless chicken breasts or thighs

1 teaspoon garlic powder

1½ tablespoons extra virgin olive oil

½ teaspoon ground cumin

1 teaspoon smoked paprika

½ teaspoon dried oregano

½ teaspoon sea salt

1 tablespoon fresh lemon juice

½ teaspoon black pepper

1 teaspoon lemon zest

Roasted Sweet Potatoes

3 medium sweet potatoes, peeled and cut into ¾-inch cubes

1 tablespoon olive oil

½ teaspoon smoked paprika

¼ teaspoon garlic powder

¼ teaspoon cumin

½ teaspoon sea salt

¼ teaspoon black pepper

Fresh Bowl Ingredients

1 avocado, sliced

4 cups fresh baby spinach or mixed greens

1 large cucumber, chopped

¼ red onion, thinly sliced

1 cup cherry tomatoes, halved

¼ cup fresh parsley, chopped

2 tablespoons pumpkin seeds or sunflower seeds

Lemon wedges for serving

Lemon Herb Dressing

1 tablespoon apple cider vinegar

3 tablespoons extra virgin olive oil

1 teaspoon honey or maple syrup

2 tablespoons fresh lemon juice

1 teaspoon Dijon mustard

½ teaspoon dried oregano

1 tablespoon fresh parsley, chopped

¼ teaspoon black pepper

1 small garlic clove, finely minced

Pinch of salt

Step-by-Step Instructions

1. Prepare the Oven

First, preheat the oven to 425°F (220°C). Line a large baking sheet with parchment paper.

A hot oven helps the sweet potatoes develop caramelized edges while keeping the centers soft. If your baking sheet is small, use two trays instead. This gives the vegetables enough room to roast properly.

2. Season the Sweet Potatoes

Place the sweet potato cubes in a large bowl. Add olive oil, smoked paprika, garlic powder, cumin, salt, and black pepper.

Toss everything until the pieces are evenly coated. Next, spread them across the prepared baking sheet in a single layer.

Roast for 25–30 minutes. Turn the cubes halfway through cooking so they brown on multiple sides.

The sweet potatoes are ready when they are fork-tender with golden, slightly crisp edges. Set them aside while you prepare the chicken.

3. Prepare the Chicken

While the sweet potatoes roast, pat the chicken dry with paper towels.

For even cooking, lightly pound thick chicken breasts so they have a more uniform thickness. If you are using thighs, trim any excess fat and leave them whole or cut them into large pieces.

Place the chicken in a bowl. Add olive oil, garlic powder, smoked paprika, cumin, oregano, black pepper, salt, lemon juice, and lemon zest.

Toss thoroughly so the seasoning covers every piece. Let the chicken rest for 10–15 minutes while the oven finishes heating.

4. Cook the Chicken

Heat a large oven-safe skillet over medium-high heat. Add a little olive oil if needed.

Place the seasoned chicken in the skillet. Sear for 3–4 minutes on the first side until golden brown.

Turn the chicken and cook for another 3–4 minutes. If the pieces are thick, transfer the skillet to the oven and continue cooking until the center reaches 165°F (74°C).

Alternatively, place the chicken on a separate baking sheet and roast it at 425°F (220°C) until completely cooked.

Once finished, transfer the chicken to a cutting board. Let it rest for 5–8 minutes.

Resting helps the chicken retain its juices and makes it easier to slice for Chicken Bowls.

5. Prepare the Fresh Ingredients

While the chicken rests, wash and prepare the vegetables.

Chop the cucumber, halve the tomatoes, thinly slice the red onion, and chop the parsley. Slice the avocado shortly before assembling the meal to help prevent browning.

Place the spinach or mixed greens into a large bowl. Keep the remaining vegetables separate until assembly.

Fresh ingredients give Chicken Bowls a pleasant contrast to the warm roasted chicken and sweet potatoes.

6. Make the Lemon Herb Dressing

Add olive oil, lemon juice, apple cider vinegar, honey or maple syrup, Dijon mustard, garlic, parsley, oregano, black pepper, and salt to a small jar or bowl.

Whisk vigorously until the dressing becomes smooth and slightly creamy.

Taste and adjust the flavor. Add more lemon juice for brightness, a little extra honey for sweetness, or another pinch of salt if needed.

The dressing should taste fresh and tangy. Its acidity balances the sweetness of the potatoes and the savory chicken.

7. Slice the Chicken

After the chicken has rested, slice it into strips or bite-size pieces.

Check the thickest piece to make sure it has reached 165°F (74°C). If necessary, return it to the skillet for a few additional minutes.

Slicing after resting helps retain the juices. Keep the pieces warm while you prepare the bowls.

8. Assemble the Bowls

Divide the spinach or mixed greens among four serving bowls.

Add roasted sweet potatoes, sliced chicken, cucumber, cherry tomatoes, red onion, and avocado.

Drizzle each bowl with the lemon herb dressing. Finish with chopped parsley and pumpkin or sunflower seeds.

For attractive Chicken Bowls, arrange the ingredients in separate sections rather than mixing everything immediately. This creates a colorful presentation and lets everyone see the different textures.

Serve with fresh lemon wedges.

Tips for the Best Results

Cut the Sweet Potatoes Evenly

Try to keep the cubes close to the same size. Smaller pieces may brown too quickly, while larger pieces can remain firm in the center.

Uniform cubes roast evenly and help Chicken Bowls have a pleasant combination of soft centers and caramelized edges.

Avoid Overcrowding the Pan

Spread the sweet potatoes across the baking sheet with a little space between each piece.

When vegetables are crowded, they release steam instead of roasting. As a result, the edges may stay soft rather than becoming golden.

Do Not Overcook the Chicken

Chicken breast can dry out when cooked for too long. Use an instant-read thermometer to check the thickest section.

Chicken should reach 165°F (74°C), then rest for several minutes before slicing.

Keep the Dressing Fresh

The lemon herb dressing can be prepared ahead, but whisk it again before serving.

If it tastes too sharp, add a little more honey or olive oil. On the other hand, if it seems too rich, add another squeeze of lemon.

Add Toppings at the End

Avocado, seeds, and fresh herbs are best added immediately before serving.

This keeps Chicken Bowls fresh and prevents delicate ingredients from becoming soggy.

Serving Suggestions

Serve Chicken Bowls as a complete lunch or dinner. The combination of chicken, sweet potatoes, greens, vegetables, avocado, and seeds makes the meal satisfying without requiring complicated side dishes.

For extra grains, add cooked quinoa, brown rice, farro, or couscous. These additions are especially useful when preparing larger portions for meal prep.

A spoonful of hummus can add creaminess and extra flavor. Greek yogurt mixed with lemon and herbs also works well as a cool topping.

For a Mediterranean-style variation, add crumbled feta, Kalamata olives, roasted red peppers, and fresh dill.

If you enjoy heat, add sliced jalapeños, crushed red pepper, or a small drizzle of chili oil.

Make-Ahead Instructions

These Chicken Bowls are excellent for meal preparation because most components can be made ahead.

Roast the sweet potatoes and cook the chicken. Allow both to cool before storing them in separate airtight containers.

Prepare the dressing and refrigerate it in a sealed jar for up to three days.

Wash and chop the vegetables, but keep the avocado uncut until serving.

For weekday lunches, Chicken Bowls can be portioned into meal-prep containers with greens, chicken, sweet potatoes, cucumber, tomatoes, and onion. Keep the dressing in a separate small container.

Add avocado, seeds, herbs, and dressing immediately before eating.

Storage Instructions

Store cooked chicken and roasted sweet potatoes in the refrigerator for up to three days.

Fresh vegetables should also remain refrigerated in sealed containers. Keep leafy greens as dry as possible because excess moisture can cause them to wilt.

The lemon herb dressing can be refrigerated for up to three days. Shake or whisk it before using.

When reheating Chicken Bowls, warm only the chicken and sweet potatoes. Keep spinach, cucumber, tomatoes, avocado, and other fresh toppings cold.

This combination gives the meal a pleasant contrast between warm and fresh ingredients.

Frequently Asked Questions

Can I Use Chicken Thighs?

Yes. Chicken thighs are juicy and flavorful, making them an excellent option if you prefer dark meat.

Can I Use Frozen Sweet Potatoes?

Fresh sweet potatoes provide the best texture, but frozen cubes can also work. Roast them directly from frozen and allow a few additional minutes if needed.

Can I Make the Recipe Dairy-Free?

Yes. The basic recipe contains no dairy ingredients. If you add feta or yogurt, choose a dairy-free alternative when necessary.

Can I Make It Gluten-Free?

Yes. The main recipe is naturally gluten-free. However, check packaged mustard, spices, and other ingredients if you need to avoid gluten completely.

Can I Add Another Protein?

Absolutely. Grilled shrimp, salmon, turkey, tofu, or chickpeas can replace or supplement the chicken.

How Can I Make the Bowls Spicier?

Add cayenne pepper to the chicken seasoning or include fresh jalapeño and chili flakes during assembly.

Can I Use Another Dressing?

Yes. A tahini lemon dressing, yogurt herb sauce, or simple balsamic vinaigrette can work beautifully.

How Do I Keep Avocado From Browning?

Cut it shortly before serving and add a little fresh lemon juice. For meal prep, store the avocado separately.

Nutrition Information

Approximate nutrition per serving:

Calories: 520 kcal
Protein: 40g
Carbohydrates: 45g
Fat: 23g
Fiber: 9g
Sugar: 12g
Sodium: 620mg

Nutrition values are estimates and can vary depending on the chicken cut, dressing quantity, toppings, and portion size.

Flavor Variations

For a Mediterranean flavor, add feta, olives, roasted red peppers, and oregano.

A smoky version can be made by adding extra smoked paprika and a pinch of chipotle powder to the chicken seasoning.

For a sweet and spicy variation, add chili flakes and a little extra honey to the dressing.

You can also make a green goddess-style bowl by replacing the lemon dressing with a creamy herb dressing made from yogurt, parsley, lemon, and garlic.

For extra crunch, add toasted almonds, pumpkin seeds, sunflower seeds, or chopped walnuts.

A spoonful of hummus can make the bowl creamier while adding another layer of savory flavor.

Final Thoughts

These Chicken Bowls combine tender seasoned chicken, roasted sweet potatoes, fresh vegetables, creamy avocado, leafy greens, and a bright lemon herb dressing. Each component adds a different texture and flavor, creating a meal that feels satisfying without being complicated.

The roasted sweet potatoes bring natural sweetness and caramelized edges. Meanwhile, the seasoned chicken provides protein and savory depth. Fresh cucumber, tomatoes, greens, and onion add crispness, while avocado creates a creamy contrast.

One of the biggest advantages of Chicken Bowls is their flexibility. You can change the vegetables, grains, toppings, or dressing according to your preferences. The basic cooking method stays the same, so the recipe can easily become part of a regular weekly meal plan.

For the best texture, keep the warm ingredients separate from the fresh toppings until serving. This is especially important when preparing the recipe ahead. The chicken and sweet potatoes can be reheated, while the vegetables and avocado remain fresh.

The lemon herb dressing brings Chicken Bowls together with a bright, tangy finish. Its acidity balances the sweetness of the potatoes and the richness of the avocado.

Whether you are preparing lunch for work, dinner for the family, or several meals for the week, Chicken Bowls offer a simple and flavorful option. With roasted vegetables, tender chicken, fresh greens, and homemade dressing, the result is colorful, filling, and easy to customize.

These Chicken Bowls are a practical choice for anyone who wants a wholesome meal without spending hours in the kitchen.

Sticky Honey Garlic Chicken

Sticky Honey Garlic Chicken glazed with honey garlic sauce, sesame seeds, and green onions

Sticky Honey Garlic Chicken

This Honey Garlic Chicken recipe features tender, golden chicken coated in a glossy homemade honey garlic sauce. The sauce combines honey, fresh garlic, soy sauce, rice vinegar, ginger, and a touch of chili for a sweet, savory, sticky finish. Sesame seeds and sliced green onions add a fresh crunch that makes every bite even more delicious.

The recipe is simple enough for a busy weeknight but looks impressive enough for a family dinner or casual gathering. The chicken is lightly seasoned, pan-seared until golden, and then coated in the sauce. As the sauce simmers, it thickens around the chicken and creates the beautiful glaze shown in the feature image.

Serve Honey Garlic Chicken with steamed rice, noodles, roasted vegetables, or a crisp cucumber salad. The sauce is flavorful enough to turn simple sides into a complete meal.

Prep Time: 15 minutes
Cook Time: 20 minutes
Total Time: 35 minutes
Servings: 4

Ingredients

For the Chicken

1½ pounds boneless, skinless chicken thighs or chicken breasts

½ cup all-purpose flour or cornstarch

1 teaspoon garlic powder

½ teaspoon paprika

½ teaspoon black pepper

½ teaspoon salt

2 tablespoons neutral cooking oil

For the Honey Garlic Sauce

⅓ cup honey

¼ cup low-sodium soy sauce

5 garlic cloves, finely minced

1 tablespoon rice vinegar

1 tablespoon freshly grated ginger

1 tablespoon water

1 teaspoon sesame oil

½ teaspoon red pepper flakes

1 teaspoon cornstarch

1 tablespoon cold water

For Garnishing

1 tablespoon white sesame seeds

1 tablespoon black sesame seeds

2 green onions, thinly sliced

Fresh cilantro, optional

Thinly sliced red chili, optional

Step-by-Step Instructions

1. Prepare the Chicken

Start by patting the chicken dry with paper towels. Removing excess moisture helps the surface brown properly in the skillet.

If using chicken breasts, cut them into evenly sized bite-size pieces. Chicken thighs can also be cut into similar pieces. Keeping the pieces close in size helps them cook at the same rate.

Place the chicken in a large bowl. Add flour or cornstarch, garlic powder, paprika, black pepper, and salt. Toss until each piece is lightly coated.

The coating helps create a lightly crisp exterior. It also gives the sauce something to cling to later.

2. Prepare the Sauce

While the chicken is ready, make the sauce.

In a medium bowl, whisk together honey, soy sauce, minced garlic, rice vinegar, grated ginger, water, sesame oil, and red pepper flakes.

In a separate small bowl, mix one teaspoon of cornstarch with one tablespoon of cold water. Stir until smooth and set it aside.

This simple sauce gives Honey Garlic Chicken its signature sweet and savory flavor. The fresh garlic adds a strong aroma, while ginger and rice vinegar keep the sauce from tasting too heavy.

3. Sear the Chicken

Heat a large skillet over medium-high heat. Add the cooking oil and allow it to become hot.

Arrange the chicken pieces in a single layer. Avoid overcrowding the skillet. If necessary, cook the chicken in two batches.

Sear the pieces for about 3–4 minutes on the first side. Turn them and cook for another 3–4 minutes, or until they are golden brown and nearly cooked through.

Do not move the chicken constantly. Letting each side sit against the hot skillet helps develop a deeper golden crust.

For Honey Garlic Chicken with the best texture, use tongs to turn the pieces rather than stirring them continuously.

4. Add the Honey Garlic Sauce

Reduce the heat to medium. Pour the prepared sauce over the browned chicken.

Stir gently so every piece becomes coated. Allow the sauce to simmer for about 2–3 minutes.

The honey will begin to bubble, and the garlic will become fragrant. Keep the heat moderate because honey can darken quickly if the pan becomes too hot.

5. Thicken the Glaze

Stir the cornstarch mixture again because the starch can settle at the bottom.

Pour it slowly into the skillet while stirring gently. Continue simmering for another 1–2 minutes.

The sauce should become glossy and thick enough to coat the back of a spoon. It will continue to thicken slightly as it cools.

If the sauce becomes too thick, add one or two tablespoons of warm water. If it is too thin, simmer for another minute.

The finished Honey Garlic Chicken should have a shiny glaze that clings to the chicken without becoming dry.

6. Finish the Chicken

Turn off the heat once the chicken is fully cooked and the sauce reaches the desired consistency.

For food safety, check the thickest piece with an instant-read thermometer. Chicken should reach an internal temperature of 165°F (74°C).

Sprinkle white and black sesame seeds over the chicken. Add sliced green onions and fresh chili if you enjoy extra heat.

Let the chicken sit for 2 minutes before serving. This gives the sauce a moment to settle around the pieces.

Tips for the Best Honey Garlic Chicken

For Evenly Sized Honey Garlic Chicken Pieces

Cutting the chicken into similar pieces helps everything cook evenly. Very large pieces may need more time, while small pieces can become dry.

Dry the Chicken First

Patting the chicken dry before coating it helps the flour or cornstarch stick better. It also encourages better browning.

Do Not Crowd the Pan

Give each chicken piece enough space. Overcrowding traps steam and can prevent the exterior from becoming golden.

If your skillet is small, cook the chicken in batches. Add a little more oil between batches if needed.

Keep the Heat Moderate for Honey Garlic Chicken

Honey contains natural sugars, so it can burn when exposed to very high heat. Once the sauce is added, lower the temperature to medium.

This allows the glaze to thicken gradually while keeping the garlic aromatic instead of bitter.

Adjust the Heat in Honey Garlic Chicken

The recipe has a mild spicy note from red pepper flakes. For a sweeter, family-friendly version, reduce or omit them.

For a hotter version, add extra chili flakes or thinly sliced fresh red chili.

Watch the Glaze

The sauce should coat the chicken rather than become hard or overly sticky. Remove the pan from the heat as soon as the glaze reaches a glossy consistency.

For Honey Garlic Chicken with a restaurant-style finish, add the sesame seeds and green onions immediately before serving.

Honey Garlic Chicken Serving Suggestions

Serve Honey Garlic Chicken over steamed jasmine rice or basmati rice. The rice absorbs the extra glaze and creates a satisfying meal.

Noodles are another excellent option. Toss cooked rice noodles or egg noodles with a little of the sauce before adding the chicken.

For vegetables, try steamed broccoli, roasted carrots, snap peas, bell peppers, or green beans. Their fresh texture balances the rich glaze.

A simple cucumber salad also works well. Thinly slice cucumber and toss it with rice vinegar, lime juice, sesame seeds, and green onions.

For a colorful dinner plate, arrange the chicken over rice and add broccoli on one side. Finish with sesame seeds, scallions, and a few slices of fresh red chili.

Honey Garlic Chicken Make-Ahead Instructions

The chicken can be cut and seasoned several hours before cooking. Keep it covered in the refrigerator until ready to use.

The sauce can also be mixed ahead and stored in a sealed container in the refrigerator for up to two days. Stir it well before adding it to the skillet.

For the best texture, cook the chicken shortly before serving. Freshly glazed chicken has a better crisp exterior and a shinier sauce.

If you need to prepare the complete dish ahead, keep the chicken and sauce together in a covered container. Reheat gently on the stovetop with a small splash of water.

Honey Garlic Chicken Storage and Reheating

Store leftover Honey Garlic Chicken in an airtight container in the refrigerator for up to 3 days.

To reheat, place the chicken in a skillet over medium-low heat. Add one or two tablespoons of water and cover the pan.

Warm until the chicken reaches a safe serving temperature. Stir gently so the glaze does not stick to the bottom.

You can also reheat individual portions in the microwave. Cover the dish loosely and heat in short intervals, stirring between intervals.

The sauce may become thicker after refrigeration. A small splash of warm water will help restore its glossy texture.

Honey Garlic Chicken FAQs

Can I use chicken breast?

Yes. Chicken breast works very well. Cut it into evenly sized pieces and avoid overcooking because breast meat is leaner than thighs.

Can I use chicken thighs?

Absolutely. Boneless chicken thighs are especially juicy and forgiving. They work beautifully with the sweet garlic glaze.

Can I make this recipe without flour?

Yes. Cornstarch is an excellent alternative. You can also skip the coating completely, although the finished chicken will have a less crisp exterior.

Can I make the sauce less sweet?

Yes. Reduce the honey slightly and increase the rice vinegar by a small amount. Taste the sauce before adding it to the chicken.

Can I make it spicy?

Yes. Add extra red pepper flakes, fresh chili, or a small amount of chili garlic sauce.

Can I make it gluten-free?

Use certified gluten-free cornstarch and gluten-free tamari or soy sauce. Check all packaged ingredients if gluten sensitivity is a concern.

Can I make it dairy-free?

Yes. The recipe contains no dairy ingredients, so no substitutions are needed.

Why is my sauce not thickening?

The cornstarch mixture may not have been fully stirred before adding it. Stir it again, then simmer the sauce for another minute or two.

Why did my glaze become too thick?

Honey and cornstarch can create a thick glaze quickly. Add warm water one tablespoon at a time and stir over low heat until the desired consistency returns.

Honey Garlic Chicken Nutrition Information

Approximate nutrition per serving:

Calories: 420 kcal
Protein: 35g
Carbohydrates: 38g
Fat: 15g
Fiber: 1g
Sugar: 24g
Sodium: 760mg

Nutrition values are estimates and can vary depending on the chicken cut, amount of sauce, brands of ingredients, and serving size.

Honey Garlic Chicken Flavor Variations

For a citrus version, add one teaspoon of fresh orange zest and replace one tablespoon of water with orange juice.

A little lime juice can make the sauce brighter and slightly more tangy.

For extra sesame flavor, add another teaspoon of toasted sesame oil at the end. Avoid adding too much because sesame oil has a strong flavor.

For a deeper savory taste, add one teaspoon of oyster sauce if desired.

For a tropical variation, serve the chicken with pineapple chunks, cucumber, and cilantro.

You can also turn the dish into a bowl by serving Honey Garlic Chicken over rice with shredded cabbage, carrots, cucumber, and avocado.

Final Thoughts

Honey Garlic Chicken is a simple dinner that delivers plenty of flavor without requiring complicated ingredients. The chicken develops a golden exterior in the skillet, while the homemade glaze brings together honey, garlic, soy sauce, ginger, sesame oil, and a touch of chili.

The most important step is controlling the heat. Brown the chicken over medium-high heat, then reduce the temperature before adding the honey-based sauce. This keeps the glaze glossy and prevents the garlic from burning.

Fresh garnishes also make a difference. Sesame seeds add a gentle crunch, while green onions provide a fresh contrast to the sweet sauce. A little fresh chili can add another layer of heat for those who enjoy spicy food.

This recipe is also flexible. Use chicken thighs for a juicier result or chicken breasts for a leaner option. Serve it with rice, noodles, vegetables, or a fresh cucumber salad.

For meal preparation, keep the cooked chicken refrigerated and reheat it gently with a small splash of water. The glaze will loosen and become glossy again.

Whether you are preparing a quick weeknight meal or something special for guests, Honey Garlic Chicken offers a comforting combination of tender chicken, sticky glaze, garlic, sesame, and fresh scallions. The result is a colorful dish that looks impressive on the table and is easy to prepare at home.