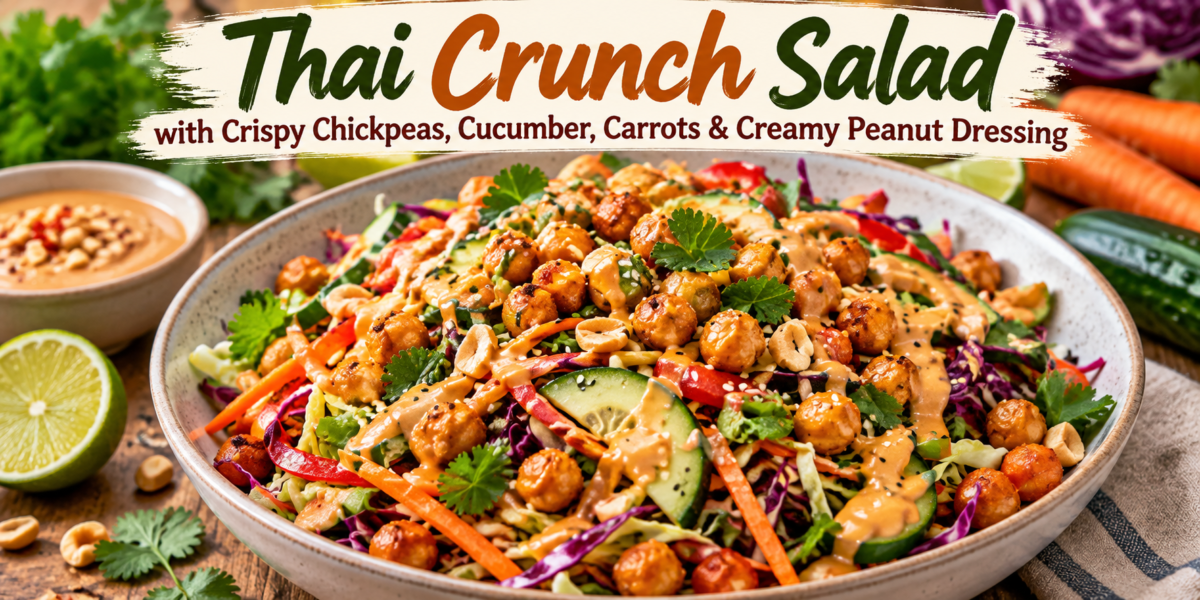
Thai Crunch Salad with Crispy Chickpeas, Cucumber, Carrots & Creamy Peanut Dressing

Thai Crunch Salad with crispy chickpeas, cucumber, carrots, cabbage, peanuts, and creamy peanut dressing

Thai Crunch Salad with Crispy Chickpeas, Cucumber, Carrots & Creamy Peanut Dressing

Thai Crunch Salad is a colorful, fresh, and satisfying recipe packed with crisp vegetables, golden crispy chickpeas, herbs, and a creamy peanut dressing. Cabbage gives the salad a hearty crunch, cucumber adds freshness, carrots bring natural sweetness, and roasted chickpeas provide a warm, crispy contrast. The peanut dressing combines peanut butter, lime juice, soy sauce, ginger, garlic, and a touch of maple syrup for a balanced sweet, salty, tangy flavor.

This Thai Crunch Salad works beautifully as a light lunch, side dish, meal-prep option, or vegetarian dinner. The Thai Crunch Salad can also be served at family gatherings. It is easy to customize with extra herbs, edamame, avocado, or cooked grains. The salad is especially enjoyable when the vegetables are sliced thinly because every bite contains several textures.

Preparation and Cooking Time

Prep Time: 25 minutes
Cook Time: 25–30 minutes
Total Time: About 55 minutes
Servings: 6
Category: Salad
Cuisine: Thai-Inspired

Ingredients

Crispy Chickpeas

  • 2 cans chickpeas, drained and rinsed
  • 1 tablespoon olive oil
  • ½ teaspoon smoked paprika
  • ½ teaspoon garlic powder
  • ¼ teaspoon ground cumin
  • ¼ teaspoon chili flakes
  • ½ teaspoon sea salt
  • ¼ teaspoon black pepper

Fresh Salad Vegetables

  • 4 cups finely shredded green cabbage
  • 2 cups finely shredded red cabbage
  • 1 large cucumber, thinly sliced
  • 2 medium carrots, julienned or grated
  • 1 red bell pepper, thinly sliced
  • ½ cup chopped fresh cilantro
  • ¼ cup chopped fresh mint
  • 3 green onions, thinly sliced
  • ½ cup roasted peanuts, roughly chopped
  • ½ cup edamame, cooked and cooled
  • 1 tablespoon sesame seeds
  • 1 small avocado, sliced, optional

 Creamy Peanut Dressing

  • ½ cup smooth natural peanut butter
  • 3 tablespoons fresh lime juice
  • 2 tablespoons soy sauce or tamari
  • 1 tablespoon maple syrup or honey
  • 1 tablespoon rice vinegar
  • 1 teaspoon toasted sesame oil
  • 1 teaspoon freshly grated ginger
  • 1 small garlic clove, finely minced
  • ½ teaspoon chili garlic sauce
  • 3–5 tablespoons warm water
  • Pinch of salt, if needed

Step-by-Step Instructions

1. Prepare the Chickpeas

First, preheat the oven to 425°F (220°C). Line a large baking sheet with parchment paper.

Drain and rinse the chickpeas. Spread them on a clean kitchen towel or several paper towels. Pat them very dry. Removing excess moisture is important because dry chickpeas become much crispier in the oven.

If any loose skins come off while drying, remove them if you like. However, it is not necessary to peel every chickpea.

Place the chickpeas in a bowl. Add olive oil, smoked paprika, garlic powder, cumin, chili flakes, salt, and black pepper. Toss until evenly coated.

Spread the chickpeas in a single layer on the baking sheet. Roast for 20–25 minutes. Shake the pan halfway through cooking so the chickpeas brown evenly.

They are ready when golden and crisp on the outside. Let them cool for several minutes after roasting. They will become slightly crispier as they cool.

2. Prepare the Vegetables

While the chickpeas roast, prepare the vegetables.

Thinly shred the green and red cabbage. Slice the cucumber into thin half-moons. Julienne or grate the carrots. Slice the red bell pepper into thin strips.

Place the cabbage, cucumber, carrots, and bell pepper in a large mixing bowl.

Add chopped cilantro, mint, green onions, edamame, and sesame seeds. If you are using avocado, wait until the salad is almost ready to serve before adding it.

The key to a great Thai Crunch Salad is variety. This Thai Crunch Salad becomes especially appealing when each vegetable is sliced thinly.

3. Make the Peanut Dressing

Add peanut butter, lime juice, soy sauce, maple syrup, rice vinegar, sesame oil, ginger, garlic, and chili garlic sauce to a medium bowl.

Whisk until smooth.

At first, the peanut butter may seem too thick. Add warm water one tablespoon at a time while whisking. Continue until the dressing becomes creamy and pourable.

Taste the dressing. Add more lime juice if you want extra brightness. Add more maple syrup for sweetness, or another small amount of chili garlic sauce for additional heat.

The dressing should taste balanced rather than overly sweet. Lime provides acidity, soy sauce adds savory depth, peanut butter creates richness, and ginger and garlic give the dressing an aromatic finish.

4. Combine the Salad

Once the vegetables are prepared, pour about two-thirds of the peanut dressing over the salad.

Use clean salad tongs to toss everything gently. Make sure the dressing reaches the cabbage and vegetables without crushing them.

A well-balanced Thai Crunch Salad should look colorful and lightly coated, not soaked in dressing. This keeps the Thai Crunch Salad fresh and crisp.

Add more dressing only if needed. Save the remaining dressing for serving.

5. Add the Crispy Chickpeas

Just before serving, scatter the roasted chickpeas over the salad.

Do not mix all of them into the salad too early. The vegetables contain moisture, and that moisture can soften the chickpeas.

For the best texture, keep some crispy chickpeas on top. This gives every serving a crunchy finish.

6. Add the Final Garnishes

Scatter chopped roasted peanuts over the salad. Add fresh cilantro, mint, sesame seeds, and green onions.

If using avocado, gently add the slices at this stage.

Finish with fresh lime wedges and a small drizzle of the remaining peanut dressing.

The finished Thai Crunch Salad should have bright colors, crisp vegetables, creamy dressing, and plenty of crunchy toppings.

Tips for the Best Results

Dry the Chickpeas Well

Moisture is the biggest enemy of crispy chickpeas. Pat them thoroughly before adding the oil and seasonings.

For an even crispier result, allow the drained chickpeas to air-dry for 10–15 minutes before roasting. This extra step makes the Thai Crunch Salad more texturally interesting.

Slice the Vegetables Thinly

Thin vegetables are easier to eat and allow the dressing to coat more evenly. A sharp knife or mandoline can make cabbage and cucumber preparation faster.

Be careful when using a mandoline and always use the safety guard.

Keep the Chickpeas Separate

If you are preparing the salad ahead, store the crispy chickpeas separately. Add them immediately before serving.

This simple step helps preserve their crunchy texture.

Adjust the Dressing

Peanut butter brands vary in thickness. Some require more water than others.

Add warm water slowly. You can always add more, but it is difficult to thicken an overly thin dressing without adding extra peanut butter.

Balance the Flavors

Taste the dressing before combining it with the salad. It should have a clear balance of creamy, salty, sweet, tangy, and spicy notes.

If the dressing tastes heavy, add lime juice. If it tastes too sharp, add a little maple syrup.

Serving Suggestions

Serve Thai Crunch Salad as a light lunch with extra crispy chickpeas and avocado. This Thai Crunch Salad also makes a refreshing side for grilled foods.

For a more filling meal, add cooked quinoa, brown rice, rice noodles, or grilled tofu.

It also works well as a side dish with grilled chicken, shrimp, salmon, or baked tofu.

For a party or gathering, place the salad in a large shallow serving bowl. Keep the peanut dressing in a small bowl on the side if guests will be serving themselves.

You can also serve the salad in lettuce cups for an attractive appetizer. Add a spoonful of the salad to each lettuce leaf and finish with peanuts and a little dressing.

Make-Ahead Instructions

The chickpeas can be roasted several hours ahead. Allow them to cool completely, then store them in a container at room temperature.

The vegetables can also be washed and prepared ahead. Store them in separate airtight containers or one large container lined with a clean paper towel.

The peanut dressing can be made up to three days ahead and refrigerated.

Before serving, whisk the dressing again. If it has thickened in the refrigerator, add warm water one teaspoon at a time until smooth.

For the freshest Thai Crunch Salad, combine the vegetables and dressing shortly before serving. Doing so keeps the Thai Crunch Salad crisp and vibrant.

Add the chickpeas and peanuts at the very end.

Storage Instructions

If the salad has already been dressed, store leftovers in an airtight container in the refrigerator and enjoy within one day for the best texture. This Thai Crunch Salad is best when its crunchy toppings are added fresh.

Undressed vegetables can last for up to three days when refrigerated properly.

Keep crispy chickpeas at room temperature in a loosely covered container. A completely airtight container can trap moisture and soften them.

Store leftover peanut dressing in the refrigerator for up to three days. Stir well before using.

If avocado has been added, it may brown over time. For meal prep, add fresh avocado immediately before eating.

Frequently Asked Questions

Can I make this salad without peanuts?

Yes. This Thai Crunch Salad is easy to adapt when you need a peanut-free option.

Use almond butter, cashew butter, or sunflower seed butter in the dressing. Replace the chopped peanuts with toasted sunflower seeds or pumpkin seeds if needed.

Can I use store-bought crispy chickpeas?

Yes. Store-bought roasted chickpeas can save time. Choose a lightly seasoned variety so the flavor does not overpower the peanut dressing.

Can I make the dressing spicy?

Absolutely. Increase the chili garlic sauce or add a small amount of crushed red pepper. Fresh sliced chili can also be added to the salad.

Can I make the salad vegan?

Yes. Use maple syrup instead of honey and choose a vegan soy sauce or tamari. The remaining ingredients are naturally plant-based.

Can I add protein?

Yes. Grilled tofu, edamame, chickpeas, chicken, shrimp, or salmon can make the salad more filling.

Can I use another cabbage?

Yes. Napa cabbage can replace green cabbage. It has a softer texture and works especially well when you prefer a more delicate crunch.

Why did my crispy chickpeas become soft?

They may have been added too early or were not dry enough before roasting. Store them separately and add them just before serving.

Nutrition Information

Approximate nutrition per serving:

Calories: 390 kcal
Protein: 14g
Carbohydrates: 38g
Fat: 22g
Fiber: 10g
Sugar: 10g
Sodium: 560mg

Nutrition values are estimates and may vary depending on ingredient brands, dressing quantity, and portion sizes.

Flavor Variations

For extra freshness, add Thai basil, extra mint, or cilantro. These herbs create a brighter flavor and pair naturally with lime and peanut dressing.

For more crunch, add shredded radish, snow peas, toasted cashews, or thinly sliced water chestnuts.

For a tropical twist, add small cubes of mango or pineapple. Their natural sweetness works especially well with the tangy dressing.

For a heartier version, add cooked rice noodles or quinoa. The grains absorb some of the dressing and make the salad more substantial.

For more heat, add fresh red chili, chili crisp, or additional chili garlic sauce.

For extra citrus flavor, add a little lime zest to the dressing before serving.

Final Thoughts

Thai Crunch Salad brings together crisp vegetables, creamy peanut dressing, golden chickpeas, fresh herbs, and roasted peanuts in one colorful bowl. Every ingredient contributes something different. Cabbage provides crunch, carrots add sweetness, cucumber brings freshness, and roasted chickpeas create a satisfying contrast.

The peanut dressing ties everything together. Its creamy texture works with the crunchy vegetables, while lime juice keeps the flavor bright. Soy sauce adds savory depth, and ginger, garlic, and chili provide warmth.

Another advantage of this Thai Crunch Salad is its flexibility. You can change the vegetables according to what you have available. Add mango for sweetness, avocado for creaminess, or tofu for extra protein.

For the best texture, prepare the vegetables and dressing ahead but keep the crispy chickpeas separate. Combine everything shortly before serving. This keeps the chickpeas crunchy and prevents the cabbage from becoming overly soft.

Thai Crunch Salad is also an excellent meal-prep option when the components are stored separately. Pack the vegetables, dressing, and crispy chickpeas in separate containers. Combine them when you are ready to eat.

Whether you serve it as a light lunch, colorful side dish, vegetarian dinner, or party salad, Thai Crunch Salad delivers a satisfying combination of textures and flavors. This Thai Crunch Salad is especially good when served immediately after adding the crispy toppings.

The creamy peanut dressing, crunchy vegetables, crisp chickpeas, herbs, and fresh lime make every bite bright and flavorful. This Thai Crunch Salad is a simple way to bring those textures together.
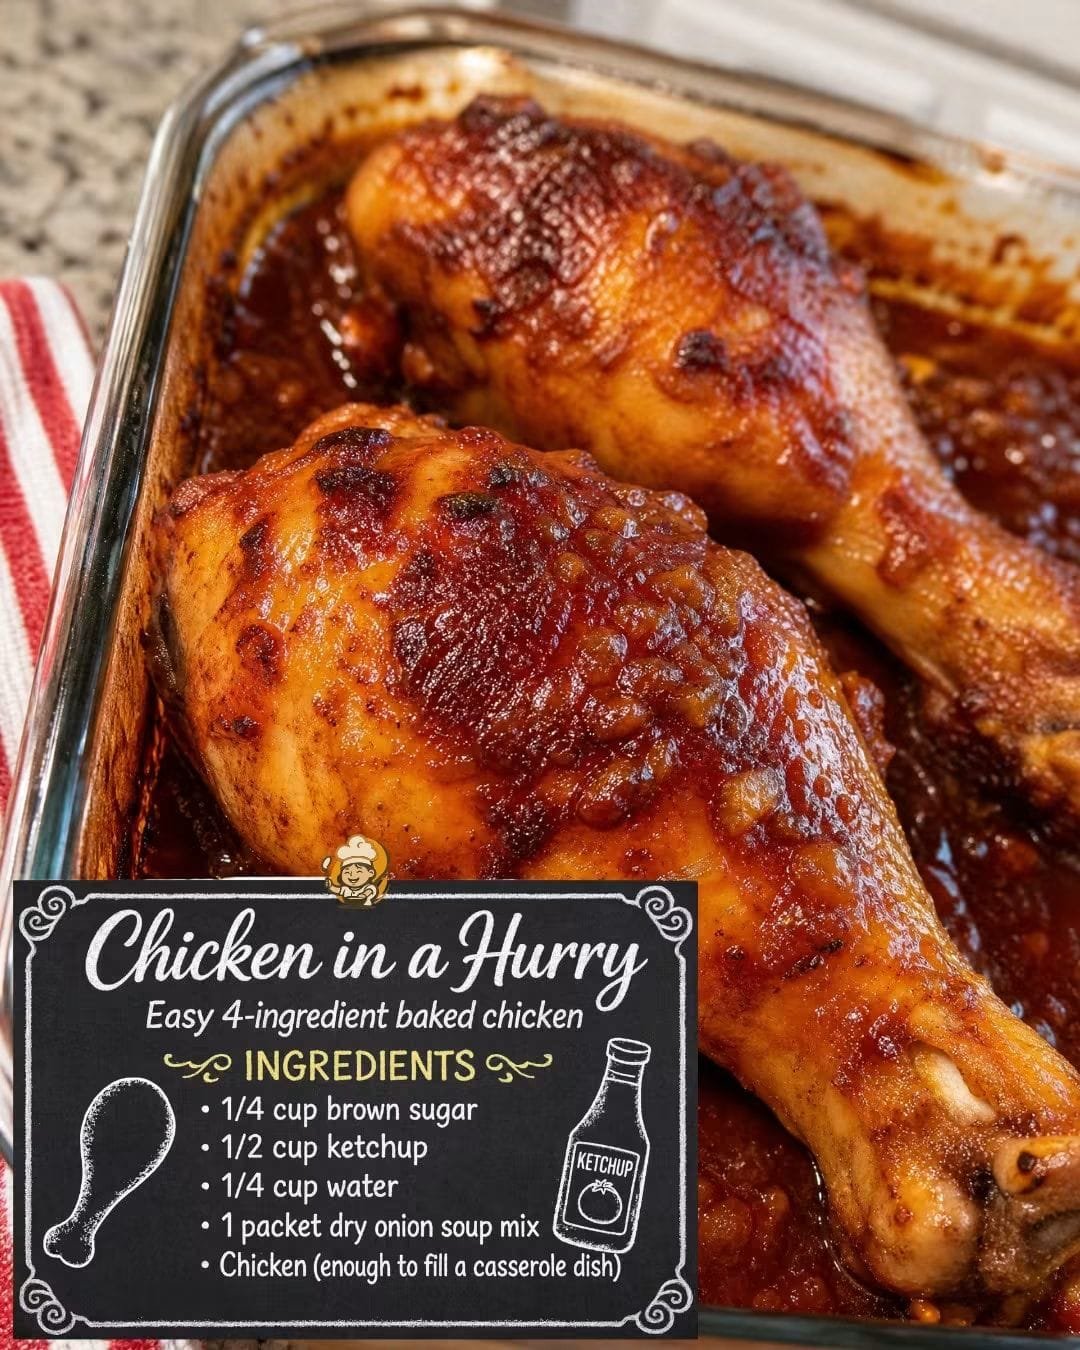
Chicken in a Hurry* – that sticky, caramelized chicken 

 *Chicken in a Hurry* – that sticky, caramelized chicken 


It really IS only 4-ingredients for the sauce – perfect for a quick dawat.


*Makes: 4-6 servings | Prep: 5 min | Bake: 1 hour*


*INGREDIENTS (from your board):*

  • – 6-8 Chicken leg quarters /
  • – 1/4 cup brown sugar (or normal sugar + 1 tsp gur)
  • – 1/2 cup ketchup
  • – 1/4 cup water
  • – 1 packet dry onion soup mix (40g) –
  • mix 2 tbsp onion powder
  • 1 tsp garlic powder
  • 1 chicken cube
  • 1 tbsp cornflour


*METHOD:*


1. *Preheat:* Oven to 180°C / 350°F. If no oven, you can do this in a big patila on dum.

2. *Make Sauce:* In a bowl, whisk brown sugar, ketchup, water, and onion soup mix together. It will be thick and brown like in your dish.

3. *Arrange Chicken:* Place chicken pieces skin-side up in your glass casserole dish. Don’t overlap too much. No need to marinate.

4. *Pour:* Pour the sauce all over the chicken. Make sure every piece is coated. The sauce will look little but it becomes gravy.

5. *Bake:* Cover with foil for first 30 mins, then remove foil. Bake uncovered for another 30-40 mins. The top will get dark, sticky, and caramelized . Chicken juice will mix with sauce and become thick gravy.

6.  *Check:* Chicken is done when skin is dark brown and sauce is bubbling thick. Internal temp 75°C.


*Serve with:* White rice, naan, or mashed potatoes – spoon that dark sauce on top, it’s the best part!


*Storage:* Fridge 3 days. Reheats beautifully.


*Tip:* For extra sticky top like in your pic, broil / grill for last 3-4 mins.

Tips for perfect *Chicken in a Hurry*- dark, sticky, juicy not dry:


*1. Don’t skip the sugar:* That dark caramelized color comes from brown sugar. White sugar works but brown gives that deep color and gur-like taste. Don’t reduce it.


*2. Make your own onion soup mix (Desi hack):* . Mix this instead:

  • 2 tbsp dried fried onion powder
  • 1 chicken knorr cube crushed
  • 1 tsp black pepper
  • 1 tsp garlic powder. Tastes same.


*3. No watery gravy:* . The trick is 1/4 cup water only, not more. Chicken itself leaves water. If gravy is thin, take chicken out and bake sauce alone 10 mins.


*4. Crispy skin trick:* Pat chicken dry with tissue before adding sauce. Bake uncovered last 30 mins. For that charred top in your pic, brush a little extra ketchup + sugar on top in last 5 mins.


*5. Don’t overcrowd:* Use big dish . If pieces overlap, they will boil not bake and won’t get that golden crust.


*Bonus:* Add 1 tsp vinegar or lemon juice to cut sweetness if you like khatta meetha – really lifts the flavor.


It’s meant to be sweet & tangy like BBQ.

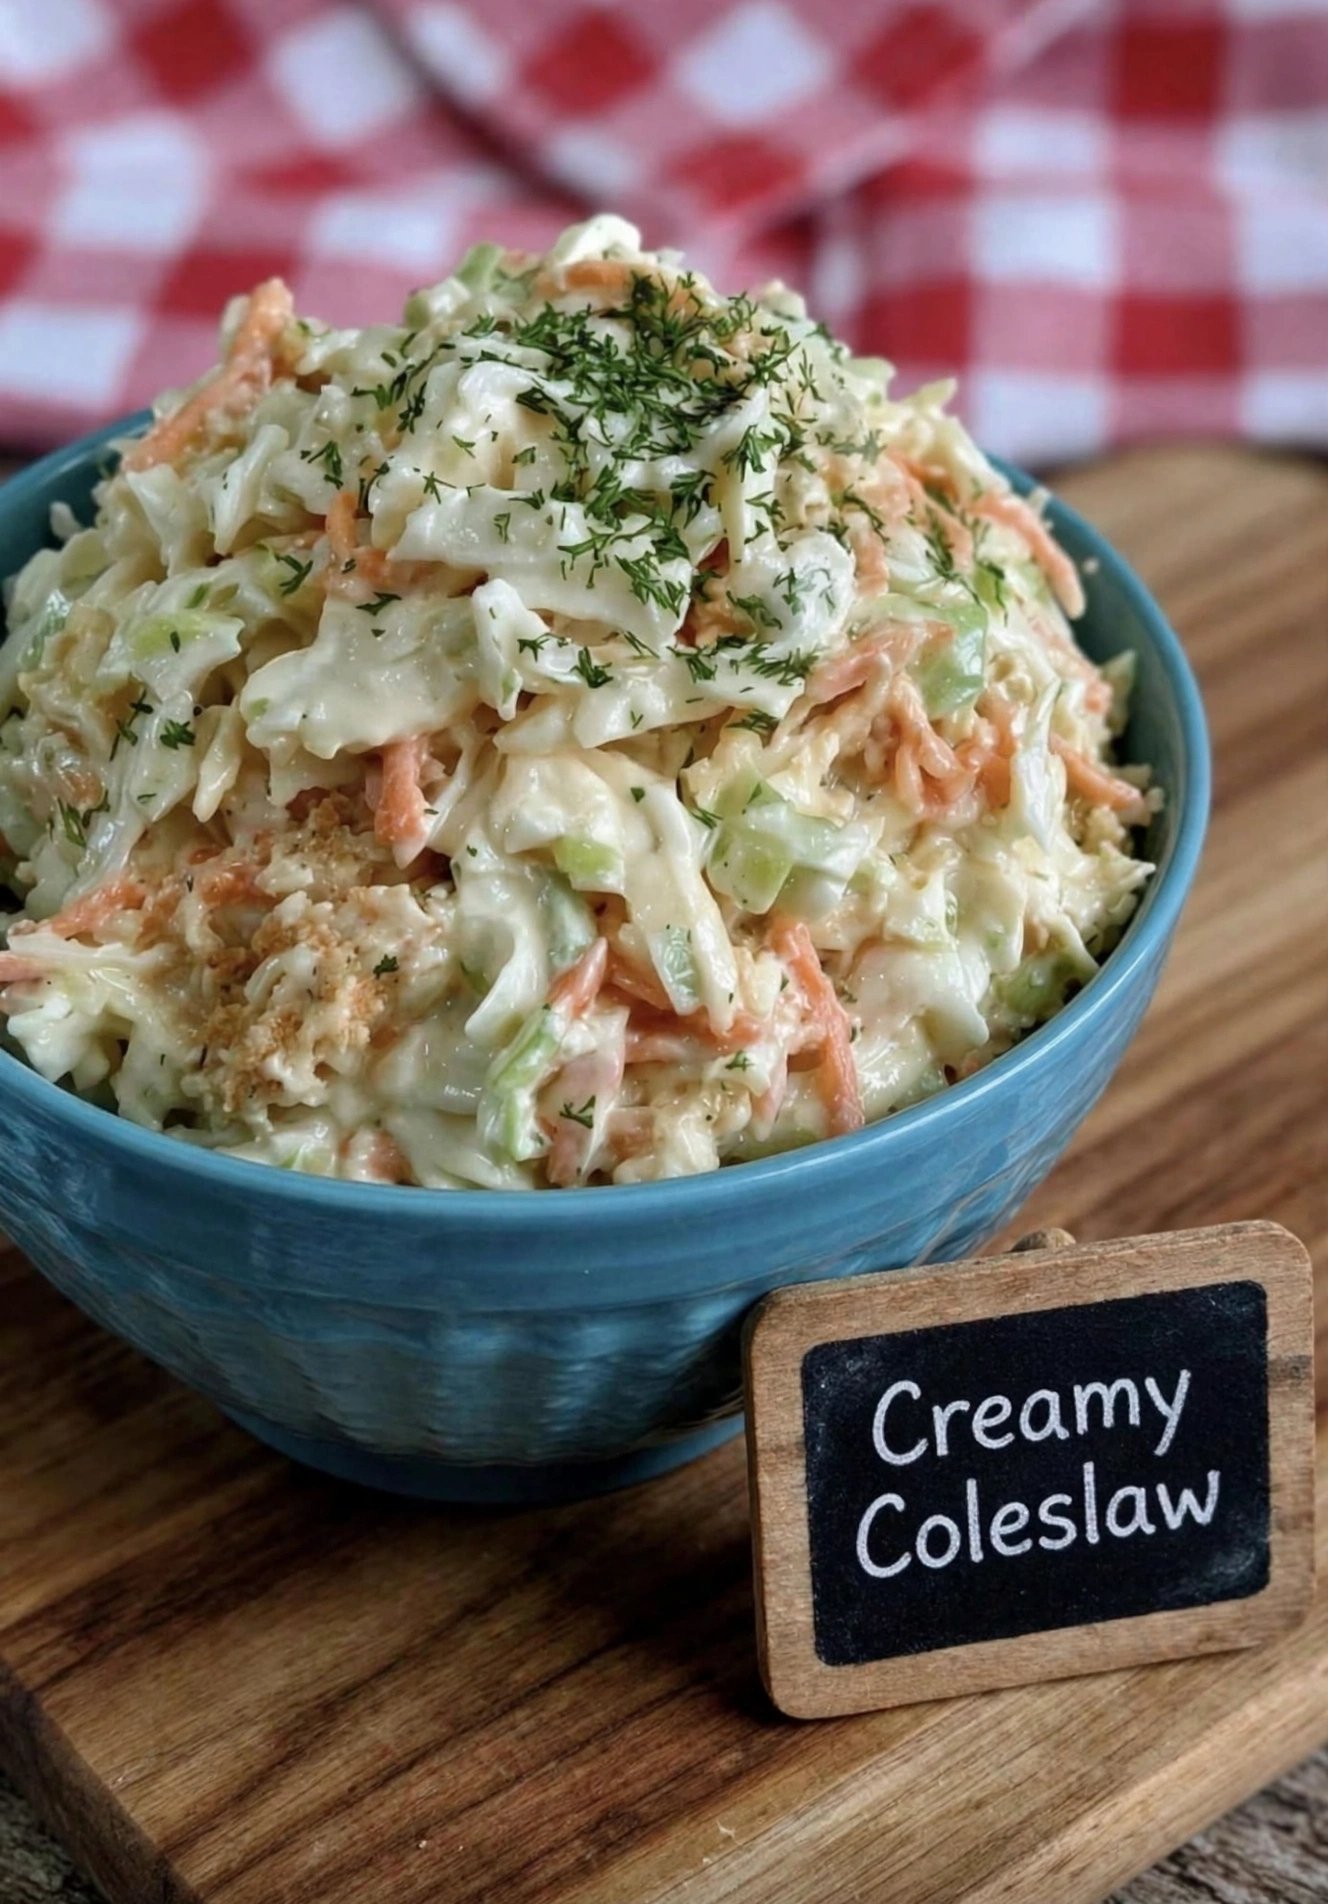
Creamy Classic Coleslaw*

*Creamy Classic Coleslaw*  –

exactly like the blue bowl with dill on top!


*Makes: 6-8 servings | Ready in 15 min*


*INGREDIENTS:*


*For the Salad:*

– 1 medium green cabbage (about 800g), thinly shredded

– 2 medium carrots, julienned / grated

– 2 celery stalks, finely chopped

– 1/4 cup fresh dill or parsley, chopped for topping


*For the Creamy Dressing

– 1 cup mayonnaise

– 2 tbsp apple cider vinegar or white vinegar

– 2 tbsp sugar

– 2 tbsp milk or cream

– 1 tsp Dijon mustard (or regular mustard)

– 1/2 tsp salt

– 1/2 tsp black pepper

– 1/4 tsp garlic powder

– Pinch of brown sugar / breadcrumbs – see that little golden crumble  Optional – 1 tbsp toasted breadcrumbs for crunch


*METHOD:*


1. *Shred:* Thinly slice cabbage with a knife. Don’t use a machine if you want that restaurant-style thick cut  Shred carrots.

2. *Mix Dressing:* In a small bowl whisk mayo, vinegar, sugar, milk, mustard, salt, pepper, garlic powder until smooth and creamy.

3. *Combine:* In your large blue bowl, add cabbage, carrots, celery. Pour dressing over. Toss very well for 2 minutes so every piece is coated – that’s the creamy white

4. *Chill – IMPORTANT:* Cover and put in fridge for at least 1 hour. This makes it soft and juicy. 2 hours is best.

5. *Serve:* Sprinkle fresh chopped dill on top  and a little black pepper.


*Tastes best with:* Fried chicken, BBQ, burgers, or shawarma!


*Store:* In fridge 3-4 days. Do not freeze.


*Secret Tip:* If you like it sweeter like KFC style, add 1 more tbsp sugar. If you like it tangy, add 1 more tbsp vinegar.

Tips for that Creamy Coleslaw to make it look and taste.


*1. No watery coleslaw:* This is the biggest mistake. After shredding cabbage, sprinkle 1 tsp salt, leave 30 mins, then squeeze out all water with your hands. Your dressing will stay thick and creamy not watery.

*2. The cut matters:* Don’t grate cabbage too fine. Use a knife to cut into thin, long strips – that’s the chunky restaurant style you have in the blue bowl. Carrots should be thin matchsticks, not big shreds.


*3. That golden crumb :* That’s the secret touch – toast 2 tbsp breadcrumbs or crushed salted biscuits in 1 tsp butter till golden and sprinkle lightly before serving. Gives a slight crunch.


*4. Make it 2 hours early:* Coleslaw tastes best after 1-2 hours in fridge. The cabbage softens a little and absorbs the dressing. Don’t add dill till serving time or it goes black.


*5. Balance the dressing:* Taste it before mixing. If too sour, add sugar. If too thick, add 1 tbsp milk. The perfect coleslaw dressing should be sweet, tangy, and creamy at same time.


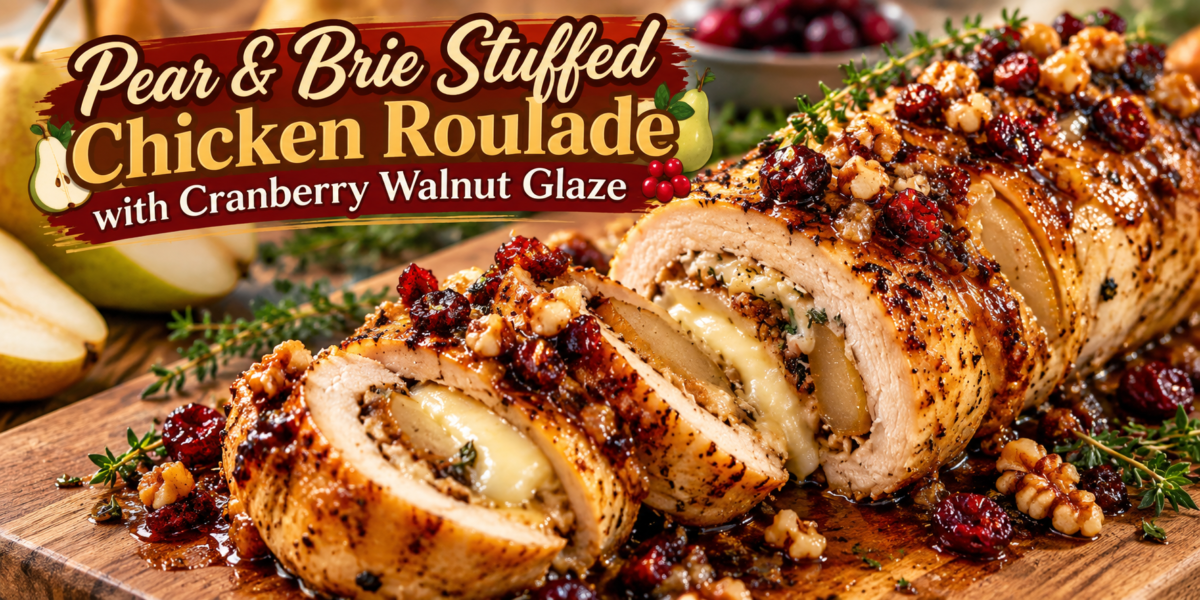
Pear & Brie Stuffed Chicken Roulade with Cranberry Walnut Glaze

Chicken Roulade stuffed with pear and Brie with cranberry walnut glaze

Pear & Brie Stuffed Chicken Roulade with Cranberry Walnut Glaze

This Chicken Roulade combines tender chicken breast with creamy Brie,, sweet pear, fragrant thyme, and toasted walnuts. A glossy cranberry glaze finishes the dish with a sweet-tart flavor. The result is a golden, elegant main course with a creamy spiral center.

Although it looks impressive, the preparation is straightforward. First, butterfly and flatten the chicken. Next, layer it with the filling, roll it tightly, and secure it with kitchen twine. After that, sear the rolls until golden and finish them in the oven. Meanwhile, prepare the cranberry walnut glaze so everything is ready together.

Pear and Brie create a delicious balance of creamy, fruity, and savory flavors. Toasted walnuts add crunch, while fresh thyme brings an earthy note. Together, these ingredients make Chicken Roulade a beautiful choice for holidays, dinner parties, or a cozy family meal.

Prep Time: 25 minutes
Cook Time: 35–40 minutes
Total Time: About 1 hour 5 minutes
Servings: 6

Ingredients

For the Chicken

3 large boneless, skinless chicken breasts, about 2½–3 pounds total

1 tablespoon extra virgin olive oil

1 teaspoon sea salt

½ teaspoon freshly ground black pepper

1 teaspoon garlic powder

1 teaspoon dried thyme

½ teaspoon smoked paprika

For the Filling

6 ounces creamy Brie, rind removed if preferred, sliced thinly

2 ripe but firm pears, cored and thinly sliced

½ cup toasted walnuts, finely chopped

2 tablespoons fresh thyme leaves

1 tablespoon fresh parsley, finely chopped

1 small garlic clove, minced

¼ teaspoon black pepper

Pinch of sea salt

For the Cranberry Walnut Glaze

1 cup fresh or frozen cranberries

½ cup orange juice

2 tablespoons pure maple syrup

1 tablespoon honey

½ cup chicken broth

2 tablespoons chopped walnuts

1 tablespoon balsamic vinegar

1 teaspoon orange zest

½ teaspoon fresh thyme leaves

Pinch of salt

For Cooking

1 tablespoon olive oil

1 tablespoon butter

Kitchen twine or heat-safe cooking string

Step-by-Step Instructions

1. Prepare the Oven

First, preheat the oven to 375°F (190°C). Lightly grease a baking dish or prepare a large oven-safe skillet.

Next, place the chicken on a clean work surface. Pat the breasts dry with paper towels. As a result, dry chicken is easier to flatten, season, and brown during searing.

2. Butterfly the Chicken

Using a sharp knife, carefully slice each chicken breast horizontally. Stop before cutting all the way through, then open the breast like a book.

Place the butterflied chicken between two sheets of plastic wrap or parchment paper. Using the flat side of a meat mallet, gently pound the chicken until it is about ¼ inch thick.

However, avoid pounding too hard. The goal is to create an even surface without tearing the meat.

Next, season both sides lightly with salt, black pepper, garlic powder, thyme, and smoked paprika.

For this reason, an even thickness is important for Chicken Roulade because it helps the chicken cook evenly and keeps the filling inside the roll.

3. Prepare the Filling

Arrange the flattened chicken pieces on your work surface. Place a layer of Brie slices over each breast, leaving about ½ inch around the edges.

Next, add the thin pear slices over the Brie. Sprinkle the toasted walnuts, fresh thyme, parsley, minced garlic, and black pepper over the pear.

Avoid adding too much filling. An overly full roll can be difficult to close, and the cheese may escape during cooking.

The pear should be ripe enough to taste sweet but firm enough to hold its shape. Very soft pears can release extra moisture and make rolling harder.

4. Roll the Chicken

Starting from one long side, carefully roll the chicken into a tight cylinder. Keep the filling tucked inside as you roll.

Once rolled, place the seam underneath. Then, tie the chicken securely with kitchen twine at several points, including near both ends.

The Chicken Roulade should feel firm but not compressed. If a little filling pushes out, gently tuck it back inside before tying.

Repeat the process with the remaining chicken breasts.

5. Sear the Chicken Roulade

Heat a large oven-safe skillet over medium-high heat. Add the olive oil and butter.

When the butter begins to foam, carefully place the Chicken Roulade in the skillet with the seam side down.

Sear for 2–3 minutes per side, turning gently with tongs. Continue until the outside is golden brown on most sides.

Meanwhile, searing the Chicken Roulade before baking creates a flavorful crust. It also helps the exterior hold its shape. Therefore, the center does not need to be fully cooked yet because the oven will finish the chicken.

6. Finish in the Oven

Transfer the skillet to the preheated oven. Alternatively, place the browned chicken in a prepared baking dish.

Bake for about 20–25 minutes, depending on the size and thickness of the rolls.

Use an instant-read thermometer to check the thickest part of the chicken. It should reach 165°F (74°C) for food safety.

Afterward, transfer the chicken to a cutting board. Tent it loosely with foil and let it rest for 8–10 minutes.

As a result, resting allows the juices to redistribute. It also gives the melted Brie time to settle inside the roll.

7. Make the Cranberry Walnut Glaze

While the chicken rests, prepare the glaze.

Add the cranberries, orange juice, maple syrup, honey, chicken broth, balsamic vinegar, orange zest, thyme, and salt to a small saucepan.

Bring the mixture to a gentle simmer over medium heat. Cook for 8–10 minutes, stirring occasionally.

As the cranberries soften, press a few against the side of the pan with the back of a spoon. Leave some berries whole for texture.

During the final 2 minutes, add the chopped walnuts.

The glaze should become glossy and slightly thick. If it seems too thick, add a tablespoon of broth. If it remains too thin, simmer for another minute or two.

As a result, this cranberry topping gives Chicken Roulade a bright, sweet-tart finish. It also balances the richness of the Brie.

8. Slice the Chicken

Remove the kitchen twine carefully with kitchen scissors. Avoid pulling the string because it may disturb the filling.

Next, using a sharp knife, slice each roll into rounds about ¾–1 inch wide.

The cut side of the Chicken Roulade should reveal a beautiful spiral of chicken, pear, Brie, herbs, and walnuts.

Arrange the slices on a warm serving platter. Then, spoon the cranberry walnut glaze over the top.

9. Garnish and Serve Chicken Roulade

Finish the Chicken Roulade with fresh thyme, extra chopped walnuts, and a little orange zest.

Finally, serve it immediately while the Brie is still soft and creamy.

Tips for the Best Results

Use Firm Pears

Choose pears that are ripe but still firm. Bosc, Anjou, or slightly underripe Bartlett pears work well.

However, very soft pears can become mushy during cooking. They may also release too much moisture into the filling.

Do Not Overfill

Although it can be tempting to add extra Brie, pears, and walnuts, keep the filling moderate. This makes rolling much easier.

In addition, a thin, even layer gives Chicken Roulade a more attractive spiral when sliced.

Roll Tightly

Roll the chicken firmly enough to hold the filling together. At the same time, avoid squeezing the filling out.

Place the seam underneath before tying. This helps maintain the shape during searing and baking.

Secure the Chicken Properly

Use several pieces of kitchen twine instead of tying only the ends. This keeps the center closed and prevents the filling from escaping.

Before serving, always remove the twine.

Sear Before Baking

Searing creates browned edges and adds another layer of flavor. Keep the skillet hot, but avoid burning the butter.

If the chicken browns too quickly, lower the heat slightly before transferring it to the oven.

Use a Thermometer

The safest way to check whether the chicken is cooked is to measure its internal temperature. The thickest part should reach 165°F (74°C).

Serving Suggestions

Serve the Chicken Roulade with roasted baby potatoes, mashed sweet potatoes, wild rice, or creamy polenta. These sides pair well with the sweet-tart cranberry glaze.

For vegetables, choose roasted Brussels sprouts, green beans, asparagus, carrots, or honey-roasted root vegetables.

Meanwhile, a simple arugula salad with lemon vinaigrette provides a fresh contrast to the rich Brie and walnut filling.

For a holiday dinner, first arrange the sliced Chicken Roulade on a large platter. Spoon the cranberry glaze over the center, then add fresh thyme sprigs, orange slices, and a few whole cranberries.

Make-Ahead Instructions

The chicken can be butterflied, filled, rolled, and tied several hours before cooking. Keep the prepared rolls covered in the refrigerator until you are ready to cook.

In addition, the cranberry glaze can be prepared one day ahead. Store it in an airtight container in the refrigerator. Warm it gently before serving.

For the best texture, cook the Chicken Roulade close to serving time. This keeps the chicken juicy and allows the Brie to remain creamy.

If you are preparing the dish for guests, complete the rolling and tying earlier in the day. Then, sear and bake the chicken shortly before dinner.

Storage and Reheating Chicken Roulade

Store leftover chicken in an airtight container in the refrigerator for up to three days.

Keep the cranberry walnut glaze in a separate container when possible.

To reheat, place the chicken slices in a covered oven-safe dish with a small splash of chicken broth. Warm at 325°F (165°C) until heated through.

For this reason, avoid overheating because repeated high-temperature reheating can dry the chicken. It can also cause the Brie filling to separate.

The glaze can be reheated gently in a saucepan. If it becomes too thick, add a teaspoon or two of orange juice or broth.

Frequently Asked Questions

Can I use chicken thighs?

Chicken breasts are easier to flatten and roll. However, boneless, skinless chicken thighs can also work if they are opened and flattened evenly. The cooking time may vary.

Which pears work best?

Firm Bosc and Anjou pears are excellent choices because they hold their shape during baking. A firm Bartlett pear can also work.

Can I replace Brie?

Yes. Camembert, mild goat cheese, or another soft melting cheese can be used. Brie provides the creamy texture and mild flavor that pairs especially well with pear.

Can I replace walnuts?

Yes. Pecans, almonds, or hazelnuts are good alternatives. Toasting the nuts first gives the filling more flavor.

Can I use dried cranberries?

Fresh or frozen cranberries are ideal for the glaze because they break down into a naturally thick sauce. Dried cranberries can also be used, but they will produce a sweeter and less tart glaze.

Can I make this without alcohol?

Yes. This Chicken Roulade recipe contains no wine or other alcohol. Orange juice, balsamic vinegar, and chicken broth provide enough acidity and depth for the glaze.

How do I stop the Brie from leaking?

Leave a small border around the edges of the chicken and avoid overfilling. Roll the meat tightly and secure it well with twine. These steps help keep the filling inside the Chicken Roulade.

Nutrition Information

Approximate nutrition per serving:

Calories: 510 kcal
Protein: 48g
Carbohydrates: 25g
Fat: 25g
Fiber: 3g
Sugar: 15g
Sodium: 620mg

Nutrition values are estimates. They can vary according to ingredient brands, portion sizes, cheese amounts, and the quantity of glaze served.

Flavor Variations

For extra sweetness, add a small amount of dried cranberries inside the chicken along with the pear and Brie.

If you want a stronger herb flavor, use fresh sage instead of some of the thyme. Sage pairs particularly well with pear, walnuts, and poultry.

For additional brightness, add orange zest directly to the chicken filling.

For a little heat, add a pinch of red pepper flakes to the cranberry glaze.

You can also replace part of the Brie with goat cheese for a tangier flavor.

Final Thoughts

This Chicken Roulade makes an elegant centerpiece with tender chicken, creamy Brie, sweet pear, fragrant herbs, toasted walnuts, and a glossy cranberry glaze. The combination creates a satisfying balance of savory, sweet, creamy, fruity, and nutty flavors.

Above all, the key to success is preparing the chicken evenly. Flatten the breasts carefully, keep the filling moderate, roll tightly, and secure each piece well with kitchen twine. Searing before baking gives the exterior a beautiful golden crust. Resting afterward helps keep the meat juicy and allows the Brie filling to settle.

Meanwhile, the cranberry walnut glaze adds both brightness and richness. Serve Chicken Roulade with roasted vegetables, potatoes, wild rice, or a fresh green salad.

For a festive presentation, arrange thick slices on a serving platter. Spoon the warm glaze over them, then finish with fresh thyme, orange zest, toasted walnuts, and a few whole cranberries.

Overall, this Chicken Roulade is suitable for family dinners, holiday gatherings, and special occasions. This Chicken Roulade also remains practical enough for a home kitchen and can be prepared ahead for easier entertaining.

6-Soup Party Tray

  *6-Soup Party Tray*

Here is the full recipe for all 6 soups in that tray – each recipe makes one small crockpot (4-6 servings).


The Tray:

Use a disposable 6-cup giant muffin pan or 6 small bowls on a tray,


*1. TOP LEFT – Hearty Beef & Potato Soup (with peas)*


  • – 500g beef mince,
  • 2 potatoes cubed,
  • 1 carrot cubed,
  • 1/2 cup frozen peas,
  • 1 onion chopped,
  • 2 tbsp tomato paste,
  • 4 cups beef stock, salt/pepper, parsley

– Method:

Fry mince + onion, add tomato paste, add stock, potatoes, carrots. Simmer 25 min till soft. Add peas last 5 min.


*2. TOP RIGHT – Broccoli Cheddar Soup*


  • – 3 cups broccoli florets,
  • 1 potato cubed small,
  • 1 onion, 2 cups milk,
  • 1 cup chicken stock,
  • 1 cup cheddar cheese,
  • 2 tbsp butter,
  • 2 tbsp flour,
  • salt/pepper

– Method: Melt butter, add onion, add flour. Add stock + milk, add potato + broccoli. Cook 15 min. Mash slightly, stir in cheese until creamy. Top with extra cheddar like photo.


*3. MIDDLE LEFT – Creamy Tomato Soup*


– 800g canned tomatoes,

1 onion,

2 garlic cloves,

2 cups vegetable stock,

1/2 cup cream/milk,

1 tsp sugar,

salt,

pepper,

parsley

– Method: Sauté onion/garlic, add tomatoes + stock + sugar. Blend smooth. Simmer 15 min, stir in cream.


*4. MIDDLE RIGHT – Cabbage Roll / Mince Cabbage Soup*

  • – 400g beef mince,
  • 2 cups chopped cabbage,
  • 1 carrot cubed,
  • 1/2 cup cooked rice,
  • 400g canned diced tomatoes,
  • 3 cups beef stock,
  • 1 onion

– Method: Fry mince + onion, add stock, tomatoes, cabbage, carrot. Simmer 20 min. Add cooked rice at end.


*5. BOTTOM LEFT – Chicken Noodle Soup*

  • – 2 chicken breasts shredded (or leftover),
  • 1 cup egg noodles/pasta,
  • 2 carrots sliced,
  • 1/2 cup peas,
  • 1 onion,
  • 6 cups chicken stock,
  • parsley

– Method: Boil stock + chicken + carrots 15 min. Add noodles cook 8 min. Add peas + shredded chicken.


*6. BOTTOM RIGHT – Chicken Tortilla / Mexican Black Bean Soup*

  • – 2 shredded chicken breasts,
  • 1 can black beans,
  • 1/2 cup corn,
  • 1 can diced tomatoes with chilies,
  • 4 cups chicken stock,
  • 1 tsp cumin, chili powder.
  • For topping: tortilla strips/fried paratha strips

– Method: Mix all in pot, simmer 20 min. Serve topped with crispy tortilla strips like in photo.


*For the Party Table

Set up small bowls with toppings:

shredded cheddar, fried bacon bits, chopped green onions, crispy tortilla strips, lime wedges, chopped coriander –

Serve hot in crockpots on warm setting. Guests take a tray and taste all 6!

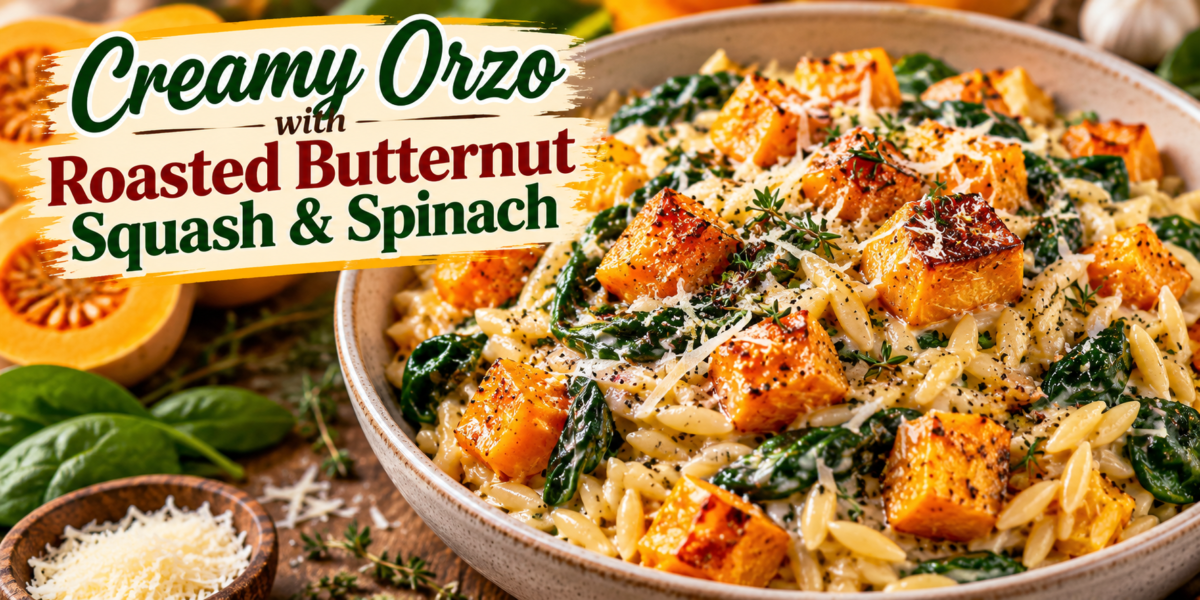
Creamy Orzo with Roasted Butternut Squash & Spinach

Creamy Orzo with roasted butternut squash, spinach, Parmesan, garlic, and fresh herbs

Creamy Orzo with Roasted Butternut Squash & Spinach

This Creamy Orzo recipe combines tender orzo pasta with golden roasted butternut squash, silky spinach, garlic, Parmesan, fresh thyme, and a lightly creamy sauce. The roasted squash brings natural sweetness and caramelized edges, while spinach adds freshness and color. Parmesan gives the dish a rich savory finish, and a little lemon keeps the sauce bright instead of heavy.

This Creamy Orzo is a cozy one-pan-inspired meal that feels elegant enough for guests while remaining simple enough for a weeknight dinner. The texture is somewhere between creamy pasta and a comforting risotto, but the small rice-shaped orzo cooks much faster. Each spoonful of Creamy Orzo brings together tender pasta, roasted squash, wilted greens, herbs, and plenty of Parmesan.

Prep Time: 20 minutes
Roasting Time: 25 minutes
Cooking Time: 20 minutes
Total Time: 1 hour 5 minutes
Servings: 6

Ingredients

For the Roasted Butternut Squash

3 cups peeled butternut squash, cut into ¾-inch cubes

1½ tablespoons extra virgin olive oil

½ teaspoon dried thyme

½ teaspoon garlic powder

¼ teaspoon smoked paprika

½ teaspoon sea salt

¼ teaspoon freshly ground black pepper

For the Orzo

1½ cups dry orzo pasta

2 tablespoons extra virgin olive oil

3 garlic cloves, finely minced

1 small yellow onion, finely diced

4 cups low-sodium vegetable broth

½ cup heavy cream

3 cups fresh baby spinach

¾ cup freshly grated Parmesan cheese

1 tablespoon fresh lemon juice

1 teaspoon lemon zest

1 teaspoon fresh thyme leaves

¼ teaspoon red pepper flakes, optional

½ teaspoon black pepper

Salt, to taste

For Garnishing

Extra Parmesan

Fresh thyme

Freshly cracked black pepper

A drizzle of extra virgin olive oil

A few roasted squash cubes

Lemon wedges, optional

Step-by-Step Instructions

1. Prepare the Oven

Preheat the oven to 425°F (220°C). Line a large rimmed baking sheet with parchment paper. A hot oven is important because the squash needs enough heat to become tender inside while developing browned, caramelized edges for Creamy Orzo.

2. Season the Squash

Place the cubed butternut squash in a large bowl. Add olive oil, dried thyme, garlic powder, smoked paprika, salt, and black pepper. Toss thoroughly until every piece is lightly coated.

Spread the squash over the prepared baking sheet in a single layer. Leave a little space between the cubes whenever possible. If the pieces are crowded, they will release steam instead of roasting and may not develop the golden edges that give the finished dish so much flavor.

3. Roast the Butternut Squash

Roast the squash for 20–25 minutes. Turn the pieces once halfway through cooking so multiple sides can brown evenly.

The squash is ready when it can be pierced easily with a fork and the edges are golden brown. Do not worry if a few corners become deeply caramelized. Those browned pieces add a wonderful sweet and savory flavor.

Reserve a few of the prettiest roasted cubes for the final garnish, especially when presenting Creamy Orzo for guests.

4. Start the Orzo Base

While the squash roasts, heat two tablespoons of olive oil in a large deep skillet or wide saucepan over medium heat.

Add the diced onion and cook for 3–4 minutes until it becomes soft and translucent. Add the minced garlic and cook for another 30–45 seconds, stirring constantly so the garlic becomes fragrant without browning.

Add the dry orzo and stir for approximately one minute. Lightly coating the pasta in the oil helps develop its flavor and keeps the grains from sticking together too quickly.

5. Add the Broth

Pour the vegetable broth into the skillet and stir well. Bring the mixture to a gentle simmer.

Cook for approximately 8–10 minutes, stirring frequently. Orzo can settle on the bottom of the pan, so regular stirring is important. Keep the heat moderate rather than allowing the liquid to boil aggressively.

As the pasta cooks, it absorbs the broth and releases starch. This creates the naturally creamy texture that makes this dish so comforting.

6. Make It Creamy

When the orzo is almost tender but still has a little bite, reduce the heat to low. Stir in the heavy cream and continue cooking for another 2–3 minutes.

Add the Parmesan gradually, stirring until it melts into the sauce. The mixture should become glossy and creamy.

For the best Creamy Orzo, avoid adding the Parmesan over very high heat. Gentle heat allows the cheese to melt smoothly without becoming stringy.

7. Add the Spinach

Add the fresh baby spinach in handfuls. Stir gently until the leaves wilt into the warm pasta.

This usually takes only 1–2 minutes. The spinach should remain vibrant rather than becoming overcooked.

Add lemon juice, lemon zest, fresh thyme, black pepper, and optional red pepper flakes. Taste and adjust the salt if needed.

The lemon is important because it cuts through the richness of the cream and Parmesan while bringing out the sweetness of the roasted squash in Creamy Orzo.

8. Combine the Squash and Pasta

Reserve some roasted squash for decoration and gently fold the remaining cubes into the pasta.

Do not stir too aggressively because the squash is tender and can break apart. A few smaller pieces naturally blend into the sauce, which is perfectly fine and adds even more squash flavor to the Creamy Orzo.

The Creamy Orzo should now have a thick but spoonable consistency. If it seems too thick, add two or three tablespoons of warm vegetable broth and stir gently.

9. Rest Briefly

Remove the skillet from the heat and let it rest for 3–5 minutes. During this short resting period, the sauce will thicken slightly while the flavors settle.

If the pasta becomes thicker than you prefer, loosen it with a small splash of warm broth or cream.

10. Garnish and Serve

Spoon the finished pasta into warm bowls. Top each serving with reserved roasted butternut squash, extra Parmesan, fresh thyme, and freshly cracked black pepper.

For a brighter presentation, add a small drizzle of olive oil and a lemon wedge on the side.

Tips for the Best Creamy Orzo

Cut the Squash Evenly

Try to keep the squash cubes close to the same size. Uniform pieces roast more evenly and make the finished dish look more attractive.

Very large cubes may remain firm while small pieces become overly soft. Around ¾ inch is a useful size for this recipe.

Do Not Overcrowd the Baking Sheet

Give the squash enough space to roast properly. If necessary, use two baking sheets.

A crowded pan traps moisture and produces softer vegetables. Proper spacing encourages caramelization and gives the squash its delicious golden edges.

Stir the Orzo Frequently

Unlike long pasta, orzo cooks directly in the broth and can settle on the bottom of the pan. Stir every minute or two during the main cooking stage.

Frequent stirring also helps distribute the starch, which contributes to the creamy consistency of Creamy Orzo.

Keep the Heat Moderate

High heat can cause the broth to evaporate before the orzo becomes tender. A gentle simmer gives the pasta time to absorb the liquid evenly.

For the best Creamy Orzo, keep the heat low once the cream and Parmesan are added.

Adjust the Consistency

Orzo continues absorbing liquid even after it leaves the stove. Therefore, the finished dish should look slightly looser than the consistency you ultimately want.

If it becomes too thick while sitting, add a splash of warm broth and stir gently.

Serving Suggestions

Serve this Creamy Orzo as a complete vegetarian meal with a crisp green salad dressed with lemon and olive oil. The fresh salad provides a pleasant contrast to the rich pasta and makes Creamy Orzo feel lighter.

For extra protein, add grilled chicken, roasted chickpeas, white beans, or pan-seared salmon to Creamy Orzo. The mild flavor of the pasta allows these additions to work without overpowering the squash and spinach.

This dish also makes a beautiful holiday side. Place it in a large serving bowl and finish with Parmesan, thyme, roasted squash, and freshly cracked pepper.

For a Mediterranean-inspired table, serve Creamy Orzo alongside roasted vegetables, cucumber salad, olives, warm bread, and a simple tomato salad.

Make-Ahead Instructions

The roasted squash can be prepared up to one day ahead. Once cooled, store it in an airtight container in the refrigerator.

The onion and garlic can also be chopped ahead, and the Parmesan can be grated in advance.

Because the orzo continues absorbing liquid as it sits, Creamy Orzo is best served soon after cooking. If you need to prepare it earlier, keep the sauce slightly looser and reserve some warm broth for reheating.

When reheating, place the pasta in a skillet over low heat and add a splash of vegetable broth. Stir gently until warmed through and creamy again.

Storage Instructions

Store leftovers in an airtight container in the refrigerator for up to three days.

The Creamy Orzo will become thicker after refrigeration because the pasta continues absorbing the sauce. Add a splash of vegetable broth or milk when reheating.

Warm leftovers gently on the stovetop or in the microwave, stirring occasionally. Avoid overheating because excessive heat can make the cream sauce too thick.

For the freshest texture, add a little fresh Parmesan, black pepper, and thyme after reheating Creamy Orzo.

Freezing is not recommended because the creamy sauce and spinach may change texture after thawing.

Frequently Asked Questions

Can I use frozen butternut squash?

Yes. Thaw it first and drain away excess moisture. Frozen squash may soften more quickly, so watch it closely during roasting.

Can I replace the heavy cream?

Yes. Half-and-half, evaporated milk, or unsweetened cooking cream can be used. For a lighter version, use additional vegetable broth and a little extra Parmesan.

Can I make this recipe vegetarian?

Yes. Use a vegetarian Parmesan if needed and make sure your vegetable broth is vegetarian.

Can I make it vegan?

Use plant-based cream, vegan Parmesan, and vegetable broth. Choose a dairy-free alternative that melts smoothly into the pasta.

Can I add protein?

Absolutely. Grilled chicken, roasted chickpeas, white beans, shrimp, or salmon can turn this into a more substantial meal.

Can I use another green?

Yes. Kale, Swiss chard, or arugula can replace spinach. Tougher greens may require a few extra minutes of cooking.

Why did my orzo become too thick?

Orzo continues absorbing liquid after cooking. Add warm broth a little at a time until the desired consistency returns.

Nutrition Information

Approximate nutrition per serving:

Calories: 465 kcal
Protein: 16g
Carbohydrates: 58g
Fat: 19g
Fiber: 6g
Sugar: 7g
Sodium: 620mg

Nutrition values are estimates and may vary according to ingredient brands, serving sizes, and substitutions.

Flavor Variations

For a stronger garlic flavor, roast a few whole garlic cloves alongside the squash and mash them into the finished pasta.

For extra heat, increase the red pepper flakes or add a small amount of chili oil just before serving.

For a Mediterranean twist, add sun-dried tomatoes, chopped olives, or a little crumbled feta.

For additional crunch, sprinkle toasted pine nuts, walnuts, or pumpkin seeds over each bowl.

For a brighter autumn flavor, add a small amount of fresh sage with the thyme. Sage pairs beautifully with roasted squash and Parmesan.

If you want a deeper savory flavor, replace part of the vegetable broth with mushroom broth.

Final Thoughts

This Creamy Orzo brings together some of the most comforting flavors of the season in one satisfying bowl. Roasted butternut squash provides natural sweetness and caramelized edges, while spinach adds freshness and color.

The small orzo pasta absorbs the seasoned vegetable broth as it cooks, creating a creamy texture without requiring complicated risotto techniques. Parmesan adds savory richness, while lemon juice and zest keep the dish balanced.

The roasted squash is especially important because it adds a deeper flavor than simply simmering raw squash with the pasta. Its browned edges provide little bursts of caramelized sweetness throughout the dish.

Another advantage of this recipe is its versatility. It can be served as a vegetarian main course, a holiday side, or a comforting weeknight dinner. You can easily add chicken, beans, chickpeas, shrimp, or salmon when you want additional protein.

For the best result, roast the squash until the edges are golden, stir the orzo regularly, and add the Parmesan over gentle heat. Keep a little warm broth nearby so you can adjust the consistency before serving.

This Creamy Orzo is best enjoyed warm, topped with extra Parmesan, fresh thyme, black pepper, and a few beautifully roasted squash cubes. A small squeeze of lemon just before eating can make the flavors even brighter.

Whether served as a cozy family dinner or placed in the center of a festive table, this Creamy Orzo offers a delicious balance of creamy pasta, sweet roasted squash, tender spinach, fragrant herbs, and savory Parmesan. It is comforting, colorful, and easy to customize for different occasions.