Sticky Honey Garlic Chicken

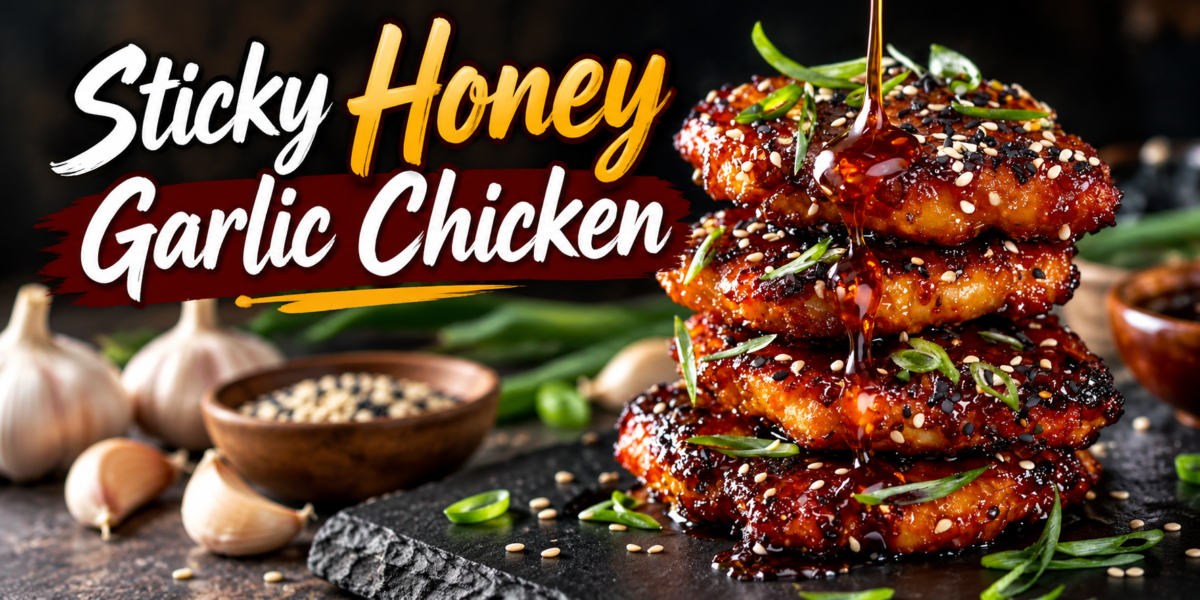
Sticky Honey Garlic Chicken glazed with honey garlic sauce, sesame seeds, and green onions

Sticky Honey Garlic Chicken

This Honey Garlic Chicken recipe features tender, golden chicken coated in a glossy homemade honey garlic sauce. The sauce combines honey, fresh garlic, soy sauce, rice vinegar, ginger, and a touch of chili for a sweet, savory, sticky finish. Sesame seeds and sliced green onions add a fresh crunch that makes every bite even more delicious.

The recipe is simple enough for a busy weeknight but looks impressive enough for a family dinner or casual gathering. The chicken is lightly seasoned, pan-seared until golden, and then coated in the sauce. As the sauce simmers, it thickens around the chicken and creates the beautiful glaze shown in the feature image.

Serve Honey Garlic Chicken with steamed rice, noodles, roasted vegetables, or a crisp cucumber salad. The sauce is flavorful enough to turn simple sides into a complete meal.

Prep Time: 15 minutes
Cook Time: 20 minutes
Total Time: 35 minutes
Servings: 4

Ingredients

For the Chicken

1½ pounds boneless, skinless chicken thighs or chicken breasts

½ cup all-purpose flour or cornstarch

1 teaspoon garlic powder

½ teaspoon paprika

½ teaspoon black pepper

½ teaspoon salt

2 tablespoons neutral cooking oil

For the Honey Garlic Sauce

⅓ cup honey

¼ cup low-sodium soy sauce

5 garlic cloves, finely minced

1 tablespoon rice vinegar

1 tablespoon freshly grated ginger

1 tablespoon water

1 teaspoon sesame oil

½ teaspoon red pepper flakes

1 teaspoon cornstarch

1 tablespoon cold water

For Garnishing

1 tablespoon white sesame seeds

1 tablespoon black sesame seeds

2 green onions, thinly sliced

Fresh cilantro, optional

Thinly sliced red chili, optional

Step-by-Step Instructions

1. Prepare the Chicken

Start by patting the chicken dry with paper towels. Removing excess moisture helps the surface brown properly in the skillet.

If using chicken breasts, cut them into evenly sized bite-size pieces. Chicken thighs can also be cut into similar pieces. Keeping the pieces close in size helps them cook at the same rate.

Place the chicken in a large bowl. Add flour or cornstarch, garlic powder, paprika, black pepper, and salt. Toss until each piece is lightly coated.

The coating helps create a lightly crisp exterior. It also gives the sauce something to cling to later.

2. Prepare the Sauce

While the chicken is ready, make the sauce.

In a medium bowl, whisk together honey, soy sauce, minced garlic, rice vinegar, grated ginger, water, sesame oil, and red pepper flakes.

In a separate small bowl, mix one teaspoon of cornstarch with one tablespoon of cold water. Stir until smooth and set it aside.

This simple sauce gives Honey Garlic Chicken its signature sweet and savory flavor. The fresh garlic adds a strong aroma, while ginger and rice vinegar keep the sauce from tasting too heavy.

3. Sear the Chicken

Heat a large skillet over medium-high heat. Add the cooking oil and allow it to become hot.

Arrange the chicken pieces in a single layer. Avoid overcrowding the skillet. If necessary, cook the chicken in two batches.

Sear the pieces for about 3–4 minutes on the first side. Turn them and cook for another 3–4 minutes, or until they are golden brown and nearly cooked through.

Do not move the chicken constantly. Letting each side sit against the hot skillet helps develop a deeper golden crust.

For Honey Garlic Chicken with the best texture, use tongs to turn the pieces rather than stirring them continuously.

4. Add the Honey Garlic Sauce

Reduce the heat to medium. Pour the prepared sauce over the browned chicken.

Stir gently so every piece becomes coated. Allow the sauce to simmer for about 2–3 minutes.

The honey will begin to bubble, and the garlic will become fragrant. Keep the heat moderate because honey can darken quickly if the pan becomes too hot.

5. Thicken the Glaze

Stir the cornstarch mixture again because the starch can settle at the bottom.

Pour it slowly into the skillet while stirring gently. Continue simmering for another 1–2 minutes.

The sauce should become glossy and thick enough to coat the back of a spoon. It will continue to thicken slightly as it cools.

If the sauce becomes too thick, add one or two tablespoons of warm water. If it is too thin, simmer for another minute.

The finished Honey Garlic Chicken should have a shiny glaze that clings to the chicken without becoming dry.

6. Finish the Chicken

Turn off the heat once the chicken is fully cooked and the sauce reaches the desired consistency.

For food safety, check the thickest piece with an instant-read thermometer. Chicken should reach an internal temperature of 165°F (74°C).

Sprinkle white and black sesame seeds over the chicken. Add sliced green onions and fresh chili if you enjoy extra heat.

Let the chicken sit for 2 minutes before serving. This gives the sauce a moment to settle around the pieces.

Tips for the Best Honey Garlic Chicken

For Evenly Sized Honey Garlic Chicken Pieces

Cutting the chicken into similar pieces helps everything cook evenly. Very large pieces may need more time, while small pieces can become dry.

Dry the Chicken First

Patting the chicken dry before coating it helps the flour or cornstarch stick better. It also encourages better browning.

Do Not Crowd the Pan

Give each chicken piece enough space. Overcrowding traps steam and can prevent the exterior from becoming golden.

If your skillet is small, cook the chicken in batches. Add a little more oil between batches if needed.

Keep the Heat Moderate for Honey Garlic Chicken

Honey contains natural sugars, so it can burn when exposed to very high heat. Once the sauce is added, lower the temperature to medium.

This allows the glaze to thicken gradually while keeping the garlic aromatic instead of bitter.

Adjust the Heat in Honey Garlic Chicken

The recipe has a mild spicy note from red pepper flakes. For a sweeter, family-friendly version, reduce or omit them.

For a hotter version, add extra chili flakes or thinly sliced fresh red chili.

Watch the Glaze

The sauce should coat the chicken rather than become hard or overly sticky. Remove the pan from the heat as soon as the glaze reaches a glossy consistency.

For Honey Garlic Chicken with a restaurant-style finish, add the sesame seeds and green onions immediately before serving.

Honey Garlic Chicken Serving Suggestions

Serve Honey Garlic Chicken over steamed jasmine rice or basmati rice. The rice absorbs the extra glaze and creates a satisfying meal.

Noodles are another excellent option. Toss cooked rice noodles or egg noodles with a little of the sauce before adding the chicken.

For vegetables, try steamed broccoli, roasted carrots, snap peas, bell peppers, or green beans. Their fresh texture balances the rich glaze.

A simple cucumber salad also works well. Thinly slice cucumber and toss it with rice vinegar, lime juice, sesame seeds, and green onions.

For a colorful dinner plate, arrange the chicken over rice and add broccoli on one side. Finish with sesame seeds, scallions, and a few slices of fresh red chili.

Honey Garlic Chicken Make-Ahead Instructions

The chicken can be cut and seasoned several hours before cooking. Keep it covered in the refrigerator until ready to use.

The sauce can also be mixed ahead and stored in a sealed container in the refrigerator for up to two days. Stir it well before adding it to the skillet.

For the best texture, cook the chicken shortly before serving. Freshly glazed chicken has a better crisp exterior and a shinier sauce.

If you need to prepare the complete dish ahead, keep the chicken and sauce together in a covered container. Reheat gently on the stovetop with a small splash of water.

Honey Garlic Chicken Storage and Reheating

Store leftover Honey Garlic Chicken in an airtight container in the refrigerator for up to 3 days.

To reheat, place the chicken in a skillet over medium-low heat. Add one or two tablespoons of water and cover the pan.

Warm until the chicken reaches a safe serving temperature. Stir gently so the glaze does not stick to the bottom.

You can also reheat individual portions in the microwave. Cover the dish loosely and heat in short intervals, stirring between intervals.

The sauce may become thicker after refrigeration. A small splash of warm water will help restore its glossy texture.

Honey Garlic Chicken FAQs

Can I use chicken breast?

Yes. Chicken breast works very well. Cut it into evenly sized pieces and avoid overcooking because breast meat is leaner than thighs.

Can I use chicken thighs?

Absolutely. Boneless chicken thighs are especially juicy and forgiving. They work beautifully with the sweet garlic glaze.

Can I make this recipe without flour?

Yes. Cornstarch is an excellent alternative. You can also skip the coating completely, although the finished chicken will have a less crisp exterior.

Can I make the sauce less sweet?

Yes. Reduce the honey slightly and increase the rice vinegar by a small amount. Taste the sauce before adding it to the chicken.

Can I make it spicy?

Yes. Add extra red pepper flakes, fresh chili, or a small amount of chili garlic sauce.

Can I make it gluten-free?

Use certified gluten-free cornstarch and gluten-free tamari or soy sauce. Check all packaged ingredients if gluten sensitivity is a concern.

Can I make it dairy-free?

Yes. The recipe contains no dairy ingredients, so no substitutions are needed.

Why is my sauce not thickening?

The cornstarch mixture may not have been fully stirred before adding it. Stir it again, then simmer the sauce for another minute or two.

Why did my glaze become too thick?

Honey and cornstarch can create a thick glaze quickly. Add warm water one tablespoon at a time and stir over low heat until the desired consistency returns.

Honey Garlic Chicken Nutrition Information

Approximate nutrition per serving:

Calories: 420 kcal
Protein: 35g
Carbohydrates: 38g
Fat: 15g
Fiber: 1g
Sugar: 24g
Sodium: 760mg

Nutrition values are estimates and can vary depending on the chicken cut, amount of sauce, brands of ingredients, and serving size.

Honey Garlic Chicken Flavor Variations

For a citrus version, add one teaspoon of fresh orange zest and replace one tablespoon of water with orange juice.

A little lime juice can make the sauce brighter and slightly more tangy.

For extra sesame flavor, add another teaspoon of toasted sesame oil at the end. Avoid adding too much because sesame oil has a strong flavor.

For a deeper savory taste, add one teaspoon of oyster sauce if desired.

For a tropical variation, serve the chicken with pineapple chunks, cucumber, and cilantro.

You can also turn the dish into a bowl by serving Honey Garlic Chicken over rice with shredded cabbage, carrots, cucumber, and avocado.

Final Thoughts

Honey Garlic Chicken is a simple dinner that delivers plenty of flavor without requiring complicated ingredients. The chicken develops a golden exterior in the skillet, while the homemade glaze brings together honey, garlic, soy sauce, ginger, sesame oil, and a touch of chili.

The most important step is controlling the heat. Brown the chicken over medium-high heat, then reduce the temperature before adding the honey-based sauce. This keeps the glaze glossy and prevents the garlic from burning.

Fresh garnishes also make a difference. Sesame seeds add a gentle crunch, while green onions provide a fresh contrast to the sweet sauce. A little fresh chili can add another layer of heat for those who enjoy spicy food.

This recipe is also flexible. Use chicken thighs for a juicier result or chicken breasts for a leaner option. Serve it with rice, noodles, vegetables, or a fresh cucumber salad.

For meal preparation, keep the cooked chicken refrigerated and reheat it gently with a small splash of water. The glaze will loosen and become glossy again.

Whether you are preparing a quick weeknight meal or something special for guests, Honey Garlic Chicken offers a comforting combination of tender chicken, sticky glaze, garlic, sesame, and fresh scallions. The result is a colorful dish that looks impressive on the table and is easy to prepare at home.
Spicy Asian Chicken Satay Recipe

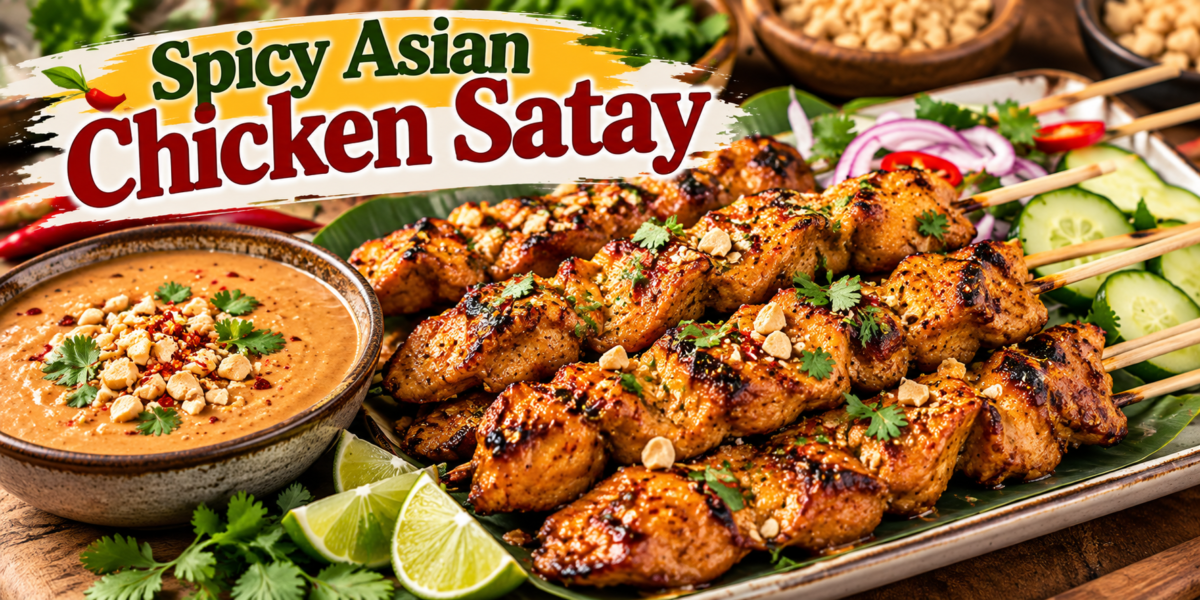
Chicken Satay with spicy peanut sauce, fresh cucumber, cilantro, lime, and roasted peanuts

Spicy Asian Chicken Satay Recipe

This Chicken Satay recipe features tender strips of marinated chicken grilled until golden, juicy, and lightly charred, then served with a creamy spicy peanut sauce. The marinade combines soy sauce, garlic, ginger, lime juice, honey, coriander, cumin, turmeric, and chili for a balanced blend of savory, sweet, tangy, and spicy flavors.

This Chicken Satay is simple enough for a weeknight dinner but attractive enough for parties, family gatherings, and weekend entertaining. Serve the skewers with jasmine rice, crisp cucumber, red onion, fresh cilantro, lime wedges, and extra peanut sauce for a complete Asian-inspired meal.

Chicken thighs are especially juicy, although chicken breast can also be used. The most important step is slicing the meat evenly so the skewers cook at the same rate. A short marinade adds plenty of flavor, while a longer marinade gives the spices more time to work.

Prep Time: 25 minutes
Marinating Time: 1–4 hours
Cook Time: 12–16 minutes
Total Time: About 4 hours 40 minutes
Servings: 4–6

Ingredients

For the Chicken

2 pounds boneless, skinless chicken thighs or chicken breasts

3 tablespoons soy sauce

2 tablespoons neutral oil

1 tablespoon fresh lime juice

1 tablespoon honey or brown sugar

3 garlic cloves, finely minced

1 tablespoon freshly grated ginger

1 teaspoon ground coriander

1 teaspoon ground cumin

1 teaspoon smoked paprika

½ teaspoon turmeric

½ teaspoon chili flakes

½ teaspoon black pepper

2 tablespoons coconut milk

Chicken Satay Spicy Peanut Sauce

½ cup smooth peanut butter

½ cup unsweetened coconut milk

2 tablespoons soy sauce

1 tablespoon fresh lime juice

1 tablespoon honey or maple syrup

1 teaspoon chili garlic sauce

1 teaspoon freshly grated ginger

1 small garlic clove, minced

2–4 tablespoons warm water

Small pinch of salt

For Serving

Fresh cilantro

Sliced cucumber

Lime wedges

Thinly sliced red onion

Chopped roasted peanuts

Cooked jasmine or basmati rice, optional

Extra chili sauce, optional

Step-by-Step Instructions

1. Prepare Chicken for Chicken Satay

Pat the chicken dry with paper towels. If using chicken breasts, place them between sheets of parchment paper and gently pound the thicker areas until the meat has a fairly even thickness.

Slice the chicken into strips about ½ inch thick. Keep the strips similar in size so they cook evenly. Chicken thighs are a particularly good choice because their natural fat helps them stay tender over high heat.

2. Make the Chicken Satay Marinade

In a large bowl, whisk together soy sauce, oil, lime juice, honey, garlic, ginger, coriander, cumin, smoked paprika, turmeric, chili flakes, black pepper, and coconut milk.

Add the chicken and toss thoroughly until every strip is coated. Cover the bowl and refrigerate for at least one hour. For deeper flavor, marinate for up to four hours.

The marinade gives Chicken Satay its characteristic combination of salty, sweet, spicy, and aromatic flavors. Do not leave raw chicken at room temperature while it marinates.

3. Soak the Skewers

If using bamboo skewers, place them in water for at least 30 minutes. This helps prevent the exposed wood from burning during grilling.

Metal skewers can be used without soaking. Keep the marinated chicken refrigerated until you are ready to thread the skewers.

4. Prepare the Peanut Sauce

Add peanut butter, coconut milk, soy sauce, lime juice, honey or maple syrup, chili garlic sauce, ginger, and garlic to a small saucepan.

Warm the mixture over low heat while whisking until smooth. Add warm water one tablespoon at a time until the sauce reaches a creamy dipping consistency.

Taste and adjust the sauce. Add more lime juice for brightness, extra chili garlic sauce for heat, or a little more sweetener if you prefer a sweeter sauce.

The peanut sauce should be rich but pourable. Avoid boiling it rapidly because excessive heat can make the sauce separate.

5. Thread the Chicken

Remove the chicken from the refrigerator. Thread each strip onto a soaked skewer, folding the meat gently back and forth.

Do not pack the pieces too tightly. Small spaces allow heat to reach more surfaces and help create browned, lightly charred edges.

Discard any remaining marinade that has touched raw chicken. Never use it as a dipping sauce unless it has been thoroughly boiled.

6. Heat the Grill

Preheat an outdoor grill or grill pan over medium-high heat. Lightly oil the cooking surface.

A hot cooking surface is important because it quickly browns the chicken and creates flavorful caramelized edges. If using a broiler, place the skewers on a lined baking sheet and position them so the chicken cooks evenly.

7. Grill the Chicken Satay

Place the skewers on the hot grill and cook for about 3–4 minutes on the first side. Turn them carefully with tongs and continue cooking for another 3–4 minutes per side, turning as needed.

The exact cooking time depends on the thickness of the chicken and the heat of your grill. Avoid pressing down on the meat because this can force out the juices.

For food safety, check the thickest piece with a food thermometer. The chicken should reach an internal temperature of 165°F (74°C).

If the exterior becomes dark too quickly, move the skewers to a cooler section of the grill and allow the center to finish cooking more gently.

8. Rest the Skewers

Transfer the cooked Chicken Satay to a clean plate and let it rest for about five minutes. Resting allows the juices to redistribute through the meat, helping the chicken remain tender.

While the skewers rest, stir the peanut sauce. If it has thickened, add a teaspoon or two of warm water.

9. Garnish and Serve Chicken Satay

Arrange the skewers on a large platter. Place the peanut sauce in a bowl alongside them.

Scatter chopped peanuts and fresh cilantro over the chicken. Add cucumber slices, red onion, and lime wedges around the platter.

For a complete meal, serve Chicken Satay with jasmine rice, basmati rice, or a fresh cucumber salad.

Tips for the Best Results

Choose the Right Chicken for Chicken Satay

Chicken thighs are ideal when you want especially juicy skewers. Chicken breast is leaner and works well when sliced evenly and cooked only until it reaches a safe internal temperature.

Give the Marinade Enough Time

At least one hour of marinating gives the chicken a noticeable flavor boost. Several hours allow the garlic, ginger, spices, soy sauce, and lime to develop a deeper taste.

Avoid marinating raw chicken for excessively long periods because the lime juice can eventually affect the texture.

Keep Chicken Satay Pieces Similar

Uniform strips cook more evenly and make the skewers easier to turn. Very thin pieces may dry out before thicker pieces are finished.

Control the Grill Temperature for Chicken Satay

Medium-high heat gives the Chicken Satay attractive browned edges without burning the honey and spices.

If your grill runs very hot, reduce the temperature after the initial browning so the center can cook through without the outside becoming too dark.

Keep the Chicken Satay Sauce Smooth

Heat the peanut sauce gently. If it becomes too thick, add warm water gradually. A good dipping sauce should cling to the chicken but still flow easily from a spoon.

Add Fresh Garnishes to Chicken Satay

Fresh lime, cucumber, cilantro, and red onion cut through the richness of the peanut sauce. Add them just before serving for the best texture.

Serving Suggestions

Chicken Satay makes an excellent appetizer when arranged on a platter with a bowl of peanut sauce in the center. Garnish with cilantro, roasted peanuts, cucumber ribbons, lime wedges, and thinly sliced red onion.

For dinner, serve the skewers with steamed jasmine rice and stir-fried vegetables such as broccoli, bell peppers, carrots, snow peas, or green beans.

A simple cucumber salad is another excellent side. Toss thin cucumber slices with rice vinegar, lime juice, a little sugar, cilantro, and red onion.

For parties, use smaller skewers so guests can easily pick them up and dip them. Offer extra chili sauce and lime wedges so everyone can adjust the heat and acidity.

Make-Ahead Instructions

The chicken can be sliced and marinated several hours before cooking. Keep it covered and refrigerated until you are ready to grill.

The peanut sauce can be prepared up to three days ahead and stored in the refrigerator. Reheat it gently and add warm water if necessary to restore its consistency.

The skewers can be threaded shortly before cooking. Keep prepared skewers refrigerated and covered.

For entertaining, prepare the garnishes in advance and cook the chicken close to serving time so it remains juicy and aromatic.

Storage Instructions

Store leftover Chicken Satay in an airtight container in the refrigerator for up to four days.

Keep the peanut sauce separate when possible. This makes reheating easier and prevents the chicken from becoming overly coated.

Reheat the chicken gently in a skillet, oven, or air fryer until hot throughout. Avoid excessive reheating because it can dry the meat.

Leftover skewered chicken can be removed from the sticks and added to rice bowls, salads, wraps, noodles, or lettuce cups.

Never save unused raw chicken marinade. If you want to turn it into a cooked sauce, it must first be brought to a thorough boil.

Frequently Asked Questions

Can I use chicken breast?

Yes. Chicken breast works well when sliced into even strips. Watch the cooking time carefully because breast meat can become dry if overcooked.

Can I cook the skewers in the oven?

Yes. Arrange them on a lined baking sheet and cook under a preheated broiler, turning during cooking. You can also bake them at 425°F (220°C), although the exterior may have less smoky char.

Can I use an air fryer?

Yes. Arrange the skewers in a single layer and cook at approximately 375°F (190°C), turning halfway through. Because air fryers vary, confirm that the thickest chicken reaches 165°F (74°C).

Can I make the peanut sauce without coconut milk?

Yes. Use warm water to thin the peanut butter, or use an unsweetened dairy-free milk. Coconut milk gives the sauce a richer texture and flavor.

Can I make this recipe nut-free?

Yes. Sunflower seed butter can replace peanut butter. If allergies are involved, check the labels of all packaged ingredients for possible cross-contact.

How can I reduce the heat?

Use fewer chili flakes and reduce the chili garlic sauce. You can also omit fresh chili from the garnish.

How can I make it hotter?

Add extra chili flakes, chili garlic sauce, fresh red chili, or a small drizzle of chili oil before serving.

Nutrition Information

Approximate nutrition per serving, including a moderate amount of peanut sauce:

Calories: 485 kcal
Protein: 39g
Carbohydrates: 16g
Fat: 29g
Fiber: 3g
Sugar: 7g
Sodium: 920mg

Nutrition values are estimates and vary according to ingredients, brands, portion sizes, and the amount of peanut sauce consumed.

Flavor Variations

For extra citrus flavor, add lime zest to the marinade. Orange zest can also create a sweeter citrus aroma.

For a stronger herbal profile, add finely chopped cilantro stems to the marinade and garnish the finished skewers with cilantro, mint, or Thai basil.

For a smoky version, cook the skewers over charcoal. A little smoked paprika in the marinade can enhance the grilled flavor.

For a sweeter glaze, add another teaspoon of honey to the marinade. The sugars will caramelize during cooking and create deeper browned edges.

For a fresh variation, serve Chicken Satay with cucumber ribbons, shredded carrots, red cabbage, and plenty of herbs.

Final Thoughts

Chicken Satay brings together tender marinated chicken, aromatic spices, smoky grilled edges, and a creamy peanut dipping sauce. Soy sauce creates savory depth, while garlic, ginger, lime, coriander, cumin, turmeric, and chili build layers of flavor.

The grilling process gives the chicken its appealing charred exterior while keeping the center juicy when cooked correctly. The peanut sauce adds richness and balances the spicy marinade with a smooth, nutty texture.

This recipe is flexible enough for everyday meals and special occasions. Prepare the marinade and sauce ahead, then grill the skewers shortly before serving.

For the best result, choose chicken thighs for maximum tenderness or use evenly sliced breast meat for a leaner option. Keep the grill hot, turn the skewers regularly, and use a thermometer rather than relying only on appearance.

Serve Chicken Satay with fresh lime, cucumber, cilantro, red onion, roasted peanuts, and plenty of peanut sauce. These garnishes brighten the dish and create a colorful presentation.

Whether served as a party appetizer, family dinner, rice bowl topping, or meal-prep option, Chicken Satay offers a satisfying combination of spicy, savory, sweet, tangy, smoky, and nutty flavors. It is simple enough for everyday cooking while still feeling special enough for entertaining.