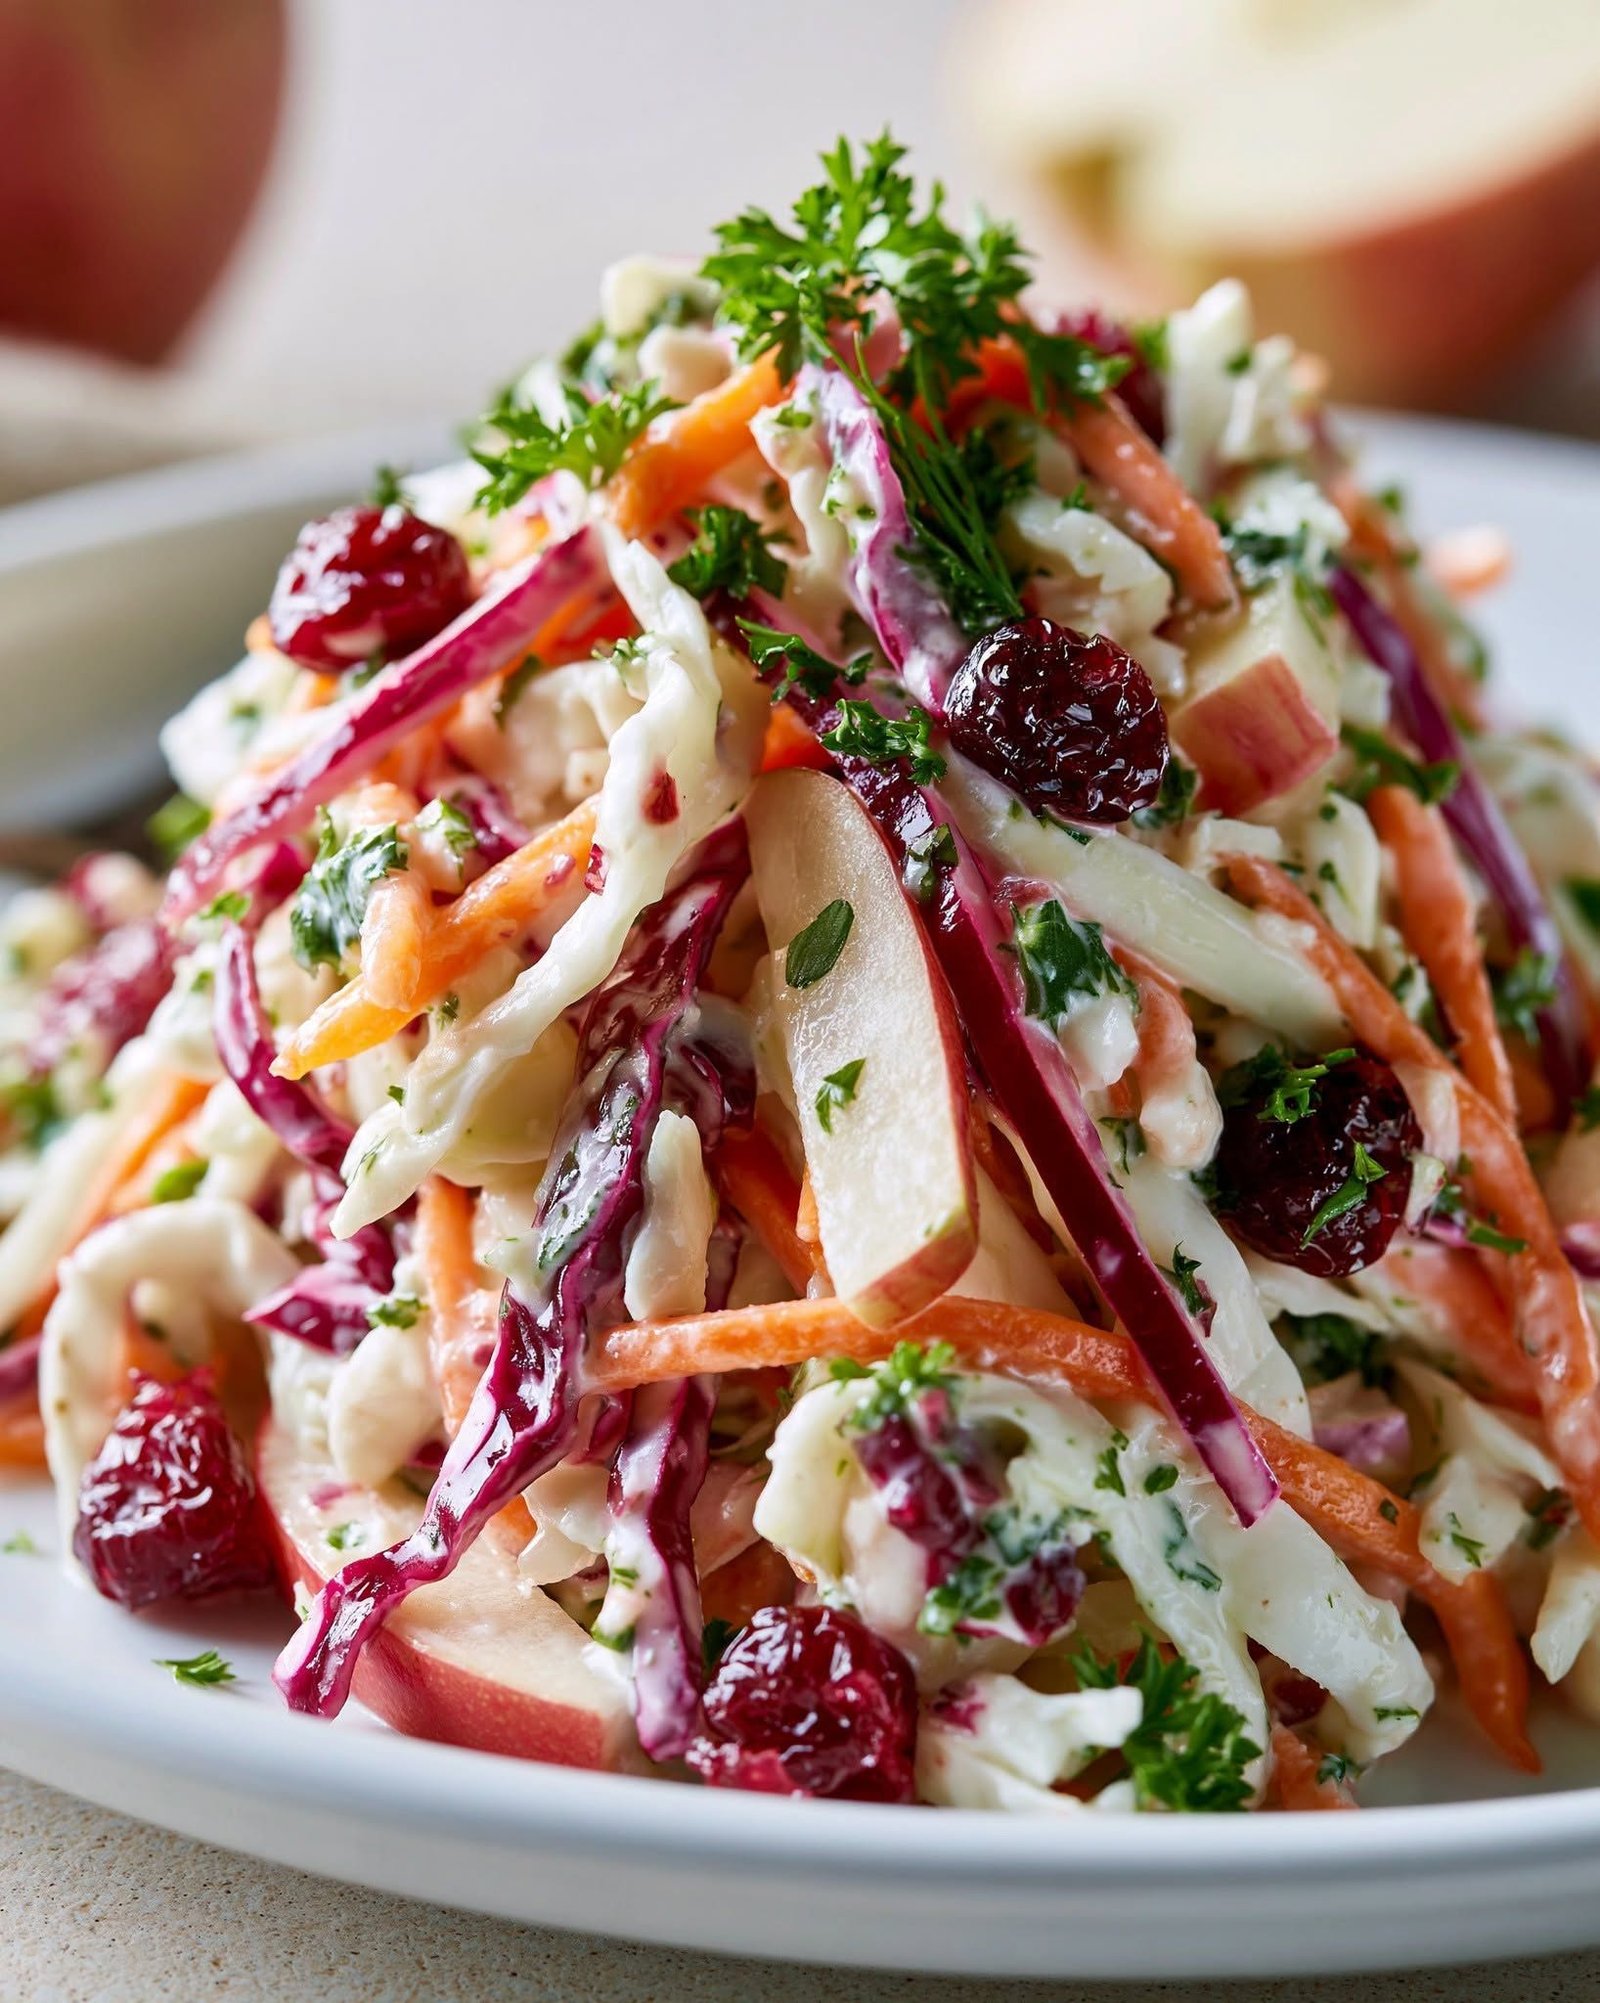
Bright Tangy Cranberry Apple Coleslaw

Bright Tangy Cranberry Apple Coleslaw

Ingredients

 5 cups shredded green cabbage
 1 large crisp apple, thinly sliced
 ½ cup dried cranberries
 1 large carrot, shredded
 ¼ cup chopped walnuts
 ½ cup Greek yogurt
 2 tbsp lemon juice
1 tbsp honey
 Salt & black pepper

Directions

 Add cabbage, apple, cranberries, carrot, and walnuts to a large bowl.
 Whisk Greek yogurt, lemon juice, and honey until smooth.
 Season the dressing with salt and black pepper.
 Pour the dressing over the cabbage mixture.
 Toss gently until everything is evenly coated.
 Refrigerate for 20–30 minutes to let the flavors blend.
 Toss once more before serving and adjust seasoning if needed.
 Serve chilled as a bright, crunchy side dish.

Nutritional Information

Servings: 6
Calories: 185 kcal
Protein: 5g
Carbohydrates: 27g
Fat: 7g
Fiber: 5g

Garlic Butter Shrimp Stuffed Zucchini Boats

Garlic Butter Shrimp Stuffed Zucchini Boats

Ingredients

For the Zucchini Boats:
4 medium zucchini
1 tablespoon olive oil
½ teaspoon salt
¼ teaspoon black pepper
For the Shrimp Filling:
1 lb raw shrimp, peeled, deveined, and chopped
3 tablespoons butter
4 cloves garlic, minced
½ small onion, finely chopped
½ cup cherry tomatoes, finely chopped
½ teaspoon paprika
½ teaspoon Italian seasoning
¼ teaspoon red pepper flakes, optional
1 tablespoon fresh lemon juice
2 tablespoons fresh parsley, chopped
½ cup shredded mozzarella cheese
¼ cup grated Parmesan cheese
Salt and black pepper, to taste

Instructions

Prepare the zucchini: Preheat the oven to 400°F (200°C). Wash the zucchini and slice each one in half lengthwise. Using a spoon, carefully scoop out the center, leaving about ¼ inch of zucchini around the edges. Chop the scooped zucchini flesh and set it aside.
Pre-bake the boats: Place the zucchini halves cut-side up on a lightly greased baking sheet. Brush them with olive oil and season with salt and pepper. Bake for 10 minutes to soften slightly.
Cook the shrimp filling: While the zucchini bakes, melt the butter in a large skillet over medium heat. Add the onion and cook for 2–3 minutes. Add the garlic and chopped zucchini flesh and cook for another 2 minutes.
Add the chopped shrimp, paprika, Italian seasoning, red pepper flakes, salt, and black pepper. Cook for 3–4 minutes, stirring occasionally, until the shrimp are just cooked through. Stir in the cherry tomatoes, lemon juice, and parsley. Remove from heat.
Stuff the zucchini: Spoon the garlic butter shrimp mixture evenly into the partially baked zucchini boats. Sprinkle mozzarella and Parmesan over the top.

Bake again:
Return the zucchini boats to the oven and bake for 10–12 minutes, until the cheese is melted and lightly golden.

Serve: Garnish with fresh parsley and an extra squeeze of lemon. Serve warm with a crisp salad, roasted vegetables, or crusty bread.

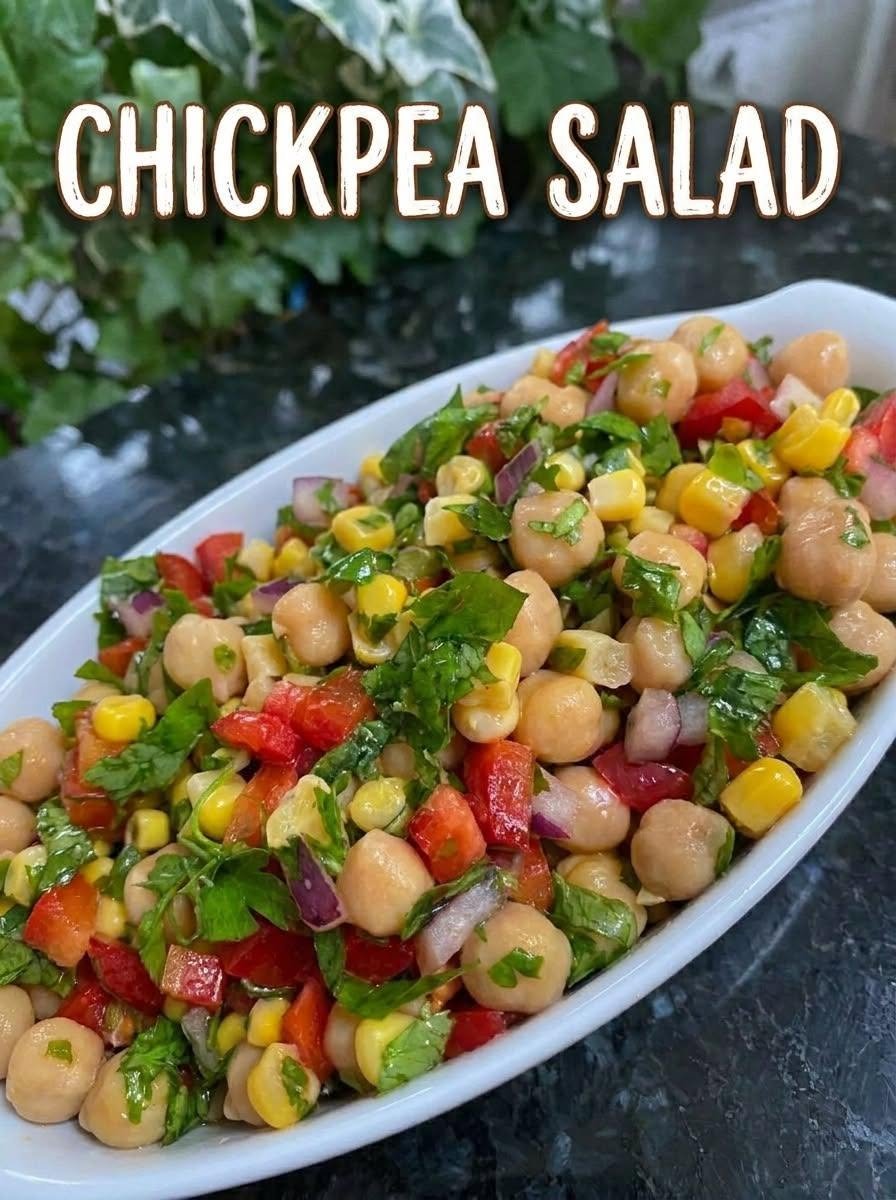
Chickpea, Sweet Corn & Fresh Greens Salad

Chickpea, Sweet Corn & Fresh Greens Salad

Loaded with protein-rich chickpeas, sweet corn, crisp red onions, and plenty of fresh greens, this colorful salad is fresh, crunchy, satisfying, and incredibly easy to prepare. A bright lemon-herb dressing brings everything together, making it perfect for lunch, meal prep, picnics, or a light Mediterranean-inspired dinner.

Ingredients

For the Salad

  • 2 cans (15 oz each) chickpeas, drained and rinsed
  • 1½ cups sweet corn, fresh or frozen and thawed
  • 4 cups mixed fresh greens or chopped romaine
  • ½ small red onion, thinly sliced
  • 1 large cucumber, diced
  • 1 cup cherry tomatoes, halved
  • ½ red bell pepper, diced
  • ¼ cup fresh parsley, chopped
  • ¼ cup fresh cilantro or mint, chopped
  • ¼ cup crumbled feta cheese, optional
  • ¼ cup Kalamata olives, sliced, optional

For the Dressing

  • ¼ cup extra-virgin olive oil
  • 2 tablespoons fresh lemon juice
  • 1 tablespoon red wine vinegar
  • 1 teaspoon Dijon mustard
  • 1 garlic clove, finely minced
  • ½ teaspoon dried oregano
  • ½ teaspoon honey or maple syrup
  • ½ teaspoon salt
  • ¼ teaspoon black pepper

Instructions

1. Prepare the Chickpeas

Drain and rinse the chickpeas thoroughly under cold water. Spread them on a clean kitchen towel or paper towels and gently pat them dry.

For the best salad texture, remove any loose chickpea skins if desired. Place the chickpeas in a large mixing bowl.

2. Prepare the Vegetables

If using frozen corn, thaw it completely and drain away excess moisture. Fresh corn can be used directly after removing it from the cob.

Add the corn, cucumber, cherry tomatoes, red bell pepper, and thinly sliced red onion to the bowl with the chickpeas.

The combination of creamy chickpeas, juicy tomatoes, sweet corn, and crisp onion creates a wonderful contrast in every bite.

3. Add the Greens

Wash and thoroughly dry the mixed greens or romaine lettuce. Chop larger leaves into bite-sized pieces.

Add the greens to the bowl along with fresh parsley and cilantro or mint. Gently toss everything together without crushing the vegetables.

4. Make the Dressing

In a small bowl or jar, combine olive oil, lemon juice, red wine vinegar, Dijon mustard, minced garlic, oregano, honey or maple syrup, salt, and black pepper.

Whisk vigorously until the dressing becomes slightly creamy and well combined.

Taste and adjust the seasoning. Add more lemon juice for brightness, olive oil for richness, or a pinch of salt if needed.

5. Combine Everything

Pour the dressing over the chickpea and vegetable mixture. Toss gently until all the ingredients are evenly coated.

Add crumbled feta and Kalamata olives if using. Toss once more, being careful not to overmix the salad.

For the best flavor, allow the salad to rest for 10–15 minutes before serving. This gives the chickpeas and vegetables time to absorb the lemon-herb dressing.

Serving Suggestions

Serve this salad as a light main dish with warm pita bread, grilled chicken, baked fish, or hummus. It also makes an excellent side dish for Mediterranean-style meals.

For a heartier meal, add grilled chicken, tuna, avocado, quinoa, or cooked orzo. A handful of toasted sunflower seeds or pumpkin seeds can also add delicious crunch.

Meal Prep Tips

This salad is excellent for meal preparation. If preparing several portions ahead of time, keep the dressing separate and add it just before serving. This prevents the greens from becoming soggy.

Store the undressed salad in an airtight container in the refrigerator for up to 3 days. Keep the dressing refrigerated separately and shake or whisk before using.

If making the salad specifically for meal prep, consider using sturdy greens such as kale or spinach because they hold their texture longer than delicate lettuce.

Recipe Tips

  • Use fresh lemon juice for the brightest dressing.
  • Drain the chickpeas and corn well to prevent a watery salad.
  • Thinly slice the red onion for a pleasant crunch without overpowering the other ingredients.
  • Add feta for a creamy, salty Mediterranean touch.
  • Fresh mint adds a particularly refreshing flavor.
  • For extra spice, add a pinch of red pepper flakes to the dressing.
  • Toasted seeds or nuts make a delicious crunchy topping.

Servings & Nutrition

Servings: 6
Prep Time: 20 minutes
Cook Time: None
Total Time: 20 minutes

Nutrition will vary depending on the exact ingredients and optional toppings used. Chickpeas provide plant-based protein and fiber, while the fresh vegetables and greens add a variety of vitamins, minerals, and antioxidants.

This Chickpea, Sweet Corn & Fresh Greens Salad is a simple, colorful, and satisfying recipe that brings together fresh Mediterranean-inspired flavors in every bite.

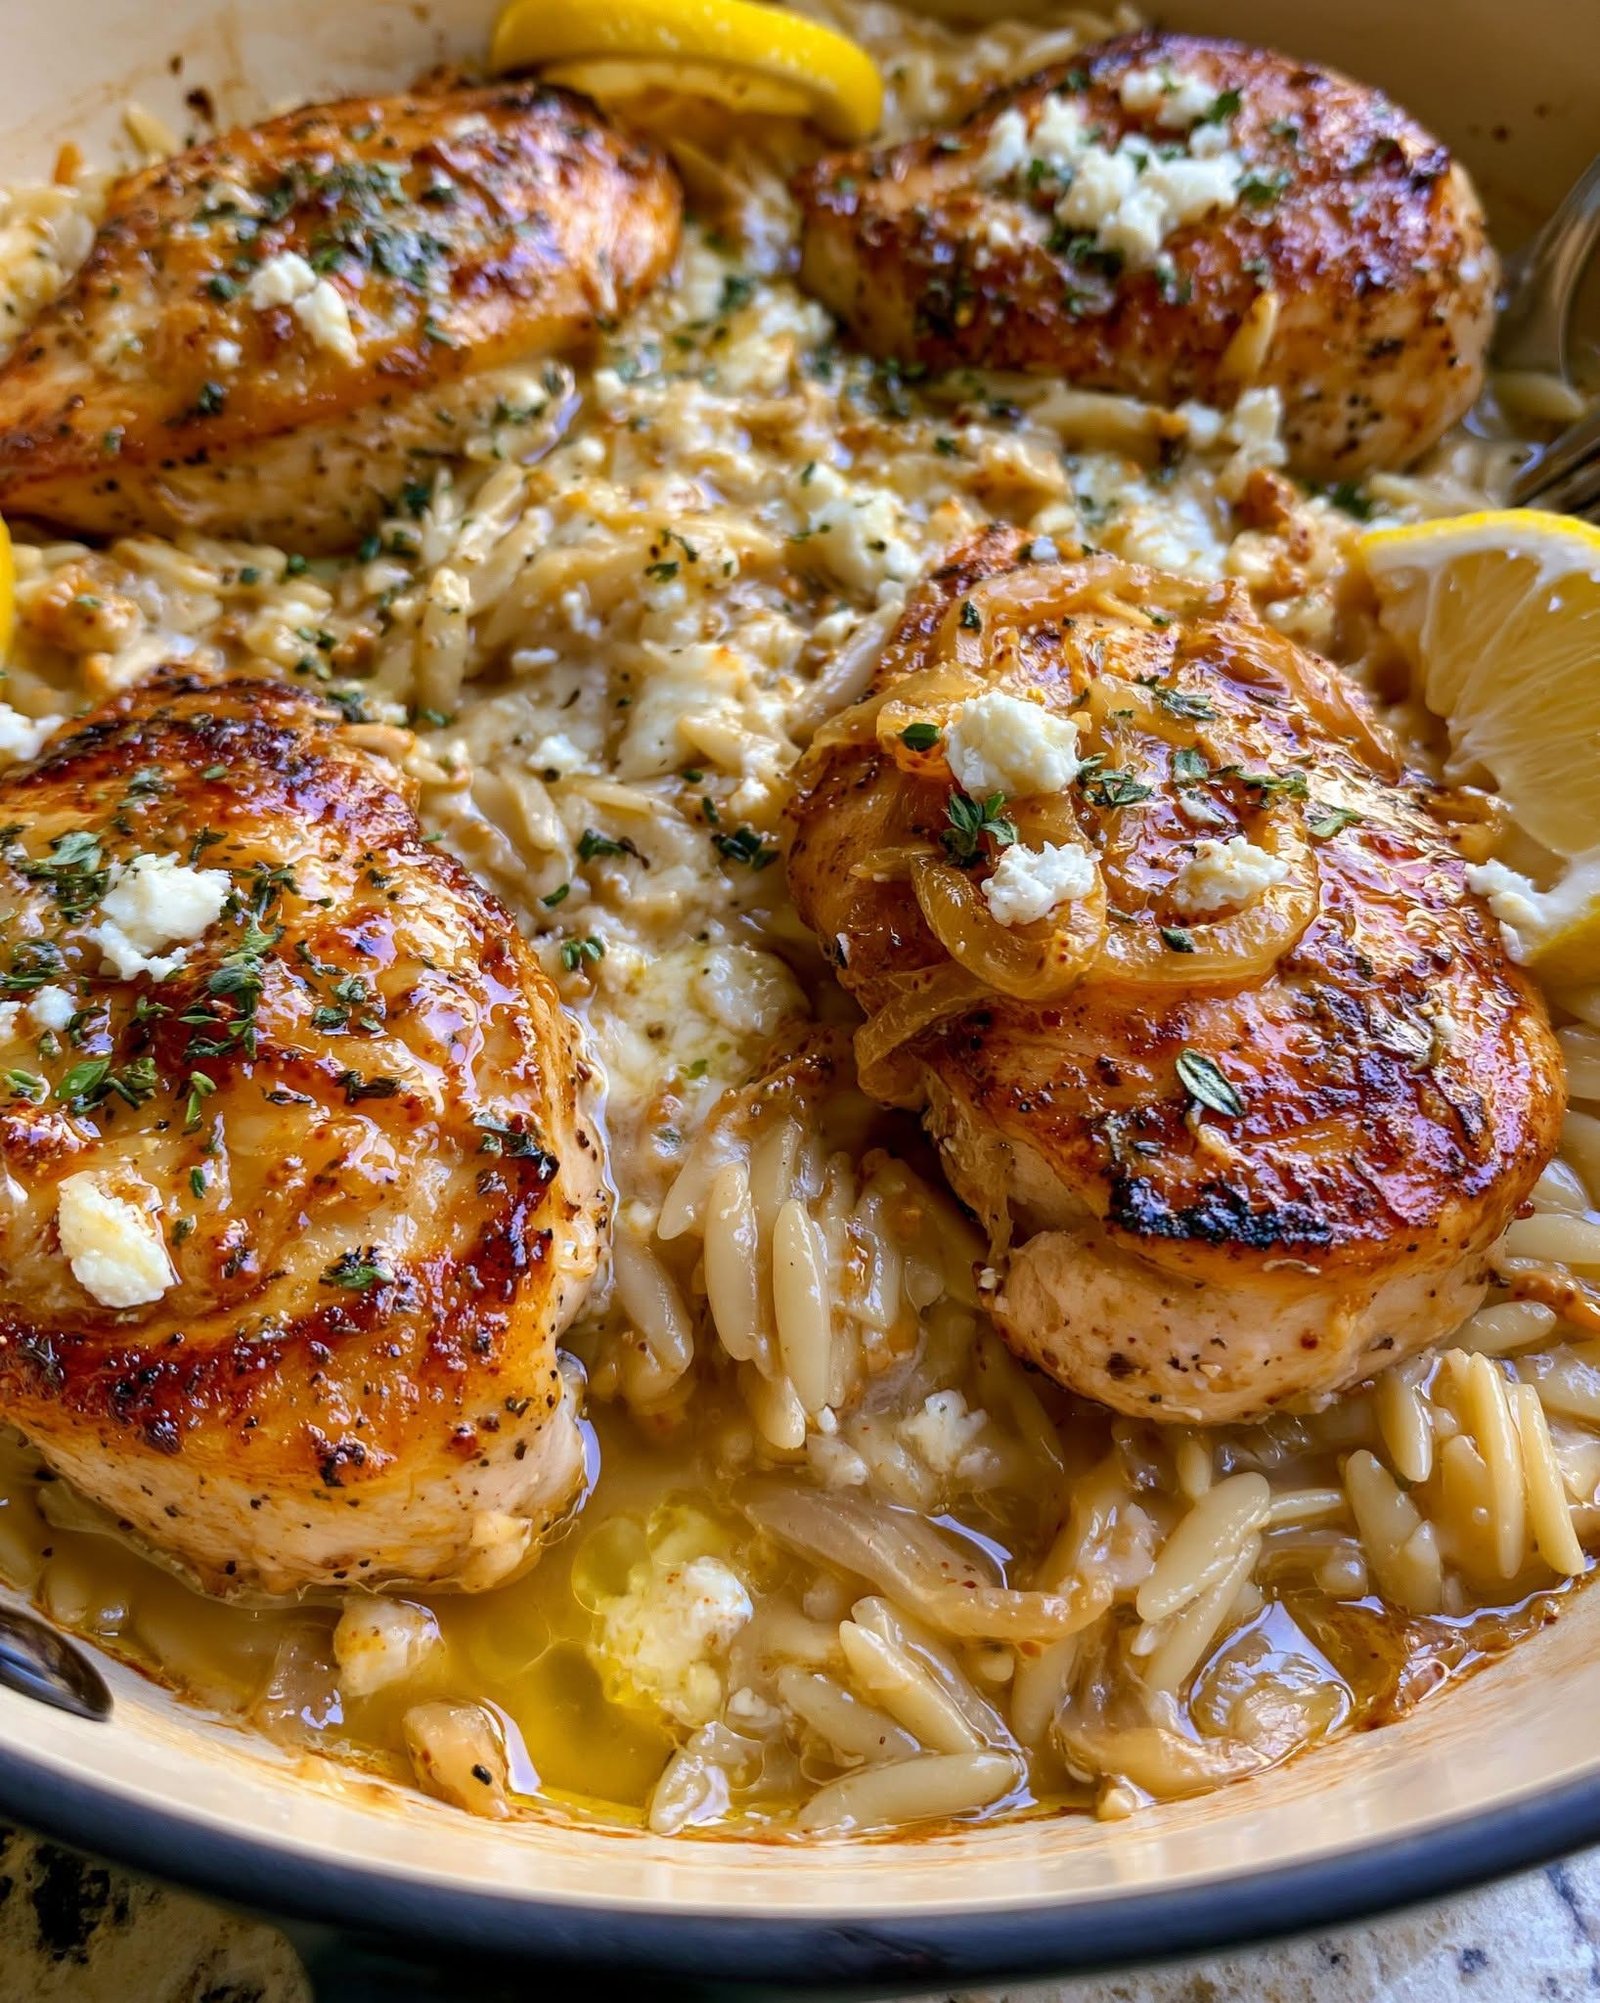
Lemon Butter Dijon Chicken and Orzo with Feta Sauce

Lemon Butter Dijon Chicken and Orzo with Feta Sauce

 Ingredients

1 lb boneless chicken breast, bite-size pieces
 1 cup orzo
 ¾ cup crumbled feta cheese
 1 lemon, juiced
 2 tbsp butter
 1½ tbsp Dijon mustard
3 garlic cloves, minced
 ½ cup chicken broth
 1 tsp dried oregano
 1 tbsp olive oil
 Salt & black pepper

Directions

Season the chicken with oregano, salt, and black pepper.
Heat olive oil in a large skillet over medium-high heat and cook the chicken for 5–7 minutes, until golden and cooked through to 165°F (74°C). Remove and set aside.
 Melt the butter in the same skillet and sauté the garlic for 30 seconds.
 Stir in the orzo and toast for 1–2 minutes.
 Add chicken broth, Dijon mustard, and lemon juice. Simmer for 8–10 minutes, stirring occasionally, until the orzo is tender and creamy.
 Crumble in the feta and stir until partially melted and creamy.
Return the chicken to the skillet and toss everything together.
Finish with fresh lemon juice, black pepper, and a little oregano.
 Serve warm with extra feta and lemon wedges.

Nutritional Information

Servings: 4
Calories: 510 kcal
Protein: 38g
Carbohydrates: 43g
Fat: 22g
Fiber: 3g
Sodium: 690mg

New Orleans Shrimp and Corn Bisque

New Orleans Shrimp and Corn Bisque

Description

New Orleans Shrimp and Corn Bisque is a rich, creamy seafood soup inspired by the bold flavors of Louisiana cooking. It combines tender shrimp, sweet corn, aromatic vegetables, Cajun seasoning, and a velvety cream base. Every spoonful delivers a delicious balance of savory, slightly spicy, buttery, and sweet flavors.

This comforting bisque makes an excellent weeknight dinner, weekend family meal, or starter for a Southern-inspired gathering. Serve it with crusty French bread, garlic toast, or warm cornbread to soak up every drop of the creamy broth.

Ingredients

For the Bisque

  • 1 lb raw shrimp, peeled, deveined, and tails removed
  • 2 cups corn kernels, fresh or frozen
  • 4 tablespoons butter
  • 1 small yellow onion, finely diced
  • 1 green bell pepper, finely diced
  • 2 celery stalks, finely diced
  • 3 cloves garlic, minced
  • ¼ cup all-purpose flour
  • 4 cups seafood or chicken broth
  • 1 cup heavy cream
  • 1 cup whole milk
  • 1 can (14.5 oz) diced tomatoes, drained
  • 2 tablespoons tomato paste
  • 1½ teaspoons Cajun seasoning
  • ½ teaspoon smoked paprika
  • ½ teaspoon dried thyme
  • ¼ teaspoon cayenne pepper, optional
  • 1 bay leaf
  • 1 teaspoon Worcestershire sauce
  • ½ teaspoon salt, or to taste
  • ½ teaspoon black pepper
  • 1 tablespoon lemon juice
  • 2 tablespoons chopped fresh parsley
  • 2 green onions, thinly sliced

Optional Garnish

  • Extra cooked shrimp
  • Fresh parsley
  • Sliced green onions
  • A sprinkle of Cajun seasoning
  • Cracked black pepper
  • Lemon wedges

Instructions

1. Prepare the Shrimp

Pat the shrimp dry with paper towels. If using large shrimp, cut them into bite-sized pieces; smaller shrimp can be left whole. Season lightly with a pinch of Cajun seasoning and black pepper.

Set the shrimp aside while you prepare the soup base. Avoid adding them too early because shrimp cook quickly and can become tough if simmered for too long.

2. Sauté the Vegetables

Place a large heavy-bottomed pot or Dutch oven over medium heat. Add the butter and allow it to melt.

Add the diced onion, bell pepper, and celery. Cook for about 5–7 minutes, stirring occasionally, until the vegetables soften and the onion becomes translucent.

Add the minced garlic and cook for another 30–60 seconds, just until fragrant.

3. Build the Roux

Sprinkle the flour over the vegetables and butter. Stir continuously for about 2 minutes to cook the flour and create a light roux.

The roux helps thicken the bisque and gives it a smooth, creamy texture. Keep the heat at medium and avoid letting the flour burn.

4. Add the Broth

Gradually pour in the seafood or chicken broth while whisking constantly. This prevents lumps from forming.

Add the milk, heavy cream, diced tomatoes, tomato paste, Cajun seasoning, smoked paprika, thyme, cayenne pepper, bay leaf, and Worcestershire sauce.

Stir everything together until well combined.

5. Simmer the Bisque

Bring the mixture to a gentle simmer. Do not let it boil rapidly, especially after adding the dairy.

Reduce the heat to low and simmer uncovered for approximately 15–20 minutes, stirring occasionally. The vegetables should become tender and the soup should gradually thicken.

Remove the bay leaf before continuing.

6. Add the Corn

Stir in the corn and continue cooking for another 5 minutes. If using frozen corn, there is no need to thaw it first.

For a thicker, more bisque-like texture, you can blend about 1 cup of the soup with an immersion blender and stir it back into the pot. This keeps plenty of whole corn and vegetables while creating a creamier consistency.

7. Add the Shrimp

Add the prepared shrimp to the gently simmering bisque. Cook for approximately 3–5 minutes, depending on their size.

The shrimp are ready when they turn opaque and pink and are cooked through. Avoid prolonged cooking to keep them tender.

8. Finish the Flavor

Turn off the heat and stir in the lemon juice. Taste the bisque and adjust the salt, black pepper, and Cajun seasoning as needed.

For additional richness, stir in a small tablespoon of butter just before serving.

Let the bisque rest for 5 minutes so the flavors can come together.

Serving Suggestions

Ladle the hot New Orleans Shrimp and Corn Bisque into bowls and garnish with fresh parsley and sliced green onions. Add a few cooked shrimp on top for an attractive presentation.

Serve immediately with crusty French bread, garlic bread, buttery crackers, or warm cornbread. A simple green salad can also balance the richness of the soup.

For extra heat, serve with hot sauce or an additional pinch of cayenne pepper.

Helpful Tips

Use fresh shrimp: Fresh or properly thawed frozen shrimp both work well. Always pat frozen shrimp dry before cooking.

Control the spice: Cajun seasoning varies in salt and heat, so start with less and add more after tasting. Cayenne can be omitted for a milder bisque.

Make it thicker: Blend a portion of the soup or add a little extra flour to the roux.

Don’t boil the cream: Keep the bisque at a gentle simmer once the milk and cream are added to help maintain a smooth texture.

For extra flavor: Add a splash of dry white wine after sautéing the vegetables, allowing it to cook down before adding the flour.

Storage: Store leftovers in an airtight container in the refrigerator for up to 3 days. Reheat gently over low heat, stirring occasionally. Avoid boiling, as the cream can separate and the shrimp may become overcooked.

Servings and Timing

Servings: 6
Prep Time: 20 minutes
Cook Time: 35 minutes
Total Time: About 55 minutes

Nutrition Information

Approximate nutrition per serving will vary depending on the exact ingredients and portion sizes. This bisque provides protein from shrimp, carbohydrates from corn, and richness from milk, cream, and butter.


Taro Root Benefits: Nutrition, Uses & How to Cook It Safely

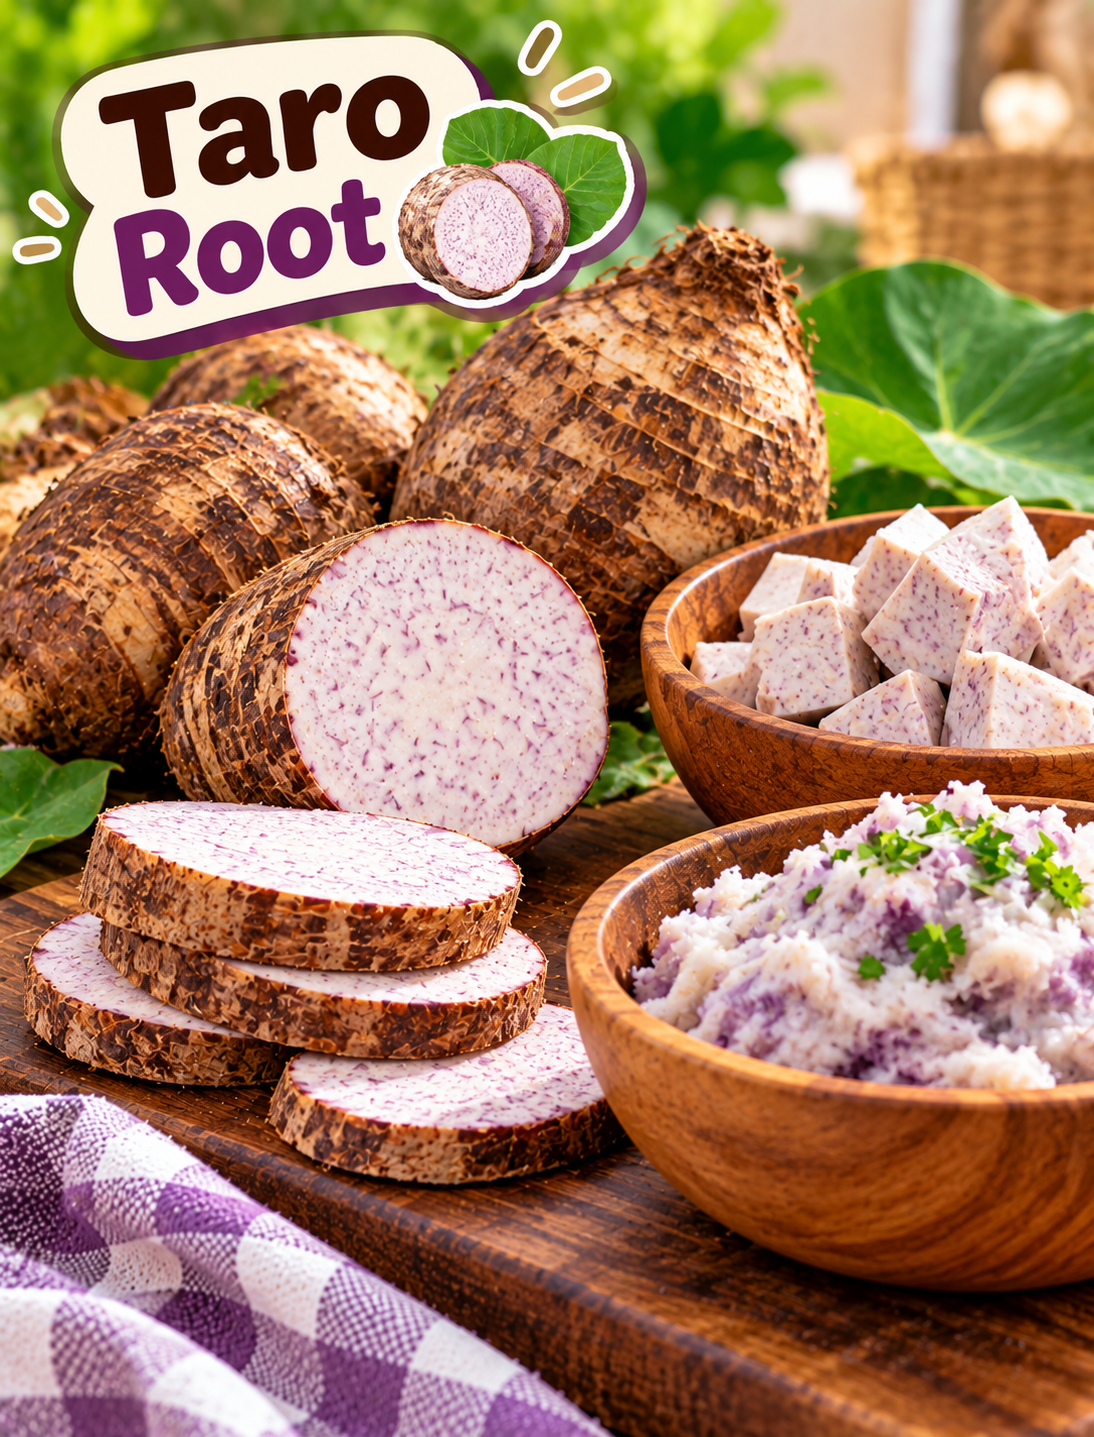
Fresh and cooked taro root showing its nutrition, traditional food uses, and safe cooking preparation

Taro Root: Nutrition, Traditional Uses & How to Prepare It Safely

Taro root looks a little like a potato, but this starchy root has its own texture, flavor, and cooking traditions. 🌿

Used in many Asian, Pacific Island, Caribbean, African, and Latin American cuisines, taro can be boiled, steamed, roasted, mashed, or added to soups and stews.

It also provides carbohydrates, fiber, potassium, vitamin B6, and manganese. But there is one important rule: taro should be properly cooked before eating because raw taro can irritate the mouth and throat.

This guide explains what taro is, how to prepare it, its nutritional value, traditional food uses, and simple ways to add it to meals.

What Is Taro Root?

Taro is the underground corm of the Colocasia esculenta plant.

Although it is often called a root, botanically it is a corm. It usually has rough brown or gray skin with white, cream, or purple-flecked flesh inside.

Taro has a mild, nutty flavor and a soft, starchy texture when cooked.

You may find taro sold as:

  • Fresh whole corms
  • Peeled pieces
  • Frozen chunks
  • Taro flour
  • Taro paste
  • Taro-based snacks and desserts

Different varieties can vary in size, color, texture, and flavor.

Why Is Taro Popular?

Taro has been eaten for generations because it is versatile, filling, and easy to use in many traditional dishes.

Its mild flavor allows it to work with both savory and sweet ingredients.

Common preparations include:

  • Boiled taro
  • Steamed taro
  • Roasted taro
  • Mashed taro
  • Taro soup
  • Taro stew
  • Taro chips
  • Taro flour
  • Taro-based desserts

In some cultures, taro leaves are also eaten, but they require proper preparation and cooking as well.

What Nutrients Does Taro Provide?

Taro is mainly a carbohydrate-rich food, making it a useful source of energy.

It also provides several nutrients, including:

  • Dietary fiber for digestive health
  • Potassium for normal muscle and nerve function
  • Vitamin B6 for normal metabolism and nervous-system function
  • Manganese for normal nutrient metabolism and antioxidant defenses
  • Small amounts of other vitamins and minerals

The exact nutrition depends on the variety, serving size, and cooking method.

Plain boiled or steamed taro is different nutritionally from fried taro chips or heavily sweetened taro desserts.

What Are the Potential Benefits of Taro?

1. It Provides Energy

The starch in taro supplies carbohydrates that the body can use for energy.

This makes cooked taro useful as a meal carbohydrate alongside protein and vegetables.

2. It Provides Dietary Fiber

Taro contains dietary fiber, which contributes to a balanced eating pattern and normal digestive function.

Adding fiber-rich foods gradually can be helpful if your current diet is low in fiber.

3. It Provides Potassium

Potassium is an essential mineral involved in normal muscle contraction, nerve signaling, and fluid balance.

Taro can contribute to daily potassium intake when included as part of a varied diet.

4. It Adds Variety to Meals

Using different whole or minimally processed foods can make a balanced diet more enjoyable.

Taro can replace potatoes, rice, or other starchy foods in many meals.

5. It Works in Many Different Dishes

Its soft texture after cooking makes taro useful for soups, mashes, stews, side dishes, and other recipes.

Can You Eat Taro Raw?

No. Raw taro should not be eaten.

Raw taro contains microscopic calcium oxalate crystals that can cause intense irritation or a burning sensation in the mouth and throat.

Proper cooking helps reduce this problem and makes the corm suitable for eating.

Do not taste raw taro to check whether it is ready.

How to Prepare Taro Safely

Follow these simple steps when cooking fresh taro.

Step 1: Wash the Corm

Rinse the outside under clean running water to remove dirt and surface debris.

Step 2: Peel Carefully

Use a clean vegetable peeler or knife to remove the tough outer skin.

Some people prefer wearing gloves because raw taro can irritate sensitive skin.

Step 3: Cut Into Even Pieces

Cut the peeled corm into similarly sized pieces so they cook evenly.

Step 4: Cook Thoroughly

Boil, steam, or cook the pieces until they are completely tender.

A fork should pass easily through the center.

Step 5: Drain and Serve

Once fully cooked, drain excess water and use the taro in your chosen recipe.

Step 6: Never Serve It Undercooked

If the texture is still firm or the food causes mouth irritation, do not continue eating it.

Cook it thoroughly before serving.

How Can You Cook Taro?

There are several simple cooking methods.

Boiled Taro

Peel and cut the corm into chunks, then boil until fork-tender.

Serve it as a side dish with vegetables, beans, chicken, fish, or another protein.

Steamed Taro

Steaming gives taro a soft texture while keeping the preparation simple.

Season cooked pieces with herbs, spices, or a small amount of olive oil.

Roasted Taro

Cut cooked or properly prepared taro into chunks and roast until the outside becomes lightly crisp.

Pair it with vegetables and a protein for a complete meal.

Mashed Taro

Cook taro until soft, then mash it with a little milk or another suitable liquid.

Add herbs, garlic, or mild seasoning for a savory side dish.

Taro Soup

Cook cubed taro with vegetables, broth, and your choice of protein.

Its starch can give soup a naturally thicker texture.

When Is the Best Time to Eat Taro?

There is no special time of day when you must eat taro.

You can include properly cooked taro at:

  • Breakfast
  • Lunch
  • Dinner
  • As part of a snack or side dish

The more important factor is how much you eat and what you serve with it.

For a balanced meal, combine taro with a protein source, vegetables, and a healthy fat.

Taro Root and Weight Management

Taro can fit into a weight-conscious eating pattern, but it is not a weight-loss food by itself.

Because it is rich in carbohydrates, portion size matters.

A practical plate can include:

  • A moderate portion of cooked taro
  • A protein such as fish, chicken, eggs, beans, or tofu
  • Plenty of non-starchy vegetables
  • A small amount of healthy fat

This combination can make a meal more balanced and satisfying.

Avoid assuming that taro-based chips, fries, bubble tea, or sugary desserts have the same nutritional profile as plain cooked taro.

Taro vs. Potato

Taro and potatoes are both starchy foods, but they have different textures and nutritional profiles.

  • Creamy texture when cooked
  • Mild, slightly nutty flavor
  • Contains dietary fiber
  • Provides potassium and vitamin B6
  • Must be thoroughly cooked

  • Wider range of varieties
  • Can be baked, boiled, roasted, or mashed
  • Provides carbohydrates, potassium, and other nutrients
  • Can also be part of a balanced meal

Neither food needs to be completely avoided.

The better choice depends on your meal, preparation method, portion, and personal dietary needs.

What About Taro Leaves?

Taro leaves are used as food in several traditional cuisines.

However, raw taro leaves should not be eaten because they can also contain calcium oxalate crystals.

They need appropriate preparation and thorough cooking before consumption.

If you are unfamiliar with preparing taro leaves, use a reliable recipe from a trusted culinary source rather than improvising.

Important Taro Safety Tips

Keep these points in mind when preparing taro at home:

  • Never eat raw taro.
  • Cook the corm thoroughly.
  • Wash fresh taro before peeling.
  • Wear gloves if your skin is sensitive.
  • Avoid tasting it while raw or partially cooked.
  • Use clean utensils and cookware.
  • Follow reliable cooking instructions for taro leaves.
  • Be cautious with packaged taro products containing added sugar, salt, or fat.
  • If you experience significant irritation after eating taro, stop eating it and seek appropriate medical advice.

Best Ways to Add Taro to Your Diet

If you are trying taro for the first time, keep the preparation simple, Options

1: Simple Side Dish

  1. Peel the taro.
  2. Cut it into chunks.
  3. Boil until tender.
  4. Drain well.
  5. Add herbs and a small amount of olive oil.
  6. Serve with vegetables and protein.

2: Roasted Taro

  1. Peel and cut taro into cubes.
  2. Cook it thoroughly first if following a recipe that requires pre-cooking.
  3. Toss with a small amount of oil and seasoning.
  4. Roast until tender and lightly browned.
  5. Serve immediately.

3: Taro Mash

  1. Peel and cut the corm.
  2. Boil until very soft.
  3. Drain completely.
  4. Mash until smooth.
  5. Add a small amount of milk or another suitable liquid.
  6. Season with herbs or spices.

Common Mistakes to Avoid

Mistake 1: Eating It Raw

Raw taro can cause mouth and throat irritation.

Mistake 2: Undercooking It

Do not assume that lightly heated taro is ready.

Mistake 3: Focusing Only on “Taro Superfood” Claims

Taro is nutritious, but no single food provides everything your body needs.

Mistake 4: Ignoring the Preparation Method

Deep-fried taro and sugary taro desserts can be much higher in calories than plain cooked taro.

Mistake 5: Forgetting Portion Size

Even nutritious carbohydrate foods can contribute significant calories when eaten in very large portions.

The Bottom Line

Taro is a versatile traditional food that can add carbohydrates, fiber, potassium, vitamin B6, and variety to meals.

Its creamy texture makes it useful in soups, stews, mashed dishes, roasted sides, and many traditional recipes.

The most important safety rule is simple: never eat taro raw or undercooked.

Cook the corm thoroughly, choose simple preparations when possible, and pair it with vegetables and a protein source for a balanced meal.

Taro does not need exaggerated “superfood” claims to be useful. It is simply a versatile starchy food that can have a place in a varied diet when prepared properly.

Frequently Asked Questions

Is taro root healthy?

Taro can be part of a balanced diet because it provides carbohydrates, fiber, potassium, vitamin B6, and other nutrients.

Can you eat taro raw?

No. Raw taro can cause mouth and throat irritation from calcium oxalate crystals, so it should be thoroughly cooked.

Does taro help with digestion?

Taro provides dietary fiber, which supports normal digestive function as part of an overall fiber-rich diet.

Is taro better than potatoes?

Neither is automatically better; both can fit into a balanced diet depending on portion size and preparation.

Can you eat taro leaves?

Yes, taro leaves are eaten in some cuisines, but they must be properly prepared and thoroughly cooked.

Is taro good for weight loss?

Taro can fit into a weight-management diet, but it does not directly cause weight loss and portion size still matters.

What does cooked taro taste like?

Cooked taro has a mild, slightly nutty flavor with a soft, creamy, and starchy texture.

How do you know when taro is fully cooked?

Taro is ready when it is completely tender and a fork passes easily through the center without resistance.