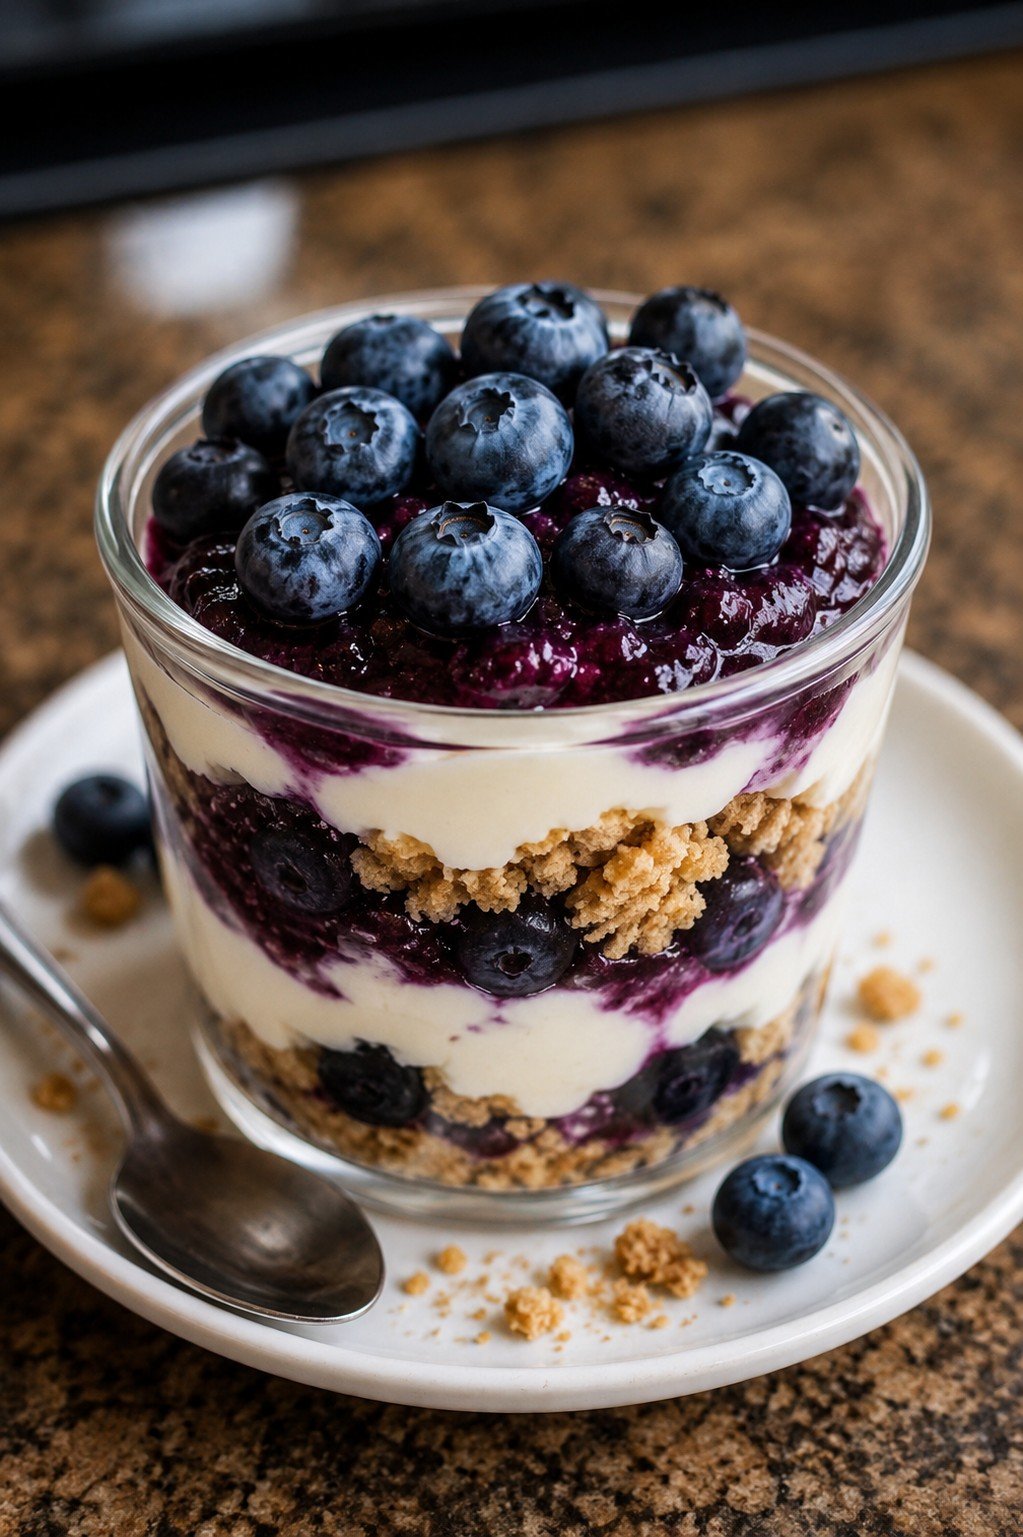
Blueberry Yogurt Parfait

Blueberry Yogurt Parfait 🫐πŸ₯„

Ingredients 🍴

  • 2 cups Greek yogurt
  • 1 cup fresh blueberries
  • 1 cup granola
  • 2 tbsp honey

Detailed Procedure πŸ‘©β€πŸ³

Step 1: Prepare the Blueberries 🫐

➑️ Wash the blueberries very well under cold water.
➑️ Let them dry for a few minutes using a clean towel.
➑️ Keep a few whole blueberries aside for the topping.


Step 2: Make the Blueberry Sauce 🍯

➑️ Add half of the blueberries to a small pan.
➑️ Add 1 tablespoon honey.
➑️ Cook on low heat for about 4–5 minutes while stirring gently.
➑️ The blueberries will become soft and juicy like a jam.
➑️ Turn off the heat and let the sauce cool slightly.


Step 3: Prepare the Glass πŸ₯›

➑️ Take a clear glass or dessert cup for beautiful layers.
➑️ Add 2 tablespoons granola at the bottom.
➑️ Press lightly with a spoon to make the base even.


Step 4: Add the Yogurt Layer 🍦

➑️ Spoon a thick layer of Greek yogurt over the granola.
➑️ Spread gently so the layers look clean from the sides.


Step 5: Add Blueberries 🫐

➑️ Add some fresh blueberries over the yogurt.
➑️ Spoon a little blueberry sauce on top.


Step 6: Repeat the Layers ✨

➑️ Repeat the layers again:

  • Granola
  • Yogurt
  • Fresh blueberries
  • Blueberry sauce

➑️ Finish with extra blueberries on top for a fresh look.


Step 7: Chill & Serve ❄️

➑️ Place the parfait in the fridge for 10–15 minutes before serving.
➑️ Serve cold with a spoon and enjoy the creamy crunchy texture.


Quick Q&A ❓

Can I use frozen blueberries?

βœ… Yes, just thaw them before making the sauce.

How do I keep granola crunchy?

βœ… Add granola just before serving for the best crunch.

Can I make it healthier?

βœ… Use unsweetened yogurt and skip extra honey.

Cheesy Green Onion Patties πŸ§€πŸŒΏ

πŸ₯” Cheesy Green Onion Patties πŸ§€πŸŒΏ

πŸ›’ Ingredients

  • 3 medium potatoes πŸ₯”
  • 1 cup mozzarella cheese πŸ§€
  • 2 tbsp cornflour
  • 2 green onions, chopped 🌿
  • Salt & black pepper
  • 2 tbsp oil for frying

πŸ‘©β€πŸ³ Step-by-Step Recipe

πŸ₯” Step 1: Boil the Potatoes

➑️ Peel and cut the potatoes into chunks.

➑️ Boil in salted water for about 15 minutes until soft.

➑️ Drain all the water completely.

➑️ Mash the potatoes until smooth with no lumps.


πŸ§€ Step 2: Make the Mixture

➑️ Add mozzarella cheese to the mashed potatoes.

➑️ Add cornflour, chopped green onions, salt, and black pepper.

➑️ Mix everything well until a soft dough forms.

πŸ’‘ If the mixture feels sticky, add a little more cornflour.


βœ‹ Step 3: Shape the Sticks

➑️ Take small portions of the mixture.

➑️ Roll and shape them into thick finger-sized sticks.

➑️ Place them on a plate.


πŸ”₯ Step 4: Cook Until Golden

➑️ Heat a little oil in a non-stick pan.

➑️ Place the potato sticks gently in the pan.

➑️ Cook on medium heat for 3–4 minutes on each side.

➑️ Turn carefully until all sides become crispy and golden brown. 😍


🍽️ Step 5: Serve

➑️ Serve hot with ketchup, garlic sauce, or spicy mayo.

➑️ Enjoy the crispy outside and cheesy soft inside! πŸ§€βœ¨


❓Quick Q&A

❓Can I bake them instead?

➑️ Yes! Bake at 200Β°C (400Β°F) for 20–25 minutes.

❓Can I use cheddar cheese?

➑️ Absolutely, cheddar gives a richer flavor.

❓How do I store leftovers?

➑️ Keep in the fridge for up to 2 days and reheat in a pan.

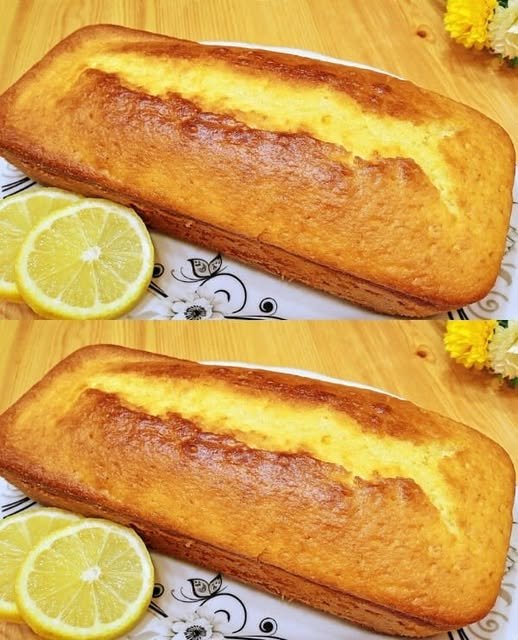
Easy Lemon Cake πŸ‹πŸ°

Easy Lemon Cake πŸ‹πŸ°

Soft, fluffy, and full of fresh lemon flavor, this easy lemon cake is perfect for tea time, breakfast, or dessert. Even beginners can make it perfectly on the first try!

Ingredients πŸ₯„

  • 4 eggs
  • 1 cup sugar
  • Juice & zest of 1 lemon
  • 1 cup vegetable oil
  • 4/5 cup milk
  • 4 tsp baking powder
  • 2Β½ cups all-purpose flour

Step-by-Step Instructions πŸ‘©β€πŸ³

πŸ₯š Step 1: Beat the Eggs & Sugar

  • Crack the eggs into a large mixing bowl.
  • Add the sugar.
  • Beat with a whisk or mixer for 3–4 minutes until light, pale, and slightly fluffy.

πŸ‘‰ This helps make the cake soft and airy.


πŸ‹ Step 2: Add Lemon Flavor

  • Grate the lemon zest carefully.
  • Squeeze the lemon juice.
  • Add both to the egg mixture.

✨ The zest gives the cake a strong fresh lemon aroma.


πŸ₯› Step 3: Add Wet Ingredients

  • Pour in the vegetable oil and milk.
  • Mix slowly until smooth and fully combined.

πŸ‘‰ Do not overmix.


🌾 Step 4: Add Dry Ingredients

  • In another bowl, combine:
    • flour
    • baking powder
  • Gradually add the dry ingredients into the wet mixture.
  • Stir gently until the batter becomes smooth with no dry flour left.

✨ The batter should be thick but pourable.


🧈 Step 5: Prepare the Pan

  • Grease a loaf pan with oil or butter.
  • Lightly dust with flour to prevent sticking.

πŸ”₯ Step 6: Bake the Cake

  • Pour the batter into the prepared pan.
  • Bake at 170Β°C (340Β°F) for about 40–45 minutes.

βœ… The cake is ready when:

  • the top is golden
  • a toothpick inserted in the center comes out clean

❄️ Step 7: Cool & Serve

  • Let the cake cool for 10 minutes before removing from the pan.
  • Slice and enjoy with tea or coffee β˜•πŸ‹

Quick Q&A ❓

Can I use butter instead of oil?

Yes πŸ‘ Melted butter works well too.

How do I make it extra lemony?

Add a little extra lemon zest on top after baking.

Can beginners make this?

Absolutely 😊 This is one of the easiest homemade cakes.

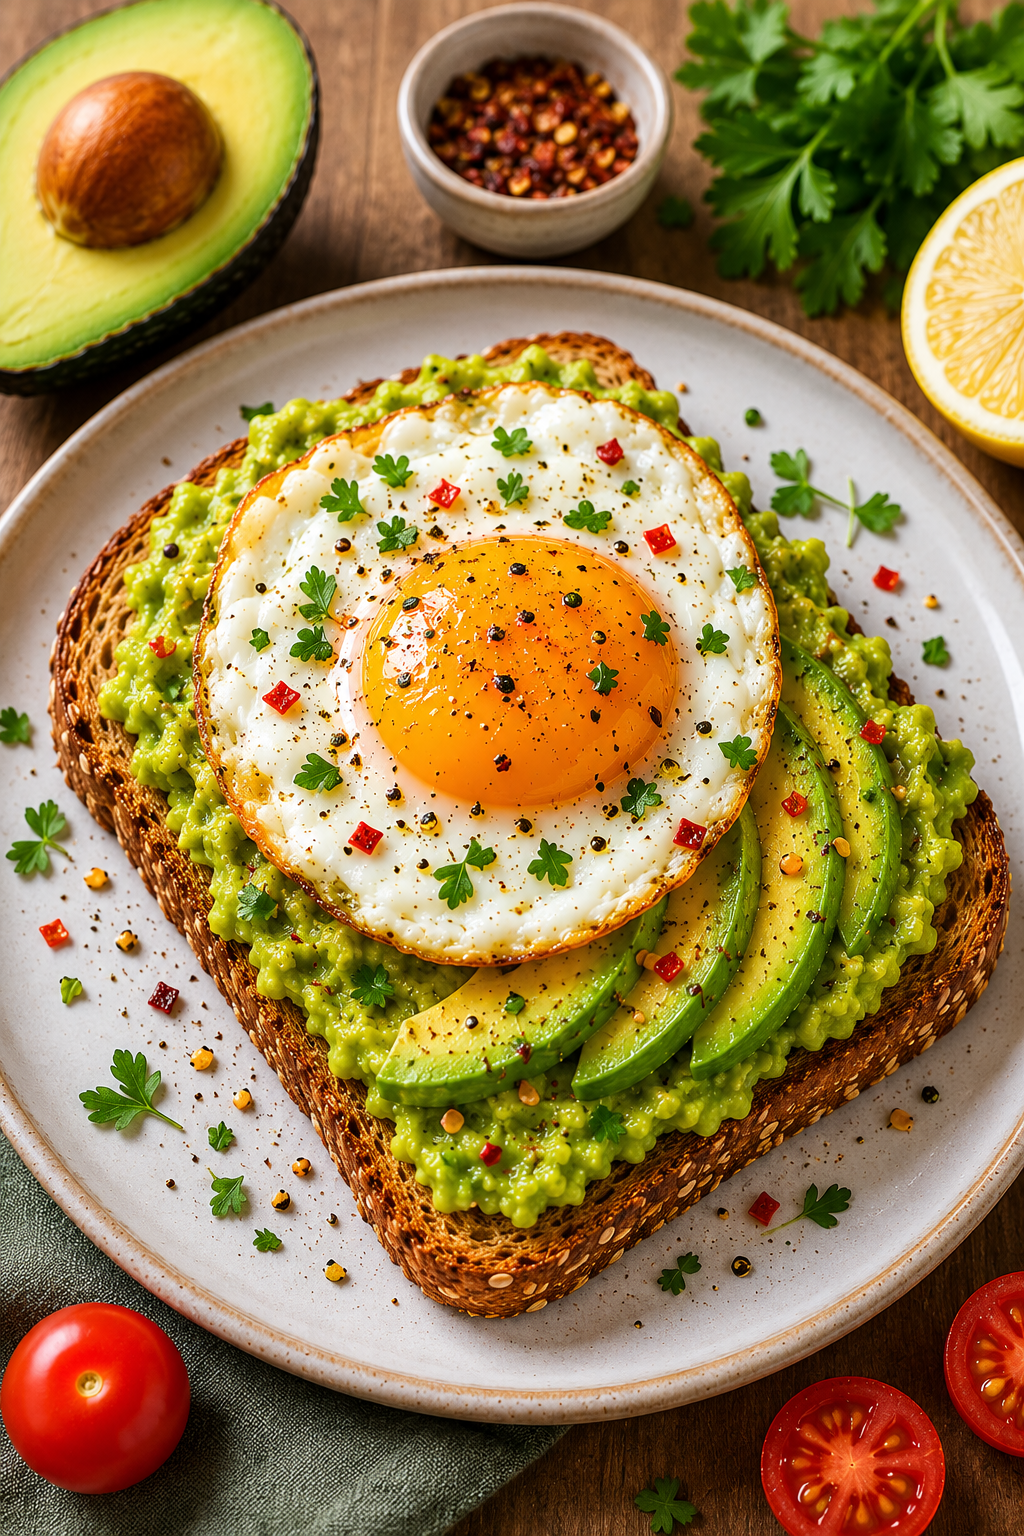
5-Minute Egg & Avocado Toast

Ingredients

  • 2 slices whole grain bread 🍞
  • 1 ripe avocado πŸ₯‘
  • 2 eggs πŸ₯š
  • Salt πŸ§‚
  • Black pepper
  • Chili flakes 🌢️
  • Lemon juice πŸ‹
  • Fresh parsley or cilantro 🌿

πŸ‘©β€πŸ³ Step-by-Step Instructions

πŸ”₯ Step 1: Toast the Bread

➑️ Place the bread slices in a toaster or pan.
➑️ Toast until golden brown and crispy.


πŸ₯‘ Step 2: Prepare the Avocado

➑️ Cut the avocado in half and remove the seed.
➑️ Scoop the avocado into a bowl.
➑️ Add a little lemon juice, salt, and black pepper.
➑️ Mash gently with a fork until creamy but slightly chunky.


🍳 Step 3: Cook the Eggs

➑️ Heat a small pan over medium heat.
➑️ Add a little oil or butter.
➑️ Crack the eggs into the pan.
➑️ Cook until the whites are set and the yolk stays soft.
➑️ Sprinkle a little salt and pepper on top.


🍞 Step 4: Assemble the Toast

➑️ Spread the mashed avocado evenly over the toasted bread.
➑️ Add avocado slices if desired.
➑️ Carefully place the fried egg on top.
➑️ Sprinkle chili flakes and fresh herbs for extra flavor.


✨ Step 5: Serve & Enjoy

➑️ Serve immediately while warm and crispy.
➑️ Pair with fresh tomatoes or salad for a complete breakfast πŸ…πŸ₯—


πŸ’‘ Tips

  • Use sourdough bread for extra crunch πŸ₯–
  • Add cheese for a creamy twist πŸ§€
  • A squeeze of lemon keeps avocado fresh πŸ‹

❓Q/A

❓Can I use scrambled eggs?

➑️ Yes! Scrambled eggs work perfectly too.

❓How do I store leftover avocado?

➑️ Cover tightly and add lemon juice to reduce browning.


🌟 Nutritional Benefits

  • πŸ₯‘ Avocados contain healthy fats and fiber
  • πŸ₯š Eggs provide protein and energy
  • 🍞 Whole grain bread supports fullness and digestion
  • 🌿 Fresh ingredients make this a balanced breakfast meal

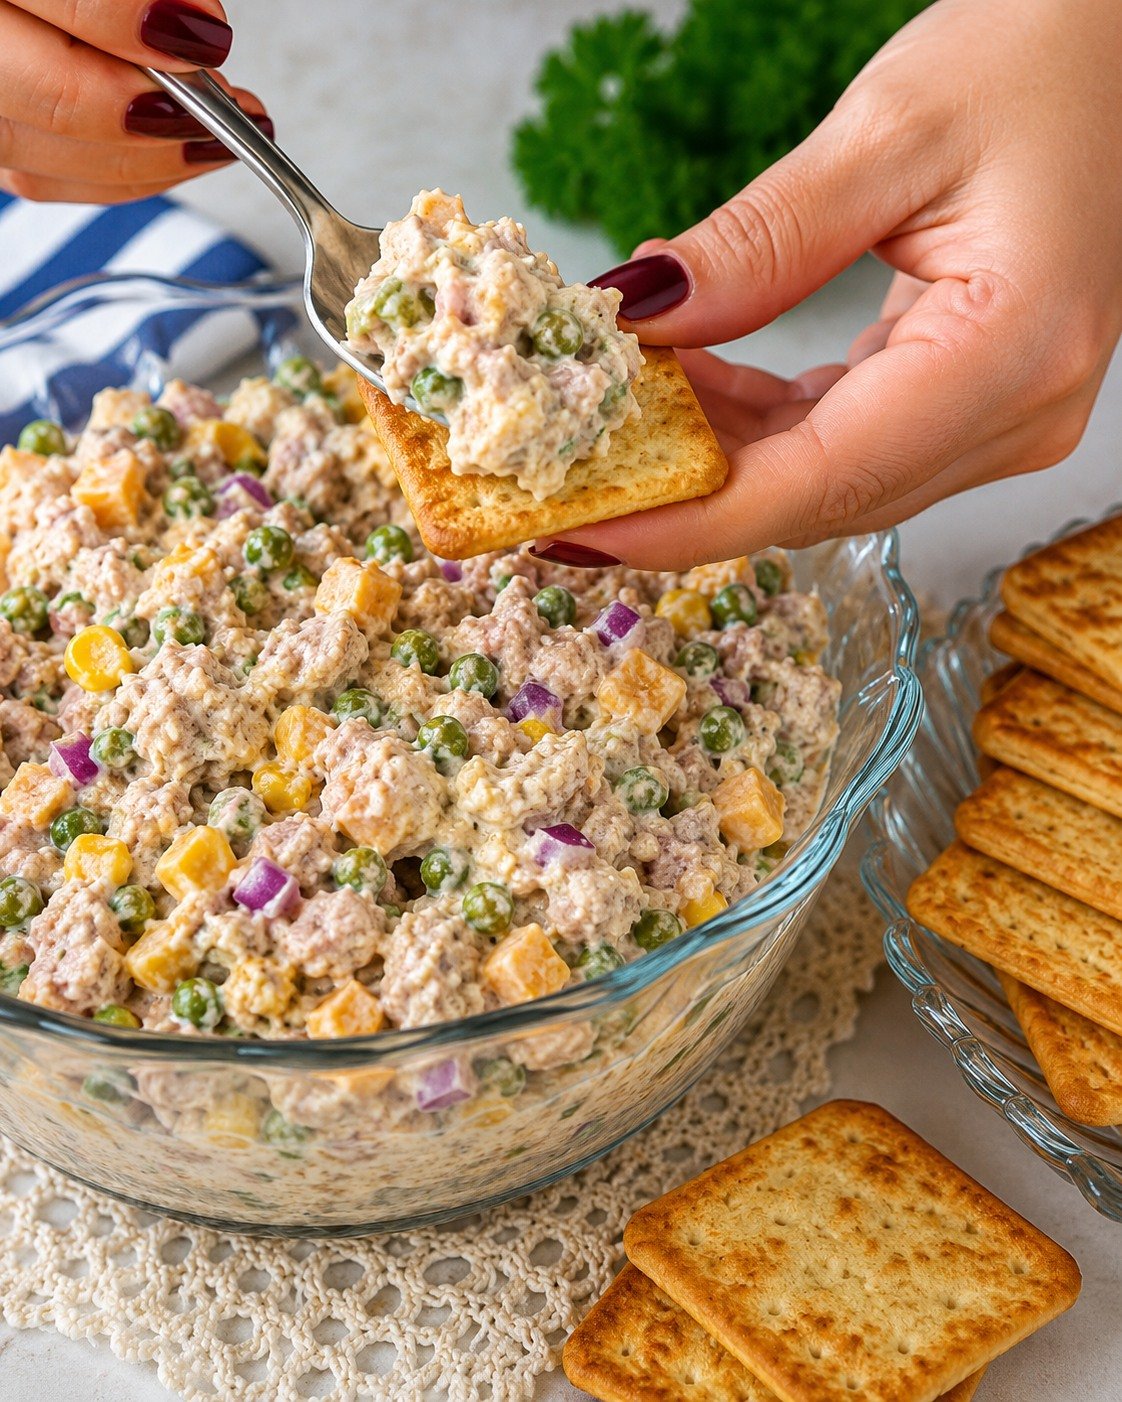
Matthew McConaughey’s Viral Tuna Salad

Matthew McConaughey’s Viral Tuna Salad

πŸ›’ Ingredients

  • 2 cans tuna, drained
  • Β½ cup mayonnaise
  • Β½ cup frozen peas
  • Β½ cup cheddar cheese cubes
  • 2 tbsp red onion, chopped
  • 1 tbsp pickle relish
  • 1 tsp mustard
  • Salt & black pepper
  • Crackers for serving

πŸ‘©β€πŸ³ Detailed Step-by-Step Recipe

🐟 1. Prepare the Tuna

➑️ Open the tuna cans and drain all the liquid well.
➑️ Add the tuna to a large mixing bowl.

πŸ’‘ Break the tuna apart gently with a fork so it becomes flaky.


πŸ§€ 2. Add the Mix-Ins

➑️ Add:

  • Frozen peas
  • Cheddar cheese cubes
  • Chopped red onion
  • Pickle relish

➑️ Stir lightly so everything spreads evenly.


πŸ₯£ 3. Make It Creamy

➑️ Add mayonnaise and mustard to the bowl.
➑️ Sprinkle a little salt and black pepper.

➑️ Mix slowly until the salad becomes creamy and fully combined.

πŸ’‘ Don’t overmix β€” keeping some texture makes it extra delicious.


❄️ 4. Chill the Salad

➑️ Cover the bowl and refrigerate for at least 20 minutes.

➑️ This helps the flavors blend together beautifully.


🍽️ 5. Serve

➑️ Scoop onto crackers, toast, sandwiches, or lettuce cups.
➑️ Serve cold and enjoy!


πŸ’‘ Tips

βœ… Add chopped celery for extra crunch.
βœ… A squeeze of lemon makes it brighter and fresher.
βœ… Best served chilled.


❓Q&A

Q: Can I make it ahead of time?

➑️ Yes! It tastes even better after a few hours in the fridge.

Q: Can I use canned chicken instead?

➑️ Absolutely β€” the recipe works great with chicken too.

Q: How long does it last?

➑️ Store in the fridge for up to 3 days in an airtight container.

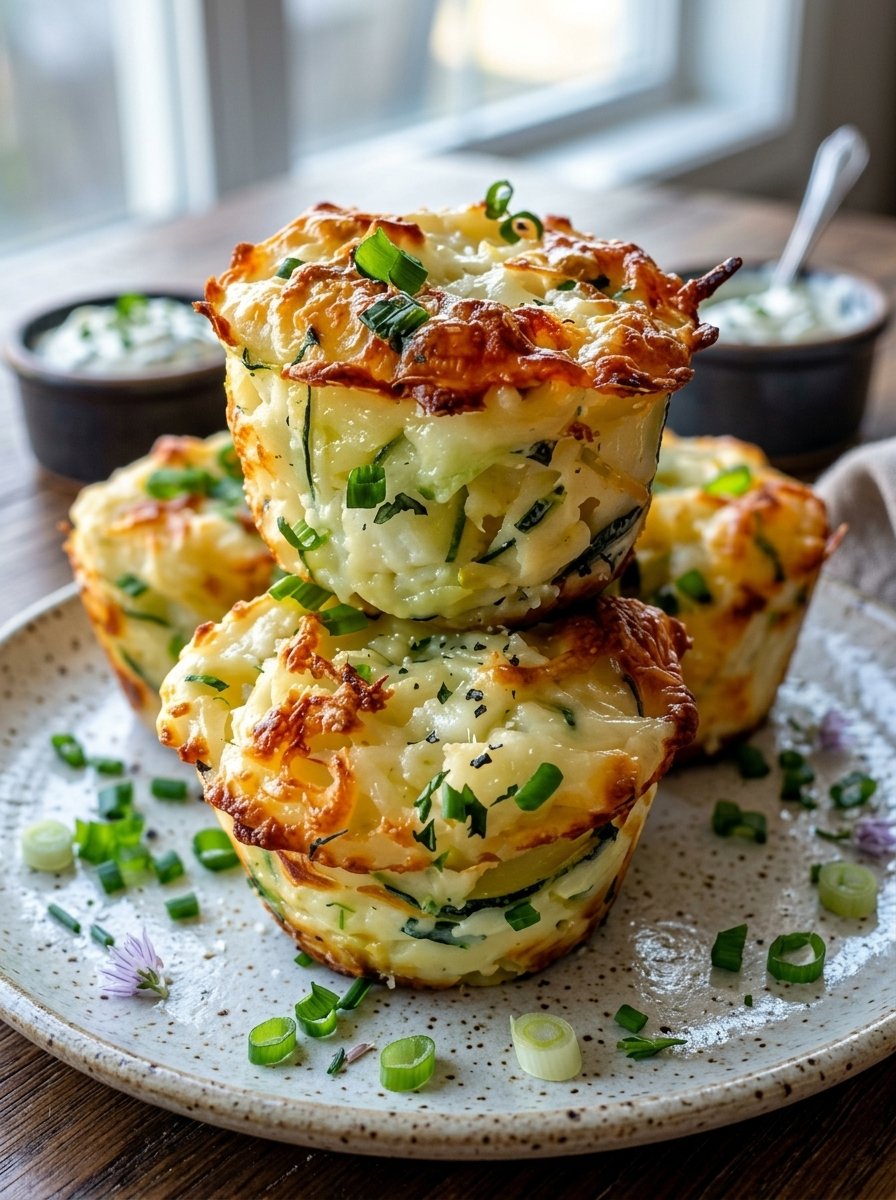
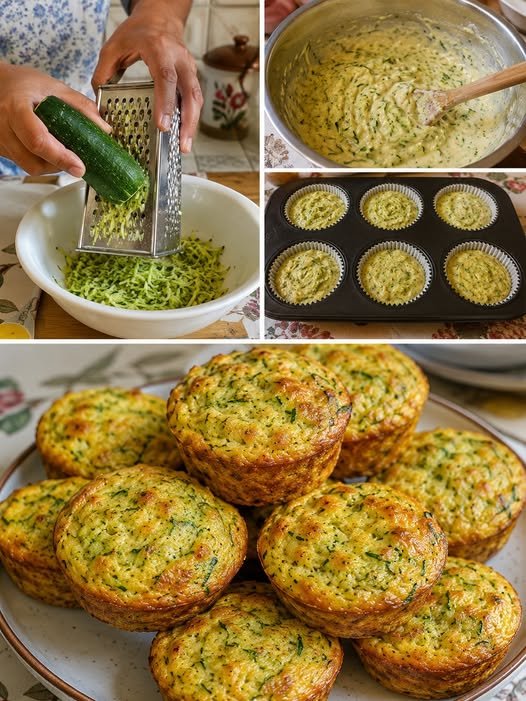
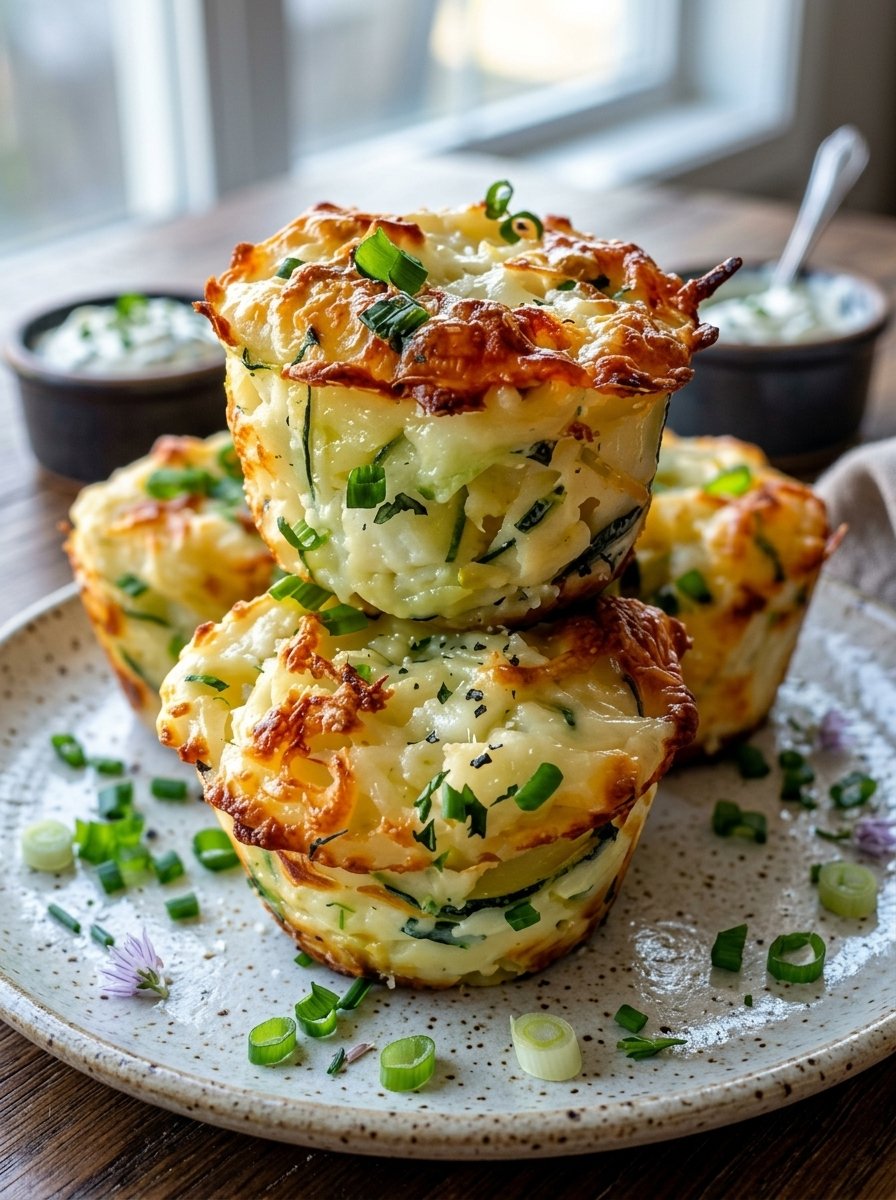
Cheesy Zucchini Egg Muffins

Cheesy Zucchini Egg Muffins

πŸ›’ Ingredients

  • 2 small zucchinis, grated
  • 4 eggs
  • 1 cup shredded mozzarella cheese
  • 2 green onions, chopped
  • Salt & black pepper
  • 1 tbsp olive oil or butter

πŸ‘©β€πŸ³ Detailed Step-by-Step Recipe

πŸ”ͺ 1. Prepare the Zucchini

➑️ Wash the zucchinis well.
➑️ Grate them using a box grater.

➑️ Place the grated zucchini in a clean towel or paper towel.
➑️ Squeeze out as much water as possible.

πŸ’‘ This step is important so the muffins stay firm and not watery.


πŸ₯š 2. Make the Egg Mixture

➑️ Crack the eggs into a large bowl.
➑️ Add salt and black pepper.
➑️ Whisk until smooth.

➑️ Add:

  • Grated zucchini
  • Mozzarella cheese
  • Chopped green onions

➑️ Mix everything together well.


🧁 3. Prepare the Muffin Tray

➑️ Preheat oven to 375°F (190°C).
➑️ Grease a muffin tray lightly with olive oil or butter.

➑️ Spoon the mixture evenly into each muffin cup.

πŸ’‘ Fill each cup almost to the top.


πŸ”₯ 4. Bake

➑️ Bake for 20–25 minutes until:
βœ… Golden on top
βœ… Firm in the center
βœ… Cheese becomes bubbly and slightly crispy

➑️ Let them cool for 5 minutes before removing from the tray.


🍽️ 5. Serve

➑️ Serve warm for breakfast, snacks, or meal prep.


πŸ’‘ Tips

βœ… Add cooked chicken or turkey for extra protein.
βœ… Use cheddar cheese for a stronger flavor.
βœ… Store leftovers in the fridge and reheat easily.


❓Q&A

Q: Can I freeze these muffins?

➑️ Yes! Freeze in an airtight container for up to 2 months.

Q: Why squeeze the zucchini?

➑️ Removing water helps the muffins bake properly and stay fluffy.

Q: Can I make them without cheese?

➑️ Yes, but the texture will be less creamy.

Keto Savoury Zucchini Cheese Muffins

Ingredients

  • 2 medium zucchinis, grated
  • 1 cup shredded cheddar cheese
  • 3 eggs
  • 1 cup almond flour
  • 1 tsp baking powder
  • 1 clove garlic, minced
  • Salt to taste
  • Black pepper to taste
  • 1 tbsp olive oil

πŸ‘©β€πŸ³ Step-by-Step Instructions

➑️ Step 1: Prepare the Zucchini

πŸ₯’ Grate the zucchinis using a grater.
🧻 Place them in a clean towel and squeeze out as much water as possible.

πŸ‘‰ This helps the muffins stay fluffy and not soggy.


➑️ Step 2: Mix the Wet Ingredients

πŸ₯£ In a large bowl, add:

  • Eggs
  • Olive oil
  • Garlic

Whisk until well combined.


➑️ Step 3: Add Dry Ingredients

✨ Add:

  • Almond flour
  • Baking powder
  • Salt
  • Black pepper

Mix everything together.


➑️ Step 4: Add Zucchini & Cheese

πŸ§€ Fold in:

  • Grated zucchini
  • Shredded cheddar cheese

Mix gently until evenly combined.


➑️ Step 5: Fill the Muffin Tray

🧁 Grease a muffin tray or use muffin liners.
Spoon the batter evenly into each cup.


➑️ Step 6: Bake

πŸ”₯ Bake at 180Β°C (350Β°F) for 20–25 minutes
until golden brown on top.


➑️ Step 7: Cool & Serve

❄️ Let the muffins cool for 5 minutes.

Serve warm and enjoy! πŸ˜‹


🌟 Tips

  • Add chili flakes for a spicy kick 🌢️
  • Parmesan cheese gives extra flavor πŸ§€
  • Store in the fridge for quick keto snacks

❓Q/A

❓Can I freeze these muffins?

βœ… Yes! Freeze for up to 1 month.

❓Can I use coconut flour?

βœ… Yes, but use less because it absorbs more liquid.

❓Are these muffins low carb?

βœ… Yes! They are keto-friendly and low in carbs.


πŸ’ͺ Nutritional Benefits

  • πŸ₯’ Zucchini is low carb and rich in nutrients
  • πŸ§€ Cheese provides protein and calcium
  • πŸ₯š Eggs add healthy protein and texture
  • 🌰 Almond flour keeps the recipe keto-friendly

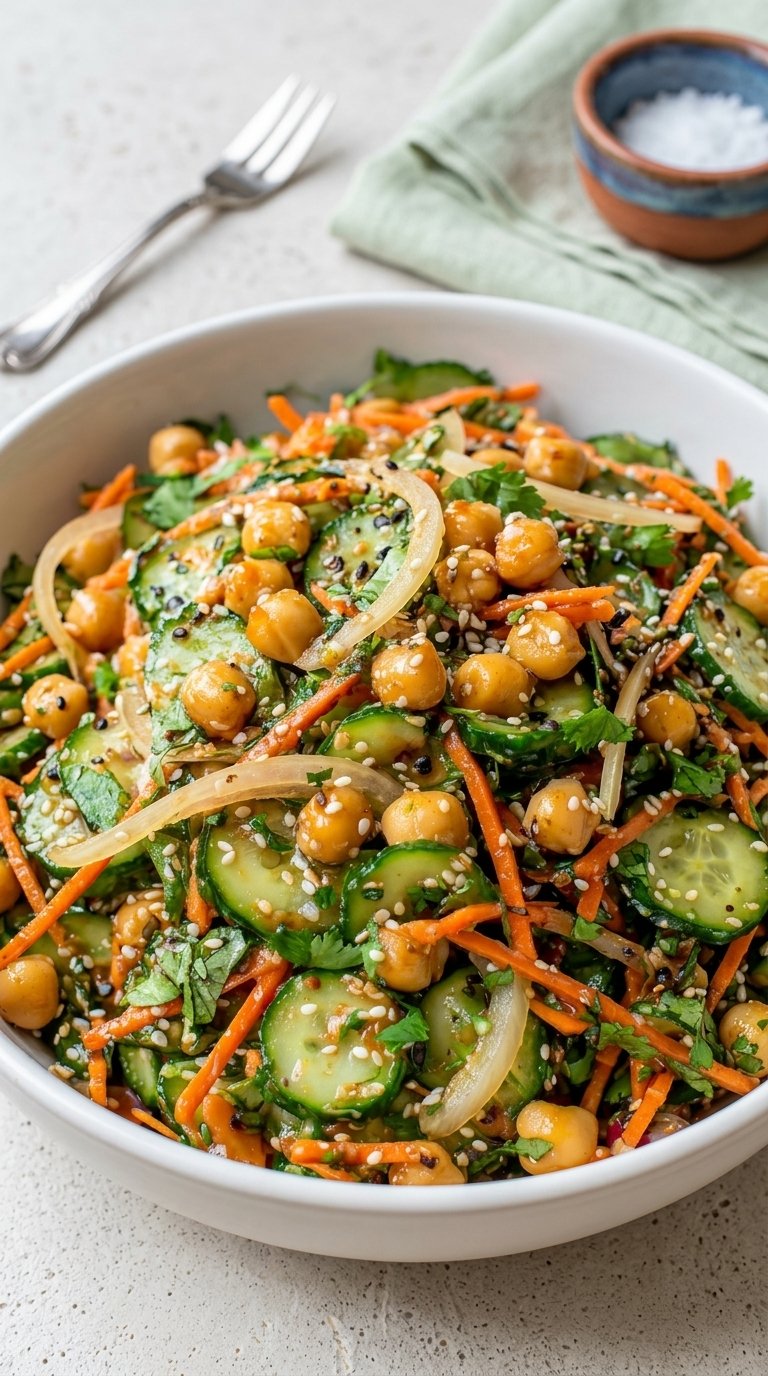
Easy Crunchy Chickpea Cucumber Salad

πŸ₯— Easy Crunchy Chickpea Cucumber Salad

πŸ›’ Ingredients

  • 2 cucumbers πŸ₯’
  • 1 cup chickpeas
  • 1 carrot πŸ₯•
  • 2 tbsp olive oil
  • 1 tbsp lemon juice πŸ‹
  • Salt & black pepper
  • Sesame seeds & parsley (optional)

πŸ‘©β€πŸ³ Detailed Step-by-Step Instructions

πŸ”ͺ 1. Slice the Vegetables

  • Wash the cucumbers well under cold water.
  • Cut them into thin round slices.
  • Peel the carrot and shred it using a grater.

πŸ‘‰ Thin slices help the salad absorb more dressing and taste better.


πŸ₯£ 2. Prepare the Chickpeas

  • Open the canned chickpeas and drain the water.
  • Rinse them under cold water for 30 seconds.
  • Let them sit for a minute so extra water drains away.

πŸ‘‰ Dry chickpeas keep the salad crunchy instead of watery.


πŸ‹ 3. Make the Dressing

  • In a small bowl, add:
    • Olive oil
    • Lemon juice
    • Salt
    • Black pepper
  • Mix well with a spoon until combined.

πŸ‘‰ Taste the dressing before adding it. Add more lemon if you like tangy flavor.


πŸ₯— 4. Combine Everything

  • Add cucumbers, chickpeas, and carrots into a large bowl.
  • Pour the dressing slowly over the salad.
  • Toss gently using two spoons until everything is coated evenly.

πŸ‘‰ Mix gently so cucumbers stay fresh and crisp.


✨ 5. Final Touch

  • Sprinkle sesame seeds and chopped parsley on top.
  • Let the salad rest for 5–10 minutes before serving.

πŸ‘‰ This resting time helps the flavors blend beautifully.


❓Q/A

❓Can I store this salad?

βœ… Yes, keep it in the fridge for up to 2 days.

❓Can I make it spicy?

βœ… Yes! Add chili flakes or black pepper for extra heat 🌢️


🌟 Tips

  • Use cold cucumbers for the freshest taste.
  • Fresh lemon juice tastes much better than bottled juice.
  • Serve chilled for the best flavor β˜€οΈ

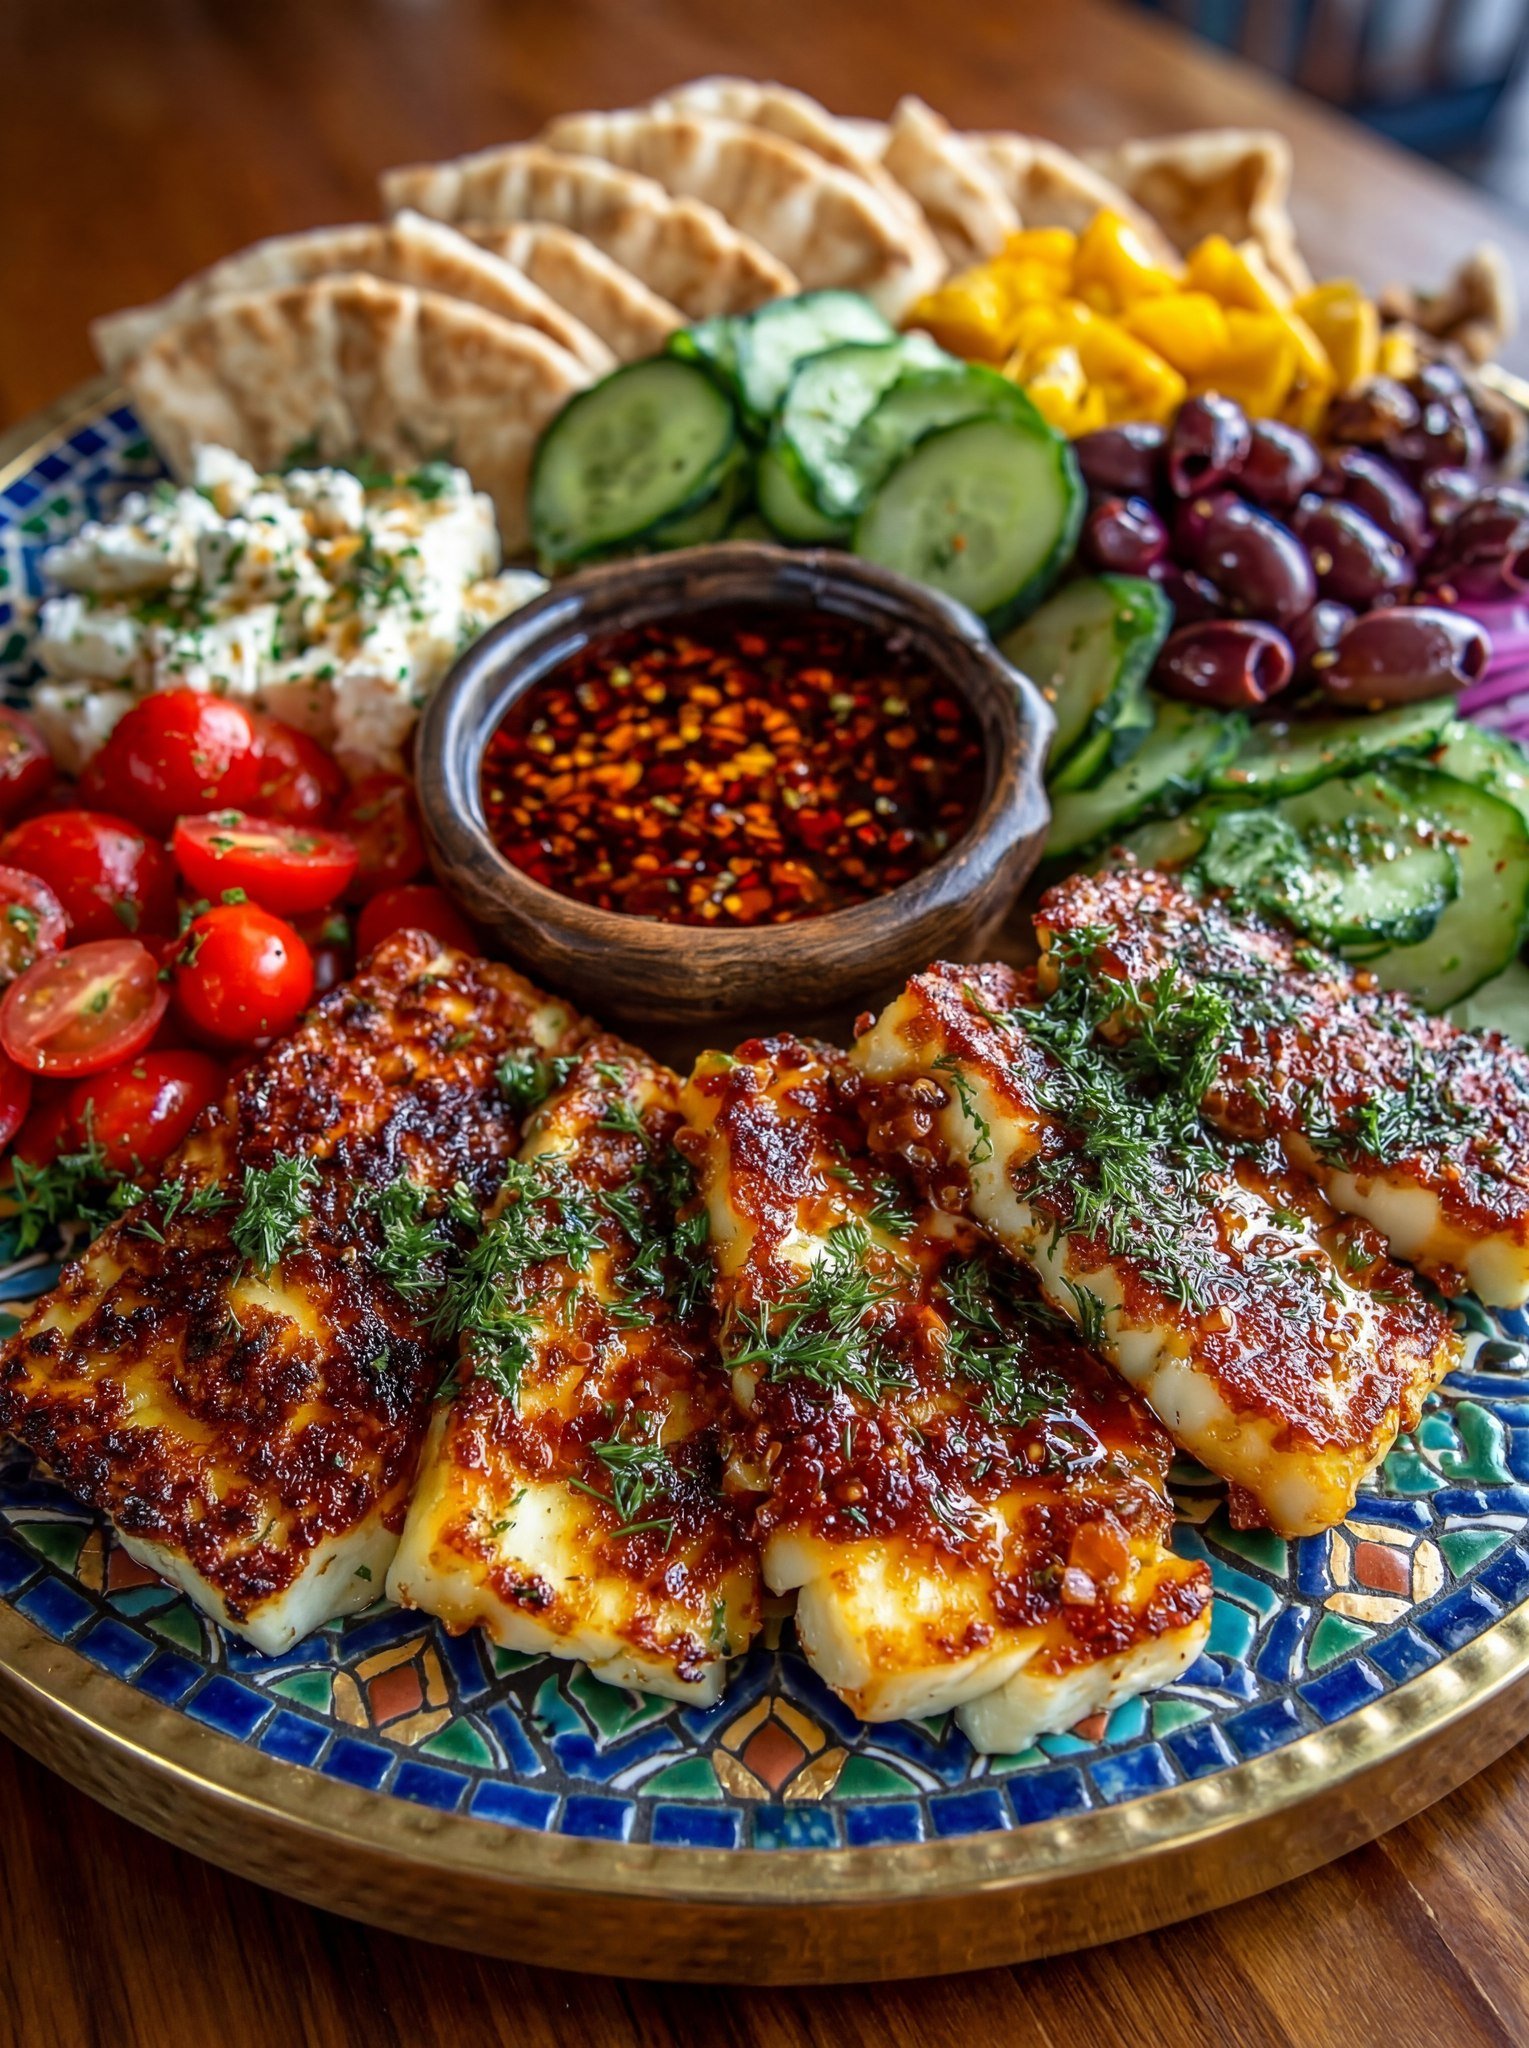
Spicy Mediterranean Glazed Fish Platter

Spicy Mediterranean Glazed Fish Platter

This colorful Mediterranean fish platter is packed with bold flavors, fresh vegetables, creamy cheese, and a spicy garlic sauce 🌢️🐟✨
Perfect for lunch, dinner, or party platters!

πŸ›’ Ingredients

For the Fish

  • 4 fish fillets (cod, tilapia, or white fish)
  • 2 tbsp olive oil
  • 2 garlic cloves (minced)
  • 1 tsp paprika
  • Β½ tsp chili flakes
  • Salt & black pepper

For the Platter

  • Cherry tomatoes
  • Sliced cucumbers
  • Kalamata olives
  • Feta cheese
  • Pita bread
  • Fresh parsley or dill

Sauce

  • 2 tbsp olive oil
  • 1 tbsp lemon juice
  • 1 tsp chili flakes
  • 1 garlic clove

πŸ‘©β€πŸ³ Instructions

🐟 Step 1: Season the Fish

  • Pat fish dry with paper towel.
  • Rub with olive oil, garlic, paprika, chili flakes, salt, and pepper.

πŸ”₯ Step 2: Cook the Fish

  • Heat a pan over medium heat.
  • Cook fish for 3–4 minutes per side until golden and flaky.
  • Brush with extra spicy sauce while cooking for glossy flavor 😍

πŸ₯— Step 3: Prepare the Sides

  • Slice cucumbers and tomatoes.
  • Arrange olives, feta cheese, and pita bread on a large platter.

✨ Step 4: Make the Sauce

  • Mix olive oil, lemon juice, garlic, and chili flakes in a bowl.

🌿 Step 5: Assemble

  • Place cooked fish onto the platter.
  • Drizzle sauce over the fish.
  • Garnish with parsley or dill.

πŸ’‘ Tips

  • Use fresh white fish for best flavor.
  • Add hummus or tzatziki on the side.
  • Warm pita bread before serving.

🌟 Nutritional Benefits

  • High in protein πŸ’ͺ
  • Rich in omega-3 nutrients 🐟
  • Fresh vegetables provide fiber and vitamins πŸ₯’πŸ…

❓Q/A

❓Can I bake the fish instead?

βœ… Yes! Bake at 200Β°C (400Β°F) for 12–15 minutes.

❓What fish works best?

βœ… Cod, tilapia, halibut, or salmon all work great.

❓Can I make it less spicy?

βœ… Absolutely! Reduce the chili flakes.

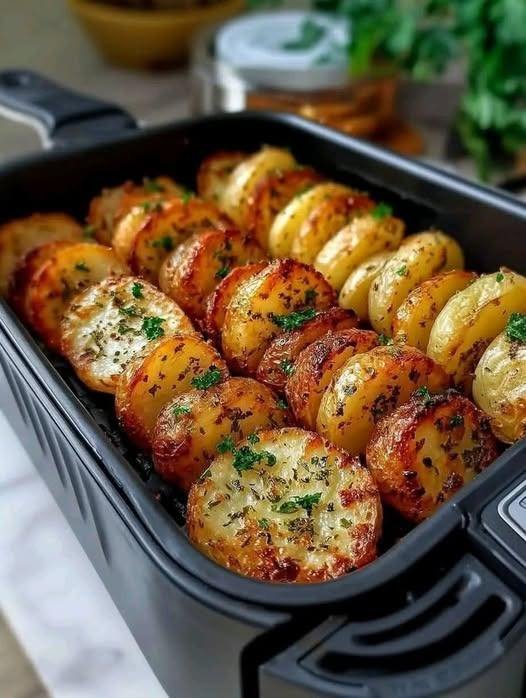
Crispy Garlic Parmesan Potatoes

Crispy Garlic Parmesan Potatoes

These crispy sliced potatoes are golden on the outside, soft inside, and packed with buttery garlic flavor. Perfect for air fryer or oven snacks! 😍

πŸ›’ Ingredients

  • 10–12 small potatoes
  • 3 tbsp butter (melted)
  • 3 garlic cloves (minced)
  • Β½ tsp salt
  • Β½ tsp black pepper
  • 1 tsp Italian seasoning
  • ΒΌ cup grated Parmesan cheese
  • Fresh parsley for garnish

πŸ‘©β€πŸ³ Instructions

πŸ₯” Step 1: Prepare the Potatoes

  • Wash the potatoes well.
  • Slice each potato halfway down into thin layers (don’t cut fully through).
  • This helps them become crispy and fan-like while cooking.

πŸ§„ Step 2: Make Garlic Butter

  • In a bowl, mix:
    • Melted butter
    • Garlic
    • Salt
    • Black pepper
    • Italian seasoning

✨ Step 3: Coat the Potatoes

  • Brush the garlic butter mixture all over the potatoes.
  • Try to get some butter between the slices too for extra flavor.

πŸ§€ Step 4: Add Parmesan

  • Sprinkle Parmesan cheese generously over the potatoes.

πŸ”₯ Step 5: Cook

Air Fryer:

  • Preheat to 180Β°C (350Β°F).
  • Cook for 18–22 minutes until crispy and golden.

Oven:

  • Bake at 200Β°C (400Β°F) for 30–35 minutes.

🌿 Step 6: Garnish & Serve

  • Sprinkle fresh parsley on top.
  • Serve hot with ketchup, garlic sauce, or sour cream. πŸ˜‹

πŸ’‘ Tips

  • Use baby potatoes for the best crispy texture.
  • Add chili flakes for a spicy version.
  • Don’t skip the Parmesan β€” it creates a crispy cheesy crust!

❓Q/A

❓Can I make these without Parmesan?

βœ… Yes, but Parmesan adds extra crispiness and flavor.

❓How do I keep them crispy?

βœ… Serve immediately after cooking while hot.

❓Can I store leftovers?

βœ… Yes, refrigerate and reheat in the air fryer for 3–4 minutes.

Crispy Cheesy Zucchini Cups

πŸ§€ Crispy Cheesy Zucchini Cups

These golden zucchini cups are cheesy, creamy, and perfectly crispy around the edges 😍 A delicious low-carb snack, appetizer, or side dish that’s easy to make and packed with flavor!

πŸ›’ Ingredients

  • 2 medium zucchini, grated πŸ₯’
  • 1 cup shredded mozzarella cheese πŸ§€
  • Β½ cup grated Parmesan cheese
  • 2 eggs πŸ₯š
  • 2 cloves garlic, minced
  • 2 tbsp chopped green onions 🌿
  • Β½ tsp Italian seasoning
  • Salt & black pepper to taste πŸ§‚
  • Butter or oil for greasing muffin tin

πŸ‘©β€πŸ³ Instructions

πŸ₯’ 1. Prep the Zucchini

Grate the zucchini and squeeze out as much moisture as possible using a clean towel.

➑️ Removing excess water helps the cups become crispy instead of soggy.


πŸ§€ 2. Make the Mixture

In a bowl, combine:

  • Grated zucchini
  • Mozzarella cheese
  • Parmesan cheese
  • Eggs
  • Garlic
  • Green onions
  • Italian seasoning
  • Salt & pepper

Mix until fully combined.


🧁 3. Fill the Muffin Tin

Grease a muffin tin lightly with butter or oil.

Spoon the mixture evenly into each cup and gently press down.


πŸ”₯ 4. Bake

Bake at 190Β°C (375Β°F) for 20–25 minutes or until golden brown and crispy on top.

✨ For extra crispiness, broil for 1–2 minutes at the end.


🍽️ 5. Serve

Let cool slightly before removing from the muffin tin.

Serve warm with sour cream, garlic yogurt dip, or marinara sauce πŸ˜‹


πŸ’‘ Tips for Best Results

βœ… Squeeze zucchini very well
βœ… Use freshly shredded cheese for better melting
βœ… Don’t overfill muffin cups
βœ… Add chili flakes for a spicy kick 🌢️


🌟 Variations

πŸ₯“ Loaded Version

Add cooked turkey bacon bits or sautΓ©ed onions.

🌢️ Spicy Cheesy Cups

Mix in jalapeΓ±os or red pepper flakes.

πŸ§„ Garlic Herb Style

Add extra garlic and fresh parsley.


❓FAQ

Can I make them ahead?

Yes! Store in the fridge for up to 3 days and reheat in the oven or air fryer.

Can I freeze them?

Absolutely β€” freeze in an airtight container for up to 2 months.

Why are my zucchini cups watery?

The zucchini likely wasn’t drained enough before mixing.

Air Fryer Grilled Cheese Sandwich

Air Fryer Grilled Cheese Sandwich

Golden, crispy bread with perfectly melted gooey cheese inside β€” this air fryer grilled cheese is the easiest way to make a classic comfort food in minutes! ✨πŸ₯ͺ

πŸ›’ Ingredients

  • 2 slices bread 🍞
  • 2 slices cheese (cheddar, mozzarella, American, or your favorite) πŸ§€
  • 1–2 tsp softened butter or mayonnaise
  • Optional: garlic powder, black pepper, Italian herbs 🌿

πŸ‘©β€πŸ³ Instructions

🍞 1. Prepare the Bread

Spread butter or mayonnaise evenly on one side of each bread slice.

➑️ Butter/mayo sides should face outward for a crispy golden crust.


πŸ§€ 2. Assemble the Sandwich

Place cheese slices between the unbuttered sides of the bread.

✨ Mix cheddar + mozzarella for extra flavor and stretchiness!


πŸ”₯ 3. Preheat the Air Fryer

Preheat air fryer to 180Β°C (350Β°F) for 2–3 minutes.


πŸ₯ͺ 4. Air Fry

Place sandwich in the air fryer basket in a single layer.

Cook for 5–7 minutes, flipping halfway through for even browning.

βœ”οΈ Bread should be crispy and golden
βœ”οΈ Cheese should be fully melted


βœ‚οΈ 5. Rest & Serve

Remove carefully and let rest for 1 minute before slicing.

Serve hot with soup, fries, or your favorite dipping sauce 😍


πŸ’‘ Tips for the Best Grilled Cheese

βœ… Use sourdough or thick bread for extra crunch
βœ… Shredded cheese melts faster
βœ… Don’t overfill or cheese may leak out
βœ… Mayo gives an extra crispy crust
βœ… Lower the temperature slightly if cheese isn’t melting properly


🌟 Delicious Variations

πŸ§„ Garlic Parmesan

Add garlic powder and sprinkle Parmesan on the outside.

🌢️ Spicy Melt

Add jalapeΓ±os or chili flakes for heat.

πŸ… Pizza Style

Add mozzarella + pepperoni + Italian seasoning.

πŸ₯“ Loaded Sandwich

Add cooked turkey bacon or caramelized onions.


πŸ“Š Approximate Nutrition (Per Sandwich)

  • Calories: 320–420 kcal
  • Protein: 12–18 g
  • Carbohydrates: 25–35 g
  • Fat: 18–25 g
  • Fiber: 1–3 g

❓FAQ

Can I use any bread?

Yes! White, whole wheat, brioche, and sourdough all work well.

Which cheese melts best?

Cheddar, mozzarella, American cheese, provolone, or a combination.

Why isn’t my sandwich crispy?

Try adding a little more butter/mayo or cook 1–2 minutes longer.

Can I make multiple sandwiches?

Absolutely! Just avoid overcrowding the basket.

Can I make it vegan?

Yes β€” use dairy-free cheese and vegan butter. 🌱

The Ultimate Air Fryer Cauliflower

πŸ₯¦ The Ultimate Air Fryer Cauliflower

Crispy on the outside, tender on the inside, and packed with flavor β€” this easy air fryer cauliflower is the perfect healthy snack, side dish, or appetizer! ✨

πŸ›’ Ingredients

  • 1 medium head cauliflower, cut into bite-sized florets πŸ₯¦
  • 2 tbsp olive oil πŸ«’
  • 1 tsp garlic powder
  • Β½ tsp onion powder
  • Β½ tsp paprika
  • Salt & black pepper to taste πŸ§‚
  • Optional: Parmesan cheese, lemon wedges, fresh parsley πŸ‹πŸŒΏ

πŸ‘©β€πŸ³ How to Make It

πŸ”₯ 1. Preheat the Air Fryer

Set your air fryer to 375Β°F (190Β°C) and let it preheat for 3–5 minutes.


πŸ₯¦ 2. Prep the Cauliflower

Wash and thoroughly dry the cauliflower florets using a clean towel or paper towel.
➑️ Dry florets = extra crispiness!

Cut into evenly sized pieces for even cooking.


🌟 3. Season

In a large bowl, toss the cauliflower with:

  • Olive oil
  • Garlic powder
  • Onion powder
  • Paprika
  • Salt & pepper

Mix until every floret is well coated.


🍽️ 4. Air Fry

Place florets in a single layer in the air fryer basket.
β›” Don’t overcrowd the basket.

Cook for 15–20 minutes, shaking the basket halfway through at the 10-minute mark.

βœ”οΈ Edges should be golden brown and crispy.


πŸ§€ Flavor Variations

πŸ₯― Everything Bagel Style

Add Everything Bagel seasoning and finish with fresh lemon juice.

πŸ§„ Steakhouse Style

Use extra garlic powder and sprinkle Parmesan cheese during the last 2 minutes.

🌢️ Firecracker Style

Add smoked paprika + cayenne pepper for spicy heat.

🦬 Buffalo Style

Cook with only oil, salt, and pepper, then toss in Buffalo sauce after air frying.


♨️ Reheating Tips

To bring leftovers back to life:

  • Air fry at 350Β°F (175Β°C) for 3–5 minutes
  • Avoid microwaving if you want to keep them crispy

πŸ’‘ Crispy Checklist

βœ… Dry the cauliflower well
βœ… Keep florets similar in size
βœ… Leave space between pieces while cooking


❓FAQ

Can I use frozen cauliflower?

Yes! Just thaw and pat dry first for the crispiest results.

How do I make it extra crispy?

Add 1–2 tbsp cornstarch before air frying for an even crunchier texture.

What can I serve with it?

It pairs perfectly with ranch, garlic yogurt dip, spicy mayo, or hummus. 😍

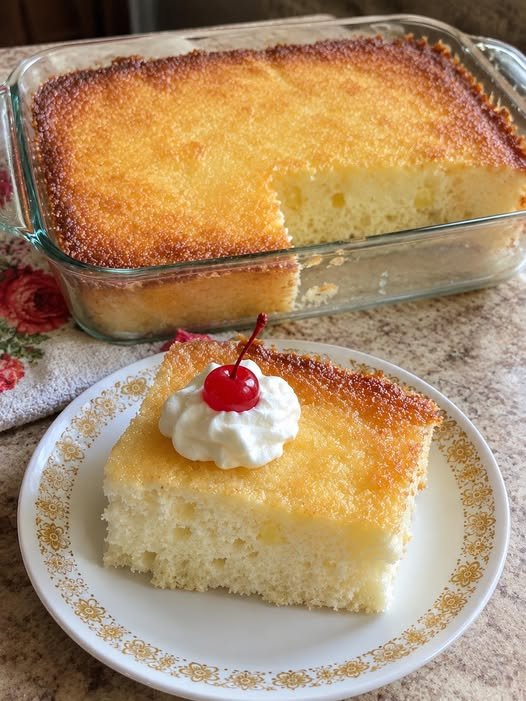
Classic Buttermilk Cake

Classic Buttermilk Cake

This soft and buttery buttermilk cake has a golden crispy top with a light, moist center. It’s simple, comforting, and perfect with coffee or tea.

Ingredients

  • 2 cups all-purpose flour
  • 1 cup sugar
  • 1 tsp baking powder
  • Β½ tsp baking soda
  • Β½ tsp salt
  • 1 cup buttermilk
  • 2 eggs
  • Β½ cup melted butter
  • 1 tsp vanilla extract

Optional Topping

  • Whipped cream
  • Cherries

Instructions

Step 1: Prepare the Batter

Preheat oven to 350Β°F (175Β°C).

Grease a baking dish lightly.

In a large bowl, combine:

  • Flour
  • Sugar
  • Baking powder
  • Baking soda
  • Salt

Add:

  • Buttermilk
  • Eggs
  • Melted butter
  • Vanilla extract

Mix until smooth.


Step 2: Bake

Pour batter into the prepared baking dish.

Bake for 30–35 minutes until the top is golden brown and a toothpick inserted in the center comes out clean.


Step 3: Cool and Serve

Let the cake cool for 10–15 minutes.

Slice and serve plain or top with whipped cream and cherries.


Tips

  • Do not overmix the batter or the cake may become dense.
  • Serve warm for the best flavor.
  • A light dusting of powdered sugar works well as a topping.

Q/A

Can I use regular milk instead of buttermilk?

Yes. Add 1 tablespoon lemon juice or vinegar to 1 cup milk and let it sit for 5 minutes.

How should leftovers be stored?

Store covered at room temperature for up to 2 days or refrigerate for up to 5 days.

Can this cake be frozen?

Yes. Wrap slices tightly and freeze for up to 2 months.

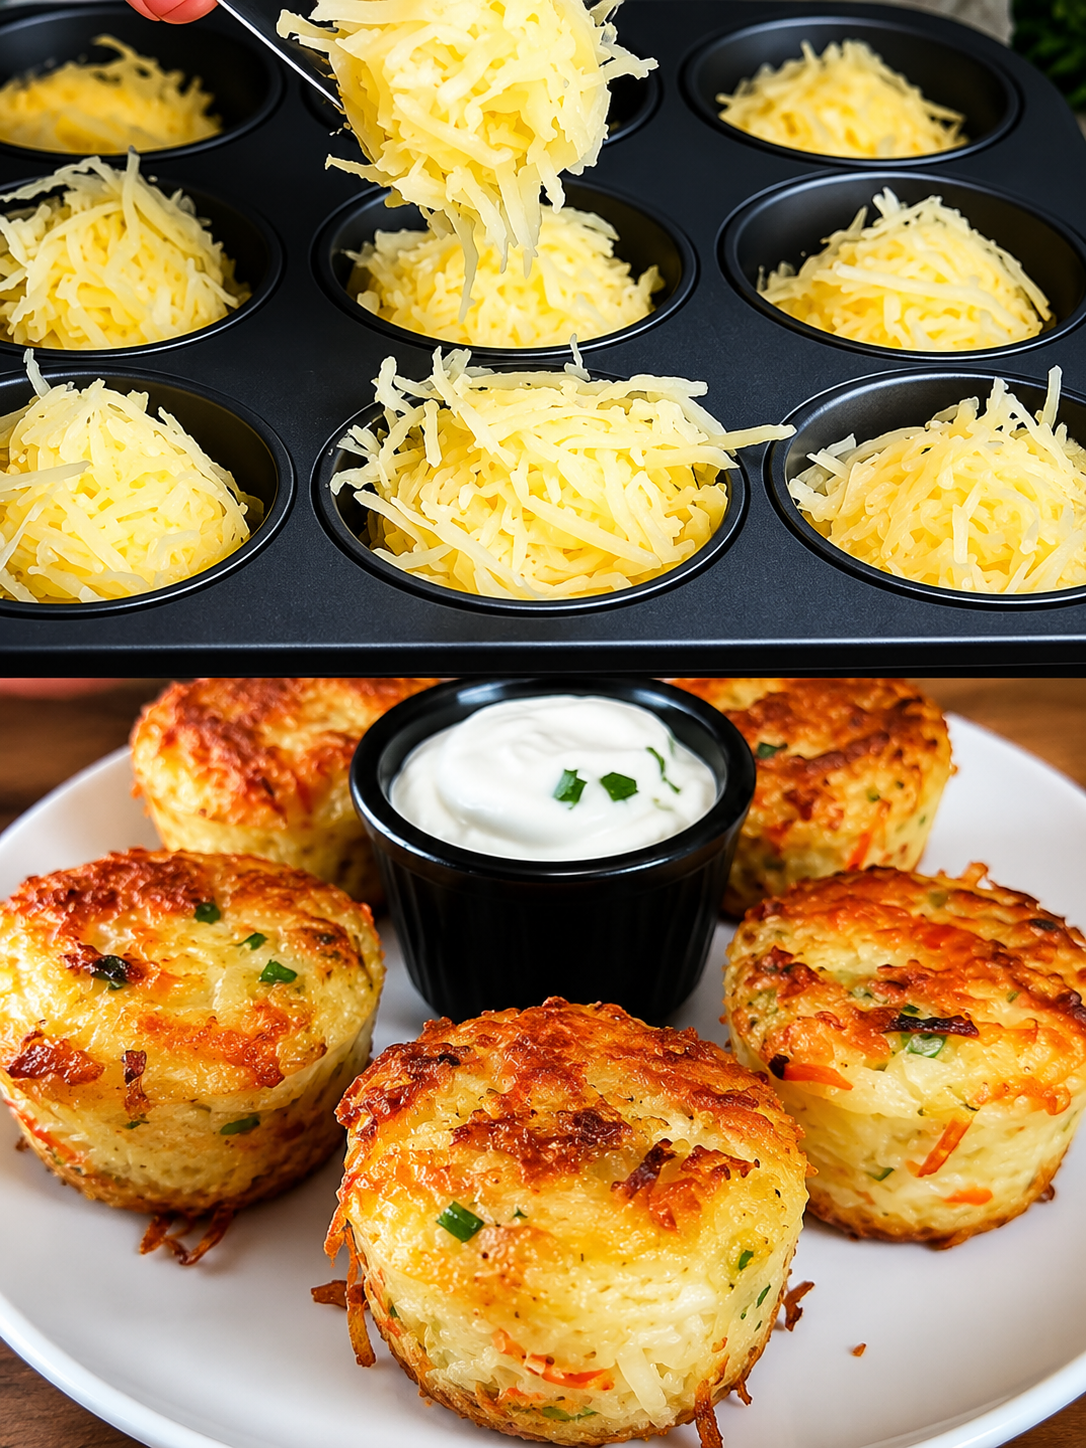
Crispy Cheesy Potato Muffins

Crispy Cheesy Potato Muffins

These crispy potato muffins are cheesy on the outside, soft inside, and perfect as a snack or side dish 😍 Served with a creamy dip for extra flavor!


πŸ›’ Ingredients

  • 3 cups potatoes, grated πŸ₯”
  • 1 cup mozzarella or cheddar cheese πŸ§€
  • 1 egg
  • 2 tbsp flour
  • 2 green onions, chopped
  • Salt & black pepper
  • Oil or butter for greasing

πŸ‘©β€πŸ³ Instructions

πŸ₯” 1. Prepare the Potatoes

Peel and grate the potatoes using a grater.

Place the grated potatoes in a clean towel and squeeze out as much water as possible.

➑️ Removing extra water helps the muffins become crispy.


πŸ₯£ 2. Make the Mixture

In a large bowl, add:

  • Grated potatoes
  • Cheese
  • Egg
  • Flour
  • Green onions
  • Salt & pepper

Mix everything well until fully combined.

➑️ The mixture should hold together when pressed with a spoon.


🧁 3. Fill the Muffin Tray

Grease a muffin tray lightly with oil or butter.

Scoop the potato mixture into each muffin cup and press gently.

➑️ Fill each cup almost to the top.


πŸ”₯ 4. Bake

Preheat oven to 200Β°C (400Β°F).

Bake for 30–35 minutes until the tops become golden brown and crispy.

➑️ The edges should look crispy and cheesy.


✨ 5. Serve

Let them cool for 5 minutes before removing from the tray.

Serve warm with sour cream, garlic sauce, or ketchup πŸ˜‹


πŸ’‘ Tips

βœ… Squeeze potatoes well for extra crispiness.
βœ… Add chili flakes for spicy flavor 🌢️
βœ… Use parmesan cheese for a richer taste.


❓ Q/A

❓Can I make these without flour?

➑️ Yes! You can use cornstarch instead.

❓Can I fry them instead of baking?

➑️ Yes, shape into patties and fry until golden.

❓How do I store leftovers?

➑️ Keep in the fridge for up to 2 days and reheat in the oven.

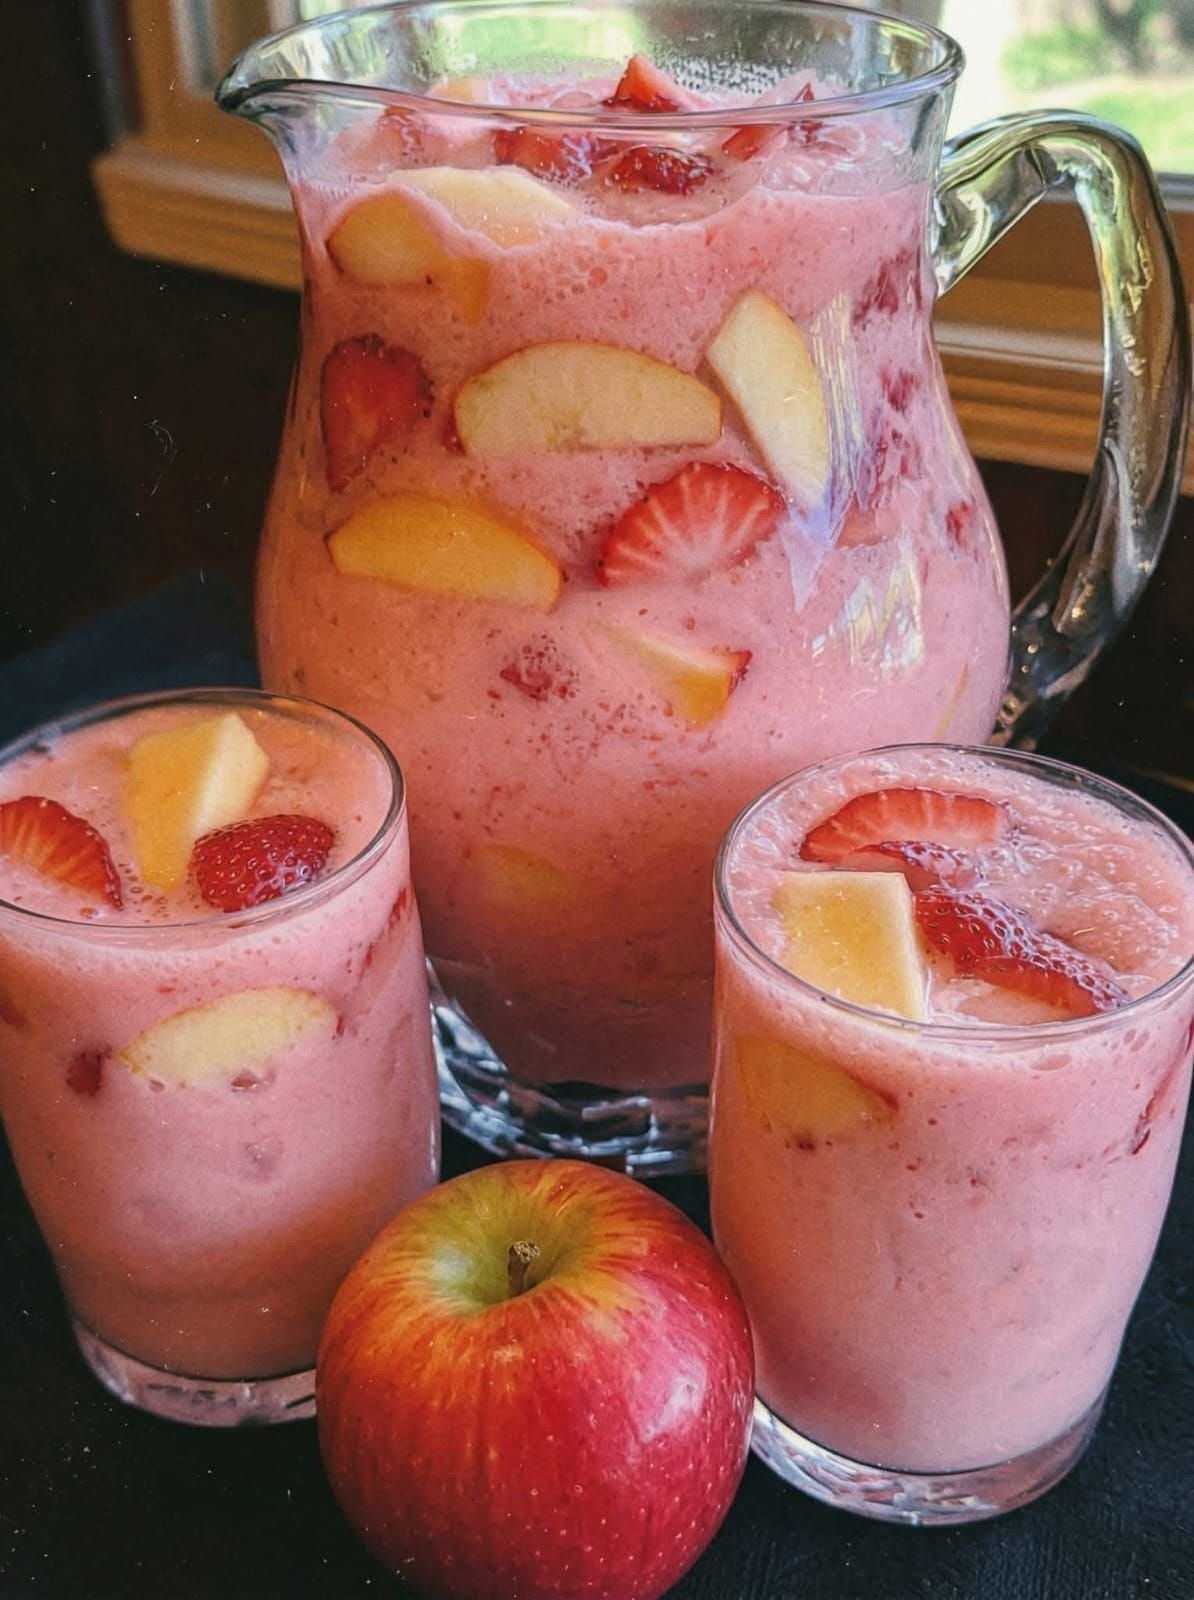
Creamy Strawberry Apple Fruit Drink

πŸ“πŸŽ Creamy Strawberry Apple Fruit Drink

πŸ›’ Ingredients

➑️ 2 cups strawberries, chopped
➑️ 2 apples, thinly sliced
➑️ 3 cups chilled milk
➑️ 1 cup yogurt
➑️ 3–4 tbsp honey or sugar
➑️ ½ cup ice cubes
➑️ Extra strawberry and apple pieces for topping


πŸ‘©β€πŸ³ Step-by-Step Recipe

1️⃣ Prepare the fruits

➑️ Wash strawberries and apples well.
➑️ Chop strawberries into small pieces.
➑️ Slice apples thinly.

2️⃣ Blend the base

➑️ Add 1½ cups strawberries to a blender.
➑️ Add milk, yogurt, honey, and ice cubes.
➑️ Blend until smooth and creamy.

3️⃣ Add fruit pieces

➑️ Pour the blended drink into a large jug.
➑️ Add remaining chopped strawberries.
➑️ Add apple slices.
➑️ Stir gently.

4️⃣ Chill the drink

➑️ Place the jug in the fridge for 20–30 minutes.
➑️ This makes the drink colder and more refreshing.

5️⃣ Serve

➑️ Pour into glasses.
➑️ Add extra strawberry and apple pieces on top.
➑️ Serve chilled and enjoy! πŸ˜‹


βœ… Tips

➑️ Use cold milk for best taste.
➑️ Add banana for a thicker texture.
➑️ Use Greek yogurt for extra creaminess.
➑️ Adjust sweetness according to taste.
➑️ Serve immediately for fresh flavor.


❓Q/A

Q: Can I use frozen strawberries?
➑️ Yes, frozen strawberries work well and make the drink colder.

Q: Can I make it without yogurt?
➑️ Yes, use only milk or add a little cream.

Q: Can I prepare it ahead of time?
➑️ Yes, keep it chilled and stir before serving.

Q: Can I use other fruits?
➑️ Yes, banana, peach, or mango taste great too.

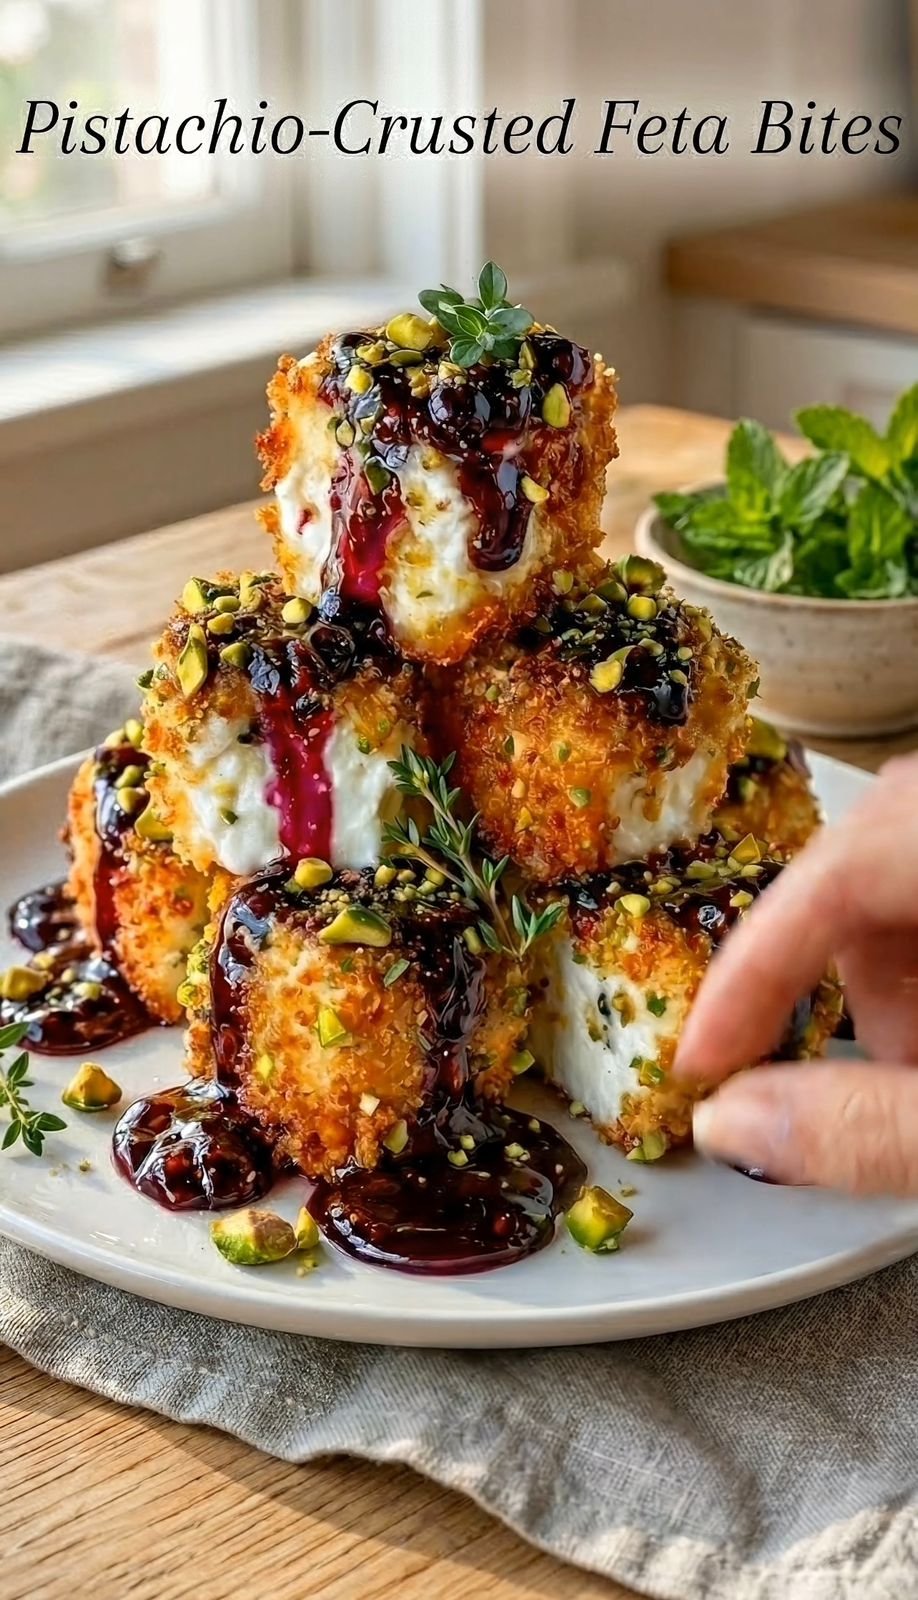
Crispy Pistachio-Crusted Feta Bites

Crispy Pistachio-Crusted Feta Bites

πŸ›’ Ingredients

  • Block Feta Cheese: 1 large block (around 7 to 8 ounces), cut into even squares or cubes πŸ§€

  • Shelled Pistachios: 0.5 cup, very finely chopped or pulsed in a food processor πŸ’š

  • Panko Breadcrumbs: 0.5 cup (Gives it that ultimate crispy crunch!) 🌾

  • All-Purpose Flour: 0.25 cup 🌾

  • Eggs: 2 large eggs, beaten πŸ₯š

  • Cooking Oil: For shallow frying (like vegetable or avocado oil) πŸ«—

  • Sweet Drizzle: 0.25 cup of hot honey, fig jam, or a warm berry reduction (as seen in the photo) πŸ―πŸ’

  • Fresh Herbs: A few sprigs of fresh thyme or mint for a beautiful garnish 🌿


πŸ“ Step-by-Step Instructions

  1. Prep the Feta: ➑️ Carefully cut your block of feta into bite-sized cubes. ➑️ Pat them completely dry with a paper towel. Tip: Keeping them dry helps the coating stick perfectly! πŸ§»πŸ§€

  2. Set Up Your Coating Station: ➑️ Grab three shallow bowls.

  • Bowl 1: Place the 0.25 cup of flour inside.

  • Bowl 2: Whisk your 2 eggs until smooth.

  • Bowl 3: Mix together the 0.5 cup of finely chopped pistachios and 0.5 cup of Panko breadcrumbs. πŸ₯£πŸ₯£πŸ₯£

  1. Coat the Bites: ➑️ Take a feta cube and roll it gently in the flour, shaking off any excess. ➑️ Dip it completely into the beaten egg. ➑️ Roll it generously into the pistachio-Panko mixture, pressing firmly so the crust coats all sides evenly. ➑️ Pro-Tip: Dip it back into the egg and into the pistachio mixture a second time for an extra-thick, fail-proof crust! πŸ”„πŸ”‹

  2. Chill Time: ➑️ Place the coated feta bites on a plate and pop them into the freezer for 10 to 15 minutes. This ensures the cheese stays firm and doesn’t melt everywhere when fried! πŸ₯Άβ„️

  3. Fry Until Golden: ➑️ Heat about 0.5 inches of oil in a skillet over medium-high heat. ➑️ Carefully add the chilled feta bites in small batches. ➑️ Fry for about 1 to 2 minutes per side, turning gently with tongs, until the crust is a gorgeous golden brown. 🍳πŸ”₯

  4. Drain and Stack: ➑️ Remove the bites from the oil and let them drain on a plate lined with paper towels for just 1 minute. ➑️ Stack them up high on your serving platter just like the picture! πŸ₯žπŸ“Έ

  5. The Final Touch: ➑️ Drizzle your warm hot honey, berry reduction, or fig jam right over the top so it cascades down the sides. ➑️ Scatter a few extra chopped pistachios and fresh herbs on top. Serve immediately while warm and melty! πŸ―πŸ’βœ¨


❓ Common Questions & Answers

Q: Can I bake these or make them in the air fryer instead of frying?

A: Yes! To air-fry them, spritz the coated, chilled bites generously with oil spray. Air-fry at $400^{\circ}\text{F}$ ($204^{\circ}\text{C}$) for about 5 to 7 minutes until crisp. Keep a close eye on them so the cheese doesn’t break through the crust! πŸ’¨πŸŸ

Q: My feta cubes are crumbling when I try to cut or coat them. What should I do?

A: Make sure you use a high-quality, firm block of feta (sheep’s milk feta works beautifully). Keeping the cheese very cold right out of the fridge before slicing also helps prevent crumbling. ❄️πŸ”ͺ

Q: What is the best sweet topping to use for the drizzle?

A: Hot honey gives it an incredible sweet-and-spicy kick! If you want a fruity look exactly like the photo, warm up some raspberry, blackberry, or fig jam with a tiny splash of water in a small pan until it becomes a pourable glaze. πŸ‡πŸ―

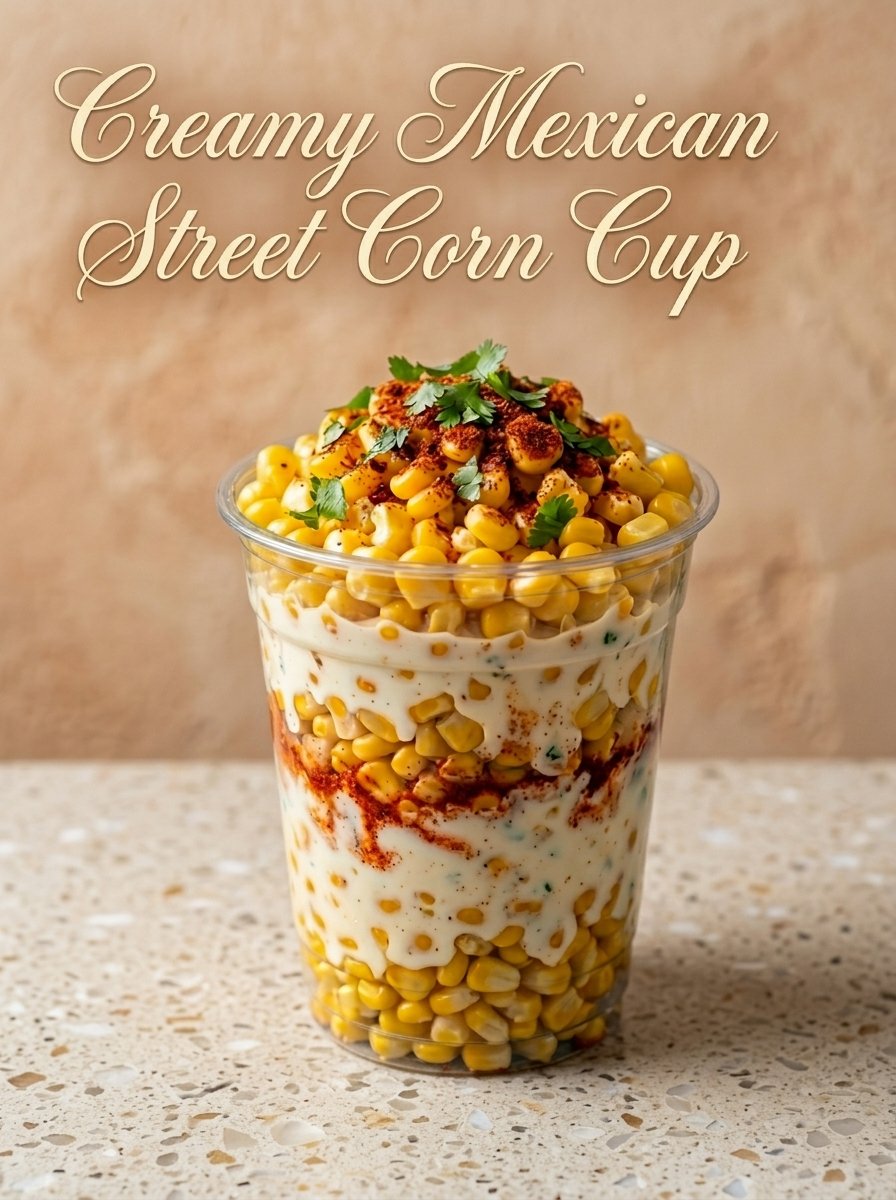
Creamy Mexican Street Corn CupsΒ 

🌽 Creamy Mexican Street Corn Cups

Sweet, smoky corn coated in a creamy chili-lime sauce and topped with cheese β€” this easy Mexican-inspired snack is bursting with flavor in every bite! πŸ§€πŸ‹βœ¨

πŸ›’ Ingredients

  • 🌽 4 cups corn kernels
  • 🧈 2 tbsp butter
  • πŸ₯„ ΒΌ cup mayonnaise
  • πŸ₯› ΒΌ cup sour cream
  • πŸ§€ Β½ cup Cotija or feta cheese, crumbled
  • πŸ§„ 1 garlic clove, minced
  • πŸ‹ 2 tbsp lime juice
  • 🌢️ 1 tsp chili powder or TajΓ­n
  • 🌿 ΒΌ cup chopped cilantro
  • πŸ§‚ Salt to taste
  • πŸ‘©β€πŸ³ Instructions

    1️⃣ Char the Corn

    ➑️ Melt butter in a skillet over medium-high heat.
    ➑️ Add corn and cook for 8–10 minutes until lightly charred and golden. 🌽πŸ”₯

    2️⃣ Make the Creamy Sauce

    ➑️ In a bowl, mix mayonnaise, sour cream, garlic, lime juice, chili powder, and salt. πŸ₯„πŸ‹

    3️⃣ Combine Everything

    ➑️ Add the warm corn to the sauce.
    ➑️ Stir in most of the cheese and cilantro until creamy and well coated. πŸŒΏπŸ§€

    4️⃣ Assemble the Cups

    ➑️ Spoon the corn mixture into serving cups.
    ➑️ Sprinkle extra chili powder, cheese, and cilantro on top. 🌢️✨

    5️⃣ Serve & Enjoy

    ➑️ Serve warm with lime wedges and enjoy every creamy, smoky bite! πŸ‹πŸ₯„

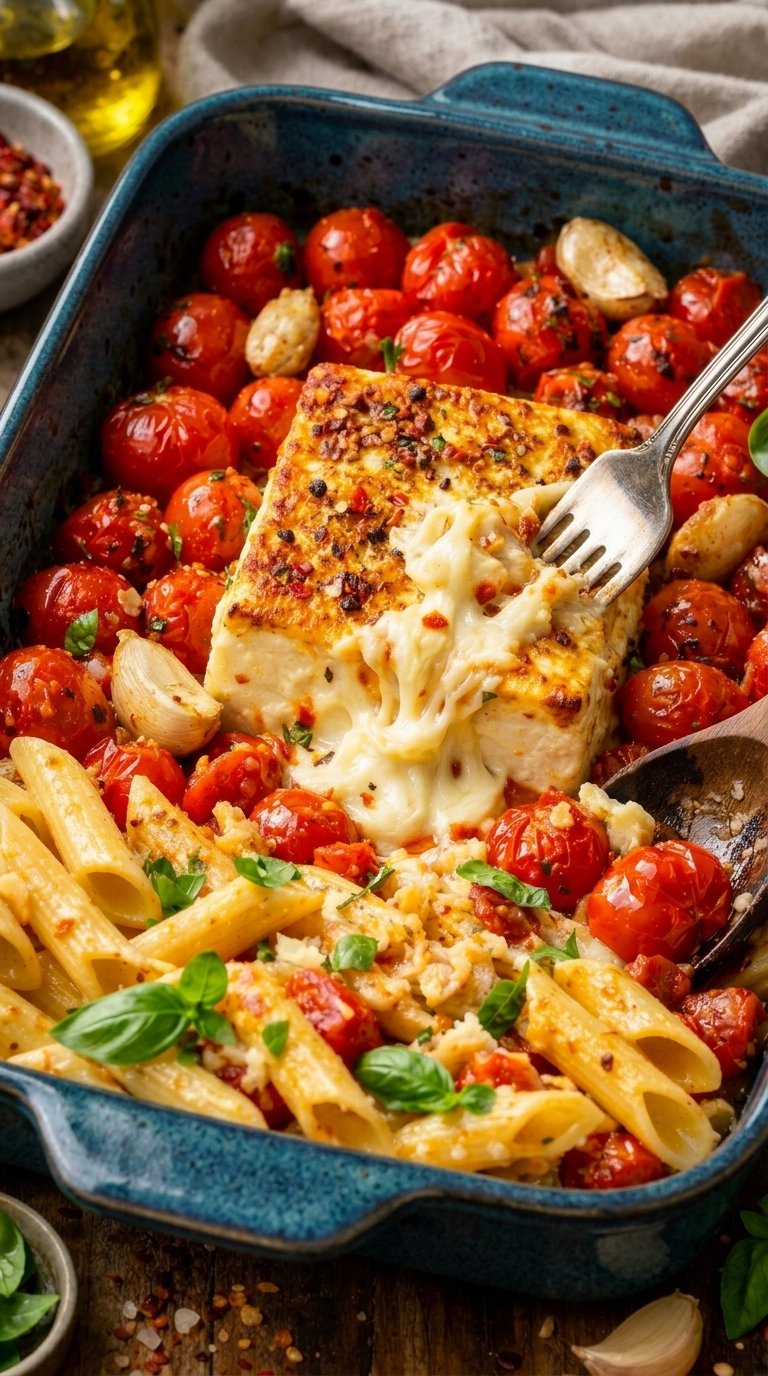
The Viral 4-Ingredient Baked Feta Pasta Recipe


🍝 The Viral 4-Ingredient Baked Feta Pasta Recipe

πŸ›’ Ingredients

  • Cherry or Grape Tomatoes: 2 pints (approx. 4 cups) πŸ…

  • Block Feta Cheese: 1 (7 to 8-ounce) block (Go for Greek sheep’s milk feta for maximum melt!) πŸ§€

  • Extra Virgin Olive Oil: 0.5 cup πŸ«’

  • Dry Pasta: 1 pound (16 oz), like penne or rigatoni 🌾

  • Fresh Garlic Cloves: 3 to 4, peeled and smashed πŸ§„

  • Red Chili Flakes: 1 teaspoon (or more if you like it spicy! πŸ”₯)

  • Fresh Basil: 1 large bunch, chopped πŸƒ

  • Salt & Pepper: to taste πŸ§‚


πŸ“ Step-by-Step Instructions

  1. Preheat Your Oven: ➑️ Set your oven to $400^{\circ}\text{F}$ ($200^{\circ}\text{C}$). 🌑️

  2. Tomato Prep: ➑️ Place the cherry tomatoes, garlic cloves, and 0.25 cup of the olive oil in a large 9×13-inch baking dish. ➑️ Toss with half of the chili flakes, salt, and pepper. πŸ§‚πŸŒͺ️

  3. Center the Feta: ➑️ Nestle the block of feta cheese right in the center of the tomatoes. ➑️ Drizzle the top of the feta with the remaining 0.25 cup of olive oil, and sprinkle with the rest of the chili flakes. πŸ§€πŸ«’

  4. Bake Until Bubbly: ➑️ Roast in the oven for 30 to 35 minutes, or until the tomatoes have burst and the feta looks soft, slightly melty, and golden-brown on the edges. ➑️ For a more caramelized top (like in the picture!), switch to broil for 2–3 minutes at the very end. πŸ’‘πŸ”₯

  5. Boil the Pasta: ➑️ While the feta bakes, cook your pasta in a pot of heavily salted water according to package directions. ➑️ Crucial Step: Before draining, save 1 full cup of the starchy pasta water! πŸŒΎπŸ’§

  6. The Magic Stir: ➑️ Remove the baking dish from the oven. ➑️ Take your fork and/or wooden spoon (just like the photo!) and immediately mash and stir the baked feta and burst tomatoes together until a incredibly creamy, uniform sauce forms. πŸ₯„πŸŒͺ️

  7. Combine: ➑️ Add the cooked pasta directly to the sauce. ➑️ Fold in the chopped fresh basil. ➑️ Slowly stir in some of the reserved pasta water (about 0.25 to 0.5 cup) until the sauce is the perfect, luxurious consistency and clings to the pasta. 🌾✨

  8. Serve Immediately: ➑️ Garnish with more basil and a crack of black pepper. Enjoy that creamy, tangy perfection! 🍝❀️


❓ Common Questions & Answers

Q: Can I use crumbled feta instead of a block?

A: It works, but it won’t be nearly as creamy! Crumbled feta has non-caking agents that prevent it from melting properly. The solid block is the secret to that luscious sauce. πŸ§€

Q: My sauce is too thick. How do I fix it?

A: This is why we save that pasta water! Add an extra splash of the reserved starchy water to loosen it up and make it perfectly creamy. πŸ’§

Q: Can I add extra proteins to this?

A: Yes! It’s delicious with chicken or shrimp, but cook those separately and fold them in at the end to keep the dish simple. πŸ”πŸ¦

2-Ingredient Pineapple Soft Serve Recipe

🍦 2-Ingredient Pineapple Soft Serve Recipe

πŸ›’ Ingredients

  • Frozen Pineapple Chunks: 1 to 1.5 cups (Ensure they are completely frozen) 🧊

  • Liquid Base: 0.25 cup to 0.35 cup of your choice (e.g., coconut milk, regular milk, pineapple juice, or water) πŸ₯›


πŸ“ Step-by-Step Instructions

  1. Prep Your Blender: ➑️ Place your frozen pineapple chunks into a small blender or food processor. πŸŒͺ️

  2. Add the Liquid: ➑️ Pour in about 0.25 cup of your chosen liquid base. Tip: Start with less liquid to keep the texture thick and soft-serve-like. πŸ₯₯

  3. Blend and Blend: ➑️ Secure the lid and blend on high. You may need to stop the blender a few times to push down the pineapple chunks with a spatula so everything blends evenly. πŸ₯„

  4. Adjust the Consistency: ➑️ If the blender is struggling or the mixture is too chunky, add an extra splash of liquid (around 1 tablespoon at a time) and blend again until smooth and creamy. πŸ”„

  5. Serve Immediately: ➑️ Scoop the smooth, velvety pineapple soft serve into a cup or bowl. Enjoy it right away before it melts! 🍍🍨


❓ Common Questions & Answers

Q: Can I make this ahead of time and store it in the freezer?

A: It is definitely best enjoyed immediately for that perfect “soft-serve” texture. If you freeze it for later, it will harden into a solid block. If that happens, just let it thaw on the counter for 10 to 15 minutes and give it a quick re-blend before serving! ⏳

Q: What is the best liquid to use?

A: Coconut milk gives it a rich, creamy, “PiΓ±a Colada” vibe. Pineapple juice or apple juice will make it sweeter and more intensely fruity. Regular milk or almond milk works perfectly fine too! πŸ₯›

Q: My blender is getting stuck. What should I do?

A: Don’t worry! Since this is a smaller batch, a smaller blender cup or food processor works best. Just add a tiny bit more liquid to help the blades catch, or let the frozen pineapple sit on the counter for about 5 minutes to soften just a tiny bit before blending. πŸ’‘

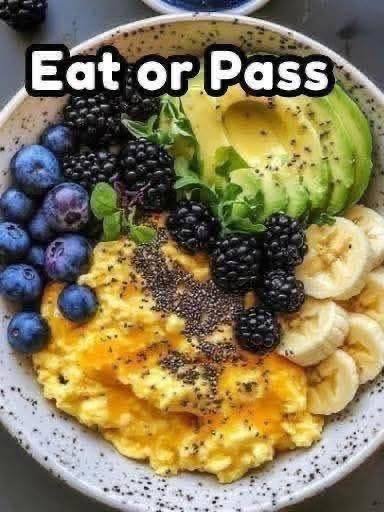
Healthy Breakfast Power Bowl

Healthy Breakfast Power Bowl πŸ₯‘πŸ«πŸŒ

A colorful, nutrient-packed breakfast bowl loaded with fluffy scrambled eggs, creamy avocado, fresh berries, banana slices, and crunchy chia seeds. Perfect for a healthy breakfast or post-workout meal!

πŸ›’ Ingredients

  • 3 large eggs
  • 1 tbsp milk
  • 1 tsp butter or olive oil
  • Salt & black pepper to taste
  • 1/2 avocado, sliced
  • 1/2 banana, sliced
  • 1/4 cup blueberries
  • 1/4 cup blackberries
  • 1 tsp chia seeds
  • Fresh herbs or microgreens (optional)

πŸ‘©β€πŸ³ Instructions

  1. Cook the Eggs
    Whisk eggs with milk, salt, and pepper. Heat butter in a pan over low-medium heat and cook the eggs slowly, stirring gently until soft and creamy.
  2. Prepare the Bowl
    Add the scrambled eggs to one side of a serving bowl.
  3. Add Fresh Toppings
    Arrange avocado slices, banana slices, blueberries, and blackberries around the eggs.
  4. Finish & Serve
    Sprinkle chia seeds on top and garnish with fresh herbs or microgreens if desired.

πŸ’‘ Tips

  • Add toast or roasted potatoes for a heartier meal.
  • Drizzle honey for a sweet touch.
  • Sprinkle chili flakes for extra flavor.

⏱️ Time

  • Prep Time: 5 minutes
  • Cook Time: 5 minutes
  • Total Time: 10 minutes

🍽️ Servings

1–2 servings

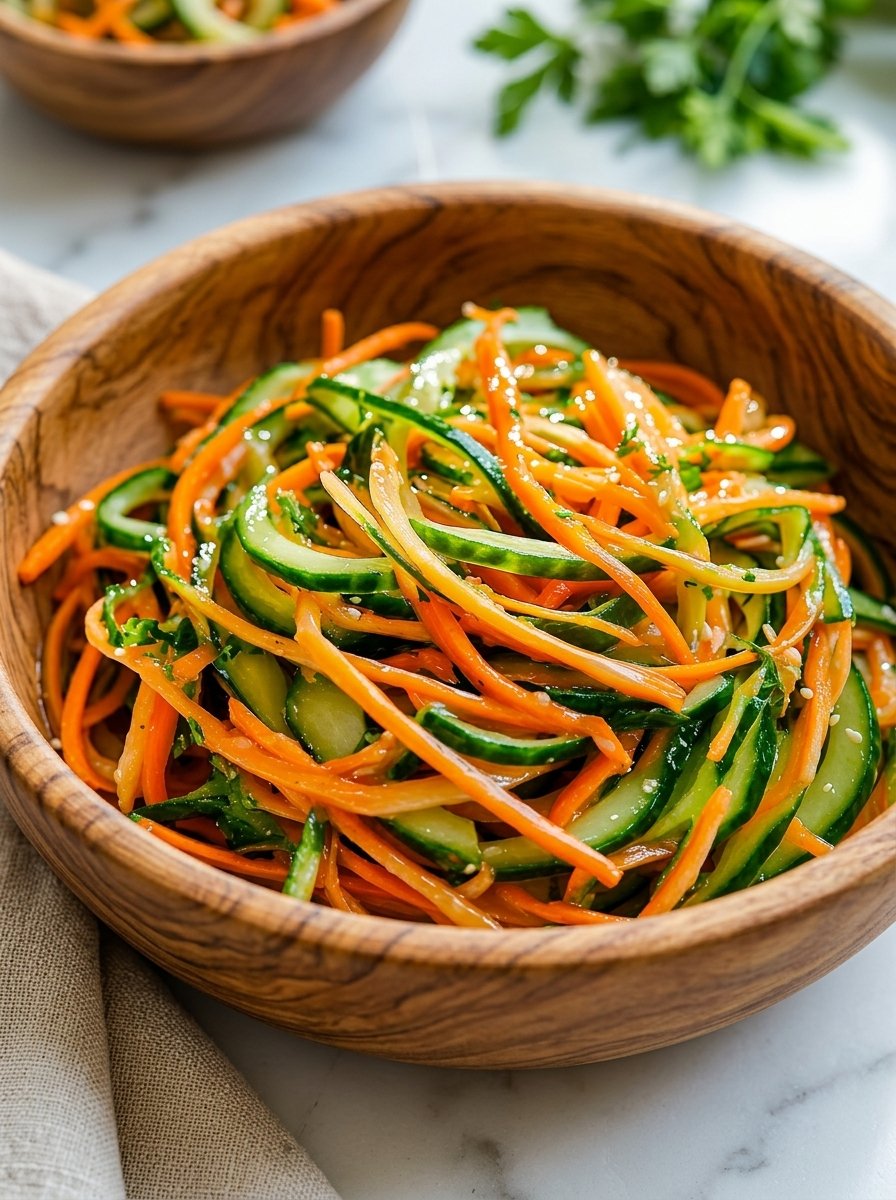
Spiralized Cucumber & Carrot Sesame Salad

Spiralized Cucumber & Carrot Sesame Salad

πŸ›’ Ingredients

πŸ₯’ For the Salad

  • 2 large English cucumbers (or 4–5 Persian cucumbers)
  • 2 large carrots, peeled
  • 1 tbsp toasted sesame seeds
  • 2 green onions, thinly sliced (optional)
  • Fresh cilantro or parsley, chopped

πŸ₯£ For the Tangy Sesame Dressing

  • 2 tbsp rice vinegar (or apple cider vinegar)
  • 1 tbsp sesame oil
  • 1 tbsp olive oil
  • 1 tbsp low-sodium soy sauce (or tamari for gluten-free)
  • Β½ tsp fresh ginger, finely grated
  • 1 small garlic clove, minced
  • Salt & black pepper to taste

πŸ‘©β€πŸ³ Step-by-Step Instructions

Step 1: Prepare the Vegetables πŸ”ͺ

➑️ Wash the cucumbers and carrots thoroughly.

➑️ Using a spiralizer, julienne peeler, or mandoline, turn the cucumbers and carrots into long thin ribbons or noodle-like strands.

➑️ If the cucumbers seem watery, place them in a colander with a tiny pinch of salt for 5–10 minutes.

➑️ Pat gently with paper towels to remove extra moisture for a crisp salad texture.

πŸ’‘ Leaving the cucumber skin on adds beautiful color and extra crunch!


Step 2: Make the Sesame Dressing πŸ₯£

➑️ In a small bowl or jar, combine:

  • Rice vinegar
  • Sesame oil
  • Olive oil
  • Soy sauce
  • Ginger
  • Garlic

➑️ Whisk well until smooth and combined.

➑️ Taste and adjust with salt and pepper if needed.

✨ The dressing should taste tangy, savory, and slightly nutty.


Step 3: Toss Everything Together πŸ₯’

➑️ Add the cucumber and carrot ribbons to a large mixing bowl.

➑️ Pour the dressing over the vegetables.

➑️ Toss gently until every ribbon is lightly coated.

πŸ’‘ Use tongs for easy mixing without breaking the veggie strands.


Step 4: Garnish & Serve ✨

➑️ Sprinkle toasted sesame seeds, sliced green onions, and fresh herbs over the top.

➑️ Serve immediately for maximum crunch or chill for 10–15 minutes for deeper flavor.

πŸ₯’ Best enjoyed fresh and cold!


🌟 Optional Add-Ins

Want to make it even more filling? Try adding:

  • πŸ₯œ Crushed peanuts or cashews
  • πŸ«› Edamame
  • πŸ— Grilled chicken
  • 🍀 Shrimp
  • 🍳 Soft-boiled egg
  • 🍜 Rice noodles
  • 🌢️ Chili flakes for heat

❓ Frequently Asked Questions

Q: Can I make this salad ahead of time?

➑️ Yes, but for the freshest texture, keep the dressing separate until serving. Cucumbers naturally release water over time.


Q: What can I use instead of sesame oil?

➑️ Sesame oil gives the salad its signature flavor, but you can reduce the amount and replace part of it with olive oil if preferred.


Q: Is this salad gluten-free?

➑️ Yes! Simply use tamari or coconut aminos instead of regular soy sauce.


Q: How long does it stay fresh?

➑️ It tastes best within 1 day. Store leftovers in an airtight container in the refrigerator.


πŸ₯’ Serving Ideas

This refreshing sesame salad pairs wonderfully with:

  • Grilled salmon 🐟
  • Teriyaki chicken πŸ—
  • Stir-fried rice 🍚
  • Dumplings πŸ₯Ÿ
  • Asian-inspired noodle bowls 🍜

Enjoy every crunchy, flavorful bite! πŸ₯’πŸ₯•βœ¨

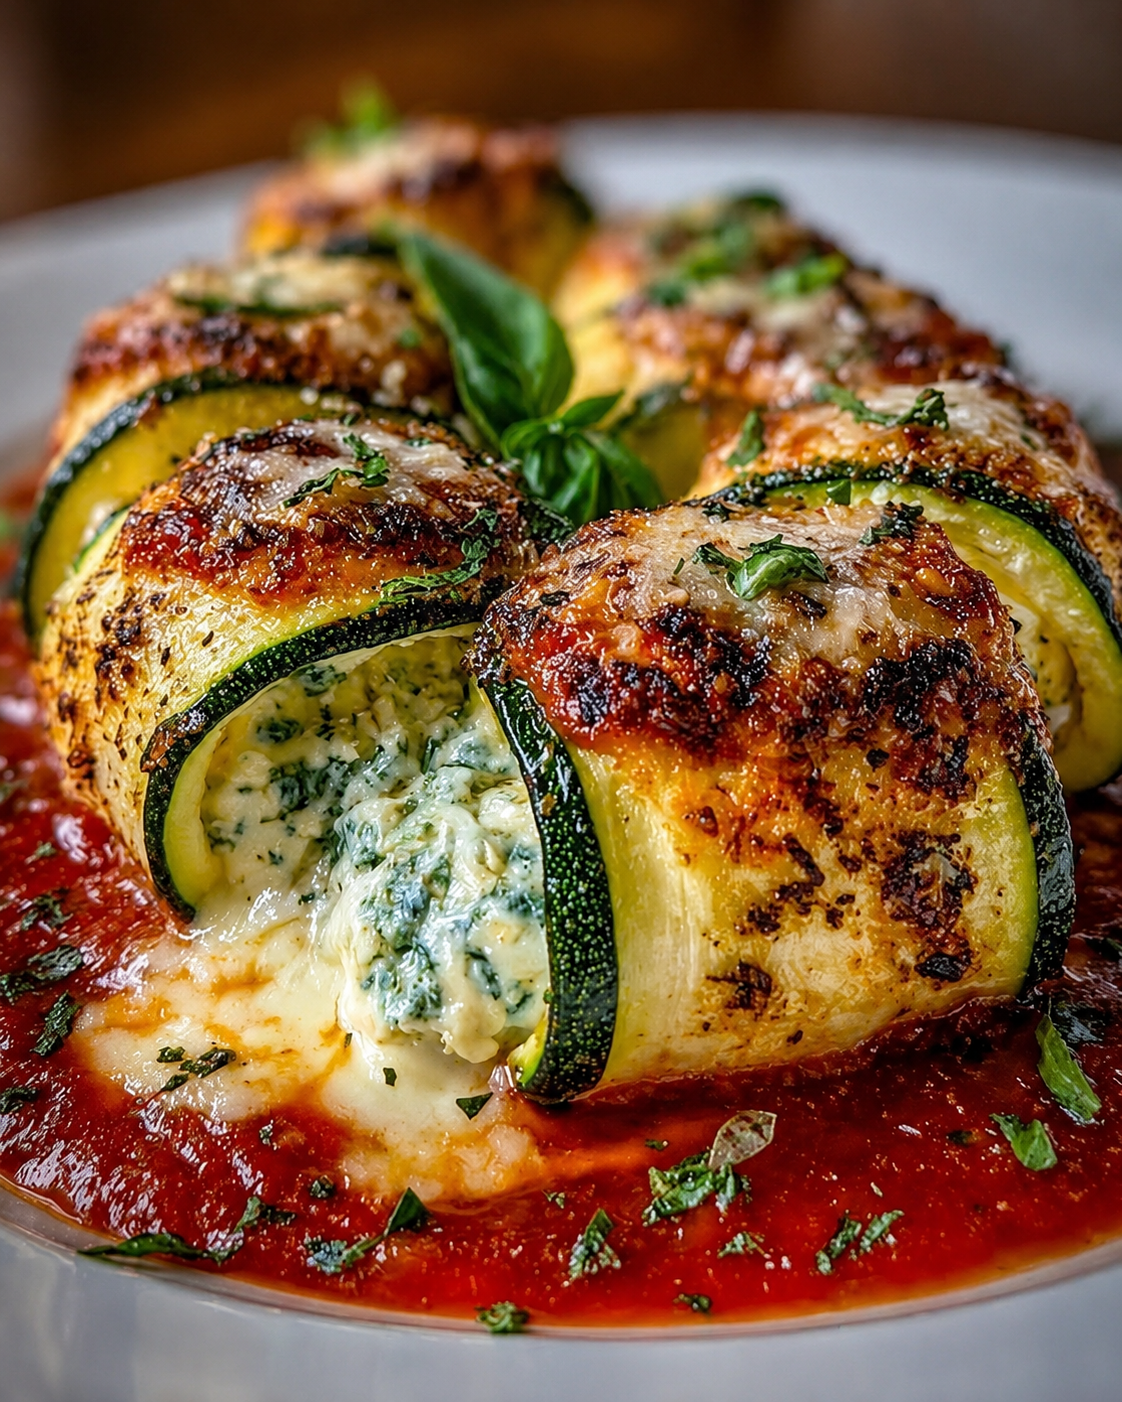
Zucchini Ricotta Involtini Recipe

🍽️ Zucchini Ricotta Involtini Recipe

πŸ›’ Ingredients

For the Zucchini & Filling:

  • 3 large zucchini (straight ones work best for slicing)

  • 15 oz (425g) ricotta cheese

  • 1 cup fresh spinach, finely chopped

  • 1/2 cup parmesan cheese, grated

  • 1 large egg (to bind the filling)

  • 1 clove garlic, minced

  • Salt and black pepper to taste

For the Assembly:

  • 2 cups marinara sauce (homemade or your favorite store-bought brand)

  • 1 cup mozzarella cheese, shredded

  • Fresh basil or parsley, chopped (for garnish)


πŸ‘©β€πŸ³ Step-by-Step Instructions

Step 1: Prep the Zucchini Slices πŸ”ͺ

  • Cut off the ends of the zucchini. Using a mandoline slicer or a very sharp knife, slice the zucchini lengthwise into thin, flexible strips (about 1/8-inch thick).

  • Pro Tip: Lay the slices on paper towels and sprinkle a pinch of salt over them. Let them sit for 10 minutes, then pat dry. This draws out excess moisture so your dish doesn’t get watery!

Step 2: Mix the Filling πŸ₯£

  • In a medium bowl, combine the ricotta cheese, chopped spinach, grated parmesan, minced garlic, and the egg.

  • Season with a pinch of salt and black pepper. Stir everything together until smooth and well combined.

Step 3: Sauce the Pan πŸ…

  • Preheat your oven to 375Β°F (190Β°C).

  • Spread about 1.5 cups of the marinara sauce evenly across the bottom of a large baking dish.

Step 4: Roll Them Up πŸŒ€

  • Lay out a zucchini slice on a clean cutting board.

  • Spoon about 1 tablespoon of the ricotta mixture onto the slice, spreading it gently along the length.

  • Starting from one end, carefully roll the zucchini strip up tightly around the filling.

  • Place the roll-up seam-side down into the prepared baking dish on top of the sauce. Repeat with the remaining slices.

Step 5: Top and Bake πŸ”₯

  • Spoon the remaining marinara sauce over the tops of the zucchini rolls.

  • Sprinkle the shredded mozzarella cheese generously over everything.

  • Bake in the preheated oven for 20 to 25 minutes, or until the cheese is melted, bubbling, and perfectly golden brown.

Step 6: Garnish and Serve ✨

  • Let the dish cool for about 5 minutes out of the oven. Garnish with fresh chopped basil or parsley, and enjoy!


❓ Frequently Asked Questions

Q: My zucchini rolls turned out a bit soggy. What went wrong? ➑️ A: Zucchini holds a lot of water! To prevent sogginess, make sure to do the salting step listed in Step 1. Letting them sweat on paper towels and patting them completely dry before rolling makes a massive difference.

Q: Can I make this dish ahead of time? ➑️ A: Absolutely! You can assemble the entire dish (up to Step 4), cover the baking dish tightly with foil, and keep it in the refrigerator for up to 24 hours. When you’re ready to eat, just top with cheese and bakeβ€”you may just need to add 5 extra minutes to the baking time since it’s starting cold.

Q: Can I add meat to this recipe? ➑️ A: Yes! If you want to add protein, you can brown some ground turkey, beef, or Italian sausage and mix it directly into the marinara sauce before layering it into the pan.

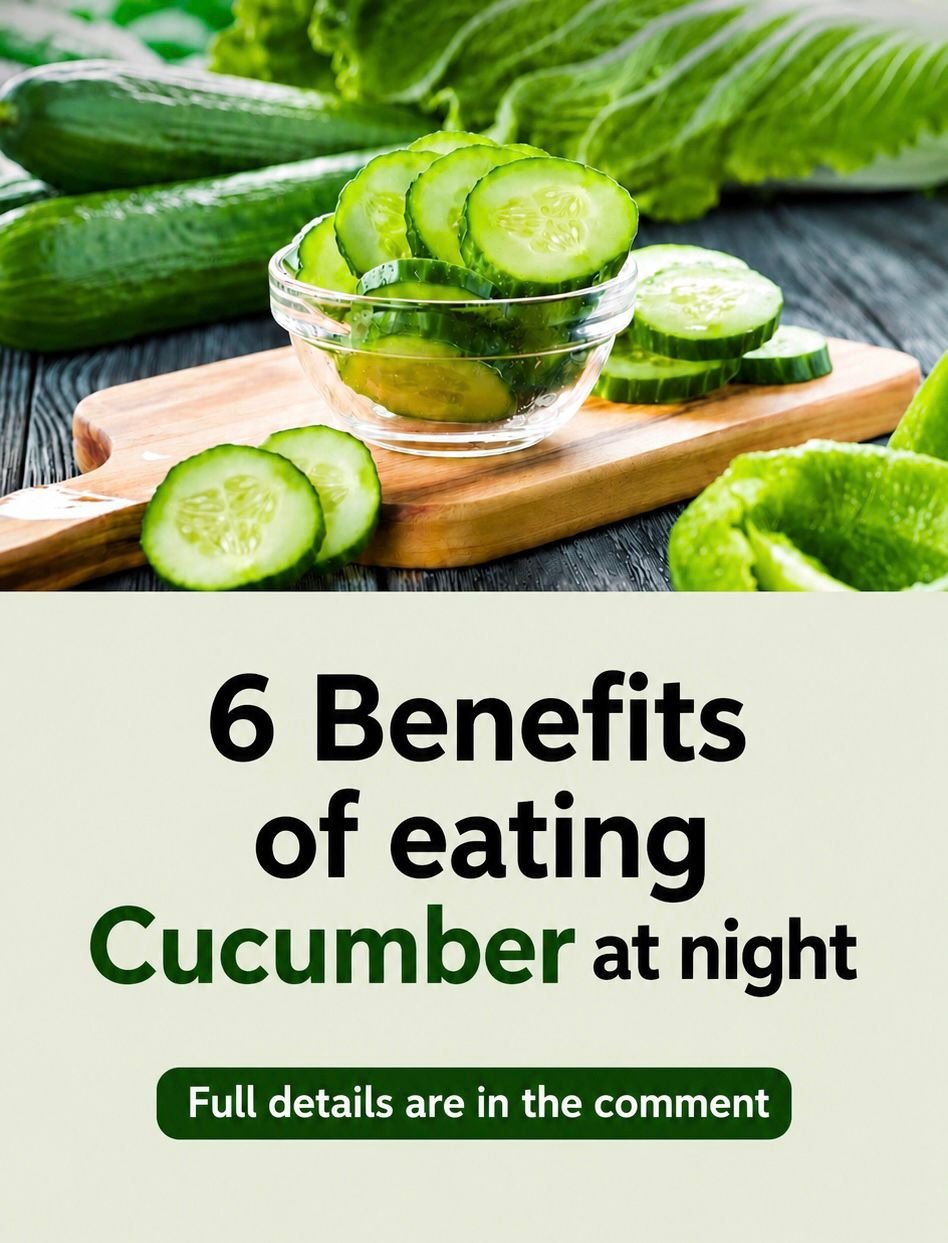
6 Benefits of Eating Cucumber at Night

6 Benefits of Eating Cucumber at Night

Cucumbers are incredibly low in calories but packed with essential vitamins, minerals, and water. Enjoying a few slices before bed can do wonders for your body while you sleep. Here is why it makes the perfect evening snack:

1. Promotes Deep Hydration

Cucumbers are made up of about 95% water. Eating them in the evening helps top off your hydration levels, ensuring your body stays refreshed and functions smoothly throughout the night.

2. Supports Better Digestion

Packed with soluble fiber and water, cucumbers help soothe the digestive tract. Eating them at night can promote regular bowel movements and help prevent that uncomfortable morning bloating.

3. Aids in Weight Management

If you get those late-night kitchen cravings, cucumbers are the ultimate guilt-free snack. They are extremely low in calories, meaning you can satisfy the urge to crunch without spiking your calorie intake or interrupting your health goals.

4. Flushes Out Toxins

The high water and potassium content in cucumbers acts as a natural diuretic. This helps your body flush out waste and excess sodium overnight, which can leave you feeling lighter and less puffy when you wake up.

5. Promotes Healthier, Glowing Skin

Cucumbers contain silica and antioxidants like vitamin C and beta-carotene. Nourishing your body with these nutrients before bed supports overnight skin cell rejuvenation, helping you wake up with a clearer, brighter complexion.

6. Helps Manage Blood Sugar Levels

Cucumbers have a very low glycemic index (GI), meaning they won’t cause a sudden spike in your blood sugar levels. Eating them at night helps keep your glucose stable, preventing late-night crashes and supporting overall metabolic health.


Quick Tip for Your Page: If you want to maximize the health benefits, encourage your followers to eat them with the peel on! Most of the fiber, vitamins, and minerals are packed right into that crisp green skin.

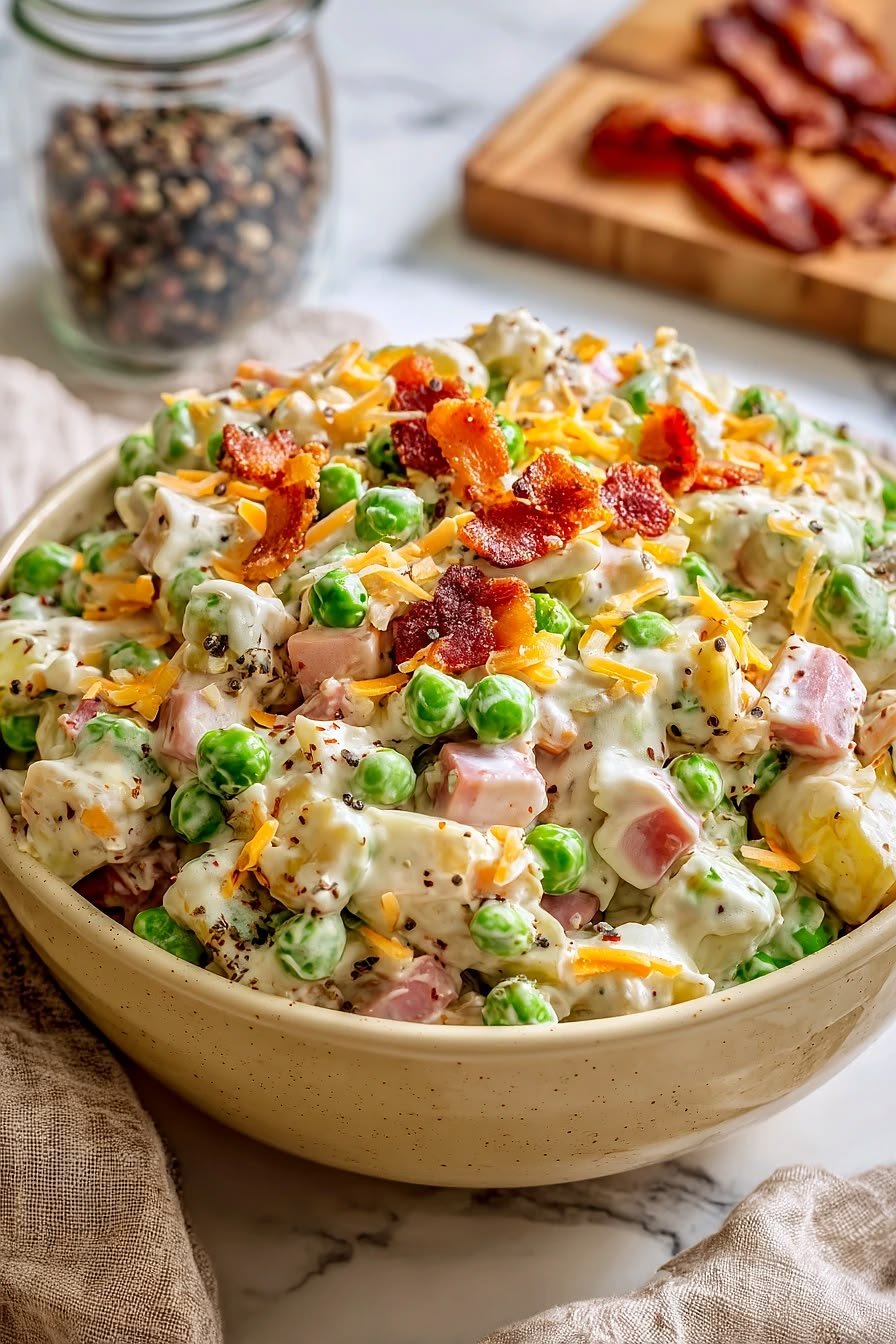
Creamy Bacon Pea Potato Salad Recipe

Creamy Bacon Pea Potato Salad Recipe

This creamy potato salad is loaded with crispy bacon, peas, cheese, and a rich dressing β€” perfect for BBQs, lunch, or family dinners 😍

πŸ›’ Ingredients

  • πŸ₯” 4 cups potatoes (boiled & cubed)
  • 🟒 1 cup green peas
  • πŸ₯“ 6 strips bacon (cooked crispy & chopped)
  • πŸ§€ 1 cup shredded cheddar cheese
  • πŸ§… Β½ cup diced ham or turkey ham
  • πŸ₯š 2 boiled eggs (optional)

For the Dressing

  • πŸ₯› 1 cup mayonnaise
  • 🍢 2 tbsp sour cream or yogurt
  • 🟑 1 tbsp mustard
  • πŸ§‚ Salt to taste
  • ⚫ Black pepper
  • 🌿 1 tsp dried herbs or parsley

πŸ‘©β€πŸ³ Step-by-Step Recipe

1️⃣ Cook the Potatoes

  • Boil potatoes until fork tender.
  • Drain and let cool slightly. πŸ₯”

2️⃣ Prepare the Bacon

  • Fry bacon until crispy. πŸ”₯
  • Place on paper towel and chop into small pieces.

3️⃣ Make the Dressing

  • In a bowl mix:
    • mayonnaise
    • sour cream
    • mustard
    • salt
    • black pepper
    • herbs
  • Stir until creamy. πŸ₯£

4️⃣ Combine Everything

  • In a large bowl add:
    • potatoes
    • peas
    • diced ham
    • cheese
    • eggs (if using)
  • Pour dressing over everything and mix gently.

5️⃣ Add Bacon

  • Sprinkle crispy bacon on top. πŸ₯“
  • Add extra cheese if desired.

6️⃣ Chill & Serve

  • Refrigerate for at least 30 minutes before serving.
  • Serve cold and enjoy πŸ˜‹

πŸ’‘ Tips

  • Use chilled potatoes for best texture.
  • Don’t overmix or potatoes may break apart.
  • Add chopped pickles for extra flavor.

❓Q/A

❓Can I make it ahead of time?

βœ… Yes, it tastes even better after chilling overnight.

❓Can I use frozen peas?

βœ… Yes, just thaw them before mixing.

❓What potatoes work best?

βœ… Yukon Gold or red potatoes hold their shape best.