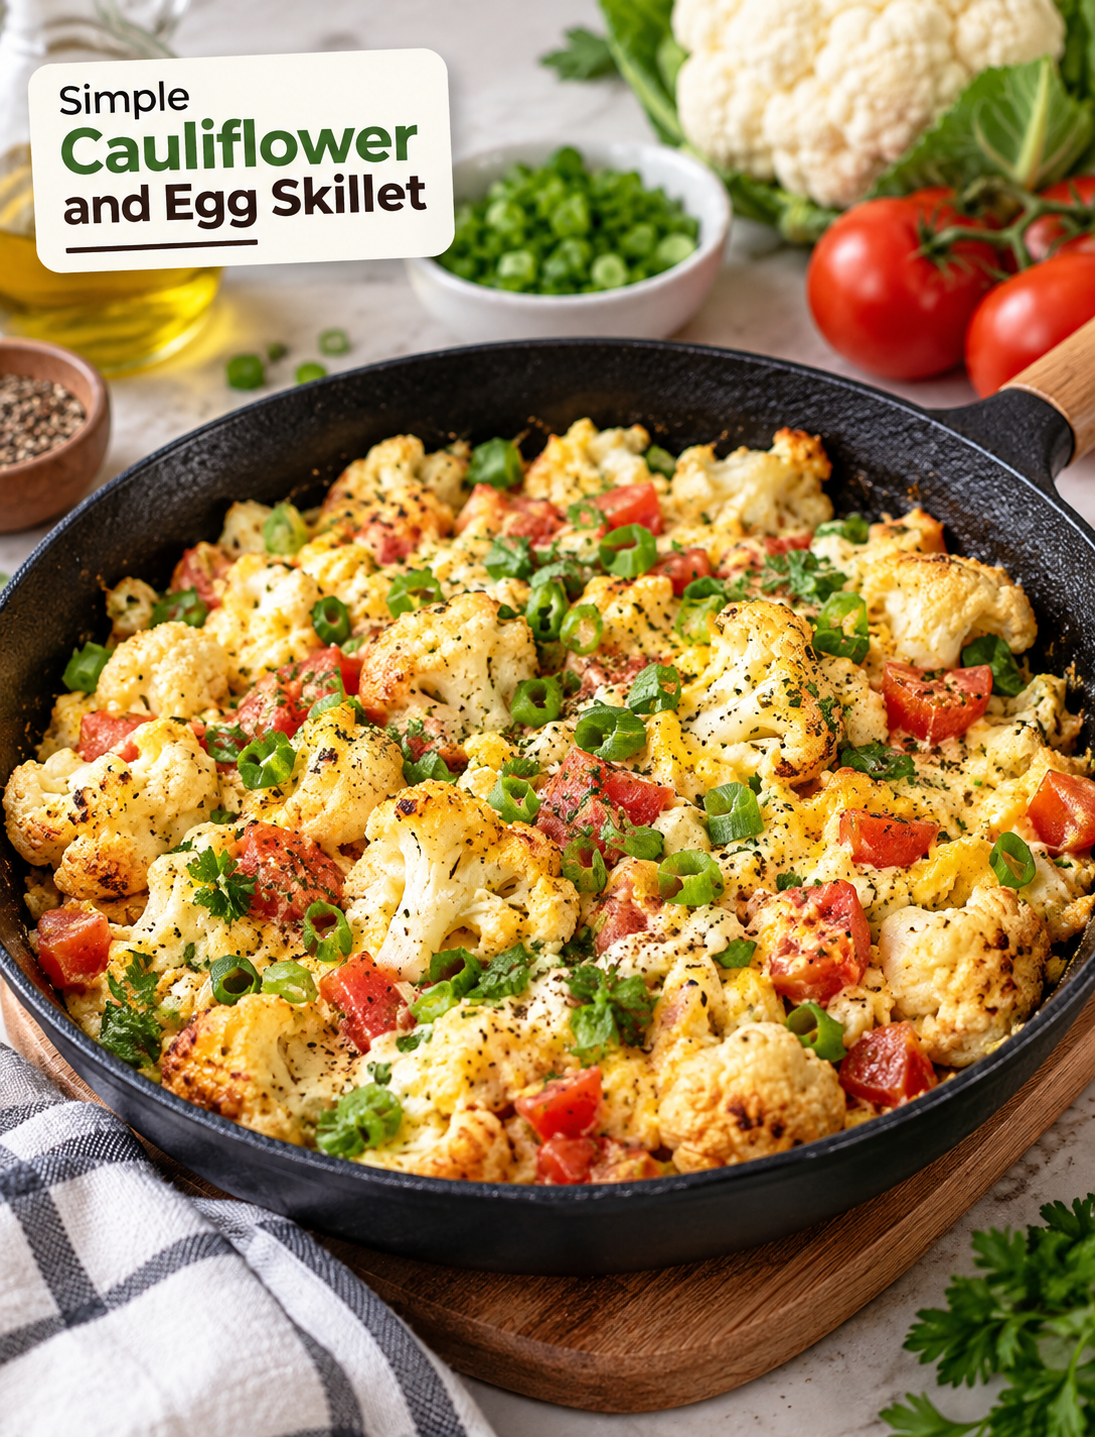
Simple Cauliflower and Egg Skillet

Simple cauliflower and egg skillet with tomatoes, spring onions, and creamy sour cream sauce

Simple Cauliflower and Egg Skillet

If you need a quick, filling meal made with simple ingredients, this Simple Cauliflower and Egg Skillet is a great choice. Tender cauliflower, fresh tomatoes, eggs, spring onions, and a creamy sour cream mixture come together in one pan for a comforting homemade dish.

This skillet works well for breakfast, lunch, or a light dinner. The cauliflower gives the dish a hearty texture, while the eggs add protein and help bring the ingredients together. A short simmer allows the garlic, black pepper, and sour cream to coat every bite.

The recipe takes about 35 minutes from start to finish, including preparation and cooking. It serves four people and is easy enough for a busy weekday meal.

Why You’ll Love This Cauliflower and Egg Skillet

  • Simple ingredients: Most of the ingredients are easy to find at a regular grocery store.
  • One-pan cooking: After boiling the cauliflower, the main dish comes together in one skillet.
  • Creamy and savory: Sour cream, garlic, and black pepper create a rich sauce without complicated steps.
  • Family-friendly: Mild flavors and tender vegetables make this a practical meal for the whole family.
  • Flexible serving option: Enjoy it on its own or pair it with toast, a green salad, or roasted vegetables.

Ingredients You’ll Need

  • 1 medium cauliflower: Choose a firm cauliflower with compact, white florets.
  • 3 large eggs: Eggs add protein and help make the skillet more satisfying.
  • 2 medium tomatoes: Fresh tomatoes add moisture, acidity, and a bright flavor.
  • Spring onions: Chop them finely so they spread evenly through the dish.
  • 3 tablespoons sour cream: Sour cream creates the creamy base for the skillet.
  • Black pepper: Add it to taste for gentle heat.
  • Dried garlic: Use according to your preferred garlic flavor.
  • Salt: Season the cauliflower water and sour cream mixture.
  • Olive oil: Use enough to lightly coat the skillet for browning.

How to Make Simple Cauliflower and Egg Skillet

Step 1: Prepare the Cauliflower

  • Remove the leaves and thick stem from the cauliflower.
  • Cut the cauliflower into small, evenly sized florets.
  • Rinse the florets under cool running water.
  • Bring a large pot of water to a boil.
  • Add about 1 teaspoon of salt to the boiling water.
  • Add the cauliflower and boil for 5 minutes.
  • Drain the florets thoroughly and allow excess water to evaporate.

Parboiling softens the cauliflower before it reaches the skillet. Draining it well is important because excess water can prevent the florets from browning properly.

Step 2: Prepare the Eggs and Vegetables

  • Crack the 3 eggs into a medium bowl.
  • Beat the eggs until the yolks and whites are fully combined.
  • Dice the tomatoes into small cubes.
  • Wash and finely chop the spring onions.
  • Set the prepared vegetables aside while you make the creamy mixture.

Keep the tomato pieces fairly small so they soften quickly during cooking without overpowering the cauliflower.

Step 3: Brown the Cauliflower

  • Place a large skillet over medium heat.
  • Add a small amount of olive oil.
  • Once the oil is warm, add the drained cauliflower florets.
  • Spread the florets into an even layer.
  • Cook for about 3–5 minutes, turning as needed.
  • Continue until the cauliflower develops light golden-brown edges.

Browning adds extra flavor and gives the cauliflower a more appealing texture. Avoid overcrowding the skillet if you want better browning.

Step 4: Make the Sour Cream Mixture

  • Add 3 tablespoons of sour cream to a small bowl.
  • Season with black pepper, dried garlic, and a little salt.
  • Stir until the mixture is smooth and evenly seasoned.

The sour cream mixture provides the creamy element of the dish. Adjust the garlic and pepper to suit your taste.

Step 5: Combine the Ingredients

  • Lower the heat after the cauliflower has browned.
  • Spoon or pour the sour cream mixture over the cauliflower.
  • Add the diced tomatoes.
  • Sprinkle the chopped spring onions over the top.
  • Stir gently to distribute the ingredients without breaking the cauliflower florets.

The tomatoes release moisture as they cook, helping create a light sauce with the sour cream.

Step 6: Cook the Skillet

  • Cover the skillet if you have a suitable lid.
  • Cook over low heat for about 15 minutes.
  • Stir gently once or twice during cooking.
  • Check that the cauliflower is tender and the tomatoes have softened.
  • Keep the heat low so the sour cream mixture does not cook too aggressively.

The slow simmer gives the vegetables time to absorb the savory flavors of garlic, pepper, and sour cream.

Step 7: Add and Cook the Eggs

  • Pour the beaten eggs evenly over the cauliflower mixture.
  • Gently stir or move the ingredients so the eggs spread throughout the skillet.
  • Cook until the eggs are fully set and no longer look runny.
  • Remove the skillet from the heat as soon as the eggs are cooked through.

Cooking the eggs at the end keeps them tender while allowing them to bind with the creamy vegetable mixture.

Step 8: Garnish and Serve

  • Taste the skillet and adjust the salt or black pepper if needed.
  • Sprinkle fresh herbs or additional spring onions over the top.
  • Serve the dish hot.
  • Divide into four portions for a simple family meal.

For a complete breakfast, serve it with whole-grain toast. For lunch or dinner, pair it with a crisp green salad or another vegetable side.

Tips for the Best Results

Use fresh cauliflower for the best texture and flavor. Cut the florets into similar sizes so they cook evenly.

Do not skip the draining step after boiling. Wet cauliflower can release too much water into the skillet and make browning difficult.

Keep the skillet at medium heat while browning, then reduce the temperature before adding the creamy mixture. Gentle heat helps prevent the sour cream from becoming overly thin or separating.

Add the eggs near the end of cooking. This prevents them from becoming dry while the cauliflower and tomatoes finish simmering.

You can also add a small amount of paprika, fresh parsley, or shredded cheese if you want to change the flavor while keeping the basic recipe intact.

Storage and Reheating

Allow leftovers to cool before placing them in an airtight container. Refrigerate within two hours of cooking and use within 3–4 days.

Reheat individual portions in a skillet over low heat or in the microwave until heated through. Add a small splash of water if the mixture seems dry during reheating.

Nutrition Information

This recipe makes approximately 4 servings, with about 150 calories per serving based on the provided recipe information. Actual nutrition can vary depending on the amount of olive oil, sour cream, and other ingredients used.

Frequently Asked Questions

Can I use frozen cauliflower?

Yes. Thaw frozen cauliflower first and drain it well before adding it to the skillet to reduce excess moisture.

Can I make this recipe without sour cream?

Yes. Plain Greek yogurt can be used as an alternative, although it may give the dish a slightly tangier flavor.

How do I prevent watery cauliflower?

Drain the boiled cauliflower thoroughly and let it steam-dry briefly before placing it in the hot skillet.

Can I add cheese to this skillet?

Yes. Sprinkle shredded cheddar, mozzarella, or Parmesan over the skillet near the end and allow it to melt before serving.

Can I prepare this recipe ahead of time?

You can chop the vegetables and prepare the sour cream mixture ahead, then cook the skillet when you are ready to serve it.

What can I serve with cauliflower and eggs?

Serve it with whole-grain toast, avocado, a fresh green salad, or roasted vegetables for a more complete meal.

Can I add other vegetables?

Yes. Bell peppers, spinach, mushrooms, or zucchini can be added, but cook vegetables that need more time before adding the eggs.

Is this recipe suitable for breakfast?

Yes. The combination of cauliflower, eggs, tomatoes, and creamy seasoning makes it a satisfying savory breakfast or brunch option.

Final Thoughts

This Simple Cauliflower and Egg Skillet turns everyday vegetables and eggs into a warm, creamy meal with very little fuss. Parboiling the cauliflower first helps create tender florets, while browning adds a deeper savory flavor. Fresh tomatoes bring brightness, spring onions add freshness, and the sour cream mixture ties everything together.

With straightforward preparation and about 35 minutes of total cooking time, this recipe is practical for busy mornings, relaxed weekend brunches, or an easy family dinner.
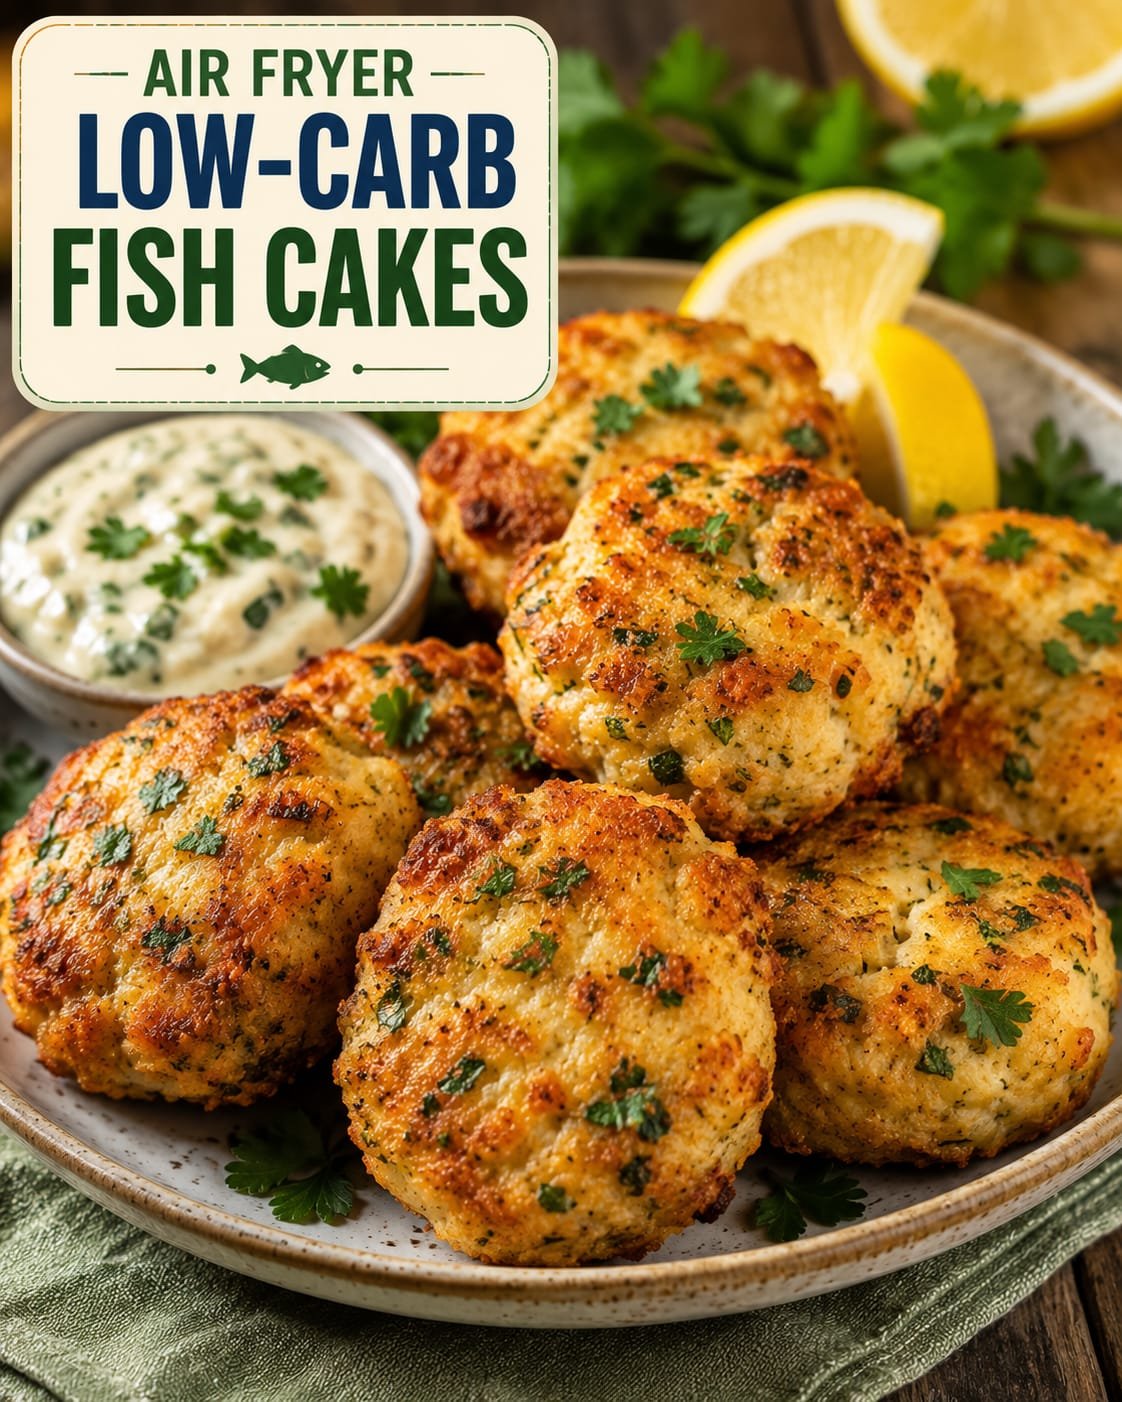

Air Fryer Low-Carb Fish Cakes

Air Fryer Low-Carb Fish Cakes

These Air Fryer Low-Carb Fish Cakes are crispy on the outside, tender and flavorful on the inside, and incredibly easy to prepare. They are made with flaky white fish, fresh herbs, lemon, Parmesan, and a simple low-carb binder instead of traditional breadcrumbs or flour.The air fryer gives these fish cakes a beautifully golden exterior with only a small amount of oil. They’re perfect for a quick lunch, light dinner, meal prep, or even a healthy appetizer. Serve them with a creamy yogurt sauce, fresh salad, roasted vegetables, or steamed greens for a satisfying low-carb meal.If you’re looking for a recipe that’s high in protein, packed with flavor, and easy enough for a busy weeknight, these fish cakes are a fantastic choice

Prep Time: 15 minutes

Chill Time: 20 minutes

Cook Time: 10–14 minutes

Total Time: 45–50 minutes

Servings: 4

Air Fryer Temperature: 390°F (200°C)

Why You’ll Love This Recipe

Low in Carbohydrates

Traditional fish cakes often use breadcrumbs or flour. This version uses almond flour and Parmesan to create a flavorful low-carb coating.

Crispy Without Deep-Frying

The air fryer produces golden, crispy fish cakes without needing a large amount of oil.

High in Protein

Fish and eggs provide a satisfying source of protein, making these fish cakes ideal for lunch or dinner.

Fresh and Flavorful

Lemon, parsley, garlic, and seasonings give the fish cakes a bright, savory flavor.

Easy to Customize

You can use different types of white fish and adjust the herbs and spices according to your taste.

Great for Meal Prep

Prepare the mixture ahead of time and refrigerate the shaped fish cakes until you’re ready to cook.

Ingredients For Air Fryer Low-Carb Fish Cakes

For the Fish Cakes

1 pound (450 g) cooked white fish, such as cod, haddock, pollock, or tilapia

1 large egg

½ cup finely ground almond flour

¼ cup grated Parmesan cheese

2 tablespoons finely chopped fresh parsley

2 green onions, finely sliced

1 clove garlic, minced

1 tablespoon fresh lemon juice

lemon zest 1 teaspoon

paprika ½ teaspoon

dried dill ½ teaspoon

onion powder ¼ teaspoon

salt ½ teaspoon

black pepper ¼ teaspoon

1 tablespoon olive oil or cooking spray

Optional Additions

¼ teaspoon red pepper flakes

1 teaspoon Dijon mustard

Fresh chives

Fresh dill

A pinch of cayenne pepper

Instructions For Air Fryer Low-Carb Fish Cakes

Cook the Fish

If you’re starting with raw fish, place the fillets in a lightly greased baking dish and cook until they are opaque and flake easily with a fork.

You can also steam or poach the fish.

Allow the cooked fish to cool slightly.

Remove any bones and skin, then gently flake the fish into small pieces.

If using leftover cooked fish, make sure it hasn’t been heavily seasoned with strong sauces that could overpower the fish cakes.

Remove Excess Moisture

Moisture is one of the biggest enemies of crispy fish cakes.

After flaking the fish, gently press it between paper towels to remove excess moisture.

The fish should be moist but not wet.

Make the Fish Cake Mixture

Place the flaked fish in a large mixing bowl.

Add the egg, almond flour, Parmesan cheese, parsley, green onions, garlic, lemon juice, lemon zest, paprika, dill, onion powder, salt, and black pepper.

Add Dijon mustard or red pepper flakes if using.

Mix gently until all ingredients are combined.

The mixture should hold together when pressed.

If it feels too wet, add another tablespoon of almond flour. If it feels too dry, add a small amount of beaten egg.

Shape the Fish Cakes

Divide the mixture into approximately 8 equal portions.

Shape each portion into a compact patty about ½–¾ inch thick.

Press the edges together firmly so the fish cakes don’t fall apart during cooking.

Place the shaped patties on a plate or parchment-lined tray.

Chill the Fish Cakes

Refrigerate the fish cakes for approximately 20 minutes.

This step helps the mixture firm up and makes the patties easier to handle.

It also helps them maintain their shape during air frying.

Preheat the Air Fryer

Preheat your air fryer to 390°F (200°C) for about 3 minutes.

Lightly spray the air fryer basket with cooking spray.

Air Fry

Carefully place the fish cakes into the air fryer basket in a single layer.

Leave space between each patty for proper air circulation.

Lightly spray or brush the tops with olive oil.

Air fry at 390°F (200°C) for 5–7 minutes.

Carefully flip the fish cakes and lightly spray the second side with oil.

Continue cooking for another 5–7 minutes, or until the fish cakes are golden brown and heated through.

The exact time will depend on the thickness of the patties and your air fryer.

Rest and Serve

Remove the fish cakes from the air fryer and let them rest for 2–3 minutes.

Serve warm with lemon wedges and your favorite low-carb dipping sauce.

Tips for Perfect Air Fryer Fish Cakes

Choose Firm White Fish

Cod, haddock, pollock, and tilapia work especially well. Avoid fish that contains excessive moisture.

Remove Excess Moisture

If the fish mixture is too wet, the patties can fall apart. Press the cooked fish gently with paper towels before mixing.

Don’t Make the Patties Too Thick

Thinner patties cook more evenly and develop a better crispy exterior.

Chill Before Cooking

Even a short chilling period helps the fish cakes hold together.

Don’t Overcrowd the Basket

Air circulation is essential for crispiness. Cook in batches if necessary.

Flip Carefully

Use a thin spatula and turn the fish cakes gently to prevent them from breaking.

Add Oil Lightly

A small amount of olive oil helps with browning. Too much oil isn’t necessary.

Benefits For Air Fryer Low-Carb Fish Cakes

Fish is an excellent source of high-quality protein and can provide important nutrients such as vitamin B12, selenium, and, depending on the type of fish used, omega-3 fatty acids.

Replacing traditional breadcrumbs with almond flour reduces the carbohydrate content of these fish cakes. Parmesan adds flavor and contributes protein and calcium.

The air fryer also allows the fish cakes to become crisp with minimal added oil compared with traditional pan-frying or deep-frying.

For a complete low-carb meal, pair them with non-starchy vegetables, leafy greens, avocado, or a fresh cucumber salad.

Serving Suggestions For Air Fryer Low-Carb Fish Cakes

With Lemon Yogurt Sauce

Combine Greek yogurt, lemon juice, garlic, dill, salt, and pepper for a fresh dipping sauce.

With Green Salad

Serve two fish cakes over mixed greens with cucumber, tomatoes, avocado, and lemon vinaigrette.

With Roasted Vegetables

Pair them with roasted broccoli, zucchini, asparagus, or cauliflower.

With Cauliflower Mash

Serve alongside creamy cauliflower mash for a comforting low-carb dinner.

With Avocado

Add sliced avocado and fresh lemon for extra creaminess and healthy fats.

As an Appetizer

Make smaller fish cakes and serve them with a selection of dipping sauces for parties or gatherings.

Nutrition Facts For Air Fryer Low-Carb Fish Cakes

Approximate nutrition per serving, based on 4 servings:

Calories: 285

Protein: 31 g

Fat: 15 g

Saturated Fat: 3.5 g

Carbohydrates: 5 g

Fiber: 2 g

Net Carbohydrates: 3 g

Sugar: 1 g

Sodium: 510 mg

Calcium: 115 mg

Iron: 1.5 mg

Nutrition information is an estimate and will vary depending on the type of fish, almond flour, Parmesan, and other ingredients used.

Frequently Asked Questions

Can I use canned fish?

Yes. Canned tuna, salmon, or another canned fish can work. Drain it extremely well before adding it to the mixture.

Can I make fish cakes without almond flour?

Yes. You can use crushed pork rinds as a low-carb alternative. For a non-low-carb version, traditional breadcrumbs can also be used.

Why are my fish cakes falling apart?

The mixture may contain too much moisture or may not have enough binder. Make sure the fish is well drained and add a little extra almond flour if needed. Chilling the patties before cooking also helps.

Can I use frozen fish?

Yes. Thaw the fish completely and pat it very dry before cooking and flaking.

Can I make these fish cakes ahead of time?

Yes. Shape the uncooked fish cakes and refrigerate them for up to 24 hours before air frying.

Can I freeze fish cakes?

Yes. Place cooked and cooled fish cakes in an airtight freezer-safe container and freeze for up to 2 months. Thaw them in the refrigerator and reheat in the air fryer.

How do I reheat fish cakes?

Air fry refrigerated fish cakes at 350°F (175°C) for 4–6 minutes, or until heated through and crisp.

What fish is best for fish cakes?

Cod, haddock, pollock, and tilapia are excellent choices. Salmon can also be used if you prefer a richer flavor.

Can I make these dairy-free?

Yes. Omit the Parmesan and add an extra tablespoon or two of almond flour if necessary to help bind the mixture.

Final Thoughts For Air Fryer Low-Carb Fish Cakes

These Air Fryer Low-Carb Fish Cakes are a delicious combination of tender flaky fish and a golden, crispy exterior. They’re easy to prepare, packed with protein, and made without traditional breadcrumbs or flour.The key to successful fish cakes is controlling moisture. Make sure the fish is well drained, shape the patties firmly, and chill them before cooking. Once they’re in the air fryer, give them enough space to crisp properly and flip them carefully.Serve them with a fresh lemon yogurt sauce, crunchy salad, roasted vegetables, or cauliflower mash for a complete low-carb meal. They’re also excellent for meal prep and can be frozen for an easy dinner later.With their crisp edges, savory herbs, fresh lemon flavor, and tender center, these air fryer fish cakes are a simple recipe you’ll want to make again and again.

Keto Flourless Cottage Cheese Flatbread

Keto flourless cottage cheese flatbread made with cottage cheese and eggs, baked until golden and crispy, served as a low-carb healthy bread alternative on a plate.

Keto Flourless Cottage Cheese Flatbread

If you want a simple bread alternative without flour, this Keto Cottage Cheese Flatbread is an easy recipe to keep in your weekly meal plan. It uses cottage cheese and eggs to create a soft, flexible flatbread with a mild flavor and a satisfying texture.

This recipe is naturally flourless, gluten free, and low carb, making it useful for many everyday meals. You can use it as a wrap for chicken, turkey, eggs, vegetables, or cheese, or serve it alongside soups and salads.

Unlike traditional bread recipes, this flatbread does not need wheat flour, yeast, or complicated preparation. A quick blend, a thin spread on a baking sheet, and a short bake are all you need.

What Is Cottage Cheese Flatbread?

Cottage cheese flatbread is a simple baked bread alternative made primarily with cottage cheese and eggs. The ingredients are blended until smooth, then baked into a thin, flexible layer.

The result is a tender flatbread with enough structure to hold fillings without relying on traditional flour. Cottage cheese also adds protein, while eggs help the flatbread set during baking.

This Flourless Cottage Cheese Flatbread works especially well when you want something bread-like without grains or a high amount of carbohydrates.

Why You’ll Love This Recipe

This Low Carb Flatbread Recipe needs only a few basic ingredients and does not require kneading or rising time.

The cottage cheese provides a creamy base and adds protein to each serving. Eggs help create a stable texture that can be sliced, folded, or rolled once the flatbread has cooled.

It is also a practical choice for meal prep because you can bake several pieces at once and store them for later meals.

The recipe is keto friendly, gluten free, and grain free, so it can fit into several eating styles without requiring specialty flour.

Ingredients You’ll Need

Cottage Cheese

Use plain cottage cheese for the best results. Full-fat cottage cheese gives the flatbread a richer texture, while low-fat cottage cheese can also work.

For a smoother batter, blend the cottage cheese well before baking.

Large Eggs

Large eggs provide structure and help bind the ingredients together. They also contribute protein and create a soft but flexible texture.

Garlic Powder

A small amount of garlic powder adds savory flavor without changing the texture. You can leave it out if you prefer a neutral flatbread for sweet or breakfast fillings.

Optional Seasonings

Salt, black pepper, Italian seasoning, dried herbs, or paprika can be added according to how you plan to serve the flatbread.

For a simple wrap, keep the seasoning mild so it works with different fillings.

How to Make Keto Flourless Cottage Cheese Flatbread

Blend the Ingredients

Add cottage cheese and large eggs to a blender or food processor. Blend until the mixture becomes smooth and evenly combined.

Add garlic powder and your preferred seasonings, then blend briefly again.

A smooth batter helps create an even flatbread with fewer visible pieces of cottage cheese.

Prepare the Baking Sheet

Line a baking sheet or flat baking pan with parchment paper. Lightly grease the parchment if needed to make removal easier.

Pour the blended mixture onto the center of the pan and spread it into a thin, even layer.

Keep the thickness consistent because very thin areas can become crisp before the center is fully set.

Bake Until Set

Bake in a preheated oven until the surface is firm and lightly golden around the edges.

The exact baking time can vary depending on the thickness of the batter and your oven.

Avoid removing the flatbread too early because the center needs enough time to set properly.

Cool Before Cutting

Let the flatbread cool for several minutes before lifting it from the parchment.

Cooling allows the texture to firm up and makes the flatbread easier to handle.

Cut it into rectangles for sandwiches or wraps, or leave it larger if you want to use it as a single flexible wrap.

What Makes This a Low Carb Flatbread?

Traditional bread is usually made with wheat flour, which contributes a significant amount of carbohydrates. This recipe skips wheat flour completely and uses cottage cheese and eggs as the main ingredients.

That makes it a useful option when you are looking for low carb wraps without relying on conventional bread.

The exact carbohydrate amount depends on the cottage cheese brand and serving size, so check the nutrition label of your ingredients if you are following a strict carbohydrate target.

Is This a High Protein Flatbread?

Yes, cottage cheese and eggs make this a naturally High Protein Flatbread compared with many traditional flour-based flatbreads.

Protein content will vary based on the ingredients and the number of servings you make. Choosing a cottage cheese with a higher protein content can increase the protein per serving.

This makes the recipe especially useful for breakfast wraps, lunch sandwiches, and quick post-workout meals.

Easy Ways to Use the Flatbread

Breakfast Wrap

Fill the flatbread with scrambled eggs, turkey, avocado, and a small amount of cheese for a filling breakfast.

Chicken Wrap

Add sliced grilled chicken, lettuce, tomato, cucumber, and a light dressing for an easy lunch.

Turkey and Cheese Roll-Up

Layer turkey and cheese over the flatbread, roll it tightly, and slice it into smaller pieces for a quick meal or snack.

Vegetable Wrap

Use roasted peppers, spinach, cucumber, avocado, and a protein source for a fresh vegetable wrap.

Pizza-Style Flatbread

Top the baked flatbread with a small amount of tomato sauce, mozzarella, and your favorite toppings, then bake until the cheese melts.

Tips for the Best Results

Use parchment paper to make the flatbread easier to remove after baking.

Blend the cottage cheese and eggs thoroughly so the batter has a smooth consistency.

Spread the mixture evenly because inconsistent thickness can lead to uneven cooking.

Do not overload the flatbread with wet fillings because excess moisture can make it difficult to roll.

Allow the flatbread to cool before filling it if you want maximum flexibility.

If you prefer a crispier texture, bake it slightly longer while watching the edges carefully.

For a more savory flavor, add herbs, garlic powder, onion powder, or smoked paprika.

Storage and Meal Prep

Let the flatbread cool completely before storing it.

Place parchment paper between individual pieces to prevent them from sticking together.

Store the flatbread in an airtight container in the refrigerator for several days.

You can also freeze individual portions for longer storage. Thaw them in the refrigerator and gently warm them before serving.

This makes the recipe convenient for preparing low carb wraps ahead of busy weekdays.

Keto and Gluten-Free Friendly

This Keto Flatbread Recipe contains no wheat flour or traditional grains. It can therefore be useful for people looking for a Gluten Free Cottage Cheese Wrap or a grain-free alternative to standard bread.

However, ingredient labels still matter if you have celiac disease or a serious gluten intolerance. Choose certified gluten-free ingredients when required and avoid cross-contact during preparation.

For a strict keto diet, check the carbohydrate information on your specific cottage cheese and other ingredients because nutritional values can vary between brands.

Can You Make a 2 Ingredient Cottage Cheese Flatbread?

Yes. The basic version can be made with cottage cheese and eggs, which is why it is often described as a 2 Ingredient Cottage Cheese Flatbread.

Seasonings such as garlic powder, salt, pepper, or dried herbs are optional and mainly add flavor rather than changing the basic structure.

This simple formula also makes it easy to customize the flatbread for breakfast, lunch, or dinner.

Why This Flourless Bread Recipe Is Useful

A traditional loaf can require flour, yeast, kneading, proofing, and a longer baking process. This Flourless bread recipe removes most of those steps.

The batter comes together quickly, and the finished flatbread can be used immediately after cooling.

It is a practical choice for anyone who wants a healthy flatbread without keeping specialty baking ingredients in the pantry.

Because the recipe uses familiar ingredients, it can also be a useful addition to a collection of simple cottage cheese recipes.

Frequently Asked Questions

Is cottage cheese flatbread keto?

Yes, it can fit a keto eating plan because it is flourless and relatively low in carbohydrates, but always check your specific ingredients for their carb content.

Is cottage cheese flatbread gluten free?

Yes, the basic recipe contains no wheat flour or gluten-containing grains, making it naturally gluten free when prepared with suitable ingredients.

How much protein is in cottage cheese flatbread?

Protein varies by serving size and the brands used, but cottage cheese and eggs make it a naturally protein-rich bread alternative.

Can I use low-fat cottage cheese?

Yes, low-fat cottage cheese can work, although full-fat cottage cheese may produce a richer and softer texture.

Can I use cottage cheese flatbread as a wrap?

Yes, once cooled, the flatbread can be filled with meat, eggs, vegetables, cheese, or other preferred wrap fillings.

How do I keep the flatbread from sticking?

Use parchment paper and allow the flatbread to cool slightly before carefully lifting it from the baking surface.

Can I freeze cottage cheese flatbread?

Yes, separate individual pieces with parchment paper, place them in a freezer-safe container, and thaw them before reheating.

Can I add different seasonings?

Yes, garlic powder, Italian herbs, paprika, black pepper, or dried parsley can add flavor without requiring flour.

Is this a grain-free bread?

Yes, the basic recipe contains no wheat, oats, rice, or other grains, making it a simple grain-free bread alternative.

Can I make this recipe without garlic powder?

Yes, garlic powder is optional, and leaving it out creates a more neutral flatbread suitable for a wider range of fillings.

Final Thoughts

This Keto Flourless Cottage Cheese Flatbread is a simple way to replace traditional bread with a flexible, protein-rich alternative. Cottage cheese and eggs create the foundation, while seasonings allow you to adjust the flavor for different meals.

Use it for breakfast wraps, chicken sandwiches, quick lunches, or simple snacks. With no traditional flour and a short ingredient list, this Grain Free Flatbread is an easy recipe to add to your regular meal rotation.