
Caramelized Baked Peaches

Baked Peaches with caramelized brown sugar, creamy ricotta, chopped pistachios, honey, and fresh mint

Caramelized Baked Peaches

Baked Peaches are a warm, elegant dessert made with ripe peaches, brown sugar, butter, cinnamon, vanilla, creamy ricotta or mascarpone, and crunchy pistachios. Baked Peaches become soft and juicy in the oven while the sugar caramelizes around the edges, creating a glossy finish and rich flavor.

This easy dessert feels special enough for guests but is simple enough for a relaxed family dinner. The creamy topping adds contrast, while pistachios and fresh mint bring texture and color.

Prep Time: 15 minutes

Cook Time: 25 minutes
Total Time: About 40 minutes
Servings: 4 to 6

Ingredients

For the Peaches

  • 4 large ripe but firm peaches
  • 3 tablespoons unsalted butter, melted
  • 1/4 cup brown sugar
  • 1 tablespoon honey
  • 1 teaspoon ground cinnamon
  • 1/2 teaspoon vanilla extract
  • Pinch of salt
  • 1 teaspoon fresh lemon juice

Ingredients For the Creamy Topping

  • 1 cup ricotta cheese or mascarpone
  • 2 tablespoons honey
  • 1/2 teaspoon vanilla extract
  • 1 teaspoon lemon zest

For Garnishing

  • 1/3 cup chopped pistachios
  • Fresh mint leaves
  • Extra honey
  • Pinch of cinnamon
  • Lemon zest, optional

Why You’ll Love This Recipe

Baked Peaches are naturally sweet, juicy, and full of warm caramelized flavor. The oven softens the fruit while brown sugar and butter create a glossy syrup that gathers around each peach half.

Another reason to love Baked Peaches is how easy they are to customize. You can use ricotta, mascarpone, Greek yogurt, or vanilla ice cream for the topping, and you can switch pistachios for pecans, walnuts, or almonds.

This dessert also comes together quickly, so it is ideal when you want something impressive without spending hours in the kitchen.

How to Make Baked Peaches

Step 1: Preheat the Oven

Preheat the oven to 375°F or 190°C.

Lightly grease a medium baking dish or line it with parchment paper.

Step 2: Prepare the Peaches

Wash and dry the peaches.

Cut each peach in half and remove the pit carefully.

If the pit is difficult to remove, use a small spoon to loosen it without tearing the fruit.

Arrange the peach halves cut-side up in the prepared baking dish.

Step 3: Make the Caramel Mixture

In a small bowl, combine melted butter, brown sugar, honey, cinnamon, vanilla, salt, and lemon juice.

Stir until smooth.

This mixture will melt over the fruit and create the caramelized coating that gives Baked Peaches their rich finish.

Step 4: Coat the Peaches

Brush or spoon the caramel mixture generously over the cut side of each peach.

Let a little of the mixture run into the center cavity where the pit was removed.

Reserve a small amount for drizzling halfway through baking.

Step 5: Bake the Peaches

Place the baking dish in the oven.

Bake for 20 to 25 minutes, depending on the ripeness and size of the peaches.

The fruit should become tender while still holding its shape.

Step 6: Baste Halfway Through

After about 12 minutes, remove the dish briefly from the oven.

Spoon the juices from the bottom of the pan over the fruit.

Brush with the reserved caramel mixture.

This extra basting helps Baked Peaches develop a deeper color and stronger caramel flavor.

Step 7: Prepare the Creamy Topping

While the peaches bake, add ricotta or mascarpone to a small bowl.

Stir in honey, vanilla, and lemon zest.

Mix until creamy and smooth.

For an extra-light texture, whip the ricotta with a hand mixer for 1 to 2 minutes.

Step 8: Toast the Pistachios

Place the chopped pistachios in a dry skillet over medium-low heat.

Toast for 2 to 3 minutes, stirring often.

Remove from the heat as soon as they smell fragrant.

Toasted pistachios add extra crunch and nutty flavor.

Step 9: Check for Doneness

Insert the tip of a small knife into the thickest part of a peach.

The fruit should feel tender but not collapse.

If your peaches were very firm, bake for another 3 to 5 minutes.

Step 10: Add Extra Caramelization

For a deeper caramelized surface, switch the oven to broil for 1 to 2 minutes.

Watch carefully because the sugar can darken quickly.

This optional step gives Baked Peaches a beautiful glossy, lightly browned top.

Step 11: Rest Briefly

Remove the baking dish from the oven.

Let the fruit rest for about 5 minutes.

The juices will thicken slightly as they cool.

Step 12: Top and Serve

Place a spoonful of the creamy ricotta mixture in the center of each peach half.

Sprinkle with toasted pistachios and fresh mint.

Finish with a drizzle of honey or the caramel juices from the baking dish.

Serve Baked Peaches warm.

Serving Suggestions

Baked Peaches are delicious on their own, but the warm fruit also pairs beautifully with vanilla ice cream, whipped cream, mascarpone, or thick Greek yogurt.

For a more elegant dessert, serve Baked Peaches on individual plates with extra pistachios, mint, lemon zest, and a thin drizzle of honey.

You can also serve them at brunch with granola and yogurt or alongside pound cake for a richer dessert.

If you want a rich and comforting dessert, try this Capirotada with Extra Pecans and Raisins made with toasted bread, cinnamon syrup, crunchy pecans, sweet raisins, and melted cheese.

Recipe Tips

Choose peaches that are ripe but still firm. Very soft fruit can collapse during baking.

Cut the peaches evenly so they cook at the same rate.

Use real butter for the best caramel flavor.

Do not use too much sugar because ripe peaches already contain natural sweetness.

For the best texture, baste the fruit with the pan juices halfway through cooking.

Toast the pistachios before serving to bring out their flavor.

Add the creamy topping only after the peaches leave the oven so it stays cool and fluffy.

Easy Variations

Baked Peaches are easy to customize with different toppings and spices.

To create a warmer flavor, add a pinch of nutmeg, cardamom, or ginger to the caramel mixture.

For a nut-free version, replace pistachios with toasted oats or granola.

You can also use maple syrup instead of honey for a deeper sweetness.

Swap ricotta for mascarpone, Greek yogurt, whipped cream, or vanilla ice cream.

If you want more texture, add crushed amaretti cookies or graham cracker crumbs just before serving.

For a fresh Mediterranean-inspired meal, try this Greek Sweet Potato Bowl with Feta & Walnut Crunch with roasted sweet potatoes, creamy feta, crunchy walnuts, vegetables, and lemon dressing.

Make-Ahead Instructions

You can prepare several parts of this recipe ahead of time.

Mix the caramel sauce up to one day in advance and refrigerate it in a sealed container.

The ricotta topping can also be prepared one day ahead.

For the freshest texture, cut and bake the peaches shortly before serving.

If you need to prepare them earlier in the day, bake the fruit, let it cool, and refrigerate.

Reheat gently before adding the topping.

Storage and Reheating

Store leftover Baked Peaches in an airtight container in the refrigerator for up to 3 days.

Keep the creamy topping separate if possible.

To reheat, place the peaches in a baking dish and warm at 325°F or 165°C for about 8 to 10 minutes.

You can also microwave individual portions in short intervals.

Freezing is not recommended because the fruit can become very soft after thawing.

Nutrition Information

Approximate nutrition per serving:

Calories: 290
Protein: 7 g
Carbohydrates: 36 g
Fat: 15 g
Saturated Fat: 7 g
Fiber: 4 g
Sugar: 29 g
Sodium: 120 mg

Nutrition values are estimates and may vary depending on the size of the peaches, amount of butter, type of creamy topping, and garnishes used.

Frequently Asked Questions

Can I make Baked Peaches with canned peaches?

Fresh peaches work best because they hold their shape and caramelize more effectively. Canned peaches are softer and contain more liquid.

Do I need to peel the peaches?

No. The skin helps the fruit hold together during baking and becomes tender in the oven.

Can I use nectarines instead?

Yes. Nectarines work very well and can be prepared the same way.

What can I use instead of ricotta?

Mascarpone, Greek yogurt, whipped cream, cottage cheese whipped until smooth, or vanilla ice cream are all good options.

Can I make Baked Peaches without butter?

Yes. Use coconut oil or a neutral plant-based butter alternative.

How do I know when the peaches are done?

They should be tender when pierced with a knife but still hold their shape.

Can I serve them cold?

Yes, although the caramel flavor and texture are especially good when the fruit is warm or at room temperature.

Final Thoughts

Baked Peaches are an easy way to turn fresh summer fruit into a warm and elegant dessert.

The combination of juicy peaches, caramelized brown sugar, butter, cinnamon, creamy ricotta, pistachios, and honey gives Baked Peaches plenty of flavor and texture.

Because Baked Peaches need only a few simple ingredients, they work well for both casual family meals and special occasions.

Keep Baked Peaches in your dessert collection whenever you want a simple fruit-based recipe that looks beautiful, tastes rich, and requires very little preparation.
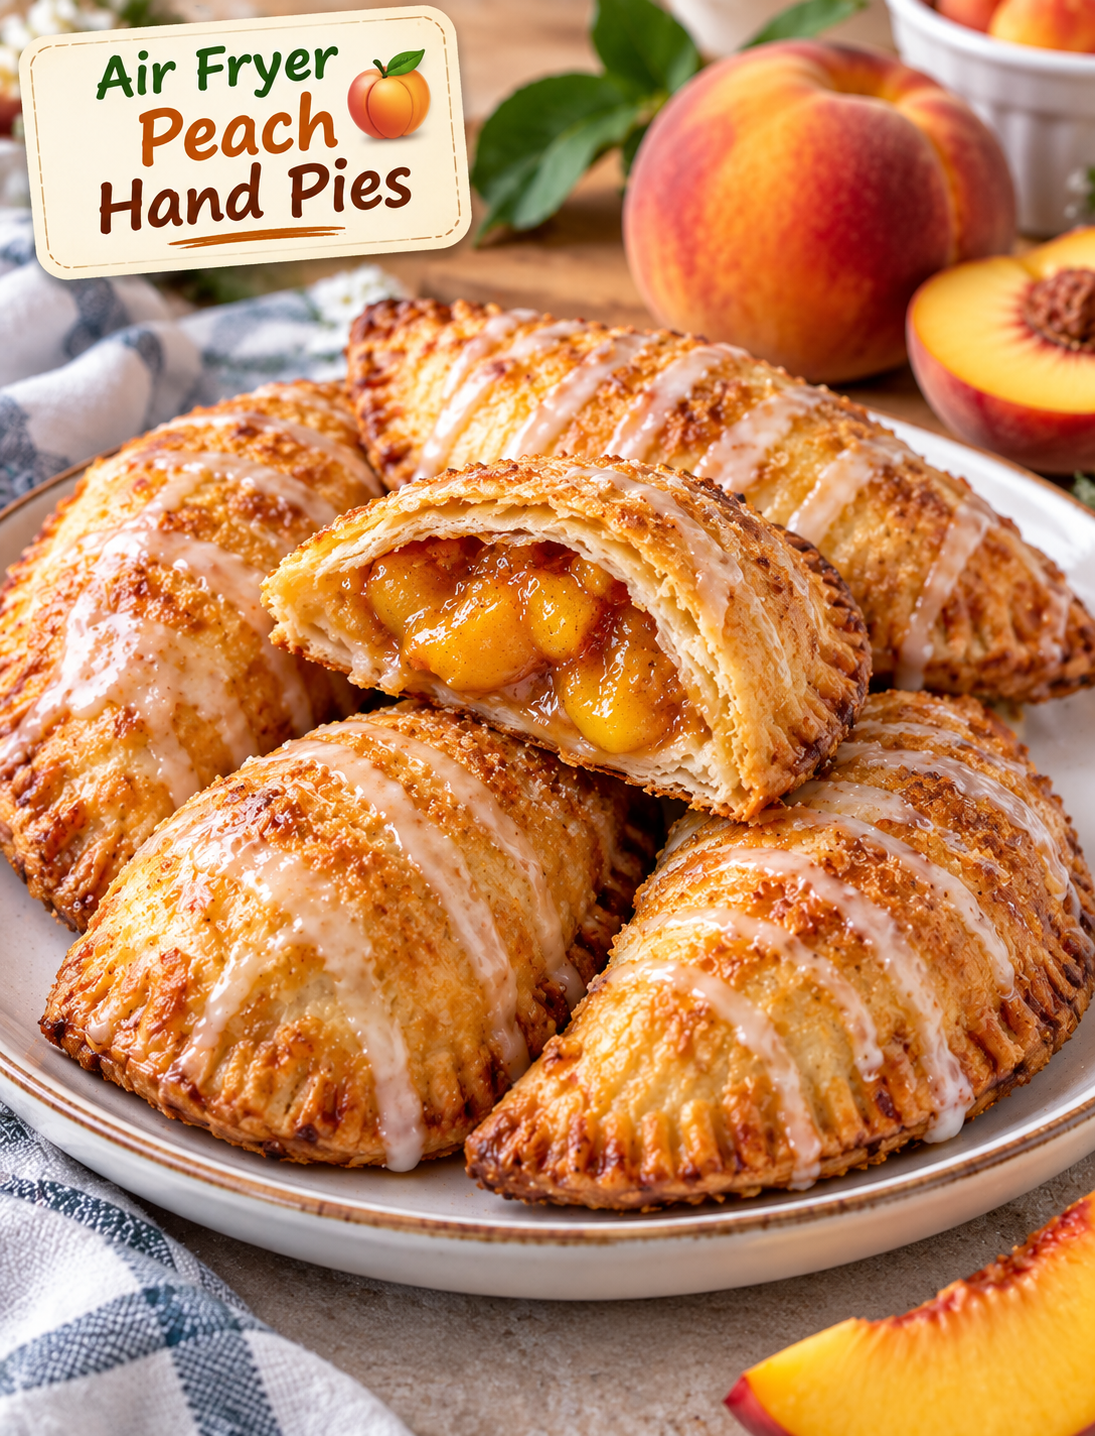
Air Fryer Peach Hand Pies

Golden Air Fryer Peach Hand Pies filled with cinnamon peaches and topped with a light glaze

Air Fryer Peach Hand Pies

These Air Fryer Peach Hand Pies are a simple way to enjoy a warm fruit dessert without making a full pie. Each small pastry has a flaky golden crust filled with sweet peaches, cinnamon, and a hint of vanilla.

The air fryer cooks the hand pies quickly and gives the pastry a crisp, lightly browned finish. They are easy enough for a weeknight dessert but special enough for a summer gathering, brunch, or family treat.

Fresh peaches work beautifully when they are ripe and juicy, while canned or frozen peaches can also be used with a few simple adjustments. The filling should be thick before it goes inside the pastry so the pies stay sealed while cooking.

Why You’ll Love These Peach Hand Pies

  • Quick dessert: The small pies cook much faster than a traditional full-size pie.
  • Crispy crust: Hot circulating air creates a golden, flaky pastry exterior.
  • Easy filling: Peaches, sugar, cinnamon, and vanilla create a classic fruit-pie flavor.
  • Small portions: Individual pies are easy to serve without slicing a whole dessert.
  • Flexible ingredients: Fresh, frozen, or canned peaches can work with the right preparation.
  • Make-ahead friendly: The assembled pastries can be refrigerated before air frying.
  • Great for sharing: They are convenient for parties, picnics, brunches, and family desserts.

Ingredients You’ll Need

For the Peach Filling

  • 2 cups peeled and diced fresh peaches
  • 2 tablespoons granulated sugar
  • 1 tablespoon brown sugar
  • 1 tablespoon cornstarch
  • ½ teaspoon ground cinnamon
  • ¼ teaspoon ground nutmeg
  • 1 teaspoon fresh lemon juice
  • ½ teaspoon vanilla extract
  • Pinch of salt

For the Pastry

  • 1 package refrigerated pie crusts, usually 2 crusts
  • 1 large egg
  • 1 tablespoon water
  • 1 tablespoon coarse sugar, optional

For the Simple Glaze

  • ½ cup powdered sugar
  • 1–2 teaspoons milk
  • ¼ teaspoon vanilla extract

Fresh peaches give the filling the best flavor when they are naturally sweet and ripe. If using canned peaches, drain them very well and pat them dry before dicing.

How to Make Air Fryer Peach Hand Pies

Step 1: Prepare the Peaches

Peel the peaches and cut them into small pieces. Smaller pieces cook more evenly and make the filling easier to spoon into the pastry.

Place the peaches in a saucepan with granulated sugar, brown sugar, cinnamon, nutmeg, lemon juice, salt, and cornstarch.

Stir everything together before turning on the heat. This helps distribute the cornstarch evenly.

Step 2: Cook the Filling

Cook the peach mixture over medium heat for about 4–6 minutes, stirring often.

The peaches should soften slightly while the juices become thick and glossy. Do not cook them until they turn completely mushy.

Remove the pan from the heat and stir in the vanilla extract.

Transfer the filling to a bowl and let it cool completely.

Important: A cool, thick filling is easier to work with and helps prevent the pastry from becoming soggy.

Step 3: Prepare the Pie Crust

Place the refrigerated pie crusts on a lightly floured surface.

Use a round cookie cutter or a small bowl to cut circles about 4–5 inches wide.

You should get several pastry rounds from the two crusts, depending on the size of your cutter.

Gather the scraps, gently press them together, and roll them out once more. Avoid overworking the dough because too much handling can make the crust tough.

Step 4: Fill the Pastry

Place about 1½ tablespoons of cooled peach filling in the center of each pastry circle.

Leave a clear border around the edges. Too much filling can make the pies difficult to seal.

Fold each circle in half to create a half-moon shape.

Press the edges together with your fingers, then use a fork to crimp the entire edge.

Step 5: Seal the Hand Pies

Check each pie carefully for open areas.

If the edges are not sealed, peach juice can leak into the air fryer during cooking.

For extra security, lightly brush the inside edge with water before pressing it closed.

Place the prepared pies on a parchment-lined tray while you finish assembling the remaining pastries.

Step 6: Add the Egg Wash

Whisk the egg with one tablespoon of water.

Lightly brush the top of each pastry with the egg wash.

The egg wash helps the crust develop a shiny, golden-brown finish.

Sprinkle a little coarse sugar over the top if you want extra crunch and sweetness.

Step 7: Preheat the Air Fryer

Preheat your air fryer to 350°F (175°C) for about 3 minutes.

A short preheat helps the pastry begin cooking evenly as soon as it enters the basket.

Step 8: Air Fry the Hand Pies

Lightly spray the air fryer basket with cooking spray.

Place the hand pies in a single layer, leaving space between them.

Air fry at 350°F (175°C) for 8–11 minutes, or until the pastry is puffed and golden brown.

Cooking time can vary between air fryer models, so begin checking around the 8-minute mark.

If your pies are browning too quickly, reduce the temperature slightly and continue cooking until the pastry is fully crisp.

Step 9: Cool Before Glazing

Carefully remove the hot pastries and place them on a wire rack.

Let them cool for about 5–10 minutes.

The peach filling will be extremely hot immediately after cooking, so allow the pies to cool before taking the first bite.

Step 10: Add the Glaze

Whisk powdered sugar, milk, and vanilla until smooth.

Drizzle the glaze over the slightly cooled pastries.

For a thicker glaze, use less milk. For a thinner drizzle, add a few extra drops of milk.

Serve warm or at room temperature.

Tips for Crispy Peach Hand Pies

  • Cool the filling completely: Warm filling can soften the pastry and make sealing difficult.
  • Do not overfill: Too much peach mixture can cause the edges to burst during cooking.
  • Seal the edges well: A fork-crimped border helps keep the fruit filling inside.
  • Avoid overcrowding: Leave room between each pastry so hot air can circulate.
  • Use parchment carefully: Use perforated air fryer parchment when appropriate so airflow is not blocked.
  • Check early: Smaller hand pies can cook faster than larger ones.
  • Keep the pastry cold: Chilled pie dough is easier to handle and usually produces a flakier crust.
  • Let them rest: The filling thickens slightly as the pies cool.

Fresh, Frozen, or Canned Peaches?

Fresh peaches are the easiest choice during peach season because they provide a bright, natural fruit flavor.

Frozen peaches can also work well. Thaw them first, drain excess liquid, and pat them dry before adding them to the filling.

Canned peaches are convenient when fresh peaches are unavailable. Choose peaches packed in juice when possible, drain them thoroughly, and reduce the added sugar if they are already very sweet.

The main goal is to control moisture. Excess liquid can make the pastry soft and may cause the filling to escape during cooking.

How to Store Peach Hand Pies

Let the pastries cool completely before storing them.

Place leftovers in an airtight container and refrigerate for up to 3 days.

For the best texture, reheat them in the air fryer at 325°F (165°C) for 3–5 minutes.

Avoid reheating them in the microwave if you want to maintain a crisp crust because microwave heat can make the pastry soft.

Can You Freeze Them?

Yes. Assemble the unbaked pies, seal the edges, and place them on a parchment-lined tray.

Freeze them until firm, then transfer them to a freezer-safe container or bag.

When ready to cook, air fry the frozen pies at 350°F (175°C) and add a few extra minutes to the cooking time.

Check that the pastry is golden and fully cooked before serving.

Serving Ideas

These little fruit pies are delicious on their own, but a few simple additions can turn them into a special dessert.

Serve them with a scoop of vanilla ice cream for a classic combination.

For a lighter option, add a spoonful of plain Greek yogurt and fresh peach slices.

A dusting of powdered sugar also works well when you want a simple finish without making a glaze.

For summer gatherings, serve the pastries on a platter with fresh berries and mint.

Common Mistakes to Avoid

Using a runny filling: A watery peach mixture can leak and make the pastry soggy.

Overfilling the crust: More filling does not always mean a better pie. Keep the amount controlled so the edges can close properly.

Skipping the egg wash: The pies will still cook without it, but the crust may not develop the same golden appearance.

Crowding the basket: Too many pastries at once can restrict airflow and lead to uneven browning.

Eating them immediately: The filling retains intense heat after cooking, so allow the pies to rest before serving.

Frequently Asked Questions

Can I use canned peaches for these hand pies?

Yes. Drain canned peaches very well, pat them dry, and adjust the sugar based on how sweet they are.

How long do peach hand pies take in an air fryer?

They usually take about 8–11 minutes at 350°F, but the exact time depends on your air fryer and pastry size.

Why did my peach filling leak out?

The pies may have been overfilled, the edges may not have been sealed firmly, or the filling may have been too warm or watery.

Can I make these with frozen peaches?

Yes. Thaw and drain frozen peaches thoroughly before cooking the filling to remove excess moisture.

Can I freeze peach hand pies?

Yes. Freeze the assembled unbaked pies, then cook them directly from frozen with a few additional minutes of air-frying time.

How do I keep the pastry crispy?

Store leftovers in an airtight container and reheat them in the air fryer rather than the microwave.

Can I make the hand pies without glaze?

Yes. They are sweet and flavorful without glaze, especially when finished with coarse sugar before air frying.

What can I serve with peach hand pies?

Vanilla ice cream, Greek yogurt, fresh berries, or a light dusting of powdered sugar all pair well with the warm peach filling.

Final Thoughts

Air Fryer Peach Hand Pies bring the flavor of classic peach pie into a smaller, easier dessert. The combination of tender peach filling, flaky pastry, cinnamon, and golden edges makes each hand pie satisfying without requiring a full-size pie.

For the best results, focus on three things: keep the peach filling thick, seal the pastry firmly, and leave enough space for air to circulate. Once you have those steps right, this recipe becomes an easy dessert you can make throughout peach season and beyond.