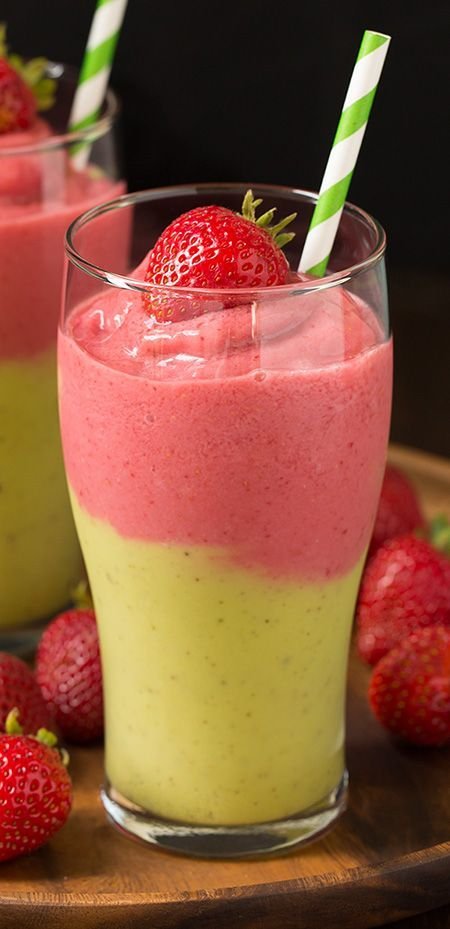
Strawberry-Kiwi Layered Smoothie

Strawberry-Kiwi Layered Smoothie

Ingredients

The Kiwi Layer (Bottom):

  • 3 large kiwis, peeled and sliced

  • 1 frozen banana, broken into chunks

  • 1/2 cup baby spinach (optional, for a deeper green)

  • 1/4 cup Greek yogurt or coconut milk

  • 1 tsp honey or maple syrup

The Strawberry Layer (Top):

  • 1 ½ cups frozen strawberries

  • 1/2 cup frozen raspberries (adds a pop of color)

  • 1/2 cup almond milk or apple juice

  • 1 tsp vanilla extract


Instructions

  1. Prepare the Green Base: Place all kiwi layer ingredients into a high-speed blender. Blend until smooth and creamy. If the mixture is too thin, add a few ice cubes; it needs to be thick enough to support the top layer.

  2. Pour and Set: Pour the kiwi mixture into two chilled glasses, filling them halfway. Place the glasses in the freezer for 5–10 minutes to let the base set slightly while you prepare the next stage.

  3. Prepare the Red Top: Rinse your blender thoroughly. Combine the strawberry layer ingredients and blend until completely smooth. You want a thick, sorbet-like consistency.

  4. Assemble the Layers: Remove the glasses from the freezer. Using a large spoon, gently dollop the strawberry mixture over the kiwi layer. Spreading it gently with the back of the spoon prevents the colors from bleeding together immediately.

  5. Garnish and Serve: Top with a fresh whole strawberry and a colorful straw. Serve immediately while the layers are crisp and cold.

Pro Tip: Using frozen fruit instead of fresh fruit with ice ensures a richer flavor and a much sturdier texture for layering!

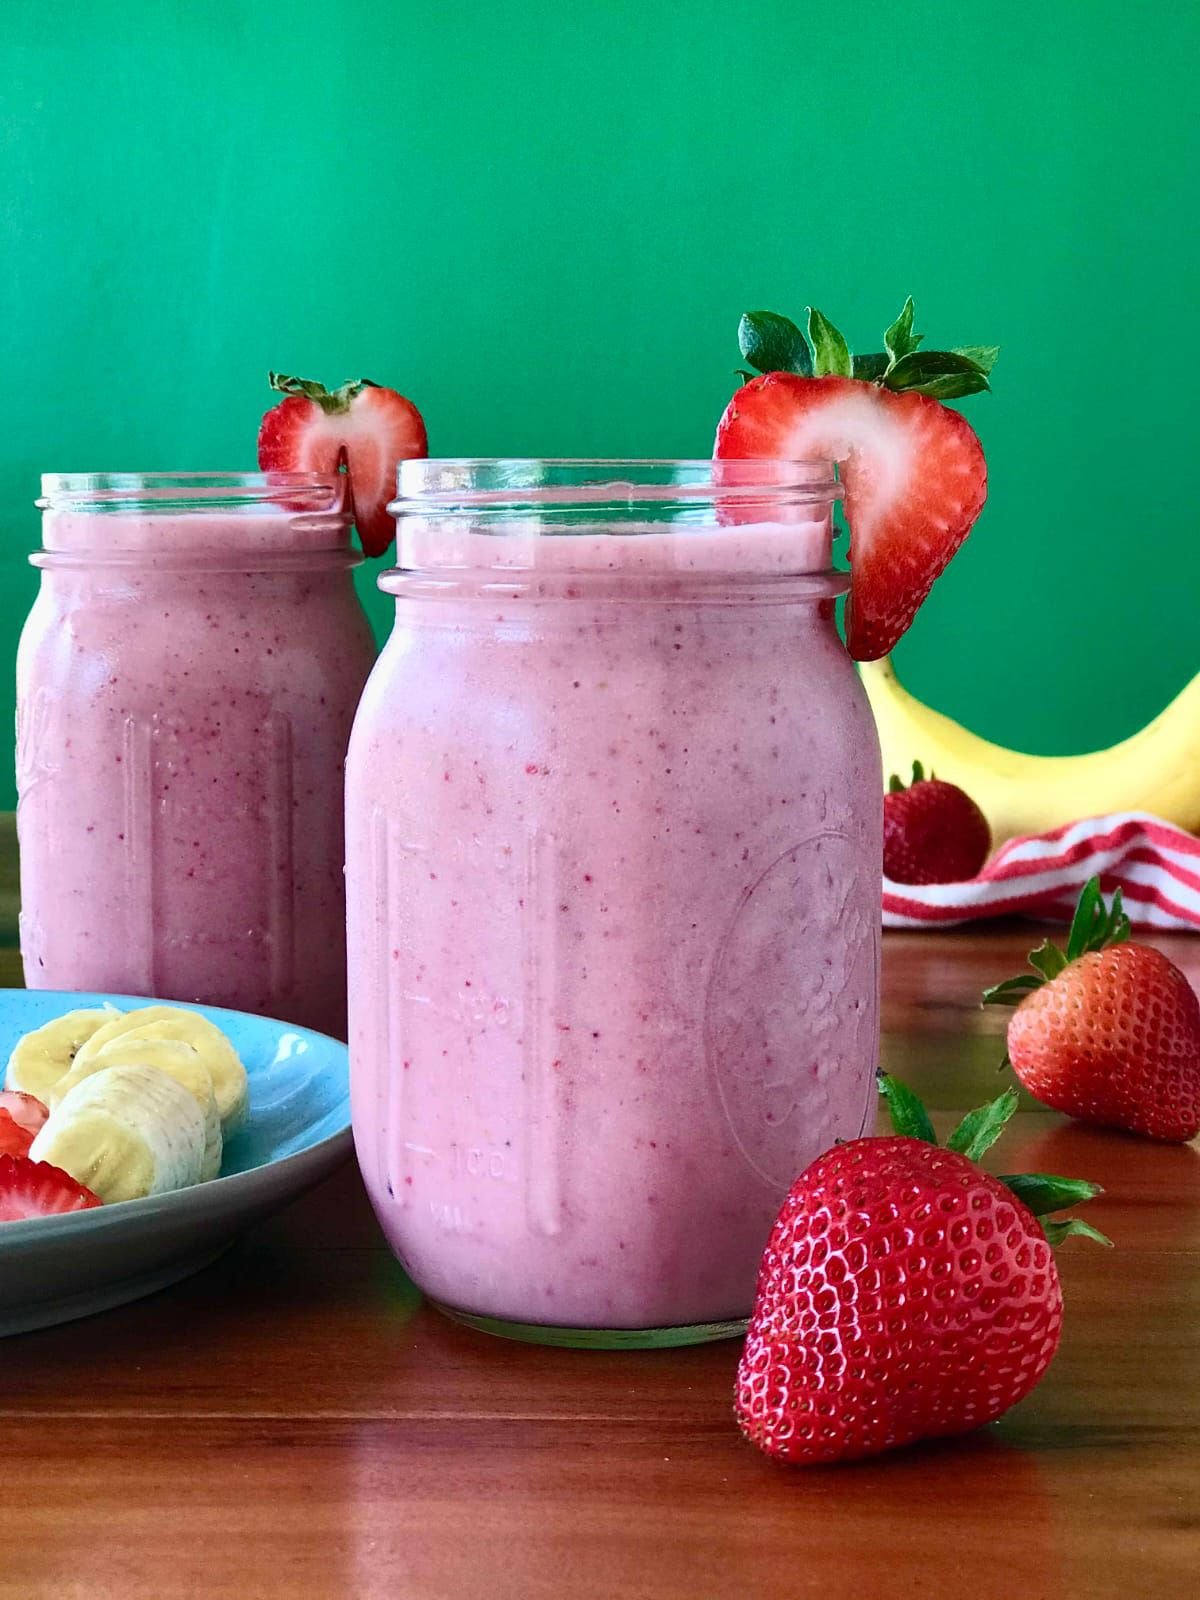
STRAWBERRY BANANA SMOOTHIE RECIPE

Strawberry Banana Smoothie Recipe

This recipe makes approximately two servings, perfect for the two jars in your photo.

Ingredients:


2 cups fresh or frozen strawberries (hulled)


1 large ripe banana (peeled)

1 cup  milk of your choice (dairy, almond, oat, or soy work great)


1/2 cup  Greek yogurt (adds creaminess and protein)

1 tablespoon  honey or maple syrup (optional, if you prefer it sweeter)


1 cup ice cubes (if using fresh fruit; skip if using frozen strawberries)

Instructions:

Prep the Fruit: Place the strawberries and banana into your blender. If you are using fresh fruit, you can slice them first to help the blender process them easily.


Add Liquids & Dairy: Pour in the milk and add the Greek yogurt.


Add Sweetener & Ice: If you like things a little sweeter, add your choice of honey or maple syrup now. If your fruit is at room temperature, toss in the ice cubes.

Blend: Start the blender on a low speed and gradually increase to high. Blend for 45–60 seconds, or until the mixture is completely smooth and creamy.


Serve: Pour into your favorite mason jars.


Garnish: As shown in your picture, finish by slicing a fresh strawberry halfway through to perch on the rim of the jar for a professional look.


Pro Tip: If you want a thicker smoothie, freeze your banana slices beforehand!

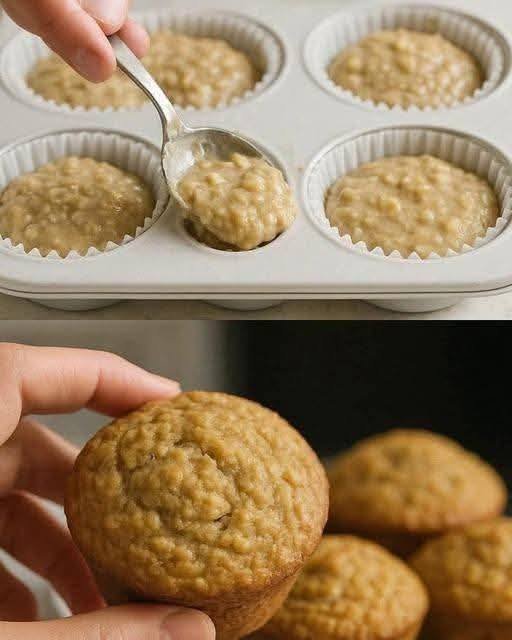
Sugar-Free 3-Ingredient Oatmeal Apple Muffins

Sugar-Free 3-Ingredient Oatmeal Apple Muffins

Diabetic-friendly | No Added Sugar | Naturally Sweet | Low-Calorie

These soft, naturally sweet oatmeal apple muffins are made with just 3 wholesome ingredients. No added sugar, no flour, no oil, and no artificial sweeteners. Perfect for a light breakfast, snack, or healthy dessert.

⚠️ Note: While this recipe contains no added sugar, it is not zero-calorie. Apples and oats contain natural carbohydrates.

 Ingredients (Makes 6–8 muffins)

  1. 1 cup (90g) rolled oats

  2. 1 medium apple (about 150g), peeled & grated

  3. 1 large egg

 Instructions

  1. Preheat oven to 180°C (350°F). Line a muffin tin with paper liners or lightly grease it.

  2. Grind oats in a blender until they become oat flour (or use store-bought oat flour).

  3. In a bowl, combine:

    • Oat flour

    • Grated apple (with juices)

    • Egg

  4. Mix until fully combined. Batter will be thick.

  5. Spoon evenly into muffin cups (fill about ¾ full).

  6. Bake for 18–22 minutes or until tops are golden and a toothpick comes out clean.

  7. Cool for 5–10 minutes before serving.

 Description

These muffins are:

  • Naturally sweet from apples

  • Soft and slightly moist

  • Lightly dense like baked oatmeal

  • Kid-friendly and diabetic-conscious

No refined flour, no added sugar, no butter, no oil.

 Recipe Notes

  • Use sweet apples (Fuji, Gala) for better natural sweetness.

  • Do not squeeze out apple juice—it adds moisture.

  • Batter thick? Let it rest 5 minutes to hydrate oats.

Optional Add-Ins (Still Healthy!)

  • Cinnamon (½ tsp)

  • Vanilla extract

  • Chopped walnuts

  • Chia seeds

  • A pinch of salt

(These are optional and not included in the 3 main ingredients.)

 Servings

Makes 6–8 muffins
Serving size: 1 muffin

Approximate Nutritional Information (Per Muffin—based on 6 muffins)

  • Calories: ~70–85 kcal

  • Carbohydrates: 12–14g

  • Fiber: 2g

  • Protein: 3g

  • Fat: 2 g

  • Added Sugar: 0g

⚠️ Exact values depend on apple size and oat brand.

 Health Benefits

🩺 Diabetic-Friendly

  • No added sugar

  • Contains fiber to slow glucose absorption

  • Lower glycemic impact than refined desserts

🌾 Oats

  • Rich in beta-glucan fiber

  • Supports heart health

  • Helps maintain stable blood sugar

🍎 Apples

  • Natural sweetness

  • Contains antioxidants

  • Good source of fiber

🥚 Egg

  • Adds protein

  • Helps keep you full longer

  • Supports muscle maintenance

 Q & A

Q: Can diabetics eat this?
A: Yes, in moderation. It contains natural carbs, so portion control is important.

Q: Can I make it vegan?
A: Replace egg with:

  • 1 tbsp chia seeds + 3 tbsp water (let gel 5 min)

Q: Can I skip blending oats?
A: Yes, but the texture will be more like baked oatmeal.

Q: How to store?
A:

  • Room temp: 1 day

  • Fridge: 4–5 days (airtight container)

  • Freeze: Up to 2 months

Glazed Brown Butter Honey Cakes

Glazed Brown Butter Honey Cakes

These cakes rely on the deep, nutty flavor of browned butter to create a dessert that tastes far more complex than the 10-minute prep time suggests.

Ingredients

For the Cake:

  • 1 cup (225g) Unsalted Butter: To be browned.

  • ¾ cup Granulated Sugar: Provides structure and sweetness.

  • ¼ cup Honey: Adds moisture and a distinct floral depth.

  • 2 Large Eggs: At room temperature for better emulsification.

  • 1 tsp Vanilla Extract: Enhances all the other flavors.

  • 1 ½ cups All-Purpose Flour: The base of the cake.

  • 1 tsp Baking Powder: For a perfect, airy rise.

  • ½ tsp Salt: Balances the sweetness of the honey.

  • ½ cup Whole Milk: Keeps the crumb tender.

For the Honey Glaze:

  • ¼ cup Honey: The star of the glaze.

  • 2 tbsp Water: To thin the glaze to a pourable consistency.

  • A pinch of Salt: To cut through the sugar.


Instructions

1. Brown the Butter

  • In a medium saucepan, melt the butter over medium heat.

  • Continue cooking, whisking occasionally. The butter will foam, then clear, and finally begin to turn golden brown with small dark specks at the bottom.

  • Once it smells nutty and looks like toasted hazelnuts, remove it from the heat immediately and pour into a heat-proof bowl to stop the cooking. Let it cool for 5 minutes.

2. Mix the Batter

  • Preheat your oven to 350°F (175°C). Grease individual foil baking tins or a standard muffin tin.

  • In a large bowl, whisk the browned butter with the sugar and honey until well combined.

  • Add the eggs one at a time, whisking well after each, then stir in the vanilla extract.

  • In a separate bowl, sift together the flourbaking powder, and salt.

  • Gradually add the dry ingredients to the butter mixture, alternating with the milk. Stir until just combined—do not overmix, or the cakes will be tough.

3. Bake

  • Divide the batter evenly among the prepared tins, filling them about two-thirds full.

  • Bake for 18–22 minutes, or until a toothpick inserted into the center comes out clean and the tops are a deep golden brown.

4. Glaze and Finish

  • While the cakes are baking, whisk the honeywater, and salt in a small bowl.

  • As soon as the cakes come out of the oven, brush the warm glaze generously over the tops. The warmth allows the glaze to soak into the top layer, creating a sticky, delicious crust.

  • Let the cakes cool in the tins for at least 10 minutes before serving.


Pro-Tip

For a dinner party presentation, serve these warm with a dollop of unsweetened whipped cream or a small scoop of vanilla bean ice cream to balance the richness of the honey.

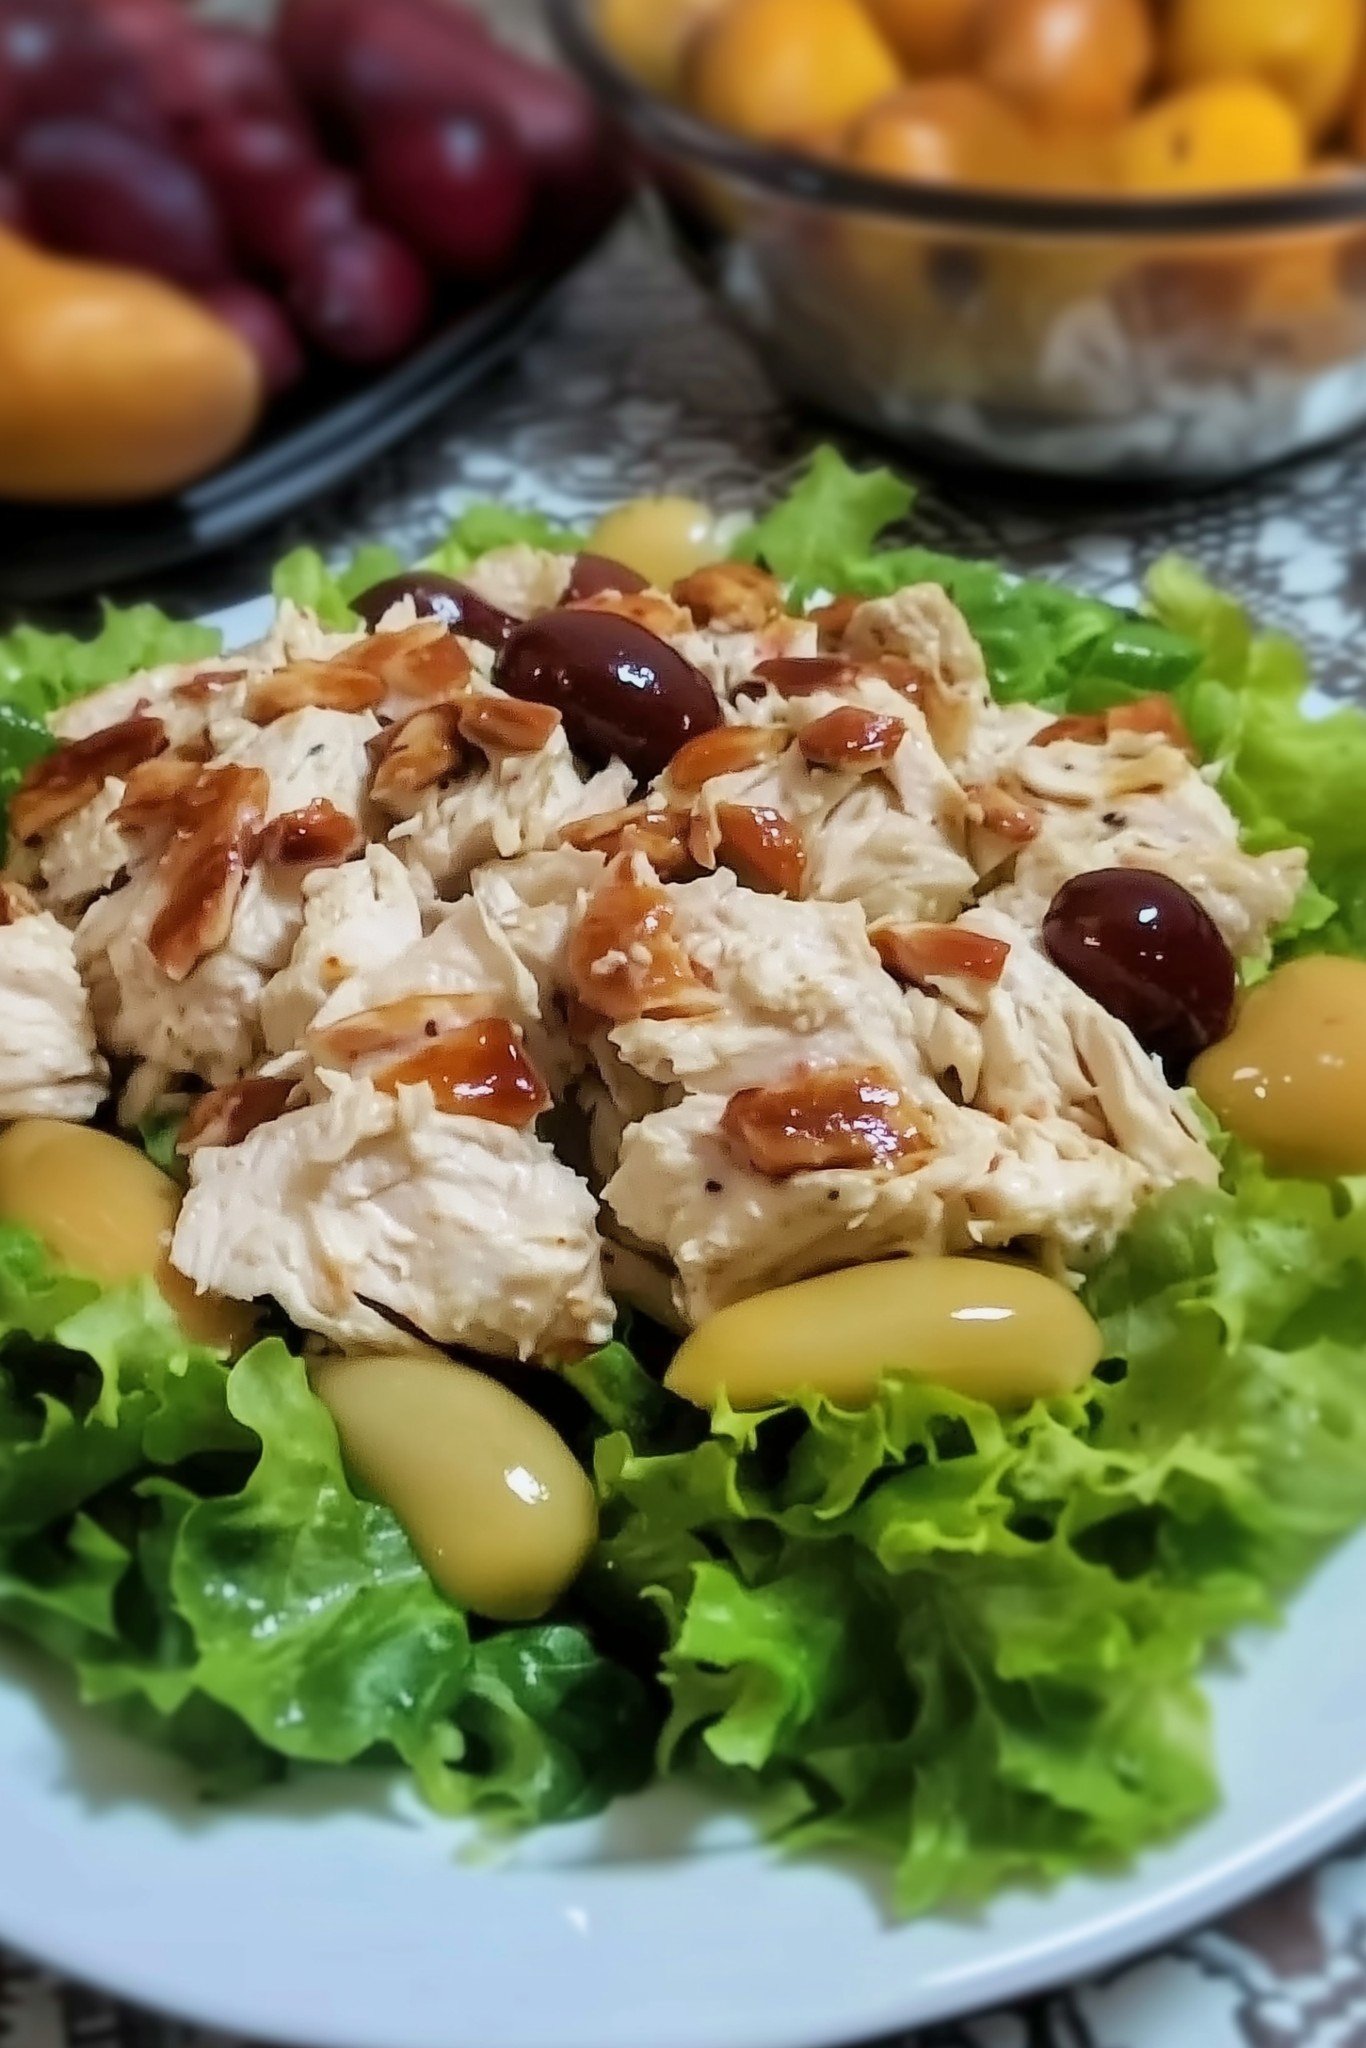
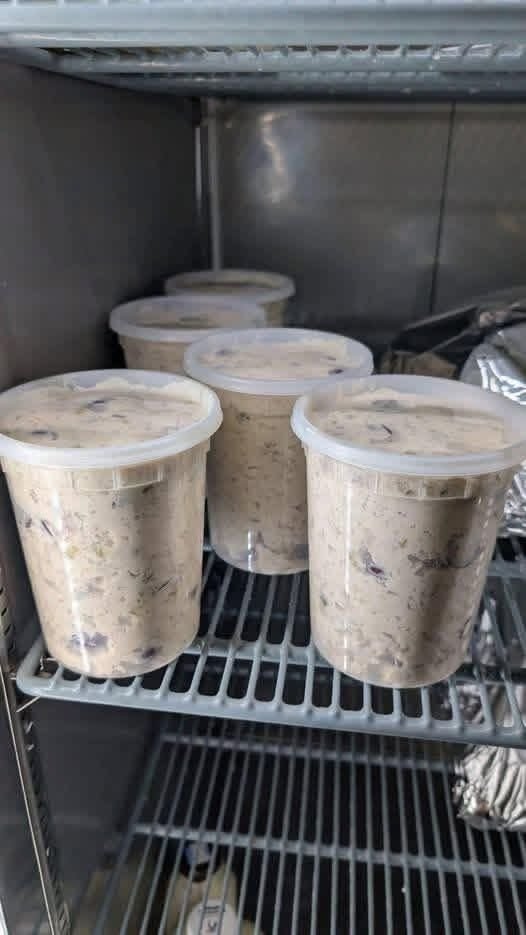
Creamy Shredded Fowl and Nut Mixture

Creamy Shredded Fowl and Nut Mixture


Oh my goodness, I have a recipe that is truly a lifesaver on busy nights! This Quick Baked Fowl, Grain, and Vegetable Medley is the perfect family dinner when you need something nutritious, comforting, and fast. It’s one of those amazing one-pan meals where you can basically just toss everything together and let the oven do all the hard work. Seriously, who has time for scrubbing endless pots?

I swear, this recipe was born out of pure desperation one night when I was staring into the fridge, trying to figure out how to feed four hungry kids without calling for pizza. I realized I could combine a few staples with some seasoning and let it bake. The result? A perfectly tender fowl, savory rice, and soft vegetables all cooked to perfection in a single dish!

This medley is easily customizable to whatever veggies you have rolling around in your crisper drawer, which makes it totally budget-friendly, too. It’s simple enough for beginners but tastes sophisticated enough for company. Trust me, if you need a hearty, flavorful, and effortless meal that saves you time and stress, you need to add this baked medley to your rotation immediately!

Why You’ll Love This Recipe

  • True One-Pan Dinner: Everything cooks together in a single baking dish for easy cleanup.
  • Quick Assembly: Mixes together in about 10 minutes before going into the oven.
  • Tender Fowl & Grain: The clear liquid and covered baking method keep the fowl and grain moist.
  • Budget-Friendly: Great for using staple grains and whichever fowl cut is cheapest.
  • Family Favorite: A simple, savory flavor that appeals to even picky eaters.

Ingredients You’ll Need

  • Fowl meat pieces that provide the main protein, which cook up tender and flavorful.
  • Long-grain dried cereal that forms the hearty, fluffy base of the meal.
  • Savory clear fowl liquid stock that serves as the essential cooking liquid for the grain.
  • Frozen mixed colorful legumes and chopped tubers that soften and add necessary nutrients.
  • A mild bulb vegetable that releases aromatic flavor as it cooks.
  • A robust, dried herb blend that seasons the entire dish.
  • Solid dairy fat that melts over the top to enhance richness and moisture.
  • Crystalline minerals and coarse ground spice used for overall flavor balance.

How It’s Made

The preparation involves combining the dry and wet ingredients in the baking dish. First, the washed grain and chopped raw vegetables are mixed with the fowl pieces and dry seasoning. This mixture is then completely covered with the savory clear liquid stock and topped with portions of the solid dairy fat. The dish is sealed tightly and baked in the oven for a set amount of time. Once baked, the lid is removed, the medley is fluffed, and it’s ready to serve immediately.

Tips, Variations & Storage

  • Tip: Make sure to seal the baking dish very tightly with heavy-duty foil. Trapping the steam is crucial for cooking the raw grain completely and keeping the fowl moist.
  • Substitution: If you don’t have long-grain dried cereal, you can substitute with a similar grain, but you may need to adjust the amount of savory liquid stock.
  • Add-ins: For a cheesy twist, sprinkle shredded curds (cheese) over the top during the last 5 minutes of baking, once the foil is removed.
  • Dietary Swap: Use all water instead of the clear fowl liquid stock for a lower-sodium option, but increase the robust dried herb blend for flavor.
  • Storage: Store cooled leftovers in an airtight container in the refrigerator for up to 3 days.
  • Freezer Notes: This meal does not freeze well due to the cooked grain becoming mushy when thawed and reheated. Best consumed fresh or refrigerated shortly after baking.

FAQ Section

1. Do I need to use raw fowl meat or can I use cooked?

For this recipe, you must use raw fowl pieces (like breast or thigh). The long baking time is necessary to fully cook the fowl and the dry grain simultaneously.

2. Is it necessary to wash the grain before using it?

Washing the grain (rice) before adding it is recommended. It removes excess starch, which helps the finished dish turn out fluffier and less sticky.

3. What can I use if I don’t have the clear fowl liquid stock?

You can use plain water, but for flavor, stir in one to two teaspoons of concentrated fowl bullion powder or cubes into the water before adding it to the dish.

4. How do I know when the grain and fowl are cooked completely?

The fowl is done when it registers 165 Fahrenheit internally. The grain is done when it has absorbed all the liquid and is tender to the bite, not crunchy.

5. What is the best way to serve this medley?

Serve this dish hot, right out of the oven. It is a complete meal on its own, but a sprinkle of fresh chopped herb leaves on top adds color and flavor.

Recipes

Main Mix

  • 1 : Pre-cooked shredded fowl (Rotisserie chicken), shredded
  • 1 C.: Dried sweet tart berries Dried cranberries
  • 1 C.: Chopped edible tree seeds Chopped pecans
  • 1 C.: Slivered edible tree seeds Almond slivers

Creamy Binder

  •  C.: Light oil-based binder Light mayo
  • ½ tsp.: Pungent dried bulb powder Garlic powder
  • ¼ tsp.: Crystalline minerals Kosher salt
  • ¼ tsp.: Coarse ground spice Black pepper

Instructions

  • In a large mixing vessel, combine the shredded fowl meat, dried sweet tart berries, chopped edible tree seeds, slivered tree seeds, crystalline minerals, coarse ground spice, and pungent dried bulb powder.
  • Gently mix all the dry and savory ingredients together until they are evenly distributed.
  • Add the light oil-based binder to the mixture. Mix thoroughly until all the ingredients are fully coated in the creamy dressing.
  • Serve immediately, or chill before enjoying.

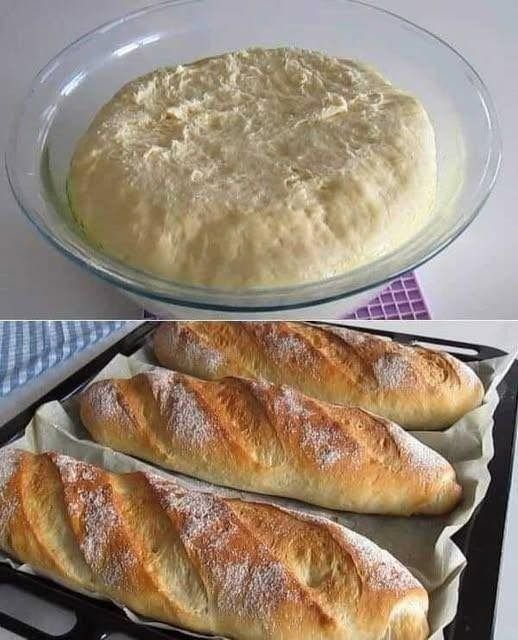
After trying this recipe, you’ll never want to buy bread again — you’ll bake it fresh at home instead

After trying this recipe, you’ll never want to buy bread again — you’ll bake it fresh at home instead

This classic Homemade White Bread recipe yields a soft, fluffy loaf with a golden, tender crust. Ideal for sandwiches, toast, or simply savoring warm with a pat of butter.

🍞 Homemade White Bread

Ingredients

For the Bread:

  • 4 cups all-purpose flour
  • 2 teaspoons instant yeast
  • 2 teaspoons salt
  • 2 tablespoons sugar
  • 2 tablespoons unsalted butter, softened
  • 1 ½ cups warm water

For the Topping (optional):

  • 1 tablespoon milk
  • 1 tablespoon unsalted butter, melted

Instructions

Step 1: Activate the Yeast
In a small bowl, stir together the warm water, sugar, and yeast. Let it rest for 5–10 minutes, until the mixture becomes foamy and active.

Step 2: Make the Dough
In a large mixing bowl, combine the flour, salt, softened butter, and the yeast mixture. Knead the dough on a lightly floured surface for about 10 minutes, or until it’s smooth and elastic.

Step 3: First Rise
Place the dough into a greased bowl, cover it, and set it in a warm area for 1–2 hours, or until it doubles in volume.

Step 4: Shape the Loaf
Gently punch down the dough to release trapped air. Form it into a loaf shape and place it in a greased bread

Step 5: Second Rise
Cover and let the shaped dough rise again for 30–45 minutes, until it puffs up nicely.

Step 6: Preheat & Prepare the Topping
Preheat your oven to 375°F (190°C). If you’re adding the topping, mix the milk and melted butter together.

Step 7: Bake
Brush the loaf with the milk-butter mixture if desired. Bake for 30–35 minutes, or until the top is golden brown and the loaf sounds hollow when tapped.

Step 8: Cool & Serve
Let the bread cool in the pan for a few minutes, then transfer it to a wire rack to cool completely. Slice and enjoy your homemade loaf fresh or toasted!

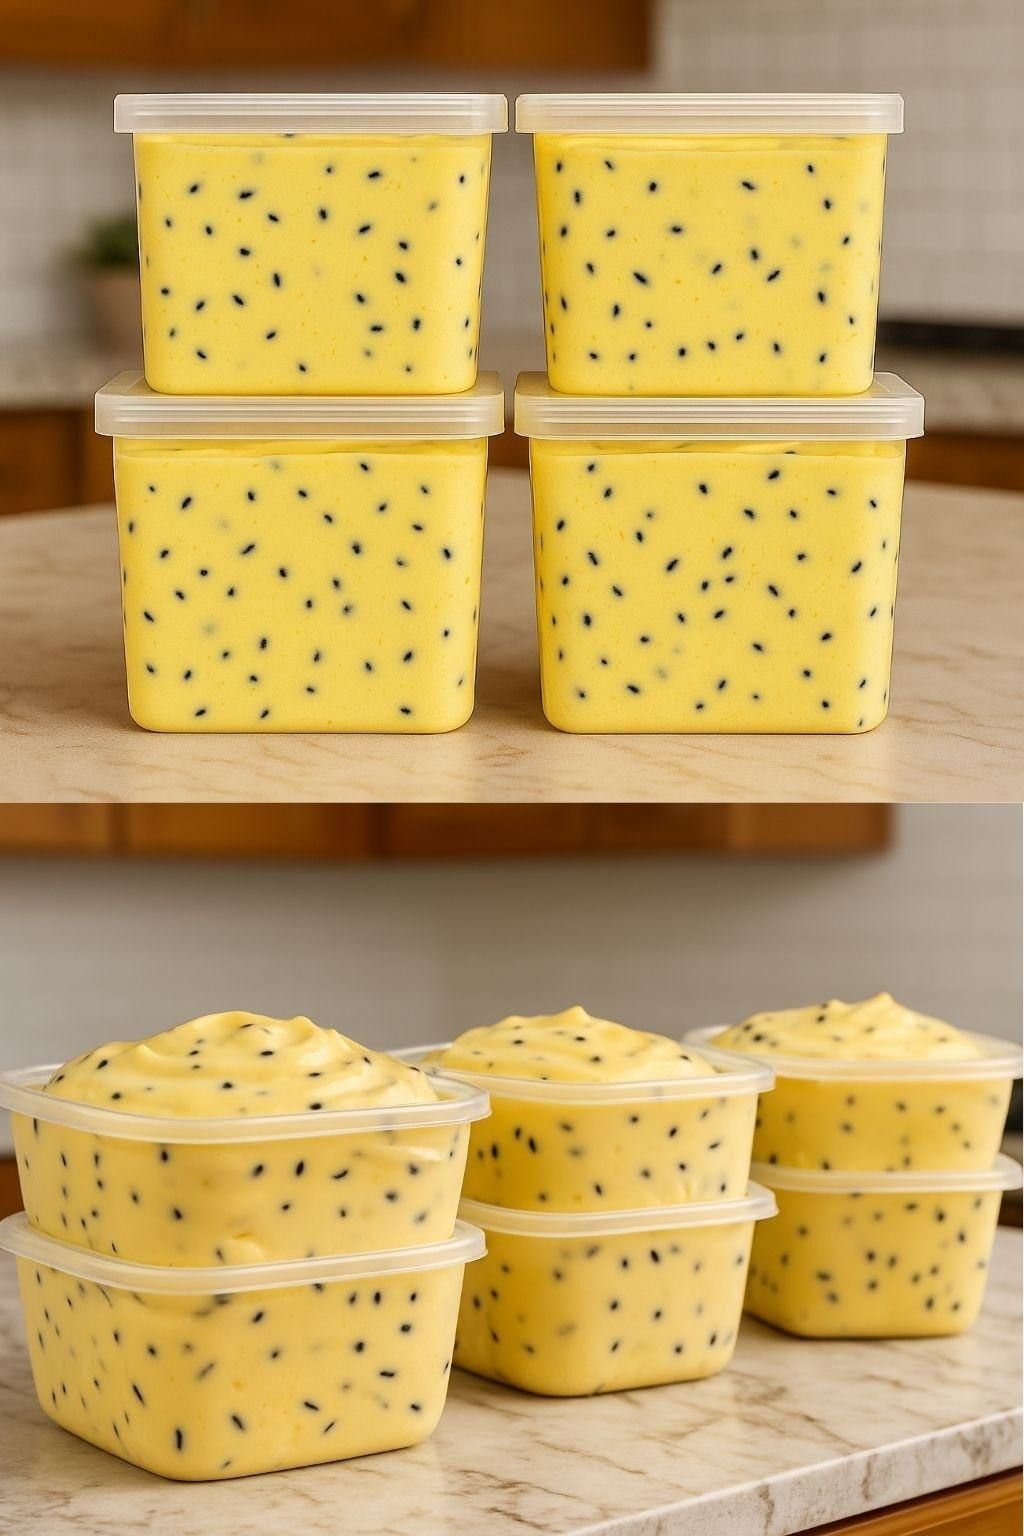
😋😀 Creamy Passion Fruit Dessert with a Touch of Chocolate – Just 4 Ingredients. I sent to those who sent Hi

Meal Prep: Passion Fruit Dessert

Learn how to prepare for dessert recipes step-by-step recipes inspired by top online culinary schools. Whether you’re an aspiring chef or just love gourmet cooking at home, these professional recipe ideas are perfect for busy days and high-quality meals.

Recipe ingredients:

  • 2 cartons of heavy cream (400 g | 14.1 oz total)
  • 4 tablespoons powdered milk (approx. 60 g | 2.1 oz)
  • 1 packet of powdered passion fruit drink mix (25 g | 0.88 oz)
  • Chocolate sprinkles to taste (for mixing and decorating)
  • Small disposable cups (145 ml | 5 oz each – makes about 4 to 5 servings)

Instructions:

In a blender, add the heavy cream, powdered milk, and the passion fruit drink mix. Blend for about 1 minute or until smooth and creamy.

Turn off the blender and stir in the chocolate sprinkles by hand with a spoon. Don’t blend again — this keeps the sprinkles whole and adds a nice crunchy texture.

Pour the mixture into the disposable cups, filling them almost to the top. Gently tap the bottom of each cup on the counter to even out the cream.

Refrigerate for at least 1 hour until chilled and firm.

Serve directly in the cups and top with extra chocolate sprinkles for a pretty finish, if desired.

Extra Tips:

  • Customize the flavor: Swap the passion fruit drink mix for strawberry, grape, or lime — the creamy base works with any flavor!
  • Great for selling: This dessert is super quick to prepare, very affordable, and yields several servings — perfect for a home business or bake sale.

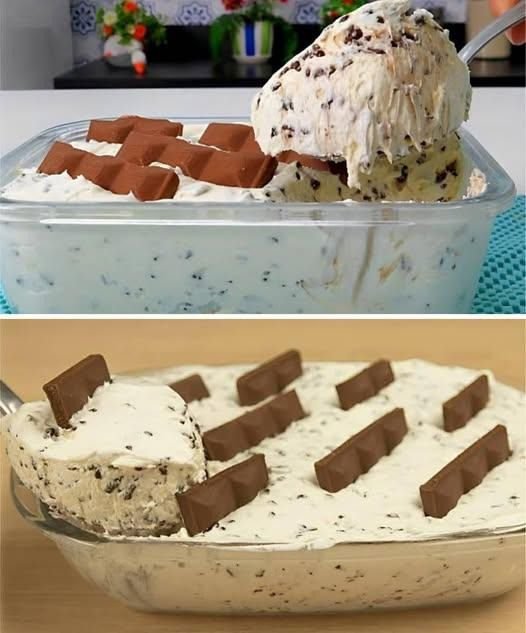
💗💗 Iced dessert! Super creamy..

Iced dessert: Super creamy, excellent option to serve on special days

🤤 Flourless Pancakes. A Quick and Delicious Recipe

Pancakes in 10 Minutes: No Wheat Flour Needed, Easy, Quick, and Delicious Recipe

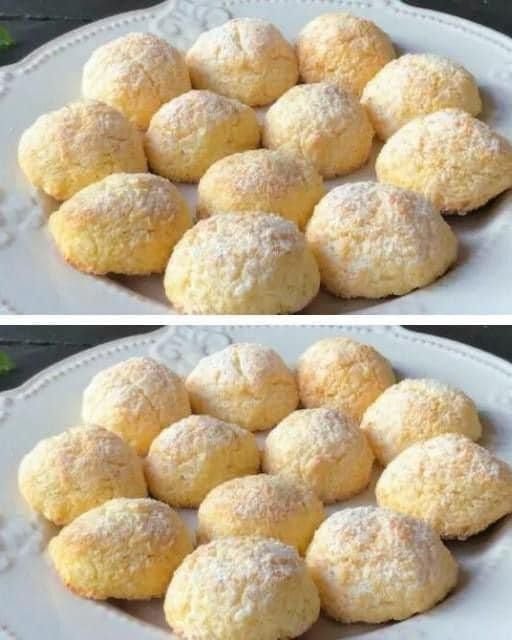
☺️ 3-Ingredient Coconut Cookies – Send Hello and receive.

3-Ingredient Coconut Cookies: A quick, easy, and delicious recipe


How to Make 3-Ingredient Coconut Cookies

With just 3 ingredients, these coconut cookies are quick, easy, and delicious. A perfect treat to sweeten your day with no hassle. You don’t need cooking classes or costly meal delivery services to prepare something delicious at home. With a bit of planning and our detailed meal prep guide, you can create amazing dishes with confidence and ease.

Recipe Ingredients:

  • 2 large eggs
  • 1 cup of shredded coconut (200 g)
  • ½ cup of sugar (100 g)

Instructions:

First, preheat the oven to the lowest possible temperature. This will ensure the cookies bake evenly and develop a light golden color.

Next, in a bowl, combine the shredded coconut, sugar, and eggs. Then, mix thoroughly using a fork until the ingredients start to come together. After that, knead with your hands for about 1 minute to ensure a well-blended, uniform dough.

Now, shape the cookies. You can use a spoon to scoop out portions of dough or roll it out slightly and cut shapes using a cookie cutter. Make sure they’re all about the same size so they bake evenly.

After that, prepare a glass baking dish: either line it with parchment paper or lightly grease it with oil. This prevents the cookies from sticking during baking.

Next, arrange the dough portions on the glass dish, leaving space between each. Bake in the preheated oven for about 10 minutes. The baking time can vary depending on cookie thickness, but the goal is a golden finish on both sides. If necessary, flip them halfway through baking.

Finally, remove the cookies from the oven and let them cool at room temperature. This makes them easier to handle and ready for decorating, if desired.

Once cooled, feel free to decorate them however you like. Try adding chocolate chips to the raw dough or dipping the baked cookies in melted chocolate.


Tips:

  • Recipe variation: Add lemon or orange zest, or chocolate chips for a different flavor.
  • Coconut: Freshly grated coconut provides a stronger taste, but unsweetened dried coconut also works well.
  • Texture: For crunchier cookies, bake for an additional 2–3 minutes, but watch closely to prevent burning.

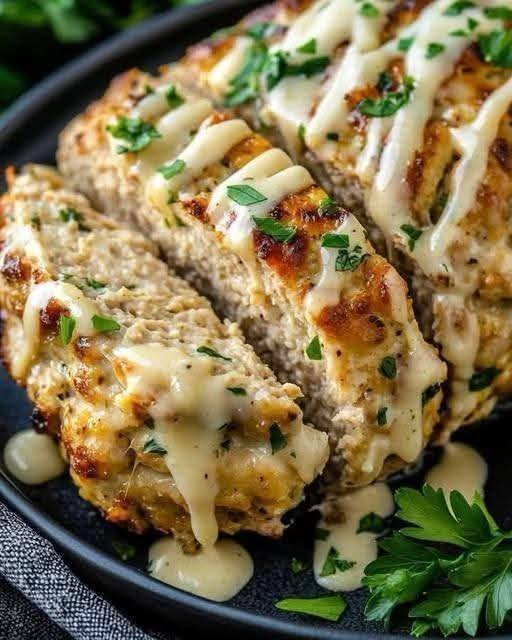
Cheesy Garlic Turkey Meatloaf

Cheesy Garlic Turkey Meatloaf

Ingredients

For the meatloaf:

* 1.5 lb (700 g) ground turkey
* 1 cup breadcrumbs (or oats for a healthier option)
* 2 large eggs
* 1 small onion, finely chopped
* 4–5 garlic cloves, minced
* 1/3 cup milk
* 2 tbsp Worcestershire sauce
* 1 tsp salt
* 1/2 tsp black pepper
* 1 tsp paprika
* 1 tsp Italian seasoning
* 1/2 cup grated Parmesan cheese

Cheesy filling:

* 1 to 1 1/2 cups shredded cheddar cheese (or mozzarella) Cheddar cheese
* 2 tbsp chopped parsley (optional)

**Garlic glaze (optional but recommended):**

* 2 tbsp butter, melted
* 2 garlic cloves, minced
* 1 tbsp honey or ketchup

Instructions

1. Prep the oven

Preheat oven to **180°C (350°F)**. Lightly grease a loaf pan or baking tray.

2. Make the meat mixture

In a large bowl, mix:
ground turkey, breadcrumbs, eggs, onion, garlic, milk, Worcestershire sauce, salt, pepper, paprika, Italian seasoning, and Parmesan cheese.

Mix just until combined (don’t overmix or it becomes dense).

3. Stuff with cheese

Spread half the meat mixture into the pan.
Add a layer of shredded cheese in the center.
Cover with the remaining meat mixture and seal the edges.

4. Bake

Bake for **45–55 minutes**, or until fully cooked (internal temp: 75°C / 165°F).

5. Add garlic glaze (optional)

Mix melted butter + garlic + honey/ketchup and brush over the top during the last 10 minutes of baking.

6. Rest & serve

Let it rest for **10 minutes** before slicing.

Serving Ideas

* Mashed potatoes or roasted veggies
* Fresh salad
* Garlic bread

This dish is a comfort-food version of classic Turkey Meatloaf but upgraded with gooey cheese and rich garlic flavor.

HEALTHY CHICKEN SALAD , LIGHT, CREAMY CHICKEN SALAD TUCKED INSIDE BUTTERY CROISSANTS FOR THE PERFECT BALANCED MEAL.

Do you miss that comforting, creamy, deli-style chicken salad? If you’re following the Weight Watchers plan, you know that creamy dressings and high-fat ingredients can quickly blow through your daily SmartPoints (or PersonalPoints). That’s why we created this brilliant SmartPoints-friendly chicken salad recipe!

We’ve swapped traditional mayonnaise for a blend of nonfat Greek yogurt and just a touch of light mayo to keep the points low while dramatically boosting the protein. This switch makes the filling incredibly satisfying and keeps you full for hours—the perfect strategy for weight loss meals. The result is a vibrant, crunchy, and absolutely delicious sandwich that fits perfectly into your plan. This recipe promises a quick, protein-rich, and macro-friendly meal that tastes like a cheat day but keeps you on track!


✨ Look At The Recipe

  • Sensory Appeal: The fantastic textural contrast of a flaky croissant (choose a lighter option!) against the super creamy, yet lean, chicken salad filling.
  • Flavor Highlight: A bright, balanced flavor profile with zesty lemon, savory chicken, and pops of sweetness from grapes and crunch from celery.
  • Key WW Benefit: Utilizes ZeroPoint foods (lean chicken breast, nonfat Greek yogurt in many plans, celery) to build a high-volume, high-protein filling for maximum satiety on fewer points.

🛒 Ingredients Needed

FOR THE ZEROPOINT-HEAVY CHICKEN SALAD

  • 2 cups cooked chicken breast (shredded or diced, skin removed – a ZeroPoint food on most plans)
  • $1/2$ cup nonfat plain Greek yogurt (ZeroPoint in many plans)
  • 2 Tbsp light mayonnaise (or a light, reduced-fat dressing)
  • $1/4$ cup finely chopped red onion
  • $1/2$ cup chopped celery
  • $1/2$ cup red or green grapes, halved (high-volume ingredient)
  • 1 Tbsp fresh lemon 
    • 1 tsp Dijon mustard
    • $1/2$ tsp dried dill (or 1 Tbsp fresh)
    • Salt and black pepper to taste

    FOR ASSEMBLY

    • 4 small croissants (look for smaller, portion-controlled sizes to minimize points)
    • 4 pieces of Butter Lettuce or watercress (high-volume, ZeroPoint greens)

    🔪 How To Make Our SmartPoints Chicken Salad

    1. Prepare the Base: Ensure your healthy chicken breast is cooled and shredded or diced evenly. Place the chicken into a large mixing bowl. This is a great easy meal prep idea to do on Sunday.
    2. Add Volume & Crunch: Finely chop the celery and red onion; halve the grapes. Add these high-volume, low-point ingredients into the bowl with the chicken.
    3. Mix the Light Dressing: In a separate bowl, whisk together the nonfat Greek yogurt, light mayonnaise, lemon juice, Dijon mustard, and dill. Season well with salt and black pepper. The yogurt keeps this a macro-friendly meal.
    4. Combine Gently: Pour the lightened dressing over the chicken and vegetable mixture. Fold everything together until the chicken is completely and evenly coated.
    5. Chill for Flavor: Cover and refrigerate for at least 30 minutes. This chilling time is essential for the flavors to deepen and the salad to set up.
    6. Assemble the WW Sandwich: To assemble, slice your croissant open. Layer with a piece of crisp lettuce (a great ZeroPoint addition) and spoon a portion of the chilled low-point chicken salad onto the bottom half. Enjoy immediately!

    🧊 Storage & Serving Suggestions

    • Storing: The WW chicken salad filling is best stored separately in an airtight container for up to 3 days in the refrigerator.
    • Reheating: This is a cold recipe and should not be reheated.
    • Freezing: Freezing is not recommended, as the Greek yogurt base will change texture when thawed.
    • Serving Pairings (WW-Approved): To keep the points low, serve alongside a huge cup of raw, chopped vegetables (ZeroPoint on most plans), a bowl of air-popped popcorn, or a simple side salad with a fat-free dressing.

    ❓ Tips & FAQs

Q: HOW CAN I REDUCE THE SMARTPOINTS FURTHER IF CROISSANTS ARE TOO HIGH?

A: Skip the croissant entirely! Serve this delicious healthy chicken salad over a large bed of mixed greens, on top of cucumber slices, or stuffed into large bell pepper halves. Focus on using your ZeroPoint foods as the vehicle.

Q: WHAT IF I DON’T LIKE GRAPES IN MY CHICKEN SALAD?

A: You can swap the grapes for $1/2$ cup of chopped apple for a similar sweetness and crunch, or use pickles/relish for a more savory flavor profile. Both are clean eating additions that keep the points low.

Q: IS USING ROTISSERIE CHICKEN OKAY ON WW?

A: Yes, as long as you meticulously remove all the skin and any visible fat, the lean breast meat is fine. However, boiling or baking your own chicken breast ensures the lowest possible points for this weight loss meal.

Q: CAN I ADD NUTS FOR CRUNCH?

A: You can, but nuts (like pecans or almonds) are high in points. If you need the crunch, measure them carefully (e.g., 1 Tbsp, chopped fine) and make sure to account for the added points in your tracker

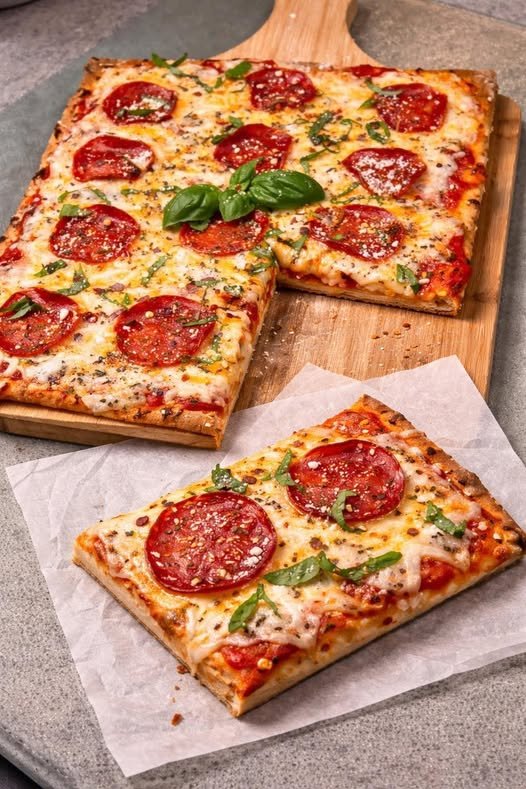
Low Point Pizza

🍕 FULL PEPPERONI PAN PIZZA RECIPE

🧾 INGREDIENTS

🔸 Dough:

  • 3 cups all-purpose flour
  • 1 tsp salt
  • 1 tsp sugar
  • 2 tsp instant yeast
  • 1 cup warm water
  • 2 tbsp olive oil

🔸 Sauce:

  • 1 cup pizza sauce (or crushed tomatoes)
  • 2 cloves garlic (minced)
  • 1 tsp oregano
  • ½ tsp chili flakes
  • Salt to taste

🔸 Toppings:

  • 2 cups mozzarella cheese (shredded)
  • Pepperoni slices
  • Fresh basil leaves
  • Parmesan (optional)

🔪 STEP-BY-STEP

1️⃣ Make Dough

  • Mix warm water + sugar + yeast → rest 5 min
  • Add flour + salt + oil
  • Knead for 8–10 minutes
  • Cover and let rise 1–1.5 hours

2️⃣ Prepare Pan

  • Oil a square tray or pan
  • Stretch dough into pan (thick base like picture)

👉 Let it rest again 15–20 mins


3️⃣ Make Sauce

  • Mix all sauce ingredients
  • Cook lightly for 5–10 mins (optional but better flavor)

4️⃣ Assemble Pizza

  1. Spread sauce evenly
  2. Add lots of mozzarella
  3. Place pepperoni slices
  4. Sprinkle oregano/chili flakes

5️⃣ Bake

  • Preheat oven: 220°C (430°F)
  • Bake for 15–20 minutes
  • Until:
    • Cheese is bubbling
    • Edges are crispy & golden

6️⃣ Finish

  • Add fresh basil 🌿
  • Sprinkle parmesan
  • Slice into squares like image

✨ PRO TIPS (Important)

  • Use pan with oil → gives crispy bottom
  • Don’t over-sauce (keeps crust crispy)
  • Bake on lower rack → better base crunch
  • For extra crispy edges → add cheese near sides

🍽️ RESULT

✔ Thick soft inside
✔ Crispy bottom
✔ Cheesy, juicy top
✔ Exactly like your image

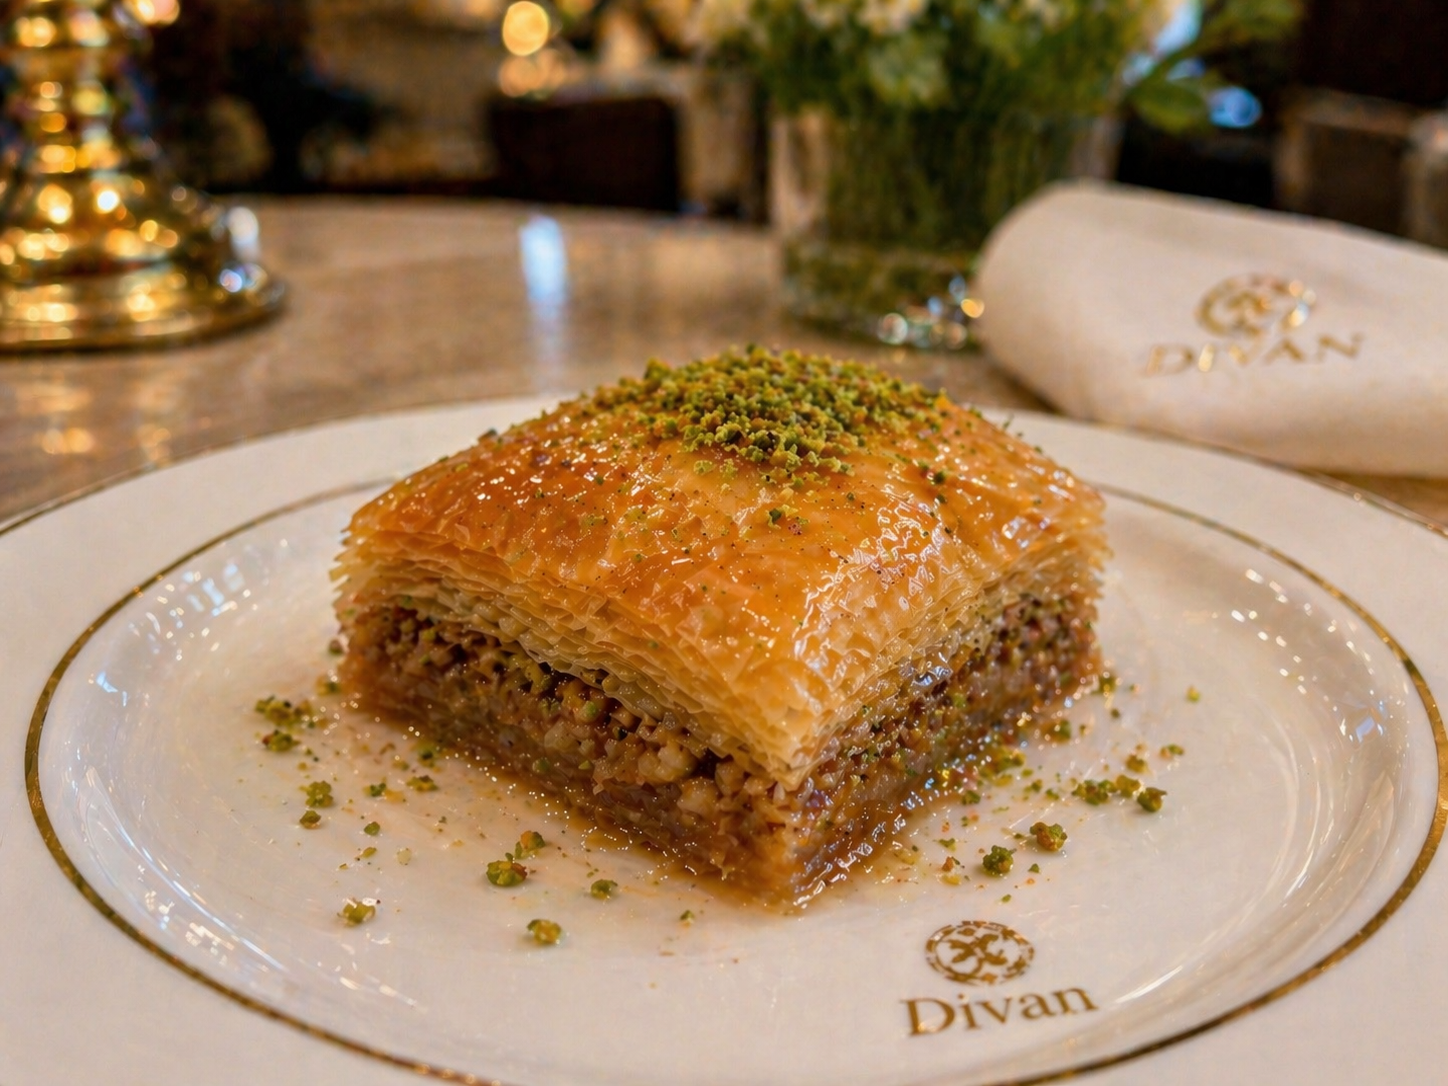
🥮 Authentic Baklava

🧾 Ingredients

For the Baklava:

  • 1 package phyllo dough (about 400–500g), thawed
  • 2 cups walnuts or pistachios (finely chopped)
  • 1 cup unsalted butter (melted)
  • 1 tsp cinnamon (optional)
  • Pinch of salt

For the Syrup:

  • 1 cup water
  • 1 cup sugar
  • ½ cup honey
  • 1 tbsp lemon juice
  • 1–2 strips lemon peel or 1 tsp vanilla (optional)

🔪 Preparation

1. Prepare the Nut Filling

  • Finely chop nuts (not powder—keep some texture).
  • Mix with cinnamon and a pinch of salt.
  • Set aside.

2. Prepare the Syrup (Do this first!)

  • In a saucepan, combine:
    • water + sugar → bring to boil
  • Add honey + lemon juice + peel
  • Simmer for 10 minutes
  • Let it cool completely

👉 Important: syrup must be cool, baklava must be hot later.


3. Prep the Phyllo

  • Preheat oven to 180°C (350°F)
  • Brush your baking dish with butter
  • Keep phyllo covered with a damp cloth (it dries fast)

4. Layering (This is the key part)

  1. Place 8–10 sheets of phyllo in the dish
    • Brush butter between each layer
  2. Add a thin layer of nuts
  3. Add 4–5 sheets, buttering each
  4. Repeat:
    • nuts → phyllo → butter
      until ingredients are used
  5. Finish with 8–10 top layers of phyllo

5. Cut Before Baking

  • Use a sharp knife to cut into:
    • diamonds, squares, or triangles

👉 Don’t skip this—cutting after baking will ruin layers.


6. Bake

  • Bake for 45–55 minutes
  • Until deep golden brown and crispy

7. Add Syrup

  • Immediately pour cool syrup over hot baklava
  • You’ll hear a sizzle—that’s perfect

8. Rest (VERY IMPORTANT)

  • Let it sit 4–6 hours (or overnight)
  • This allows full absorption and flavor

✨ Tips for Perfect Baklava

  • Use real butter, not margarine
  • Don’t rush layering—thin layers = better texture
  • Keep phyllo moist while working
  • Pistachios = more Turkish style
  • Walnuts = more Greek style

🍽️ Serving

  • Garnish with crushed pistachios
  • Serve with tea or coffee ☕

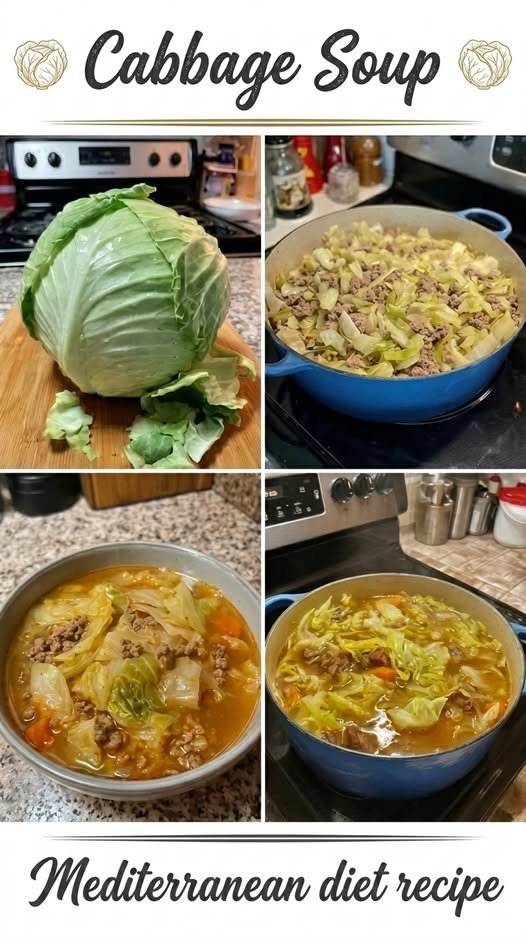
Cabbage Soup

 Cabbage Soup
Filling, low-calorie & perfect for weight loss 🥣💪✨ Keeps you full and helps control cravings!

Ingredients:

  • 1 lb (450g) lean ground beef or turkey
  • 1 medium head cabbage, chopped
  • 1 onion, chopped
  • 2 carrots, sliced
  • 2 celery stalks, chopped
  • 1 can (14.5 oz) diced tomatoes
  • 4 cups beef or vegetable broth
  • 2 cloves garlic, minced
  • 1 teaspoon paprika or mixed herbs
  • Salt & pepper (to taste)

Instructions:

Start by heating a large pot over medium heat. Add the ground beef or turkey and cook until fully browned, breaking it apart with a spoon as it cooks. If using beef, drain any excess fat to keep the soup lighter and healthier.

Next, add the chopped onion and minced garlic to the pot. Cook for about 2–3 minutes until the onion becomes soft and fragrant. Stir in the sliced carrots and chopped celery, allowing them to cook for another 5 minutes. This step helps build a flavorful base for the soup.

Now, add the chopped cabbage and mix everything well. The cabbage may seem like a lot at first, but it will soften and reduce in size as it cooks. Pour in the diced tomatoes along with their juices, followed by the broth. Stir everything together until well combined.

Season the soup with paprika, salt, and pepper. You can also add your favorite herbs like thyme or oregano for extra flavor. Bring the soup to a gentle boil, then reduce the heat to low.

Cover and let the soup simmer for 25–30 minutes, or until all the vegetables are tender and the flavors have blended together. Stir occasionally to ensure even cooking.

Taste the soup and adjust seasoning if needed. If you prefer a thinner consistency, you can add a little more broth or water.

Serve the soup hot, either on its own or with a light side. It’s perfect for meal prep and tastes even better the next day as the flavors deepen.

Nutrition (per serving approx):

  • Calories: 180–220 kcal
  • Protein: 18–22g
  • Carbs: 15–18g
  • Fat: 6–8g

Enjoy a healthy, satisfying bowl that supports your weight loss journey 💚🔥

👁️ Can you really improve vision overnight

👁️ Can you really improve vision overnight? Not exactly.

Eating foods like pumpkin seeds, green tea, fatty fish, berries, egg yolks, and cacao supports long-term eye health—but they won’t magically sharpen your vision by morning.

What they actually do:

  • 🥜 Pumpkin seeds → zinc for retinal health
  • 🐟 Fatty fish → omega-3s for dry eyes & vision support
  • 🫐 Berries → antioxidants for macular protection
  • 🥚 Egg yolks → lutein & zeaxanthin for eye function
  • 🍫 Raw cacao → improves blood flow
  • 🍵 Green tea → reduces oxidative stress

📊 Reality check:
Benefits build over weeks to months, not overnight.

💡 Best approach:
Consistency matters—eat nutrient-rich foods, protect your eyes, and maintain a healthy lifestyle.

⚠️ If you notice vision changes, always consult an eye specialist.

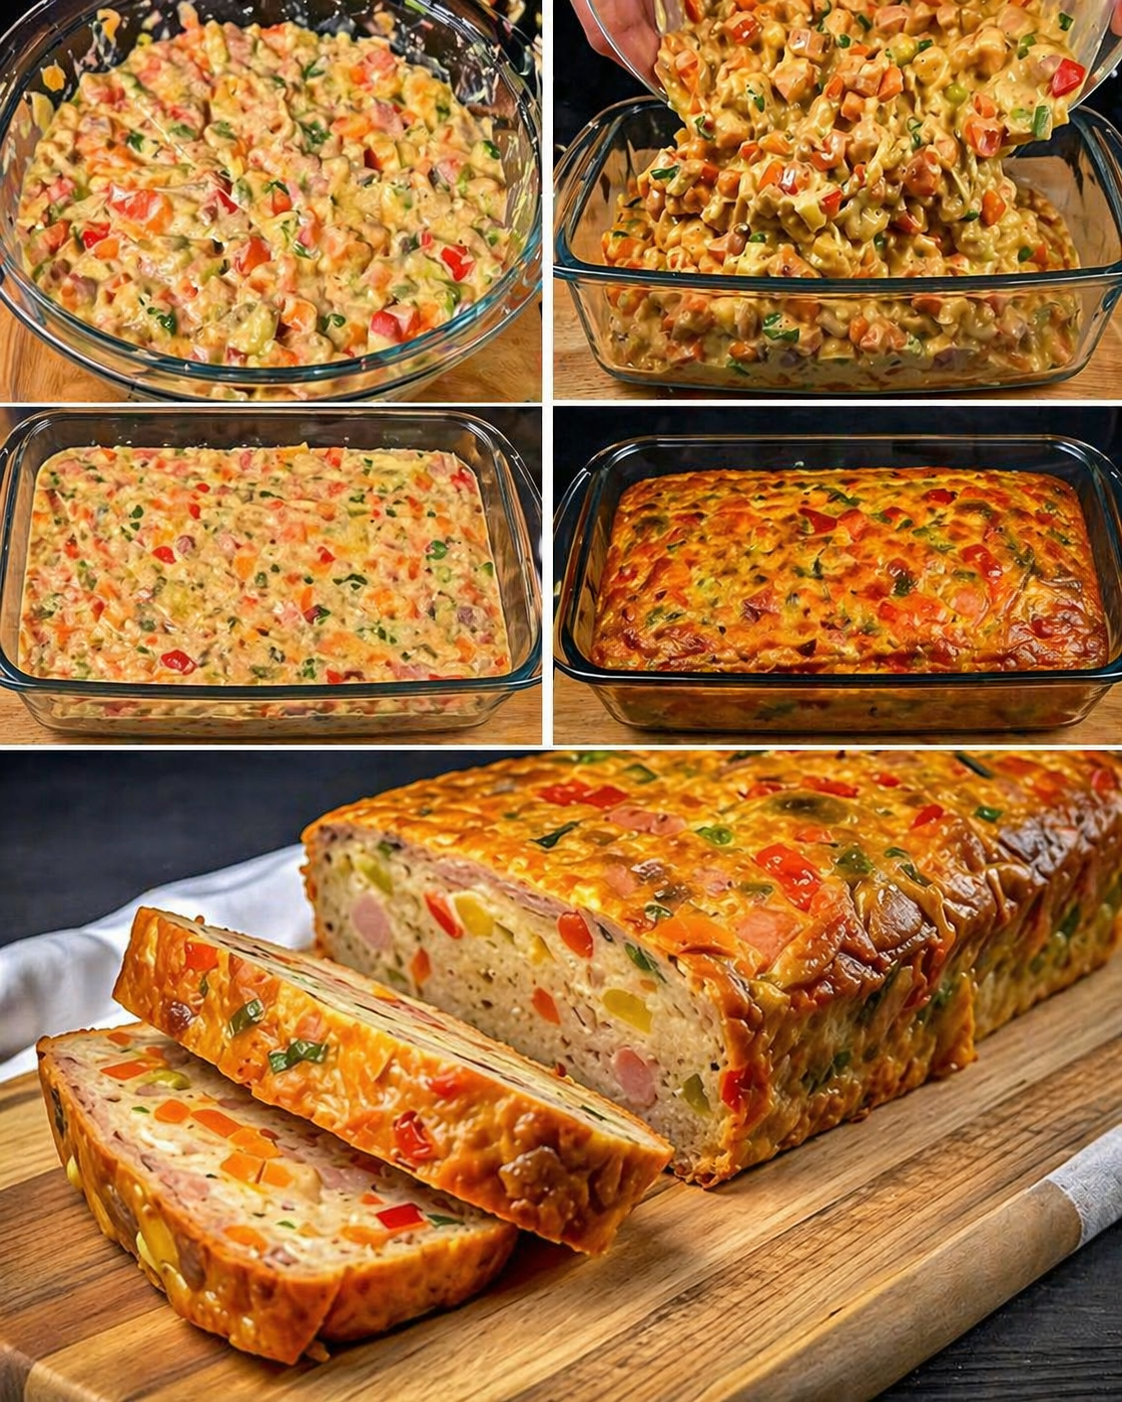
Savory Vegetable & Sausage Baked Loaf

Savory Vegetable & Sausage Baked Loaf

Ingredients

  • 4 eggs
  • 1 cup milk
  • 1 cup all-purpose flour
  • 1 tsp baking powder
  • 1 cup shredded cheese
  • 1 cup cooked sausage or hot dog, diced
  • 1 small carrot, finely diced
  • 1 small red bell pepper, finely diced
  • 1 small green bell pepper, finely diced
  • 1 small onion, finely chopped
  • 2 tbsp chopped parsley or spring onion
  • 2 tbsp olive oil
  • Salt to taste
  • Black pepper to taste
  • 1/2 tsp paprika
  • 1/2 tsp oregano

Instructions

  1. Preheat your oven to 180°C / 350°F.
  2. Grease a loaf pan or glass baking dish.
  3. In a large bowl, whisk the eggs and milk together.
  4. Add flour and baking powder, then mix until smooth.
  5. Stir in cheese, sausage, carrot, bell peppers, onion, parsley, olive oil, salt, black pepper, paprika, and oregano.
  6. Mix everything well until evenly combined.
  7. Pour the mixture into the prepared baking dish.
  8. Bake for 40 to 50 minutes, or until the top is golden and a toothpick inserted in the center comes out clean.
  9. Let it cool for 10 minutes before slicing.
  10. Serve warm.

Tips

  • Add olives, corn, or peas for extra flavor.
  • You can replace sausage with shredded chicken or tuna.
  • For a softer loaf, do not overbake.

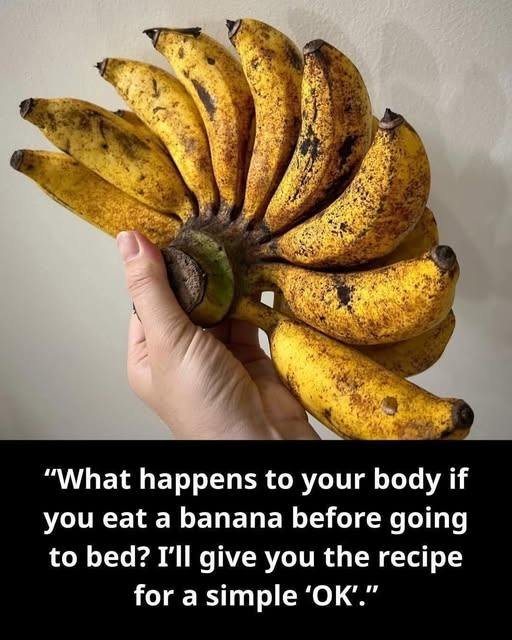
What Happens If You Eat a Banana Before Bed?

🍌 Banana Sleep Drink (Nighttime Remedy)

🛒 Ingredients

  • 1 ripe banana
  • 1 cup warm milk (or almond milk)
  • ½ teaspoon cinnamon
  • 1 teaspoon honey (optional)

🥣 Instructions

  1. Add the ripe banana and warm milk to a blender
  2. Blend until smooth and creamy
  3. Add cinnamon and honey
  4. Mix well and pour into a cup

👉 Drink 30–60 minutes before bed


🌙 Benefits

  • Helps relax muscles (magnesium & potassium)
  • Supports sleep hormones (tryptophan)
  • Reduces late-night hunger
  • Provides gentle, steady energy

💡 Tips

  • Best time: 1 hour before sleep
  • Stick to 1 banana only
  • Use slightly ripe (not overripe) bananas
  • Pair with milk for better effect

⚠️ Notes

  • Avoid overeating (may cause bloating)
  • Diabetics should watch portion size
  • Not for fat loss—supports sleep only

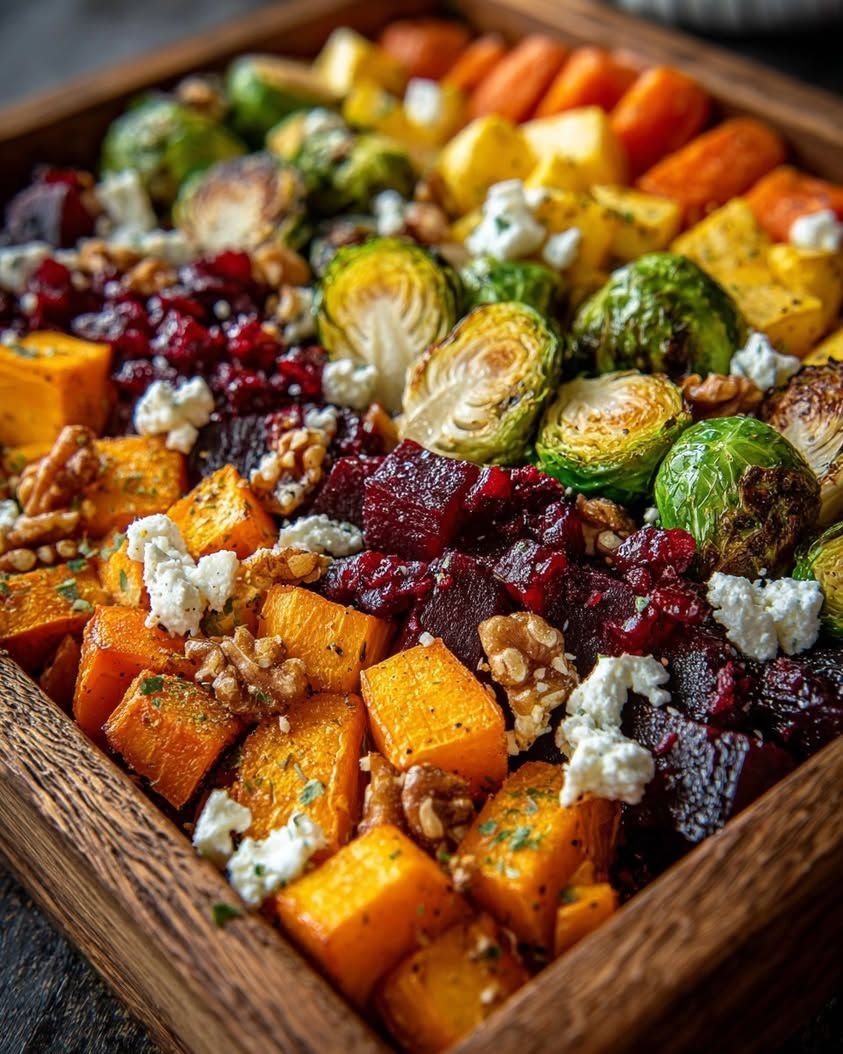
🌟 Festive Roasted Winter Vegetable Medley with Maple-Feta Walnut Crumble

🌟 Festive Roasted Winter Vegetable Medley with Maple-Feta Walnut Crumble

🛒 Ingredients

Vegetables

  • 2 cups Brussels sprouts (halved)
  • 2 cups carrots (peeled & sliced)
  • 1 cup sweet potatoes (cubed)
  • 1 red onion (cut into wedges)
  • 1 cup butternut squash (cubed)

Seasoning

  • 3 tbsp olive oil
  • 1 tbsp maple syrup
  • 3 cloves garlic (minced)
  • 1 tsp dried thyme
  • 1 tsp rosemary (chopped)
  • Salt & black pepper (to taste)

Maple-Feta Walnut Crumble

  • ½ cup walnuts (chopped)
  • ½ cup feta cheese (crumbled)
  • 1 tbsp maple syrup
  • 1 tbsp butter (or olive oil)
  • 1 tbsp fresh parsley (optional, chopped)

🔥 Instructions

1. Prep the Oven

  • Preheat oven to 400°F (200°C)
  • Line a large baking tray with parchment paper

2. Roast the Vegetables

  • In a large bowl, combine all vegetables
  • Add olive oil, maple syrup, garlic, herbs, salt, and pepper
  • Toss until evenly coated
  • Spread in a single layer on the tray

👉 Roast for 30–35 minutes, flipping halfway, until golden and tender


3. Make the Crumble

  • In a pan over medium heat, toast walnuts for 2–3 minutes
  • Add butter and maple syrup, stir until lightly caramelized
  • Remove from heat and let cool slightly
  • Mix in crumbled feta

4. Assemble

  • Transfer roasted vegetables to a serving dish
  • Sprinkle generously with the maple-feta walnut crumble
  • Garnish with fresh parsley

🍽️ Serving Tips

  • Serve warm as a holiday side dish
  • Pairs perfectly with roast chicken, turkey, or lamb
  • Add a squeeze of lemon for brightness

⭐ Pro Tips

  • Don’t overcrowd the pan → helps crisping
  • Use fresh herbs for a stronger aroma
  • Swap feta with goat cheese for a creamier twist

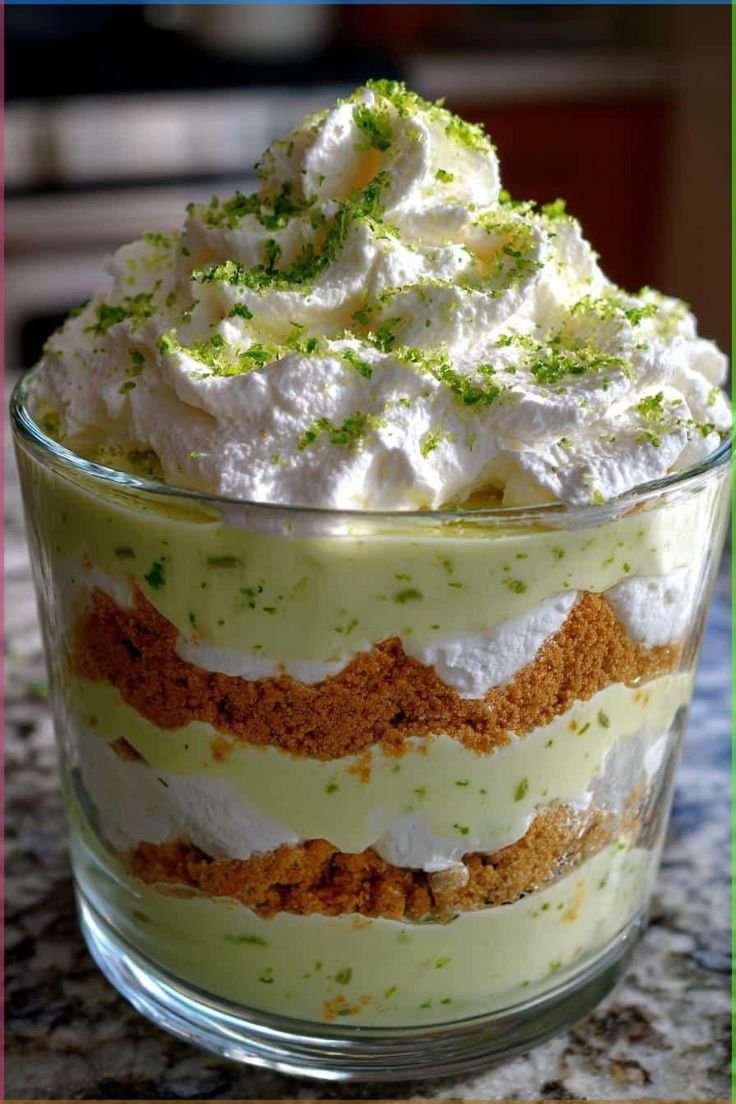
Dreamy Key Lime Pie Trifle 🍋✨

Ingredients

For the base

  • 2 cups graham cracker crumbs (or crushed biscuits)
  • 1/3 cup melted butter
  • 2 tablespoons sugar

For the key lime filling

  • 1 can (400g) sweetened condensed milk
  • 1/2 cup fresh key lime juice (or regular lime juice)
  • 1 teaspoon lime zest
  • 1 package instant vanilla pudding mix
  • 1 cup cold milk

For the creamy layer

  • 2 cups whipped cream (or whipped topping)
  • 2 tablespoons powdered sugar (if using fresh cream)
  • 1/2 teaspoon vanilla extract

Optional toppings

  • Extra whipped cream
  • Lime slices
  • Crushed graham crackers
  • White chocolate shavings

Steps

  1. Make the crust
    Mix graham cracker crumbs, melted butter, and sugar. Press lightly into the bottom of a trifle dish or serving cups.
  2. Prepare the filling
    Whisk sweetened condensed milk, lime juice, and lime zest in a bowl. In another bowl, whisk pudding mix with cold milk until thick. Combine both mixtures until smooth.
  3. Make whipped cream
    Whip cream with powdered sugar and vanilla until soft peaks form (skip if using ready-made topping).
  4. Assemble layers
    Layer in this order: graham cracker base → key lime filling → whipped cream. Repeat layers until full.
  5. Chill
    Refrigerate for at least 2 hours (longer for better results).
  6. Garnish & serve
    Top with whipped cream, lime zest, or crushed crackers before serving.

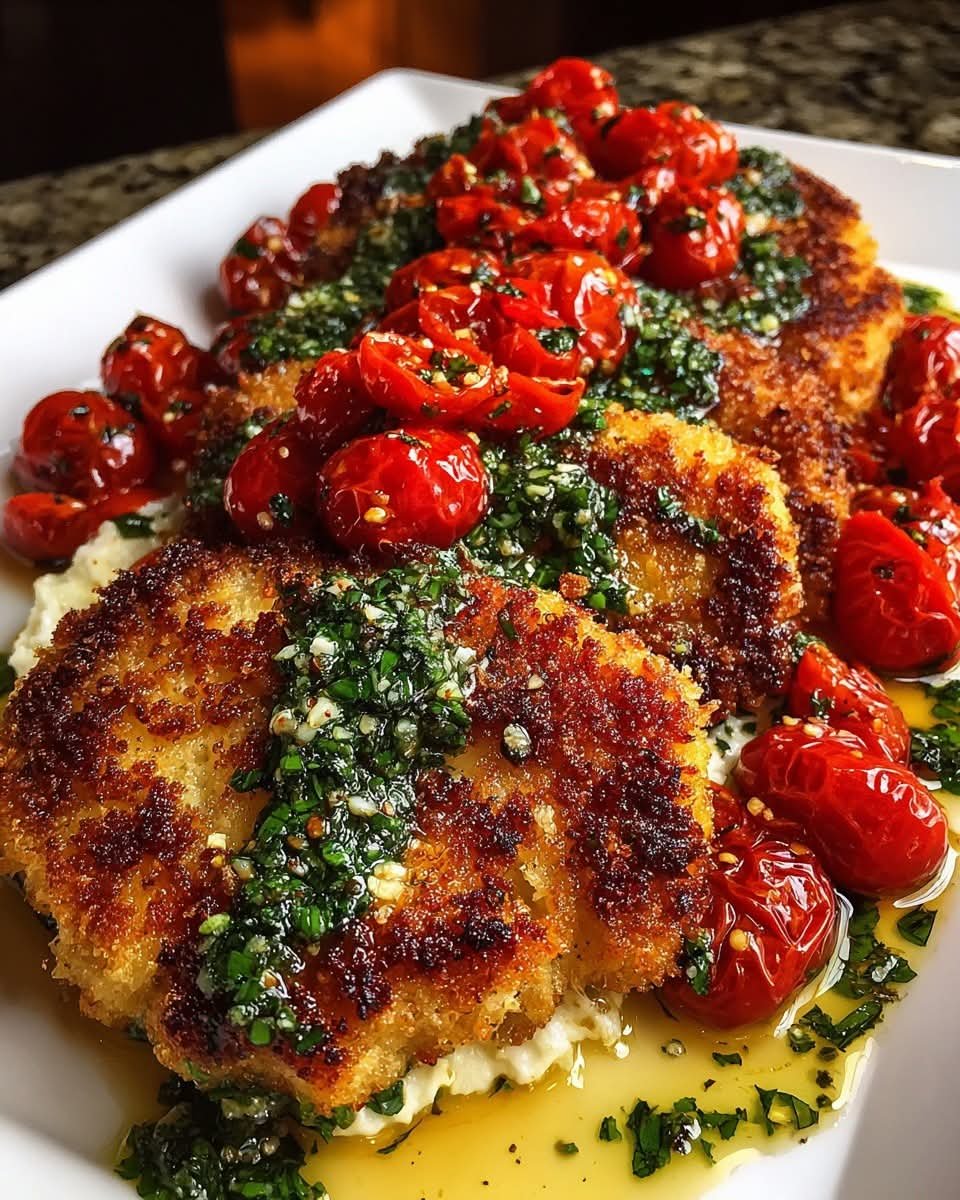
Chicken Milanese with Whipped Feta, Roasted Tomatoes & Garlic Basil Oil

Chicken Milanese with Whipped Feta, Roasted Tomatoes & Garlic Basil Oil

Ingredients

  • 2 boneless, skinless chicken breasts, butterflied and pounded thin
  • 1/2 cup all-purpose flour
  • 2 eggs, beaten
  • 1 cup panko breadcrumbs
  • 1/2 cup grated Parmesan cheese
  • 1 teaspoon garlic powder
  • 1/2 teaspoon paprika
  • Salt and black pepper to taste
  • 1/3 cup olive oil (for frying)
  • Roasted Tomatoes
  • 1 cup cherry tomatoes
  • 1 tablespoon olive oil
  • Salt and black pepper to taste
  • Whipped Feta
  • 1 cup feta cheese
  • 1/2 cup Greek yogurt
  • 2 tablespoons olive oil
  • 1 tablespoon lemon juice
  • Salt and black pepper to taste
  • Garlic Basil Oil
  • 1/4 cup olive oil
  • 2 cloves garlic, finely minced
  • 2 tablespoons fresh basil, finely chopped
  • Pinch of salt

Directions

Preheat oven to 200°C (400°F). Toss cherry tomatoes with olive oil, salt, and pepper, then roast for 15–20 minutes until blistered.

Season chicken with salt and pepper. Dredge in flour, dip in eggs, then coat in panko mixed with Parmesan, garlic powder, and paprika.

Heat olive oil in a skillet over medium heat and fry chicken for 3–4 minutes per side until golden and crispy. Transfer to paper towels.

Blend feta, Greek yogurt, olive oil, lemon juice, salt, and pepper until smooth and creamy.

Mix olive oil with minced garlic, basil, and a pinch of salt to create garlic basil oil.

Spread whipped feta on a plate, place crispy chicken on top.

Add roasted tomatoes over the chicken.

Drizzle with garlic basil oil and serve immediately.

Nutritional Information (per serving)

Calories: 650 kcal

Protein: 45 g

Carbohydrates: 28 g

Fat: 40 g

Fiber: 2 g

Sugar: 4 g

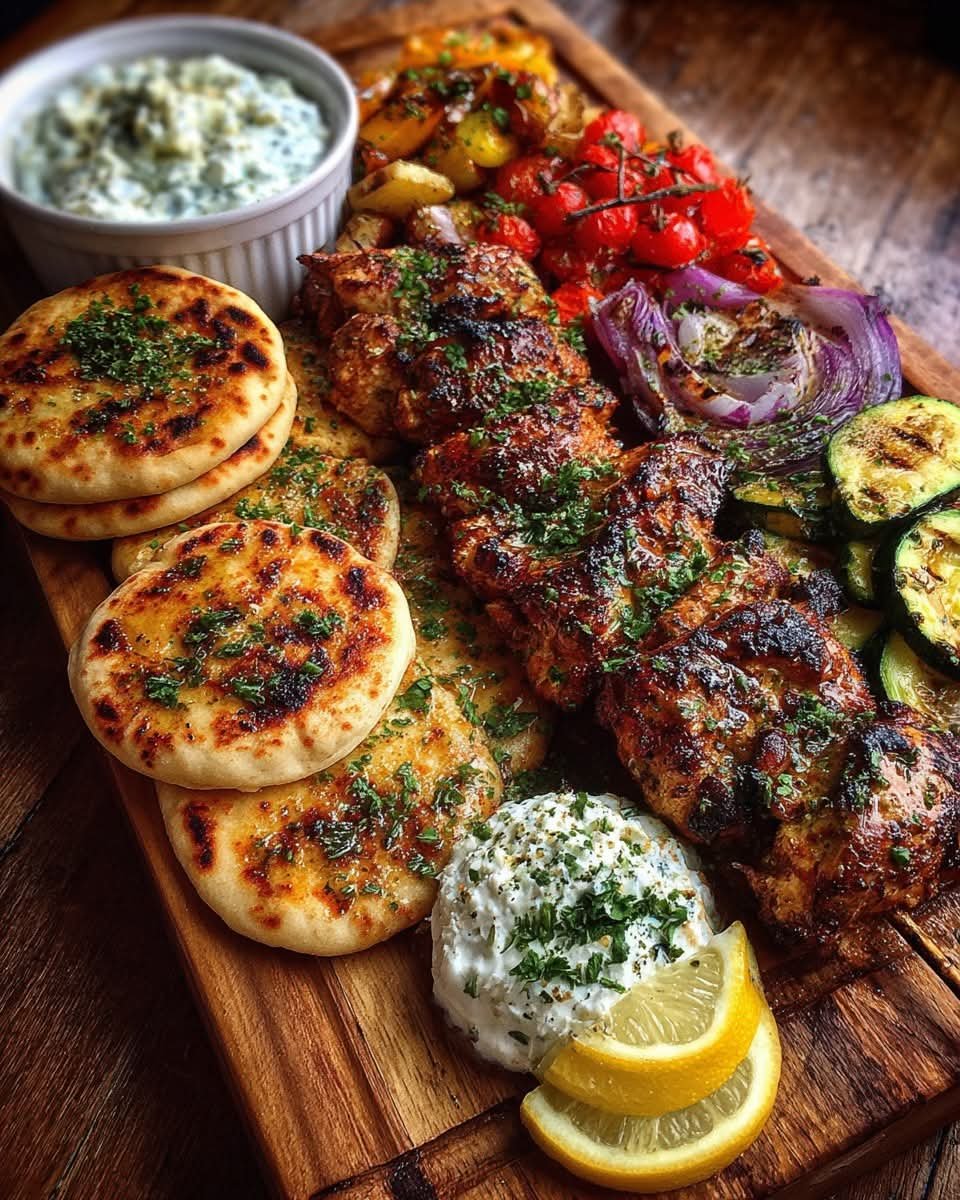
Greek Chicken Souvlaki Grazing Board with Feta Dip & Roasted Vegetables

Greek Chicken Souvlaki Grazing Board with Feta Dip & Roasted Vegetables

Ingredients

  • 2 lbs boneless, skinless chicken thighs or breasts, cut into chunks
  • 3 tablespoons olive oil
  • 2 tablespoons lemon juice
  • 1 teaspoon lemon zest
  • 3 cloves garlic, minced
  • 1 tablespoon dried oregano
  • 1 teaspoon paprika
  • Salt and black pepper to taste
  • Wooden skewers (soaked if needed)
  • 2–3 pita breads, warmed and sliced
  • Roasted Vegetables
  • 1 zucchini, sliced
  • 1 red bell pepper, sliced
  • 1 cup cherry tomatoes
  • 1/2 red onion, sliced
  • 2 tablespoons olive oil
  • 1/2 teaspoon paprika
  • Salt and black pepper to taste

Feta Dip

  • 1 cup feta cheese, crumbled
  • 1/2 cup Greek yogurt
  • 2 tablespoons olive oil
  • 1 tablespoon lemon juice
  • 1 clove garlic
  • Salt and black pepper to taste

Fresh parsley for garnish

Lemon wedges for serving

Directions

Preheat oven to 200°C (400°F).

Mix olive oil, lemon juice, lemon zest, garlic, oregano, paprika, salt, and pepper. Marinate chicken for at least 1 hour.

Toss zucchini, bell pepper, cherry tomatoes, and red onion with olive oil, paprika, salt, and pepper. Roast for 20–25 minutes until tender and slightly caramelized.

Thread chicken onto skewers.

Grill over medium-high heat for 10–12 minutes, turning until fully cooked and lightly charred.

Blend feta, Greek yogurt, olive oil, lemon juice, garlic, salt, and pepper until smooth and creamy.

Arrange skewers, roasted vegetables, and pita bread on a large grazing board.

Serve with feta dip in the center, garnish with parsley, and add lemon wedges.

Greek Chicken Souvlaki Grazing Board with Feta Dip & Roasted Vegetables

Greek Chicken Souvlaki Grazing Board with Feta Dip & Roasted Vegetables

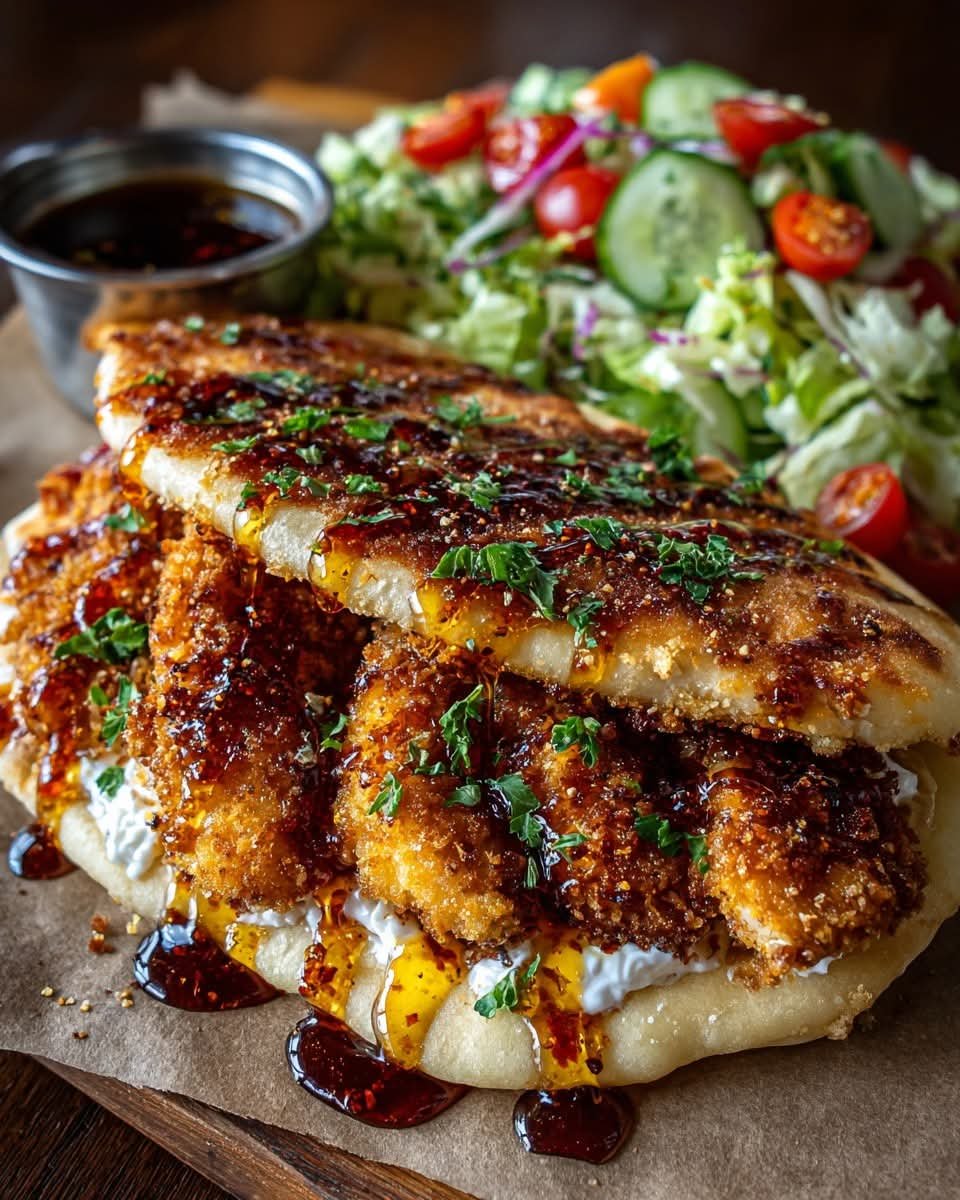
Crispy Baked Hot Honey Goat Cheese Chicken Pita with Garlic Sauce Drizzle

Crispy Baked Hot Honey Goat Cheese Chicken Pita with Garlic Sauce Drizzle

Ingredients

2 boneless, skinless chicken breasts

1/2 cup all-purpose flour

2 eggs, beaten

1 cup panko breadcrumbs

1/2 cup grated Parmesan cheese

1 teaspoon paprika

1/2 teaspoon garlic powder

Salt and black pepper to taste

Cooking spray or 2 tablespoons olive oil

2–3 pita breads, warmed

1 cup shredded lettuce

1 cup cherry tomatoes, halved

1/2 cucumber, sliced

Hot Honey Drizzle

3 tablespoons honey

1 teaspoon chili flakes

1 tablespoon lemon juice

Garlic Sauce

1/2 cup Greek yogurt

2 cloves garlic, minced

1 tablespoon olive oil

1 tablespoon lemon juice

Salt and black pepper to taste

Topping

1/2 cup goat cheese, crumbled

Fresh parsley for garnish

Directions

Preheat oven to 200°C (400°F). Line a baking sheet with parchment paper.

Slice chicken into cutlets and season with salt and pepper.

Dredge in flour, dip in eggs, then coat in panko mixed with Parmesan, paprika, and garlic powder.

Place on baking sheet, spray lightly with oil, and bake for 20–25 minutes until crispy and golden.

Mix honey, chili flakes, and lemon juice for the hot honey drizzle.

In a bowl, combine Greek yogurt, garlic, olive oil, lemon juice, salt, and pepper to make garlic sauce.

Warm pita breads.

Fill with crispy chicken, lettuce, tomatoes, cucumber, and goat cheese.

Drizzle with hot honey and garlic sauce.

Garnish with fresh parsley and serve immediately.

Nutritional Information (per serving)

Calories: 600 kcal

Protein: 40 g

Carbohydrates: 45 g

Fat: 28 g

Fiber: 4 g

Sugar: 12 g

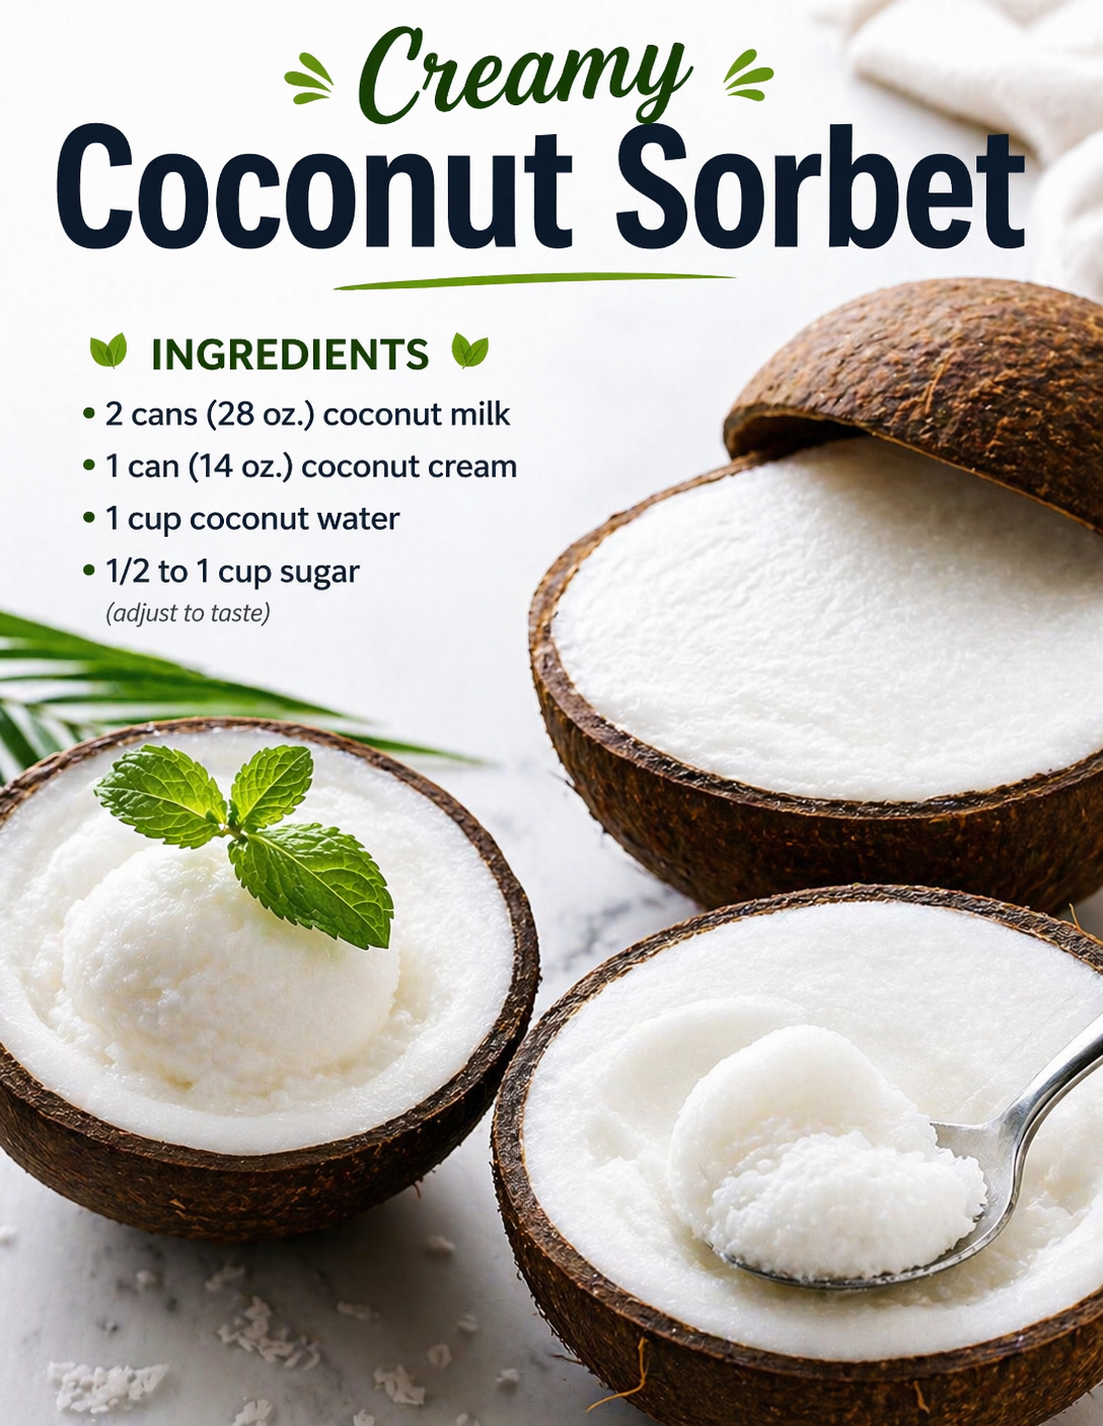
Creamy Coconut Sorbet

Creamy Coconut Sorbet

A smooth, cold, creamy coconut dessert with just a few ingredients ✨

🛒  Ingredients

  • 🥥 2 cans coconut milk (about 28 oz total)
  • 🥥 1 can coconut cream (14 oz)
  • 💧 1 cup coconut water
  • 🍬 1/2 to 1 cup sugar

👩‍🍳 Step-by-Step Recipe

  • 1️⃣ Chill the ingredients
    • Place the coconut milk, coconut cream, and coconut water in the fridge for a little while if possible. ❄️
    • Cold ingredients help the mixture freeze better.
  • 2️⃣ Mix the base
    • In a large bowl, add:
      • coconut milk
      • coconut cream
      • coconut water
      • sugar
    • Whisk everything together until smooth. 🥣
  • 3️⃣ Dissolve the sugar
    • Keep whisking until the sugar is fully dissolved.
    • Make sure there are no grainy bits left. ✨
  • 4️⃣ Taste the mixture
    • Taste the base with a spoon.
    • Add more sugar if you want it sweeter. 🍬
  • 5️⃣ Chill before freezing
    • Cover the bowl and place it in the fridge for about 30 minutes to 1 hour.
    • This helps the mixture get nice and cold before freezing. ❄️
  • 6️⃣ Freeze the sorbet
    • Pour the mixture into a freezer-safe container.
    • Cover it well.
    • Freeze for about 4 to 6 hours.
  • 7️⃣ Stir for a smoother texture
    • Every 1 to 2 hours, take it out and stir well with a fork or spoon. 🥄
    • This helps break up ice crystals and makes it creamier.
  • 8️⃣ Let it firm up
    • Freeze again until the sorbet is scoopable and set.
  • 9️⃣ Soften before serving
    • Remove it from the freezer about 5 to 10 minutes before serving.
    • This makes scooping easier. 🍨
  • 🔟 Serve
    • Scoop into bowls or coconut shells if you want a pretty presentation. 🥥✨

✅ Quick Tips

  • ❄️ Stirring during freezing helps make the sorbet smoother.
  • 🥥 Full-fat coconut milk gives the creamiest result.
  • 🍬 Start with less sugar, then adjust after tasting.
  • 🍨 Let it sit a few minutes before scooping if it freezes very hard.

❓Q / A Related to the Recipe

  • Q: Do I need an ice cream machine?
    • A: No, this version can be made in the freezer without one.
  • Q: Why is my sorbet icy?
    • A: It may not have been stirred during freezing, or the mixture may need a little more sugar or coconut cream.
  • Q: Can I use only coconut milk?
    • A: Yes, but the coconut cream makes it richer and creamier.
  • Q: How sweet should it be before freezing?
    • A: It should taste slightly sweeter than you want, because frozen desserts taste less sweet once frozen.
  • Q: How long does it last in the freezer?
    • A: It is best within 1 to 2 weeks for the best texture.
  • Q: What if it freezes too hard?
    • A: Let it sit at room temperature for 5 to 10 minutes before scooping.
  • Q: Can I make it less sweet?
    • A: Yes, start with 1/2 cup sugar and add more only if needed.
  • Q: Can I serve it with toppings?
    • A: Yes, but it is also delicious plain. Shredded coconut or mint work nicely. 🌿
  • Q: Can I use fresh coconut water?
    • A: Yes, fresh coconut water works very well.

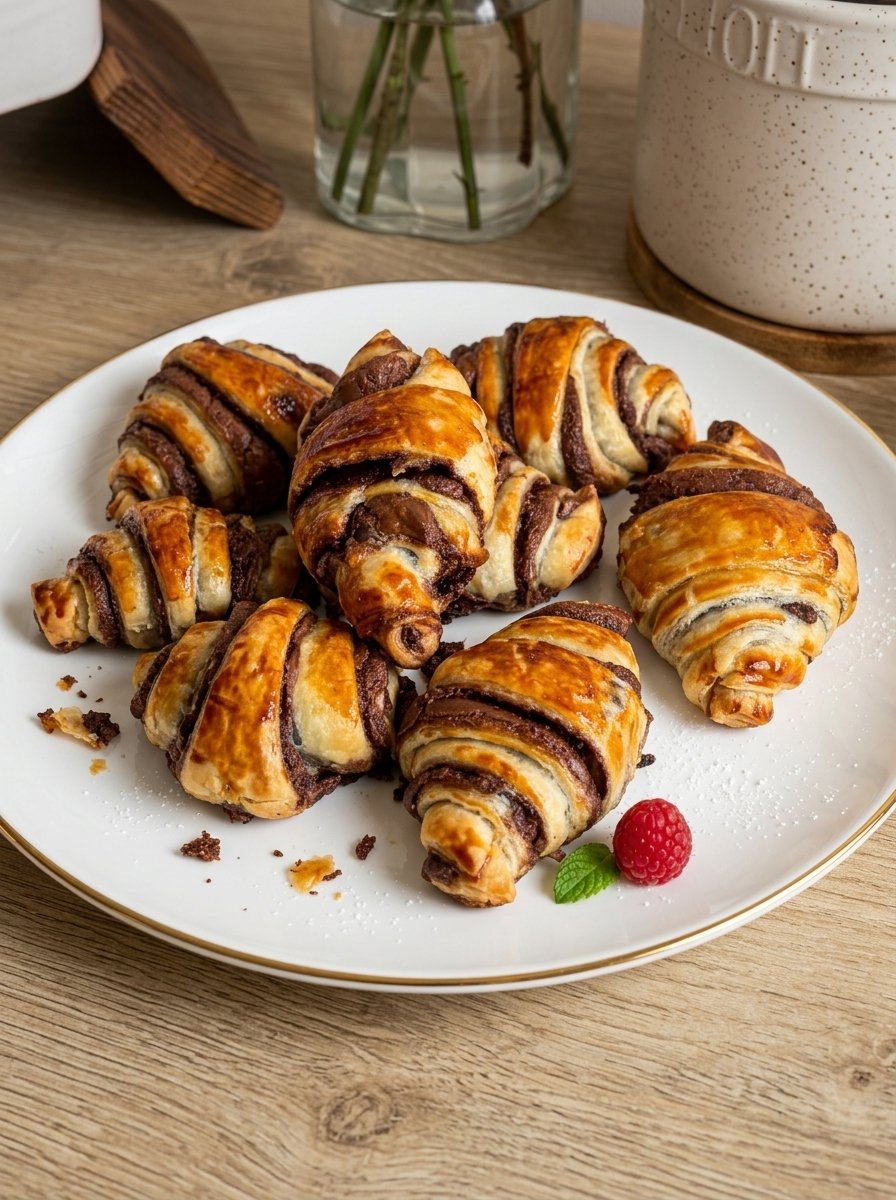
Easy Chocolate Mini Croissants

Easy Chocolate Mini Croissants

A super simple version with very few ingredients and a bakery-style look ✨

🛒 Ingredients

  • 🥐 1 sheet puff pastry, thawed
  • 🍫 4–5 tbsp chocolate spread or chocolate filling
  • 🥚 1 egg
  • 🍬 Optional: a little powdered sugar for topping

👩‍🍳 Step-by-Step Recipe

  • 1️⃣ Prep the oven
    • Preheat your oven to 400°F (200°C).
    • Line a baking tray with parchment paper. 🔥
  • 2️⃣ Prepare the pastry
    • Place the thawed puff pastry sheet on a clean surface.
    • If needed, lightly roll it out just a little so it becomes even.
  • 3️⃣ Add the chocolate
    • Spread a thin layer of chocolate spread over the pastry.
    • Do not spread too much, or it may leak out while baking. 🍫
  • 4️⃣ Cut into triangles
    • Use a knife or pizza cutter to cut the pastry into small triangles.
    • For mini croissants, make the triangles smaller.
    • Each triangle should have a wide base and a pointed tip. 🔺
  • 5️⃣ Roll the croissants
    • Start from the wide end of each triangle.
    • Roll gently toward the pointed tip.
    • Curve the ends slightly inward to create that croissant shape. 🥐
  • 6️⃣ Place on the tray
    • Put each rolled croissant on the lined tray.
    • Leave a little space between them because they will puff up.
  • 7️⃣ Brush with egg wash
    • Beat the egg in a small bowl.
    • Brush the tops of the croissants with the egg.
    • This gives them a shiny, golden finish. ✨
  • 8️⃣ Bake
    • Bake for 12–15 minutes or until the croissants are puffed and deep golden brown.
    • Keep an eye on them near the end so they do not overbake. ⏲️
  • 9️⃣ Cool slightly
    • Remove from the oven and let them cool for 5 minutes.
    • The filling will be very hot right away. ⚠️
  • 🔟 Finish and serve
    • Dust lightly with powdered sugar if using.
    • Serve warm for the best melty chocolate center. 🍫💛

✅ Quick Tips

  • 🥐 Cold puff pastry is easier to cut and roll.
  • 🍫 Use only a thin layer of filling to prevent leaking.
  • 🥚 Egg wash helps make them glossy and golden.
  • ❄️ If the pastry gets too soft, chill it for 10 minutes before baking.

❓Q / A Related to the Recipe

  • Q: Can I use Nutella?
    • A: Yes, Nutella or any chocolate spread works well.
  • Q: Can I make them without egg wash?
    • A: Yes, but they will be less shiny and slightly less golden.
  • Q: Why did the chocolate leak out?
    • A: You probably used too much filling or rolled them too loosely.
  • Q: Can I use crescent dough instead of puff pastry?
    • A: Yes, but the texture will be softer and less flaky.
  • Q: How do I store leftovers?
    • A: Keep them in an airtight container for up to 2 days.
  • Q: How do I reheat them?
    • A: Warm in the oven for a few minutes so they stay crisp.
  • Q: Can I freeze them?
    • A: Yes, freeze before baking or after baking once cooled.
  • Q: How do I make them extra chocolatey?
    • A: Add a few chocolate chips before rolling. 🍫