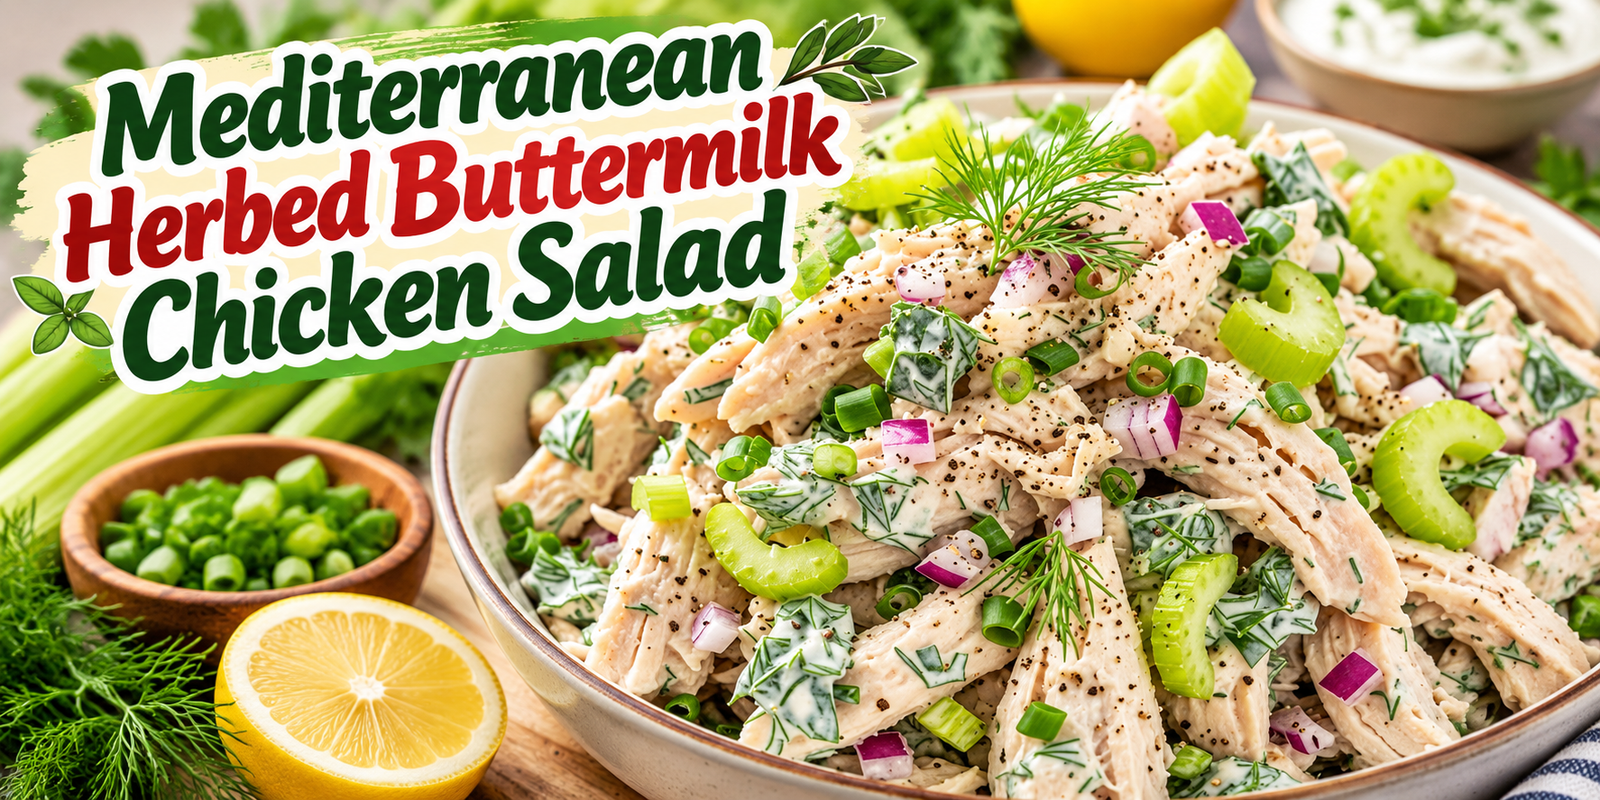
Mediterranean Herbed Buttermilk Chicken Salad

Chicken Salad with tender chicken, creamy Greek yogurt dressing, celery, cucumber, red onion, dill, parsley, and fresh herbs

Mediterranean Herbed Buttermilk Chicken Salad

Description

Chicken Salad gets a fresh Mediterranean twist with tender buttermilk-marinated chicken, crisp celery, cucumber, red onion, green onions, fresh dill, parsley, and a creamy Greek yogurt dressing. The combination is bright, tangy, herby, and satisfying without feeling heavy.

Buttermilk helps keep the chicken tender while lemon, garlic, and oregano add flavor. Greek yogurt creates a creamy base for the dressing, while fresh herbs and crunchy vegetables bring plenty of freshness. This recipe is perfect for sandwiches, wraps, lettuce cups, pita bread, or a simple lunch bowl.

This Chicken Salad is also easy to prepare ahead, making it a practical choice for busy weekdays.

Ingredients

For the Chicken

2 pounds boneless, skinless chicken breasts
1 cup buttermilk
1 tablespoon olive oil
1 tablespoon fresh lemon juice
2 garlic cloves, minced
1 teaspoon dried oregano
1 teaspoon dried dill
1/2 teaspoon paprika
1/2 teaspoon salt
1/2 teaspoon black pepper

For the Salad

3/4 cup plain Greek yogurt
1/3 cup mayonnaise
1/4 cup buttermilk
1 tablespoon fresh lemon juice
1 teaspoon Dijon mustard
1/2 teaspoon garlic powder
1/2 teaspoon black pepper
1/2 teaspoon salt
2 celery stalks, finely chopped
1/3 cup red onion, finely diced
1/3 cup green onions, sliced
1/3 cup fresh dill, chopped
1/4 cup fresh parsley, chopped
1 tablespoon fresh chives, chopped
1/2 cup cucumber, finely diced

Step-by-Step Instructions

Prepare the Chicken

Place the chicken breasts in a shallow bowl or baking dish.

Pour in the buttermilk. Add olive oil, lemon juice, minced garlic, oregano, dried dill, paprika, salt, and black pepper.

Turn the chicken several times so the marinade coats every surface.

Cover the dish and refrigerate for at least 30 minutes. If you have more time, let the chicken marinate for up to 4 hours.

The buttermilk adds a gentle tang while helping the chicken stay tender during cooking. Lemon and garlic provide additional flavor without overpowering the herbs.

For the best Chicken Salad, avoid leaving the chicken in the acidic marinade for an excessively long period because the texture can become less pleasant.

Cook the Chicken

Preheat a large skillet or grill pan over medium heat.

Remove the chicken from the marinade and allow excess liquid to drip away.

Place the chicken in the hot pan.

Cook for about 6 to 8 minutes per side, depending on thickness. The chicken should reach an internal temperature of 165°F (74°C).

Transfer the cooked chicken to a clean plate.

Let it rest for 5 to 10 minutes before slicing or shredding.

Resting allows the juices to redistribute, which helps keep the chicken moist.

For this Chicken Salad, shredded chicken creates a soft texture and allows the creamy dressing to coat each piece evenly.

Make the Creamy Dressing

Add Greek yogurt and mayonnaise to a large mixing bowl.

Pour in the buttermilk and lemon juice.

Add Dijon mustard, garlic powder, salt, and black pepper.

Whisk everything until smooth and creamy.

The dressing should be thick enough to coat the chicken while remaining easy to mix.

If it feels too thick, add another tablespoon of buttermilk.

Taste the dressing before adding the vegetables.

A balanced dressing should have creamy, tangy, savory, and slightly herby flavors.

The dressing gives the Chicken Salad its rich texture while lemon and buttermilk keep the flavor fresh.

Add the Vegetables and Herbs

Add chopped celery, red onion, green onions, dill, parsley, chives, and cucumber to the dressing.

Fold everything together gently.

Avoid crushing the cucumber or herbs.

The celery provides crispness, while cucumber adds freshness. Red onion contributes a mild sharpness, and green onions bring a softer onion flavor.

Fresh dill is especially important because it gives the Chicken Salad its distinctive herbed character.

If you prefer a milder flavor, reduce the amount of red onion.

Combine the Chicken and Dressing

Slice or shred the cooled chicken.

Add it to the bowl containing the dressing and vegetables.

Fold everything together gently.

Make sure the dressing coats the chicken evenly.

Do not stir too aggressively because the vegetables can lose their crisp texture.

Taste the finished mixture.

Add more lemon juice if you want extra brightness.

A small pinch of salt can enhance the herbs and chicken.

Cover the bowl and refrigerate for 20 to 30 minutes.

This resting period allows the flavors to blend.

Tips for the Best Results

Use chicken breasts with similar thickness so they cook evenly.

If some pieces are very thick, gently pound them to an even thickness before marinating.

Fresh herbs make a noticeable difference. Dill adds a cool, grassy flavor, while parsley gives the recipe a clean and fresh finish.

For the creamiest Chicken Salad, use thick Greek yogurt rather than a very thin yogurt.

Add the buttermilk gradually to control the consistency.

Allow the chicken to cool before mixing it with the dressing.

Warm chicken can make the dressing thinner and soften the vegetables.

Finely chop the celery and cucumber for a more balanced bite.

Avoid adding too much dressing at once. You can always add more, but removing excess dressing is difficult.

Easy Variations

For a lighter version, replace some of the mayonnaise with additional Greek yogurt. The dressing will remain creamy while tasting slightly fresher.

A Mediterranean variation can include chopped Kalamata olives, crumbled feta, roasted red peppers, or a small amount of sun-dried tomato.

For extra crunch, add toasted almonds, walnuts, or sunflower seeds just before serving.

Sweet additions can also work well. Try chopped apples, grapes, or dried cranberries for a slightly sweeter contrast.

Spice lovers can add crushed red pepper flakes, cayenne, or finely chopped jalapeño.

For a stronger herb flavor, increase the fresh dill and parsley.

These additions allow you to customize the Chicken Salad without changing the basic preparation.

Serving Suggestions

Serve the finished Chicken Salad on toasted sourdough or whole-grain bread.

A soft pita pocket makes another excellent option.

For a lighter meal, spoon the chicken mixture into crisp lettuce cups.

You can also place it over mixed greens with cucumber, tomatoes, olives, and lemon wedges.

A tortilla wrap turns the recipe into a portable lunch.

For brunch, serve it alongside fresh fruit, roasted potatoes, or a simple green salad.

A sprinkle of fresh herbs just before serving makes the dish look brighter and more appetizing.

Meal Prep Instructions

This recipe works especially well for meal preparation.

Cook the chicken ahead and allow it to cool completely.

Prepare the dressing separately and refrigerate it in a sealed container.

Chop the vegetables and herbs shortly before combining everything.

For the freshest texture, mix only the amount you plan to eat within the next day or two.

Keeping the components separate can help prevent the vegetables from becoming watery.

Chicken Salad can then be assembled quickly whenever you need lunch.

A chilled Chicken Salad is particularly convenient for packed lunches because it can be served directly from the refrigerator.

Storage Instructions

Place leftover Chicken Salad in an airtight container.

Keep it refrigerated and enjoy it within 3 to 4 days for the best quality.

Do not leave the salad at room temperature for extended periods.

If the dressing becomes thicker after refrigeration, stir in a small splash of buttermilk or lemon juice.

Taste again before serving because cold temperatures can slightly reduce the perception of salt and acidity.

Keep bread, lettuce, avocado, and other fresh serving ingredients separate until you are ready to eat.

Frequently Asked Questions

Can I use rotisserie chicken?

Yes. Rotisserie chicken is an easy shortcut. Remove the skin and bones, then shred the meat before mixing it with the dressing.

For a quick meal, prepared rotisserie chicken can turn this Chicken Salad into a lunch that requires very little cooking.

Can I use all Greek yogurt?

Yes. Replace the mayonnaise with additional Greek yogurt if you prefer.

The dressing will have a slightly tangier flavor and a thicker consistency.

Can I use dried herbs?

Fresh herbs provide the brightest flavor, but dried dill and parsley can be used when fresh herbs are unavailable.

Use smaller quantities because dried herbs are more concentrated.

Can I make it without buttermilk?

Yes. Plain yogurt thinned with a little milk can work as a substitute.

Add lemon juice to provide the tangy flavor associated with buttermilk.

Is this good for sandwiches?

Absolutely. Chicken Salad works beautifully in sandwiches, pita pockets, wraps, and croissants.

Add lettuce or cucumber slices for extra crunch.

Can I add feta cheese?

Yes. Crumbled feta provides a salty Mediterranean flavor.

Start with a small amount so it does not overpower the herbs.

Can I add avocado?

Yes. Diced avocado makes the dish even creamier.

Add it immediately before serving because avocado can darken after being cut.

Can I freeze it?

Freezing is not recommended.

The creamy dressing and fresh vegetables can change texture after thawing.

Instead, cook and freeze the chicken separately, then prepare the dressing and vegetables fresh.

Can I use chicken thighs?

Yes. Boneless, skinless chicken thighs work well and can produce especially juicy results.

Cook them until they reach 165°F (74°C).

What can I serve with it?

Fresh fruit, pita bread, mixed greens, tomatoes, cucumber, olives, or roasted vegetables all pair nicely with the recipe.

Nutrition Information

Approximate nutrition per serving:

Calories: 365 kcal
Protein: 42g
Carbohydrates: 7g
Fat: 18g
Fiber: 1g
Sugar: 4g
Sodium: 620mg

Nutrition values are estimates and can vary depending on the ingredients and portion sizes used.

Why You Will Love This Recipe

This Chicken Salad combines creamy texture with crisp vegetables and plenty of fresh herbs.

The buttermilk marinade helps create tender chicken with a subtle tang.

Greek yogurt keeps the dressing smooth, while mayonnaise adds richness.

Fresh lemon juice brings brightness and balances the creamy ingredients.

Dill, parsley, and chives create a fresh Mediterranean-inspired flavor.

Celery and cucumber add crunch, while red onion provides a gentle sharpness.

Another benefit is flexibility.

Serve the mixture as a sandwich filling, spoon it into lettuce cups, or place it over greens.

The recipe also works well for meal prep because the chicken can be cooked ahead.

For a Mediterranean twist, feta, olives, roasted peppers, and cucumber can be added.

A little lemon zest can provide even more citrus flavor.

For extra texture, toasted walnuts or almonds make excellent additions.

The creamy dressing also pairs nicely with warm pita bread.

This makes Chicken Salad suitable for lunch, brunch, picnics, casual gatherings, and simple family meals.

A fresh herb garnish can make each serving look attractive without requiring complicated decoration.

Final Thoughts

Chicken Salad is an easy recipe that brings together tender chicken, creamy dressing, fresh vegetables, and fragrant herbs.

The buttermilk marinade adds flavor and helps keep the chicken tender.

Greek yogurt creates a smooth dressing, while lemon juice adds brightness.

Fresh dill, parsley, chives, celery, cucumber, and red onion give every bite a refreshing contrast.

The recipe can be adjusted according to your preferences.

Add feta and olives for a stronger Mediterranean flavor.

Use extra cucumber and celery for more crunch.

Choose Greek yogurt for a lighter dressing or include more mayonnaise for a richer result.

For busy weekdays, prepare the chicken ahead and keep the dressing refrigerated until needed.

A chilled Chicken Salad can be served quickly for lunch without additional cooking.

It also works beautifully in sandwiches, wraps, pita pockets, lettuce cups, and green salads.

Keep the finished mixture refrigerated and add delicate toppings such as avocado shortly before serving.

For gatherings, place the salad in a serving bowl surrounded by toasted pita, fresh vegetables, olives, and lemon wedges.

This simple presentation makes the meal feel fresh and inviting.

With its creamy texture, tender chicken, crisp vegetables, and bright Mediterranean herbs, Chicken Salad is an easy recipe to keep in your regular meal rotation.

The combination of buttermilk, lemon, garlic, dill, parsley, and Greek yogurt gives the dish a balanced flavor that is satisfying without being complicated.

Whether served as a quick lunch, a family meal, or a make-ahead option, this Chicken Salad offers a practical and flavorful way to enjoy tender chicken with fresh ingredients.

Carrot Cake Greek Yogurt Scones

Carrot Cake Scones

Carrot Cake Greek Yogurt Scones

Carrot Cake Scones combine the cozy flavor of classic carrot cake with the tender texture of homemade scones. Freshly grated carrots, warm cinnamon, Greek yogurt, chopped walnuts, and a light vanilla glaze create a delicious breakfast or snack. These scones are golden on the outside, soft inside, and easy to prepare.

The Greek yogurt adds moisture and a subtle tang while helping create a tender crumb. Fresh carrots bring natural sweetness, color, and texture. Cinnamon and vanilla provide the familiar flavor of carrot cake, while walnuts add a pleasant crunch.

These Carrot Cake Scones are perfect with coffee or tea. They also make a lovely addition to brunch, weekend breakfasts, bake sales, and family gatherings.

Prep Time: 20 minutes
Bake Time: 18–22 minutes
Total Time: About 42 minutes
Servings: 8 scones

Ingredients

For the Scones

2 cups all-purpose flour

1/3 cup granulated sugar

2 teaspoons baking powder

1/2 teaspoon baking soda

1/2 teaspoon salt

1 teaspoon ground cinnamon

1/4 teaspoon ground nutmeg

1/4 teaspoon ground ginger

6 tablespoons cold unsalted butter, cubed

3/4 cup finely grated carrots

1/2 cup plain Greek yogurt

1 large egg

1 teaspoon vanilla extract

1/3 cup chopped walnuts

For the Glaze

1/2 cup powdered sugar

1 tablespoon plain Greek yogurt

1 tablespoon milk

1/2 teaspoon vanilla extract

1/4 teaspoon cinnamon

Optional Toppings

Extra chopped walnuts

A little finely grated carrot

A pinch of cinnamon

Orange zest

Step-by-Step Instructions

Prepare the Oven and Baking Sheet

Preheat the oven to 400°F (200°C).

Line a baking sheet with parchment paper.

Set the tray aside while you prepare the dough.

A hot oven helps the scones rise quickly and develop a golden exterior. Proper oven temperature is important because a cooler oven can leave the centers heavy.

Prepare the Dry Ingredients

Add the flour, sugar, baking powder, baking soda, salt, cinnamon, nutmeg, and ginger to a large mixing bowl.

Whisk everything together until the spices are evenly distributed.

This dry mixture creates the flavorful base for the Carrot Cake Scones.

Make sure there are no large clumps of baking powder or baking soda.

Add the Cold Butter

Add the cold cubed butter to the flour mixture.

Use a pastry cutter or your fingertips to work the butter into the flour.

Stop when the mixture resembles coarse crumbs with a few small pieces of butter still visible.

Do not completely melt or soften the butter.

Cold butter creates small pockets of steam during baking. Those pockets help produce a tender and flaky texture.

This step is especially important when making Carrot Cake Scones because it keeps the finished pastry light instead of dense.

Prepare the Wet Mixture

In a separate bowl, whisk together the Greek yogurt, egg, and vanilla extract.

Mix until smooth.

Add the finely grated carrots and stir gently.

Use finely grated carrots rather than large shreds. Smaller pieces distribute more evenly through the dough and become tender during baking.

The yogurt mixture provides moisture without making the dough overly heavy.

Combine the Ingredients

Pour the wet mixture into the bowl containing the dry ingredients.

Add the chopped walnuts.

Use a wooden spoon or rubber spatula to gently combine everything.

Mix only until the dough begins to come together.

Do not overmix.

A few dry crumbs are fine at this stage.

Overworking the dough can develop too much gluten, which may make the finished scones tough.

The dough should be soft and slightly sticky.

These Carrot Cake Scones get their tender texture from gentle mixing and cold butter.

Shape the Dough

Lightly flour a clean work surface.

Transfer the dough to the surface.

Gently bring it together with your hands.

Avoid kneading it like bread dough.

Shape the mixture into a round disc about 1 inch thick.

If the dough feels very sticky, sprinkle a small amount of flour over the surface.

Do not add too much flour because excess flour can make the scones dry.

Use a sharp knife to cut the disc into 8 equal wedges.

Carefully separate the wedges and place them on the prepared baking sheet.

Leave some space between each piece.

Bake the Scones

Place the baking sheet in the preheated oven.

Bake for approximately 18 to 22 minutes.

The scones should become lightly golden around the edges.

The tops should look set and slightly golden.

Insert a toothpick into the center of one scone.

It should come out without wet dough attached.

Avoid overbaking.

Once the scones are finished, remove the tray from the oven.

Allow them to cool on the baking sheet for about 5 minutes.

Then transfer them to a wire rack.

The warm aroma of cinnamon and baked carrots makes these Carrot Cake Scones especially inviting.

Prepare the Glaze

While the scones cool, prepare the glaze.

Add powdered sugar to a small bowl.

Stir in Greek yogurt, milk, vanilla extract, and cinnamon.

Mix until smooth.

If the glaze is too thick, add a few drops of milk.

If it is too thin, add a little more powdered sugar.

The finished glaze should be thick enough to drizzle slowly from a spoon.

Allow the scones to cool for at least 10 minutes before glazing.

A slightly cooled surface helps the glaze stay visible instead of melting completely.

Decorate the Scones

Drizzle the glaze over the cooled scones.

Sprinkle chopped walnuts over the top.

Add a tiny amount of fresh carrot if desired.

A little cinnamon or orange zest also works beautifully.

Let the glaze sit for several minutes before serving.

The creamy topping adds sweetness while keeping the carrot cake flavor recognizable.

The finished Carrot Cake Scones should have a golden exterior, tender center, visible carrot pieces, and a light creamy drizzle.

Tips for the Best Results

Use cold butter for the best texture.

Finely grate the carrots so they blend naturally into the dough.

Do not squeeze the carrots completely dry because their moisture helps keep the scones tender.

Measure flour carefully.

Too much flour can produce dry scones.

Avoid overmixing the dough.

Handle it gently when shaping.

Keep the dough fairly thick before cutting.

A disc that is too thin can produce flat scones.

Bake immediately after shaping.

This allows the baking powder and baking soda to work effectively in the hot oven.

These simple techniques help make Carrot Cake Scones soft, golden, and flavorful.

Easy Variations

Pecan Version

Replace the walnuts with chopped pecans.

Pecans provide a buttery flavor that pairs well with carrots and cinnamon.

Raisin Version

Add 1/3 cup raisins to the dough.

Golden raisins provide extra sweetness and chewy texture.

Coconut Version

Add 1/4 cup unsweetened shredded coconut.

Coconut gives the scones a subtle tropical note.

Orange Carrot Version

Add 1 teaspoon finely grated orange zest to the dough.

You can also add a little orange zest to the glaze.

Cream Cheese Glaze

For a richer topping, combine softened cream cheese with powdered sugar, vanilla, and a small amount of milk.

The cream cheese flavor makes the scones taste even more like carrot cake.

Each variation gives the Carrot Cake Scones a slightly different flavor while keeping the basic recipe simple.

Serving Suggestions

Serve the scones slightly warm or at room temperature.

A cup of coffee pairs beautifully with the cinnamon and vanilla flavors.

Tea is another excellent choice.

For brunch, arrange the scones on a serving platter with fresh fruit.

You can also serve them with plain Greek yogurt and a little honey.

Fresh berries add color and a refreshing contrast.

For a special breakfast, serve one scone with scrambled eggs and fresh fruit.

These Carrot Cake Scones are sweet enough to feel like a treat without needing a heavy dessert.

Storage Instructions

Allow the scones to cool completely before storing.

Place them in an airtight container.

Keep them at room temperature for up to 2 days.

For longer storage, refrigerate them for up to 4 days.

The glaze may soften slightly during refrigeration.

For the best texture, allow refrigerated scones to come to room temperature before serving.

You can also warm them gently in the microwave for a few seconds.

Avoid overheating because the glaze can melt and the scone can become dry.

Freezing Instructions

These scones can be frozen successfully.

Place completely cooled scones in a freezer-safe container or bag.

Separate layers with parchment paper.

Freeze for up to 2 months for the best quality.

Thaw overnight in the refrigerator or at room temperature.

Add fresh glaze after thawing if you want the best presentation.

For even better results, freeze the unbaked wedges on a tray.

Once firm, transfer them to a freezer-safe container.

Bake from frozen with a few extra minutes added to the cooking time.

This makes Carrot Cake Scones convenient for future breakfasts and unexpected guests.

Common Mistakes to Avoid

Do not use warm butter.

Avoid adding too much flour.

Do not overmix the dough.

Do not make the dough too thin.

Avoid using large chunks of raw carrot.

Do not overbake the scones.

Wait until the scones cool before adding the glaze.

Avoid storing them while they are still warm because trapped steam can make them soggy.

Using fresh baking powder and baking soda also helps the scones rise properly.

Frequently Asked Questions

Can I use whole-wheat flour?

Yes. Replace part of the all-purpose flour with whole-wheat flour. Using all whole-wheat flour may create a denser texture.

Can I make these without walnuts?

Absolutely. Simply leave them out or replace them with pecans, almonds, or pumpkin seeds.

Can I use regular yogurt?

Yes. Plain yogurt can replace Greek yogurt, although the dough may be slightly softer.

Can I make the dough ahead of time?

Yes. Shape the dough, cover it well, and refrigerate it overnight. Bake it the next morning.

Why are my scones dry?

Too much flour, overmixing, or overbaking can cause dryness. Measure carefully and remove the scones as soon as they are fully baked.

Can I make smaller scones?

Yes. Divide the dough into 10 or 12 wedges instead of 8. Reduce the baking time slightly.

Can I skip the glaze?

Yes. The scones are delicious without it. A light dusting of powdered sugar can also work.

Can I add raisins and walnuts together?

Yes. The combination gives the scones extra texture and sweetness.

Can I use baby carrots?

Yes, but grate them finely before adding them to the dough.

Are these good for breakfast?

Yes. They work well as a breakfast pastry, snack, or brunch treat.

Nutrition Information

Approximate nutrition per scone, based on 8 servings:

Calories: 320 kcal

Protein: 7g

Carbohydrates: 42g

Fat: 14g

Fiber: 2g

Sugar: 16g

Sodium: 300mg

Nutrition values are estimates and can vary depending on the exact ingredients and brands used.

Why You Will Love This Recipe

These scones bring together two comforting favorites in one simple bake.

The carrots add natural color and moisture.

Greek yogurt creates a tender crumb.

Cinnamon provides warm spice.

Walnuts add crunch.

Vanilla gives the dough a sweet bakery-style aroma.

The glaze adds a creamy finish without requiring complicated decorating.

Another advantage is the simple preparation.

You do not need a stand mixer.

You can mix the dough by hand in one bowl and shape it on the counter.

The scones bake quickly, making them practical for weekend breakfasts.

They also look attractive enough for brunch tables and gatherings.

For anyone who enjoys carrot cake, these Carrot Cake Scones offer familiar flavors in an easy-to-serve format.

Final Thoughts

Carrot Cake Scones are a delicious way to enjoy the warm flavors of carrot cake in a tender, golden pastry.

Fresh carrots provide moisture and color.

Greek yogurt helps create a soft crumb.

Cinnamon, nutmeg, ginger, and vanilla build a warm flavor profile.

Walnuts add a satisfying crunch.

The simple yogurt glaze brings everything together with a creamy finish.

For the best results, keep the butter cold and avoid overworking the dough.

Use finely grated carrots and measure the flour carefully.

Bake until the edges are golden and the centers are cooked through.

Serve the scones warm with coffee, tea, fresh fruit, or Greek yogurt.

You can also prepare the dough ahead of time or freeze baked scones for later.

With their tender texture, warm spices, fresh carrots, and light glaze, Carrot Cake Scones are perfect for breakfast, brunch, afternoon tea, or a homemade snack.

Once you try these Carrot Cake Scones, they can become a favorite whenever you want something that combines the comforting flavor of carrot cake with the simple appeal of a freshly baked scone.

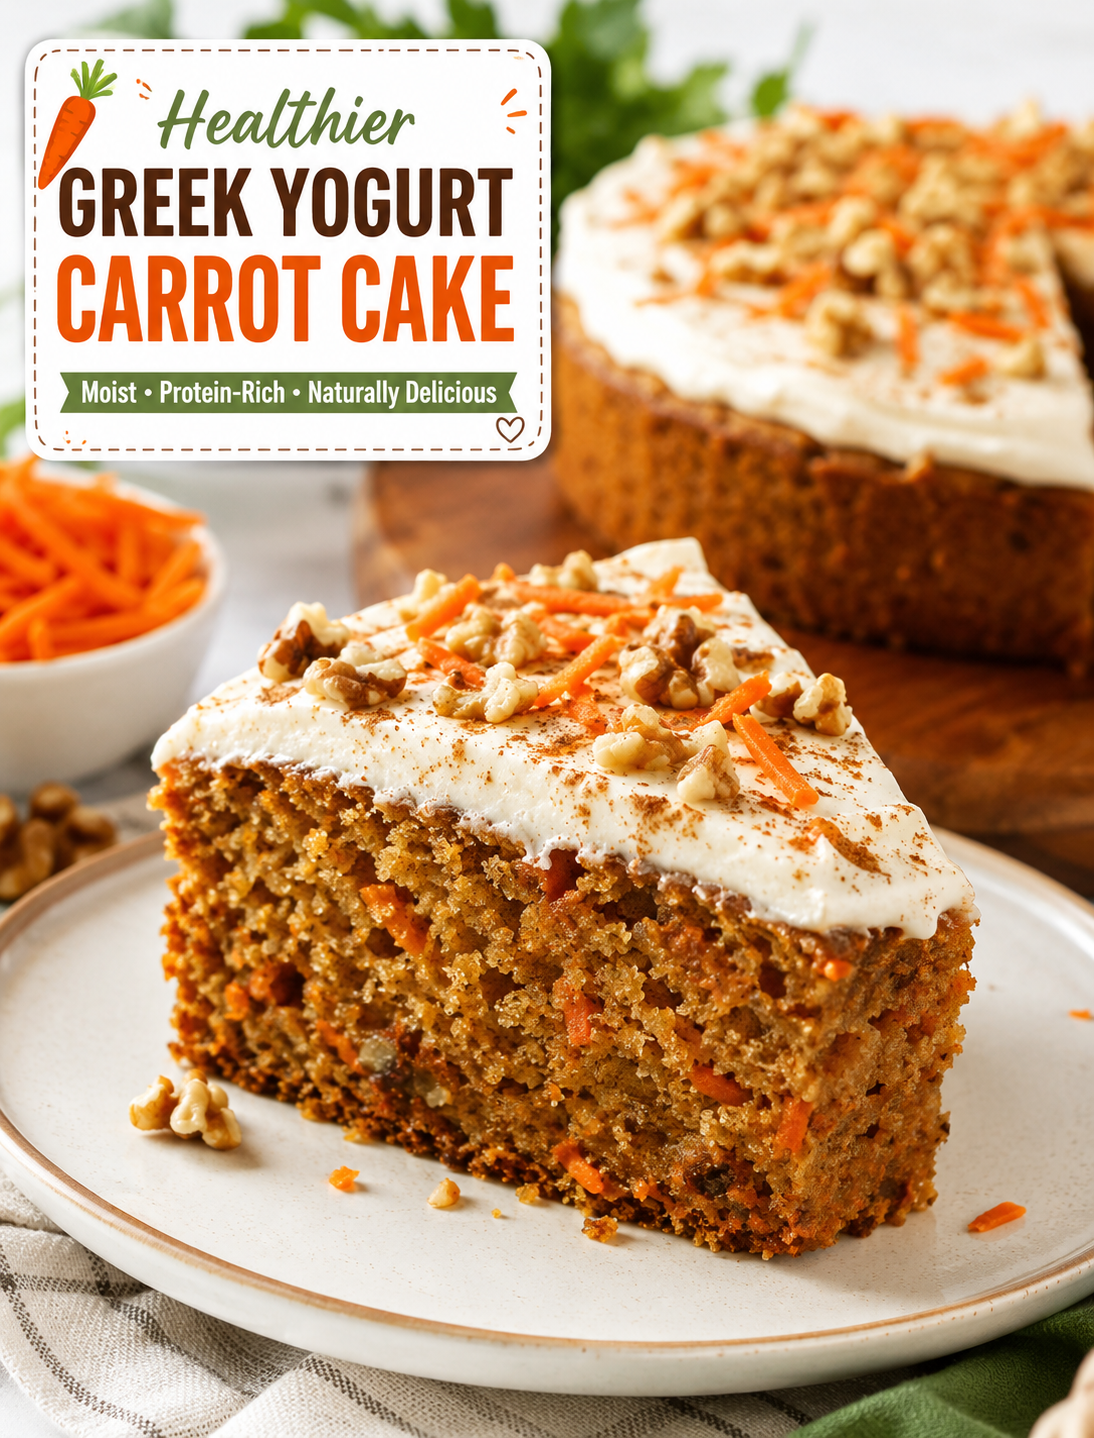
Healthier Greek Yogurt Carrot Cake – Moist & Protein-Rich

Healthier Greek Yogurt Carrot Cake – Moist & Protein-Rich

Healthier Greek Yogurt Carrot Cake

Moist, Protein-Rich & Naturally Delicious

If you love classic carrot cake but want a lighter homemade option, this Healthier Greek Yogurt Carrot Cake is a great choice. It has a soft, moist crumb, warm cinnamon flavor, fresh carrots, and a creamy Greek yogurt frosting.

Greek yogurt adds moisture and protein without making the cake heavy. Freshly grated carrots add natural sweetness, fiber, and beta-carotene. Whole wheat flour, walnuts, and a modest amount of honey or maple syrup make this carrot cake a more balanced choice for breakfast, an afternoon snack, or dessert.

The recipe is simple enough for a busy weekday and satisfying enough for a family gathering. It also stores well in the refrigerator, making it useful for meal prep.

Why You’ll Love This Healthier Carrot Cake

This recipe keeps the familiar flavor of carrot cake while using several wholesome ingredients. Greek yogurt replaces part of the richer ingredients often found in traditional cakes and helps create a tender texture.

Fresh carrots are the star ingredient. They bring moisture, color, mild sweetness, and a pleasant texture to every slice. Cinnamon and nutmeg add warm spice without needing extra sugar.

The light Greek yogurt cream cheese frosting adds creamy richness without covering the cake in a thick layer of frosting. You can also skip the frosting if you want a simple breakfast cake or snack.

With about 15 minutes of preparation and 35–40 minutes of baking, this homemade carrot cake is easy to fit into a busy schedule.

Ingredients for Greek Yogurt Carrot Cake

For the Carrot Cake

  • 2 cups whole wheat flour or all-purpose flour
  • 2 cups freshly grated carrots
  • ¾ cup plain Greek yogurt
  • 3 large eggs
  • ½ cup honey or pure maple syrup
  • ¼ cup olive oil or melted coconut oil
  • 1 teaspoon vanilla extract
  • 2 teaspoons ground cinnamon
  • ½ teaspoon ground nutmeg
  • 1 teaspoon baking powder
  • ½ teaspoon baking soda
  • ¼ teaspoon salt
  • ½ cup chopped walnuts, optional
  • ¼ cup raisins, optional

For the Greek Yogurt Cream Cheese Frosting

  • 4 ounces reduced-fat cream cheese, softened
  • ½ cup plain Greek yogurt
  • 2 tablespoons honey or maple syrup
  • 1 teaspoon vanilla extract
  • Pinch of cinnamon

Optional Garnishes

  • Chopped walnuts
  • Freshly grated carrot
  • Light cinnamon sprinkle
  • Orange zest

Fresh carrots and plain Greek yogurt work best because they provide moisture without adding strong flavors that compete with the spices.

How to Make Healthier Greek Yogurt Carrot Cake

1. Prepare the Oven and Pan

Preheat your oven to 350°F (175°C). Grease an 8×8-inch baking pan or line it with parchment paper.

Parchment makes the finished cake easier to lift and slice after cooling.

2. Grate the Carrots

Wash and peel the carrots before grating them with the small or medium side of a box grater.

Do not squeeze out the carrot moisture. That natural moisture helps keep the cake soft and prevents a dry crumb.

3. Mix the Wet Ingredients

Add Greek yogurt, eggs, honey or maple syrup, olive oil, and vanilla to a large mixing bowl.

Whisk until the mixture looks smooth and evenly blended. Room-temperature ingredients can help the batter combine more easily.

4. Combine the Dry Ingredients

In a separate bowl, whisk together the flour, cinnamon, nutmeg, baking powder, baking soda, and salt.

Mixing the dry ingredients first helps spread the spices and leavening agents evenly throughout the cake.

5. Make the Batter

Gradually add the dry mixture to the wet ingredients. Stir gently until just combined.

Fold in the grated carrots, walnuts, and raisins if you are using them. Avoid overmixing because excessive stirring can produce a heavier cake.

6. Bake Until Tender

Transfer the batter to the prepared pan and spread it into an even layer.

Bake for 35–40 minutes. Insert a toothpick into the center; it should come out clean or with a few moist crumbs.

Let the cake cool completely before adding the frosting.

7. Make the Greek Yogurt Frosting

Beat the softened cream cheese until smooth. Add Greek yogurt, honey or maple syrup, vanilla, and cinnamon.

Mix until creamy and smooth. Spread the frosting over the completely cooled cake.

8. Garnish and Serve

Finish with chopped walnuts, a little grated carrot, orange zest, or a light dusting of cinnamon.

Serve the cake chilled or at room temperature. Chilling it can make the frosting firmer and easier to slice.

Tips for a Moist Carrot Cake

Use freshly grated carrots rather than dry packaged shreds. Fresh carrots release moisture into the batter as the cake bakes.

Do not overmix once the flour is added. Stir only until the ingredients are combined.

Measure flour accurately by spooning it into a measuring cup and leveling the top. Too much flour can make the cake dry.

Avoid overbaking. Start checking the cake around the 35-minute mark because oven temperatures can vary.

Let the cake cool fully before frosting. Warm cake can soften or melt the yogurt-based topping.

For the best texture, allow refrigerated cake to sit at room temperature for a few minutes before serving.

Easy Recipe Variations

Carrot Cake Muffins

Divide the batter among a lined muffin pan and bake for about 18–22 minutes. Check with a toothpick before removing them from the oven.

Gluten-Free Carrot Cake

Use a reliable gluten-free flour blend designed for baking. Follow the package guidance if it includes a recommended amount of xanthan gum.

Lower-Sugar Version

Reduce the honey or maple syrup slightly and let the natural sweetness of the carrots provide more of the flavor.

Tropical Carrot Cake

Add unsweetened shredded coconut and a small amount of crushed pineapple. Drain excess pineapple liquid first to avoid making the batter too wet.

Higher-Protein Version

Add a suitable vanilla protein powder while keeping enough Greek yogurt in the batter to maintain moisture. Because protein powders vary, the texture may change slightly.

Frosting-Free Carrot Cake

Skip the frosting for a simpler snack or breakfast option. Add chopped walnuts and a little cinnamon before serving for extra texture and flavor.

Healthier Carrot Cake Benefits

This homemade cake includes several ingredients that offer useful nutrients.

Greek yogurt contributes protein and calcium while helping create a moist, tender texture. Eggs also provide protein and help bind the batter.

Carrots provide fiber and beta-carotene, which the body can convert into vitamin A. Whole wheat flour can provide more fiber than refined flour when compared with an equal amount of all-purpose flour.

Walnuts add healthy unsaturated fats, protein, and texture. Olive oil provides another source of unsaturated fat when used in place of butter.

These ingredients do not make cake a health food, but they can make this version a more nutrient-conscious choice than many heavily frosted desserts.

Storage and Freezing Instructions

Because the frosting contains Greek yogurt and cream cheese, store the finished cake in an airtight container in the refrigerator.

For the best quality, enjoy refrigerated frosted cake within about 5 days.

You can freeze the unfrosted cake for up to 3 months. Wrap individual portions tightly and place them in a freezer-safe container or bag.

Thaw the cake overnight in the refrigerator. Add fresh frosting after thawing for the best texture.

Serving Ideas

Serve a slice with fresh berries for a colorful dessert plate. A spoonful of plain Greek yogurt can also add extra creaminess without requiring more frosting.

For breakfast, pair a small slice with fruit and a protein-rich food. For dessert, add a light sprinkle of walnuts and orange zest.

This cake also works well for brunch, family gatherings, lunchbox treats, and weekend baking.

Recipe Details

Prep Time: 15 minutes
Cook Time: 35–40 minutes
Total Time: About 55 minutes
Servings: 12 slices
Oven Temperature: 350°F (175°C)
Pan Size: 8×8 inches

Approximate Nutrition Per Slice

Based on 12 servings, one slice provides approximately:

  • Calories: 240
  • Protein: 8g
  • Carbohydrates: 32g
  • Fiber: 4g
  • Fat: 10g
  • Sugar: 12g
  • Calcium: 120mg
  • Iron: 1.5mg

Nutrition values vary based on the flour, yogurt, sweetener, frosting, nuts, and serving size used.

Frequently Asked Questions

Can I make carrot cake without frosting?

Yes. The cake stays moist and flavorful without frosting, making it a simple option for breakfast or snacks.

Can I use regular yogurt instead of Greek yogurt?

Yes. Regular yogurt works, but Greek yogurt gives the cake a thicker texture and adds more protein.

Can I make this recipe dairy-free?

Yes. Use a dairy-free yogurt and dairy-free cream cheese alternative that works well for baking and frosting.

How do I keep carrot cake moist?

Use freshly grated carrots, avoid overmixing, and remove the cake when a toothpick shows only a few moist crumbs.

Can I use almond flour?

Yes, but almond flour changes the structure and creates a softer, denser cake. A tested almond-flour recipe gives more reliable results.

How long does Greek yogurt carrot cake last?

Store frosted cake in the refrigerator and use it within about 5 days for the best quality and freshness.

Can I freeze carrot cake?

Yes. Freeze the unfrosted cake for up to 3 months, then thaw it overnight and add fresh frosting before serving.

Is this carrot cake good for meal prep?

Yes. Cut the cooled cake into individual portions and refrigerate them in sealed containers for convenient snacks during the week.

Final Thoughts

This Healthier Greek Yogurt Carrot Cake brings together fresh carrots, creamy Greek yogurt, warm spices, walnuts, and a lighter frosting for a satisfying homemade treat. Its moist texture and simple preparation make it easy to serve for breakfast, brunch, snacks, or dessert.

For the best results, use freshly grated carrots, measure the flour carefully, avoid overmixing, and let the cake cool completely before frosting. Whether you keep the walnuts and raisins or customize the recipe with your favorite additions, this carrot cake offers a delicious way to enjoy a classic favorite with a more balanced ingredient list.