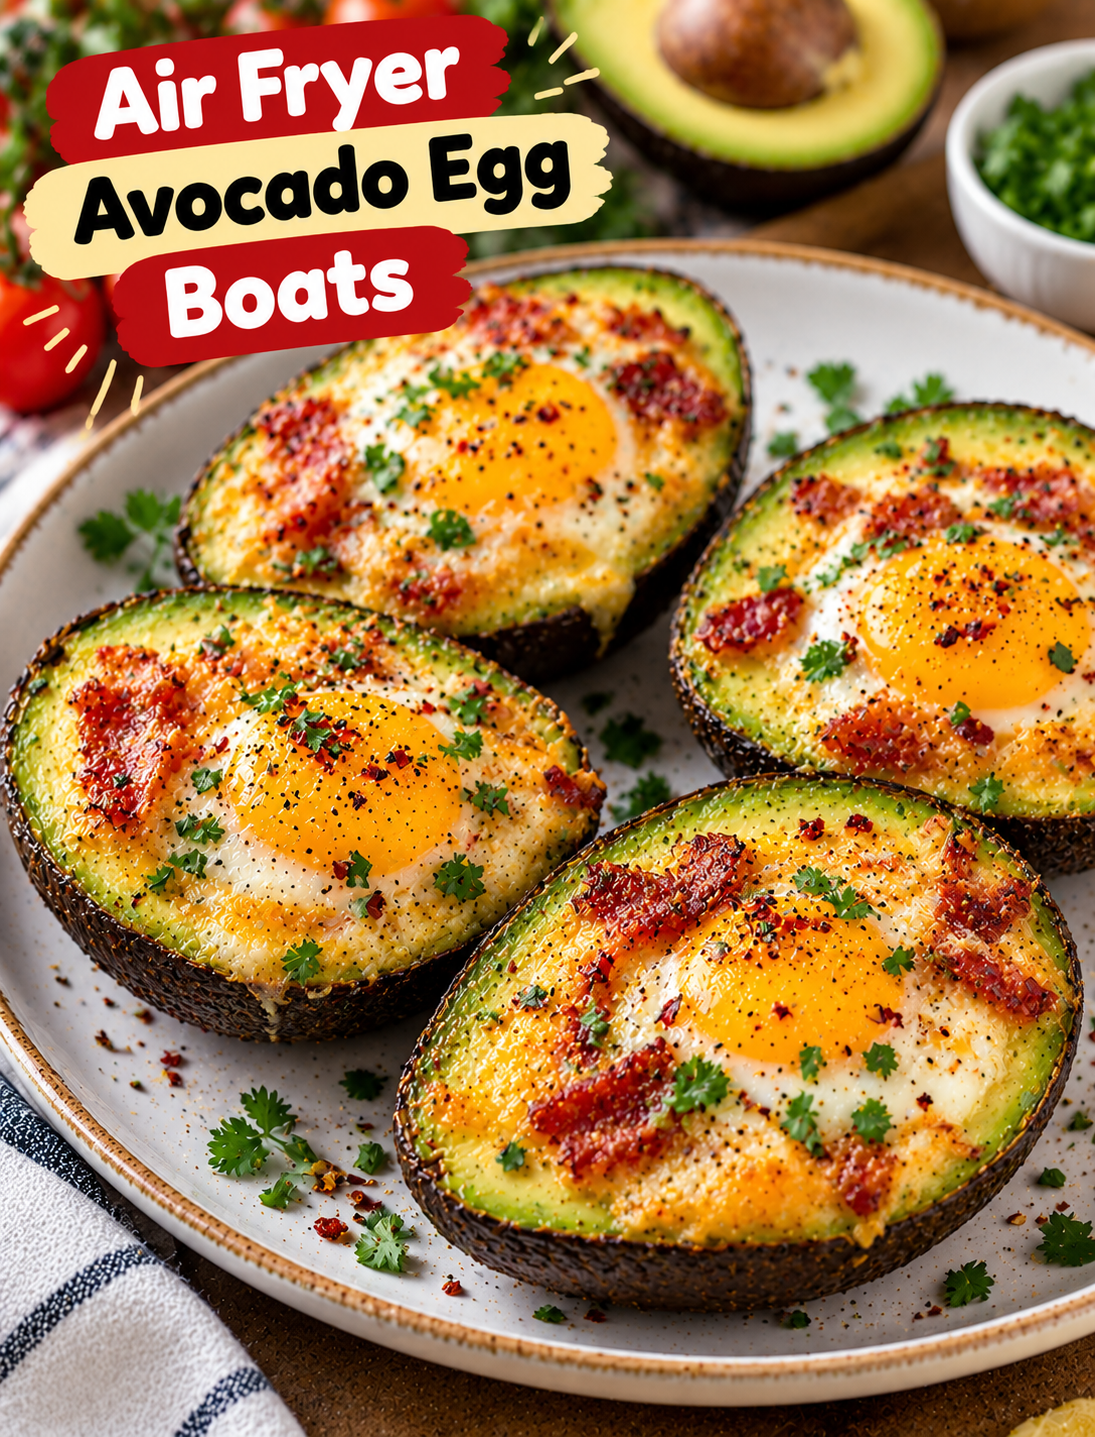
Air Fryer Avocado Egg Boats

Air fryer avocado egg boats filled with cooked eggs, topped with fresh herbs, black pepper, and melted cheese.
Air Fryer Avocado Egg Boats

Looking for a quick breakfast that feels fresh, satisfying, and easy to prepare? These Air Fryer Avocado Egg Boats combine creamy avocado with a perfectly cooked egg, simple seasonings, and optional cheese for a delicious start to the day. The air fryer makes this recipe convenient, while the avocado provides a soft, buttery base for the egg.

Each avocado half becomes a small edible bowl. After removing a little extra flesh, crack an egg into the center, add your favorite seasonings, and air fry until the egg reaches your preferred doneness. Finish with fresh herbs, black pepper, or a sprinkle of shredded cheese for extra flavor.

This recipe works well for breakfast, brunch, or a light lunch when you want something simple without using several pans. You can also customize it with tomatoes, spinach, red pepper flakes, or cooked bacon. If you enjoy easy air fryer breakfast recipes, these avocado egg boats are a practical option for your weekly menu.

Why You’ll Love These Air Fryer Avocado Egg Boats

  • Quick preparation: You need only a few basic ingredients and minimal prep work.
  • Creamy texture: Ripe avocado provides a smooth, buttery base for the egg.
  • Easy customization: Add cheese, herbs, vegetables, or cooked bacon to suit your taste.
  • Convenient cooking: The air fryer cooks the egg and avocado together in one dish.
  • Naturally satisfying: Eggs provide protein, while avocado contributes fiber and unsaturated fats.
  • Great for breakfast or brunch: Serve the boats alone or alongside toast, fruit, or a fresh salad.

Recipe Overview

  • Prep Time: 5 minutes
  • Cook Time: 8–12 minutes
  • Total Time: Approximately 15–20 minutes
  • Servings: 2
  • Yield: 2 avocado egg boats
  • Course: Breakfast, Brunch, Light Lunch
  • Cuisine: American-Inspired
  • Cooking Method: Air Fryer
  • Difficulty: Easy

Cooking time depends on avocado size, egg size, and your air fryer model. Check the egg near the end of cooking because the white and yolk may cook at different rates.

Ingredients for Air Fryer Avocado Egg Boats

Choose ripe but firm avocados that can hold their shape while cooking. Very soft avocados may collapse when you remove the pit or add the egg.

For the Avocado Egg Boats

  • 1 large ripe but firm avocado
  • 2 small eggs
  • 1/4 teaspoon salt, or to taste
  • 1/4 teaspoon black pepper
  • 1/4 teaspoon garlic powder, optional
  • 2 tablespoons shredded cheddar or mozzarella cheese, optional
  • 1 teaspoon chopped fresh chives or parsley, optional
  • A pinch of red pepper flakes, optional

Optional Toppings

  • Diced cherry tomatoes
  • Finely chopped spinach
  • Cooked, crumbled bacon
  • Crumbled feta cheese
  • Smoked paprika
  • A squeeze of fresh lemon juice

Ingredient tip: Small eggs are usually easier to fit into avocado halves than large eggs. If you only have large eggs, remove a little more avocado flesh to create enough space and add the egg gradually.

How to Make Air Fryer Avocado Egg Boats

Follow these steps to prepare the avocado, add the eggs, and cook everything until the whites are set.

Step 1: Choose and Prepare the Avocado

Wash the avocado and dry it with a clean towel. Place it on a cutting board and carefully slice it lengthwise around the pit.

Twist the halves apart and remove the pit with a spoon. Avoid using a knife to strike the pit, as this can cause hand injuries.

Check the center of each half. If the cavity looks too small for an egg, scoop out a little avocado flesh with a spoon.

Step 2: Create Enough Space for the Eggs

Use a spoon to widen the cavity in each avocado half until it can hold a small egg. Keep enough flesh around the edges so the avocado maintains its shape.

If the avocado halves wobble, trim a tiny piece from the rounded underside to create a flatter base. Do not cut through the bottom of the avocado.

Save the removed avocado flesh for toast, a small salad, or a quick guacamole.

Step 3: Preheat the Air Fryer

Preheat your air fryer to 350°F for about 3 minutes, following your appliance instructions.

If your air fryer does not require preheating, follow the manufacturer’s guidance. Choose a small oven-safe dish or ramekin that fits inside the basket if you need extra support to keep the avocado halves upright.

Step 4: Position the Avocado Halves

Place the avocado halves cut-side up in the air fryer basket or in a suitable oven-safe dish. Make sure they sit securely without tipping.

If needed, use small pieces of crumpled foil around the outside to help support the halves. Keep the foil away from the heating element and use it only if your appliance manufacturer allows it.

Step 5: Add the Eggs

Crack each egg into a small bowl first. This makes it easier to control the amount of egg and remove any shell fragments.

Carefully pour one egg into each avocado cavity. If the egg is too large, add some of the white first and reserve the extra for another use.

Keep the egg inside the avocado edges to reduce spills. If a little egg white runs over the side, leave it in place rather than trying to move the avocado.

Step 6: Season the Egg Boats

Sprinkle the eggs with salt, black pepper, and garlic powder if using. Add a small amount of shredded cheese if you want a richer, savory flavor.

For a fresh variation, add a few finely chopped chives or a small pinch of smoked paprika. Keep wet toppings such as tomatoes to a minimum because excess moisture can affect the texture.

Step 7: Air Fry Until the Eggs Set

Air fry the avocado halves at 350°F for approximately 8–12 minutes. Start checking at 8 minutes because air fryers vary in heat output.

For a softer yolk, the cooking time may be shorter, but the egg white must be fully cooked. For a firmer yolk, continue cooking until the yolk reaches your preferred texture.

For food safety, cook eggs until both the whites and yolks are firm, or use pasteurized eggs if you prefer a softer yolk. If cooking for young children, pregnant people, older adults, or anyone with a weakened immune system, fully cooked eggs are the safer choice.

Step 8: Add Fresh Toppings

Carefully remove the avocado boats from the air fryer using heat-safe tongs or a spatula. Let them rest for about 1–2 minutes before adding delicate toppings.

Sprinkle with fresh parsley, chives, or red pepper flakes. If you like a brighter flavor, add a small squeeze of lemon juice just before serving.

Step 9: Serve Warm

Place the avocado egg boats on a serving plate and enjoy them while warm. Serve with whole-grain toast, fresh fruit, or a small green salad for a more complete breakfast.

Use a spoon to scoop out the egg and avocado together. The creamy avocado pairs well with the soft egg and savory seasonings.

Tips for Perfect Avocado Egg Boats

Use these practical tips to help the avocado hold its shape and the egg cook evenly.

  • Choose firm-ripe avocados: They should yield slightly to gentle pressure without feeling mushy.
  • Use small eggs: Smaller eggs fit better inside avocado cavities.
  • Widen the cavity carefully: Remove extra flesh without cutting through the bottom.
  • Keep the halves stable: Use a suitable ramekin or oven-safe dish if the avocado tips over.
  • Check early: Begin checking at 8 minutes to avoid overcooking.
  • Add delicate toppings later: Fresh herbs and lemon juice taste brighter when added after cooking.
  • Cook eggs safely: Fully set whites and yolks are the safest choice for people at higher risk from foodborne illness.
  • Handle the basket carefully: Hot avocado and egg can be slippery, so use heat-safe utensils.

Easy Variations to Try

Change the seasonings and toppings to create different breakfast flavors without changing the basic method.

Cheesy Avocado Egg Boats

Sprinkle cheddar, mozzarella, or Monterey Jack over the egg during the final 2–3 minutes of cooking. The cheese melts into a savory topping without overpowering the avocado.

Spinach and Feta Avocado Boats

Add a small amount of finely chopped, cooked spinach and crumbled feta before cooking. Remove excess moisture from the spinach so the egg can set properly.

Bacon and Egg Avocado Boats

Top the egg with a little fully cooked, crumbled bacon. Use cooked bacon rather than raw bacon because the short cooking time may not cook raw bacon safely.

Spicy Avocado Egg Boats

Add red pepper flakes, a pinch of cayenne, or a little finely chopped jalapeño. Serve with a small spoonful of salsa if you enjoy a spicy breakfast.

Tomato and Herb Avocado Boats

Add a few small pieces of cherry tomato after cooking, then finish with parsley or chives. This keeps the tomatoes fresh and prevents them from releasing too much liquid into the egg.

Mediterranean Avocado Egg Boats

Add a little feta, oregano, and chopped parsley. Serve with cucumber and tomato salad for a Mediterranean-inspired breakfast.

What to Serve with Avocado Egg Boats

Pair these breakfast boats with simple sides that complement their creamy texture.

  • Whole-grain toast: Adds crunch and makes the meal more filling.
  • Fresh fruit: Berries, orange slices, or melon provide a refreshing contrast.
  • Greek yogurt: Offers a cool, creamy side with additional protein.
  • Breakfast potatoes: Serve with seasoned air fryer potatoes for a heartier brunch.
  • Green salad: A light salad works well when serving the boats for lunch.
  • Salsa: Adds tomato flavor and a little heat.
  • Turkey bacon: Provides a savory side if you want a traditional breakfast plate.

For a quick weekday meal, serve one avocado half with toast and fruit. For brunch, prepare several halves and offer different toppings so everyone can choose their favorite.

Storage and Reheating Instructions

How to Store Leftover Avocado Egg Boats

These boats taste best when freshly cooked because avocado can brown and soften over time. If you have leftovers, refrigerate them in an airtight container within 2 hours of cooking and eat within 1–2 days for the best quality.

Keep the boats refrigerated at 40°F or below. Discard them if they have been left at room temperature for more than 2 hours.

How to Reheat Avocado Egg Boats

Place the refrigerated boats in the air fryer at 300°F for approximately 3–5 minutes, checking that the center is heated through. Avoid high heat because the avocado can become overly soft and the egg can turn rubbery.

Reheat only the portion you plan to eat. The texture will be softer than when freshly cooked.

Can You Prepare Avocado Egg Boats Ahead of Time?

You can wash the avocado, prepare the toppings, and measure the seasonings ahead of time. For the best color and texture, cut the avocado and add the eggs just before cooking.

Do not crack raw eggs into avocado halves and leave them at room temperature while waiting to cook.

Common Mistakes to Avoid

  • Using an overripe avocado: Very soft flesh may collapse during preparation.
  • Choosing eggs that are too large: Excess egg can spill over the sides.
  • Leaving the cavity too small: The egg may not fit or cook evenly.
  • Skipping support: Unstable avocado halves can tip and spill the egg.
  • Adding too many wet toppings: Extra moisture can affect how the egg sets.
  • Overcooking the avocado: Long cooking can make its texture very soft.
  • Ignoring egg safety: Cook the whites and yolks fully when preparing food for people at higher risk.
  • Preparing too far ahead: Cut avocado browns and loses freshness when stored for too long.

Frequently Asked Questions

1. How long do avocado egg boats take in the air fryer?

Most avocado egg boats take about 8–12 minutes at 350°F, depending on egg size, avocado cavity depth, and your air fryer.

2. Can I use large eggs for avocado boats?

Yes, but you may need to scoop out more avocado flesh and add the egg gradually to prevent overflow.

3. How do I stop the avocado halves from tipping over?

Place them in a small oven-safe dish or ramekin that fits inside your air fryer basket and keeps them upright.

4. Can I make avocado egg boats without cheese?

Yes. Leave out the cheese and season the egg with salt, pepper, garlic powder, or fresh herbs.

5. Are avocado egg boats good for meal prep?

They are best fresh, but leftovers can be refrigerated for 1–2 days and reheated gently in the air fryer.

6. Why is my egg white still runny?

The egg may need more cooking time, especially if the cavity is deep or the egg is large; continue cooking until the white is fully set.

7. Can I use an oven instead of an air fryer?

Yes. Bake the prepared avocado halves at 375°F until the egg white is set, checking frequently because timing varies.

8. What toppings taste best on avocado egg boats?

Shredded cheese, cooked bacon, feta, chives, smoked paprika, and red pepper flakes all work well in small amounts.

Final Thoughts

Air Fryer Avocado Egg Boats are a simple breakfast option made with creamy avocado, eggs, and seasonings you may already have in your kitchen. They are easy to customize with cheese, herbs, vegetables, or cooked bacon, making them useful for breakfast, brunch, or a light lunch.

Choose firm-ripe avocados, create enough room for the eggs, and keep the halves stable in the air fryer. Check the eggs carefully and cook them to a safe doneness before serving.

Ready to try this easy breakfast? Save this recipe for your next morning meal and tell us in the comments: would you top your avocado egg boats with feta, cheddar, or crispy bacon?
Cucumber Avocado Salad

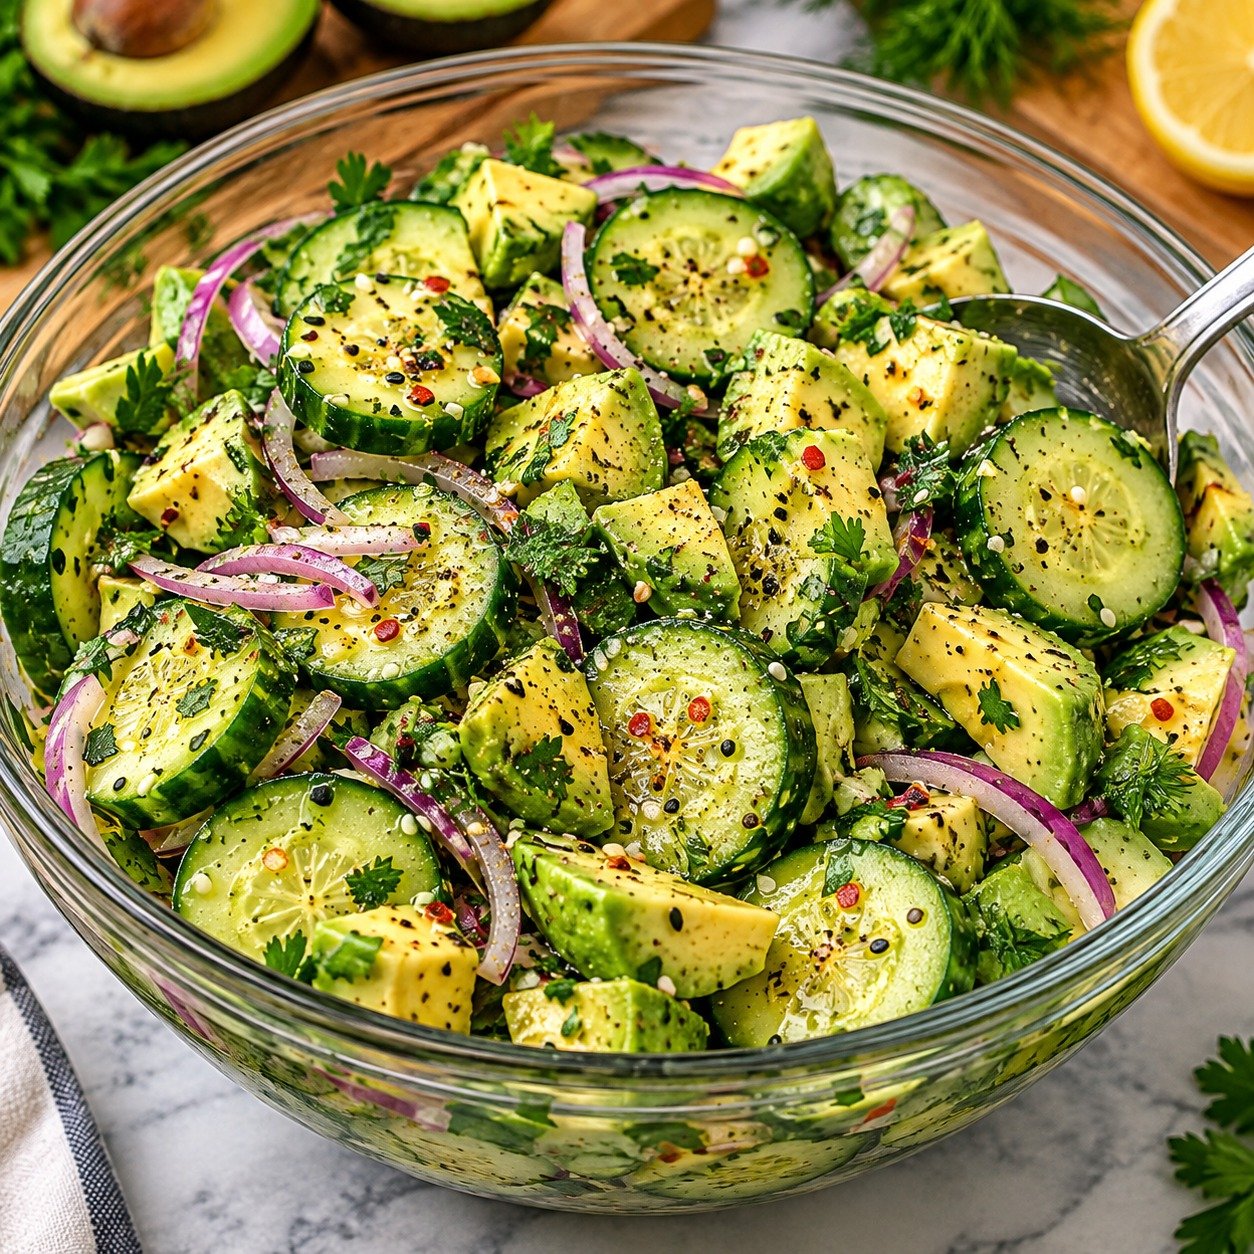
Cucumber Avocado Salad with cucumber, avocado, cherry tomatoes, red onion, feta, fresh herbs, lemon, and olive oil

Cucumber Avocado Salad

Cucumber Avocado Salad is a fresh, creamy, and refreshing dish made with crisp cucumber, ripe avocado, juicy tomatoes, red onion, herbs, and a bright lemon-lime dressing.

This Cucumber Avocado Salad is especially useful when you want something light that still feels satisfying. The creamy avocado balances the crunchy vegetables, while lemon, olive oil, herbs, and a touch of garlic keep every bite bright and flavorful.

Prep Time: 15 minutes
Chill Time: 10 minutes, optional
Total Time: 25 minutes
Servings: 4

Ingredients

For the Salad

  • 2 large English cucumbers, sliced into half-moons
  • 2 ripe but firm avocados, diced
  • 1 1/2 cups cherry tomatoes, halved
  • 1/4 small red onion, thinly sliced
  • 1/3 cup crumbled feta cheese, optional
  • 2 tablespoons chopped fresh parsley
  • 2 tablespoons chopped fresh dill
  • 1 tablespoon chopped fresh mint

Ingredients For the Dressing

  • 3 tablespoons extra virgin olive oil
  • 2 tablespoons fresh lemon juice
  • 1 tablespoon fresh lime juice
  • 1 small garlic clove, finely minced
  • 1 teaspoon honey or maple syrup
  • 1/2 teaspoon dried oregano
  • 1/2 teaspoon salt
  • 1/4 teaspoon black pepper
  • Pinch of red pepper flakes, optional

For Serving

  • Lemon or lime wedges
  • Extra herbs
  • Toasted pumpkin seeds or sunflower seeds, optional
  • Warm pita or crusty bread, optional

Why You’ll Love This Recipe

Cucumber Avocado Salad is crisp, creamy, and full of fresh flavor without requiring any cooking. The cucumber adds crunch, avocado gives richness, tomatoes bring juiciness, and the herbs make the whole bowl taste lively.

You can also add feta, chickpeas, olives, grilled chicken, shrimp, or extra greens to make it more filling. It comes together quickly, making it useful for weekdays, picnics, and casual dinners.

How to Make Cucumber Avocado Salad

Step 1: Prepare the Cucumbers

Wash and dry the cucumbers well.

Slice them into half-moons about 1/4 inch thick. If using regular cucumbers with thick skin or large seeds, peel them and scoop out the watery centers first.

Place the sliced cucumber in a large mixing bowl.

Step 2: Prepare the Tomatoes and Onion

Cut the cherry tomatoes in half.

Thinly slice the red onion so it blends easily with the other ingredients.

If you prefer a milder onion flavor, soak the slices in cold water for 5 to 10 minutes, then drain and pat dry.

This keeps Cucumber Avocado Salad balanced without making the onion overpowering.

Step 3: Dice the Avocado

Cut the avocados in half, remove the pits, and scoop out the flesh.

Dice the avocado into medium pieces.

Use ripe but firm avocados so they hold their shape when tossed.

Very soft avocado can turn Cucumber Avocado Salad creamy in a way that feels more like a dip than a salad.

Step 4: Make the Dressing

In a small bowl or jar, combine olive oil, lemon juice, lime juice, garlic, honey, oregano, salt, black pepper, and optional red pepper flakes.

Whisk or shake until the dressing looks smooth and slightly emulsified.

Taste and adjust the acidity, sweetness, or salt if needed.

Step 5: Combine the Vegetables

Add the cucumbers, tomatoes, onion, parsley, dill, and mint to a large bowl.

Pour most of the dressing over the vegetables and toss gently.

Adding the avocado last helps Cucumber Avocado Salad keep a cleaner appearance and prevents the avocado pieces from breaking apart.

Step 6: Add the Avocado

Add the diced avocado to the bowl.

Drizzle with the remaining dressing, then fold everything together gently with a large spoon or silicone spatula.

Avoid vigorous mixing because the avocado should stay in visible chunks.

Step 7: Add Feta or Seeds

Sprinkle crumbled feta over the top if using.

For extra crunch, add toasted pumpkin seeds or sunflower seeds.

These toppings give Cucumber Avocado Salad extra texture and savory flavor.

Step 8: Let the Flavors Rest

Let the salad stand for 5 to 10 minutes before serving.

This gives the dressing time to coat the vegetables. Do not leave it too long at room temperature because avocado softens quickly.

Step 9: Taste and Adjust

Taste the salad before serving.

Add extra lemon juice, salt, black pepper, or herbs if needed.

If the salad tastes too sharp, a tiny drizzle of honey can soften the acidity.

Step 10: Garnish and Serve

Transfer Cucumber Avocado Salad to a serving bowl or platter.

Finish with extra herbs, feta, seeds, or lemon wedges.

Serve immediately for the best texture.

Serving Suggestions

Cucumber Avocado Salad is especially good when you want a cool side beside a warm main course.

Cucumber Avocado Salad is an excellent side for grilled chicken, salmon, shrimp, baked fish, turkey burgers, or Mediterranean chicken skewers.

Serve it with hummus, pita, couscous, quinoa, or roasted potatoes for a larger meal.

For lunch, add chickpeas, chicken, tuna, or boiled eggs.

You can also serve Cucumber Avocado Salad beside wraps, sandwiches, flatbreads, or soups for a fresh contrast.

For another easy Mediterranean-inspired meal, try our Mediterranean Baked Feta & Veggie Pasta with creamy feta, roasted vegetables, and tender pasta.

Recipe Tips

Use English or Persian cucumbers when possible because they usually have thin skins and fewer seeds.

Choose avocados that are ripe but still firm enough to dice cleanly.

Pat watery vegetables dry before mixing so the dressing does not become diluted.

Add avocado near the end and toss gently.

Fresh lemon and lime juice give better flavor than bottled juice.

For the best Cucumber Avocado Salad texture, prepare it shortly before serving.

If you need to make it ahead, keep the avocado and dressing separate until the last few minutes.

Easy Variations

Cucumber Avocado Salad is easy to customize with ingredients you already have.

Add chickpeas for protein and fiber, or mix in Kalamata olives for a more Mediterranean flavor.

Corn, radishes, peppers, or arugula can also be added.

For a creamy version, stir a spoonful of Greek yogurt into the dressing.

You can replace feta with goat cheese or mozzarella pearls.

For extra heat, add jalapeño, chili flakes, or a small spoonful of harissa.

If you prefer a fruitier version, add mango or watermelon for a sweet and savory contrast.

If you enjoy creamy and savory Mediterranean-inspired dishes, you may also like our Spinach, Mushroom & Brie Flatbread with Garlic Cream.

Make-Ahead Instructions

Cucumber Avocado Salad is best assembled close to serving time, but most components can be prepared ahead.

Slice the cucumbers, tomatoes, and onion up to one day in advance and refrigerate them separately in airtight containers.

Make the dressing up to 3 days ahead and keep it refrigerated in a sealed jar.

Chop the herbs shortly before serving.

Cut and add the avocado at the last minute to reduce browning and keep the texture firm.

Storage and Reheating

Store leftover Cucumber Avocado Salad in an airtight container in the refrigerator for up to 2 days.

The avocado may darken slightly and the cucumber may release some water.

A squeeze of fresh lemon or lime juice before storage can help slow avocado browning.

This salad does not need reheating and is best served chilled or at cool room temperature.

Freezing is not recommended because cucumber and avocado both lose their texture after thawing.

Nutrition Information

Approximate nutrition per serving:

Calories: 260
Protein: 5 g
Carbohydrates: 18 g
Fat: 20 g
Saturated Fat: 4 g
Fiber: 9 g
Sugar: 7 g
Sodium: 380 mg

Nutrition values are estimates and may vary depending on the avocado size, feta, seeds, dressing, and serving size.

Frequently Asked Questions

Can I make this salad without tomatoes?

Yes. Replace the tomatoes with bell pepper, radishes, or extra cucumber.

How do I keep avocado from turning brown?

Coat the avocado with lemon or lime juice and add it shortly before serving.

Can I make it dairy-free?

Yes. Simply omit the feta or use a dairy-free alternative.

Can I add protein?

Yes. Chickpeas, grilled chicken, shrimp, tuna, or boiled eggs all work well.

Can I use regular cucumbers?

Yes. Peel them if the skin is thick and remove large seeds if necessary.

What herbs work best?

Parsley, dill, mint, cilantro, and basil can all work, either alone or in combination.

Can I make it ahead for a party?

Yes. Prepare the vegetables and dressing ahead, then add avocado and toss everything together shortly before serving.

Final Thoughts

Cucumber Avocado Salad is an easy way to bring fresh color, creamy texture, and bright flavor to the table. Crisp cucumber, ripe avocado, tomatoes, herbs, lemon, lime, and olive oil create a simple combination that pairs with many different meals.

Because Cucumber Avocado Salad can be customized with cheese, beans, protein, or extra vegetables, it works equally well as a side dish or light lunch.

Keep this Cucumber Avocado Salad recipe handy whenever you need a quick, refreshing dish made with simple ingredients and plenty of fresh flavor.

Sweet Potatoes with Avocado & Feta

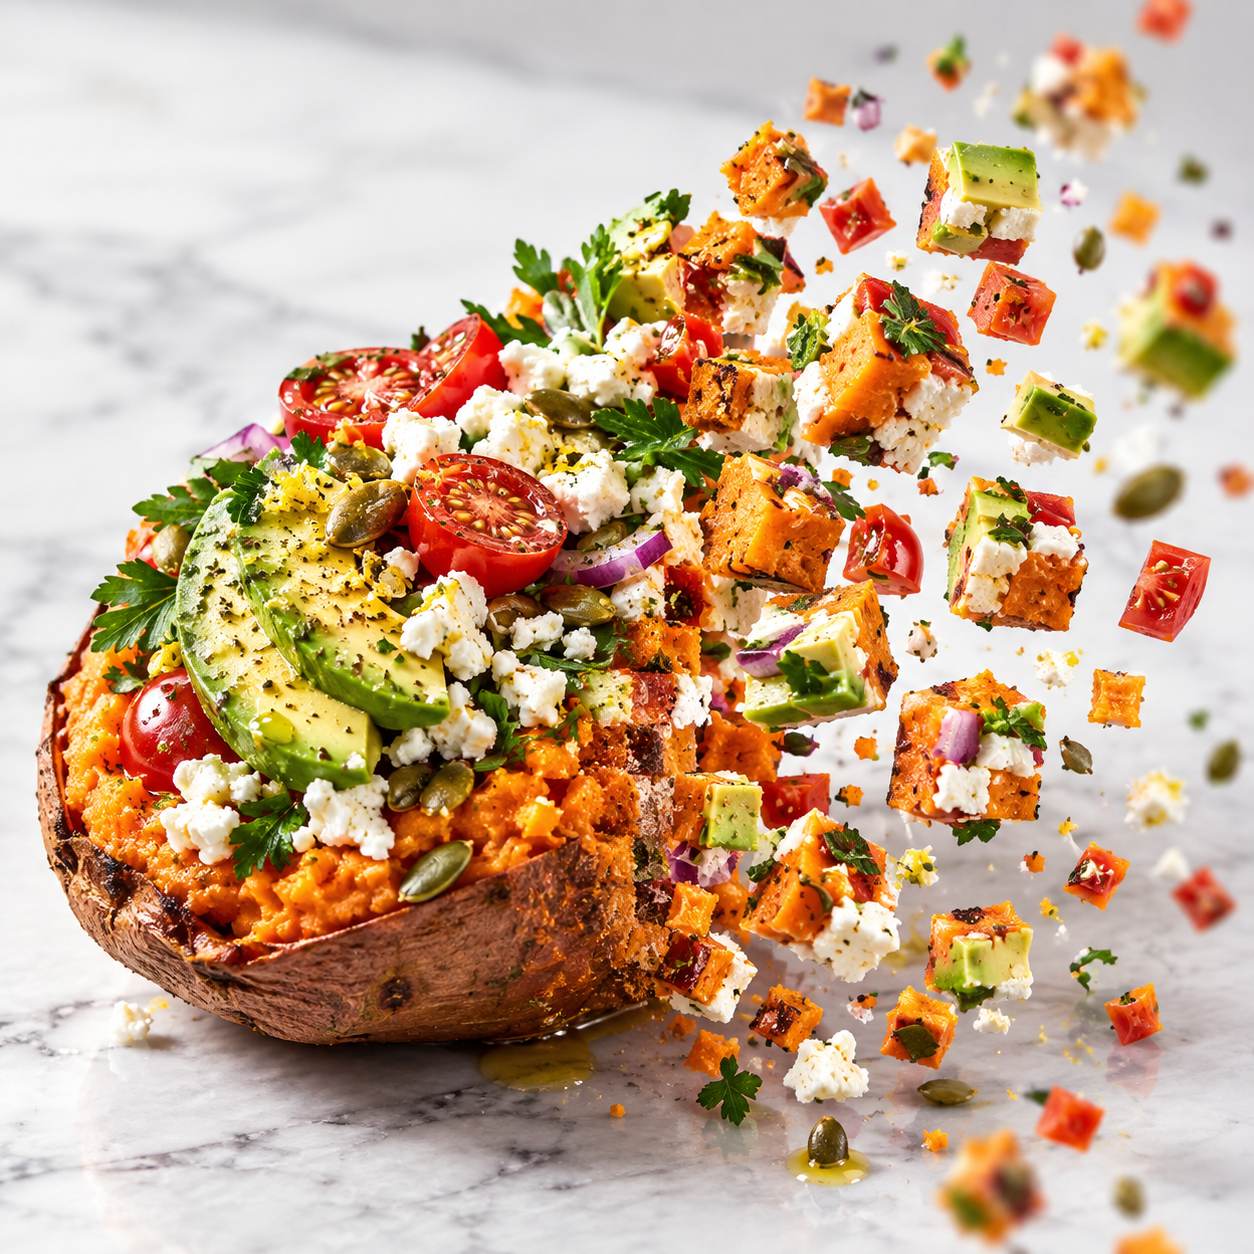
Loaded Mediterranean Sweet Potatoes with avocado feta tomatoes and herbs

Loaded Mediterranean Sweet Potatoes with Avocado & Feta

Loaded Mediterranean Sweet Potatoes with Avocado & Feta are a colorful, wholesome, and satisfying meal packed with fresh Mediterranean-inspired flavors. Soft roasted sweet potatoes create a naturally creamy base, while salty feta, fresh avocado, juicy cherry tomatoes, herbs, toasted seeds, and a bright lemon dressing add freshness, richness, and texture.

This recipe works beautifully for lunch, dinner, meal prep, or even as a hearty side dish. You can keep it vegetarian or add chickpeas, chicken, shrimp, salmon, or lentils for extra protein.

Prep Time: 15 minutes
Cook Time: 35–40 minutes
Total Time: 50–55 minutes
Servings: 4

Ingredients

For the Sweet Potatoes

4 medium sweet potatoes
2 tablespoons olive oil
1 teaspoon dried oregano
1/2 teaspoon smoked paprika
1/2 teaspoon garlic powder
1/2 teaspoon onion powder
1/2 teaspoon salt
1/4 teaspoon black pepper

For the Mediterranean Topping

2 ripe avocados, sliced
3/4 cup crumbled feta cheese
1 cup cherry tomatoes, halved
1/4 cup finely chopped red onion
2 tablespoons fresh parsley, chopped
1 tablespoon fresh dill, optional
2 tablespoons toasted pumpkin seeds or pine nuts
1/4 teaspoon red pepper flakes, optional

For the Lemon Herb Drizzle

2 tablespoons extra-virgin olive oil
1 1/2 tablespoons fresh lemon juice
1 teaspoon honey or maple syrup, optional
1/2 teaspoon dried oregano
1 small garlic clove, finely minced
Pinch of salt
Pinch of black pepper

Instructions

Step 1: Preheat the Oven

Preheat your oven to 425°F or 220°C.

Line a large baking sheet with parchment paper for easy cleanup.

Step 2: Prepare the Sweet Potatoes

Wash the sweet potatoes thoroughly and pat them dry.

Cut each sweet potato in half lengthwise.

Drizzle the cut sides with olive oil, then season with oregano, smoked paprika, garlic powder, onion powder, salt, and black pepper.

Rub the seasoning evenly over the potatoes.

Step 3: Roast the Sweet Potatoes

Place the sweet potatoes cut-side down on the baking sheet.

Roast for 30 to 40 minutes, depending on size, until the centers are soft and the edges are golden and caramelized.

For extra browning, flip them cut-side up during the final 5 to 8 minutes.

Step 4: Prepare the Toppings

While the sweet potatoes are roasting, slice the avocado and cherry tomatoes.

Finely chop the red onion, parsley, and dill.

Toast the pumpkin seeds or pine nuts in a dry skillet over medium-low heat for a few minutes until lightly golden.

Step 5: Make the Lemon Herb Drizzle

In a small bowl, whisk together olive oil, lemon juice, honey or maple syrup if using, oregano, garlic, salt, and black pepper.

Set aside.

Step 6: Fluff the Sweet Potatoes

Remove the roasted sweet potatoes from the oven and let them cool for 2 to 3 minutes.

Turn them cut-side up and gently fluff the soft centers with a fork.

Step 7: Add the Toppings

Top each sweet potato with crumbled feta, avocado slices, cherry tomatoes, red onion, parsley, and dill.

Sprinkle with toasted seeds or pine nuts.

Add red pepper flakes if you want a little heat.

Step 8: Finish and Serve

Drizzle the lemon herb dressing over the loaded sweet potatoes.

Serve immediately while the potatoes are warm and the toppings are fresh.

Tips for the Best Loaded Mediterranean Sweet Potatoes

Choose sweet potatoes that are similar in size so they cook evenly.

Roasting cut-side down helps the surface caramelize better.

Do not add avocado too early because it can brown.

If your feta is very salty, reduce the added salt in the recipe.

Use fresh lemon juice for the best flavor.

Toast the seeds or pine nuts before serving for extra crunch.

Variations

Chickpea Version

Add roasted chickpeas for extra plant-based protein.

Chicken Version

Top with sliced grilled chicken breast for a heartier meal.

Shrimp Version

Add garlic shrimp for a Mediterranean seafood variation.

Greek-Style Version

Add Kalamata olives, cucumber, extra feta, and oregano.

Vegan Version

Use dairy-free feta and maple syrup instead of honey.

Spicy Version

Add chili flakes, chili oil, or sliced jalapeños.

What to Serve With It

These loaded sweet potatoes pair well with:

Greek salad
Mediterranean chickpea salad
Grilled chicken
Lemon herb salmon
Garlic shrimp
Quinoa salad
Lentil salad
Roasted vegetables
Cucumber tomato salad

Storage

Store the roasted sweet potatoes separately from the fresh toppings if possible.

Refrigerate the potatoes in an airtight container for up to 4 days.

Fresh toppings such as avocado are best added just before serving.

Reheating

Reheat the sweet potatoes in the oven at 350°F or 175°C for about 10 to 15 minutes.

You can also microwave them for 1 to 2 minutes.

Add fresh avocado, feta, herbs, and dressing after reheating.

Frequently Asked Questions

Can I make these ahead of time?

Yes. Roast the sweet potatoes ahead of time and store them in the refrigerator. Add the fresh toppings when ready to serve.

Can I use regular potatoes?

Yes. Russet or Yukon Gold potatoes can be used, although the flavor will be different.

Can I use goat cheese instead of feta?

Yes. Goat cheese works very well and gives the dish a creamier texture.

How do I keep avocado from browning?

Lightly coat the avocado slices with lemon juice before serving.

Can I add protein?

Yes. Chickpeas, chicken, shrimp, salmon, lentils, and white beans all work well.

Nutrition Information

Approximate nutrition per serving:

Calories: 340
Protein: 8 g
Carbohydrates: 43 g
Fat: 17 g
Fiber: 9 g
Sugar: 10 g
Sodium: 430 mg

Nutrition may vary depending on portion size and toppings.

Final Thoughts

Loaded Mediterranean Sweet Potatoes with Avocado & Feta combine sweet, savory, creamy, fresh, and crunchy textures in one easy meal.

The roasted sweet potatoes provide a warm and satisfying base, while feta adds salty richness and avocado brings creaminess. Fresh tomatoes, herbs, toasted seeds, and lemon dressing brighten the whole dish and make it feel fresh and colorful.

This is a flexible recipe that works for a simple vegetarian dinner or can easily be upgraded with your favorite protein.


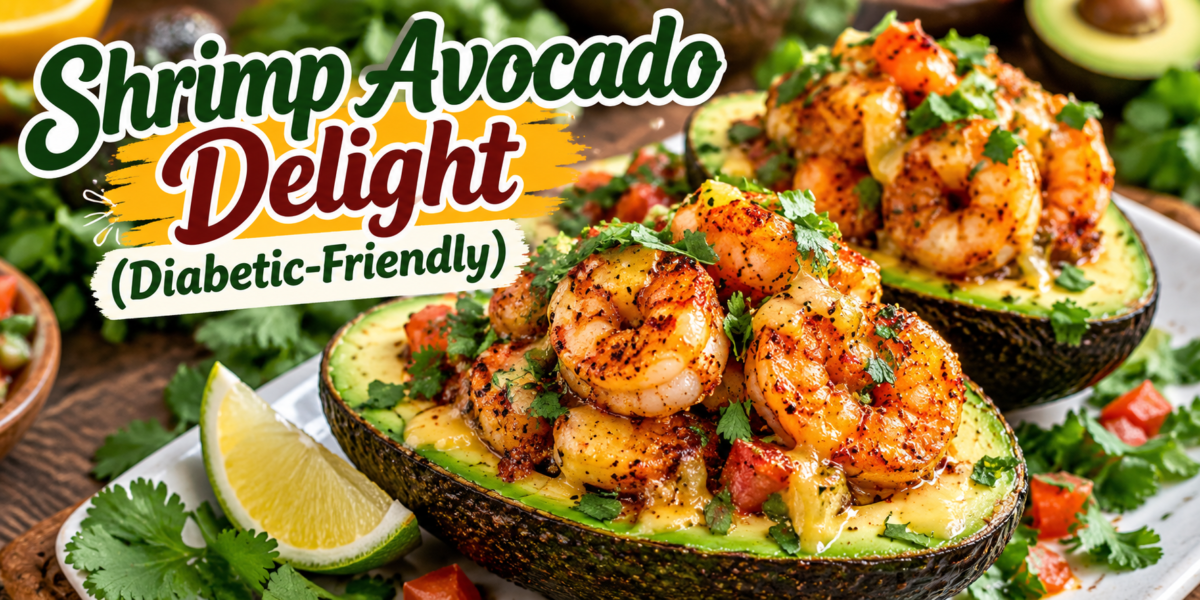
Shrimp Avocado Delight (Diabetic-Friendly)

Shrimp Avocado Delight with seasoned shrimp, creamy avocado, fresh herbs, tomatoes, lime, and a light dressing

Shrimp Avocado Delight (Diabetic-Friendly)

Shrimp Avocado Delight is a fresh, colorful, and satisfying meal made with juicy seasoned shrimp, creamy avocado, crisp vegetables, lime juice, herbs, and a light savory dressing. It comes together quickly and works well for lunch, dinner, or a simple meal-prep option.

This Shrimp Avocado recipe combines lean protein with avocado and non-starchy vegetables. The result is a flavorful meal that does not need a heavy sauce or a large amount of added sugar. If you are managing diabetes, remember that individual carbohydrate needs vary, so portion size and the full meal plan matter.

The bright flavors make this recipe feel satisfying rather than restrictive. Garlic, paprika, cumin, chili powder, lime, and fresh cilantro give the shrimp plenty of flavor. Tomatoes and cucumber add freshness, while avocado creates a creamy texture.

Prep Time: 15 minutes
Cook Time: 8 minutes
Total Time: 23 minutes
Servings: 4

Ingredients

For the Shrimp

1 1/2 pounds large shrimp, peeled and deveined
1 tablespoon olive oil
1 tablespoon fresh lime juice
2 cloves garlic, minced
1 teaspoon chili powder
1 teaspoon smoked paprika
1/2 teaspoon ground cumin
1/2 teaspoon garlic powder
1/2 teaspoon onion powder
1/2 teaspoon salt
1/4 teaspoon black pepper
1/4 teaspoon red pepper flakes, optional

For the Avocado Mixture

3 large ripe avocados
1 cup cherry tomatoes, halved
1/2 cup cucumber, diced
1/4 cup red onion, finely chopped
1/4 cup fresh cilantro, chopped
2 tablespoons fresh lime juice
1 tablespoon extra virgin olive oil
1/4 teaspoon salt
1/4 teaspoon black pepper

For the Optional Dressing

1/4 cup plain unsweetened Greek yogurt
1 tablespoon fresh lime juice
1 tablespoon chopped cilantro
1/2 teaspoon garlic powder
1/4 teaspoon cumin
2 tablespoons water
A pinch of salt

Step-by-Step Instructions

Prepare the Shrimp

Pat the shrimp dry with paper towels. This helps them brown instead of releasing too much water into the pan.

Place the shrimp in a bowl. Add olive oil, lime juice, garlic, chili powder, smoked paprika, cumin, garlic powder, onion powder, salt, black pepper, and red pepper flakes if using.

Toss until every shrimp is evenly coated. Let the shrimp rest for 5 minutes while you prepare the vegetables.

The seasoning gives this Shrimp Avocado dish a warm, smoky, and slightly spicy flavor.

Prepare the Fresh Ingredients

Cut the avocados in half and remove the pits. Scoop the flesh into a medium bowl and cut it into bite-sized pieces.

Add the cherry tomatoes, cucumber, red onion, and cilantro.

Drizzle with lime juice and olive oil. Add salt and black pepper.

Fold everything together gently. Avoid overmixing because the avocado can become mashed.

Keep the mixture chilled while you cook the shrimp.

Fresh vegetables are important because they give the Shrimp Avocado mixture a crisp texture that balances the tender shrimp.

Cook the Shrimp

Heat a large skillet over medium-high heat.

Place the seasoned shrimp in a single layer. Cook for about 2 minutes on the first side.

Turn the shrimp and cook for another 2 to 3 minutes.

The shrimp should become opaque and curl into a loose C shape. For food safety, cook shrimp to an internal temperature of 145°F.

Remove the skillet from the heat as soon as the shrimp are cooked. Overcooked shrimp can become firm and rubbery.

Let the shrimp rest for 2 minutes before assembling the dish.

The quick cooking method keeps this Shrimp Avocado meal tender and flavorful.

Make the Optional Dressing

Add Greek yogurt, lime juice, cilantro, garlic powder, cumin, water, and a pinch of salt to a small bowl.

Whisk until smooth.

Add another teaspoon of water if the dressing is too thick.

Taste and adjust the lime juice or salt.

Use plain unsweetened Greek yogurt rather than sweetened yogurt.

For a brighter Shrimp Avocado dressing, add a little extra fresh lime juice just before serving.

Assemble the Dish

Divide the avocado mixture among four plates or shallow bowls.

Place the warm shrimp on top.

Drizzle with the yogurt-lime dressing if using.

Finish with fresh cilantro and a squeeze of lime.

For extra color, add a few thin slices of red onion or a sprinkle of chili flakes.

The creamy avocado and warm shrimp create a satisfying contrast in every bite. This Shrimp Avocado combination is especially good when served immediately.

Tips for the Best Results

Choose avocados that are ripe but still firm. Very soft avocados can become mushy during mixing.

Pat the shrimp dry before seasoning. This small step helps them sear properly.

Do not overcrowd the skillet. Cook the shrimp in batches if your pan is small.

Use fresh lime juice for a brighter flavor.

Add the avocado shortly before serving to reduce browning.

Keep the dressing unsweetened.

If you prefer a milder dish, skip the red pepper flakes.

For more heat, add fresh jalapeño or extra chili flakes.

These simple steps help keep the Shrimp Avocado mixture fresh, colorful, and balanced.

For an even fresher finish, add chopped cilantro immediately before serving. The herb adds a clean aroma without making the dish complicated.

Ingredient Substitutions

Shrimp

Large shrimp work well, but medium shrimp can also be used. Adjust the cooking time because smaller shrimp cook faster.

Avocado

If you need a substitute, mashed white beans can provide creaminess, although the flavor will be different.

Greek Yogurt

Use plain unsweetened yogurt. You can also skip the dressing and serve the dish with extra lime.

Cilantro

Fresh parsley can replace cilantro if you prefer a milder herb flavor.

Cucumber

Try diced bell pepper or celery for additional crunch.

Lime

Fresh lemon juice can be used when lime is unavailable.

The flexible ingredients make this Shrimp Avocado recipe easy to adapt to what you already have.

Serving Suggestions

Serve the shrimp and avocado mixture as a complete light meal.

For a larger meal, add a small portion of brown rice, quinoa, or another whole grain that fits your eating plan.

You can also serve it with leafy greens to create a larger salad.

A side of roasted vegetables works well too.

For a lower-carbohydrate option, serve the mixture over lettuce leaves or cauliflower rice.

Avoid adding a sugary sauce. The lime, herbs, spices, and natural creaminess of avocado already provide plenty of flavor.

A squeeze of lime just before eating makes the dish taste brighter.

This Shrimp Avocado plate is also attractive enough for a casual lunch with guests.

Meal Prep Instructions

This recipe can be prepared in separate components.

Cook the shrimp and allow them to cool.

Store the shrimp in an airtight container in the refrigerator.

Prepare the cucumber, tomatoes, and onion separately.

Keep the avocado whole until you are ready to eat whenever possible.

Prepare the dressing and refrigerate it in a small sealed container.

When ready to serve, cut the avocado and combine it with the vegetables.

Add the chilled or gently warmed shrimp.

Drizzle with dressing just before eating.

For the best quality, use refrigerated cooked shrimp within 3 to 4 days.

Keeping the components separate helps maintain the texture of the Shrimp Avocado mixture.

Storage and Reheating

Store cooked shrimp in the refrigerator at 40°F or below.

Keep the avocado mixture in a separate airtight container.

Because avocado can brown and soften, it is best prepared close to serving time.

The shrimp can be eaten chilled or gently warmed.

If reheating, use short intervals and stop as soon as the shrimp are warm.

Do not repeatedly reheat shrimp.

The fresh vegetables and avocado should not be heated.

If the avocado mixture has darkened slightly on the surface, stir gently and check its smell and texture before serving. When in doubt about food safety, discard it.

Diabetes-Friendly Meal Notes

The recipe uses shrimp, avocado, vegetables, and unsweetened yogurt instead of a sugary sauce.

However, calling a recipe “diabetic-friendly” does not mean it is appropriate for every person with diabetes. Blood glucose responses vary from person to person.

If you are managing diabetes, consider your individual meal plan, medication, activity level, and portion size.

Adding rice, tortillas, bread, or other carbohydrate-rich foods will change the total carbohydrate content of the meal.

For a lower-carbohydrate plate, serve the shrimp and avocado over leafy greens.

For additional fiber, add non-starchy vegetables such as cucumber, bell pepper, broccoli, or leafy greens.

The key is to build the meal around ingredients that fit your personal nutrition goals.

This Shrimp Avocado recipe is easy to portion because the ingredients can be divided into four servings.

Flavor Variations

Spicy Lime Version

Add sliced jalapeño, extra red pepper flakes, and a little lime zest.

Garlic Herb Version

Increase the fresh garlic and add chopped parsley.

Mediterranean Version

Add cucumber, tomatoes, olives, feta, oregano, and parsley.

Creamy Version

Use the optional Greek yogurt dressing and add a small amount of avocado to the dressing.

Crunchy Version

Add chopped cucumber, radish, celery, or toasted pumpkin seeds.

Tropical Version

Add a small amount of diced mango. Remember that fruit adds carbohydrates, so adjust the portion according to your meal plan.

Each variation keeps the Shrimp Avocado base simple while giving you a different flavor.

Common Mistakes to Avoid

Do not overcook the shrimp.

Avoid using very soft avocados because they can become mushy.

Do not add the dressing too early.

Avoid sweetened yogurt or sugary sauces if you are trying to keep added sugar low.

Do not leave cooked shrimp at room temperature for long periods.

Avoid cutting all of the avocado several hours before serving.

Do not overcrowd the skillet.

Do not skip the lime juice because it helps balance the rich avocado.

Frequently Asked Questions

Can I use frozen shrimp?

Yes. Thaw the shrimp completely and pat them dry before seasoning.

Can I make this recipe without yogurt?

Yes. The yogurt dressing is optional. Lime juice, olive oil, and herbs are enough for a simple dressing.

Can I use cooked shrimp?

Yes. Add cooked shrimp near the end and warm them briefly. Avoid prolonged cooking.

Can I prepare the avocado ahead?

It is better to cut the avocado close to serving time. Fresh lime juice can help slow browning.

What can I serve with this recipe?

Leafy greens, roasted vegetables, cauliflower rice, or a measured portion of whole grains can work well.

Is this recipe low in carbohydrates?

The main ingredients are relatively low in carbohydrates, but total carbohydrate intake depends on portions and any side dishes. Individual nutrition needs vary.

Can I make it spicy?

Yes. Add jalapeño, cayenne, or extra red pepper flakes.

Can I use lemon instead of lime?

Yes. Lemon provides a slightly different but still fresh flavor.

How long does it keep?

For best quality, keep the cooked shrimp refrigerated and use them within 3 to 4 days. Prepare the avocado mixture closer to serving time.

Can I use chicken instead of shrimp?

Yes. Cooked chicken can replace shrimp, although the cooking method and time will change.

Nutrition Information

Approximate nutrition per serving, without optional rice or other sides:

Calories: 420 kcal
Protein: 32g
Carbohydrates: 18g
Fat: 27g
Fiber: 9g
Sugar: 3g
Sodium: 610mg

Nutrition values are estimates and can vary based on ingredient brands, avocado size, shrimp size, and serving portions.

Why You Will Love This Recipe

The biggest advantage of this recipe is how quickly it comes together.

The shrimp cook in only a few minutes.

The avocado mixture requires no cooking.

The dressing takes less than five minutes.

That makes the dish practical for busy days.

It is also colorful. Green avocado, red tomatoes, purple onion, fresh cilantro, and golden shrimp create an appealing plate.

The texture is just as enjoyable. Tender shrimp pair with creamy avocado and crisp vegetables.

The flavors are balanced without requiring a complicated sauce.

Lime adds brightness. Garlic provides savory depth. Smoked paprika adds warmth. Chili powder provides gentle heat.

This combination makes the Shrimp Avocado dish feel satisfying while keeping the preparation simple.

The recipe is also easy to adjust. You can increase the vegetables, change the herbs, or make the seasoning milder without changing the basic cooking method.

Final Thoughts

Shrimp Avocado Delight is a fresh and flexible recipe that can fit into many meal styles.

The seasoned shrimp bring protein and savory flavor.

Creamy avocado adds richness.

Cucumber and tomatoes provide freshness and crunch.

Lime juice keeps the flavors bright.

Fresh cilantro adds an aromatic finish.

The optional yogurt dressing creates an extra creamy layer without relying on a sugary sauce.

For meal preparation, keep the shrimp, vegetables, avocado, and dressing separate until you are ready to eat.

You can also change the seasoning to match your preferences. Add chili flakes for heat, herbs for freshness, or extra vegetables for more volume.

If you are managing diabetes, consider the full meal and your individual carbohydrate needs rather than relying on a recipe label alone.

The recipe is especially useful when you want something quick. It can move from refrigerator to table in a short time, and the colorful presentation makes it suitable for both everyday meals and casual entertaining.

For a lighter plate, serve it over leafy greens. For a more substantial meal, add a measured portion of whole grains or another side that fits your eating plan.

The combination of warm shrimp and cool avocado makes this Shrimp Avocado recipe especially enjoyable.

With simple ingredients, fresh flavors, and plenty of texture, Shrimp Avocado Delight can become an easy option for lunch, dinner, or meal prep.

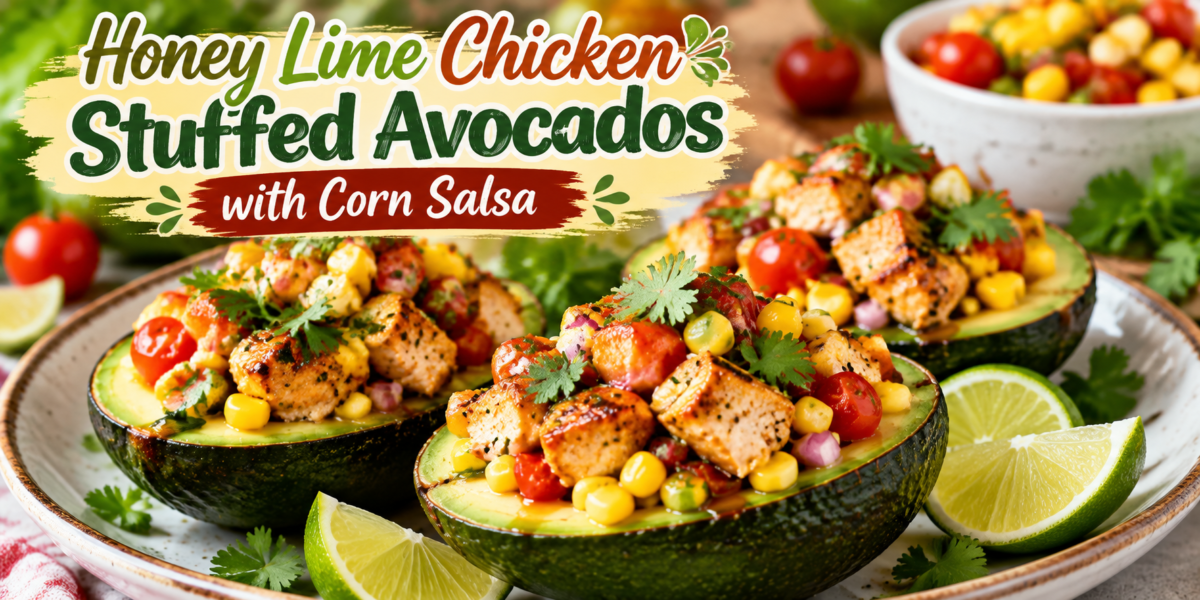
Honey Lime Chicken Stuffed Avocados with Corn Salsa

Stuffed Avocados filled with honey lime chicken, corn salsa, tomatoes, and fresh cilantro

Honey Lime Chicken Stuffed Avocados with Corn Salsa

Honey Lime Chicken Stuffed Avocados with Corn Salsa is a fresh, healthy, and flavorful recipe that combines juicy honey lime chicken, creamy avocados, sweet corn salsa, and vibrant Mexican-inspired flavors. This recipe is perfect for lunch, dinner, meal preparation, or a light summer meal.

The combination of tender chicken, creamy avocado, fresh vegetables, and a sweet-tangy honey lime dressing creates a balanced dish full of amazing textures and flavors. The natural creaminess of avocado pairs beautifully with the smoky seasoned chicken and refreshing corn salsa.

These Stuffed Avocados are a great choice for anyone who wants a nutritious meal without spending hours in the kitchen. The recipe uses simple ingredients but delivers restaurant-quality flavor.

Avocados provide healthy fats and a creamy base, while chicken adds lean protein to keep you satisfied. Fresh corn, tomatoes, onions, cilantro, and lime juice create a bright salsa that makes every bite refreshing.

This recipe is also easy to customize. You can add extra vegetables, adjust the spice level, or replace chicken with another protein according to your preference.

Whether you are looking for a quick weekday meal, a healthy party appetizer, or a colorful family dinner, these Stuffed Avocados are an excellent option.

Preparation Time: 20 minutes
Cooking Time: 15 minutes
Total Time: 35 minutes
Servings: 4 servings

Ingredients

For the Honey Lime Chicken

1 pound boneless skinless chicken breast, diced

2 tablespoons olive oil

3 tablespoons fresh lime juice

2 tablespoons honey

1/2 teaspoon salt

3 cloves garlic, minced

1 teaspoon chili powder

1 teaspoon smoked paprika

1/2 teaspoon cumin

1 tablespoon fresh cilantro, chopped

1/2 teaspoon black pepper

For the Corn Salsa

1 cup sweet corn kernels

1 cup cherry tomatoes, diced

1/4 cup red onion, finely chopped

1 small jalapeño, finely chopped (optional)

1/4 cup fresh cilantro, chopped

2 tablespoons fresh lime juice

1 tablespoon olive oil

Salt and pepper to taste

For the Stuffed Avocados

4 large ripe avocados

Extra cilantro for garnish

Lime wedges for serving

Step-by-Step Instructions

Prepare the Honey Lime Chicken

Start by preparing the chicken marinade.

In a medium bowl, combine olive oil, lime juice, honey, minced garlic, chili powder, smoked paprika, cumin, salt, and black pepper.

Add diced chicken and mix well until every piece is coated with the flavorful marinade.

Allow the chicken to rest for 15 to 20 minutes so the flavors can develop.

Heat a large skillet over medium heat.

Add the marinated chicken and cook for 8 to 10 minutes until the chicken is fully cooked and lightly browned.

Stir occasionally to cook the chicken evenly.

Remove the chicken from heat and add fresh cilantro.

The sweet and tangy honey lime flavor creates the perfect filling for these Stuffed Avocados.

Prepare the Corn Salsa

While the chicken is cooking, prepare the fresh corn salsa.

In a bowl, combine corn, diced tomatoes, red onion, jalapeño, and cilantro.

Add lime juice, olive oil, salt, and pepper.

Mix everything gently until the ingredients are well combined.

Allow the salsa to rest for a few minutes so the flavors blend together.

The fresh salsa adds a crunchy texture and refreshing taste to the creamy avocado.

Prepare the Avocados

Cut the avocados in half lengthwise.

Remove the pits carefully.

Use a spoon to slightly enlarge the center area if needed to create more space for the filling.

Keep the avocado flesh intact because it provides a beautiful presentation.

Brush a little lime juice over the avocado surface to help prevent browning.

Assemble the Stuffed Avocados

Fill each avocado half with the honey lime chicken mixture.

Top generously with the fresh corn salsa.

Add extra cilantro and serve with lime wedges.

Your Stuffed Avocados are now ready to enjoy.

The combination of creamy avocado, flavorful chicken, and fresh salsa creates a perfect balance of taste and nutrition.

Tips for Making the Best Stuffed Avocados

Choose ripe but firm avocados because they hold their shape better.

Do not prepare the avocados too far in advance because they can change color.

Use fresh lime juice for the best flavor.

Allow the chicken to marinate before cooking because it improves tenderness and taste.

For extra flavor, grill the chicken instead of cooking it in a skillet.

Add more jalapeño if you prefer a spicy version.

Keep the corn salsa chilled before serving for a refreshing contrast.

These Stuffed Avocados taste best when served immediately after preparation.

Variations

Shrimp Stuffed Avocados

Replace chicken with grilled shrimp seasoned with lime and spices.

Vegetarian Version

Replace chicken with black beans, chickpeas, or grilled vegetables.

Spicy Version

Add extra jalapeños, hot sauce, or cayenne pepper.

Cheese Version

Add shredded cheese, feta, or cotija cheese for extra flavor.

Tropical Version

Add diced mango or pineapple to the corn salsa for a sweet tropical twist.

Low-Carb Meal Option

This recipe is naturally low in carbohydrates and can be enjoyed as a light meal.

Serving Suggestions

Serve these Stuffed Avocados as a complete meal with a side salad or roasted vegetables.

They are also perfect as an appetizer for gatherings, summer parties, or family dinners.

Serve with tortilla chips, salsa, or a fresh cucumber salad.

For meal preparation, prepare the chicken and salsa separately, then assemble the avocados before eating.

A fresh lime drink or sparkling water pairs beautifully with this recipe.

Health Benefits

Avocados are rich in healthy fats, fiber, and important nutrients.

Chicken provides lean protein that helps support muscle health and keeps you feeling full.

Corn contains fiber and natural carbohydrates that provide energy.

Fresh vegetables provide vitamins, minerals, and antioxidants.

Lime juice adds fresh flavor while reducing the need for heavy sauces.

This recipe combines protein, healthy fats, and vegetables in one balanced meal.

These Stuffed Avocados are a nutritious option for anyone looking for a fresh and satisfying recipe.

Storage and Reheating Instructions

Store cooked chicken separately in an airtight container for up to 4 days.

Keep corn salsa refrigerated and use within 2 to 3 days.

It is best to prepare fresh avocados right before serving.

Do not freeze assembled avocados because the texture may change.

To reheat chicken, warm gently in a skillet or microwave.

Preparing ingredients separately helps maintain the freshness of these Stuffed Avocados.

Why This Recipe Is Perfect for Every Occasion

This recipe is perfect because it is simple, colorful, and packed with flavor.

It works well for quick lunches, healthy dinners, and special gatherings.

The presentation makes it look impressive while requiring minimal effort.

Families enjoy this recipe because everyone can customize their toppings.

The combination of creamy avocado, flavorful chicken, and fresh salsa makes these Stuffed Avocados a meal everyone will love.

It is also a great choice for warm weather because it feels light and refreshing.

Cooking Notes

Always use ripe avocados for the best creamy texture.

Avoid overcooking chicken because it can become dry.

Taste the salsa before serving and adjust seasoning if needed.

Fresh herbs create the best flavor.

If preparing ahead, keep each ingredient separate until serving.

Use a sharp knife when cutting avocados for cleaner presentation.

Frequently Asked Questions

Can I prepare Stuffed Avocados ahead of time?

You can prepare the chicken and salsa ahead, but assemble the avocados before serving.

How do I keep avocados from turning brown?

Adding fresh lime juice helps slow browning.

Can I use leftover chicken?

Yes, shredded leftover chicken works well in this recipe.

Are Stuffed Avocados healthy?

Yes, they provide protein, healthy fats, fiber, and fresh vegetables.

Can I make this recipe dairy-free?

Yes, the recipe is naturally dairy-free.

What other fillings can I use?

You can use shrimp, beans, vegetables, or turkey as alternative fillings.

Nutrition Information (Per Serving)

Calories: 430 kcal

Protein: 32g

Carbohydrates: 24g

Fat: 27g

Fiber: 10g

Sugar: 8g

Sodium: 520mg approximately

Nutrition values may vary depending on ingredients and portion sizes.

Final Thoughts

Honey Lime Chicken Stuffed Avocados with Corn Salsa is a delicious recipe that combines fresh ingredients with bold flavors.

The creamy avocado, sweet honey lime chicken, and colorful corn salsa create a meal that is both healthy and satisfying.

These Stuffed Avocados are easy enough for everyday cooking but impressive enough for serving guests.

With simple preparation, flexible variations, and nutritious ingredients, this recipe is a perfect addition to your healthy meal collection. It proves that wholesome food can be flavorful, beautiful, and enjoyable.

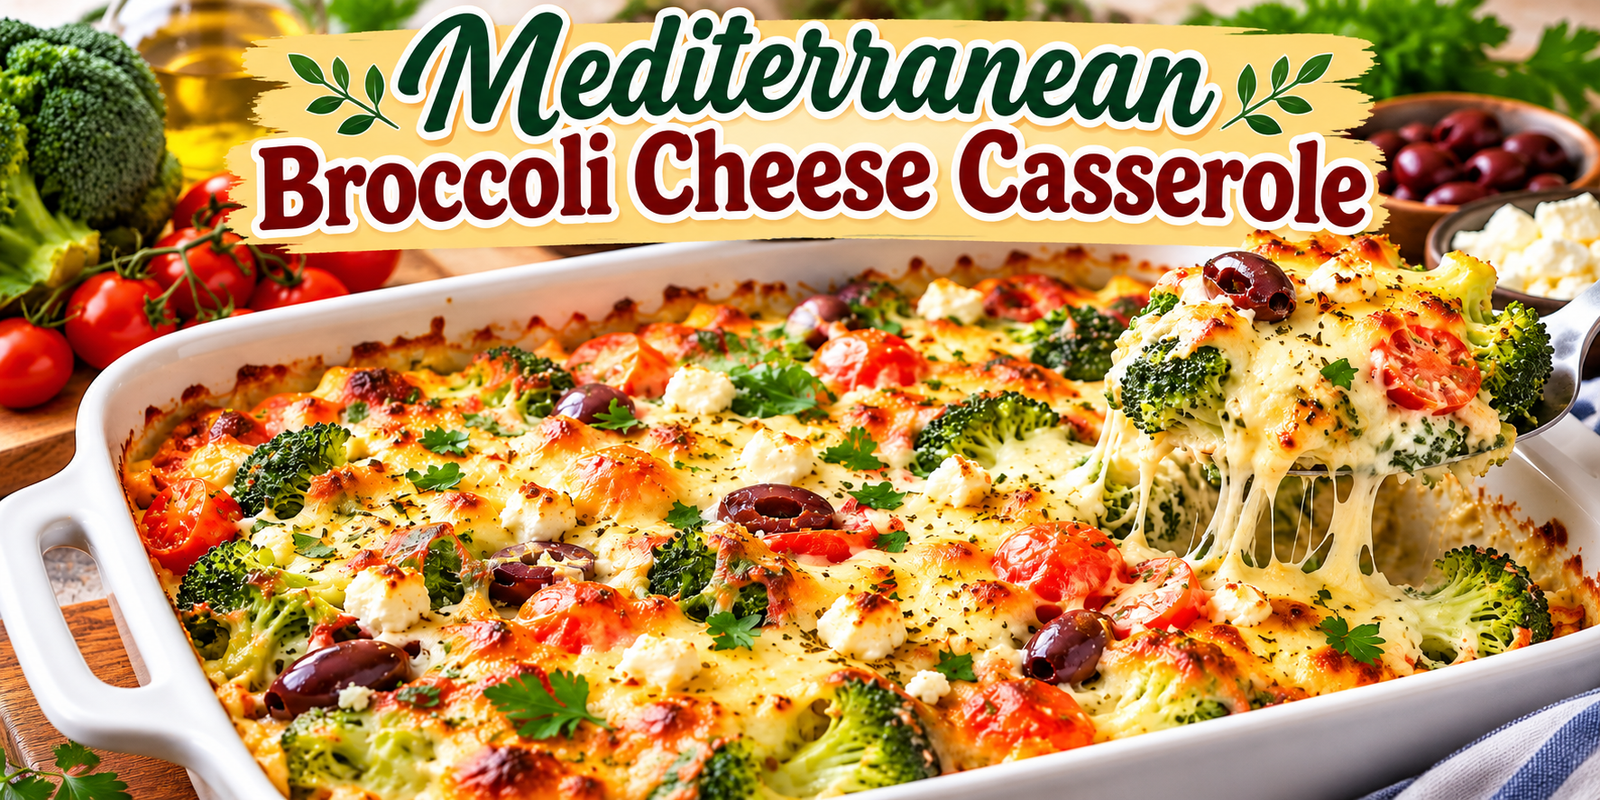
Mediterranean Broccoli Cheese Casserole

Mediterranean Broccoli Cheese Casserole with broccoli feta cheese tomatoes and olives

Mediterranean Broccoli Cheese Casserole

Description

Mediterranean Broccoli Cheese Casserole is a comforting, creamy, and flavorful baked dish that brings together tender broccoli, savory Mediterranean-inspired ingredients, and plenty of melted cheese. It is easy enough for a weeknight dinner but satisfying enough to serve as a family side dish or a light main meal.

This Mediterranean Broccoli Cheese Casserole combines fresh broccoli with garlic, tomatoes, herbs, feta, mozzarella, and a creamy sauce. The result is a golden, bubbling casserole with tender vegetables underneath and a delicious cheesy topping.

If you are looking for a simple way to add more vegetables to your meal, this recipe is an excellent option. The broccoli provides a fresh texture, while Mediterranean herbs, garlic, and cheese give the dish plenty of flavor without requiring complicated cooking techniques.

Ingredients

For the Broccoli

4 cups fresh broccoli florets

1 tablespoon olive oil

2 cloves garlic, finely minced

1/2 teaspoon dried oregano

1/2 teaspoon dried basil

1/4 teaspoon black pepper

1/4 teaspoon salt

For the Creamy Cheese Mixture

1/2 cup plain Greek yogurt

1/3 cup cream cheese, softened

1/2 cup crumbled feta cheese

1/2 cup shredded mozzarella cheese

1/4 cup grated Parmesan cheese

1/2 teaspoon garlic powder

1/4 teaspoon black pepper

Mediterranean Additions

1/2 cup cherry tomatoes, halved

1/4 cup sliced Kalamata olives

2 tablespoons finely chopped red onion

2 tablespoons fresh parsley, chopped

1 tablespoon chopped fresh basil

1 teaspoon lemon juice

Step-by-Step Instructions

Step 1: Prepare the Broccoli

Preheat your oven to 375°F (190°C). Lightly grease a medium-sized baking dish with olive oil.

Bring a large pot of water to a gentle boil. Add the broccoli florets and cook for about 2–3 minutes. You want the broccoli to become slightly tender while still maintaining some firmness.

Drain the broccoli thoroughly and allow excess water to evaporate. This step is important because overly wet broccoli can make the finished casserole watery.

Step 2: Season the Vegetables

Place the drained broccoli in a large mixing bowl. Add olive oil, minced garlic, oregano, basil, salt, and black pepper.

Gently toss everything together until the broccoli is evenly coated with the seasonings.

Add the cherry tomatoes, Kalamata olives, and red onion. Toss gently again so the vegetables remain intact.

Step 3: Prepare the Cheese Mixture

In a separate bowl, combine the Greek yogurt, softened cream cheese, feta cheese, mozzarella, Parmesan, garlic powder, and black pepper.

Stir until the ingredients are well combined and creamy.

The feta adds a salty Mediterranean flavor, while mozzarella creates a stretchy melted topping. Parmesan contributes a deeper savory taste.

Step 4: Combine Everything

Add the creamy cheese mixture to the seasoned broccoli and vegetables.

Fold everything together carefully until the broccoli is coated with the creamy mixture. Avoid stirring too aggressively because you want to keep the broccoli florets intact.

Taste the mixture and adjust the seasoning if necessary.

Step 5: Transfer to the Baking Dish

Spoon the mixture into your prepared baking dish and spread it evenly.

Sprinkle a little additional mozzarella and Parmesan over the top if you want an especially golden, cheesy crust.

For extra Mediterranean flavor, you can also add a small amount of dried oregano before baking.

Step 6: Bake the Casserole

Place the baking dish in the preheated oven and bake for approximately 25–30 minutes.

The casserole is ready when the cheese is melted, bubbling around the edges, and lightly golden on top.

If you want a more deeply browned surface, place it under the broiler for 1–2 minutes at the end. Watch it carefully because cheese can brown quickly.

Step 7: Rest and Garnish

Remove the casserole from the oven and allow it to rest for about 5 minutes.

Finish with fresh parsley and basil. Add a small squeeze of lemon juice just before serving to brighten the rich cheese flavor.

Serve warm.

Tips and Notes

For the best Mediterranean Broccoli Cheese Casserole, use fresh broccoli whenever possible. Frozen broccoli can work, but it should be thawed and drained extremely well before being added to the casserole.

Do not overcook the broccoli before baking. A brief blanching keeps the florets pleasantly tender instead of mushy.

If you prefer a stronger Mediterranean flavor, add extra Kalamata olives, a pinch of red pepper flakes, or a little more oregano.

You can also add chopped spinach, zucchini, roasted red peppers, or artichoke hearts. Make sure vegetables with high water content are drained well so they do not add excess moisture.

For a richer casserole, replace some of the Greek yogurt with additional cream cheese. For a lighter version, use reduced-fat Greek yogurt and a moderate amount of cheese.

Fresh herbs are especially useful at the end because they add brightness to the creamy baked dish.

If preparing ahead, assemble the casserole, cover it, and refrigerate it until ready to bake. Allow the baking dish to sit at room temperature briefly before placing it in the oven, especially if using a glass dish.

If you enjoy Mediterranean-style baked dishes, try our Mediterranean Spinach Lasagna for another comforting vegetable-filled meal.

Serving Suggestions

This Mediterranean Broccoli Cheese Casserole can be served as a vegetable side dish alongside grilled chicken, baked salmon, roasted turkey, or another protein.

For a vegetarian meal, serve it with a simple green salad, whole-grain bread, roasted potatoes, or a bowl of lentil soup.

A spoonful of plain Greek yogurt or a little fresh parsley can also be added when serving.

The casserole is particularly good when served warm because the cheese remains creamy and the top stays pleasantly golden.

For more guidance on building balanced meals with vegetables, healthy proteins, and healthy fats, see the Harvard Healthy Eating Plate.

Q&A

Can I use frozen broccoli?

Yes. Frozen broccoli can be used, but thaw it completely and drain it thoroughly first. Excess water can make the casserole too soft.

Can I make this casserole ahead of time?

Yes. You can assemble it ahead of time and refrigerate it before baking. This makes it convenient for busy weeknights or family meals.

Can I add chicken?

Absolutely. Cooked shredded chicken can be added to turn this casserole into a more substantial main dish. Make sure the chicken is fully cooked before combining it with the other ingredients.

Can I make it vegetarian?

Yes. The recipe as written can be served as a vegetarian casserole. Always check the labels of your cheeses if you have specific dietary requirements.

How do I store leftovers?

Allow the casserole to cool, then cover and refrigerate leftovers promptly. Reheat individual portions in the microwave or reheat the casserole gently in the oven until warmed through.

Can I freeze it?

You can freeze the casserole, although the creamy cheese mixture may change slightly in texture after thawing. For the best texture, enjoy it fresh or refrigerated within a few days.

Servings & Nutrition

Servings: 6

Prep Time: 15 minutes

Cook Time: 30 minutes

Total Time: 45 minutes

Estimated Calories: 285 per serving

Protein: 15 g

Carbohydrates: 13 g

Fat: 19 g

Fiber: 4 g

Sugar: 4 g

Nutrition values are estimates and can vary depending on the specific ingredients and brands used.

Conclusion

This Mediterranean Broccoli Cheese Casserole is an easy way to turn everyday broccoli into a warm, satisfying, and flavorful dish. The combination of tender broccoli, creamy Greek yogurt, feta, mozzarella, Parmesan, tomatoes, olives, garlic, and Mediterranean herbs creates a casserole that feels comforting while still featuring plenty of vegetables.

It is flexible enough for family dinners, meal preparation, holiday tables, or simple weeknight meals. You can also customize it with chicken, spinach, roasted peppers, or additional Mediterranean vegetables depending on what you have available.

If you enjoy simple vegetable-based recipes with plenty of flavor, this Mediterranean Broccoli Cheese Casserole is an easy recipe to keep in your regular rotation.