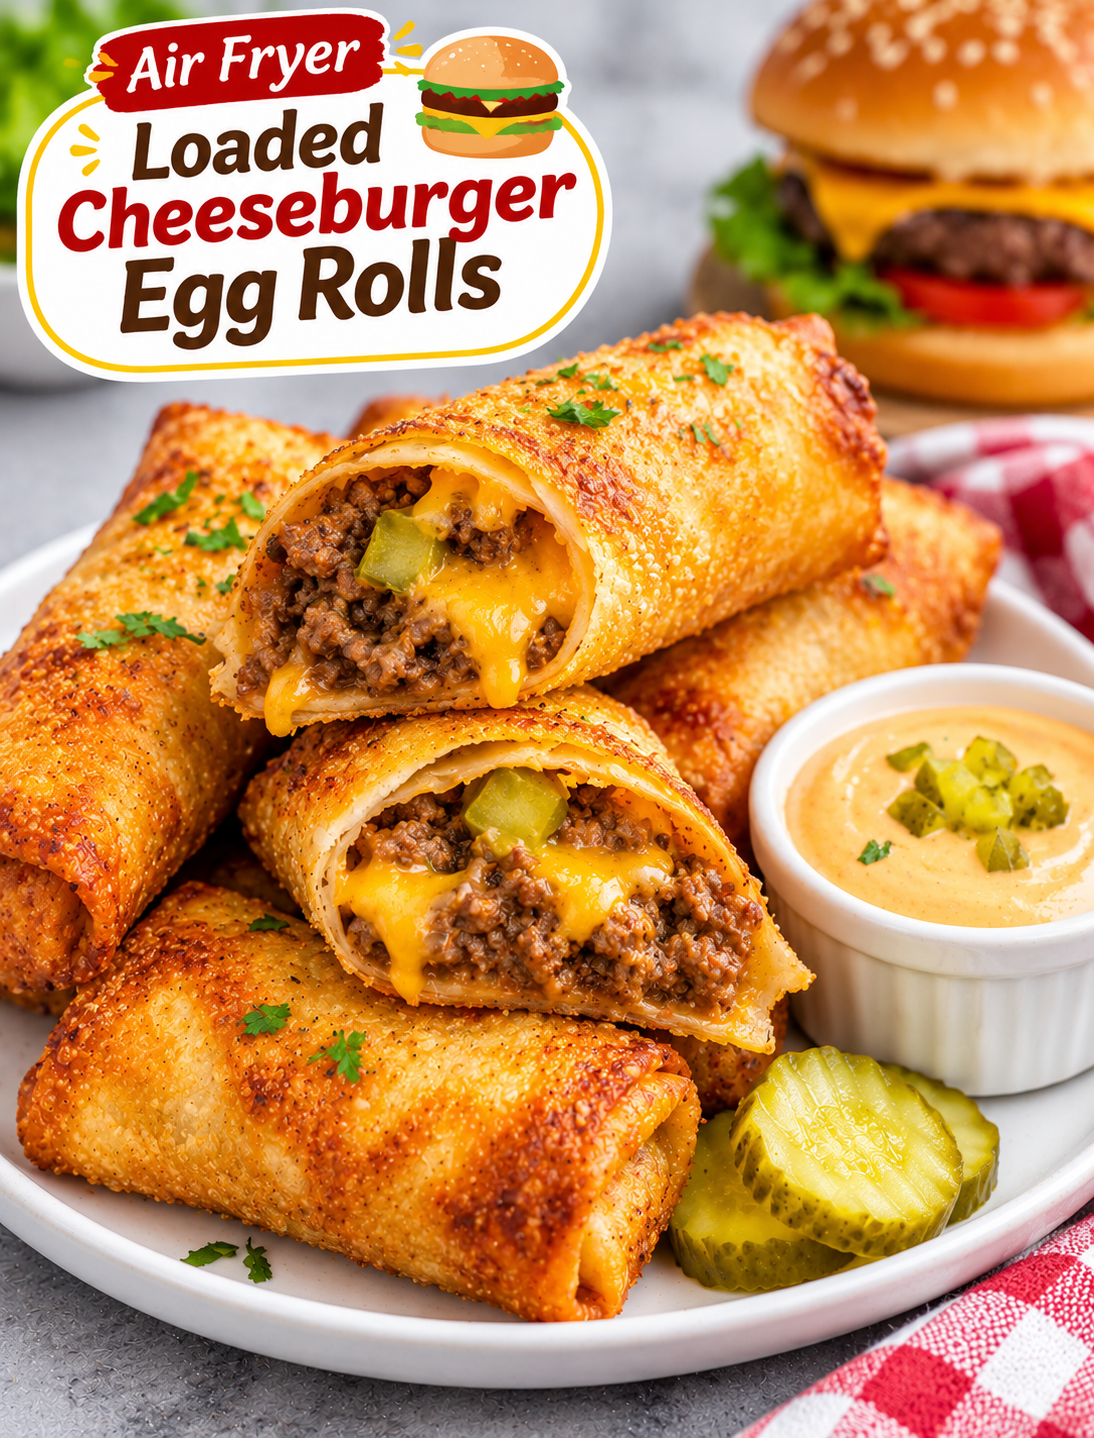
Love cheeseburgers and crispy egg rolls? These Air Fryer Loaded Cheeseburger Egg Rolls bring both favorites together in one delicious snack! Each roll has a golden, crunchy wrapper filled with seasoned ground beef, melted cheddar cheese, pickles, and classic burger flavors.
The best part is that you can make them at home without deep frying. Your air fryer creates a crispy outside with a warm, cheesy filling using just a little cooking spray or oil. They are easy to prepare, fun to serve, and perfect for sharing.
These cheeseburger egg rolls are a great choice for game-day parties, family movie nights, weekend snacks, or quick appetizers. Serve them with burger sauce, ketchup, ranch dressing, or your favorite dipping sauce for an extra burst of flavor.
If you enjoy classic cheeseburgers but want something a little different, this easy air fryer recipe is worth trying. You get all the familiar burger flavors wrapped inside a crunchy egg roll that is easy to hold and even easier to enjoy.
Why You’ll Love This Recipe
- Classic cheeseburger flavor: Seasoned ground beef, cheddar cheese, and pickles create the familiar taste of a loaded cheeseburger.
- Crispy without deep frying: The air fryer makes the wrappers golden and crunchy with less oil.
- Easy party appetizer: These handheld bites are perfect for game days, family gatherings, and casual parties.
- Simple ingredients: Most ingredients are easy to find at your local grocery store.
- Cheesy filling: Melted cheddar adds a rich, creamy texture to every bite.
- Easy to customize: Add bacon, jalapeños, onions, or different cheeses to create your favorite combination.
- Great for dipping: Serve with burger sauce, spicy mayo, ketchup, or ranch dressing.
Ingredients You’ll Need
These ingredients create a savory cheeseburger filling wrapped in a crispy egg roll shell.
- 1 pound lean ground beef: Provides the classic cheeseburger flavor. Ground beef with 85–90% lean meat works well.
- 12 egg roll wrappers: These thin wrappers become crispy and golden when air-fried.
- 1 cup shredded cheddar cheese: Adds a rich, cheesy flavor to the beef filling.
- 1/2 cup dill pickles, finely chopped: Gives the filling a tangy crunch similar to a classic cheeseburger.
- 1/4 cup finely chopped yellow onion: Adds sweetness and savory flavor.
- 2 tablespoons ketchup: Brings a familiar burger-style taste to the filling.
- 1 tablespoon yellow mustard: Adds a mild tangy flavor.
- 1 teaspoon Worcestershire sauce: Gives the ground beef a deeper savory taste.
- 1/2 teaspoon garlic powder: Adds a mild garlic flavor.
- 1/2 teaspoon onion powder: Enhances the savory seasoning.
- 1/4 teaspoon black pepper: Adds gentle warmth.
- 1/4 teaspoon salt: Adjust according to the saltiness of your cheese and pickles.
- 1 tablespoon cooking oil: Helps cook the ground beef and onions.
- Cooking spray or a little olive oil: Helps the egg roll wrappers turn golden and crispy.
- 2 tablespoons water: Used to seal the egg roll wrappers.
Optional Ingredients for Loaded Egg Rolls
You can add these ingredients to make the filling even more flavorful.
- 3 slices cooked bacon, finely chopped.
- 1/4 cup finely chopped jalapeños.
- 2 tablespoons finely chopped green onions.
- 1/4 cup finely chopped tomatoes, with excess moisture removed.
- 1 tablespoon burger relish.
Equipment You’ll Need
- Air fryer (basket-style or oven-style).
- Large skillet for cooking the beef.
- Wooden spoon or spatula.
- Cutting board and sharp knife.
- Mixing bowl.
- Measuring cups and spoons.
- Pastry brush or cooking spray.
- Small bowl of water for sealing wrappers.
- Tongs for turning the egg rolls.
- Meat thermometer for checking the ground beef.
How to Make Air Fryer Loaded Cheeseburger Egg Rolls
Follow these simple steps to prepare crispy egg rolls filled with seasoned beef and melted cheddar cheese.
Step 1: Prepare the Ground Beef
- Place a large skillet over medium heat.
- Add one tablespoon of cooking oil.
- Add the ground beef to the hot skillet.
- Break the meat into small pieces using a wooden spoon.
- Cook for approximately 6–8 minutes, stirring regularly.
- Continue cooking until the beef is fully browned and reaches an internal temperature of 160°F (71°C).
- Drain excess grease carefully.
Tip: Lean ground beef works well because it produces less grease. Removing excess fat helps prevent the egg roll wrappers from becoming oily or soggy.
Step 2: Add the Burger Seasonings
- Add the finely chopped yellow onion to the cooked beef.
- Stir in the garlic powder and onion powder.
- Add black pepper and salt.
- Pour in the Worcestershire sauce.
- Mix everything until the seasonings are evenly distributed.
- Cook for another 2 minutes to soften the onions and blend the flavors.
Tip: Allow the onion to soften before adding the remaining filling ingredients. This gives the beef a better texture and prevents large raw onion pieces inside the egg rolls.
Step 3: Add the Cheeseburger Ingredients
- Reduce the skillet heat to low.
- Add the ketchup and yellow mustard.
- Stir until the sauces coat the beef evenly.
- Add the finely chopped dill pickles.
- Mix everything gently.
- Remove the skillet from the heat.
- Let the mixture cool for several minutes.
- Fold in the shredded cheddar cheese.
Tip: Let the filling cool before assembling the egg rolls. Hot filling can make the wrappers soft and difficult to seal.
Step 4: Prepare the Egg Roll Wrappers
- Place one egg roll wrapper on a clean cutting board.
- Position it like a diamond, with one corner pointing toward you.
- Keep the remaining wrappers covered with a slightly damp kitchen towel to prevent them from drying out.
- Place approximately 2 tablespoons of cooled cheeseburger filling near the center of the wrapper.
Tip: Avoid adding too much filling. Overstuffed wrappers can split during air frying and allow the melted cheese to escape.
Step 5: Fold and Seal the Egg Rolls
- Fold the bottom corner over the filling.
- Pull it gently toward the center.
- Fold the left and right corners inward.
- Roll the wrapper tightly toward the top corner.
- Dip your finger into the water.
- Lightly moisten the top corner.
- Press the edge firmly against the roll to seal it.
- Repeat with the remaining wrappers and filling.
Tip: Keep the rolls snug but not overly tight. A little space inside allows the filling to heat without putting too much pressure on the wrapper.
Step 6: Preheat the Air Fryer
- Preheat your air fryer to 375°F (190°C) for approximately 3 minutes, if your model requires preheating.
- Lightly spray the air fryer basket with cooking spray.
- Check that the basket is clean and dry.
- Prepare the assembled egg rolls for cooking.
Tip: A preheated air fryer helps the wrappers begin crisping quickly and encourages even browning.
Step 7: Arrange the Egg Rolls in the Basket
- Place the assembled egg rolls in the air fryer basket.
- Arrange them in a single layer.
- Leave a little space between each roll.
- Position the sealed edges facing down.
- Lightly brush or spray the outside with cooking oil.
- Avoid stacking the egg rolls.
Tip: Cook in batches if needed. Proper airflow is important for achieving a crispy, evenly browned wrapper.
Step 8: Air Fry Until Golden and Crispy
- Air fry at 375°F (190°C) for 8–10 minutes.
- Turn the egg rolls halfway through cooking.
- Check the wrappers after 8 minutes.
- Continue cooking for another 1–2 minutes if they need more color.
- Remove them when the wrappers are golden brown and crisp.
- Let them rest for 2–3 minutes before serving.
Tip: Air fryer models can cook at different speeds. Check the first batch early to avoid over-browning or splitting the wrappers.
Step 9: Prepare the Burger Dipping Sauce
- Add 1/4 cup mayonnaise to a small bowl.
- Add 1 tablespoon ketchup.
- Add 1 teaspoon yellow mustard.
- Stir in 1 teaspoon pickle relish.
- Mix until smooth and creamy.
- Refrigerate briefly if you prefer a chilled dipping sauce.
Tip: Add a little smoked paprika or hot sauce if you want a smoky or spicy burger sauce.
Step 10: Serve and Enjoy
- Transfer the cooked egg rolls to a serving plate.
- Cut one egg roll diagonally to show the cheesy filling.
- Sprinkle chopped green onions over the top if desired.
- Serve with homemade burger sauce, ketchup, or ranch dressing.
- Enjoy while the wrappers are warm and crispy.
Your homemade Air Fryer Loaded Cheeseburger Egg Rolls are ready to enjoy!
Tips for the Best Crispy Cheeseburger Egg Rolls
Use these simple tips to improve the texture, flavor, and appearance of your egg rolls.
- Drain the beef well: Excess grease can make the filling oily and weaken the wrappers.
- Cool the filling: Warm filling is easier to handle and less likely to soften the wrappers.
- Chop ingredients finely: Small pieces distribute evenly and make rolling easier.
- Don’t overfill: Two tablespoons of filling are usually enough for a standard wrapper.
- Seal every edge: A little water helps keep the wrapper closed during cooking.
- Use a light oil coating: Too much oil can make the wrappers greasy.
- Leave space between rolls: Good airflow helps the outside become evenly crispy.
- Turn halfway through: This helps both sides develop a golden finish.
- Let them rest: A short resting time helps the filling settle before serving.
Variations and Substitutions
One of the best things about this recipe is how easily you can change the filling to match your favorite burger toppings.
Bacon Cheeseburger Egg Rolls
Add three slices of cooked, crispy bacon to the ground beef mixture. The smoky bacon adds a delicious flavor that pairs well with cheddar cheese and pickles.
Spicy Jalapeño Cheeseburger Egg Rolls
Mix finely chopped jalapeños into the beef filling. Add a pinch of cayenne pepper if you prefer extra heat.
BBQ Cheeseburger Egg Rolls
Replace the ketchup and mustard with two tablespoons of your favorite BBQ sauce. Add cheddar cheese and finely chopped onions for a smoky, sweet filling.
Mushroom Swiss Egg Rolls
Replace the cheddar with shredded Swiss cheese and add finely chopped sautéed mushrooms. This variation gives the egg rolls a rich, savory burger flavor.
Turkey Cheeseburger Egg Rolls
Use ground turkey instead of ground beef. Cook it fully to 165°F (74°C), then follow the same filling and wrapping steps.
Pizza Cheeseburger Egg Rolls
Add a small amount of pizza sauce, mozzarella cheese, and Italian seasoning to the cooked beef. This creates a fun combination of cheeseburger and pizza flavors.
Gluten-Free Cheeseburger Egg Rolls
Use certified gluten-free egg roll wrappers if available. Check the Worcestershire sauce, ketchup, mustard, and other packaged ingredients to confirm they meet your dietary needs.
What to Serve With Loaded Cheeseburger Egg Rolls
These crispy bites pair well with simple sides and classic burger toppings.
- French fries: Serve with crispy air fryer fries for a classic burger-style meal.
- Coleslaw: A creamy or vinegar-based slaw adds a refreshing contrast.
- Garden salad: Fresh lettuce, tomatoes, and cucumbers balance the rich filling.
- Sweet potato fries: Their natural sweetness works well with savory beef and cheddar.
- Pickle spears: Add extra tangy crunch to your serving plate.
- Onion rings: Serve with crispy onion rings for a fun party appetizer spread.
- Fresh vegetable sticks: Carrots, celery, and cucumber make easy dipping sides.
How to Store Leftovers
Proper storage helps keep leftover cheeseburger egg rolls fresh and safe to enjoy.
Refrigerator:
- Allow the cooked egg rolls to cool slightly.
- Place them in an airtight food storage container.
- Refrigerate within 2 hours of cooking.
- Store for up to 3–4 days.
- Keep dipping sauces in a separate container.
Freezer:
- Allow the cooked egg rolls to cool completely.
- Arrange them in a single layer on a baking sheet.
- Freeze until firm.
- Transfer them to a freezer-safe container or bag.
- Store for up to 2 months for best quality.
Important: The wrappers may lose some crispness during storage. Reheating in the air fryer helps restore their crunchy texture.
How to Reheat Cheeseburger Egg Rolls
The air fryer is the best way to warm leftover egg rolls while keeping the outside crispy.
- Air fryer: Reheat at 350°F (175°C) for approximately 3–5 minutes, until heated through.
- Oven: Place on a baking sheet and heat at 350°F (175°C) for approximately 8–10 minutes.
- Microwave: Heat in short 20–30 second intervals. The filling will warm, but the wrapper may become soft.
For food safety, reheat leftovers to an internal temperature of 165°F (74°C).
Frequently Asked Questions
1. Can I make cheeseburger egg rolls in an air fryer?
Yes, fill egg roll wrappers with cooked cheeseburger filling, seal them, lightly coat with oil, and air fry until golden and crispy.
2. What temperature is best for air fryer cheeseburger egg rolls?
Cook them at 375°F (190°C) for approximately 8–10 minutes, turning halfway through.
3. Can I use ground turkey instead of ground beef?
Yes, ground turkey is a great alternative, but cook it to an internal temperature of 165°F (74°C).
4. How do I stop egg rolls from opening during cooking?
Avoid overfilling, fold the corners tightly, and seal the final edge with a little water before air frying.
5. Can I prepare loaded cheeseburger egg rolls ahead of time?
Yes, assemble them up to 24 hours ahead, cover tightly, and refrigerate until ready to air fry.
6. Can I freeze uncooked cheeseburger egg rolls?
Yes, freeze the assembled uncooked rolls in a single layer, then transfer them to a freezer-safe container for storage.
7. What is the best dipping sauce for cheeseburger egg rolls?
A creamy burger sauce made with mayonnaise, ketchup, mustard, and pickle relish is a delicious choice.
8. Why are my air fryer egg rolls not crispy?
They may need more cooking time, a light oil coating, or better airflow from leaving enough space between the rolls.
Final Thoughts
These Air Fryer Loaded Cheeseburger Egg Rolls are a fun way to enjoy the flavors of a classic cheeseburger in a crispy, handheld appetizer. The seasoned beef, melted cheddar, tangy pickles, and golden wrapper create a delicious combination that is perfect for sharing.
They are easy to customize with bacon, jalapeños, mushrooms, or your favorite burger toppings. Serve them with homemade burger sauce and crispy fries for a satisfying meal or add them to your next game-day snack table.
Give this recipe a try the next time you’re craving something cheesy, crunchy, and full of classic cheeseburger flavor!