3-Ingredient Cottage Cheese Bake

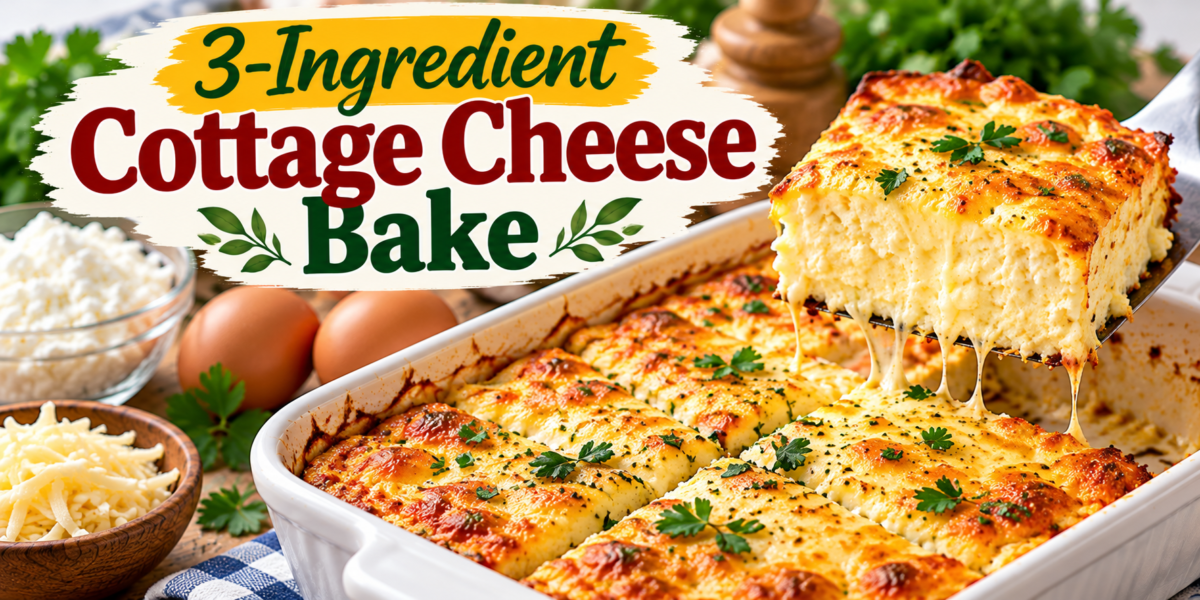
3-Ingredient Cottage Cheese Bake with cottage cheese, eggs, and melted cheese

3-Ingredient Cottage Cheese Bake

Cottage Cheese Bake is a simple, protein-rich dish made with just cottage cheese, eggs, and shredded cheese. It is soft, creamy, lightly cheesy, and easy to prepare when you want a quick breakfast, light lunch, or simple meal-prep option. Because the ingredient list is so short, Cottage Cheese Bake is also a useful recipe for busy days when you do not want to spend much time cooking.

This recipe is flexible enough to enjoy plain or customize with herbs, vegetables, or seasonings after you master the basic version. Cottage Cheese Bake works especially well for anyone who likes easy, high-protein meals with minimal prep and very little cleanup.

Prep Time: 5 minutes
Cook Time: 30 to 35 minutes
Total Time: 40 minutes
Servings: 4

Ingredients

For the Basic Bake

2 cups cottage cheese

4 large eggs

1 cup shredded mozzarella or cheddar cheese

Optional Seasonings

Salt, to taste

Black pepper, to taste

Garlic powder

Dried oregano

Fresh herbs

Red pepper flakes

These optional ingredients are not required, but they can add extra flavor if desired.

Why You’ll Love This Recipe

Cottage Cheese Bake is one of those recipes that proves a short ingredient list can still create something satisfying. Cottage cheese provides creaminess and protein, eggs help the bake set, and shredded cheese adds richness and flavor.

Another reason to love Cottage Cheese Bake is how easy it is to prepare. You only need one mixing bowl and one baking dish, which makes cleanup simple.

The recipe also works well for meal prep. You can bake it ahead, portion it, refrigerate it, and reheat it when needed.

How to Make 3-Ingredient Cottage Cheese Bake

Step 1: Preheat the Oven

Preheat your oven to 375°F or 190°C.

Lightly grease an 8-inch square baking dish or a similar-sized oven-safe dish.

Using a smaller dish gives Cottage Cheese Bake a thicker, softer texture, while a wider dish creates a thinner bake with more golden edges.

Step 2: Mix the Cottage Cheese and Eggs

Add the cottage cheese and eggs to a large mixing bowl.

Whisk until the eggs are fully combined with the cottage cheese.

You do not need the mixture to become completely smooth. Small curds are perfectly fine and help give Cottage Cheese Bake its soft texture.

If you prefer a smoother result, you can blend the cottage cheese and eggs briefly with an immersion blender or regular blender.

Step 3: Add the Shredded Cheese

Stir in the shredded mozzarella or cheddar.

Mozzarella creates a milder and softer flavor, while cheddar gives the dish a stronger savory taste.

Fold the cheese evenly through the mixture.

At this point, Cottage Cheese Bake is ready for the oven using only the three main ingredients.

Step 4: Transfer to the Baking Dish

Pour the mixture into the prepared baking dish.

Use a spatula to spread the top evenly.

If you want a little more color, sprinkle a small amount of extra shredded cheese over the surface.

This extra cheese is optional and not necessary for the basic recipe.

Step 5: Bake

Place the dish in the center of the oven.

Bake for 30 to 35 minutes, or until the center is set and the top is lightly golden.

The exact cooking time may vary depending on the size and depth of your baking dish.

Cottage Cheese Bake should be firm around the edges with a soft center that no longer looks wet.

Step 6: Rest Before Slicing

Remove the baking dish from the oven and let it rest for 10 minutes.

Resting is important because it allows the eggs and cheese to settle.

If you slice immediately, the dish may appear softer than expected.

After resting, Cottage Cheese Bake will hold its shape better and be easier to serve.

Step 7: Serve

Cut into squares or scoop portions directly from the baking dish.

Serve warm, at room temperature, or chilled.

Cottage Cheese Bake can be eaten on its own or paired with fruit, salad, toast, or roasted vegetables.

Serving Suggestions

Cottage Cheese Bake works well at breakfast with sliced tomatoes, avocado, berries, or fresh fruit.

For brunch, serve it with toast, a green salad, or roasted potatoes.

At lunch, pair it with cucumber salad, soup, or a simple vegetable side.

You can also use Cottage Cheese Bake as a protein-rich base and serve it with grilled vegetables or a fresh tomato salad.

For another easy cottage cheese breakfast, try our Cottage Cheese & Spinach Crustless Quiche for Easy Brunch Bliss.

Recipe Tips

Use full-fat cottage cheese for a creamier texture.

Low-fat cottage cheese also works, but the result may be slightly less rich.

Drain excess liquid from very watery cottage cheese before mixing.

Shred your own cheese if possible because it usually melts more smoothly.

Do not overbake Cottage Cheese Bake, as this can make the eggs rubbery.

Let the finished dish rest before slicing.

Use a glass or ceramic baking dish for even cooking.

If the top is browning too quickly, cover loosely with foil during the last few minutes.

Easy Variations

Although the basic version uses only three ingredients, you can easily build on it once you want more flavor.

For an herby version, add chopped parsley, dill, basil, or chives.

For a vegetable version, stir in cooked spinach, mushrooms, bell peppers, or zucchini.

Cottage Cheese Bake can also be made with pepper Jack cheese for a little heat.

For a Mediterranean twist, add feta, oregano, chopped olives, or sun-dried tomatoes.

If you prefer a breakfast-style version, add cooked turkey sausage or chopped green onions.

Make-Ahead Instructions

Cottage Cheese Bake is excellent for meal prep.

Prepare and bake the recipe as directed.

Once cooled, cut it into portions and store them in airtight containers.

You can make the full dish up to 3 days ahead and reheat individual servings as needed.

If you want to prepare the mixture in advance, whisk the ingredients together, cover, refrigerate, and bake within 12 hours.

Storage and Reheating

Store leftover Cottage Cheese Bake in an airtight container in the refrigerator for up to 4 days.

Reheat individual portions in the microwave for 30 to 60 seconds, depending on size.

You can also reheat slices in a covered skillet over low heat or in a 325°F oven until warmed through.

Freezing is possible, but the texture may become slightly softer after thawing.

For the best results, refrigerate Cottage Cheese Bake and enjoy it within a few days.

Nutrition Information

Approximate nutrition per serving:

Calories: 260
Protein: 27 g
Carbohydrates: 7 g
Fat: 14 g
Saturated Fat: 7 g
Fiber: 0 g
Sugar: 5 g
Sodium: 620 mg

Nutrition values are estimates and will vary depending on the cottage cheese and shredded cheese used.

Frequently Asked Questions

Can I use low-fat cottage cheese?

Yes. Low-fat cottage cheese works well, although the finished texture may be slightly less creamy than when using full-fat cottage cheese.

Can I blend the mixture?

Yes. Blending creates a smoother, more uniform texture. If you like visible cottage cheese curds, simply whisk by hand.

What cheese works best?

Mozzarella creates a mild flavor, while cheddar gives Cottage Cheese Bake a stronger, more savory taste. Colby Jack, Monterey Jack, or pepper Jack also work.

Why is my bake watery?

Some cottage cheese brands contain more liquid than others. If yours looks especially wet, drain off a little liquid before mixing.

Can I add vegetables?

Yes. Cook vegetables first and remove excess moisture before adding them to the mixture.

Can I make this without shredded cheese?

You can, but the recipe will be less rich and less cheesy. The shredded cheese also helps improve the texture and flavor.

Is this good for meal prep?

Yes. Cottage Cheese Bake stores well, reheats easily, and can be portioned into containers for quick breakfasts or lunches.

Final Thoughts

Cottage Cheese Bake is a simple recipe that delivers a soft, cheesy, protein-rich result with only three basic ingredients. Cottage cheese, eggs, and shredded cheese come together quickly and bake into a versatile dish that works for breakfast, lunch, or meal prep.

Cottage Cheese Bake is especially useful when you want something easy, filling, and flexible. You can keep it plain or add vegetables, herbs, or extra seasonings depending on your preference.

Whether you serve Cottage Cheese Bake warm from the oven or prepare it ahead for the week, its short ingredient list and simple method make it a practical recipe worth keeping.

For a hearty protein-packed dinner, you may also like our Mediterranean Baked Chicken Juicy and Flavorful.
Italian Grandmother-Style Eggplant Bake

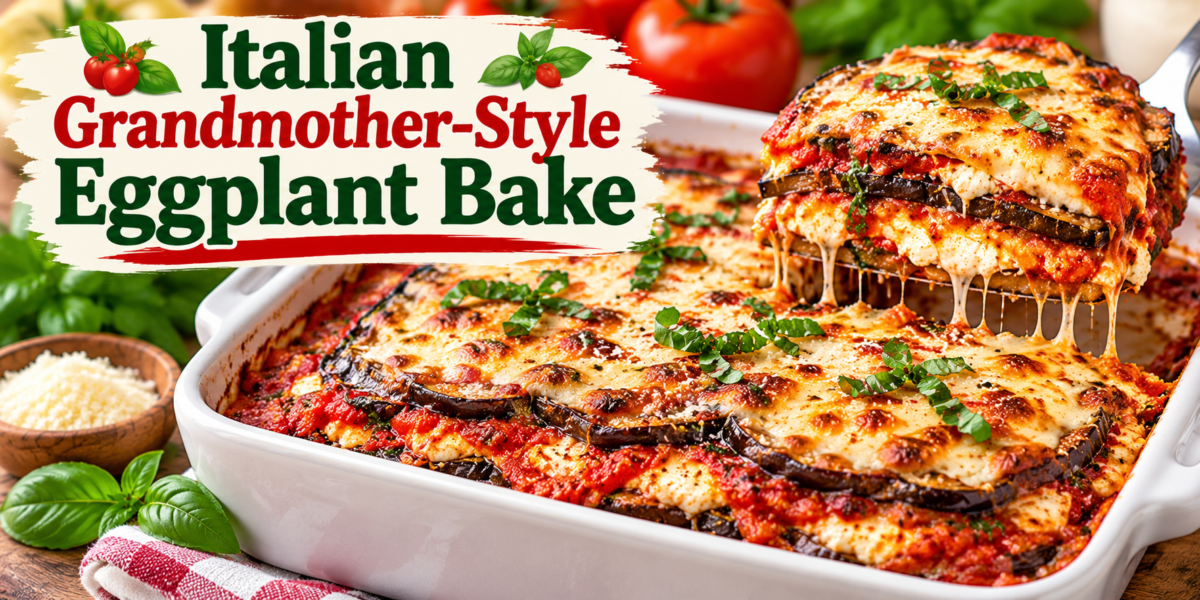
Italian Eggplant Bake with roasted eggplant, tomato sauce, ricotta, mozzarella, Parmesan, and fresh basil

Italian Grandmother-Style Eggplant Bake

Eggplant Bake is a cozy, old-fashioned Italian-inspired dish made with tender roasted eggplant, tomato sauce, garlic, herbs, mozzarella, and Parmesan. It has the comforting feel of a family casserole without requiring complicated steps or hard-to-find ingredients. The layers become soft and savory in the oven, while the cheese melts into a golden, bubbling topping.

This Eggplant Bake works beautifully as a vegetarian main dish, a hearty side, or a make-ahead dinner for busy weeks. Serve it with crusty bread, pasta, salad, or roasted vegetables for a simple meal that feels homemade and satisfying.

Prep Time: 25 minutes
Cook Time: 45 minutes
Total Time: 1 hour 10 minutes
Servings: 6

Ingredients

For the Eggplant

2 large eggplants, sliced into 1/4-inch rounds

2 tablespoons olive oil

1 teaspoon salt

1/2 teaspoon black pepper

1 teaspoon dried oregano

1/2 teaspoon garlic powder

For the Tomato Sauce

1 tablespoon olive oil

1 small yellow onion, finely chopped

3 cloves garlic, minced

1 can crushed tomatoes, 28 ounces

2 tablespoons tomato paste

1 teaspoon dried basil

1 teaspoon dried oregano

1/2 teaspoon sugar, optional

1/2 teaspoon salt

1/4 teaspoon black pepper

Pinch of red pepper flakes, optional

For the Cheese Layers

2 cups shredded mozzarella cheese

3/4 cup grated Parmesan cheese

1 cup ricotta cheese

1 large egg

2 tablespoons chopped fresh parsley

1 tablespoon chopped fresh basil

For Finishing

Extra Parmesan

Fresh basil

Fresh parsley

Cracked black pepper

Why You’ll Love This Recipe

Eggplant Bake has all the warm, comforting flavors people love in classic Italian casseroles. The roasted eggplant becomes tender, the tomato sauce adds richness, and the cheese layers bring creaminess and a golden finish.

Another reason to love this casserole is that it is flexible. You can make it with ricotta, cottage cheese, extra mozzarella, or even a little provolone. It can also be prepared ahead and baked later.

The recipe is hearty enough to serve as dinner, but it also works well beside grilled chicken, fish, or a large salad.

How to Make Italian Grandmother-Style Eggplant Bake

Step 1: Prepare the Eggplant

Slice the eggplant into even rounds and arrange them on a large tray.

Sprinkle lightly with salt and let them sit for 15 minutes. This helps draw out some moisture and can improve the final texture.

Pat the slices dry with paper towels.

Brush both sides lightly with olive oil and season with black pepper, oregano, and garlic powder.

Preparing the eggplant this way helps Eggplant Bake stay tender without becoming watery.

Step 2: Roast the Eggplant

Preheat the oven to 425°F or 220°C.

Arrange the eggplant slices in a single layer on parchment-lined baking sheets.

Roast for 18 to 20 minutes, turning once halfway through, until the slices are soft and lightly golden.

Roasting instead of frying keeps Eggplant Bake easier to prepare and gives the vegetables a deeper flavor.

Step 3: Make the Tomato Sauce

While the eggplant roasts, heat olive oil in a saucepan over medium heat.

Add the onion and cook for 4 to 5 minutes until softened.

Stir in the garlic and cook for about 30 seconds.

Add crushed tomatoes, tomato paste, basil, oregano, sugar if using, salt, black pepper, and red pepper flakes.

Simmer for 15 minutes, stirring occasionally.

A slightly thick sauce works best here because it keeps the layers from becoming too loose.

Step 4: Make the Ricotta Mixture

In a medium bowl, combine ricotta, egg, parsley, basil, and about 1/4 cup Parmesan.

Stir until smooth and evenly mixed.

This creamy layer gives the casserole a soft, rich texture between the roasted vegetables and tomato sauce.

Step 5: Assemble the First Layer

Reduce the oven temperature to 375°F or 190°C.

Spread a thin layer of tomato sauce over the bottom of a lightly greased baking dish.

Arrange a layer of roasted eggplant over the sauce.

Spoon small amounts of the ricotta mixture over the eggplant, then add a little mozzarella and Parmesan.

Repeat the layers until all ingredients are used.

Finish Eggplant Bake with tomato sauce, mozzarella, and Parmesan on top.

Step 6: Bake

Cover the dish loosely with foil and bake for 20 minutes.

Remove the foil and continue baking for another 15 to 20 minutes.

The top should be melted, bubbling, and lightly golden.

For extra browning, broil for 1 to 2 minutes at the end, watching carefully.

When finished, the casserole should look rich and set around the edges.

Step 7: Rest Before Serving

Remove the baking dish from the oven and let it rest for at least 10 minutes.

This resting time allows the layers to settle and makes the casserole easier to slice.

Top Eggplant Bake with fresh basil, parsley, extra Parmesan, and cracked black pepper before serving.

Serving Suggestions

Eggplant Bake is delicious with warm crusty bread, garlic bread, or focaccia.

For a fuller meal, serve it with spaghetti, penne, or a simple bowl of buttered pasta.

A crisp green salad with lemon vinaigrette balances the richness of the cheese and tomato sauce.

You can also pair Eggplant Bake with roasted broccoli, green beans, zucchini, or sautéed spinach.

For a crispy side dish, serve this with our Crispy Garlic Thyme Smashed Potatoes.

Recipe Tips

Salt the eggplant briefly to help remove excess moisture.

Roast the slices instead of frying for an easier and less oily dish.

Use a thick tomato sauce so the casserole does not become watery.

Whole-milk ricotta gives Eggplant Bake a creamier texture.

Freshly grated Parmesan melts better and adds stronger flavor.

Do not skip the resting time after baking.

If using very large eggplants, remove any sections with many hard seeds.

Fresh basil added after baking gives the dish a brighter finish.

Easy Variations

Add sautéed mushrooms or spinach between the layers for extra vegetables.

For more protein, add cooked ground beef, turkey, or Italian-style sausage to the tomato sauce.

Eggplant Bake can also be made with sliced zucchini mixed into the layers.

For a cheesier version, add provolone or fontina with the mozzarella.

If you prefer a lighter version, use part-skim ricotta and reduce the amount of mozzarella.

A spicy version can include extra red pepper flakes or a spoonful of Calabrian chili paste.

If you enjoy cheesy eggplant dishes, try our Spinach and Ricotta Stuffed Eggplant Roll-Ups for another comforting Italian-inspired recipe.

Make-Ahead Instructions

Eggplant Bake is a great make-ahead meal.

You can roast the eggplant and prepare the tomato sauce up to 2 days in advance.

Assemble the casserole, cover it tightly, and refrigerate for up to 24 hours before baking.

If baking directly from the refrigerator, add about 10 extra minutes to the covered baking time.

Storage and Reheating

Store leftover Eggplant Bake in an airtight container in the refrigerator for up to 4 days.

Reheat individual portions in the microwave or warm the whole dish in a 350°F oven until heated through.

Cover loosely with foil while reheating to prevent the cheese from drying out.

You can freeze the baked casserole for up to 2 months. Let it cool completely, wrap well, and thaw overnight in the refrigerator before reheating.

Nutrition Information

Approximate nutrition per serving:

Calories: 360
Protein: 21 g
Carbohydrates: 25 g
Fat: 21 g
Saturated Fat: 10 g
Fiber: 7 g
Sugar: 10 g
Sodium: 760 mg

Nutrition values are estimates and may vary depending on the cheese, sauce, and serving size.

Frequently Asked Questions

Can I make this without ricotta?

Yes. Cottage cheese can be used instead, or you can leave out the creamy layer and use more mozzarella and Parmesan.

Do I have to peel the eggplant?

No. The skin softens during roasting and baking. Peel it if you prefer a softer texture.

Why is my casserole watery?

The eggplant may have contained too much moisture, or the tomato sauce may have been too thin. Salting and roasting the eggplant first helps Eggplant Bake stay firm and sliceable.

Can I make this gluten-free?

Yes. The recipe is naturally gluten-free as written, but always check packaged ingredients if you are cooking for someone with specific dietary needs.

Can I add meat?

Yes. Cooked ground beef, turkey, or sausage can be stirred into the tomato sauce before layering.

Can I freeze it before baking?

Yes. Assemble the casserole in a freezer-safe dish, wrap tightly, and freeze. Thaw overnight in the refrigerator before baking for the best texture.

What cheese works best?

Mozzarella, Parmesan, ricotta, provolone, and fontina all work well in Eggplant Bake.

Final Thoughts

Italian Grandmother-Style Eggplant Bake is a warm, comforting recipe built from simple ingredients and familiar Italian flavors. Roasted eggplant, rich tomato sauce, creamy ricotta, mozzarella, Parmesan, garlic, and herbs come together in layers that feel both rustic and satisfying.

Eggplant Bake is easy enough for a weeknight but special enough for a family gathering. It can be prepared ahead, stored well, and served with bread, pasta, salad, or vegetables.

Whether you make Eggplant Bake as a vegetarian main dish or a hearty side, the combination of roasted vegetables, bubbling cheese, and homemade tomato sauce makes it a dependable recipe worth keeping.

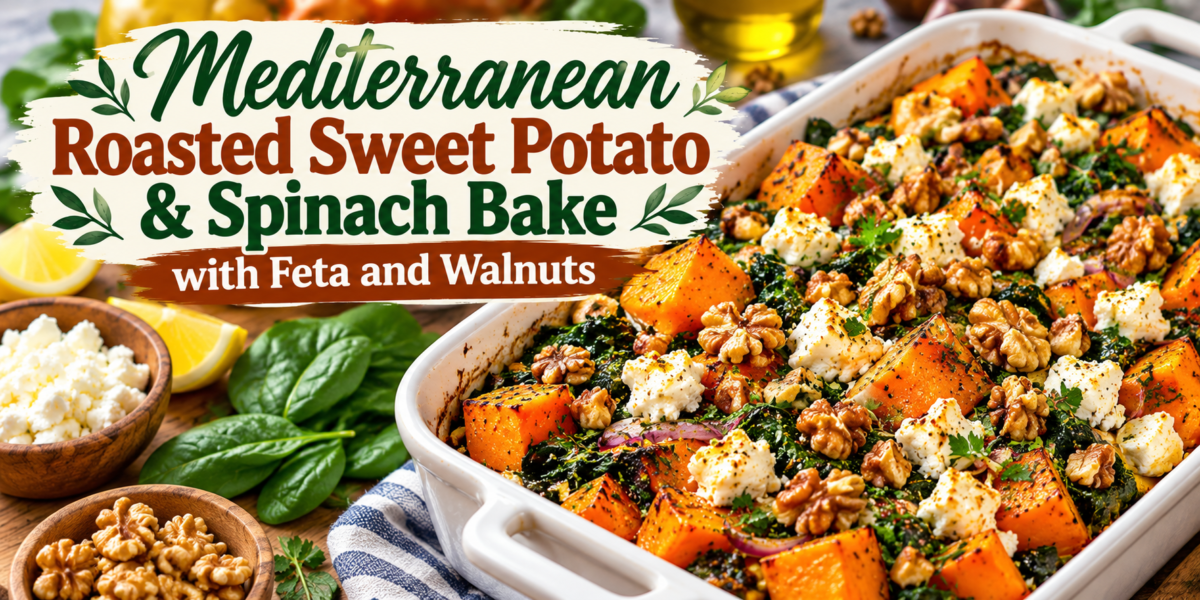
Mediterranean Roasted Sweet Potato & Spinach Bake with Feta and Walnuts

Mediterranean Sweet Potato Spinach Bake with feta, walnuts, garlic, lemon, and fresh herbs

Mediterranean Roasted Sweet Potato & Spinach Bake with Feta and Walnuts

Sweet Potato Spinach Bake is a colorful Mediterranean-inspired dish made with roasted sweet potatoes, fresh spinach, feta cheese, crunchy walnuts, garlic, herbs, and olive oil. It works beautifully as a vegetarian main dish, hearty side, or meal-prep option. The combination of naturally sweet potatoes, savory feta, and earthy spinach creates a balanced flavor that feels comforting without being too heavy.

This Sweet Potato Spinach Bake is especially useful when you want a simple oven meal made with wholesome ingredients. The roasted vegetables develop deep flavor, while the walnuts add crunch and the feta adds a creamy, salty finish.

Prep Time: 20 minutes
Cook Time: 40 minutes
Total Time: 1 hour
Servings: 6

Ingredients

For the Sweet Potatoes

3 medium sweet potatoes, peeled and cut into 1-inch cubes

2 tablespoons extra virgin olive oil

1/2 teaspoon garlic powder

1 teaspoon smoked paprika

1/2 teaspoon ground cumin

1/2 teaspoon salt

1 teaspoon dried oregano

1/4 teaspoon black pepper

For the Spinach Mixture

1 tablespoon olive oil

3 cloves garlic, minced

1 small red onion, thinly sliced

6 cups fresh baby spinach

1 tablespoon fresh lemon juice

1 teaspoon lemon zest

1/4 teaspoon red pepper flakes, optional

For the Topping

1 cup crumbled feta cheese

1/2 cup chopped walnuts

2 tablespoons chopped fresh parsley

1 tablespoon chopped fresh dill

1 tablespoon extra virgin olive oil

Fresh black pepper, to taste

Why You’ll Love This Recipe

Sweet Potato Spinach Bake combines several textures in one simple dish. The sweet potatoes become tender and lightly caramelized, the spinach stays soft and savory, and the walnuts provide a satisfying crunch.

It is also easy to adapt. You can add chickpeas for extra protein, change the cheese, or include more vegetables depending on what you already have.

Another reason to love Sweet Potato Spinach Bake is that it works for several occasions. Serve it for a weeknight dinner, bring it to a potluck, or prepare portions ahead for lunches.

How to Make Mediterranean Roasted Sweet Potato & Spinach Bake

Step 1: Roast the Sweet Potatoes

Preheat the oven to 425°F or 220°C.

Place the cubed sweet potatoes on a large baking sheet.

Drizzle with olive oil and sprinkle with smoked paprika, oregano, garlic powder, cumin, salt, and black pepper.

Toss until every piece is evenly coated.

Spread the potatoes into a single layer and roast for about 25 minutes, turning once halfway through.

Roasting first gives Sweet Potato Spinach Bake a deeper flavor and prevents the sweet potatoes from becoming overly soft in the finished dish.

Step 2: Prepare the Spinach

While the sweet potatoes roast, heat olive oil in a large skillet over medium heat.

Add the red onion and cook for 3 to 4 minutes until slightly softened.

Stir in the garlic and cook for about 30 seconds.

Add the spinach in batches, stirring until each handful wilts before adding more.

This step removes excess moisture and keeps Sweet Potato Spinach Bake from becoming watery.

Step 3: Season the Spinach Mixture

Once the spinach has wilted, remove the skillet from the heat.

Stir in lemon juice, lemon zest, and red pepper flakes if using.

Season lightly with black pepper.

You may not need much salt because the feta will add plenty of savory flavor later.

Step 4: Assemble the Bake

Reduce the oven temperature to 400°F or 200°C.

Lightly grease a medium baking dish.

Add the roasted sweet potatoes and spread them evenly across the bottom.

Spoon the spinach and onion mixture over the potatoes.

Gently toss or layer the ingredients so the spinach is distributed throughout.

This creates an even base for Sweet Potato Spinach Bake and helps every serving contain both vegetables.

Step 5: Add Feta and Walnuts

Sprinkle the crumbled feta evenly over the top.

Add the chopped walnuts.

Drizzle lightly with extra virgin olive oil.

The feta will soften and lightly brown in the oven, while the walnuts become more fragrant and crisp.

These toppings give Sweet Potato Spinach Bake its signature Mediterranean-style flavor and texture.

Step 6: Bake

Place the dish in the oven and bake uncovered for 12 to 15 minutes.

The feta should be warm and slightly golden, and the walnuts should smell toasted.

Avoid baking for too long because the spinach can dry out.

Step 7: Garnish and Serve

Remove the dish from the oven and let it rest for about 5 minutes.

Sprinkle with fresh parsley, dill, and extra black pepper.

Serve Sweet Potato Spinach Bake warm with lemon wedges if desired.

Serving Suggestions

Sweet Potato Spinach Bake can be served as a vegetarian main dish with a simple salad, hummus, or warm pita bread.

For a more filling meal, pair it with quinoa, couscous, lentils, or chickpeas.

It also works well alongside grilled chicken, baked salmon, roasted turkey, or white fish.

For brunch, serve Sweet Potato Spinach Bake with poached eggs or scrambled eggs for extra protein.

Recipe Tips

Cut the sweet potatoes into similar-sized cubes so they roast evenly.

Do not overcrowd the baking sheet, or the potatoes may steam instead of caramelizing.

Cook the spinach before adding it to the baking dish to remove excess moisture.

Use good-quality feta for the best salty and creamy flavor.

Toast the walnuts lightly if you want an even stronger nutty flavor.

Fresh lemon juice brightens Sweet Potato Spinach Bake and balances the sweetness of the potatoes.

Add herbs after baking so they keep their fresh flavor and color.

Let the dish rest briefly before serving so the layers settle.

Easy Variations

For extra protein, add one can of drained chickpeas before baking.

You can make Sweet Potato Spinach Bake with goat cheese instead of feta for a softer, tangier flavor.

For more vegetables, add roasted bell peppers, zucchini, mushrooms, or artichoke hearts.

Pecans or almonds can replace the walnuts.

If you like sweeter Mediterranean flavors, add a small handful of dried cranberries or chopped dates.

For extra heat, increase the red pepper flakes or add a pinch of cayenne.

For another hearty low-carb bake, try our Low-Carb Zucchini, Mushroom, and Ground Meat Casserole.

Make-Ahead Instructions

Sweet Potato Spinach Bake can be prepared ahead, making it useful for busy days.

Roast the sweet potatoes and cook the spinach mixture up to one day in advance.

Store both components separately in airtight containers in the refrigerator.

When ready to bake, assemble the dish, add feta and walnuts, and cook until everything is heated through.

You may need a few extra minutes if the ingredients are cold.

Storage and Reheating

Store leftover Sweet Potato Spinach Bake in an airtight container in the refrigerator for up to 3 days.

Reheat individual portions in the microwave, or warm the whole dish in a 350°F oven until heated through.

For the best texture, add a few fresh walnuts after reheating.

Freezing is possible, but the spinach and feta may become slightly softer after thawing.

For best quality, refrigerate and enjoy within a few days.

Nutrition Information

Approximate nutrition per serving:

Calories: 330
Protein: 10 g
Carbohydrates: 35 g
Fat: 18 g
Saturated Fat: 6 g
Fiber: 7 g
Sugar: 9 g
Sodium: 470 mg

Nutrition values are estimates and may vary depending on the size of the sweet potatoes and the amount of feta, walnuts, and olive oil used.

Frequently Asked Questions

Can I use frozen spinach?

Yes. Thaw it completely and squeeze out as much liquid as possible before adding it to the recipe. Fresh spinach usually gives Sweet Potato Spinach Bake a lighter texture, but frozen spinach works well.

Can I make this vegan?

Yes. Replace the feta with a dairy-free feta alternative or leave it out entirely.

Can I add protein?

Absolutely. Chickpeas, lentils, shredded chicken, or white beans are all good additions.

Can I use another cheese?

Yes. Goat cheese, ricotta, Parmesan, or mozzarella can be used depending on the flavor you want.

Can I prepare the dish the night before?

Yes. Assemble everything except the walnuts, cover, and refrigerate. Add the walnuts just before baking for better crunch.

What can I use instead of walnuts?

Pecans, almonds, pumpkin seeds, or sunflower seeds are all good substitutes.

Is this recipe good for meal prep?

Yes. Sweet Potato Spinach Bake stores well and can be divided into containers for easy lunches or dinners.

Final Thoughts

Mediterranean Roasted Sweet Potato & Spinach Bake with Feta and Walnuts is a flavorful way to combine simple vegetables with classic Mediterranean ingredients. Roasted sweet potatoes bring natural sweetness, while spinach, feta, walnuts, garlic, herbs, and lemon add savory contrast.

Sweet Potato Spinach Bake is versatile enough to serve as a vegetarian main course or as a hearty side dish with chicken, fish, or grains. It also works well for meal prep because the ingredients hold up nicely after reheating.

Whether you make Sweet Potato Spinach Bake for a weeknight dinner, brunch, or gathering, the combination of roasted vegetables, creamy feta, and crunchy walnuts makes it an easy recipe worth repeating.

If you enjoy easy low-carb comfort food, you may also like our Low-Carb Crustless Pizza Bowl.

Fluffy Blueberry Pancakes with Honey Drizzle

Fluffy Blueberry Pancakes with fresh blueberries and warm honey drizzle

Fluffy Blueberry Pancakes with Honey Drizzle

Blueberry Pancakes are soft, fluffy, and packed with juicy berries in every bite. Finished with a warm honey drizzle, they make a simple but special breakfast that works for busy mornings, weekend brunch, or family gatherings. The batter comes together with basic pantry ingredients, while fresh or frozen blueberries add natural sweetness and color.

These pancakes are designed to rise well without becoming heavy. A combination of baking powder, buttermilk, and a short resting time gives the batter extra lift. The honey drizzle adds sweetness without overpowering the berries, making the pancakes taste balanced, fresh, and comforting.

Prep Time: 15 minutes
Rest Time: 10 minutes
Cook Time: 20 minutes
Total Time: 45 minutes
Servings: 4

Ingredients

For the Pancakes

2 cups all-purpose flour

2 tablespoons granulated sugar

1 tablespoon baking powder

1/2 teaspoon baking soda

1/2 teaspoon salt

2 large eggs

1 3/4 cups buttermilk

1 teaspoon lemon zest, optional

1/4 cup melted unsalted butter

1 teaspoon vanilla extract

Butter or oil, for the skillet

1 1/2 cups fresh or frozen blueberries

For the Honey Drizzle

1/3 cup honey

1 tablespoon unsalted butter

1 teaspoon fresh lemon juice

Pinch of cinnamon, optional

For Serving

Extra blueberries

Greek yogurt or whipped cream

Chopped nuts, optional

Powdered sugar, optional

Why You’ll Love This Recipe

Blueberry Pancakes are easy to make but still feel like a special breakfast. The batter is simple, the cooking method is straightforward, and you do not need any unusual equipment.

The blueberries burst slightly as the pancakes cook, adding pockets of sweet fruit throughout. The warm honey drizzle gives them a glossy finish and a gentle sweetness that works especially well with the berries.

Another reason to love Blueberry Pancakes is how flexible they are. You can use fresh or frozen fruit, adjust the sweetness, add lemon zest, or serve them with yogurt, nuts, or extra fruit.

How to Make Fluffy Blueberry Pancakes

Step 1: Mix the Dry Ingredients

In a large bowl, whisk together the flour, sugar, baking powder, baking soda, and salt.

Mixing the dry ingredients first helps distribute the leavening evenly, which is important for light Blueberry Pancakes.

Make sure there are no large lumps before adding the wet ingredients.

Step 2: Mix the Wet Ingredients

In a separate bowl, whisk the eggs, buttermilk, melted butter, vanilla, and lemon zest if using.

The buttermilk adds tenderness and helps activate the baking soda.

For the best Blueberry Pancakes, let the melted butter cool slightly before adding it so it does not scramble the eggs.

Step 3: Combine the Batter

Pour the wet mixture into the dry ingredients.

Stir gently with a spatula or wooden spoon until just combined.

A few small lumps are fine. Overmixing develops too much gluten and can make the pancakes dense.

Let the batter rest for 10 minutes. This short pause helps Blueberry Pancakes cook up thicker and fluffier.

Step 4: Fold in the Blueberries

Gently fold most of the blueberries into the batter, reserving a few for serving.

If using frozen berries, do not thaw them first. Add them directly to the batter to reduce streaking.

Fold only a few times so the berries stay intact.

Step 5: Heat the Skillet

Place a large nonstick skillet or griddle over medium heat.

Lightly grease the surface with butter or oil.

The pan should be hot enough to cook the pancakes evenly but not so hot that the outside browns before the center is done.

Step 6: Cook the Pancakes

Pour about 1/4 cup of batter onto the skillet for each pancake.

Cook until bubbles appear on the surface and the edges look slightly set, usually 2 to 3 minutes.

Flip carefully and cook for another 1 to 2 minutes.

Blueberry Pancakes should be golden on both sides and cooked through in the center.

Transfer finished pancakes to a warm plate while you cook the remaining batter.

Step 7: Make the Honey Drizzle

Add the honey and butter to a small saucepan over low heat.

Warm gently until the butter melts.

Stir in lemon juice and cinnamon if using.

Do not boil the honey. A gentle warming keeps the flavor smooth and gives the sauce a pourable texture.

Step 8: Serve

Stack the warm pancakes on plates.

Drizzle generously with the warm honey mixture.

Top Blueberry Pancakes with extra berries, yogurt, nuts, or a light dusting of powdered sugar if desired.

Serve immediately for the best texture.

Serving Suggestions

Blueberry Pancakes are delicious on their own, but a few simple sides can turn them into a complete breakfast.

Serve them with scrambled eggs, Greek yogurt, turkey sausage, or fresh fruit for a balanced meal.

For brunch, add a fruit salad, coffee, tea, or a smoothie.

You can also serve Blueberry Pancakes with almond butter, peanut butter, or a spoonful of ricotta for extra richness.

Recipe Tips

Do not overmix the batter. Stir only until the flour disappears.

Let the batter rest before cooking for better lift.

Use medium heat so the pancakes cook evenly.

Fresh blueberries give the cleanest appearance, but frozen berries work well too.

If using frozen fruit, add it straight from the freezer.

Keep cooked Blueberry Pancakes warm in a low oven while finishing the rest of the batch.

Grease the skillet lightly between batches if needed.

Use a measuring cup or scoop for evenly sized pancakes.

Easy Variations

For lemon flavor, add extra lemon zest to the batter and a little more lemon juice to the honey drizzle.

For extra protein, replace a small portion of the flour with protein powder and serve with Greek yogurt.

You can make Blueberry Pancakes with whole wheat flour by replacing up to half of the all-purpose flour.

For added texture, stir in chopped walnuts, pecans, or sliced almonds.

A chocolate version can include a small handful of mini chocolate chips.

For a mixed-berry variation, replace some of the blueberries with raspberries or chopped strawberries.

For another delicious pancake idea, try our Sugar-Free Chocolate Chip Pancakes.

Make-Ahead Instructions

The dry ingredients can be mixed the night before and stored in a covered bowl.

The wet ingredients can also be measured separately and refrigerated.

For the best texture, combine the wet and dry mixtures shortly before cooking.

Cooked Blueberry Pancakes can also be prepared ahead and reheated for quick breakfasts during the week.

Storage and Reheating

Store leftover Blueberry Pancakes in an airtight container in the refrigerator for up to 3 days.

Place parchment paper between layers if you want to prevent sticking.

Reheat them in a toaster, skillet, or microwave.

For a slightly crisp edge, the toaster or skillet works best.

The pancakes can also be frozen for up to 2 months. Freeze them in a single layer first, then transfer to a freezer-safe bag.

Nutrition Information

Approximate nutrition per serving:

Calories: 430
Protein: 10 g
Carbohydrates: 67 g
Fat: 14 g
Saturated Fat: 7 g
Fiber: 4 g
Sugar: 27 g
Sodium: 560 mg

Nutrition values are estimates and may vary depending on the buttermilk, butter, honey, and serving size.

Frequently Asked Questions

Can I use frozen blueberries?

Yes. Frozen blueberries work very well. Add them directly to the batter without thawing.

Why are my pancakes flat?

Flat Blueberry Pancakes are usually caused by old baking powder, overmixed batter, or a pan that is not hot enough.

Can I use regular milk instead of buttermilk?

Yes. You can use regular milk, but buttermilk gives a softer texture. To make a quick substitute, add 1 tablespoon of lemon juice or vinegar to 1 3/4 cups milk and let it sit for 5 minutes.

Can I make the batter ahead?

It is better to cook the batter soon after mixing because the leavening starts working right away.

How do I stop the blueberries from sinking?

Toss the berries lightly with a teaspoon of flour before folding them into the batter.

Can I reduce the sugar?

Yes. The batter contains only a small amount of sugar, and the honey drizzle provides most of the sweetness.

Can I make these dairy-free?

Yes. Use plant-based milk mixed with a little lemon juice and replace the butter with a neutral oil or dairy-free butter.

Final Thoughts

Fluffy Blueberry Pancakes with Honey Drizzle are an easy breakfast that combines soft, tender pancakes with juicy fruit and a warm, lightly sweet topping.

Blueberry Pancakes work well for everyday mornings, weekend brunch, holidays, or meal prep. They use simple ingredients, can be customized in several ways, and pair easily with yogurt, eggs, fruit, or coffee.

Whether you serve Blueberry Pancakes with a generous honey drizzle or keep the toppings simple, the fluffy texture and bright berry flavor make this a dependable breakfast recipe worth making again.

For a savory side dish to serve later in the day, you may also like our Creamy Cajun Corn with Parmesan.

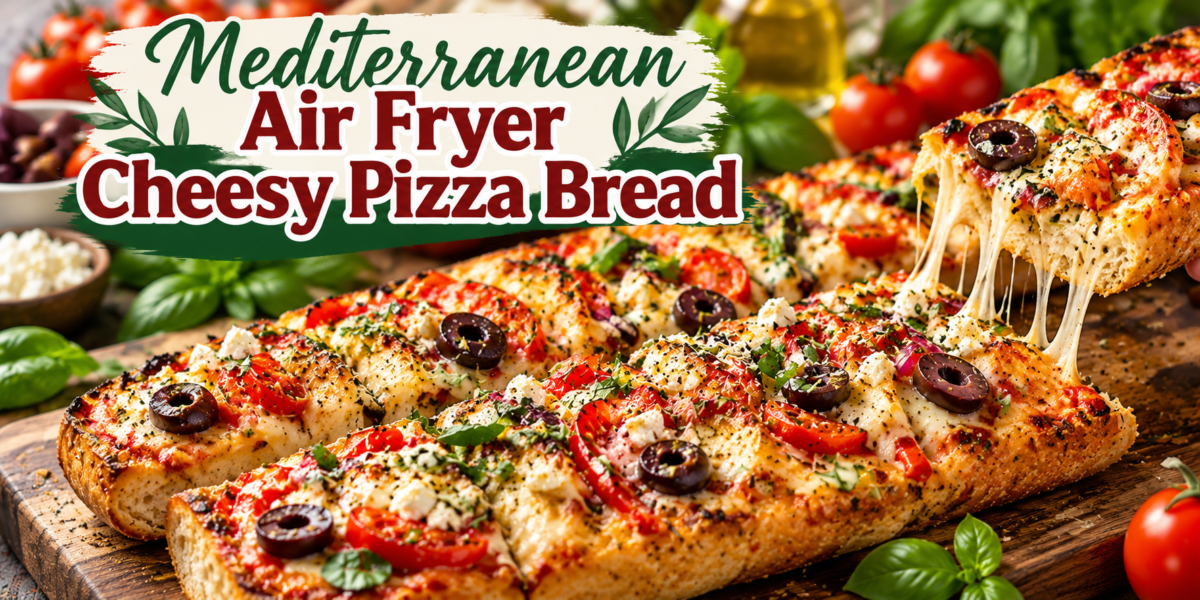
Mediterranean Air Fryer Cheesy Pizza Bread

Mediterranean Cheesy Pizza Bread with mozzarella, feta, olives, tomatoes, herbs, and crispy golden bread

Mediterranean Air Fryer Cheesy Pizza Bread

Cheesy Pizza Bread is a quick, crispy, and satisfying recipe made with crusty bread, tomato sauce, mozzarella, feta, olives, herbs, and a touch of olive oil. If you need an easy snack, lunch, appetizer, or fast family meal, Cheesy Pizza Bread is a simple option that uses everyday ingredients and requires very little prep.

The combination of melted cheese, tangy tomato sauce, briny olives, and herbs gives Cheesy Pizza Bread plenty of flavor without needing a full pizza dough. You can make it with ciabatta, baguette, naan, pita, or another sturdy bread.

Prep Time: 10 minutes
Cook Time: 6 to 8 minutes
Total Time: 18 minutes
Servings: 4

Ingredients

For the Bread

1 medium ciabatta loaf or 1 small baguette, halved lengthwise

1 tablespoon extra virgin olive oil

1/2 teaspoon garlic powder

1/2 teaspoon dried oregano

For the Pizza Topping

1/2 cup pizza sauce or marinara sauce

1/4 cup chopped roasted red peppers

1 1/2 cups shredded mozzarella cheese

1/3 cup crumbled feta cheese

1/4 cup sliced Kalamata olives

1/2 cup halved cherry tomatoes

1 tablespoon chopped fresh basil

1/4 cup thinly sliced red onion

1 teaspoon dried oregano

1/4 teaspoon red pepper flakes, optional

1 tablespoon grated Parmesan cheese

For Finishing

Fresh basil

Fresh parsley

Extra feta

Extra virgin olive oil

Cracked black pepper

Why You’ll Love This Recipe

Cheesy Pizza Bread is fast enough for a busy afternoon but flavorful enough to serve as a casual appetizer when guests arrive. The bread becomes crisp around the edges while staying slightly tender in the center.

Another reason to love this recipe is that it is easy to customize. You can keep the topping simple with tomato sauce and mozzarella or add vegetables, olives, feta, herbs, or cooked chicken for a fuller meal.

Because the air fryer heats quickly, you do not need to preheat a large oven. That makes this recipe especially useful when you want a hot snack without making the kitchen too warm.

How to Make Mediterranean Air Fryer Cheesy Pizza Bread

Step 1: Prepare the Bread

Slice the ciabatta loaf or baguette lengthwise so you have two broad pieces.

If the bread is very thick, gently press the soft center down with your fingers to create a flatter surface for the toppings.

Brush the cut sides with olive oil and sprinkle lightly with garlic powder and oregano.

This first layer gives Cheesy Pizza Bread extra flavor and helps the surface turn crisp in the air fryer.

Step 2: Pre-Crisp the Bread

Preheat the air fryer to 375°F or 190°C for 2 to 3 minutes if your model benefits from preheating.

Place the bread cut-side up in the basket.

Air fry for 2 minutes.

This short first cook helps prevent the sauce from soaking too deeply into the bread and gives Cheesy Pizza Bread a better texture.

Step 3: Add the Sauce

Remove the bread carefully from the air fryer.

Spread a thin, even layer of pizza sauce or marinara over each piece.

Avoid using too much sauce because excess moisture can make the center soft.

Leave a small border around the edges to keep the bread easy to handle.

Step 4: Add the Cheese and Toppings

Sprinkle the mozzarella evenly over the sauce.

Add feta, olives, roasted red peppers, red onion, and cherry tomatoes.

Finish with dried oregano, red pepper flakes, and Parmesan.

Try not to overload the bread. A balanced amount of topping helps Cheesy Pizza Bread cook evenly and keeps the cheese from sliding off.

Step 5: Air Fry

Return the topped bread to the air fryer.

Cook at 375°F for 4 to 6 minutes, checking after 4 minutes.

The exact time will depend on the thickness of the bread and the strength of your air fryer.

Cheesy Pizza Bread is ready when the mozzarella is fully melted, the edges are crisp, and the vegetables are lightly softened.

Step 6: Finish with Fresh Herbs

Carefully remove the bread and place it on a cutting board.

Top with fresh basil, parsley, extra feta, cracked black pepper, and a very light drizzle of olive oil.

Let it rest for 1 to 2 minutes before slicing.

A short rest helps the cheese settle and makes Cheesy Pizza Bread easier to slice.

Step 7: Slice and Serve

Cut the bread into strips, squares, or individual portions.

Serve immediately while the cheese is hot and stretchy.

Cheesy Pizza Bread can be enjoyed on its own or paired with salad, soup, or a dipping sauce.

Serving Suggestions

Cheesy Pizza Bread is excellent with a crisp Greek salad, cucumber tomato salad, or simple mixed greens dressed with lemon and olive oil.

For a more filling meal, serve it with tomato soup, lentil soup, grilled chicken, or roasted vegetables.

You can also place Cheesy Pizza Bread on an appetizer board with hummus, olives, fresh vegetables, and a yogurt-based dip.

For parties, cut the bread into small squares for easy serving.

For another easy air fryer meal, try our Air Fryer Honey Mustard Chicken Tenderloin.

Recipe Tips

Use sturdy bread that can hold sauce and cheese without collapsing.

Do not add too much sauce, especially if your bread is soft.

Pre-crisping the bread helps create a better base for the toppings.

Shred mozzarella from a block for smoother melting.

Drain olives, roasted peppers, and tomatoes well before adding them.

Keep the toppings in a fairly thin layer so the cheese melts evenly.

Check the bread early because air fryers vary in strength.

If the cheese is browning faster than the bread is crisping, reduce the temperature slightly.

Easy Variations

For a spicy version, add sliced jalapeños, more red pepper flakes, or a drizzle of chili oil.

For extra protein, top Cheesy Pizza Bread with cooked chicken, turkey pepperoni, tuna, or chickpeas.

A vegetable-packed version can include mushrooms, spinach, zucchini, or artichoke hearts.

For stronger Mediterranean flavor, add more feta, Kalamata olives, sun-dried tomatoes, and fresh oregano.

You can also make a white version by replacing tomato sauce with a thin layer of ricotta mixed with garlic and herbs.

For a pesto variation, spread basil pesto over the bread and top it with mozzarella, tomatoes, and Parmesan.

Make-Ahead Instructions

You can prepare most of the components ahead of time.

Slice the bread, chop the vegetables, shred the cheese, and portion the sauce up to 1 day in advance.

Store the ingredients separately in the refrigerator.

For the best texture, assemble the bread just before air frying so it does not absorb moisture from the sauce.

Storage and Reheating

Store leftover Cheesy Pizza Bread in an airtight container in the refrigerator for up to 2 days.

For the best texture, reheat it in the air fryer at 350°F for 2 to 4 minutes.

The oven also works well.

Microwaving is convenient, but it can soften the bread.

Freezing is not ideal once the bread is fully topped and cooked because the vegetables may release moisture after thawing.

Nutrition Information

Approximate nutrition per serving:

Calories: 390
Protein: 18 g
Carbohydrates: 39 g
Fat: 19 g
Saturated Fat: 8 g
Fiber: 4 g
Sugar: 6 g
Sodium: 820 mg

Nutrition values are estimates and will vary depending on the bread, cheese, sauce, and toppings used.

Frequently Asked Questions

Can I use naan instead of ciabatta?

Yes. Naan works very well and creates a softer base. Reduce the cooking time slightly because naan is thinner.

Can I use pita bread?

Yes. Pita makes a thinner and crispier version. Keep an eye on it because it cooks quickly.

Can I make this without feta?

Absolutely. Use extra mozzarella, Parmesan, provolone, or another cheese you enjoy.

Can I make it vegetarian?

Yes. The recipe is vegetarian as written, provided your cheeses meet your dietary preference.

Can I use fresh mozzarella?

Yes, but drain and pat it dry first. Too much moisture can make Cheesy Pizza Bread soggy.

What sauce works best?

Pizza sauce, marinara, or a thick tomato basil sauce all work well. Avoid very watery sauces.

Can I make this in the oven?

Yes. Bake at 425°F or 220°C for about 8 to 10 minutes, or until the cheese is melted and the edges are crisp.

Final Thoughts

Mediterranean Air Fryer Cheesy Pizza Bread is an easy way to make a hot, cheesy snack or light meal without preparing pizza dough. Crisp bread, tomato sauce, mozzarella, feta, olives, vegetables, and herbs create plenty of flavor in a short amount of time.

Cheesy Pizza Bread is especially useful when you need something fast that still feels homemade. It works for lunch, after-school snacks, casual dinners, game-day food, or party appetizers.

With a few simple ingredients and a short air-fryer cooking time, Cheesy Pizza Bread gives you a crispy, cheesy, Mediterranean-inspired recipe that is easy to customize and even easier to enjoy.

For a flaky party appetizer, you may also like our Cranberry Walnut Cream Cheese Puff Pastry Pinwheels.

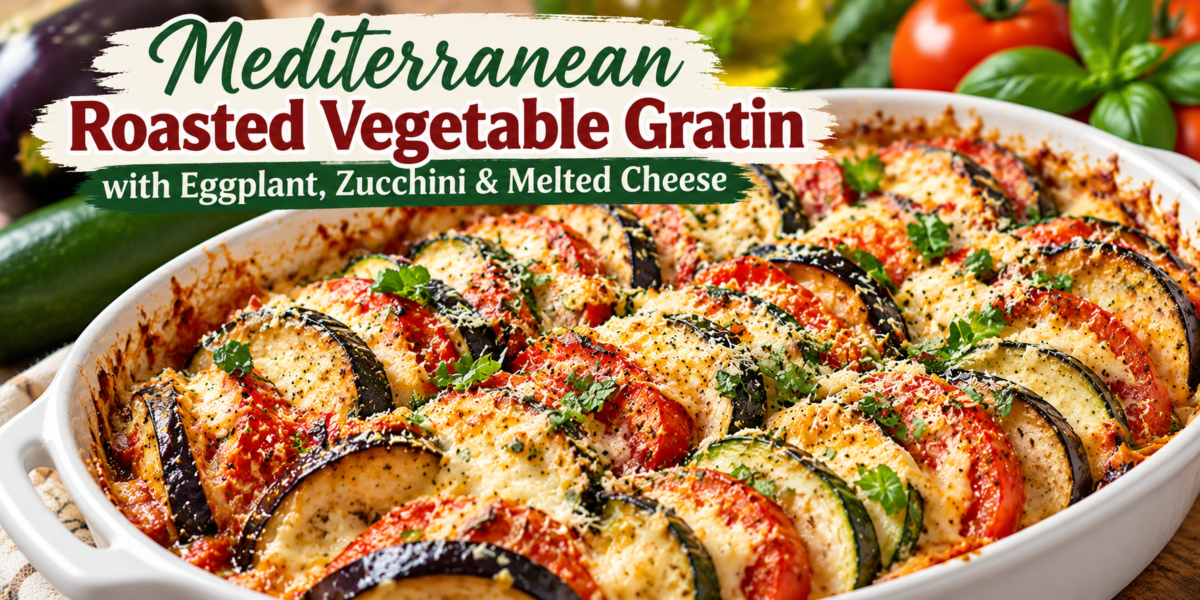
Mediterranean Roasted Vegetable Gratin with Eggplant, Zucchini & Melted Cheese

Mediterranean Roasted Vegetable Gratin with eggplant, zucchini, tomatoes, mozzarella, Parmesan, and feta

Mediterranean Roasted Vegetable Gratin with Eggplant, Zucchini & Melted Cheese

Roasted Vegetable Gratin is a colorful Mediterranean-inspired side dish made with tender eggplant, zucchini, tomatoes, herbs, olive oil, and melted cheese. The vegetables roast until soft and lightly caramelized, while the cheesy topping adds richness and a golden finish. This is a simple way to turn everyday vegetables into a warm, satisfying dish that works for family dinners, holidays, or meal prep.

The combination of eggplant, zucchini, tomatoes, garlic, and herbs gives Roasted Vegetable Gratin a fresh and savory flavor. It can be served with chicken, fish, beef, or a vegetarian main dish. You can also enjoy it with crusty bread and a simple salad for a lighter Mediterranean-style meal.

Prep Time: 20 minutes
Cook Time: 45 minutes
Total Time: 1 hour 5 minutes
Servings: 6

Ingredients

For the Vegetables

1 large eggplant, sliced into 1/4-inch rounds

2 medium zucchini, sliced into 1/4-inch rounds

3 medium tomatoes, sliced

1 small red onion, thinly sliced

3 cloves garlic, minced

3 tablespoons extra virgin olive oil

1 teaspoon dried oregano

1/2 teaspoon dried thyme

1 teaspoon dried basil

1/2 teaspoon salt

1/4 teaspoon black pepper

1/2 teaspoon paprika

For the Cheese Topping

1 cup shredded mozzarella cheese

1/2 cup grated Parmesan cheese

1/3 cup crumbled feta cheese

2 tablespoons breadcrumbs, optional

1 tablespoon olive oil

For Garnish

Fresh parsley

Fresh basil

Extra Parmesan

Cracked black pepper

Why You’ll Love This Recipe

Roasted Vegetable Gratin is a great way to serve more vegetables without making the meal feel plain or repetitive. Roasting concentrates the natural sweetness of the vegetables and gives the edges a lightly caramelized texture.

The cheese topping adds comfort and richness without covering up the flavor of the vegetables. Mozzarella melts smoothly, Parmesan adds savory depth, and feta brings a salty Mediterranean touch.

Another reason to love Roasted Vegetable Gratin is its flexibility. You can add bell peppers, mushrooms, potatoes, or squash, depending on what you have available.

How to Make Mediterranean Roasted Vegetable Gratin

Step 1: Prepare the Eggplant

Slice the eggplant into even rounds and place them on a large tray.

Sprinkle lightly with salt and let them sit for 10 to 15 minutes.

This step helps draw out some excess moisture.

Pat the slices dry with paper towels before assembling the dish.

Removing extra moisture helps Roasted Vegetable Gratin stay tender without becoming watery.

Step 2: Prepare the Remaining Vegetables

Slice the zucchini and tomatoes into rounds of similar thickness.

Thinly slice the red onion and mince the garlic.

Place the zucchini, tomatoes, and onion in a large bowl.

Drizzle with olive oil and add oregano, basil, thyme, paprika, black pepper, and a small amount of salt.

Toss gently until evenly coated.

Step 3: Arrange the Vegetables

Preheat the oven to 400°F or 200°C.

Lightly grease a medium baking dish with olive oil.

Arrange alternating slices of eggplant, zucchini, and tomato in rows or a spiral pattern.

Tuck slices of red onion between some of the vegetables.

Sprinkle the garlic evenly across the top.

A neat arrangement makes Roasted Vegetable Gratin look especially attractive when it comes out of the oven.

Step 4: First Bake

Cover the baking dish loosely with foil.

Bake for about 25 minutes.

The foil helps the vegetables soften without drying out.

After 25 minutes, remove the foil and check the vegetables. They should be beginning to soften but should not be mushy.

Step 5: Add the Cheese

Sprinkle mozzarella, Parmesan, and feta evenly over the vegetables.

If using breadcrumbs, combine them with 1 tablespoon olive oil and scatter them over the cheese.

This creates a lightly crisp topping and adds extra texture.

Return Roasted Vegetable Gratin to the oven uncovered.

Step 6: Finish Baking

Bake for another 15 to 20 minutes.

The vegetables should be tender, the cheese should be melted, and the top should be golden in spots.

If you want a deeper browned finish, broil for 1 to 2 minutes at the end.

Watch carefully because cheese can brown quickly under the broiler.

Step 7: Rest and Garnish

Remove the baking dish from the oven and let it rest for 5 to 10 minutes.

Resting allows some of the juices to settle and makes the gratin easier to serve.

Finish Roasted Vegetable Gratin with fresh parsley, basil, Parmesan, and cracked black pepper.

Serving Suggestions

Roasted Vegetable Gratin pairs beautifully with grilled chicken, baked fish, salmon, steak, or roasted turkey.

For a vegetarian meal, serve it with quinoa, couscous, lentils, chickpeas, or a fresh bean salad.

Crusty bread is also an excellent choice because it can soak up the flavorful juices from the vegetables.

For a lighter meal, pair Roasted Vegetable Gratin with a Greek salad or simple cucumber and tomato salad.

For another flavorful Mediterranean vegetable side, try our Mediterranean Roasted Cauliflower Steaks.

Recipe Tips

Slice the vegetables evenly so they cook at the same rate.

Do not skip the resting step after salting the eggplant if you want to reduce excess moisture.

Choose firm zucchini and ripe but not overly soft tomatoes.

Use freshly grated Parmesan for better melting and flavor.

Do not overcrowd the baking dish too tightly, or the vegetables may steam instead of roast.

Roasted Vegetable Gratin tastes best when the vegetables are tender but still hold their shape.

If the top begins browning too quickly, cover the dish loosely with foil.

Fresh herbs added after baking give the dish a brighter finish.

Easy Variations

Add sliced bell peppers for more color and sweetness.

For a heartier version, layer in thinly sliced potatoes. Parboil them first so they cook at the same rate as the other vegetables.

Roasted Vegetable Gratin can also be made with yellow squash, mushrooms, or artichoke hearts.

For more protein, add cooked white beans or chickpeas between the vegetable layers.

If you prefer a stronger cheese flavor, replace some of the mozzarella with provolone or Gruyère.

For a spicier version, add red pepper flakes or a pinch of cayenne.

Make-Ahead Instructions

Roasted Vegetable Gratin can be assembled several hours before baking.

Prepare and arrange the vegetables in the baking dish, cover tightly, and refrigerate.

For best results, wait to add the cheese topping until just before baking.

Let the dish sit at room temperature for about 15 minutes before putting it in the oven.

You can also bake the gratin ahead and reheat it shortly before serving.

Storage and Reheating

Store leftover Roasted Vegetable Gratin in an airtight container in the refrigerator for up to 3 days.

Reheat individual portions in the microwave, or warm the whole dish in a 350°F oven until heated through.

For a crispier cheese topping, the oven is the better choice.

If the vegetables release extra liquid during storage, drain off a small amount before reheating.

Freezing is not recommended because zucchini and tomatoes can become very soft after thawing.

Nutrition Information

Approximate nutrition per serving:

Calories: 260
Protein: 12 g
Carbohydrates: 18 g
Fat: 17 g
Saturated Fat: 7 g
Fiber: 5 g
Sugar: 8 g
Sodium: 520 mg

Nutrition values are estimates and may vary depending on the vegetables, cheese, and serving size.

Frequently Asked Questions

Can I use different vegetables?

Yes. Bell peppers, yellow squash, mushrooms, potatoes, and artichokes all work well in Roasted Vegetable Gratin.

Do I have to salt the eggplant first?

It is not absolutely necessary, but salting helps remove some moisture and can improve the final texture.

Can I make it without breadcrumbs?

Yes. The breadcrumbs are optional. The cheese will still create a delicious golden topping.

Can I make this dairy-free?

Yes. Use your favorite dairy-free cheese alternatives or leave the cheese off and top with seasoned breadcrumbs.

Can I use canned tomatoes?

Fresh tomatoes work best because they hold their shape better. Canned tomatoes contain more liquid and may make the dish watery.

Is this a main dish or a side?

Roasted Vegetable Gratin is usually served as a side, but it can become a light main dish when paired with beans, lentils, quinoa, or bread.

How do I stop the gratin from becoming watery?

Salt and dry the eggplant, avoid using overly ripe tomatoes, and do not overcrowd the baking dish. Letting the finished dish rest also helps.

Final Thoughts

Mediterranean Roasted Vegetable Gratin with Eggplant, Zucchini & Melted Cheese is an easy way to turn simple vegetables into a comforting and attractive side dish. The roasted vegetables become tender and flavorful, while mozzarella, Parmesan, and feta create a rich golden topping.

Roasted Vegetable Gratin is especially useful when you need a versatile side that pairs with chicken, fish, meat, or vegetarian mains. It can be adapted with different vegetables and cheeses, making it easy to use ingredients you already have.

Whether you serve Roasted Vegetable Gratin for a weeknight dinner, holiday meal, or casual gathering, its colorful layers, fresh herbs, and melted cheese make it a dish that is both simple and satisfying.

If you enjoy comforting baked meals, you may also like our Chicken & Cabbage Pie.