Mediterranean Lemon Garlic Chicken Orzo Skillet

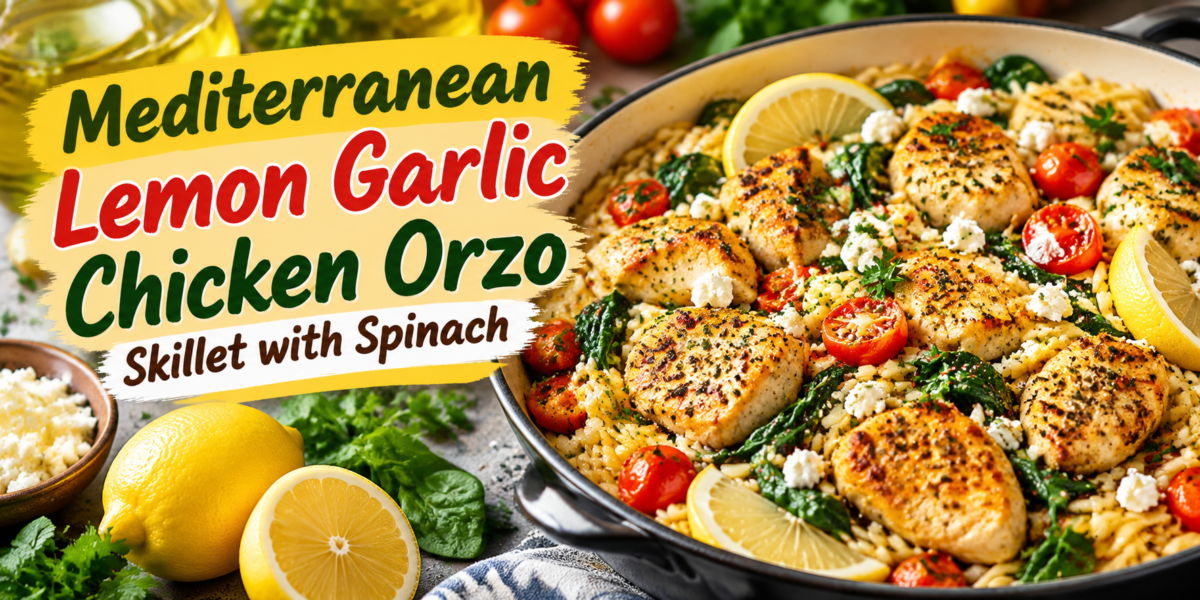
Mediterranean Lemon Garlic Chicken Orzo Skillet with spinach, chicken, lemon, herbs, and feta cheese

Mediterranean Lemon Garlic Chicken Orzo Skillet

Mediterranean Lemon Garlic Chicken Orzo is a flavorful one-pan meal that combines tender chicken, creamy orzo pasta, fresh spinach, garlic, lemon, herbs, and Mediterranean-inspired ingredients. This comforting skillet recipe delivers a perfect balance of protein, vegetables, and satisfying flavors while keeping preparation simple and convenient.

The combination of juicy chicken and fragrant garlic creates a delicious base, while lemon adds a bright and refreshing taste. Orzo pasta absorbs all the wonderful flavors from the broth, herbs, and seasonings, creating a rich texture similar to a creamy rice dish.

This Mediterranean Lemon Garlic Chicken Orzo recipe is perfect for busy weeknight dinners because everything cooks together in one skillet. The easy preparation means less cleanup while still creating a restaurant-quality meal at home.

Fresh spinach adds color, nutrients, and a mild earthy flavor, while feta cheese provides a creamy and slightly tangy finish. The Mediterranean flavors from olive oil, oregano, parsley, and lemon make this dish light yet satisfying.

Whether you are preparing dinner for your family, meal prepping for the week, or looking for a comforting homemade meal, this skillet recipe is an excellent choice. It brings together simple ingredients to create a dish full of freshness, flavor, and wholesome goodness.

This Mediterranean Lemon Garlic Chicken Orzo recipe is a simple way to enjoy a flavorful and wholesome homemade meal with fresh ingredients.

Preparation Time: 15 minutes

Cooking Time: 35 minutes

Total Time: 50 minutes

Servings: 6 people

Difficulty Level: Easy

Ingredients

For Chicken and Orzo Skillet

  • 2 tablespoons extra virgin olive oil
  • 1 and 1/2 pounds boneless chicken breasts or thighs, cut into bite-sized pieces
  • 1 teaspoon salt
  • 1/2 teaspoon black pepper
  • 1 teaspoon paprika
  • 1 teaspoon dried oregano
  • 4 cloves garlic, minced
  • 1 medium onion, finely chopped
  • 2 cups orzo pasta
  • 3 cups chicken broth
  • 1 cup cherry tomatoes, halved
  • 2 cups fresh spinach
  • 1 teaspoon dried basil
  • 1/2 teaspoon red pepper flakes (optional)
  • 1/4 cup fresh parsley, chopped
  • 2 tablespoons fresh lemon juice
  • 1 teaspoon lemon zest
  • 1/2 cup crumbled feta cheese

Optional Ingredients

  • Sliced black olives
  • Roasted red peppers
  • Extra Parmesan cheese
  • Fresh dill or mint
  • Chickpeas for additional protein

Step-by-Step Instructions

Preparing the Chicken

Start by preparing the chicken pieces. Pat the chicken dry with a paper towel, then season with salt, black pepper, paprika, and dried oregano. Proper seasoning helps the chicken develop a beautiful golden crust and enhances the overall flavor of the dish.

Heat olive oil in a large skillet over medium-high heat. Add the seasoned chicken pieces and cook for about 5–7 minutes until they become golden brown and fully cooked. Remove the chicken from the skillet and set it aside.

Building the Mediterranean Flavors

In the same skillet, add chopped onion and cook for 2–3 minutes until softened. Add minced garlic and cook briefly until fragrant. The combination of garlic and onion creates the flavorful foundation of Mediterranean Lemon Garlic Chicken Orzo.

Add cherry tomatoes and cook for another minute until they begin to soften. Their natural sweetness adds freshness and balances the savory flavors.

Cooking the Orzo

Add the orzo pasta to the skillet and stir it with the vegetables. Allowing the pasta to lightly toast for a minute helps improve its flavor.

Pour in chicken broth and add dried basil, red pepper flakes, and additional seasoning if needed. Stir well and bring the mixture to a gentle simmer.

Reduce the heat, cover the skillet, and cook for approximately 10–12 minutes. Stir occasionally to prevent the orzo from sticking. The pasta should become tender while absorbing the flavorful broth.

Combining Everything Together

Return the cooked chicken to the skillet and mix it with the orzo. Add fresh spinach and stir until it wilts completely.

Finish the dish with fresh lemon juice, lemon zest, and chopped parsley. These ingredients brighten the flavors and create the signature taste of Mediterranean Lemon Garlic Chicken Orzo.

Sprinkle crumbled feta cheese over the top and allow it to soften slightly before serving.

Garnish with extra herbs, lemon slices, or additional feta cheese for a beautiful presentation.

Tips for Perfect Results

For the best Mediterranean Lemon Garlic Chicken Orzo, use fresh garlic and freshly squeezed lemon juice because they provide stronger and brighter flavors.

Avoid overcooking the chicken because it can become dry. Cooking the chicken until golden and then returning it to the skillet later helps maintain tenderness.

Choose a good quality chicken broth because the orzo absorbs the liquid while cooking, making the final dish much more flavorful.

Stir the orzo occasionally during cooking to prevent it from sticking to the bottom of the skillet.

Fresh herbs added at the end provide a more vibrant taste compared with cooking them for a long time.

If the orzo becomes too thick, add a small amount of warm broth or water to achieve your preferred consistency.

For the best Mediterranean Lemon Garlic Chicken Orzo, always balance the lemon, garlic, and herbs according to your taste preferences.

Variations

Mediterranean Lemon Garlic Chicken Orzo can easily be customized according to your taste and dietary preferences.

For a creamy version, add a few tablespoons of Greek yogurt or cream cheese at the end of cooking. This creates a richer texture while maintaining the Mediterranean flavor.

For a seafood variation, replace chicken with shrimp. Shrimp cooks quickly and pairs beautifully with lemon, garlic, and herbs.

You can create a vegetarian version by replacing chicken with chickpeas, mushrooms, or extra vegetables such as zucchini and bell peppers.

For extra Mediterranean flavor, add sun-dried tomatoes, olives, artichoke hearts, or roasted peppers.

A spicy version can be prepared by increasing red pepper flakes or adding fresh chili peppers.

The versatility of Mediterranean Lemon Garlic Chicken Orzo allows you to create different versions by adding vegetables, seafood, or extra herbs.

Serving Suggestions

Mediterranean Lemon Garlic Chicken Orzo is a complete meal on its own, but it can also be served with additional sides.

Serve it with a fresh Greek salad made with cucumbers, tomatoes, olives, and feta cheese for a complete Mediterranean-inspired dinner.

Warm pita bread or garlic bread makes a great addition because it pairs well with the flavorful sauce.

For special occasions, serve this skillet dish with roasted vegetables or a refreshing lemon herb salad.

Leftovers make an excellent lunch option. Simply store portions in airtight containers and reheat gently before serving.

Serve Mediterranean Lemon Garlic Chicken Orzo with a fresh salad or warm bread for a complete Mediterranean-inspired dinner.

Health Benefits

Mediterranean Lemon Garlic Chicken Orzo provides a balanced combination of protein, carbohydrates, vegetables, and healthy fats.

Chicken is an excellent source of lean protein that supports muscle health and helps keep you satisfied.

Spinach provides important vitamins, minerals, antioxidants, and fiber. Including leafy greens in meals is a simple way to increase nutrient intake.

Garlic contains natural plant compounds and adds strong flavor without requiring excessive salt.

Olive oil provides healthy fats commonly used in Mediterranean-style cooking.

Lemon adds vitamin C and freshness, while herbs provide flavor and beneficial plant compounds.

The balanced ingredients in Mediterranean Lemon Garlic Chicken Orzo make it a nourishing option for families who enjoy flavorful homemade meals.

Including Mediterranean Lemon Garlic Chicken Orzo in your weekly meal plan can help you enjoy a balanced combination of protein, vegetables, and whole grains.

Questions and Answers

Can I use chicken thighs instead of chicken breast?

Yes, chicken thighs work very well because they remain juicy and add extra flavor to the skillet.

Can I prepare this recipe ahead of time?

Yes, this recipe is suitable for meal preparation. Store it in the refrigerator and reheat gently before serving.

How long does it stay fresh?

It can stay fresh for up to four days when stored properly in an airtight container.

Can I freeze this dish?

Yes, you can freeze it, although the texture of the orzo may become slightly softer after thawing.

What can I use instead of feta cheese?

You can use Parmesan cheese, goat cheese, or another cheese according to your preference.

Can I make this recipe gluten-free?

Yes, use gluten-free pasta instead of regular orzo to make it suitable for a gluten-free diet.

Nutrition Information

Approximate nutrition per serving:

Calories: 520

Protein: 38 grams

Carbohydrates: 55 grams

Fiber: 5 grams

Fat: 18 grams

Calcium: 160 mg

The nutritional values may vary depending on ingredients, portion sizes, and substitutions.

Storage and Reheating Instructions

Proper storage helps maintain the taste and texture of Mediterranean Lemon Garlic Chicken Orzo for several days. After cooking, allow the skillet to cool completely before transferring it into airtight containers. Store the leftovers in the refrigerator for up to four days.

When reheating, add a small splash of chicken broth or water to bring back the creamy texture of the orzo. Warm the dish gently on the stovetop or microwave until heated evenly. Avoid overheating because it can make the chicken dry and the pasta too soft.

This recipe is also an excellent choice for meal preparation. Prepare a larger batch and divide it into individual portions for quick lunches or dinners throughout the week. The flavors of garlic, lemon, herbs, and vegetables often become even better after resting.

Leftover Mediterranean Lemon Garlic Chicken Orzo remains flavorful when stored properly and gently reheated.

Why This Recipe Is Perfect for Busy Weeknights

Mediterranean Lemon Garlic Chicken Orzo is ideal for busy families because it combines everything in one skillet. You do not need multiple pans or complicated cooking techniques to create a flavorful homemade dinner.

The recipe provides a balanced meal with protein from chicken, carbohydrates from orzo, and nutrients from spinach and other fresh ingredients. It is filling enough for dinner while still maintaining a fresh Mediterranean style.

Another benefit of this skillet meal is its flexibility. You can easily adjust the vegetables, seasonings, or toppings depending on what you have available. This makes it a practical recipe that can be enjoyed regularly without becoming boring.

The combination of lemon, garlic, herbs, and olive oil creates a comforting aroma that makes this dish appealing for both family meals and special occasions.

Cooking Notes for Best Results

For the best flavor, always use fresh lemon juice and freshly minced garlic. These ingredients create a brighter and more authentic Mediterranean taste.

Allow the chicken pieces to develop a golden color before adding the other ingredients. This step adds extra depth and improves the overall flavor of the skillet.

When cooking the orzo, keep an eye on the liquid level because pasta absorbs broth quickly. Stirring occasionally helps create an even texture and prevents sticking.

Adding spinach near the end of cooking keeps its color vibrant and preserves its fresh taste. Similarly, adding feta cheese after cooking allows it to maintain its creamy texture.

A final drizzle of olive oil and a sprinkle of fresh herbs before serving can enhance the appearance and flavor of Mediterranean Lemon Garlic Chicken Orzo.

Small details like fresh herbs and quality ingredients make Mediterranean Lemon Garlic Chicken Orzo taste even better.

Final Thoughts

Mediterranean Lemon Garlic Chicken Orzo is a delicious example of how simple ingredients can create a flavorful and satisfying meal. The combination of tender chicken, creamy orzo, fresh spinach, garlic, lemon, and herbs creates a dish that feels both comforting and refreshing.

This one-pan recipe is perfect for busy evenings because it offers easy preparation, minimal cleanup, and incredible flavor. The Mediterranean-inspired ingredients make it a wholesome meal that the whole family can enjoy.

Whether served for dinner, prepared for meal prep, or shared with guests, Mediterranean Lemon Garlic Chicken Orzo brings warmth and freshness to the table. With its flexible variations and nourishing ingredients, this skillet recipe is sure to become a favorite homemade meal.

Mediterranean Lemon Garlic Chicken Orzo is a recipe you can prepare again and again because of its simple ingredients and amazing flavor.

Air Fryer Loaded Breakfast Hash

Air Fryer Loaded Breakfast Hash with crispy potatoes, sausage, peppers, melted cheddar, and eggs.

Air Fryer Loaded Breakfast Hash

Air Fryer Loaded Breakfast Hash is an easy way to turn simple breakfast ingredients into a crispy, hearty morning meal. Golden potatoes, savory sausage, peppers, onions, and melted cheese come together in one flavorful dish.

The air fryer gives the potatoes crisp edges while keeping the inside tender. It also cooks the ingredients quickly without requiring a large skillet or a lot of oil.

This loaded breakfast hash works well for busy weekday mornings, lazy weekend breakfasts, and family brunch. You can also change the ingredients based on what you already have in the refrigerator.

Why You’ll Love This Breakfast Hash

This breakfast recipe is filling, flexible, and easy to prepare.

  • Crispy potatoes: The air fryer creates browned edges without deep frying.
  • Hearty breakfast: Potatoes, sausage, and eggs make this a satisfying meal.
  • One appliance: Most of the cooking happens in the air fryer.
  • Easy cleanup: Fewer pans mean less cleanup after breakfast.
  • Customizable: Add your favorite vegetables, cheese, or breakfast meat.
  • Meal-prep friendly: The cooked hash reheats well for quick breakfasts.
  • Family-friendly: Mild ingredients make it easy to serve to both adults and kids.

Ingredients You’ll Need

For the Breakfast Hash

  • 1½ pounds Yukon Gold or russet potatoes, cut into ½-inch cubes
  • 8 ounces breakfast sausage, crumbled
  • ½ medium yellow onion, diced
  • 1 red bell pepper, diced
  • 1 green bell pepper, diced
  • 1 tablespoon olive oil
  • 1 teaspoon garlic powder
  • ½ teaspoon smoked paprika
  • ½ teaspoon onion powder
  • ½ teaspoon salt
  • ¼ teaspoon black pepper
  • ½ cup shredded cheddar cheese
  • 2 tablespoons chopped fresh parsley

For the Eggs

  • 4 large eggs
  • ¼ teaspoon salt
  • ⅛ teaspoon black pepper

You can use mild, spicy, turkey, or chicken breakfast sausage depending on your preference. Yukon Gold potatoes are especially good because they become crisp outside while staying creamy inside.

How to Make Air Fryer Loaded Breakfast Hash

Step 1: Prepare the Potatoes

Wash the potatoes and cut them into small, evenly sized cubes.

Keeping the pieces close to the same size helps them cook at the same rate.

Pat the potatoes dry with a clean kitchen towel or paper towel. Removing excess moisture helps the outside brown and crisp.

Place the potatoes in a large bowl.

Step 2: Season the Potatoes

Add olive oil, garlic powder, smoked paprika, onion powder, salt, and black pepper.

Toss until the potatoes are evenly coated.

Do not add too much oil. A light coating is enough for the air fryer to create crispy edges.

Step 3: Air Fry the Potatoes

Preheat the air fryer to 400°F (200°C) for about 3 minutes.

Place the seasoned potatoes in the basket.

Cook for 10 minutes, then shake the basket well.

Continue cooking for another 5–7 minutes, or until the potatoes begin to turn golden and tender.

Avoid filling the basket too deeply. A crowded basket can trap steam and prevent the potatoes from becoming crisp.

Step 4: Add the Sausage

Add the crumbled breakfast sausage to the partially cooked potatoes.

Shake or stir carefully to distribute the sausage.

Return the basket to the air fryer and cook at 390°F (200°C) for about 5–7 minutes.

The sausage should be fully cooked and browned before moving to the next step.

If your sausage pieces are large, break them into smaller pieces during cooking so they brown evenly.

Step 5: Add the Vegetables

Add the diced onion, red bell pepper, and green bell pepper.

Toss everything together.

Cook for another 4–5 minutes, until the vegetables soften slightly while keeping some texture.

Adding the vegetables later prevents them from becoming overly soft during the longer potato cooking time.

Step 6: Add the Cheese

Sprinkle shredded cheddar cheese over the hot hash.

Return the basket to the air fryer for 1–2 minutes, just until the cheese melts.

Keep an eye on the cheese because it can brown quickly under the air fryer’s strong heat.

Step 7: Cook the Eggs

There are two easy ways to finish the eggs.

For fried eggs, cook them separately in a small skillet and place them on top of the finished hash.

For air fryer eggs, transfer the hash to an air-fryer-safe dish, make four small spaces in the mixture, and carefully crack an egg into each space.

Cook at 350°F (175°C) for about 4–6 minutes, depending on how firm you like the yolks.

Eggs will continue cooking slightly after they are removed, so take them out when they are close to your preferred doneness.

Step 8: Finish and Serve

Sprinkle fresh parsley over the finished breakfast hash.

Add extra black pepper, hot sauce, or sliced green onions if desired.

Serve immediately while the potatoes are crisp and the cheese is melted.

Tips for Crispy Breakfast Hash

Small details can make a big difference when cooking potatoes in an air fryer.

  • Dry the potatoes well: Moisture creates steam and can prevent browning.
  • Cut evenly: Similar-sized cubes cook more consistently.
  • Avoid overcrowding: Leave enough space for hot air to circulate.
  • Shake the basket: Moving the potatoes helps them brown on multiple sides.
  • Use moderate oil: Too much oil can make the hash greasy instead of crisp.
  • Add vegetables later: Peppers and onions cook faster than potatoes.
  • Use freshly shredded cheese: It melts smoothly and creates a better finish.
  • Serve immediately: The potatoes are crispiest right after cooking.

Best Potatoes for Breakfast Hash

Yukon Gold and russet potatoes are both excellent choices.

Yukon Gold potatoes have a naturally creamy center and crisp nicely in the air fryer.

Russet potatoes contain more starch and can develop very crisp edges when cooked properly.

Red potatoes also work well if you prefer a firmer texture.

Whatever variety you choose, cut the potatoes into small cubes and dry them thoroughly before seasoning.

Easy Ways to Customize It

One of the best things about a loaded breakfast hash is how easy it is to change.

Spicy version, add diced jalapeño, hot breakfast sausage, crushed red pepper, or your favorite hot sauce.

Meat-free option, replace the sausage with mushrooms, black beans, or extra vegetables.

Richer breakfast, add shredded Monterey Jack, pepper jack, or mozzarella cheese.

You can also add cooked bacon, diced ham, leftover chicken, or turkey sausage.

For extra freshness, top the finished hash with avocado, tomatoes, cilantro, or green onions.

How to Serve Loaded Breakfast Hash

Serve the hash as a complete breakfast with eggs on top.

You can also serve it with fresh fruit, toast, avocado slices, or a simple green salad for brunch.

A spoonful of salsa adds acidity and freshness that balances the crispy potatoes and savory sausage.

For a classic American breakfast plate, serve the hash with scrambled or fried eggs and a side of fresh fruit.

How to Store Leftovers

Allow the breakfast hash to cool before placing it in an airtight container.

Refrigerate leftovers for up to 3 days.

For the best texture, reheat the hash in the air fryer at 350°F (175°C) for about 3–5 minutes.

You can also reheat it in a skillet over medium heat.

Avoid reheating it for too long because the potatoes can become dry.

If you plan to store leftovers, keep fried eggs separately when possible. This makes it easier to reheat the potato mixture without overcooking the eggs.

Can You Make Breakfast Hash Ahead of Time?

Yes. You can prepare the potatoes, sausage, and vegetables ahead of time and refrigerate them.

For meal prep, divide the cooked hash into individual containers.

When ready to eat, reheat one portion in the air fryer and add a freshly cooked egg on top.

This method keeps the breakfast convenient while giving you better texture than reheating everything together.

Common Mistakes to Avoid

The biggest mistake is overcrowding the air fryer basket.

When too many ingredients are packed together, the hot air cannot circulate properly. The potatoes may become soft instead of crisp.

Another common mistake is cutting the potatoes too large. Large pieces take longer to cook and may remain firm in the center.

Adding vegetables too early can also make them overly soft or browned before the potatoes are ready.

Finally, avoid adding cheese too early. It can stick to the basket or become overly browned before the rest of the hash is finished.

Frequently Asked Questions

Can I use frozen potatoes for breakfast hash?

Yes. Frozen diced potatoes can be used, but check them frequently because cooking time may vary by brand and size.

Can I make this hash without sausage?

Yes. Replace the sausage with bacon, ham, turkey sausage, black beans, mushrooms, or additional vegetables.

How do I make the potatoes extra crispy?

Dry the potatoes thoroughly, use a light oil coating, avoid overcrowding, and shake the basket during cooking.

Can I add eggs directly to the hash?

Yes. Transfer the hash to an air-fryer-safe dish, create small spaces, crack in the eggs, and cook until the eggs reach your preferred doneness.

What cheese is best for breakfast hash?

Cheddar is a classic choice, while pepper jack, Monterey Jack, and mozzarella also melt well.

Can I make this breakfast hash vegetarian?

Yes. Skip the sausage and add mushrooms, black beans, spinach, zucchini, or extra bell peppers.

How long does leftover breakfast hash last?

Store cooked hash in an airtight container in the refrigerator for up to 3 days.

Can I freeze breakfast hash?

Yes, but the potatoes may lose some crispness after thawing; reheat them in the air fryer to restore some texture.

Final Thoughts

This Air Fryer Loaded Breakfast Hash brings crispy potatoes, savory sausage, colorful vegetables, melted cheese, and eggs together in one satisfying meal.

The recipe is simple enough for a weekday breakfast but hearty enough for a weekend brunch. You can also adjust the ingredients to match your family’s favorite flavors.

For the best results, keep the potatoes dry, avoid overcrowding the basket, and add the faster-cooking ingredients later. Serve the finished hash hot with your favorite egg style, salsa, avocado, or hot sauce.

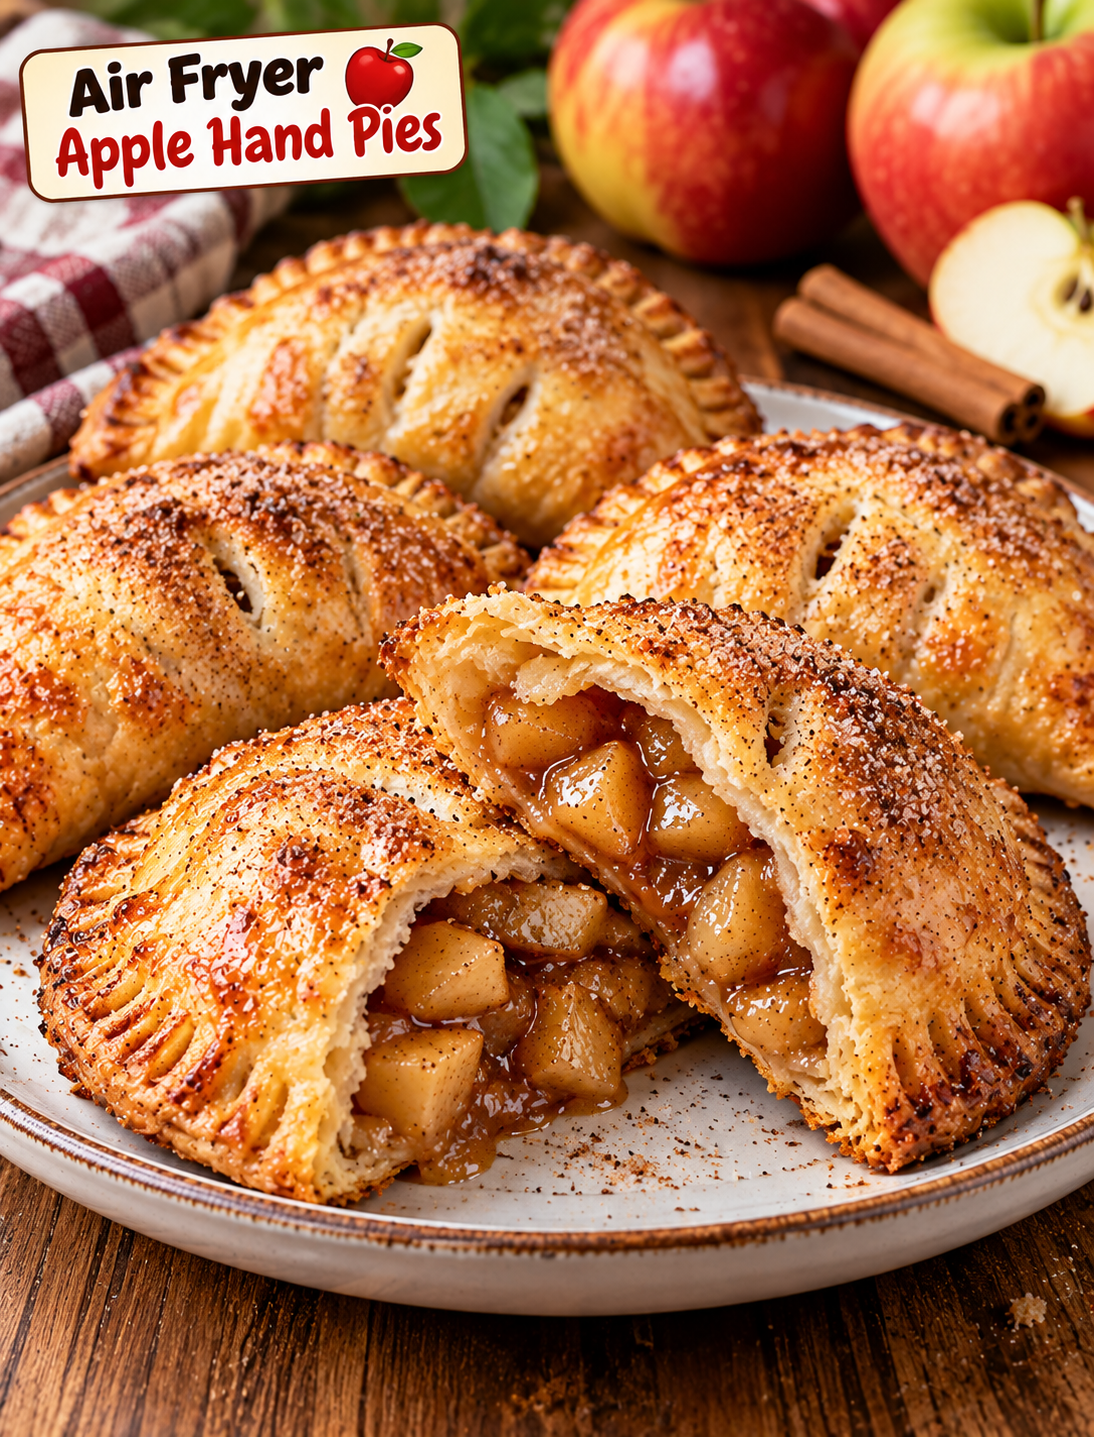
Air Fryer Apple Hand Pies

Golden Air Fryer Apple Hand Pies filled with cinnamon-spiced apples and finished with a crisp flaky crust.

Air Fryer Apple Hand Pies

There is something special about a warm apple dessert with a crisp golden crust and a sweet cinnamon filling. These Air Fryer Apple Hand Pies give you that classic apple-pie flavor in a small, easy-to-eat package.

Each hand pie has a flaky pastry outside and a warm apple filling inside. The air fryer creates a lightly crisp crust without the need for deep frying. A simple cinnamon-sugar topping adds even more flavor and gives the pies a beautiful finish.

This recipe is perfect for fall gatherings, weekend baking, holiday dessert tables, or a quick treat when you want homemade apple pie without making a full pie.

Why You’ll Love These Apple Hand Pies

These individual apple pies are simple to prepare and easy to customize.

  • Quick cooking: The air fryer cooks the pies in about 10 minutes.
  • Small portions: Each pie is easy to serve and enjoy without slicing a whole dessert.
  • Crispy crust: Hot circulating air gives the pastry a golden, flaky texture.
  • Warm apple filling: Cinnamon, brown sugar, and apples create a classic fall flavor.
  • Easy ingredients: You can find everything at most U.S. grocery stores.
  • Make-ahead friendly: Assemble the pies ahead of time and refrigerate them until ready to cook.
  • Great for gatherings: Their individual size makes them convenient for parties and family dinners.

Ingredients You’ll Need

For the Apple Filling

  • 2 medium apples, peeled, cored, and finely diced
  • 2 tablespoons brown sugar
  • 1 tablespoon granulated sugar
  • 1 tablespoon unsalted butter
  • 1 teaspoon lemon juice
  • 1 teaspoon ground cinnamon
  • ¼ teaspoon ground nutmeg
  • 1 teaspoon cornstarch
  • 1 tablespoon water
  • ½ teaspoon vanilla extract

Use firm apples that hold their shape during cooking. Honeycrisp, Granny Smith, Pink Lady, or Fuji apples all work well.

For the Hand Pies

  • 1 package refrigerated pie crusts, usually 2 crusts
  • 1 large egg
  • 1 tablespoon water
  • 1 tablespoon granulated sugar
  • ½ teaspoon ground cinnamon
  • Cooking spray

The refrigerated pie dough keeps the preparation simple. You can also use homemade pie dough if you prefer a fully homemade crust.

How to Make Air Fryer Apple Hand Pies

Step 1: Prepare the Apple Filling

Peel and core the apples, then cut them into small pieces.

Small apple pieces are important because they soften faster and fit neatly inside the pastry.

Place the diced apples in a small saucepan over medium heat. Add the brown sugar, granulated sugar, butter, lemon juice, cinnamon, and nutmeg.

Cook for about 4 to 5 minutes, stirring often, until the apples begin to soften.

In a small bowl, mix the cornstarch with water until smooth. Pour this mixture into the apples and stir well.

Cook for another 1 to 2 minutes until the filling thickens.

Remove the saucepan from the heat and stir in the vanilla extract.

Let the apple mixture cool completely before filling the pastry.

Step 2: Prepare the Pie Dough

Place the refrigerated pie crusts on a lightly floured surface.

Use a round cookie cutter or a small bowl to cut circles about 4 to 5 inches wide.

You should get several dough circles from the two crusts. Gather the leftover dough, gently roll it again, and cut additional circles if needed.

Avoid rolling the dough too thin because a thin crust can tear while you fill or seal the pies.

Step 3: Add the Apple Filling

Place about 1 to 1½ tablespoons of cooled apple filling in the center of each dough circle.

Do not overfill the pastry.

Too much filling can prevent the edges from sealing properly and may cause the mixture to leak during cooking.

Leave about ½ inch of space around the edges.

Step 4: Seal the Hand Pies

Fold each dough circle in half over the apple filling.

Press the edges together gently with your fingers.

Use a fork to crimp around the entire edge. This creates a decorative border and helps seal the filling inside.

If the edges feel dry, lightly brush them with a little water before sealing.

Step 5: Prepare the Egg Wash

Whisk one egg with one tablespoon of water.

Brush a thin layer of egg wash over the top of each hand pie.

The egg wash helps the pastry turn golden brown while cooking.

For extra flavor, mix the granulated sugar and cinnamon together and sprinkle a small amount over each pie.

Step 6: Add Small Vents

Use a sharp knife to make two or three small cuts on the top of each hand pie.

These vents allow steam to escape while the apple filling heats.

Without vents, pressure can build inside the pastry and cause the edges to open.

Step 7: Air Fry

Preheat the air fryer to 350°F (175°C) for about 3 minutes.

Lightly spray the basket with cooking spray.

Place the hand pies in the basket in a single layer. Leave space between each one so hot air can circulate properly.

Cook for 8 to 11 minutes, or until the pastry is puffed and golden brown.

Depending on your air fryer model and the size of the pies, cooking time may vary slightly.

Check the pies around the 8-minute mark to prevent over-browning.

Step 8: Cool and Serve

Carefully remove the hand pies from the basket and place them on a cooling rack.

Let them cool for at least 5 minutes before serving.

The apple filling becomes extremely hot during cooking, so allowing the pies to cool slightly makes them easier and safer to eat.

Tips for Crispy Apple Hand Pies

A few simple techniques can make a big difference in the final texture.

  • Cool the filling first: Hot filling can soften the pastry and make sealing difficult.
  • Avoid overfilling: A moderate amount of filling helps the crust stay closed.
  • Do not overcrowd the basket: Air needs room to move around each pie.
  • Use an egg wash: It creates a deeper golden color and slightly crisp surface.
  • Vent the pastry: Small cuts allow steam to escape.
  • Watch the final minutes: Pie crust can brown quickly in an air fryer.
  • Use firm apples: Softer apples can turn mushy during cooking.
  • Let them rest: A few minutes of cooling allows the filling to thicken slightly.

Best Apples for Hand Pies

Different apples create slightly different flavors.

Granny Smith apples provide a bright tart flavor that balances the sweetness of the filling.

Honeycrisp apples offer a sweet, crisp flavor and hold their texture well.

Pink Lady apples have a pleasant balance of sweet and tart flavors.

Fuji apples are naturally sweet and work well if you prefer a sweeter filling.

You can also combine two varieties for a more complex apple flavor.

Easy Topping Ideas

These individual apple pies taste delicious on their own, but simple toppings can turn them into a special dessert.

  • Dust with powdered sugar.
  • Drizzle with vanilla glaze.
  • Add a thin caramel drizzle.
  • Serve with vanilla ice cream.
  • Sprinkle with extra cinnamon sugar.
  • Add chopped toasted pecans for crunch.
  • Serve with warm caramel sauce for a classic fall combination.

For a simple glaze, mix ½ cup powdered sugar with 1 to 2 teaspoons of milk and a small splash of vanilla extract. Drizzle it over the cooled pies.

How to Store Leftovers

Allow the hand pies to cool completely before storing them.

Place them in an airtight container and refrigerate for up to 3 days.

To reheat, place one or two pies in the air fryer at 325°F (165°C) for about 3 to 5 minutes.

Avoid microwaving them if you want to keep the crust crisp. The microwave can make the pastry soft.

Can You Freeze Apple Hand Pies?

Yes, these pies can be frozen before or after cooking.

For the best texture, assemble the pies, seal them, and place them on a parchment-lined tray. Freeze until firm, then transfer them to a freezer-safe container or bag.

When ready to cook, you can air fry them from frozen. Add a few extra minutes to the cooking time and check that the pastry is fully golden and the filling is hot.

If freezing cooked pies, let them cool completely before wrapping and freezing.

Common Mistakes to Avoid

The most common problem is using too much apple filling. A generous-looking amount can actually make the pastry difficult to close.

Another mistake is placing too many pies in the air fryer at once. Crowding blocks airflow and can result in uneven browning.

Do not skip the cooling time for the filling. Warm filling can make the dough soft and difficult to handle.

Finally, avoid cooking at an excessively high temperature. The outside can brown before the pastry and filling have heated properly.

Serving Suggestions

These apple hand pies are excellent for breakfast, dessert, afternoon snacks, and holiday gatherings.

Serve them warm with vanilla ice cream for an easy dessert. For a fall party, arrange them on a platter with caramel sauce for dipping.

They also pair well with coffee, hot chocolate, apple cider, or a warm cup of tea.

For Thanksgiving or other holiday gatherings, make smaller pies and serve them as individual desserts after dinner.

Frequently Asked Questions

Can I use store-bought pie crust for apple hand pies?

Yes. Refrigerated pie crust is an easy option and creates a flaky crust with less preparation.

What apples are best for apple hand pies?

Granny Smith, Honeycrisp, Pink Lady, and Fuji apples all work well because they provide good flavor and hold their shape during cooking.

Why are my hand pies leaking?

Overfilling, weak sealing, or skipping the steam vents can cause the apple filling to escape during cooking.

Can I make these hand pies without eggs?

Yes. Brush the pastry with a little milk or cream instead, although the crust may not become as deeply golden.

Can I make apple hand pies ahead of time?

Yes. Assemble the pies several hours ahead and refrigerate them until you are ready to air fry them.

How do I keep the pastry crispy?

Let cooked pies cool on a wire rack instead of placing them directly in a sealed container while they are still hot.

Can I freeze these apple hand pies?

Yes. Freeze assembled unbaked pies or fully cooled cooked pies in an airtight freezer-safe container.

How long do apple hand pies last?

Refrigerated cooked pies are best enjoyed within 3 days when stored properly in an airtight container.

Final Thoughts

These Air Fryer Apple Hand Pies are a simple way to enjoy the flavors of homemade apple pie without preparing a full-size pie. The combination of flaky pastry, cinnamon-spiced apples, and a golden finish makes them especially appealing during the fall season.

The recipe is easy to adjust with different apples, toppings, and spices. Serve them warm with caramel sauce or vanilla ice cream, or enjoy one on its own with a cup of coffee.

Once you try this smaller version of a classic apple dessert, it may become a regular treat for family weekends, fall gatherings, and holiday celebrations.

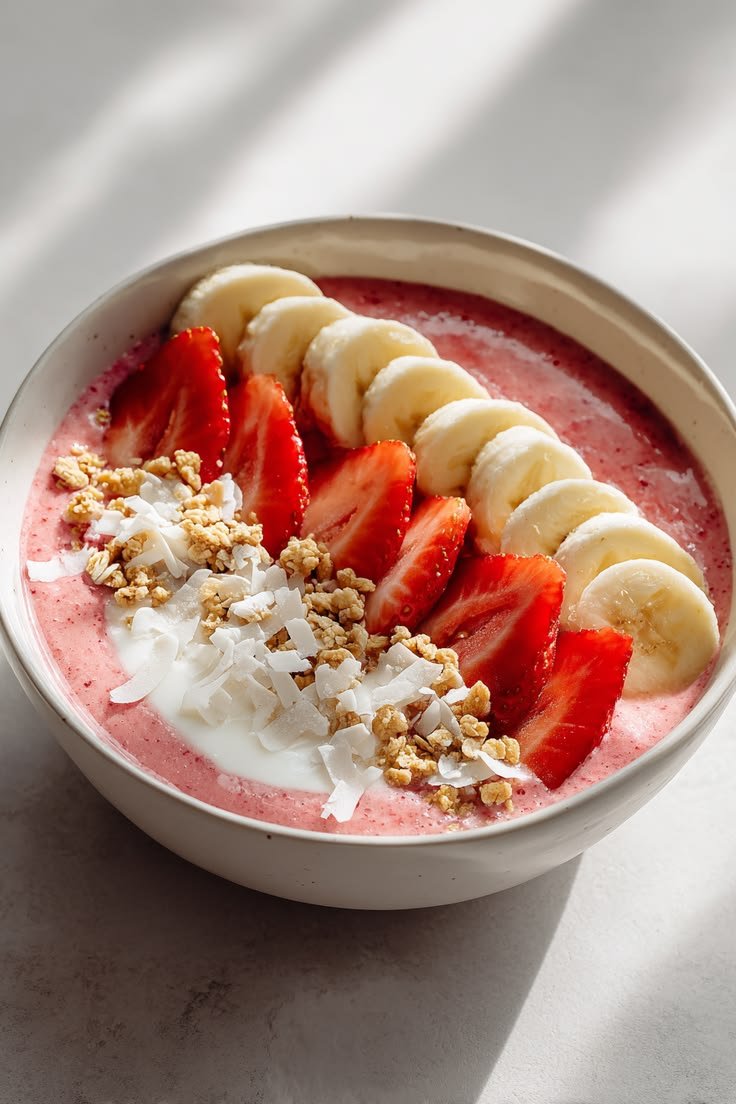
Strawberry Banana Smoothie Bowl

Strawberry Banana Smoothie Bowl

Ingredients

Smoothie Base:

  • 1.5 cups frozen strawberries (gives the bowl its thick texture)

  • 1 frozen banana (creates a soft-serve consistency)

  • 1/2 cup Greek yogurt or plain yogurt

  • 1/4 cup liquid of choice (almond milk, whole milk, coconut water, or apple juice)

  • 1 tablespoon honey or maple syrup (optional, for extra sweetness)

Toppings (as pictured):

  • 1 fresh banana, sliced into thin rounds

  • 3-4 fresh strawberries, sliced vertically

  • 2 tablespoons crunchy granola

  • 1 tablespoon unsweetened coconut flakes or shredded coconut

  • 1 tablespoon Greek yogurt (for swirl garnish)

Step-by-Step Instructions

  1. Prepare the Blender: Add the frozen strawberries, frozen banana, 1/2 cup Greek yogurt, and your liquid of choice to a high-speed blender or food processor.

  2. Blend on Low: Start blending on low speed. Use the tamper attachment of your blender (or stop occasionally to scrape down the sides with a spatula) to push the frozen fruit down toward the blades.

  3. Adjust Consistency: Blend for 1 to 2 minutes until completely smooth, thick, and velvety. If the mixture is too thick to blend, add liquid 1 tablespoon at a time. The goal is a ice-cream-like texture that holds toppings without sinking.

  4. Assemble the Bowl: Scoop the thick pink smoothie into a chilled serving bowl using a silicone spatula. Smooth the surface with the back of a spoon.

  5. Add the Cream Layer: Add a spoonful of fresh Greek yogurt to one side of the surface and gently spread it out.

  6. Decorate: Arrange the fresh banana slices in a neat line along one edge. Place the sliced fresh strawberries right beside them.

  7. Finish with Crunch: Sprinkle granola and coconut flakes over the yogurt section to complete the presentation. Serve immediately with a spoon!

Helpful Tips

  • Use Frozen Fruit for the Base: Using unfrozen fruit will result in a runny smoothie rather than a spoonable bowl. Freeze your fruit at least 4 hours ahead of time.

  • Chill Your Bowl: Place your serving bowl in the freezer for 10 minutes before assembling. This keeps the smoothie from melting while you arrange the toppings.

  • Freeze Ripe Bananas: The riper your bananas are before freezing, the naturally sweeter your smoothie bowl will taste.

Frequently Asked Questions

Q: Why is my smoothie bowl too runny?

A: A runny texture usually means too much liquid was added or room-temperature fruit was used. Stick to a minimal amount of liquid and blend slowly until smooth.

Q: Can I make this dairy-free or vegan?

A: Absolutely! Replace the Greek yogurt with coconut yogurt or almond milk yogurt, and swap honey for maple syrup or agave nectar.

Q: Can I prepare this smoothie bowl in advance?

A: Smoothie bowls are best enjoyed immediately. However, you can blend the base, freeze it in an airtight container, and let it thaw at room temperature for 10–15 minutes before stirring and adding fresh toppings.

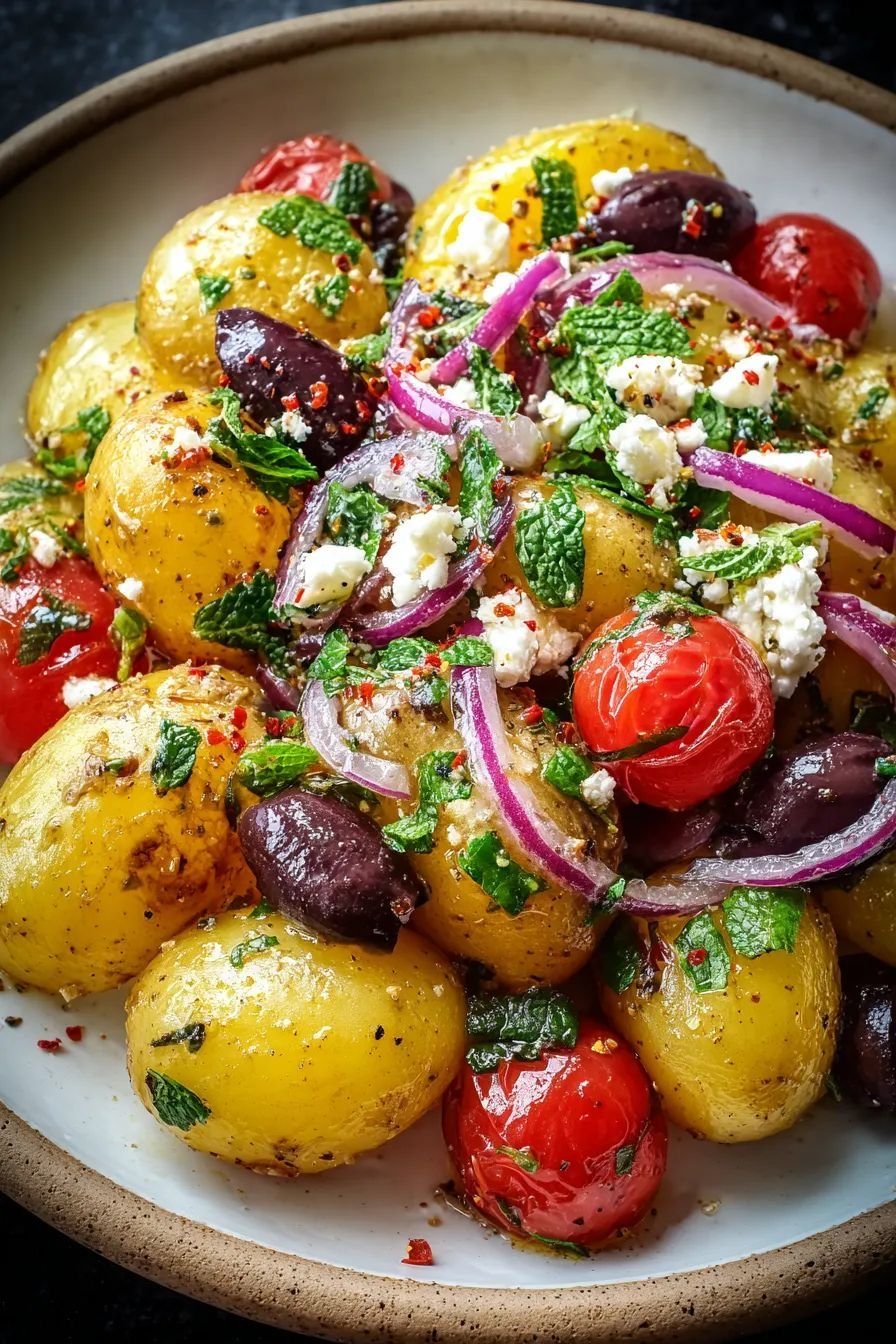
Greek Baby Potato Salad

Greek Baby Potato Salad

This Greek Baby Potato Salad is a vibrant, herb-packed dish featuring buttery baby potatoes, juicy cherry tomatoes, salty Kalamata olives, crisp red onion, creamy feta cheese, and fresh mint leaves, all tossed in a lemon-herb dressing.

Ingredients

For the Salad:

  • Baby potatoes: 1.5 lbs (700g), washed and kept whole or halved

  • Cherry tomatoes: 1 cup, whole or lightly blistered

  • Kalamata olives: 1/2 cup, pitted

  • Red onion: 1/2 small, thinly sliced

  • Feta cheese: 1/2 cup, crumbled

  • Fresh mint leaves: 1/4 cup, roughly chopped

  • Red pepper flakes: 1/2 tsp (optional, for mild heat)

For the Greek Lemon Dressing:

  • Extra virgin olive oil: 1/4 cup

  • Fresh lemon juice: 2 tbsp

  • Garlic: 1 clove, minced

  • Dried oregano: 1 tsp

  • Salt and fresh black pepper: To taste

Step-by-Step Instructions

  1. Boil the Potatoes: Place the baby potatoes into a large pot and cover with cold water. Add a pinch of salt. Bring to a boil over medium-high heat and cook for 12–15 minutes until tender when pierced with a fork. Drain well and let cool slightly.

  2. Blister Tomatoes (Optional): In a small pan over medium heat with a drop of olive oil, lightly toss the cherry tomatoes for 2–3 minutes until the skins begin to soften and crack.

  3. Whisk the Dressing: In a small bowl or jar, combine extra virgin olive oil, fresh lemon juice, minced garlic, dried oregano, salt, and black pepper. Whisk or shake vigorously until combined.

  4. Assemble the Salad: In a large bowl, add the warm baby potatoes, blistered tomatoes, pitted Kalamata olives, and thinly sliced red onions.

  5. Dress and Toss: Pour the Greek lemon dressing over the warm potatoes so they absorb the flavor. Toss gently.

  6. Garnish and Serve: Top with crumbled feta cheese, fresh mint leaves, and a sprinkle of red pepper flakes before serving.

Tips for the Best Results

  • Warm Dressing Absorption: Toss the warm potatoes with the dressing right after draining. Warm potatoes absorb seasonings much better than cold ones.

  • Mellowing Red Onions: If you prefer a milder raw onion bite, soak the sliced red onions in ice water for 10 minutes before adding them to the salad.

  • Make-Ahead Friendly: You can boil the potatoes and make the dressing a day in advance. Assemble the feta, tomatoes, and herbs right before serving to keep everything fresh.

Frequently Asked Questions

Q: Can I use regular potatoes instead of baby potatoes?

A: Yes, Yukon Gold or red skin potatoes work great. Simply cut them into 1-inch bite-sized cubes before boiling.

Q: Is this potato salad served warm or cold?

A: It can be served warm, at room temperature, or chilled! Room temperature allows the lemon, mint, and olive oil flavors to come through best.

Q: How long does leftovers last in the fridge?

A: Stored in an airtight container, this salad will keep well in the refrigerator for up to 3 to 4 days.

Creamy Lemon Mint Smoothie

Creamy Lemon Mint Smoothie

Ingredients

  • Fresh Mint Leaves: $1/2$ cup (packed), thoroughly washed

  • Fresh Lemon Juice: $1/4$ cup (from about 2 juicy lemons)

  • Lemon Zest: 1 teaspoon (for an extra bright burst of citrus flavor)

  • Banana: 1 medium, frozen (adds natural sweetness and a thick, creamy texture)

  • Greek Yogurt or Plant-Based Yogurt: $1/2$ cup (plain or vanilla)

  • Liquid Base: $3/4$ cup coconut water, almond milk, or regular milk

  • Sweetener: 1 to 2 tablespoons honey, maple syrup, or agave (adjust to taste)

  • Ice Cubes: $1/2$ cup (optional, for an extra chilled blend)

  • Garnish: Fresh lemon slices and a cluster of mint sprigs

Step-by-Step Instructions

  1. Prep the Citrus & Herbs: Wash the mint leaves under cold water and pat them dry. Grate 1 teaspoon of fresh lemon zest before squeezing $1/4$ cup of fresh lemon juice into a small bowl, removing any seeds.

  2. Layer the Blender: Pour the liquid base (coconut water or milk) into your blender first. Liquid at the bottom prevents the blades from getting jammed. Next, add the fresh mint leaves, lemon juice, lemon zest, frozen banana slices, Greek yogurt, and sweetener. Top with ice if using.

  3. Blend Until Smooth: Secure the lid and blend on medium speed for 15 seconds, then switch to high speed for 30 to 45 seconds. Keep blending until the mint is finely flecked throughout the drink and the mixture reaches a velvety, uniform consistency.

  4. Taste Test: Pause to taste the smoothie. If you prefer a tart flavor, add a splash more lemon juice; if you prefer it sweeter, drizzle in a bit more honey or maple syrup. Blend for another 5 seconds to combine.

  5. Serve & Garnish: Pour the smooth green drink into a tall chilled glass. Decorate the rim with a fresh lemon wheel and place a cluster of mint leaves right on top for a beautiful presentation. Serve immediately while frosty!

Questions & Answers (Tips)

Q: My smoothie isn’t blending smoothly, how can I fix it?

A: Always pour your liquids into the blender jar before adding frozen fruit or ice. If the blender struggles, stop it, push the ingredients down with a spatula, add an extra splash of liquid, and try blending again.

Q: Can I make this drink without yogurt?

A: Absolutely! You can swap the yogurt for $1/2$ a peeled avocado or $1/4$ cup of soaked cashews to maintain that lush, velvety consistency without dairy.

Q: How do I store leftovers?

A: Fresh smoothies are best enjoyed immediately, but you can keep leftovers in an airtight glass jar or insulated tumbler in the refrigerator for up to 24 hours. Simply shake or stir well before drinking, as natural separation may occur.