Creamy Lemon Mint Smoothie

Creamy Lemon Mint Smoothie

Ingredients

  • Fresh Mint Leaves: $1/2$ cup (packed), thoroughly washed

  • Fresh Lemon Juice: $1/4$ cup (from about 2 juicy lemons)

  • Lemon Zest: 1 teaspoon (for an extra bright burst of citrus flavor)

  • Banana: 1 medium, frozen (adds natural sweetness and a thick, creamy texture)

  • Greek Yogurt or Plant-Based Yogurt: $1/2$ cup (plain or vanilla)

  • Liquid Base: $3/4$ cup coconut water, almond milk, or regular milk

  • Sweetener: 1 to 2 tablespoons honey, maple syrup, or agave (adjust to taste)

  • Ice Cubes: $1/2$ cup (optional, for an extra chilled blend)

  • Garnish: Fresh lemon slices and a cluster of mint sprigs

Step-by-Step Instructions

  1. Prep the Citrus & Herbs: Wash the mint leaves under cold water and pat them dry. Grate 1 teaspoon of fresh lemon zest before squeezing $1/4$ cup of fresh lemon juice into a small bowl, removing any seeds.

  2. Layer the Blender: Pour the liquid base (coconut water or milk) into your blender first. Liquid at the bottom prevents the blades from getting jammed. Next, add the fresh mint leaves, lemon juice, lemon zest, frozen banana slices, Greek yogurt, and sweetener. Top with ice if using.

  3. Blend Until Smooth: Secure the lid and blend on medium speed for 15 seconds, then switch to high speed for 30 to 45 seconds. Keep blending until the mint is finely flecked throughout the drink and the mixture reaches a velvety, uniform consistency.

  4. Taste Test: Pause to taste the smoothie. If you prefer a tart flavor, add a splash more lemon juice; if you prefer it sweeter, drizzle in a bit more honey or maple syrup. Blend for another 5 seconds to combine.

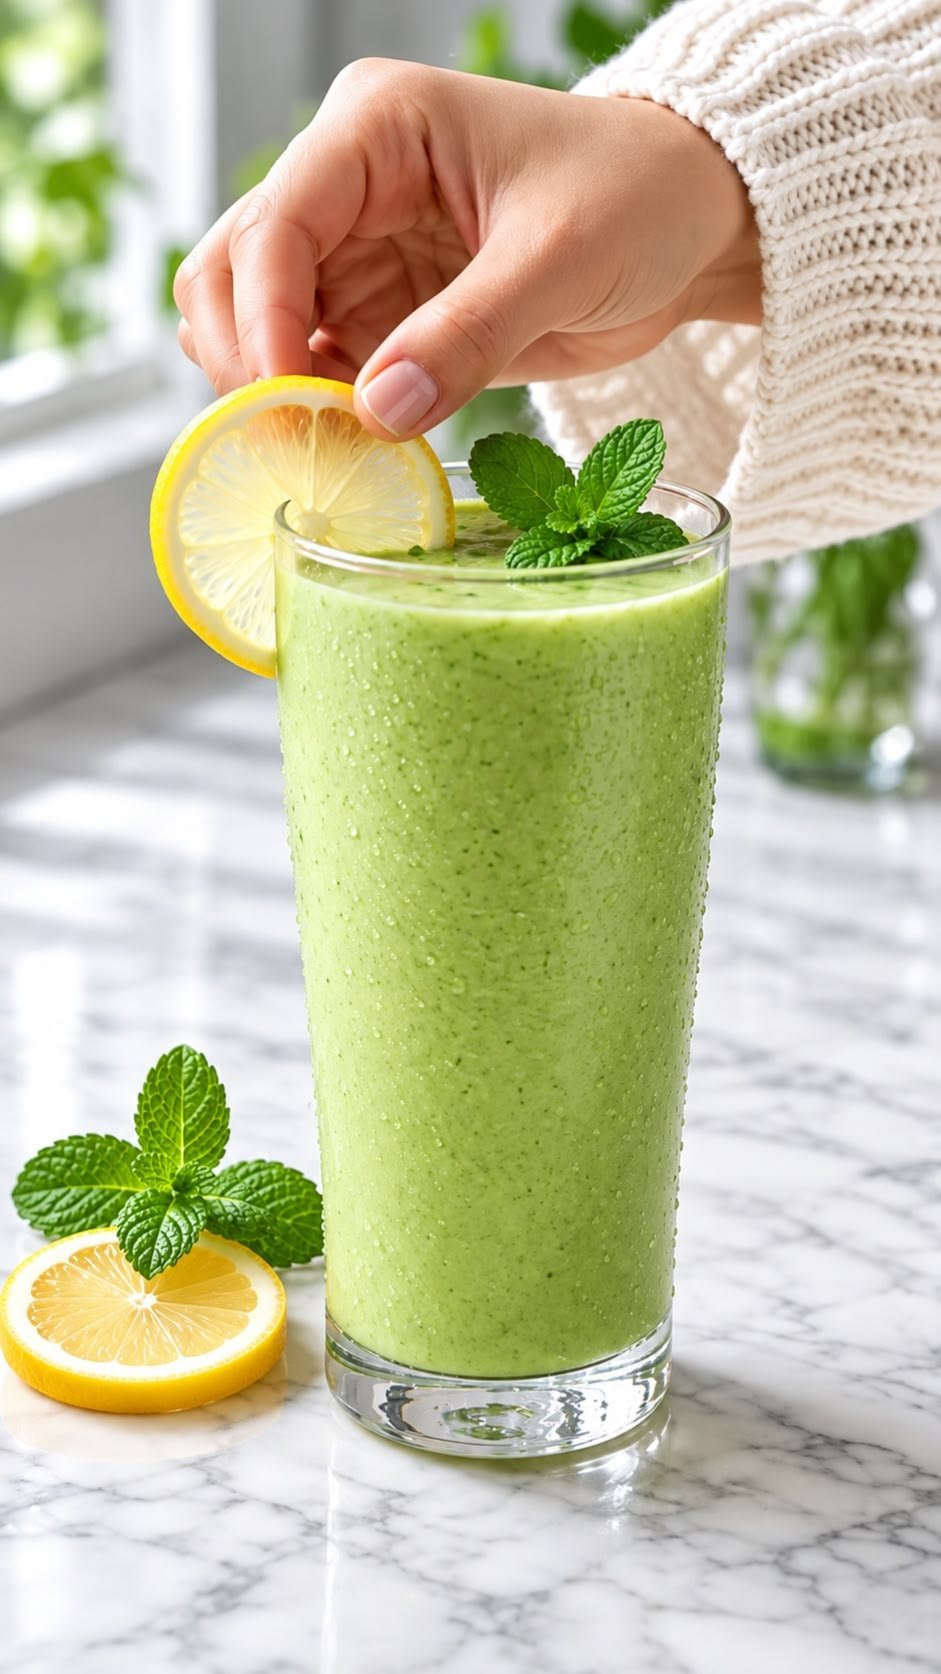
  5. Serve & Garnish: Pour the smooth green drink into a tall chilled glass. Decorate the rim with a fresh lemon wheel and place a cluster of mint leaves right on top for a beautiful presentation. Serve immediately while frosty!

Questions & Answers (Tips)

Q: My smoothie isn’t blending smoothly, how can I fix it?

A: Always pour your liquids into the blender jar before adding frozen fruit or ice. If the blender struggles, stop it, push the ingredients down with a spatula, add an extra splash of liquid, and try blending again.

Q: Can I make this drink without yogurt?

A: Absolutely! You can swap the yogurt for $1/2$ a peeled avocado or $1/4$ cup of soaked cashews to maintain that lush, velvety consistency without dairy.

Q: How do I store leftovers?

A: Fresh smoothies are best enjoyed immediately, but you can keep leftovers in an airtight glass jar or insulated tumbler in the refrigerator for up to 24 hours. Simply shake or stir well before drinking, as natural separation may occur.

Tropical Pineapple Chia Seed Smoothie

Tropical Pineapple Chia Seed Smoothie

This refreshing, creamy tropical smoothie features sweet pineapple, coconut milk, banana, and nutrient-dense chia seeds. It is a simple, delicious, and energizing drink that comes together in under five minutes.

Prep Time & Servings

  • Prep Time: 5 minutes

  • Total Time: 5 minutes

  • Servings: 2 tall glasses

Ingredients

  • 2 cups fresh or frozen pineapple chunks

  • 1 large frozen banana (sliced)

  • 1 tablespoon chia seeds

  • 1 cup unsweetened coconut milk (or almond milk)

  • 1/2 cup Greek yogurt (plain or vanilla)

  • 1 tablespoon honey or maple syrup (optional, for added sweetness)

  • 1/2 cup ice cubes (if using fresh pineapple)

  • Fresh pineapple wedge (for garnish)

Step-by-Step Instructions

  1. Prepare the Base: Pour the coconut milk and Greek yogurt into the blender container first. Placing liquid ingredients at the bottom helps the blades rotate smoothly.

  2. Add Frozen Fruit: Add the pineapple chunks and frozen banana slices on top of the liquid base.

  3. Incorporate Chia Seeds & Sweetener: Sprinkle in the chia seeds and add honey or maple syrup if extra sweetness is desired. Add ice cubes if you are using fresh fruit instead of frozen.

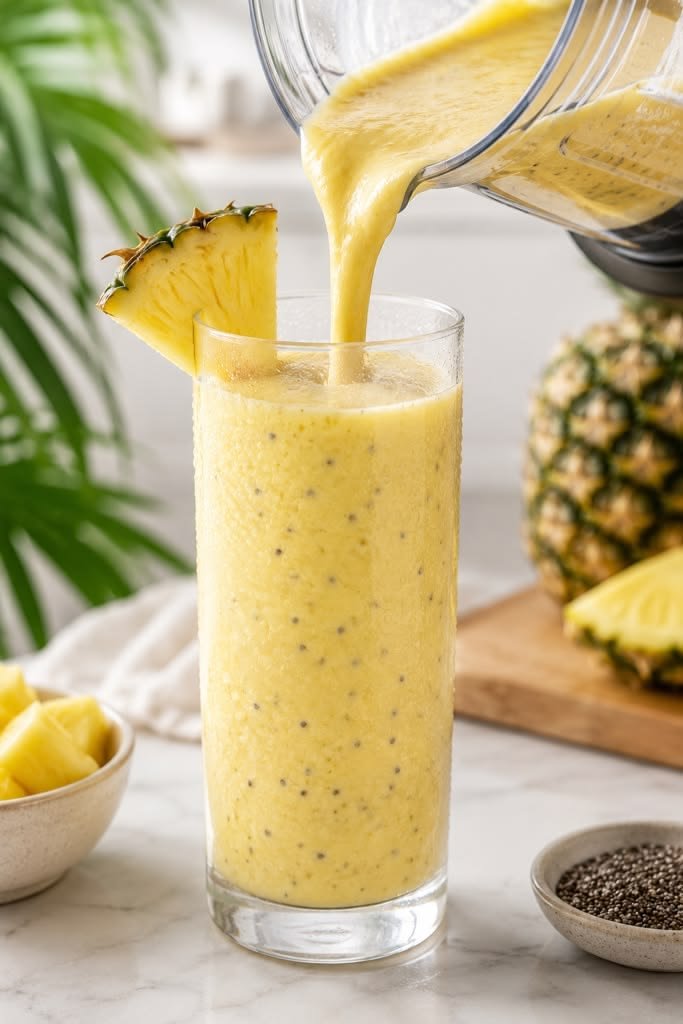
  4. Blend: Secure the lid and blend on high speed for 60 to 90 seconds, or until the mixture reaches a completely smooth, velvety consistency with visible dark chia seed speckles.

  5. Serve: Pour the smoothie into tall glasses. Garnish the rim of each glass with a fresh pineapple wedge and a light sprinkle of chia seeds on top. Enjoy immediately while chilled!

Q&A & Expert Tips

  • Q: Can I soak the chia seeds beforehand?

    • A: Yes! Soaking chia seeds in a couple of tablespoons of water or milk for 10 minutes creates a gel-like texture that makes the smoothie even thicker and aids digestion.

  • Q: How can I make this recipe vegan?

    • A: Swap the regular Greek yogurt for coconut yogurt or soy yogurt, and use maple syrup or agave nectar instead of honey.

  • Q: Can I store leftovers for later?

    • A: Chia seeds absorb liquid over time, so leftover smoothie will thicken considerably in the refrigerator. Store in an airtight jar for up to 24 hours, and stir in a splash of milk before drinking.

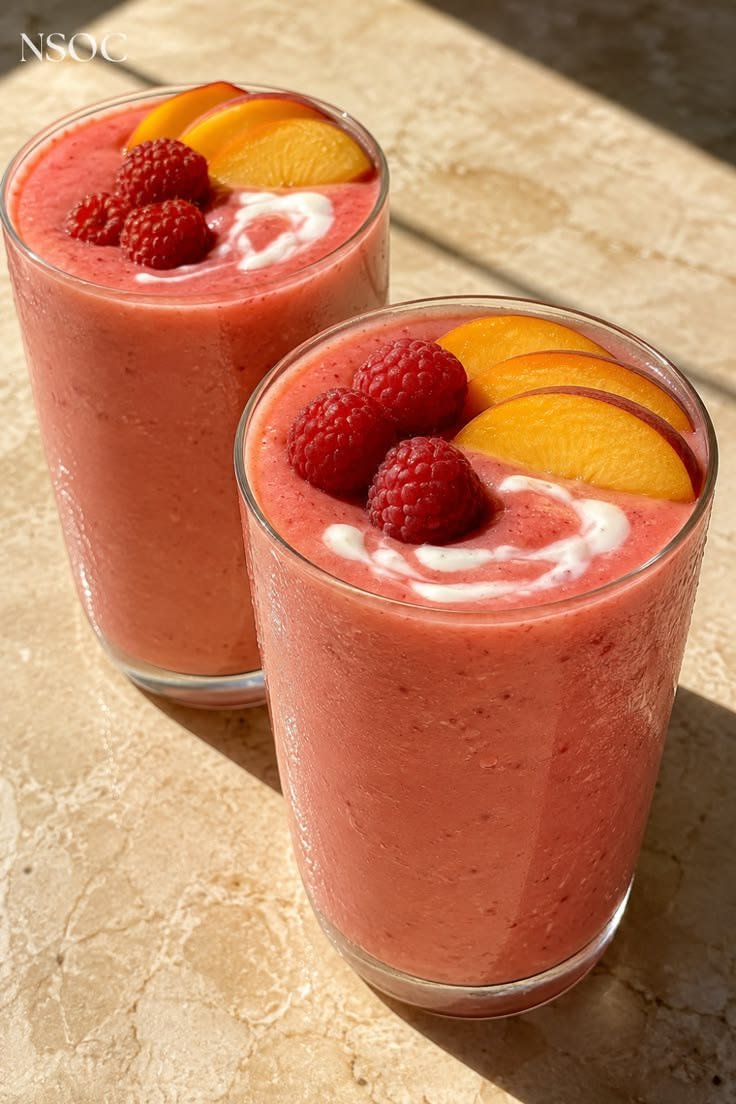
Creamy Peach Raspberry Smoothie

Creamy Peach Raspberry Smoothie

This vibrant, thick peach-raspberry smoothie delivers a refreshing blend of sweet peaches, tangy raspberries, and creamy yogurt. It is packed with fiber and vitamins, making it an ideal choice for a quick breakfast or a midday refresher.

Ingredients

  • Frozen Peaches: 1.5 cups (sliced)

  • Frozen Raspberries: 1 cup

  • Greek Yogurt: 1/2 cup (plain or vanilla)

  • Milk or Dairy-Free Alternative: 3/4 cup (almond, oat, or dairy milk)

  • Honey or Maple Syrup: 1 to 2 tablespoons (optional, to taste)

  • Chia Seeds or Flaxseeds: 1 tablespoon (optional, for extra fiber)

For Garnish:

  • Fresh peach slices

  • Whole fresh raspberries

  • A dollop of plain Greek yogurt

Step-by-Step Instructions

  1. Layer the Ingredients: Add the liquid base (milk) and Greek yogurt to your high-speed blender first. Adding liquids before frozen fruit prevents blades from jamming and ensures a smoother blend.

  2. Add Fruit and Sweetener: Toss in the frozen peach slices, frozen raspberries, sweetener, and seeds (if using).

  3. Blend Until Smooth: Secure the blender lid tightly. Start blending on low speed, then gradually increase to high. Process for 60 to 90 seconds until the texture is completely smooth, thick, and velvety.

  4. Adjust Consistency: If the smoothie is too thick to pour, add an extra splash of milk and blend for another 10 seconds. If you prefer a thicker texture, add a few extra frozen peach slices or ice cubes.

  5. Serve and Decorate: Pour the blend into two tall glasses. Spoon a small swirl of Greek yogurt on top, then garnish with fresh peach slices and whole raspberries as shown in the picture. Serve immediately with a straw.

Q&A Tips

Q: How can I make this smoothie dairy-free or vegan?

A: Swap the Greek yogurt for coconut yogurt or almond-milk yogurt, and use plant-based milk such as almond, oat, or soy milk. Use maple syrup or agave nectar instead of honey.

Q: Can I use fresh fruit instead of frozen?

A: Yes! If you use fresh peaches and raspberries, add 1 cup of ice to the blender to achieve that cold, thick smoothie texture.

Q: Can I make this ahead of time?

A: Smoothies taste best fresh, but you can prepare smoothie portion packs by freezing sliced peaches and raspberries together in a silicone bag. When ready, simply dump the frozen fruit into the blender with milk and yogurt.

Q: How do I boost the protein content?

A: Add a scoop of unflavored or vanilla protein powder, or stir in an extra tablespoon of chia, hemp, or flax seeds before blending.

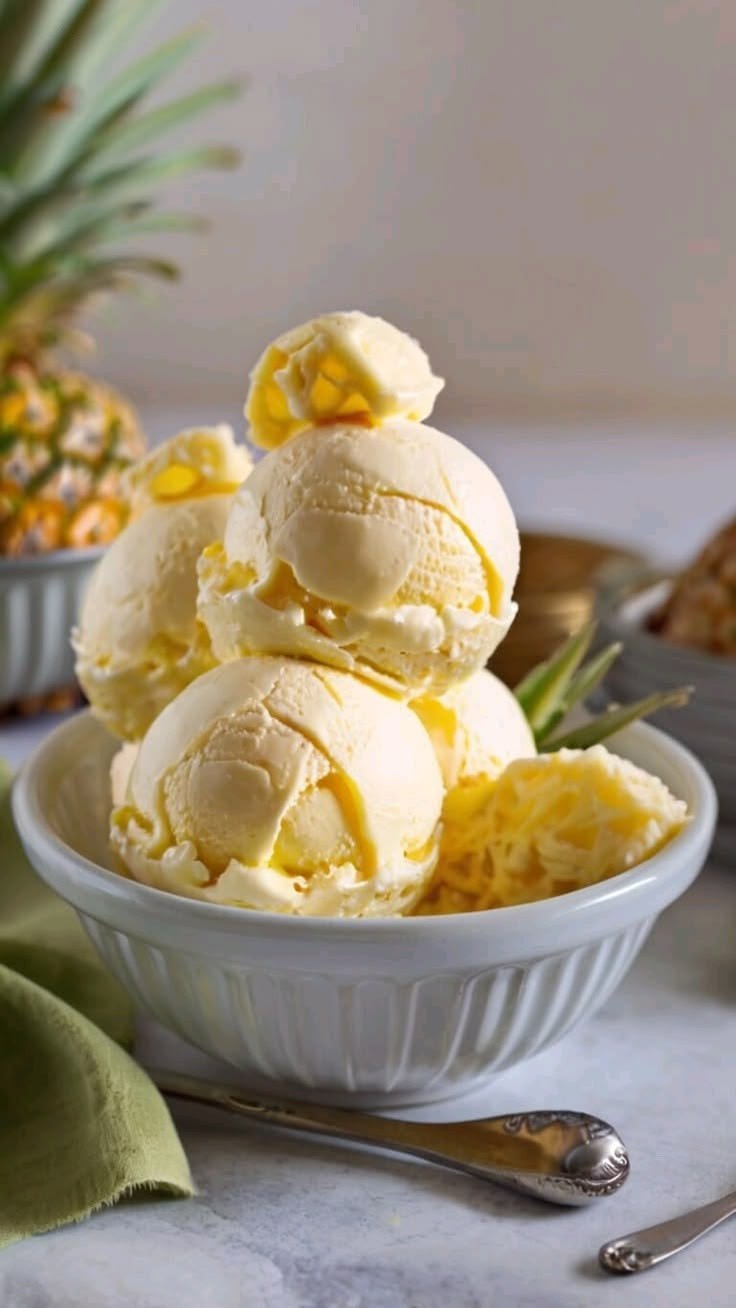
Pineapple Ice Cream

Pineapple Ice Cream

Ingredients

  • Fresh Pineapple Puree: 1.5 cups (cooked down to remove excess moisture)

  • Heavy Whipping Cream: 2 cups (cold, at least 36% milk fat)

  • Sweetened Condensed Milk: 1 cup (cold)

  • Pure Vanilla Extract: 1 teaspoon

  • Lemon Juice: 1 tablespoon (enhances acidity and brightness)

  • Optional Mix-in: 1/2 cup finely diced pineapple pieces

Instructions

  1. Prepare the Pineapple Reduction: Place 1.5 cups of fresh pineapple puree into a saucepan over medium-low heat. Simmer for about 8 to 10 minutes, stirring frequently, until the liquid reduces by almost half and thickens into a jam-like consistency. Remove from heat, stir in the tablespoon of lemon juice, and let it cool completely in the refrigerator.

  2. Whip the Cream: In a large chilled mixing bowl, pour in the cold heavy whipping cream. Using an electric hand mixer or stand mixer fitted with a whisk attachment, whip on medium-high speed until stiff peaks form.

  3. Combine the Base: In a separate bowl, whisk together the cold sweetened condensed milk, cooled pineapple reduction, and vanilla extract until smooth.

  4. Fold Together: Gently fold one-third of the whipped cream into the condensed milk mixture using a silicone spatula to lighten it. Gently fold in the remaining whipped cream and optional diced pineapple pieces until completely combined, being careful not to deflate the mixture.

  5. Freeze: Pour the mixture into a 9×5-inch loaf pan or airtight freezer-safe container. Smooth the top with a spatula. Cover the surface directly with plastic wrap to prevent ice crystals, then cover tightly with a lid or foil. Freeze for at least 6 hours, preferably overnight, until solid.

Q&A & Helpful Tips

Q: Why do I need to cook the pineapple before adding it to the ice cream base?

A: Raw pineapple contains an enzyme called bromelain, which breaks down proteins and can cause dairy products to taste bitter or curdle over time. Simmering the pineapple deactivates this enzyme and removes extra water, preventing icy crystals from forming in your ice cream.

Q: Can I use canned pineapple instead of fresh?

A: Yes, canned crushed pineapple or pineapple puree works great! Make sure to drain it thoroughly before simmering it down to remove excess liquid.

Q: How do I make the ice cream scoop smoother?

A: Allow the ice cream to sit at room temperature for 5 to 10 minutes before scooping. Running your ice cream scoop under hot water and wiping it dry before each scoop also helps create neat, round balls.

Q: How long does homemade ice cream stay fresh?

A: Stored in an airtight container with plastic wrap pressed against the surface, it will stay fresh and soft for up to 2 weeks in the freezer.

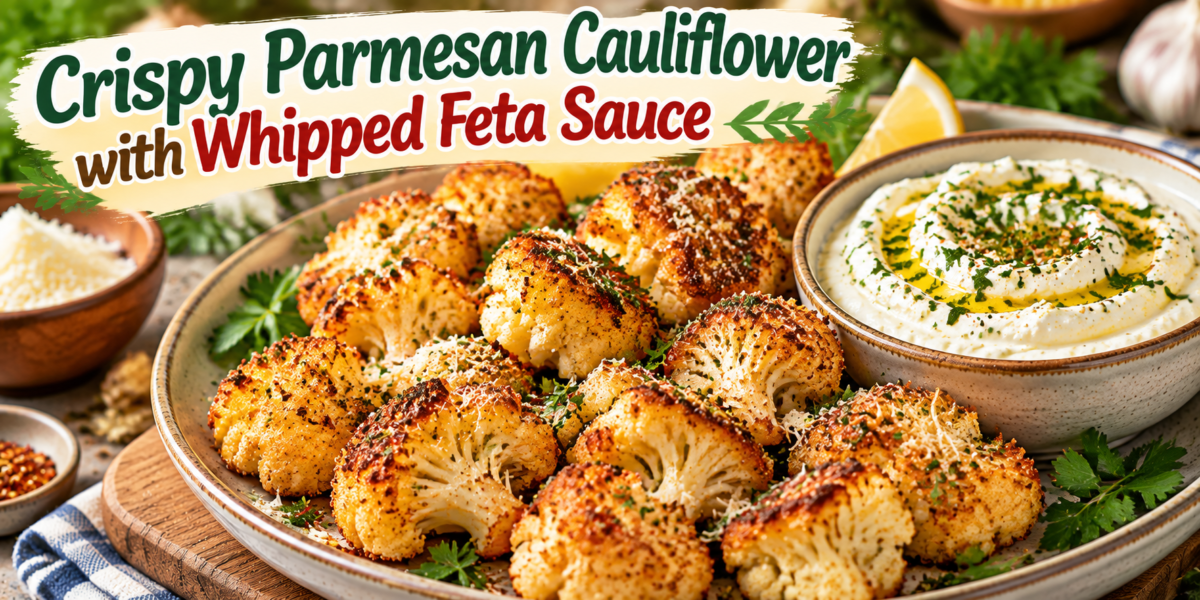
Crispy Parmesan Cauliflower with Whipped Feta Sauce

Crispy Parmesan Cauliflower with Whipped Feta Sauce served as a golden baked appetizer with herbs

Crispy Parmesan Cauliflower with Whipped Feta Sauce

Crispy Parmesan Cauliflower is a delicious and flavorful way to enjoy a nutritious vegetable with a restaurant-style twist. This recipe transforms simple cauliflower florets into golden, crispy bites coated with Parmesan cheese, herbs, and a perfectly seasoned crust. Served with a creamy whipped feta sauce, this dish creates a beautiful balance between crunchy texture and smooth, tangy flavor.

This recipe is perfect for anyone looking for a healthier alternative to traditional fried snacks while still enjoying something satisfying and delicious. The cauliflower becomes tender inside while developing a crispy outer layer that makes every bite enjoyable.

The creamy whipped feta sauce adds an extra layer of flavor with its rich texture, fresh herbs, lemon juice, and Mediterranean-inspired taste. Together, the crispy cauliflower and feta dip create an appetizer, side dish, or light meal that works for family dinners, parties, and weekend gatherings.

Crispy Parmesan Cauliflower is also easy to customize according to your taste. You can make it spicy, add different herbs, or adjust the seasoning to create your favorite version. This recipe proves that vegetables can be exciting, flavorful, and satisfying when prepared with the right combination of ingredients.

Whether served as a party snack, a healthy side dish, or a vegetarian option for dinner, this recipe delivers amazing flavor with simple ingredients.

Preparation Time: 20 minutes

Cooking Time: 30 minutes

Total Time: 50 minutes

Servings: 4 people

Ingredients

Crispy Parmesan Cauliflower

1 large cauliflower head, cut into bite-sized florets

1 cup breadcrumbs or panko breadcrumbs

1/2 cup grated Parmesan cheese

1/2 cup all-purpose flour

2 large eggs

1/4 cup milk

2 tablespoons olive oil

2 cloves garlic, minced

1 teaspoon paprika powder

1 teaspoon dried oregano

1/2 teaspoon dried basil

1/2 teaspoon black pepper

Salt according to taste

1/4 teaspoon red pepper flakes (optional)

Whipped Feta Sauce

1 cup feta cheese, crumbled

1/2 cup Greek yogurt

2 tablespoons olive oil

1 tablespoon fresh lemon juice

1 small garlic clove

2 tablespoons fresh parsley or dill

Black pepper according to taste

1–2 tablespoons water if needed for texture

Step-by-Step Instructions

To prepare Crispy Parmesan Cauliflower, begin by washing the cauliflower thoroughly and cutting it into evenly sized florets. Try to keep the pieces similar in size so they cook evenly and develop the same crispy texture.

Preheat your oven to 425°F (220°C). Line a baking tray with parchment paper and lightly brush it with olive oil. You can also prepare this recipe using an air fryer for an extra crispy finish.

Bring a large pot of water to a boil and lightly steam or blanch the cauliflower florets for 3–4 minutes. This step helps soften the cauliflower slightly while keeping its structure. Drain completely and allow the florets to cool.

Prepare three separate bowls for coating the cauliflower. Add flour, paprika, oregano, basil, salt, and black pepper to the first bowl. Whisk the eggs with milk in the second bowl until well combined. Finally, combine breadcrumbs with Parmesan cheese in the third bowl to create the crispy coating mixture..

Take each cauliflower floret and coat it first with the seasoned flour mixture. Then dip it into the egg mixture and finally coat it evenly with the Parmesan breadcrumb mixture.

Place the coated cauliflower pieces on the prepared baking tray. Drizzle lightly with olive oil to help create a golden, crispy crust.

Bake for 25–30 minutes, turning halfway through cooking, until the coating becomes golden brown and crunchy. The Parmesan cheese should melt slightly and create a delicious crispy layer.

While the cauliflower is baking, prepare the whipped feta sauce. Add feta cheese, Greek yogurt, olive oil, lemon juice, garlic, and herbs into a food processor or blender.

Blend the mixture until smooth and creamy. Add a small amount of water if needed to achieve your preferred consistency.

Taste the sauce and adjust seasoning with extra lemon juice, herbs, or black pepper according to your preference.

Serve the warm Crispy Parmesan Cauliflower with the whipped feta sauce on the side. Garnish with fresh herbs and an extra sprinkle of Parmesan cheese for a beautiful presentation.

Tips for Perfect Crispy Cauliflower

For the best Crispy Parmesan Cauliflower, choose a fresh cauliflower head with firm florets and no dark spots. Fresh cauliflower provides better texture and flavor.

Make sure the cauliflower is not too wet before coating. Excess moisture can prevent the coating from becoming crispy.

Using panko breadcrumbs creates a lighter and crunchier coating compared with regular breadcrumbs. However, regular breadcrumbs also work well.

Do not overcrowd the baking tray because proper air circulation helps the cauliflower become crisp. Leave some space between each piece.

Freshly grated Parmesan cheese provides better flavor and melts more evenly than pre-packaged cheese.

For an extra golden crust, lightly spray the cauliflower with olive oil before baking.

If using an air fryer, cook at 400°F (200°C) for approximately 15–18 minutes, shaking the basket halfway through.

Variations

This recipe can be customized in many different ways to suit your preferences.

For a spicy version, add cayenne pepper, chili powder, or extra red pepper flakes to the coating mixture.

For a gluten-free option, use gluten-free breadcrumbs and flour instead of regular versions.

You can create a Mediterranean-style variation by adding chopped olives, fresh basil, sun-dried tomatoes, or extra herbs.

For a vegan version, replace Parmesan cheese with nutritional yeast and use a dairy-free feta alternative for the sauce.

You can also make a cheesy cauliflower version by adding shredded mozzarella along with Parmesan before baking.

For extra protein, serve the cauliflower with grilled chicken, chickpeas, or a fresh bean salad.

Serving Suggestions

Crispy Parmesan Cauliflower with Whipped Feta Sauce is a versatile dish that can be served in many ways.

Serve it as an appetizer at parties with the whipped feta sauce as a creamy dip. Guests will enjoy the crispy texture and flavorful coating.

It also works beautifully as a side dish alongside grilled chicken, roasted salmon, Mediterranean salads, or vegetable bowls.

For a light lunch, serve Crispy Parmesan Cauliflower with a fresh green salad, tomatoes, cucumbers, and a drizzle of olive oil.

You can also place the crispy cauliflower pieces inside wraps or pita bread with vegetables and sauce for a delicious vegetarian meal.

For gatherings, arrange the cauliflower on a serving platter and decorate with fresh herbs, lemon wedges, and extra feta cheese.

Health Benefits

Crispy Parmesan Cauliflower provides several nutritional benefits because cauliflower is naturally rich in vitamins, minerals, and fiber.

Cauliflower contains vitamin C, antioxidants, and plant compounds that support overall health. Its fiber content helps support digestion and contributes to a feeling of fullness.

Parmesan cheese adds calcium and protein, while Greek yogurt in the whipped feta sauce provides additional protein and probiotics.

Using baking instead of deep frying reduces the amount of added oil while still creating a satisfying crispy texture.

The combination of cauliflower, olive oil, herbs, and feta creates a balanced dish inspired by Mediterranean flavors.

Including vegetable-based recipes like this can help increase your daily vegetable intake while enjoying exciting flavors.

Questions and Answers

Can I make Crispy Parmesan Cauliflower ahead of time?

Yes, you can prepare the cauliflower pieces ahead and reheat them in the oven or air fryer before serving to restore crispiness.

Can I use frozen cauliflower?

Yes, frozen cauliflower can be used, but make sure it is fully thawed and dried before coating.

How do I keep the cauliflower crispy?

Avoid covering it immediately after baking because trapped steam can make the coating soft.

Can I store leftovers?

Store leftovers in an airtight container in the refrigerator for up to three days. Reheat in the oven or air fryer for the best texture.

Can I make the whipped feta sauce without yogurt?

Yes, you can replace yogurt with cream cheese or a dairy-free alternative depending on your preference.

Is this recipe vegetarian?

Yes, this recipe is vegetarian-friendly.

Nutrition Information

Approximate nutrition per serving:

Calories: 320

Protein: 14 grams

Carbohydrates: 28 grams

Fiber: 5 grams

Fat: 18 grams

Calcium: 250 mg

Nutrition values may vary depending on the exact ingredients and portion sizes used.

Storage and Reheating Instructions

Proper storage helps maintain the texture and flavor of Crispy Parmesan Cauliflower for a longer time. After cooking, allow the cauliflower pieces to cool completely before placing them in an airtight container. Store them in the refrigerator for up to three days.

When reheating, avoid using the microwave because it can make the crispy coating soft. Instead, place the cauliflower pieces in an oven or air fryer for a few minutes until they become warm and crunchy again. This method helps bring back the original texture and keeps the Parmesan coating delicious.

The whipped feta sauce should be stored separately in a sealed container in the refrigerator. It can stay fresh for up to four days. Before serving, stir the sauce well and add a few drops of lemon juice or olive oil if needed to refresh its creamy consistency.

Why This Recipe Is Perfect for Every Occasion

Crispy Parmesan Cauliflower is a recipe that fits many different occasions. It can be served as a quick weekday snack, a party appetizer, or a beautiful side dish for a family dinner.

One of the best things about this recipe is its simplicity. Even though the final dish looks impressive, it uses basic ingredients that are easy to find. The combination of Parmesan cheese, herbs, and cauliflower creates a flavor that appeals to both adults and children.

This dish is also a great way to encourage more vegetable consumption. Many people avoid vegetables because they think they are boring, but recipes like this transform cauliflower into something exciting and enjoyable.

The creamy whipped feta sauce makes the dish even more special. Its smooth texture and tangy flavor balance perfectly with the crunchy cauliflower coating, creating a restaurant-style experience at home.

Cooking Notes for Best Results

For the crispiest results, make sure each cauliflower floret receives an even coating. A thin but complete layer of breadcrumbs and Parmesan creates the perfect golden crust.

Allowing the oven to fully preheat before baking is another important step. A hot oven helps the coating become crispy while keeping the inside tender.

Fresh herbs can enhance the final flavor of the dish. Adding parsley, dill, or basil before serving gives the recipe a fresh Mediterranean touch.

You can also prepare extra whipped feta sauce because it pairs well with other foods. It can be served with roasted vegetables, crackers, grilled meats, or sandwiches.

This recipe is flexible, flavorful, and easy to adapt, making it a useful addition to your regular meal rotation.

Final Thoughts

Crispy Parmesan Cauliflower with Whipped Feta Sauce is proof that simple vegetables can become a delicious and impressive dish. The combination of crispy Parmesan coating and creamy feta sauce creates a perfect contrast of textures and flavors.

This recipe is easy enough for everyday cooking but special enough for entertaining guests. With simple ingredients, flexible variations, and a flavorful Mediterranean-inspired taste, it can quickly become a favorite recipe in your kitchen.

Whether you serve it as an appetizer, side dish, or light meal, Crispy Parmesan Cauliflower offers a satisfying way to enjoy more vegetables without compromising on flavor.
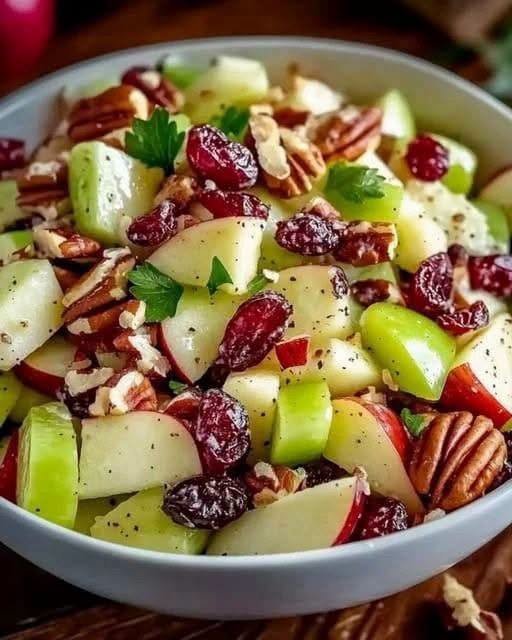
Apple Cranberry Pecan Salad

Apple Cranberry Pecan Salad

There are some recipes that instantly brighten the table, and this  Apple Cranberry Pecan  Salad is definitely one of them. I first tried this  salad last weekend when my family came over for a casual Sunday lunch. My cousin had recommended a similar version to me a few months ago, and I finally decided to put my own spin on it. I wasn’t expecting such a simple salad to become the star of the meal, but that’s exactly what happened.

The combination of crisp apples, sweet dried cranberries, crunchy pecans, and fresh greens creates a balance of flavors that feels both comforting and refreshing. Everyone kept going back for seconds, and by the end of the meal, the salad bowl was completely empty. That’s usually a good sign in my house!

I love making this salad whenever I need something light but satisfying. It’s one of those recipes that works whether I’m feeling happy and celebrating with friends or just looking for something fresh after a stressful week. The colors alone make me smile, and the flavors always remind me that simple ingredients can create something truly special.

Why You’ll Love This Apple Cranberry Pecan Salad

  • Quick and easy to prepare.
  • Perfect for holidays, family dinners, and weekend lunches.
  • A delicious mix of sweet, crunchy, and tangy flavors.
  • Packed with nutrients from fresh fruits and nuts.
  • Easy to customize with your favorite toppings.

Ingredients

For the Salad:

  • 6 cups mixed salad greens
  • 2 medium apples, thinly sliced
  • ½ cup dried cranberries
  • ½ cup pecans, roughly chopped
  • ½ cup crumbled feta cheese (optional)
  • ¼ small red onion, thinly sliced

For the Dressing:

  • 3 tablespoons olive oil
  • 1 tablespoon apple cider vinegar
  • 1 tablespoon honey
  • 1 teaspoon Dijon mustard
  • Salt and black pepper to taste

How to Make Apple Cranberry Pecan Salad

Step 1: Prepare the Ingredients

Wash and dry the salad greens thoroughly. Slice the apples into thin wedges and soak them briefly in cold water with a splash of lemon juice if you want to prevent browning.

Step 2: Make the Dressing

In a small bowl, whisk together the olive oil, apple cider vinegar, honey, Dijon mustard, salt, and black pepper until smooth and well combined.

Step 3: Assemble the Salad

Place the mixed greens in a large serving bowl. Add the sliced apples, dried cranberries, pecans, red onion, and feta cheese.

Step 4: Toss and Serve

Drizzle the dressing over the salad just before serving. Gently toss everything together until evenly coated.

Serve immediately and enjoy the wonderful combination of textures and flavors.

My Favorite Tips

After making this salad several times, I’ve picked up a few tricks that make it even better:

  • Toast the pecans for a few minutes to enhance their flavor.
  • Use a mix of sweet and tart apples for extra depth.
  • Add grilled chicken for a more filling meal.
  • Toss the salad right before serving to keep the greens crisp.
  • Store the dressing separately if making ahead.

Serving Suggestions

This salad pairs beautifully with:

  • Grilled chicken or turkey
  • Roasted salmon
  • Soup and crusty bread
  • Holiday dinners
  • Light summer lunches

I recently served it alongside roasted chicken during a family get-together, and several relatives asked for the recipe before they left. Those moments always make me appreciate home cooking even more.

Nutritional Information

Approximate values per serving (based on 6 servings):

Nutrient Amount
Calories 245 kcal
Protein 4 g
Carbohydrates 22 g
Fat 17 g
Saturated Fat 3 g
Fiber 4 g
Sugar 15 g
Sodium 180 mg
Cholesterol 8 mg
Potassium 220 mg

Frequently Asked Questions

Can I make this salad ahead of time?

Yes. Prepare all ingredients in advance, but keep the dressing separate until serving.

Which apples work best?

Honeycrisp, Fuji, Gala, or Pink Lady apples all work wonderfully in this recipe.

Can I use a different nut?

Absolutely. Walnuts, almonds, or candied pecans are great alternatives.

Is this salad vegetarian?

Yes, as written it is vegetarian. Just make sure the cheese and honey align with your dietary preferences.

Final Thoughts

This  Apple Cranberry Pecan  Salad has become one of my favorite recipes to make throughout the year. It’s fresh, colorful, and incredibly easy to prepare, yet it always feels special enough for guests. Every time I make it, I’m reminded of that family lunch last weekend when everyone gathered around the table, shared stories, and enjoyed every bite together.