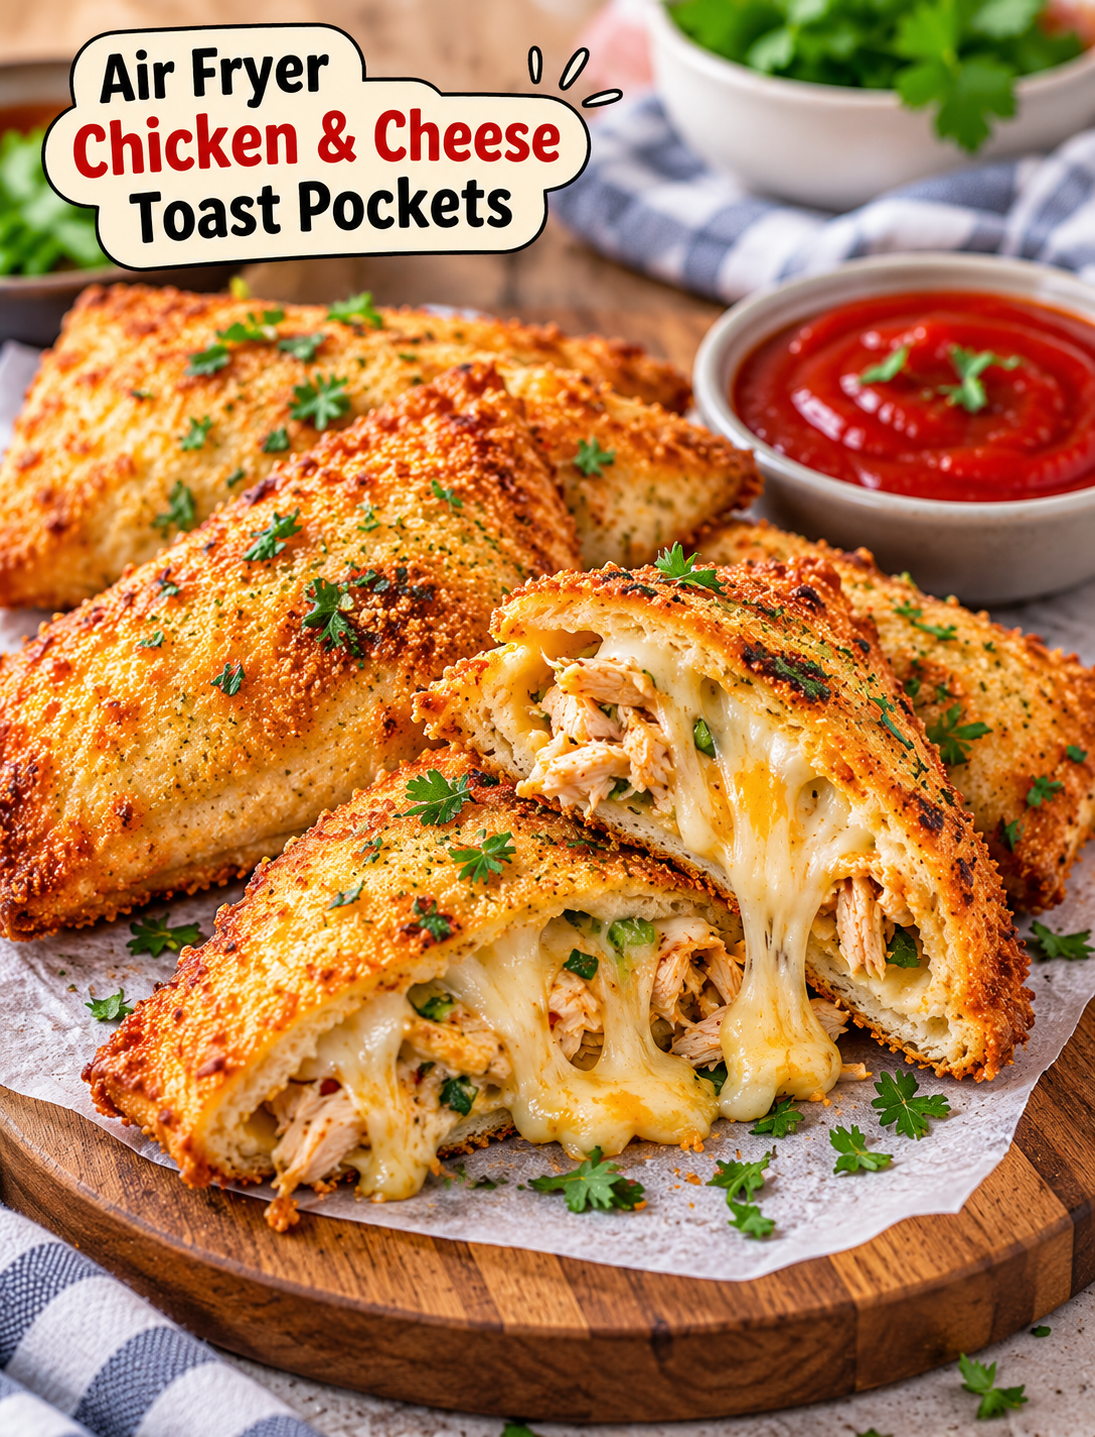
Air Fryer Crispy Chicken & Cheese Toast Pockets are a quick, satisfying meal made with bread, cooked chicken, melted cheese, and simple seasonings. The outside turns golden and crisp in the air fryer, while the inside stays warm, cheesy, and flavorful. They are perfect for busy weeknights, quick lunches, after-school snacks, or a casual weekend meal.
This easy recipe uses everyday ingredients and does not require deep frying. You can use leftover roast chicken, rotisserie chicken, or freshly cooked chicken to make the filling. Cheddar, mozzarella, or a blend of both gives the pockets a rich, cheesy center.
The best part is that you can prepare these crispy chicken toast pockets in just a few simple steps. Serve them with ketchup, ranch dressing, garlic sauce, or your favorite dipping sauce for a meal the whole family can enjoy.
Why You’ll Love These Air Fryer Chicken & Cheese Toast Pockets
- Crispy without deep frying: The air fryer creates a golden, crunchy exterior with only a light coating of oil.
- Quick and convenient: Using cooked chicken helps you prepare the filling in minutes.
- Cheesy and satisfying: Melted cheese binds the filling together and adds plenty of flavor.
- Easy to customize: Add vegetables, spices, or different cheeses to suit your taste.
- Great for leftovers: This recipe is a practical way to use leftover cooked chicken.
- Family-friendly: The mild seasoning and handheld shape make these pockets easy to serve for lunch or snacks.
Ingredients You’ll Need
Use fresh bread and fully cooked chicken for the best results. The measurements below make approximately 4 toast pockets, depending on the size of your bread slices.
- 8 slices sandwich bread: White bread works well, but whole-wheat bread is another option.
- 1 cup cooked chicken: Shred or finely chop the chicken so the filling fits neatly inside each pocket.
- ½ cup shredded cheddar cheese: Adds a rich, savory flavor.
- ½ cup shredded mozzarella cheese: Helps create a soft, stretchy cheese center.
- 2 tablespoons mayonnaise: Adds moisture and helps the filling hold together.
- 1 tablespoon finely chopped green onion: Adds a mild onion flavor.
- ¼ teaspoon garlic powder: Gives the chicken filling a savory taste.
- ¼ teaspoon paprika: Adds gentle warmth and color.
- ¼ teaspoon black pepper: Provides a little extra seasoning.
- Salt to taste: Adjust the amount based on how salty your chicken and cheese are.
- 1 egg, beaten: Helps seal the bread edges.
- 1–2 teaspoons olive oil or cooking spray: Helps the outside become golden and crisp.
Optional additions: Finely chopped bell pepper, a pinch of chili flakes, or a little chopped parsley can add extra flavor. Avoid adding too many wet ingredients because excess moisture can make the bread soggy.
Equipment Needed
- Air fryer
- Mixing bowl
- Fork or spoon
- Cutting board
- Rolling pin or flat-bottomed cup
- Pastry brush
- Fork for sealing the edges
- Silicone-tipped tongs or a spatula
How to Make Air Fryer Crispy Chicken & Cheese Toast Pockets
Follow these numbered steps for crisp bread, a flavorful filling, and melted cheese in every bite.
Step 1: Prepare the Chicken Filling
Place the cooked, shredded chicken in a mixing bowl. Add the cheddar cheese, mozzarella cheese, mayonnaise, green onion, garlic powder, paprika, black pepper, and salt.
Mix everything until the ingredients are evenly combined. Break up any large pieces of chicken so the filling spreads easily across the bread.
The mixture should be moist enough to hold together without becoming watery. If your chicken is already seasoned, taste the filling before adding extra salt.
Step 2: Flatten the Bread Slices
Place the bread slices on a clean cutting board. Use a rolling pin to flatten each slice gently until it is thin but not torn.
Flattening the bread makes it easier to fold and seal. It also helps the pockets develop a crisp texture during air frying.
If the crusts are very firm, trim them off for easier sealing. You can save the crusts for breadcrumbs or another recipe.
Step 3: Add the Filling
Spoon approximately 2 tablespoons of chicken and cheese filling onto one side of each flattened bread slice. Leave a clear border around the edges so the filling does not squeeze out.
Avoid overfilling the bread. Too much filling can prevent the edges from sealing properly and may cause cheese to leak into the air fryer basket.
For evenly sized pockets, divide the filling into eight portions before assembling them.
Step 4: Fold and Seal the Pockets
Fold each bread slice over the filling to create a half-moon or rectangular pocket. Brush a little beaten egg along the edges, then press them firmly together.
Use the back of a fork to crimp around the edges. Check every pocket for gaps before cooking.
A tight seal keeps the filling inside and helps the bread hold its shape. If the bread cracks while folding, press the damaged area gently together before sealing.
Step 5: Preheat the Air Fryer
Preheat your air fryer to 375°F for about 3 minutes, if your model recommends preheating.
Lightly brush or spray the outside of each pocket with olive oil. This helps the bread brown evenly and develop a crisp finish.
Place the pockets on a plate while the air fryer heats. Do not stack them, because the surfaces need space to crisp properly.
Step 6: Air Fry Until Golden and Crispy
Arrange the toast pockets in a single layer in the air fryer basket. Leave a little space between each one so hot air can circulate.
Air fry at 375°F for 6–9 minutes, flipping the pockets carefully halfway through cooking. Check them early because thin bread may brown faster than thick bread.
The pockets are ready when both sides look golden and crisp, the cheese is melted, and the filling is hot throughout. If they need more color, cook for another 1–2 minutes while watching closely.
Because the chicken is already cooked, the main goal is to heat the filling thoroughly and crisp the bread. If you use any freshly cooked chicken in the filling, cook it separately first and make sure it reaches a safe internal temperature of 165°F.
Step 7: Rest, Slice, and Serve
Remove the pockets carefully using tongs or a spatula. Let them rest for 2 minutes before cutting or serving.
The short resting time allows the melted cheese to settle and reduces the chance of burning your mouth. Slice each pocket in half if you want a snack-sized serving.
Serve warm with ketchup, ranch dressing, barbecue sauce, or marinara. Add a simple green salad, sliced cucumbers, or fresh fruit to turn the pockets into a more complete meal.
Expert Tips for the Crispiest Toast Pockets
- Use fully cooled filling: Very hot filling can soften the bread before cooking.
- Choose bread that folds easily: Fresh sandwich bread is usually easier to seal than dry bread.
- Keep the filling away from the edges: A clear border helps prevent leaks.
- Do not skip the oil: A light coating encourages browning without deep frying.
- Avoid overcrowding: Cook in batches if needed to maintain good airflow.
- Check your air fryer early: Different models and bread thicknesses can change the cooking time.
- Use finely shredded cheese: Smaller pieces melt more evenly and combine well with the chicken.
- Do not use excess mayonnaise: Too much moisture can make the bread soft instead of crisp.
Easy Variations to Try
Spicy Chicken and Cheese Pockets
Add a pinch of chili flakes or cayenne pepper to the chicken mixture. You can also use pepper jack cheese for extra heat.
BBQ Chicken Toast Pockets
Replace the mayonnaise with a small amount of barbecue sauce, or mix a little barbecue sauce into the filling. Use cheddar cheese for a smoky, savory flavor, but keep the filling thick rather than runny.
Garlic Parmesan Pockets
Add 1–2 tablespoons of grated Parmesan cheese and a small pinch of Italian seasoning. Serve with warm marinara for an easy pizza-inspired snack.
Veggie Chicken Pockets
Mix in a tablespoon or two of finely chopped bell pepper or spinach. Cooked vegetables should be drained and patted dry to prevent excess moisture.
Whole-Wheat Chicken Pockets
Use whole-wheat sandwich bread for a slightly heartier option. If the bread is less flexible, flatten it gently and avoid overfilling to prevent tearing.
What to Serve With Chicken and Cheese Toast Pockets
These pockets pair well with simple sides and dipping sauces. Try one or two of the following:
- Ranch dressing: A creamy option that complements the chicken and cheese.
- Ketchup: A familiar, slightly sweet dip.
- Marinara sauce: Adds a tomato and herb flavor.
- Fresh green salad: Balances the rich filling with crisp vegetables.
- Air fryer potato wedges: Makes the meal more filling.
- Cucumber and carrot sticks: Adds freshness and crunch.
- Tomato soup: A comforting choice for lunch or a light dinner.
How to Store and Reheat Leftovers
Refrigerator: Let the pockets cool, then place them in an airtight container. Refrigerate within 2 hours of cooking and eat within 3–4 days.
Freezer: For better texture, freeze the cooled pockets in a single layer until firm, then transfer them to a freezer-safe container. For best quality, use within 2 months.
Reheating: Reheat refrigerated pockets in an air fryer at 350°F for about 3–5 minutes, checking that the center is hot. Frozen pockets may need additional time; reheat until the filling reaches 165°F.
Avoid reheating for too long: Excessive heat can dry out the chicken and make the bread overly hard. The microwave is convenient, but it usually makes the bread softer rather than crispy.
Frequently Asked Questions
1. Can I use rotisserie chicken for this recipe?
Yes. Remove the skin and bones, then shred the cooked rotisserie chicken into small pieces before mixing the filling.
2. What temperature should I use for air fryer toast pockets?
Start at 375°F and cook for 6–9 minutes, flipping halfway through. Adjust the time to suit your air fryer and bread thickness.
3. Which cheese melts best in chicken toast pockets?
Mozzarella gives a stretchy texture, while cheddar adds a stronger flavor. A mixture of both works especially well.
4. Can I make these pockets without eggs?
Yes. Use a little water or milk to help the bread edges stick, then press firmly with a fork. The seal may be slightly less secure.
5. Why are my toast pockets soggy?
Soggy pockets usually result from wet filling, excess mayonnaise, overcrowding, or too little cooking time. Keep the filling thick and leave space between pockets.
6. Can I prepare the pockets ahead of time?
Yes. Assemble them and refrigerate in a covered container for up to 24 hours before air frying. Cook them until crisp and heated through.
7. Can I cook these pockets in a regular oven?
Yes. Place them on a lined baking sheet and bake at 400°F for approximately 10–15 minutes, flipping halfway through. Check for golden bread and a hot center.
8. Are these chicken and cheese pockets good for kids’ lunchboxes?
They can work well when packed safely, but they are best served hot and crisp. If packing for later, use an insulated container to keep them at a safe temperature.
Final Thoughts
Air Fryer Crispy Chicken & Cheese Toast Pockets are a practical way to turn cooked chicken, sandwich bread, and cheese into a warm, satisfying meal. The air fryer gives the bread a crisp exterior without the need for deep frying, while the seasoned filling stays cheesy and flavorful.
Keep the filling thick, seal the edges firmly, and cook the pockets in a single layer for the best results. Serve them with your favorite dipping sauce, or pair them with a fresh salad for an easy lunch or dinner. Once you try the basic version, experiment with spicy, barbecue, or garlic Parmesan flavors to create your own favorite combination.