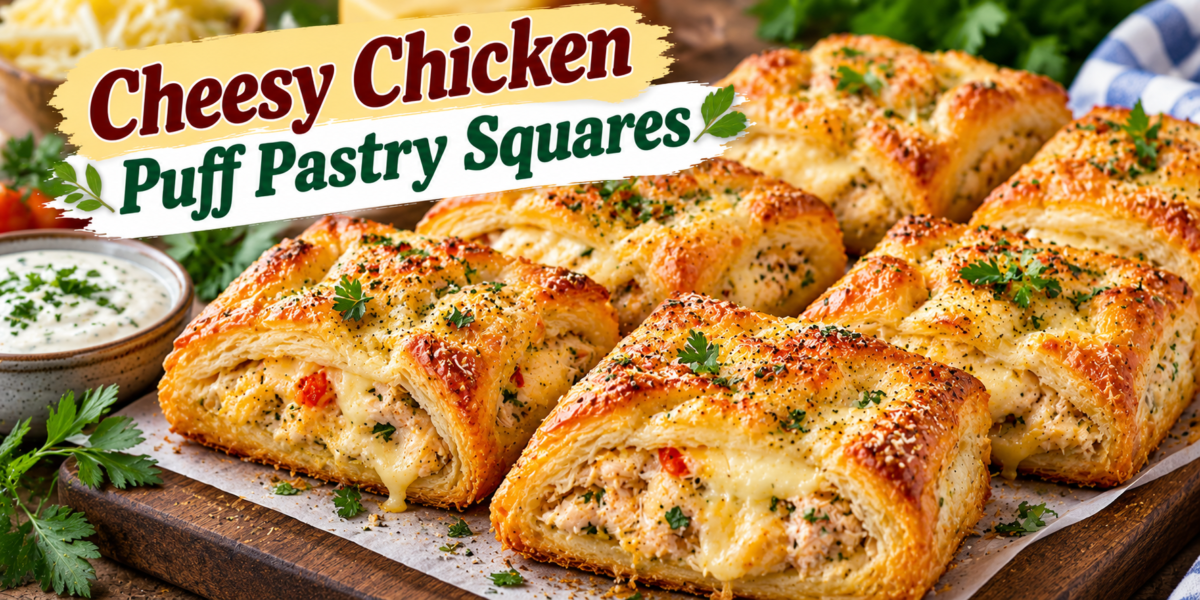
Cheesy Chicken Puff Pastry Squares

Chicken Puff Pastry squares with tender chicken, cream cheese, mozzarella, cheddar, herbs, and golden flaky pastry

Cheesy Chicken Puff Pastry Squares

Chicken Puff Pastry is a golden, flaky, and creamy savory bake filled with tender chicken, melted cheese, herbs, and a lightly seasoned filling. These puff pastry squares are easy to assemble but look impressive enough for brunch, lunch, parties, or a casual family dinner. The crisp pastry creates a buttery shell around a soft, cheesy center, giving you a satisfying contrast in every bite.

This Chicken Puff Pastry recipe is also a practical way to use cooked chicken. Rotisserie chicken, leftover roasted chicken, or simply poached chicken all work well. With a simple filling and ready-made puff pastry, you can have a bakery-style dish on the table without making dough from scratch.

Prep Time: 20 minutes
Bake Time: 22 to 25 minutes
Total Time: About 45 minutes
Servings: 8 squares

Ingredients

For the Chicken Filling

  • 2 cups cooked chicken, finely chopped or shredded
  • 1 cup shredded mozzarella cheese
  • 1/2 cup shredded cheddar cheese
  • 4 ounces cream cheese, softened
  • 1/4 cup sour cream or plain Greek yogurt
  • 2 green onions, finely sliced
  • 2 tablespoons chopped fresh parsley
  • 1 small garlic clove, minced
  • 1 teaspoon Dijon mustard
  • 1/2 teaspoon dried oregano
  • 1/2 teaspoon garlic powder
  • 1/4 teaspoon smoked paprika
  • 1/4 teaspoon black pepper
  • 1/4 teaspoon salt, or to taste

For the Puff Pastry

  • 2 sheets frozen puff pastry, thawed
  • 1 large egg
  • 1 tablespoon water
  • 1 tablespoon sesame seeds, optional
  • 1 tablespoon grated Parmesan, optional

Optional Garnishes

  • Fresh parsley
  • Extra green onions
  • Red pepper flakes
  • Garlic yogurt dip
  • Marinara sauce

Why You’ll Love This Recipe

Chicken Puff Pastry combines convenience with a rich, homemade flavor. The filling is creamy and cheesy, while the pastry bakes into crisp, airy layers.

Another reason to love Chicken Puff Pastry is its flexibility. You can change the cheese, add vegetables, or use different herbs without changing the basic method.

The squares are also easy to portion, making them ideal for lunchboxes, party platters, or make-ahead snacks.

How to Make Chicken Puff Pastry

Step 1: Preheat the Oven

Preheat the oven to 400°F or 200°C.

Line a large baking sheet with parchment paper.

A properly heated oven is important because high heat helps Chicken Puff Pastry rise quickly and develop crisp, flaky layers.

Step 2: Make the Filling

In a large mixing bowl, combine the cooked chicken, mozzarella, cheddar, cream cheese, sour cream, green onions, parsley, garlic, Dijon mustard, oregano, garlic powder, smoked paprika, black pepper, and salt.

Stir until the mixture is evenly combined.

The filling should be creamy enough to hold together but not watery.

Step 3: Prepare the Puff Pastry

Unfold the thawed puff pastry sheets on a lightly floured surface.

If needed, gently roll each sheet just enough to smooth the folds.

Cut each sheet into 4 equal squares so you have 8 pieces total.

Keeping the pastry cold helps Chicken Puff Pastry puff more effectively in the oven.

Step 4: Add the Filling

Place about 2 to 3 tablespoons of chicken filling in the center of each pastry square.

Leave a border around the edges so the pastry can seal properly.

Do not overfill the squares because too much filling can leak during baking.

Step 5: Shape the Squares

You can bake the squares open-faced or fold the corners slightly toward the center.

For a more enclosed shape, bring the four corners toward the middle and pinch gently, leaving a small opening in the center.

This gives Chicken Puff Pastry an attractive bakery-style appearance while still letting steam escape.

Step 6: Make the Egg Wash

Whisk the egg with 1 tablespoon water.

Brush the exposed pastry lightly with the egg wash.

Sprinkle with sesame seeds or grated Parmesan if desired.

The egg wash gives the finished pastry a shiny, golden surface.

Step 7: Bake

Arrange the squares on the prepared baking sheet, leaving space between each one.

Bake for 22 to 25 minutes, or until the pastry is deeply golden and puffed.

Chicken Puff Pastry is best when the edges are crisp and the filling is hot and melted.

Step 8: Cool Briefly

Let the squares rest on the baking sheet for about 5 minutes.

This short cooling time allows the filling to settle slightly while the pastry stays crisp.

Step 9: Garnish and Serve

Sprinkle with fresh parsley, green onions, or red pepper flakes.

Serve Chicken Puff Pastry warm with garlic yogurt dip, marinara, or a simple salad.

Serving Suggestions

Chicken Puff Pastry works beautifully as an appetizer or light meal.

Serve the squares with a crisp green salad, cucumber salad, roasted vegetables, or tomato soup.

For brunch, pair Chicken Puff Pastry with scrambled eggs, fresh fruit, or a simple yogurt bowl. When serving these squares at a party, arrange them on a platter with several dipping sauces so guests can choose their favorite. For another flavorful Mediterranean-style meal, try our Garlic Butter Shrimp Stuffed Zucchini Boats.

Recipe Tips

Use cooked chicken that is not overly wet.

Cool the chicken before mixing it with the cream cheese.

Thaw puff pastry in the refrigerator so it remains cold but flexible.

Do not leave puff pastry sitting at room temperature for too long.

Avoid overfilling the squares.

Seal or pinch the pastry gently so it does not tear.

Chicken Puff Pastry becomes crispest when baked on a preheated oven rack near the center.

Use parchment paper to prevent sticking.

Let the squares rest briefly before serving.

For extra browning, brush all exposed pastry with egg wash.

Easy Variations

Add chopped spinach for extra color and vegetables.

Chicken Puff Pastry can also be made with sautéed mushrooms, roasted red peppers, sweet corn, or finely chopped broccoli.

For a stronger cheese flavor, replace part of the mozzarella with Gouda, provolone, or Monterey Jack.

Add jalapeños or red pepper flakes if you prefer a spicy filling.

For Mediterranean flavor, mix in feta, chopped olives, and oregano.

You can also add a little pesto to the filling for a basil-garlic variation.

Make-Ahead Instructions

Chicken Puff Pastry can be assembled several hours ahead.

Prepare the filling and keep it refrigerated.

Cut and fill the pastry, then place the unbaked squares on a parchment-lined tray and refrigerate until ready to bake.

Brush with egg wash just before they go into the oven.

For longer preparation, freeze the assembled unbaked squares on a tray until firm, then transfer them to a freezer-safe container.

Storage and Reheating

Store leftover Chicken Puff Pastry in an airtight container in the refrigerator for up to 3 days.

Reheat in a 350°F or 175°C oven or air fryer for 5 to 8 minutes until the pastry is crisp again.

The microwave works, but it will soften the pastry.

You can freeze baked squares for up to 2 months. Thaw in the refrigerator, then reheat in the oven.

Nutrition Information

Approximate nutrition per square:

Calories: 360
Protein: 18 g
Carbohydrates: 24 g
Fat: 22 g
Saturated Fat: 10 g
Fiber: 1 g
Sugar: 2 g
Sodium: 520 mg

Nutrition values are estimates and may vary depending on the pastry, chicken, cheese, and serving size.

Frequently Asked Questions

Can I use rotisserie chicken?

Yes. Rotisserie chicken is one of the easiest options for Chicken Puff Pastry. Remove the skin and shred or chop the meat before mixing it into the filling.

Can I use frozen puff pastry?

Yes. Frozen puff pastry works perfectly as long as it is thawed according to package directions.

Can I make these without cream cheese?

Yes. Replace cream cheese with ricotta, thick Greek yogurt, or a little extra shredded cheese.

How do I keep the pastry from getting soggy?

Use a filling that is thick rather than watery, avoid overfilling, and bake at a high temperature until deeply golden.

Can I add vegetables?

Yes. Spinach, mushrooms, broccoli, corn, and roasted peppers all work well. Cook and drain watery vegetables before adding them.

Can I make smaller appetizer pieces?

Yes. Cut the pastry into smaller squares and use less filling. Reduce the baking time slightly and watch them closely.

What dipping sauce works best?

Garlic yogurt sauce, ranch, marinara, honey mustard, or a creamy herb dip all pair well.

Final Thoughts

Chicken Puff Pastry is an easy way to turn simple cooked chicken into a flaky, cheesy dish that works for many occasions. The combination of crisp pastry and creamy filling makes it feel special while still being simple enough for everyday cooking.

Because Chicken Puff Pastry is so easy to customize, you can change the vegetables, cheese, herbs, or dipping sauce to suit your meal.

Keep this Chicken Puff Pastry recipe in your rotation whenever you need a quick savory bake for lunch, brunch, parties, or family dinners.

If you enjoy fresh and colorful Mediterranean dishes, you may also like our Mediterranean Chickpea Cucumber Feta Salad.
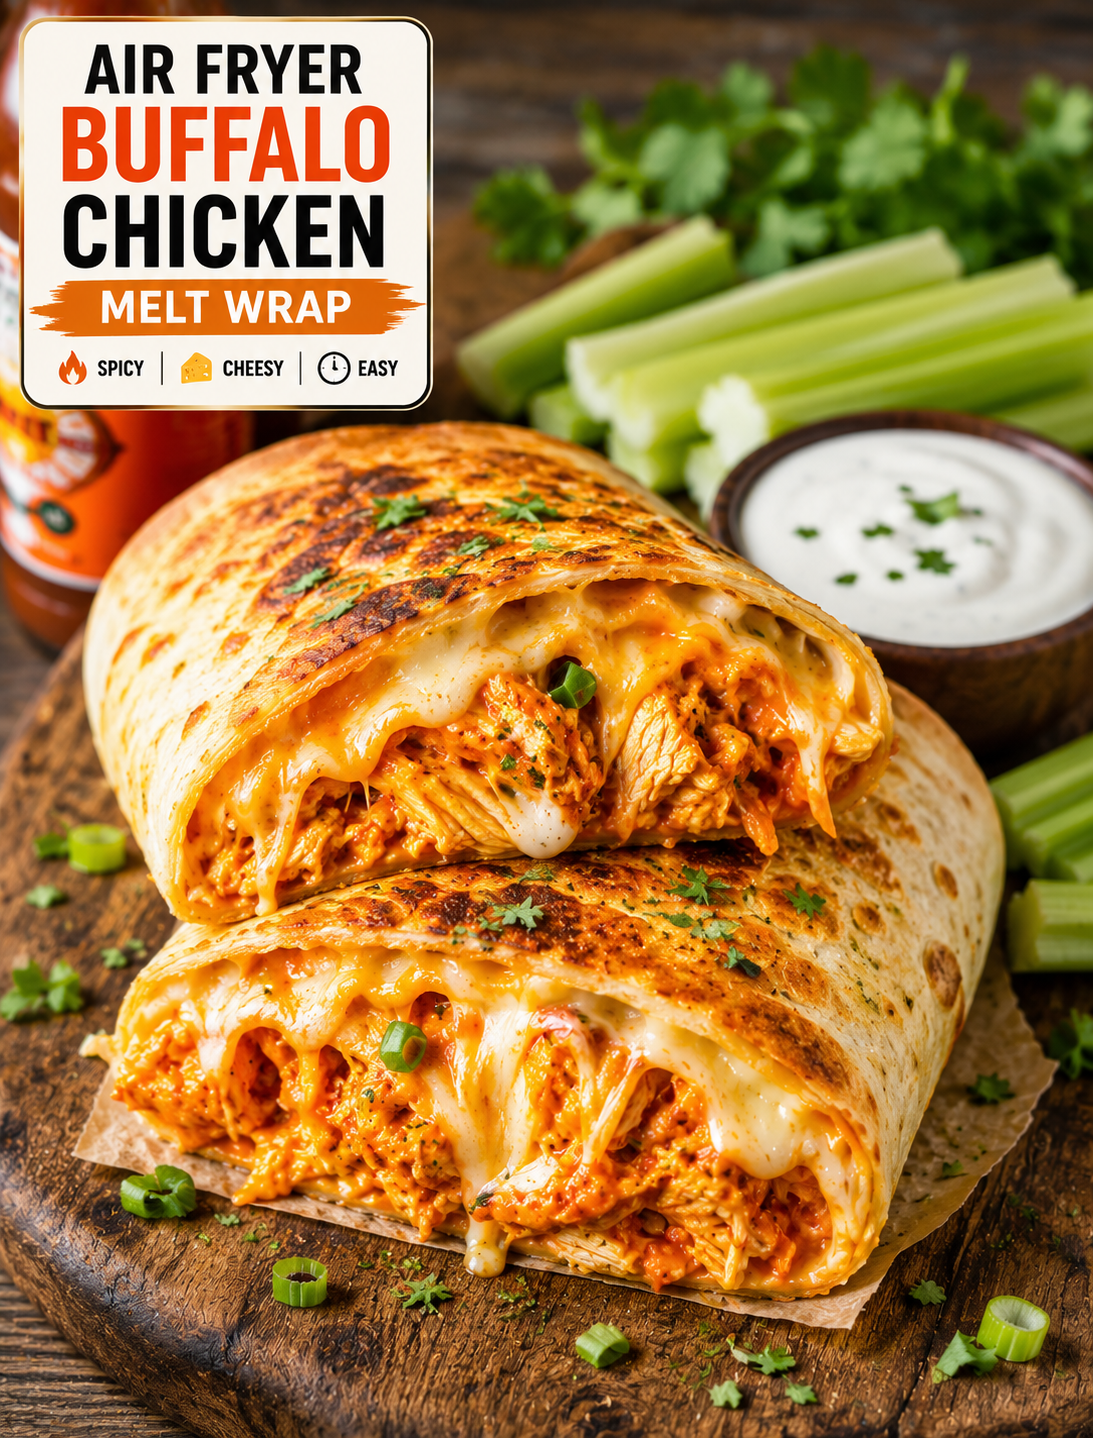
Air Fryer Buffalo Chicken Melt Wrap

Crispy air fryer buffalo chicken melt wrap sliced open with juicy buffalo chicken, melted cheese, ranch dip, and fresh vegetables

Air Fryer Buffalo Chicken Melt Wrap

Craving something crispy, cheesy, spicy, and easy enough for a busy weeknight? This Air Fryer Buffalo Chicken Melt Wrap brings all those flavors together in one golden, satisfying meal.

Tender shredded chicken is tossed with tangy buffalo sauce, wrapped with melted cheese and fresh toppings, then cooked in the air fryer until the tortilla turns crisp and golden. The cheese melts into the chicken while the outside develops a crunchy texture that makes every bite satisfying.

This recipe is perfect for lunch, dinner, game day, or a quick snack when you want something more exciting than a plain sandwich. It uses simple ingredients and takes only a few minutes to assemble.

Serve it with ranch dressing, blue cheese dip, celery sticks, or a fresh side salad for a complete meal.

Why You’ll Love This Buffalo Chicken Wrap

This wrap combines several textures in one easy recipe. The chicken stays tender, the cheese becomes gooey, and the tortilla turns crisp in the air fryer.

Buffalo sauce gives the filling a bold combination of heat, tang, and buttery flavor. You can use mild, medium, or hot buffalo sauce depending on how spicy you like your food.

The recipe is also a great way to use leftover cooked chicken. Rotisserie chicken works especially well because it is already seasoned and easy to shred.

Unlike a deep-fried wrap, the air fryer requires only a light coating of oil or cooking spray. The circulating hot air helps crisp the tortilla without needing a pot of frying oil.

You can also customize the filling with different cheeses, vegetables, and sauces to create your own version.

Ingredients You’ll Need

  • 2 cups cooked shredded chicken
  • ½ cup buffalo wing sauce
  • 4 large flour tortillas
  • 1 cup shredded Monterey Jack cheese
  • ½ cup shredded cheddar cheese
  • ¼ cup finely diced red onion
  • ½ cup shredded lettuce
  • ¼ cup chopped green onions
  • 2 tablespoons ranch dressing
  • 1 tablespoon melted butter
  • ½ teaspoon garlic powder
  • ½ teaspoon smoked paprika
  • ¼ teaspoon black pepper
  • Cooking spray
  • Fresh parsley or green onions for garnish, optional

For a stronger buffalo flavor, add a little more wing sauce to the chicken. For a milder wrap, reduce the sauce and increase the ranch dressing.

Flour tortillas work best because they are flexible and easy to fold. Choose burrito-size tortillas when you want larger wraps with plenty of filling.

How to Make Air Fryer Buffalo Chicken Melt Wrap

1. Prepare the Chicken

Place the cooked shredded chicken in a medium bowl.

Add buffalo sauce, melted butter, garlic powder, smoked paprika, and black pepper.

Stir until the chicken is evenly coated.

If the chicken seems dry, add another tablespoon of buffalo sauce. The filling should be moist but not watery because excess sauce can make the tortilla difficult to crisp.

2. Warm the Tortillas

Warm the tortillas for about 10–15 seconds in the microwave.

This small step makes them softer and easier to fold without cracking.

Keep the tortillas covered with a clean kitchen towel while assembling the wraps so they stay flexible.

3. Add the Filling

Place one tortilla on a flat surface.

Add a portion of buffalo chicken slightly below the center of the tortilla.

Sprinkle Monterey Jack and cheddar cheese over the chicken.

Add a small amount of diced red onion for crunch and extra flavor.

Do not overfill the tortilla because too much filling can make it difficult to seal.

4. Fold the Wrap

Fold the bottom edge of the tortilla over the filling.

Fold both sides inward, then roll the tortilla tightly upward until you have a sealed wrap.

Place the wrap seam-side down while preparing the remaining tortillas.

Keeping the seam underneath helps prevent the wrap from opening during air frying.

5. Air Fry Until Golden

Preheat the air fryer to 375°F if your model requires preheating.

Lightly spray the air fryer basket with cooking spray.

Place the wraps seam-side down in the basket, leaving space between them for air circulation.

Lightly spray or brush the tops with a small amount of oil or melted butter.

Air fry for approximately 6–9 minutes, turning halfway through cooking.

The wraps are ready when the tortillas are golden and crisp and the cheese inside is melted.

Cooking time can vary between air fryer models, so watch the wraps closely during the final few minutes.

6. Slice and Serve

Carefully remove the hot wraps from the air fryer.

Allow them to rest for 1–2 minutes before cutting.

Slice each wrap diagonally and arrange the pieces on a serving plate.

Drizzle with ranch or serve the dressing on the side.

Add chopped green onions or fresh parsley for a bright finishing touch.

Best Chicken for This Recipe

Cooked shredded chicken is the easiest choice for these wraps.

Rotisserie chicken saves time and provides tender meat with plenty of flavor. You can also use leftover roasted or baked chicken.

Chicken breast creates a leaner filling, while chicken thighs provide a richer texture and more moisture.

If using freshly cooked chicken, allow it to cool slightly before shredding. Pull the meat apart with two forks or use clean hands once it is safe to handle.

Avoid using chicken that is overly wet because excess moisture can prevent the tortilla from becoming crisp.

Choosing the Best Cheese

Monterey Jack is an excellent choice because it melts smoothly and has a mild flavor.

Cheddar adds a sharper taste and gives the filling a classic cheesy finish.

You can also use pepper Jack for extra heat or mozzarella for a milder, stretchy texture.

For the best melt, shred cheese from a block rather than using large chunks.

A combination of two cheeses gives the wrap more flavor without overpowering the buffalo chicken.

How to Control the Spice Level

Buffalo sauce can range from mild to very hot, so the heat level is easy to adjust.

For a mild wrap, choose mild buffalo sauce and add extra ranch dressing.

For medium heat, use a traditional buffalo wing sauce with the recipe measurements.

For a spicy version, add cayenne pepper, crushed red pepper flakes, or sliced jalapeños to the chicken mixture.

You can also serve hot sauce on the side so each person can control the heat.

What to Serve With Buffalo Chicken Wraps

These crispy wraps pair well with classic buffalo-style sides.

Serve them with celery and carrot sticks for a fresh, crunchy contrast.

Ranch dressing or blue cheese dressing makes a creamy dip for the spicy chicken.

A simple green salad can balance the richness of the melted cheese.

For game day, serve the wraps with sweet potato fries, potato wedges, or air fryer onion rings.

You can also cut the wraps into smaller pieces and serve them as party appetizers.

Tips for Crispy Air Fryer Wraps

Do not overfill the tortillas because a thin, even filling cooks more evenly.

Warm the tortillas before rolling so they do not crack.

Keep the seam facing downward when placing the wraps in the air fryer.

Leave space between the wraps so hot air can circulate around them.

Use only a light amount of oil because too much can make the tortilla greasy.

Turn the wraps halfway through cooking for even browning.

Allow the finished wraps to rest briefly before slicing so the melted cheese does not spill out immediately.

Serve them soon after cooking for the best crispy texture.

Can You Make These Wraps Ahead of Time?

Yes. You can prepare the chicken filling several hours ahead and refrigerate it until you are ready to assemble the wraps.

For meal prep, keep the chicken mixture in a sealed container and assemble the tortillas shortly before air frying.

You can also assemble the wraps in advance and refrigerate them covered for a short period.

For the best texture, air fry the wraps just before serving rather than cooking them far ahead of time.

If you have leftovers, refrigerate them in an airtight container and reheat them in the air fryer until hot and crisp.

Easy Variations to Try

There are many ways to change this recipe without changing the basic cooking method.

Add chopped celery to the chicken for classic buffalo-style crunch.

Mix in finely diced jalapeños for extra heat.

Add sliced avocado after cooking for a creamy contrast.

Use pepper Jack instead of cheddar for a spicy cheese version.

Add shredded cabbage for extra crunch.

Replace ranch with blue cheese dressing for a stronger buffalo flavor.

For a smoky version, add extra smoked paprika to the chicken.

You can also make mini wraps with smaller tortillas for parties and appetizers.

Storage and Reheating

Place leftover wraps in an airtight container and refrigerate them promptly.

For the best texture, reheat them in the air fryer at about 350°F for 3–5 minutes or until heated through.

Avoid relying on the microwave when crispiness matters because microwave heating can soften the tortilla.

If the filling contains chicken that has been stored for several days, check its freshness before reheating.

Always discard leftovers that have an unusual smell, appearance, or texture.

The Bottom Line

Air Fryer Buffalo Chicken Melt Wraps are an easy way to turn simple chicken and tortillas into a crispy, cheesy meal with bold buffalo flavor.

The air fryer creates a golden tortilla while keeping the inside warm and melty. Buffalo sauce adds tangy heat, while ranch, fresh vegetables, and cheese help balance the flavor.

The recipe is flexible enough for lunch, dinner, game-day gatherings, or quick snacks. You can adjust the spice level, change the cheese, or add your favorite crunchy vegetables.

For the crispiest result, avoid overfilling the tortillas, keep them seam-side down, and serve them soon after air frying.

Frequently Asked Questions

1. How long do buffalo chicken wraps take in the air fryer?

Cook them at 375°F for about 6–9 minutes, turning halfway, until the tortilla is golden and the cheese is melted.

2. Can I use rotisserie chicken?

Yes. Shredded rotisserie chicken is one of the easiest and most flavorful options for this recipe.

3. What cheese melts best in buffalo chicken wraps?

Monterey Jack, cheddar, pepper Jack, and mozzarella all melt well and pair nicely with buffalo chicken.

4. How do I keep the wrap from opening?

Roll it tightly and place it seam-side down in the air fryer basket before cooking.

5. Can I make these wraps spicy?

Yes. Use hot buffalo sauce or add cayenne, jalapeños, or crushed red pepper for extra heat.

6. Can I make buffalo chicken wraps ahead of time?

Yes. Prepare the filling ahead, refrigerate it, and assemble and air fry the wraps shortly before serving.

7. What dipping sauce goes with buffalo chicken wraps?

Ranch and blue cheese dressing are classic choices that balance the spicy buffalo flavor.

8. Can I reheat leftover buffalo chicken wraps?

Yes. Reheat them in an air fryer at about 350°F for 3–5 minutes to restore some of the crispy texture.

Final Thoughts

Air Fryer Buffalo Chicken Melt Wraps are the kind of easy meal that delivers big flavor without complicated preparation. Tender buffalo chicken, gooey melted cheese, and a crispy golden tortilla make every bite satisfying.

They are especially useful when you have leftover chicken and want to turn it into something completely different. Add your favorite toppings, adjust the heat, and serve with ranch, blue cheese, or crunchy vegetables.

For the best results, keep the filling balanced, roll the tortillas tightly, and air fry until golden and crisp.

Spicy, cheesy, crispy, and easy—this is one wrap you’ll want to make again.