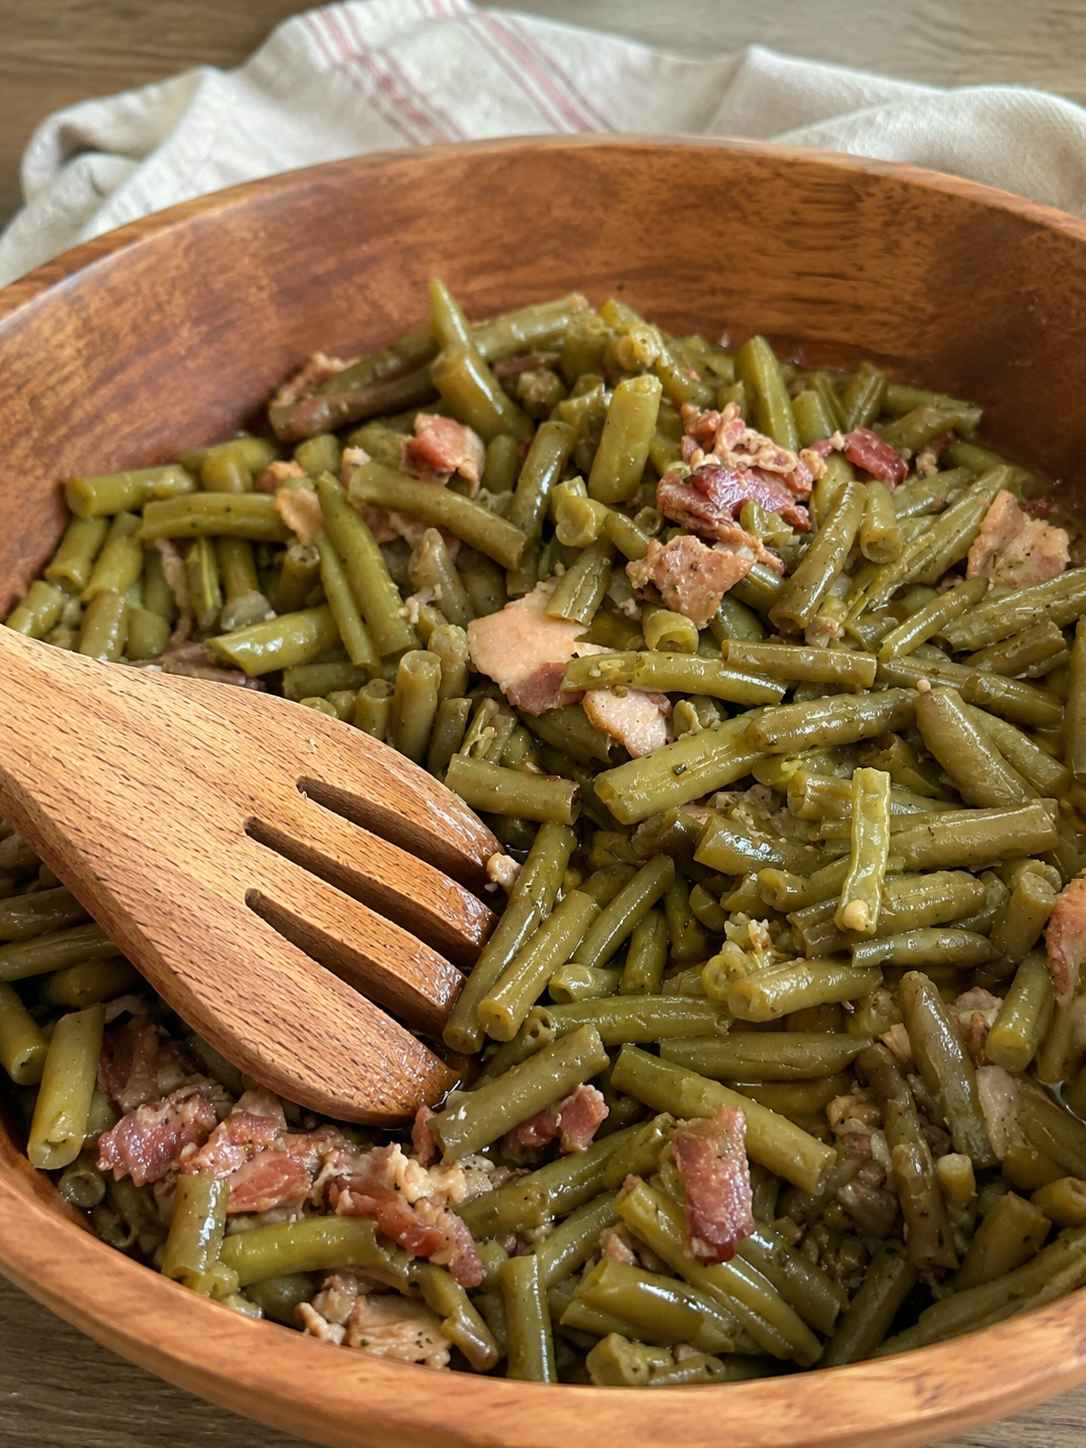
Southern Green Beans with Bacon

Southern Green Beans with Bacon

Ingredients 🛒

  • 4 cups green beans (fresh, frozen, or canned)
  • 6 slices bacon, chopped
  • 1 small onion, diced
  • 1 cup chicken broth
  • Salt and black pepper, to taste

Detailed Steps 👩‍🍳

1️⃣ Cook the Bacon

  • Place a large skillet or pot over medium heat.
  • Add the chopped bacon.
  • Cook for 6–8 minutes, stirring occasionally, until crispy.
  • Remove half of the bacon and set aside for garnish.

2️⃣ Sauté the Onion

  • Add the diced onion to the bacon drippings.
  • Cook for 3–4 minutes until soft and lightly golden.
  • Stir frequently so the onion doesn’t burn.

3️⃣ Add the Green Beans

  • Add the green beans to the pot.
  • Stir well so they are coated with the bacon and onion mixture.

4️⃣ Pour in the Broth

  • Add the chicken broth.
  • Season with a little salt and black pepper.
  • Stir everything together.

5️⃣ Simmer

  • Bring the mixture to a gentle simmer.
  • Cover with a lid and cook for 20–25 minutes.
  • Stir occasionally.
  • The beans should become tender and absorb the smoky bacon flavor.

6️⃣ Finish the Dish

  • Remove the lid.
  • Let any excess liquid reduce for 2–3 minutes if needed.
  • Stir in the reserved crispy bacon.

7️⃣ Serve

  • Transfer to a serving bowl.
  • Spoon a little of the flavorful broth over the top.
  • Serve warm as a side dish with chicken, beef, or your favorite comfort-food meal.

Nutrition Benefits 💪

Good Source of Protein

  • Bacon and green beans provide protein to help keep you satisfied.

Rich in Fiber

  • Green beans contain fiber that supports healthy digestion.

Low-Carb Side Dish

  • Naturally lower in carbohydrates than many traditional side dishes.

Approximate Protein Content

  • Per Serving: 8–10g protein
  • Whole Recipe: 30–40g protein

Quick Q/A ❓

Can I use canned green beans?
➡️ Yes, drain them well before adding.

Can I use frozen green beans?
➡️ Yes, no need to thaw first.

Can I make this ahead of time?
➡️ Yes, it tastes even better the next day after the flavors have blended.
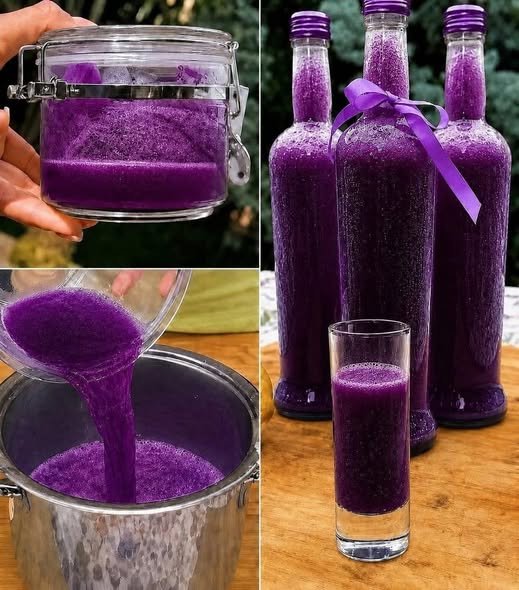
Purple Cabbage Drink

Purple Cabbage Drink

Ingredients

  • 1 small purple cabbage, chopped
  • 6 cups water
  • 2 tbsp honey (optional)
  • Juice of 1 lemon

Instructions

1️⃣ Prepare the Cabbage

  • Wash the purple cabbage thoroughly.
  • Chop it into small pieces.

2️⃣ Boil

  • Add the cabbage and water to a large pot.
  • Bring to a boil over medium-high heat.

3️⃣ Simmer

  • Reduce the heat and simmer for 20–25 minutes.
  • The water will turn a deep purple color.

4️⃣ Strain

  • Remove from heat.
  • Strain the liquid into a large bowl or pitcher.

5️⃣ Add Flavor

  • Stir in the lemon juice.
  • Add honey if desired and mix well.

6️⃣ Cool

  • Let the drink cool completely.
  • Transfer to bottles and refrigerate.

7️⃣ Serve

  • Shake before serving.
  • Enjoy chilled.

Q & A

Q: How long can I store it?
➡️ Up to 4 days in the refrigerator.

Q: Can I drink it warm?
➡️ Yes, it can be enjoyed warm or cold.

Q: Why does the color change after adding lemon?
➡️ Purple cabbage naturally reacts to acidity, creating a brighter purple-pink color.

Yield: About 4–5 cups. 💜🥬🥤

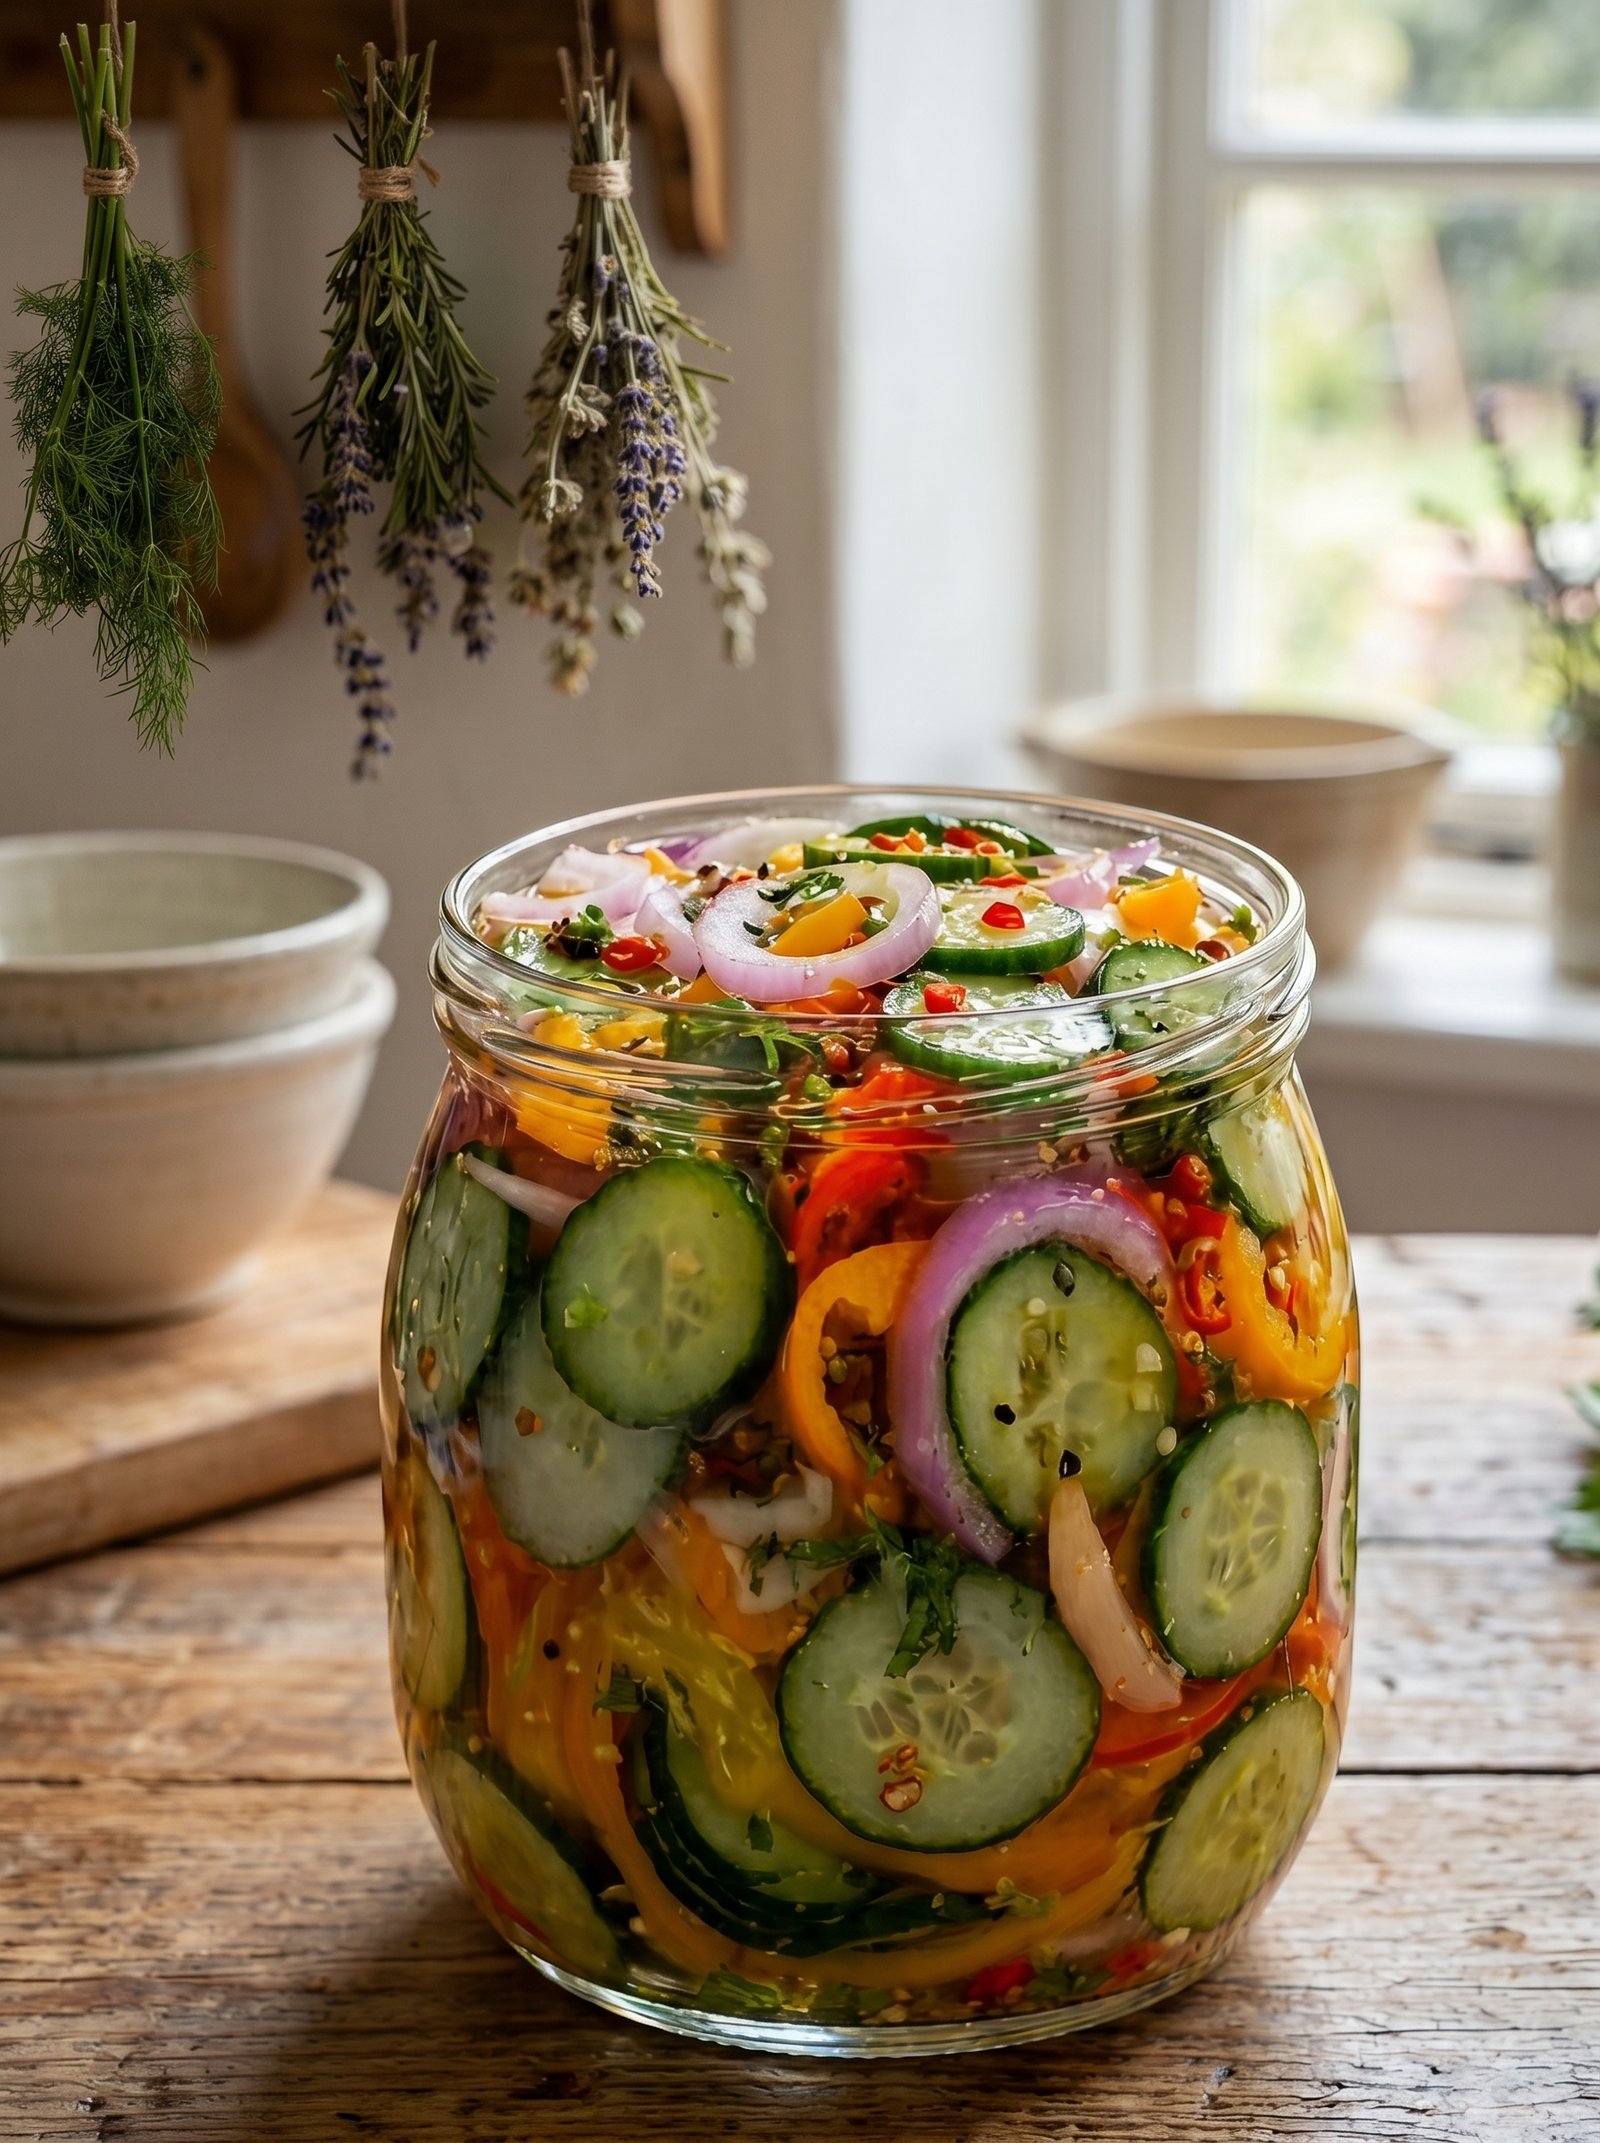
Zesty Cucumber & Pepper Garden Salad

Zesty Cucumber & Pepper Garden Salad

Ingredients 🛒

  • 2 large cucumbers, thinly sliced
  • 1 red bell pepper, thinly sliced
  • ½ red onion, thinly sliced
  • 2 tbsp olive oil
  • 1 tbsp fresh lemon juice
  • 1 tsp honey
  • ½ tsp salt
  • ¼ tsp black pepper
  • ½ tsp chili flakes (optional)
  • 1 tbsp fresh parsley, chopped

Detailed Steps 👩‍🍳

1️⃣ Prepare the Vegetables

  • Wash the cucumbers, bell pepper, and onion thoroughly.
  • Slice the cucumbers into thin rounds.
  • Cut the bell pepper into thin strips.
  • Slice the red onion into thin half-rings.
  • Chop the parsley finely.

2️⃣ Make the Dressing

  • In a small bowl, add olive oil, lemon juice, honey, salt, and black pepper.
  • Whisk well until the dressing looks smooth and fully combined.

3️⃣ Combine the Salad

  • Place the sliced cucumbers, bell pepper, and onion into a large mixing bowl.
  • Sprinkle the chopped parsley over the vegetables.
  • Pour the prepared dressing evenly over the top.

4️⃣ Toss Well

  • Using salad tongs or a large spoon, gently toss everything together.
  • Continue mixing for 1–2 minutes so every vegetable slice is coated with the dressing.

5️⃣ Chill for Better Flavor

  • Cover the bowl or transfer the salad to a glass container.
  • Refrigerate for 20–30 minutes.
  • Chilling helps the vegetables absorb the dressing and become more flavorful.

6️⃣ Serve

  • Give the salad one final toss before serving.
  • Serve cold as a refreshing side dish, light lunch, or healthy snack.

Quick Q/A ❓

Can I make it ahead of time?
➡️ Yes, it can be prepared up to 24 hours in advance.

Can I add cheese?
➡️ Yes, crumbled feta cheese pairs perfectly with this salad.

How long does it stay fresh?
➡️ Store in the refrigerator for up to 2 days.

Dandelion Tea

Dandelion Tea

Ingredients

  • 1 tablespoon dried dandelion root or leaves
  • 2 cups water
  • 1 teaspoon honey (optional)
  • Lemon slice (optional)

Instructions

1. Boil the Water

  • Bring 2 cups of water to a boil.

2. Add Dandelion

  • Add the dried dandelion root or leaves to the water.

3. Simmer

  • Simmer for 10–15 minutes if using roots.
  • Steep for 5–10 minutes if using leaves.

4. Strain

  • Strain the tea into a cup.

5. Serve

  • Add honey or a lemon slice if desired.
  • Enjoy warm.

Q&A

Q: What does dandelion tea taste like?
A: It has a mild earthy flavor, slightly bitter, similar to herbal tea.

Q: Does dandelion tea cure cancer?
A: No. There is no proven evidence that dandelion tea cures cancer in humans.

Q: Can I drink it daily?
A: Most healthy adults can enjoy it in moderation, but consult a healthcare professional if you have medical conditions or take medications.

Yield: 2 servings. 🌼🍵

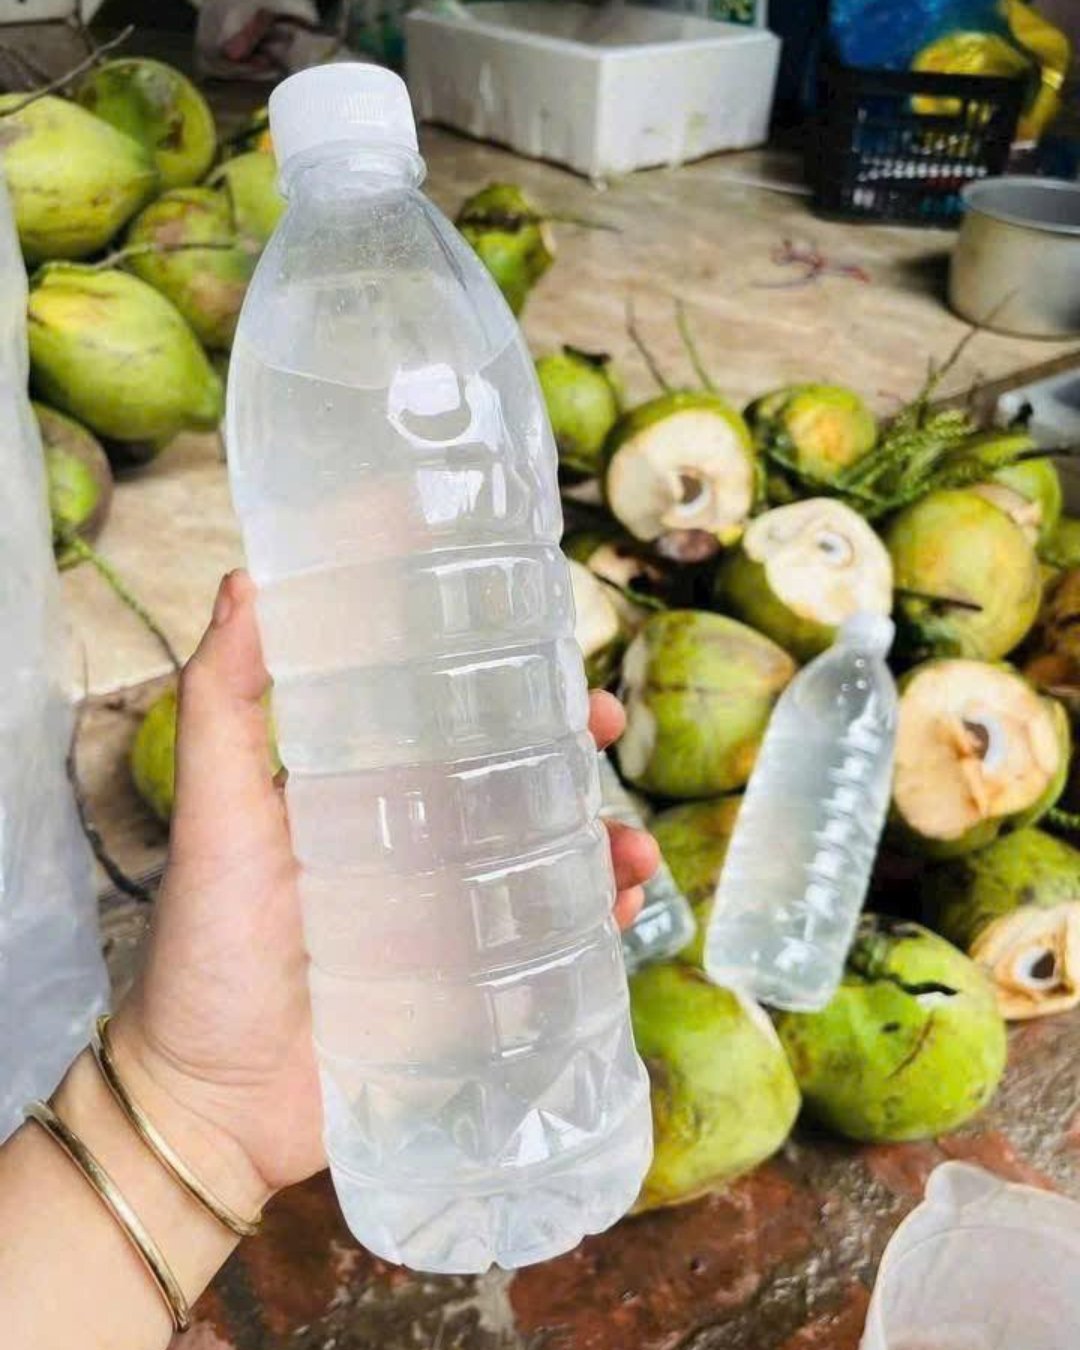
7 Days of Drinking Coconut Water on an Empty Stomach: Surprising Benefits You Should Know

7 Days of Drinking Coconut Water on an Empty Stomach: Surprising Benefits You Should Know

Coconut water is a refreshing drink packed with natural electrolytes, vitamins, and minerals. Drinking it on an empty stomach may offer several health benefits when included as part of a balanced diet.

Day 1: Morning Hydration

Starting your day with coconut water helps replenish fluids after a night’s sleep and supports overall hydration.

Day 2: Electrolyte Boost

Coconut water contains potassium, magnesium, and sodium, which help maintain fluid balance and support normal muscle function.

Day 3: Digestive Support

Some people find that coconut water feels gentle on the stomach and may help support healthy digestion.

Day 4: Natural Energy

Its natural carbohydrates and minerals can provide a light energy boost without caffeine.

Day 5: Heart Health Support

The potassium in coconut water may help support normal blood pressure levels when consumed as part of a healthy diet.

Day 6: Skin Hydration

Proper hydration can contribute to healthier-looking skin, and coconut water can be one way to increase daily fluid intake.

Day 7: Healthy Lifestyle Habit

Regularly choosing coconut water instead of sugary beverages may help reduce added sugar consumption.

Important Notes

  • Coconut water is not a cure or treatment for diseases.
  • People with kidney problems or those on potassium-restricted diets should consult a healthcare professional before consuming large amounts.
  • Choose unsweetened coconut water for the best nutritional value.

Q & A

Q: How much coconut water should I drink daily?
A: About 1 cup (240–330 ml) per day is sufficient for most people.

Q: Can I drink it every morning?
A: Yes, most healthy adults can enjoy coconut water regularly as part of a balanced diet.

Q: Does coconut water help with weight loss?
A: Coconut water can be a lower-calorie alternative to sugary drinks, but it does not directly cause weight loss.

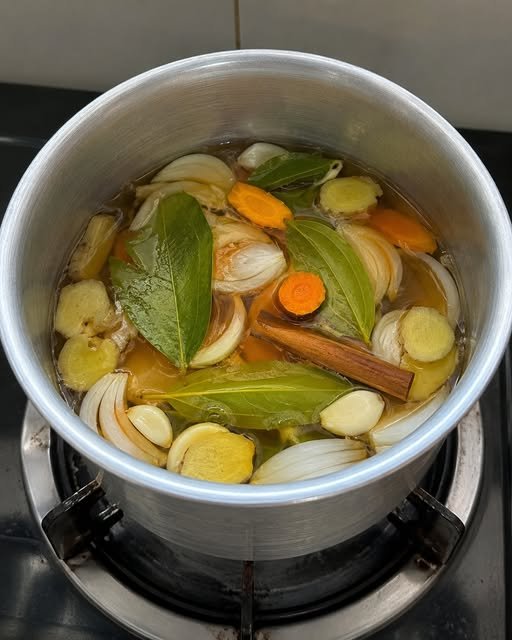
Garlic, Ginger, Onion & Guava Leaf Herbal Tea

Garlic, Ginger, Onion & Guava Leaf Herbal Tea

Ingredients

  • 4 cups water
  • 1 medium onion, sliced
  • 4 garlic cloves, crushed
  • 2-inch piece fresh ginger, sliced
  • 1 tsp fresh turmeric slices (or ½ tsp turmeric powder)
  • 1 cinnamon stick
  • 4–5 fresh guava leaves, washed

Instructions

Step 1

  • Pour 4 cups of water into a pot.

Step 2

  • Add onion, garlic, ginger, turmeric, cinnamon stick, and guava leaves.

Step 3

  • Bring to a boil over medium-high heat.

Step 4

  • Reduce heat and simmer for 15 minutes.

Step 5

  • Remove from heat and let it cool slightly.

Step 6

  • Strain the liquid into cups.

Step 7

  • Serve warm. Add a little honey or lemon if desired.

Q & A

Q: How much can I drink?
A: Generally, 1–2 cups per day is enough.

Q: Can I store leftovers?
A: Yes, refrigerate for up to 2 days and reheat before drinking.

Q: What is this drink commonly used for?
A: Many people drink it as a warm herbal beverage, especially during cold weather. However, it is not a proven treatment for any disease.

Note: This is a traditional herbal drink. Claims about curing illnesses, infections, or chronic diseases are not scientifically established. Consult a healthcare professional for medical concerns.

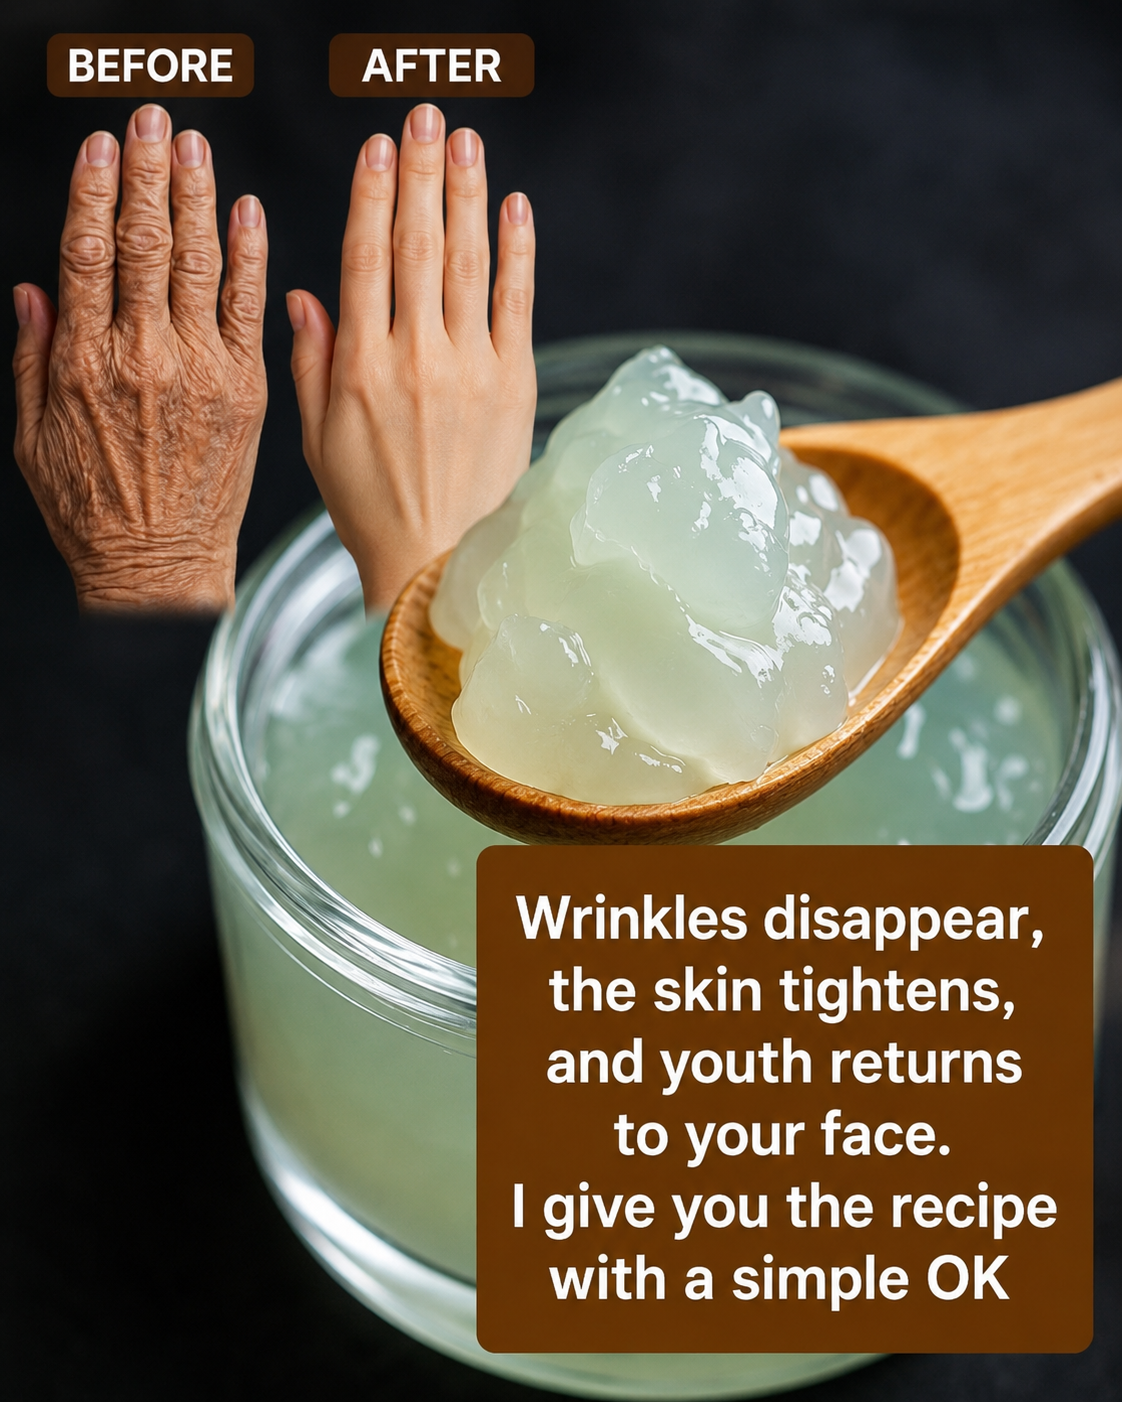
Natural Aloe Vera Anti-Aging Gel

Natural Aloe Vera Anti-Aging Gel

Ingredients

  • 2 tbsp pure aloe vera gel
  • 1 tsp rose water
  • 1 tsp vitamin E oil (or 1 capsule)
  • 1 tsp glycerin
  • 1 tsp honey

Instructions

  1. Add aloe vera gel to a clean bowl.
  2. Mix in rose water and stir until smooth.
  3. Add glycerin and honey.
  4. Pierce the vitamin E capsule and squeeze the oil into the mixture.
  5. Mix well until a smooth gel forms.
  6. Transfer to a clean glass jar.

How to Use

  • Wash your face and hands.
  • Apply a thin layer of the gel.
  • Gently massage for 2–3 minutes.
  • Leave on overnight or for at least 30 minutes.
  • Rinse with cool water.

Storage

  • Keep refrigerated.
  • Use within 7–10 days.

Important Note

This homemade gel may help moisturize and temporarily improve the appearance of dry skin, but it is not proven to remove wrinkles, tighten skin permanently, or restore youthfulness. Results vary from person to person. Always do a patch test before applying to your face.

Papaya Seeds: The Overlooked Superfood with Surprising Health Benefits and Practical Uses

What Papaya Seeds May Actually Do

✅ Contain fiber, antioxidants, and healthy plant compounds.

✅ May support digestion and overall wellness when eaten in moderation.

✅ Can be used in smoothies, salads, or as a seasoning.

What They Cannot Do

❌ Cure fatty liver disease.

❌ Reverse diabetes.

❌ Treat thyroid disorders.

❌ Cause dramatic weight loss on their own.

The Real Keys to Better Health

For Weight Loss:

  • Eat a balanced diet
  • Control calorie intake
  • Exercise regularly
  • Get enough sleep

For Fatty Liver:

  • Reduce excess body weight
  • Limit sugary and processed foods
  • Stay physically active

For Diabetes:

  • Follow your doctor’s treatment plan
  • Monitor blood sugar levels
  • Eat a healthy, balanced diet

For Thyroid Conditions:

  • Take prescribed medications
  • Have regular medical checkups

If You Want to Try Papaya Seeds

  • Start with a small amount (about ½ teaspoon).
  • Add them to smoothies or salads.
  • Consume in moderation, as excessive amounts are not recommended.

Bottom Line

Papaya seeds can be a nutritious addition to a healthy diet, but they are not a miracle cure for fatty liver, diabetes, thyroid problems, or weight loss. Be cautious of social media posts that make dramatic health claims or show unrealistic before-and-after results.

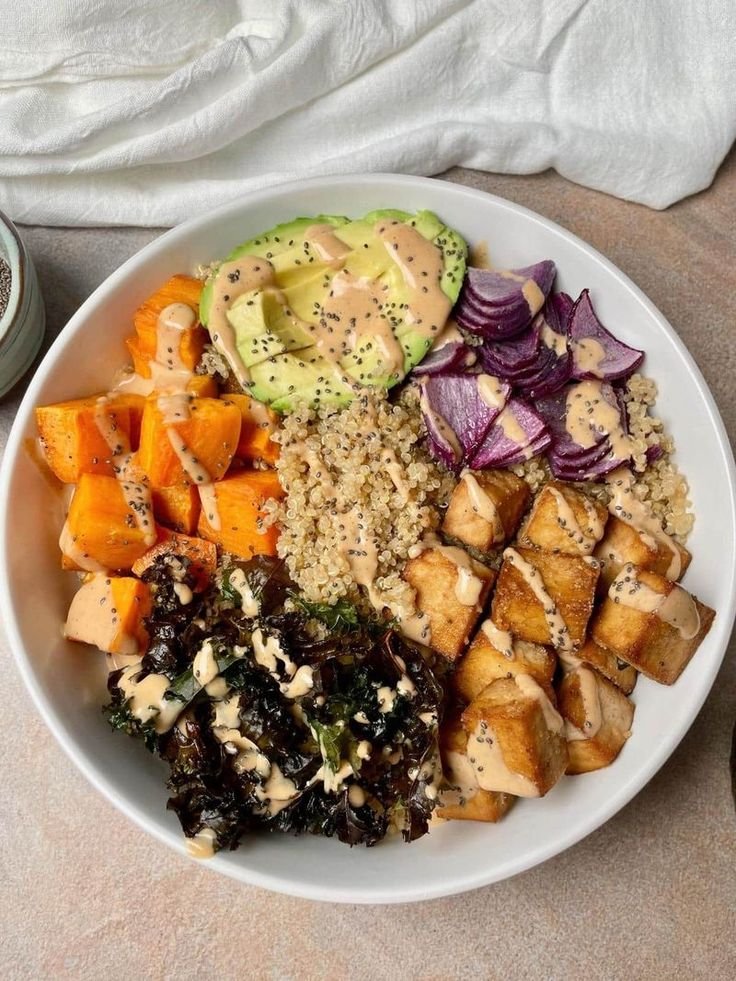
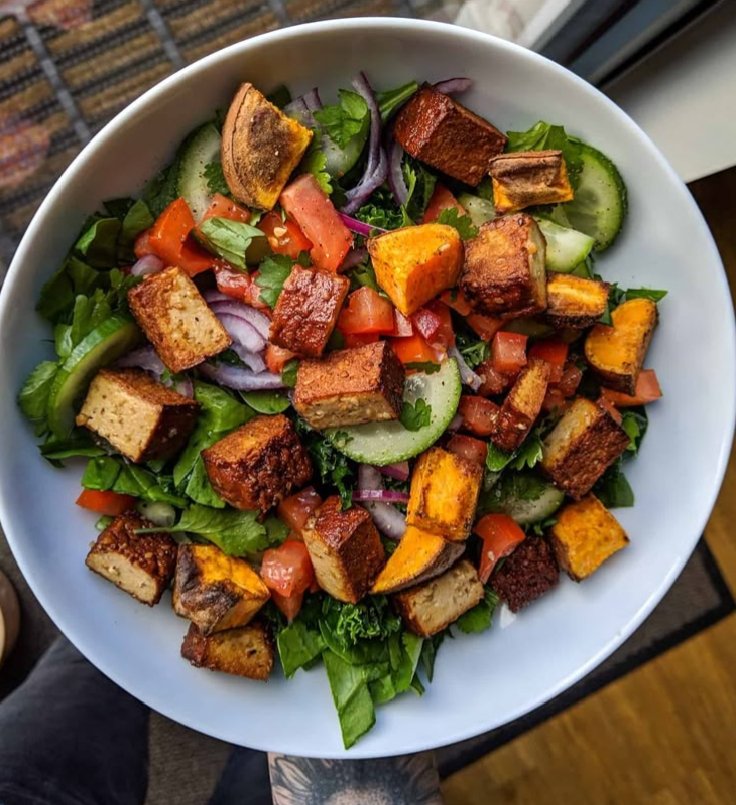
Roasted Sweet Potato & Crispy Tofu Buddha Bowl

Roasted Sweet Potato & Crispy Tofu Buddha Bowl

This Roasted Sweet Potato & Crispy Tofu Buddha Bowl is a colorful, nourishing meal packed with plant-based protein, fiber, and fresh vegetables. Crispy seasoned tofu and caramelized sweet potatoes are paired with crunchy cucumbers, juicy tomatoes, leafy greens, and a bright lemon-tahini dressing for a balanced bowl that’s both satisfying and delicious.

Recipe Details

Prep Time: 15 minutes

Cook Time: 25 minutes

Total Time: 40 minutes

Servings: 4

Cuisine: Mediterranean-Inspired

Course: Lunch, Dinner, Main Course

Ingredients

For the Bowl

1 medium sweet potato, peeled and cubed

14 oz (400g) extra-firm tofu, pressed and cubed

4 cups mixed greens

1 cucumber, sliced

2 medium tomatoes, diced

½ red onion, thinly sliced

¼ cup fresh parsley, chopped

2 tablespoons olive oil

1 teaspoon smoked paprika

½ teaspoon garlic powder

½ teaspoon salt

¼ teaspoon black pepper

For the Lemon Tahini Dressing

3 tablespoons tahini

2 tablespoons fresh lemon juice

1 tablespoon olive oil

1 tablespoon water

1 teaspoon maple syrup or honey

1 small garlic clove, minced

Salt and pepper to taste

Instructions

Step 1: Roast the Sweet Potatoes

Preheat your oven to 425°F (220°C).

Toss the sweet potato cubes with 1 tablespoon olive oil, paprika, salt, and pepper. Spread them on a baking sheet and roast for 20–25 minutes until tender and lightly caramelized.

Step 2: Cook the Tofu

Pat the tofu dry and toss with the remaining olive oil, garlic powder, salt, and pepper.

Arrange on a baking sheet and bake for 20 minutes, flipping halfway through, until crispy and golden.

Step 3: Prepare the Dressing

In a small bowl, whisk together tahini, lemon juice, olive oil, water, maple syrup, garlic, salt, and pepper until smooth and creamy.

Step 4: Assemble the Buddha Bowls

Divide the mixed greens among four bowls.

Top with cucumber, tomatoes, red onion, parsley, roasted sweet potatoes, and crispy tofu.

Step 5: Finish and Serve

Drizzle the lemon tahini dressing over each bowl and serve immediately.

Notes & Tips

Recipe Notes

Pressing tofu for at least 15 minutes helps it become crispier.

Roasting brings out the natural sweetness of the sweet potatoes.

The dressing can be prepared a day in advance.

Frequently Asked Questions

What is a Buddha bowl?

A Buddha bowl is a balanced meal served in a bowl featuring vegetables, protein, healthy fats, and often grains.

Can I make this bowl vegan?

Yes. Use maple syrup instead of honey in the dressing.

How long does it keep?

Store components separately in airtight containers for up to 4 days.

Can I add grains?

Absolutely. Quinoa, brown rice, farro, or couscous are excellent additions.

What other proteins can I use?

Chickpeas, lentils, grilled chicken, or salmon work well in place of tofu.

Nutritional Information

Calories: 360

Protein: 16g

Carbohydrates: 29g

Fiber: 8g

Sugar: 8g

Fat: 21g

Saturated Fat: 3g

Sodium: 320mg

Mediterranean Roasted Sweet Potato & Crispy Tofu Salad

Mediterranean Roasted Sweet Potato & Crispy Tofu Salad

This Mediterranean Roasted Sweet Potato & Crispy Tofu Salad is a hearty, plant-based meal packed with vibrant vegetables, crispy protein-rich tofu, and naturally sweet roasted sweet potatoes. Fresh cucumbers, tomatoes, herbs, and a simple lemon dressing add brightness and balance, creating a satisfying salad that’s perfect for lunch, dinner, or meal prep.

Time

Prep Time: 15 minutes

Cook Time: 25 minutes

Total Time: 40 minutes

Servings: 4

Cuisine: Mediterranean

Course: Salad, Main Course

Ingredients

For the Salad

1 block (14 oz) extra-firm tofu, pressed and cubed

1 medium sweet potato, cubed

4 cups mixed greens

1 cucumber, sliced

2 tomatoes, diced

½ red onion, thinly sliced

¼ cup fresh parsley, chopped

2 tablespoons olive oil

1 teaspoon paprika

½ teaspoon garlic powder

Salt and black pepper to taste

Lemon Herb Dressing

3 tablespoons olive oil

1½ tablespoons fresh lemon juice

1 teaspoon Dijon mustard

1 teaspoon honey or maple syrup

Salt and pepper to taste

Instructions

Step 1: Roast the Sweet Potatoes

Preheat the oven to 425°F (220°C).

Toss sweet potato cubes with 1 tablespoon olive oil, paprika, salt, and pepper. Spread on a baking sheet and roast for 20–25 minutes until golden and tender.

Step 2: Cook the Tofu

Pat the tofu dry and toss with the remaining olive oil, garlic powder, salt, and pepper.

Bake alongside the sweet potatoes for 20 minutes or pan-fry until crispy and golden on all sides.

Step 3: Prepare the Vegetables

In a large bowl, combine mixed greens, cucumber, tomatoes, red onion, and parsley.

Step 4: Make the Dressing

Whisk together olive oil, lemon juice, Dijon mustard, honey, salt, and pepper until smooth.

Step 5: Assemble the Salad

Add the roasted sweet potatoes and crispy tofu to the vegetables.

Drizzle with the dressing and toss gently before serving.

Nutritional Information

Calories: 340

Protein: 15g

Carbohydrates: 28g

Fiber: 7g

Fat: 18g

Saturated Fat: 2g

Sugar: 7g

Sodium: 280mg

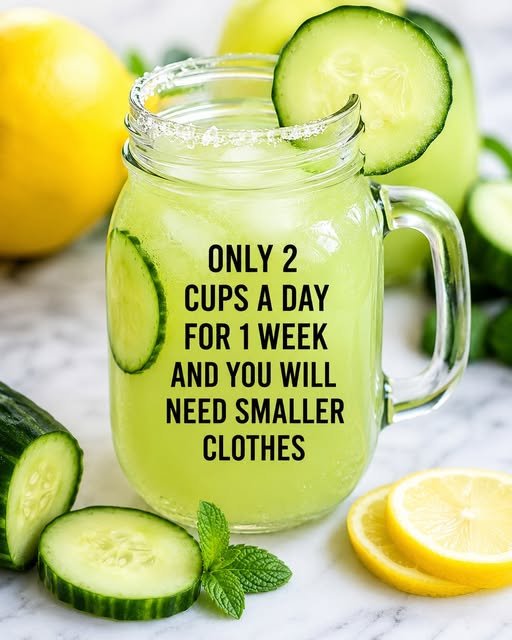
Fresh Cucumber Lemonade

Fresh Cucumber Lemonade

Ingredients

  • 1 large cucumber
  • 2 lemons, juiced
  • 6 cups cold water
  • 1–2 tablespoons honey (optional)
  • Ice cubes
  • Fresh mint leaves (optional)

Instructions

Step 1:
Wash the cucumber thoroughly. Slice half for garnish and chop the remaining cucumber.

Step 2:
Juice the lemons and remove any seeds.

Step 3:
Add the chopped cucumber, lemon juice, 2 cups of water, and honey to a blender. Blend until smooth.

Step 4:
Strain the mixture through a fine-mesh strainer if you prefer a smoother texture.

Step 5:
Pour into a large pitcher. Add the remaining water and stir well. Refrigerate for 30 minutes.

Step 6:
Serve over ice and garnish with cucumber slices, lemon slices, and fresh mint.

Q&A

Can I make it ahead of time?
Yes. Store in the refrigerator for up to 2 days.

Can I use sparkling water?
Yes. Replace some of the water with sparkling water for a fizzy version.

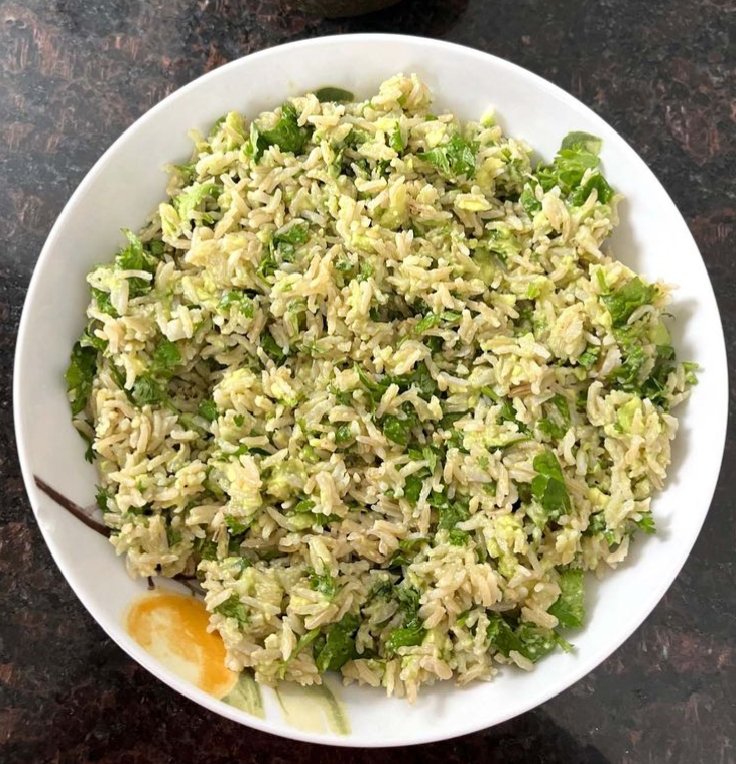
Creamy Avocado Rice

Creamy Avocado Rice

This creamy avocado rice is fresh, fluffy, and packed with flavor. Ripe avocado is blended with lime, garlic, and herbs to create a creamy sauce that coats every grain of rice. It’s simple, comforting, and works perfectly as a side dish or light meal.

The best part? It comes together in about 15 minutes.

Prep Time & Servings

Prep Time: 10 minutes

Cook Time: 15 minutes

Total Time: 25 minutes

Servings: 4

Ingredients

3 cups cooked rice (white, brown, or jasmine)

2 ripe avocados

Juice of 1 lime

1 garlic clove

2 tablespoons fresh cilantro or parsley

2 tablespoons Greek yogurt (optional for extra creaminess)

1 tablespoon olive oil

Salt and black pepper, to taste

Optional Toppings

Cherry tomatoes

Corn

Black beans

Grilled chicken

Shrimp

Feta cheese

Chili flakes

Instructions

1. Make the Avocado Sauce

In a blender or food processor, combine:

avocados

lime juice

garlic

herbs

Greek yogurt

olive oil

salt

pepper

Blend until smooth and creamy.

2. Mix with Rice

Place the warm cooked rice in a large bowl.

Pour the avocado sauce over the rice and gently mix until every grain is coated.

3. Adjust Seasoning

Taste and add:

more lime juice

salt

pepper

if needed

4. Serve

Serve warm or chilled.

Top with your favorite toppings and enjoy.

Helpful Tips

Use ripe avocados for the creamiest texture.

Fresh lime juice keeps the avocado bright and flavorful.

Mix the sauce into warm rice for the best consistency.

If the sauce is too thick, add 1–2 tablespoons of water.

Nutritional Information

Calories: 340

Protein: 6g

Carbohydrates: 38g

Fiber: 6g

Fat: 18g

Saturated Fat: 3g

Sodium: 180mg

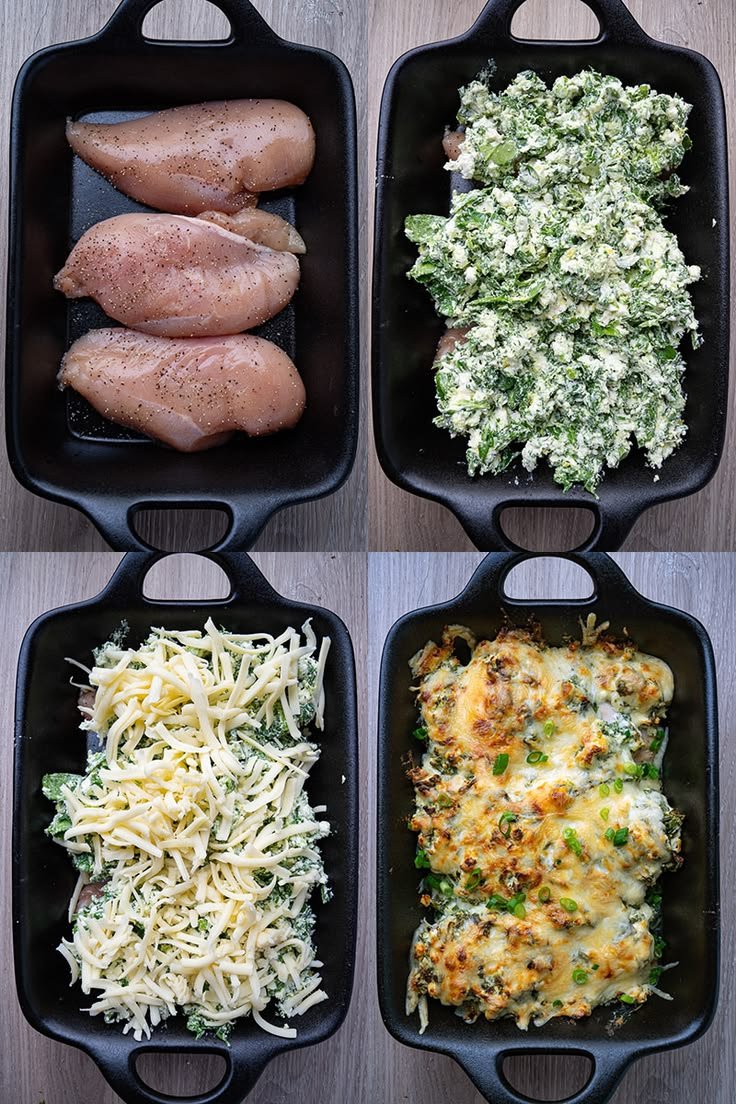
Spinach & Feta Baked Chicken

Spinach & Feta Baked Chicken

This spinach and feta baked chicken is juicy, flavorful, and surprisingly easy to make. Tender chicken breasts are filled with a creamy spinach and feta mixture, then baked until perfectly golden and juicy.

It feels like something you’d order at a restaurant, but it’s simple enough for a weeknight dinner and packed with Mediterranean-inspired flavors.

Prep Time & Servings

Prep Time: 15 minute

Cook Time: 25 minutes

Total Time: 40 minutes

Servings: 4

Ingredients

For the Chicken

4 boneless, skinless chicken breasts

1 tablespoon olive oil

1 teaspoon paprika

1 teaspoon dried oregano

Salt and black pepper, to taste

For the Filling

2 cups fresh spinach, chopped

½ cup feta cheese, crumbled

2 garlic cloves, minced

2 tablespoons cream cheese or Greek yogurt

1 tablespoon fresh parsley, chopped

Optional Add-Ins

Sun-dried tomatoes

Mozzarella cheese

Roasted red peppers

Chili flakes

Instructions

1. Prepare the Chicken

Preheat your oven to 400°F (200°C).

Using a sharp knife, carefully cut a pocket into the side of each chicken breast.

Season both sides with:

paprika

oregano

salt

pepper

2. Make the Filling

In a bowl, combine:

spinach

feta cheese

garlic

cream cheese or Greek yogurt

parsley

Mix until well combined.

3. Stuff the Chicken

Spoon the spinach mixture into each chicken breast pocket.

Secure with toothpicks if needed.

Place the chicken in a lightly greased baking dish.

4. Bake

Brush the tops with olive oil.

Bake for 22–25 minutes, or until the chicken reaches an internal temperature of 165°F (74°C).

For a golden top, broil for the last 2 minutes if desired.

5. Serve

Let the chicken rest for 5 minutes before serving.

Serve with:

roasted potatoes

rice

quinoa

Mediterranean salad

roasted vegetables

Helpful Tips

Use thick chicken breasts for easier stuffing.

Don’t overfill the chicken to prevent the filling from spilling out.

Fresh spinach works best, but thawed frozen spinach can also be used.

Let the chicken rest before slicing to keep it juicy.

Nutritional Information

Calories: 350

Protein: 42g

Carbohydrates: 3g

Fiber: 1g

Fat: 18g

Saturated Fat: 6g

Sodium: 450mg

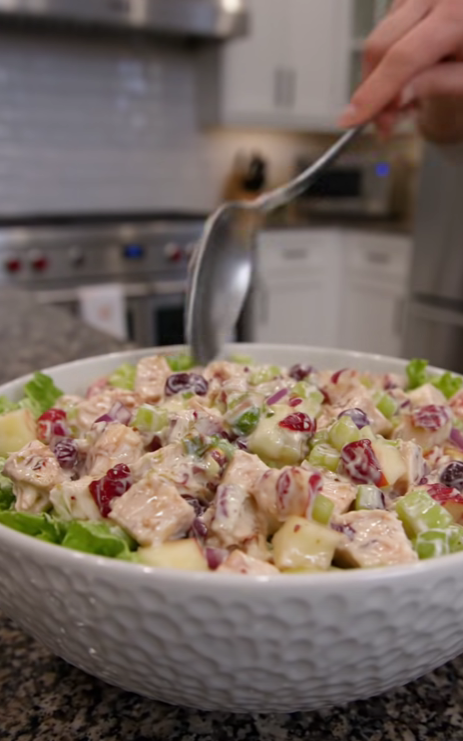
Creamy Chicken Apple Cranberry Salad

Creamy Chicken Apple Cranberry Salad

A refreshing salad packed with tender chicken, crisp apples, juicy cranberries, and a creamy dressing.

🛒 Ingredients

  • 2 cups cooked chicken, diced
  • 1 apple, diced
  • 1 cup celery, chopped
  • ½ cup red grapes or dried cranberries
  • ½ cup mayonnaise
  • 1 tbsp lemon juice
  • Salt & black pepper

👩‍🍳 Step-by-Step Recipe

1️⃣ Prepare the Ingredients

➡️ Dice the cooked chicken into bite-sized pieces.

➡️ Wash and dice the apple into small cubes.

➡️ Chop the celery into thin slices.

➡️ Halve the grapes if using fresh grapes.

2️⃣ Make the Dressing

➡️ In a large bowl, combine mayonnaise and lemon juice.

➡️ Add a pinch of salt and black pepper.

➡️ Stir until smooth and creamy.

3️⃣ Mix the Salad

➡️ Add the chicken, apples, celery, and grapes/cranberries to the bowl.

➡️ Gently toss until everything is evenly coated with the dressing.

4️⃣ Chill

➡️ Cover and refrigerate for at least 30 minutes.

➡️ This helps the flavors blend together beautifully.

5️⃣ Serve

➡️ Spoon onto a serving plate.

➡️ Enjoy on its own, in lettuce cups, or as a sandwich filling.

❓ Quick Q&A

Q: Can I use Greek yogurt instead of mayonnaise?
✅ Yes! Greek yogurt makes a lighter version.

Q: How long does it keep in the fridge?
✅ Up to 3 days in an airtight container.

Q: Can I add nuts?
✅ Absolutely! Chopped pecans or walnuts add a delicious crunch.

🍽️ Creamy, crunchy, sweet, and savory—perfect for lunch, picnics, or meal prep! 😋

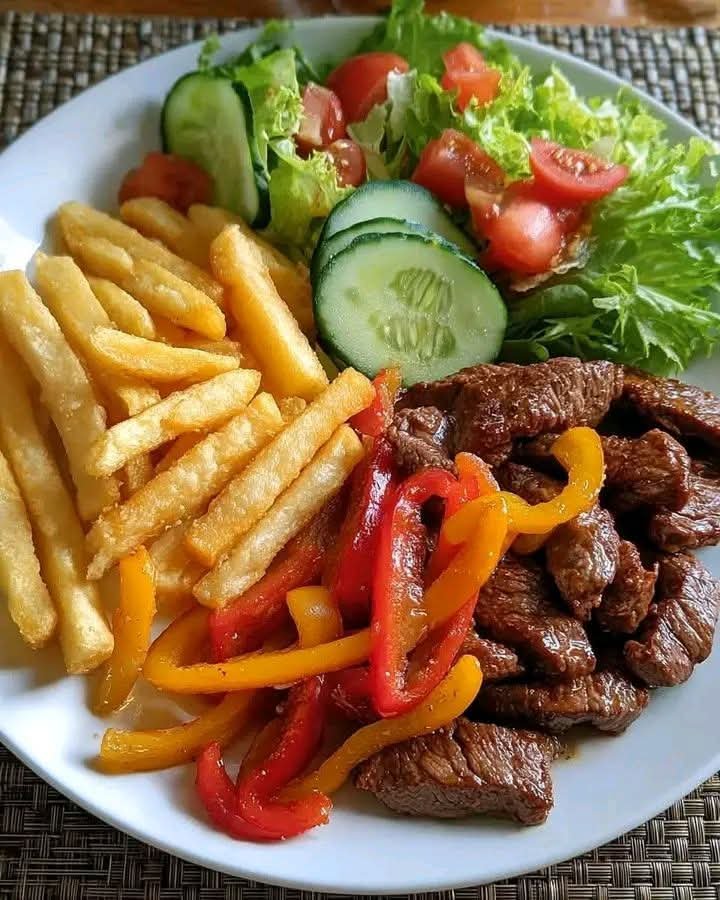
Steak Strips with Crispy Fries & Fresh Garden Salad

Steak Strips with Crispy Fries & Fresh Garden Salad

📝 Ingredients :

•1 lb beef steak, sliced into strips

•2 tbsp olive oil

•1 tsp garlic powder

•1 tsp paprika

•1 tsp soy sauce

•Salt and black pepper to taste

•1 red bell pepper, sliced

•1 yellow bell pepper, sliced

•4 large potatoes, cut into fries

•Vegetable oil for frying

•Lettuce leaves

•1 cucumber, sliced

•Cherry tomatoes, halved


🍽️ How to Make It :

1️⃣ Season the Steak:

Toss steak strips with olive oil, garlic powder, paprika, soy sauce, salt, and pepper for an easy dinner idea, best steak recipe, and family favorite meal flavor boost.

2️⃣ Cook the Fries:

Fry potato strips until crispy and golden for a quick comfort meal, best homemade fries, and weeknight food win texture.

3️⃣ Sauté Steak & Peppers:

Cook steak strips in a hot skillet with red and yellow bell peppers until juicy and caramelized. This restaurant-style dinner, best beef recipe, and easy weeknight meal creates amazing flavor.

4️⃣ Prepare the Salad:

Toss lettuce, cucumber, and cherry tomatoes together for a fresh healthy side, easy balanced meal, and clean eating favorite touch.

5️⃣ Plate & Serve:

Arrange fries, steak strips with peppers, and salad exactly like the photo for a crowd-pleasing dinner, comfort food favorite, and best homemade meal presentation.

Prep Time: 15 minutes | Cook Time: 20 minutes | Total Time: 35 minutes | Serving: 3 persons

Calories: ~620

per serving | Protein: ~36g per serving

Apple Cider Vinegar Morning Drink

Apple Cider Vinegar Morning Drink

🛒 Ingredients

  • 1–2 tbsp apple cider vinegar 🍎
  • 1 glass warm water 💧
  • 1 tsp honey 🍯
  • Few drops fresh lemon juice 🍋

👩‍🍳 Step-by-Step Instructions

🥄 1. Add the Vinegar

  • Pour apple cider vinegar into a glass.

💧 2. Mix with Warm Water

  • Add warm water and stir well.

🍯 3. Add Flavor

  • Mix in honey and a few drops of lemon juice.

✨ 4. Stir & Drink

  • Stir until everything is combined.
  • Drink 20–30 minutes before breakfast.

❓Q/A

❓Can I drink it every day?

✅ Yes, but use small amounts and dilute it with water.

❓Can I use cold water?

✅ Warm water is better for morning digestion, but cold works too.

❓Can I drink it on an empty stomach?

✅ Yes, many people drink it before breakfast.

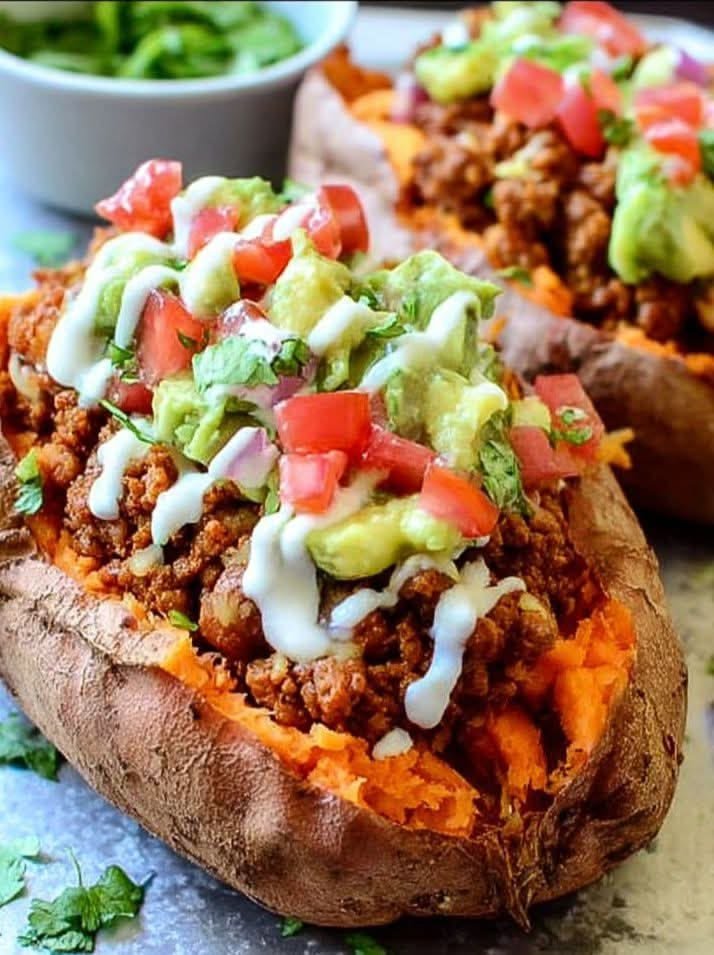
Mediterranean Taco Stuffed Sweet Potatoes

Mediterranean Taco Stuffed Sweet Potatoes

These Mediterranean taco stuffed sweet potatoes are hearty, fresh, and packed with flavor. Roasted sweet potatoes are filled with seasoned taco-style meat or chickpeas, crunchy vegetables, creamy feta, and a fresh yogurt sauce that ties everything together.

They’re healthy, filling, and perfect for easy dinners or meal prep during the week.

Prep Time & Servings

Prep Time: 15 minutes

Cook Time: 40 minutes

Total Time: 55 minutes

Servings: 4

Ingredients

For the Sweet Potatoes

4 medium sweet potatoes

1 tablespoon olive oil

Salt and black pepper

For the Filling

1 pound ground turkey, chicken, or beef

1 teaspoon paprika

1 teaspoon cumin

1 teaspoon oregano

2 garlic cloves, minced

1 tablespoon olive oil

Salt and pepper

Toppings

1 cup cherry tomatoes, chopped

1 cucumber, diced

¼ red onion, sliced

½ avocado, sliced

½ cup feta cheese

Fresh parsley

For the Yogurt Sauce

½ cup Greek yogurt

Juice of ½ lemon

1 garlic clove, minced

Salt and pepper

Instructions

1. Roast the Sweet Potatoes

Preheat the oven to 425°F (220°C).

Rub the sweet potatoes with olive oil and season lightly with salt and pepper.

Place on a baking sheet and roast for about 40–45 minutes until soft inside.

2. Cook the Filling

Heat olive oil in a skillet over medium heat.

Add:

ground meat

garlic

paprika

cumin

oregano

salt

pepper

Cook for about 8–10 minutes until browned and fully cooked.

3. Make the Yogurt Sauce

In a small bowl, mix together:

Greek yogurt

lemon juice

garlic

salt

pepper

The sauce should taste fresh and creamy.

4. Assemble the Sweet Potatoes

Slice the roasted sweet potatoes open slightly.

Fill them with:

taco meat

tomatoes

cucumber

onion

avocado

feta cheese

Drizzle with yogurt sauce and top with parsley.

5. Serve

Serve warm while the sweet potatoes are soft and fluffy.

Helpful Tips

Roast the sweet potatoes until very soft for the best texture

Add chickpeas instead of meat for a vegetarian version

Crumbled feta adds a salty creamy finish

A little hot sauce tastes great on top

Nutritional Information

Calories: 480

Protein: 28g

Carbohydrates: 36g

Fiber: 7g

Fat: 24g

Saturated Fat: 6g

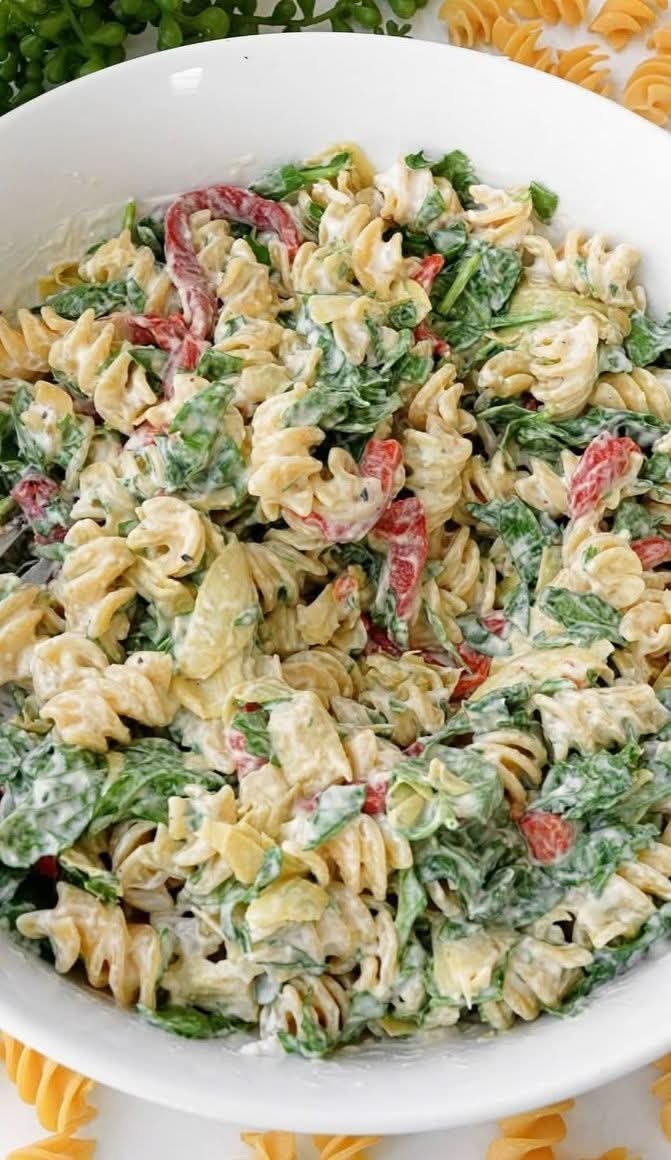
Creamy spinach artichoke pasta

Creamy Spinach Artichoke Pasta

This creamy spinach artichoke pasta is rich, cozy, and full of flavor while still being easy enough for a weeknight dinner. Tender pasta gets tossed in a creamy garlic parmesan sauce with spinach and artichokes for that classic spinach-artichoke dip flavor everyone loves.

It’s comforting, creamy, and comes together in about 30 minutes.

Prep Time & Servings

Prep Time: 10 minutes

Cook Time: 20 minutes

Total Time: 30 minutes

Servings: 4–5

Ingredients

12 oz pasta (penne, rigatoni, or fettuccine)

2 tablespoons olive oil

3 garlic cloves, minced

2 cups fresh spinach

1 can artichoke hearts, drained and chopped

1 cup heavy cream or half-and-half

½ cup cream cheese

½ cup parmesan cheese

½ teaspoon Italian seasoning

Salt and black pepper

Optional Add-Ins

Grilled chicken

Mushrooms

Sun-dried tomatoes

Chili flakes

Mozzarella cheese

Instructions

1. Cook the Pasta

Bring a large pot of salted water to a boil.

Cook the pasta until al dente according to package directions.

Before draining, save about ½ cup pasta water.

2. Cook the Garlic & Vegetables

Heat olive oil in a large skillet over medium heat.

Add garlic and cook for about 30 seconds until fragrant.

Add:

spinach

artichokes

Cook for 2–3 minutes until the spinach softens.

3. Make the Creamy Sauce

Lower the heat slightly and stir in:

heavy cream

cream cheese

parmesan cheese

Italian seasoning

salt

pepper

Stir until smooth and creamy.

If the sauce feels too thick, add a little reserved pasta water.

4. Toss Everything Together

Add the cooked pasta to the skillet.

Toss until the pasta is fully coated in the creamy sauce.

Taste and adjust seasoning if needed.

5. Serve

Serve warm with:

extra parmesan

black pepper

fresh parsley

chili flakes if you like heat

Helpful Tips

Don’t overcook the spinach or it loses texture

Use freshly grated parmesan for the smoothest sauce

Add grilled chicken if you want extra protein

Pasta water helps make the sauce silky and glossy

Nutritional Information

Calories: 610

Protein: 18g

Carbohydrates: 48g

Fiber: 4g

Fat: 38g

Saturated Fat: 19g

Sodium: 520mg

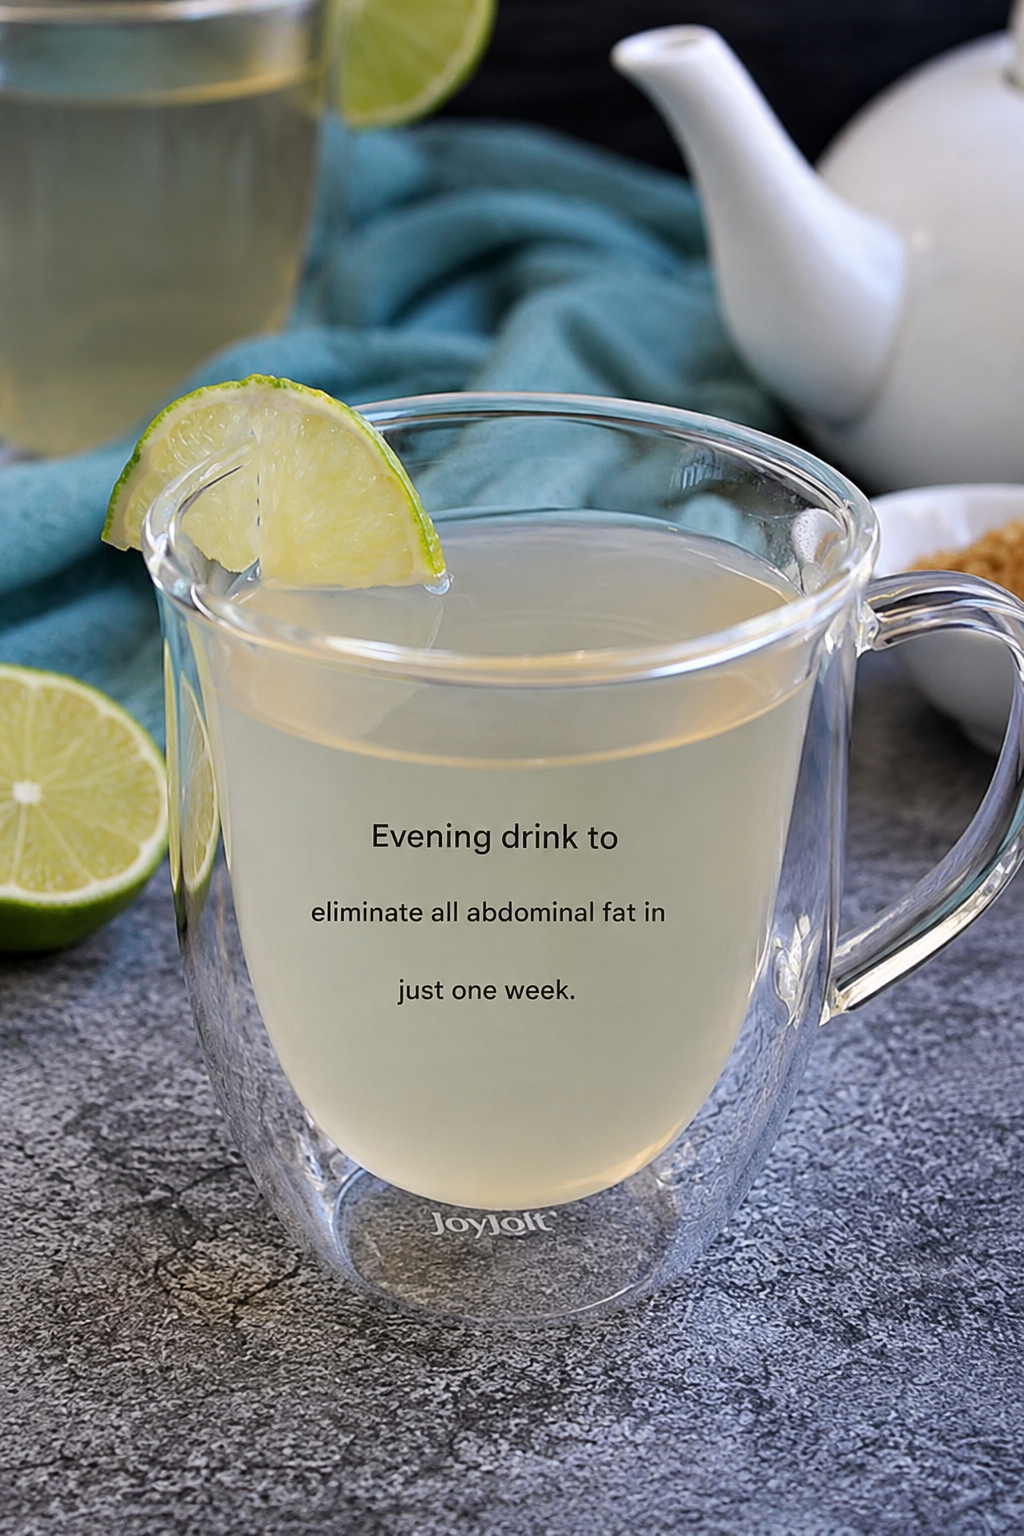
🍋 Evening Lemon Detox Drink

Ingredients

  • 2 cups warm water 💧
  • 1 lemon or lime (sliced) 🍋
  • 1 tbsp honey 🍯
  • 1 tsp grated ginger
  • 1 tbsp apple cider vinegar
  • Pinch of cinnamon (optional)

👩‍🍳 Instructions

🔥 Step 1: Warm the Water

  • Heat water until warm but not boiling.

🍋 Step 2: Add Ingredients

  • Pour warm water into a mug.
  • Add lemon or lime slices.
  • Stir in honey, ginger, and apple cider vinegar.

🥄 Step 3: Mix Well

  • Stir everything together for 1 minute.
  • Let it sit for 2–3 minutes.

☕ Step 4: Serve

  • Drink warm in the evening before bedtime ✨

💡 Tips

✅ Use fresh lemon for best flavor
✅ Add mint leaves for freshness 🌿
✅ Drink alongside healthy meals and exercise


❓Q/A

❓Can I drink it daily?

✅ Yes, 1 cup daily is enough.

❓Can I use cold water?

✅ Warm water works best for this recipe.

❓Can I skip apple cider vinegar?

✅ Yes, but it adds extra tangy flavor.


🌟 Why You’ll Love It

✨ Refreshing and soothing
✨ Easy 5-minute drink
✨ Light citrus flavor
✨ Cozy nighttime wellness drink 🍋

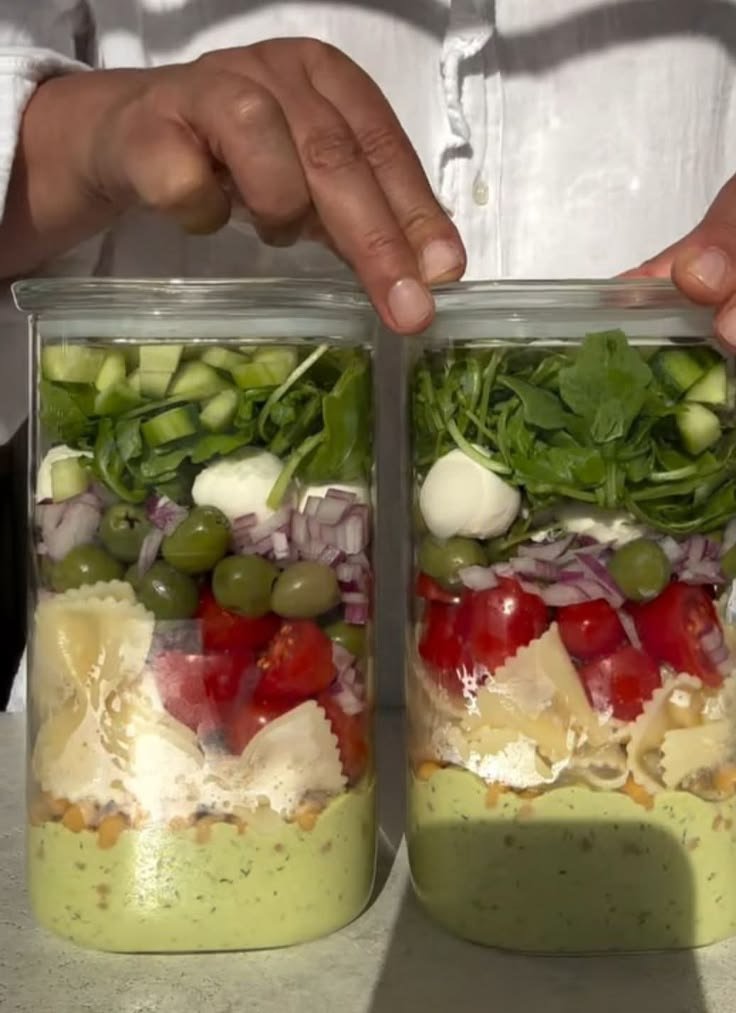
20 minutes healthy jar pasta salad

20-Minute Healthy Jar Pasta Salad

This healthy jar pasta salad is fresh, colorful, and perfect for meal prep. Everything gets layered into jars so the salad stays crisp and flavorful for days. It’s packed with pasta, crunchy vegetables, protein, and a light homemade dressing that makes it taste fresh and satisfying without feeling heavy.

Perfect for lunches, busy weekdays, road trips, or easy grab-and-go meals.

Prep Time & Servings

Prep Time: 20 minutes

Cook Time: 10 minutes

Total Time: 20 minutes

Servings: 4 jars

Ingredients

For the Salad

3 cups cooked pasta, cooled

1 cup cherry tomatoes, halved

1 cucumber, diced

1 bell pepper, diced

½ cup chickpeas

¼ red onion, sliced

½ cup feta cheese

¼ cup olives, sliced

2 cups chopped romaine or spinach

For the Dressing

¼ cup olive oil

Juice of 1 lemon

1 tablespoon red wine vinegar

1 teaspoon Dijon mustard

1 garlic clove, minced

Salt and black pepper

Optional Add-Ins

Grilled chicken

Tuna

Avocado

Sun-dried tomatoes

Fresh basil

Roasted chickpeas

Instructions

1. Cook the Pasta

Cook pasta according to package directions.

Drain and rinse under cold water so it cools quickly.

2. Make the Dressing

In a small bowl or jar, whisk together:

olive oil

lemon juice

vinegar

Dijon mustard

garlic

salt

pepper

It should taste bright and fresh.

3. Layer the Jars

Add ingredients in this order:

1. Dressing

2. Chickpeas and onions

3. Cucumbers and peppers

4. Tomatoes and olives

5. Pasta

6. Feta cheese

7. Lettuce or spinach on top

Keeping the greens at the top helps them stay fresh.

4. Chill

Seal the jars and refrigerate until ready to eat.

Shake before serving or pour into a bowl.

Helpful Tips

Use short pasta like rotini or penne

Let the pasta cool before layering

Wide-mouth jars work best

Add avocado right before serving

Nutritional Information

Calories: 390

Protein: 13g

Carbohydrates: 38g

Fiber: 6g

Fat: 20g

Saturated Fat: 5g

Sodium: 430mg

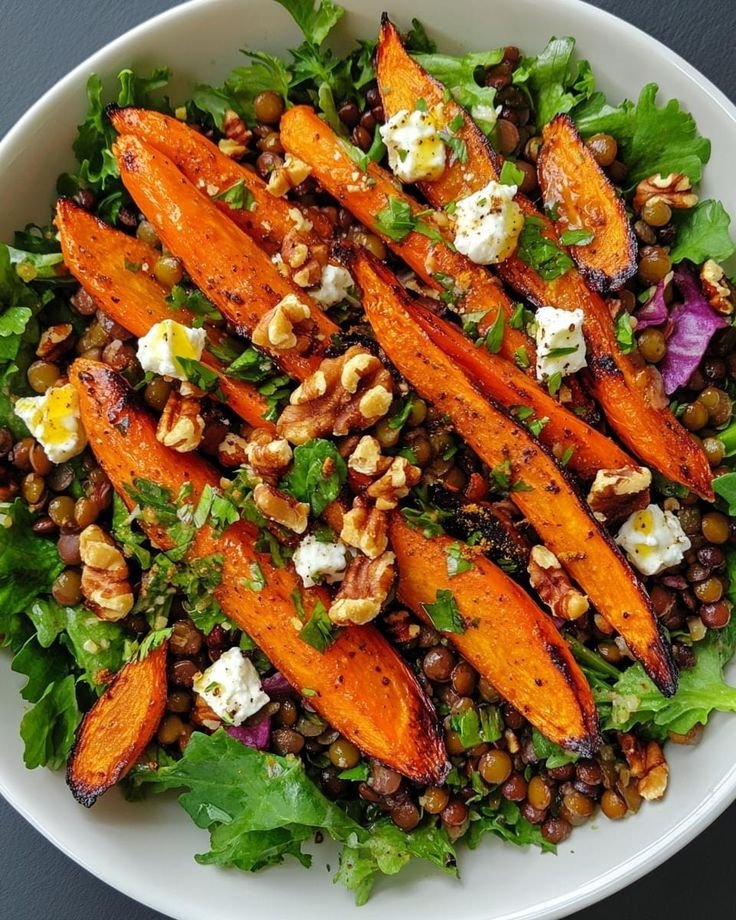
Easy roasted carrots and lentil salad with honey dijon dressing

Easy Roasted Carrots & Lentil Salad with Honey Dijon Dressing

This roasted carrot and lentil salad is warm, hearty, and full of fresh flavor. Sweet roasted carrots, tender lentils, fresh herbs, and crunchy vegetables are tossed in a simple honey Dijon dressing that makes everything taste bright and balanced.

It’s healthy, filling, and perfect for lunch, meal prep, or an easy Mediterranean-style dinner.

Prep Time & Servings

Prep Time: 15 minutes

Cook Time: 30 minutes

Total Time: 45 minutes

Servings: 4

Ingredients

For the Salad

5–6 carrots, peeled and sliced

1 cup cooked lentils

1 cucumber, diced

¼ red onion, thinly sliced

¼ cup parsley, chopped

2 tablespoons olive oil

1 teaspoon paprika

Salt and black pepper

For the Honey Dijon Dressing

2 tablespoons olive oil

1 tablespoon Dijon mustard

1 tablespoon honey

Juice of 1 lemon

1 garlic clove, minced

Salt and pepper to taste

Optional Add-Ins

Feta cheese

Avocado

Pumpkin seeds

Arugula

Roasted chickpeas

Instructions

1. Roast the Carrots

Preheat the oven to 425°F (220°C).

Spread the carrots on a baking sheet and toss with:

olive oil

paprika

salt

pepper

Roast for about 25–30 minutes until tender and slightly caramelized.

2. Make the Dressing

In a small bowl, whisk together:

olive oil

Dijon mustard

honey

lemon juice

garlic

salt

pepper

The dressing should taste sweet, tangy, and fresh.

3. Build the Salad

In a large bowl, combine:

cooked lentils

cucumber

red onion

parsley

Add the roasted carrots on top.

4. Toss Everything Together

Drizzle the honey Dijon dressing over the salad and gently toss.

Add any optional toppings you like.

5. Serve

Serve warm or chilled.

It tastes even better after sitting for a little while.

Helpful Tips

Roast the carrots until the edges get slightly golden for the best flavor

Use fresh lemon juice for a brighter dressing

French green lentils hold their shape best in salads

Add feta for a creamy salty finish

Nutritional Information

Calories: 340

Protein: 11g

Carbohydrates: 35g

Fiber: 10g

Fat: 18g

Saturated Fat: 2g

Sodium: 320mg

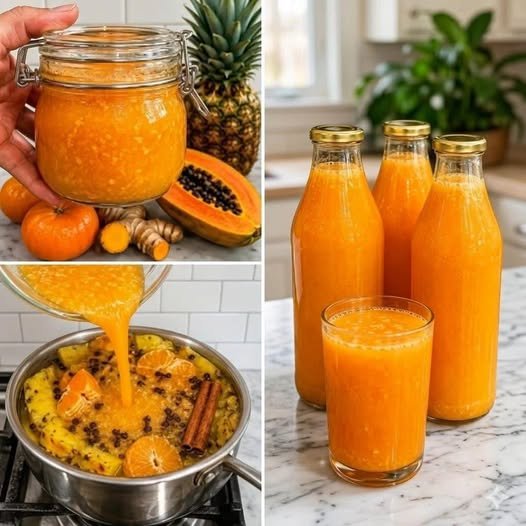
Tropical Anti-Inflammatory Pineapple Papaya Turmeric Smoothie

Prep Time: 5 Minutes
🥤 Servings: 1

A refreshing tropical smoothie loaded with pineapple, papaya, ginger, and turmeric for a naturally healthy and energizing drink! Perfect for digestion, hydration, and reducing inflammation. 💛

🛒 Ingredients

🌟 Main Ingredients

  • 🍍 1 cup frozen pineapple chunks
  • 🥭 1 cup papaya cubes
  • 🍌 ½ small banana
  • 🫚 1 small piece fresh ginger
  • 💛 ½ tsp ground turmeric
  • 🌶 Pinch of black pepper
  • 🥥 ¾ cup coconut water

✨ Optional Add-Ins

  • 🥄 2 tbsp Greek yogurt
  • 🌱 1 tbsp chia seeds
  • 🍋 1 tsp lime juice

👩‍🍳 Step-by-Step Instructions

🔹 Step 1: Prepare Ingredients

➡️ Peel and chop the papaya.
➡️ Grate the ginger if using fresh.
➡️ Measure all ingredients before blending.


🔹 Step 2: Add to Blender

➡️ Pour coconut water into the blender first.
➡️ Add pineapple, papaya, banana, ginger, turmeric, and black pepper.
➡️ Add yogurt or chia seeds if using.


🔹 Step 3: Blend

➡️ Blend for 45–60 seconds until smooth and creamy.
➡️ Add a little extra coconut water if the smoothie is too thick.


🔹 Step 4: Serve

➡️ Pour into a chilled glass.
➡️ Garnish with pineapple pieces or a sprinkle of turmeric if desired.
➡️ Enjoy immediately for the freshest flavor! 🥤✨


💡 Helpful Tips

✅ Use frozen fruit for a thicker smoothie.
✅ Don’t skip black pepper — it helps turmeric absorption.
✅ Rinse blender quickly because turmeric can stain.
✅ Add protein powder to make it a filling breakfast smoothie.


🌿 Health Benefits

💛 Turmeric may help support the body’s natural anti-inflammatory response.
🍍 Pineapple contains bromelain that may aid digestion.
🥭 Papaya is rich in vitamins and digestive enzymes.
🥥 Coconut water helps keep you hydrated.


❓ Q&A

❓Can I make this without banana?

✅ Yes! The banana only adds creaminess and sweetness.

❓Can I store it for later?

✅ It’s best enjoyed fresh, but you can refrigerate it for a few hours.

❓Can I use regular water instead of coconut water?

✅ Yes, but coconut water gives better flavor and hydration.


📊 Nutrition (Approx.)

🔥 140 Calories
💪 4g Protein
🥥 0.5g Fat
🍍 35g Carbs

With yogurt + chia:
🔥 210 Calories
💪 8g Protein

Flaxseed Wellness Drink

⚠️ Flaxseeds are healthy and nutritious, but they do not cure cancer, diabetes, or high blood pressure. They may help support heart health, digestion, and overall wellness as part of a balanced diet.

🛒 Ingredients

  • 2 tbsp flaxseeds
  • 1 cup milk (or almond milk)
  • 1 tsp honey
  • 1/4 tsp cinnamon (optional)

👩‍🍳 Instructions

  • 🥄 Add flaxseeds to a blender.
  • 🥛 Pour in the milk.
  • 🍯 Add honey and cinnamon.
  • ⚡ Blend for 30–40 seconds until smooth.
  • ❄️ Chill for a few minutes and serve fresh.

💡 Tips

  • Soak flaxseeds for 15 minutes for a smoother drink.
  • Add banana for extra creaminess.
  • Drink in the morning for best results.

❓Q&A

Q: What are flaxseeds good for?
➡️ They are rich in fiber, omega-3 fats, and antioxidants.

Q: Can I drink this daily?
➡️ Yes, 1 small glass daily is usually fine for most people.

Q: Can I use water instead of milk?
➡️ Yes, but milk makes it creamier and tastier.

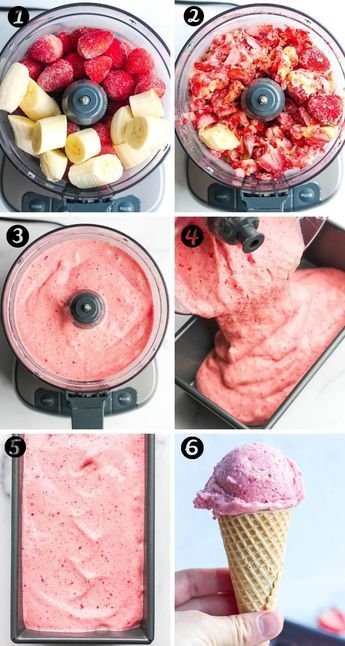
Easy & Healthy 5-Ingredient Ice Cream

Easy & Healthy 5-Ingredient Ice Cream

This Easy & Healthy 5-Ingredient Ice Cream is creamy, naturally sweet, refreshing, and incredibly simple to make. Made with frozen fruit, yogurt, and natural ingredients, it tastes like soft-serve ice cream without heavy cream or refined sugar.

Prep Time & Servings

Prep Time: 10 minutes

Freeze Time: Optional 1 hour

Total Time: 10–70 minutes

Servings: 4

Ingredients

2 frozen bananas

1 cup frozen berries

½ cup Greek yogurt

1 tablespoon honey or maple syrup

1 teaspoon vanilla extract

Optional Toppings

Fresh berries

Dark chocolate chips

Crushed nuts

Coconut flakes

Chia seeds

Granola

How to Make Healthy 5-Ingredient Ice Cream

Step 1: Blend the Ingredients

Add to a blender or food processor:

frozen bananas

frozen berries

Greek yogurt

honey

vanilla

Blend until:

smooth

thick

creamy

Scrape down the sides as needed.

Step 2: Adjust Texture

If too thick:

add a small splash of milk

If too soft:

freeze for 30–60 minutes

Step 3: Serve

Serve immediately for soft-serve texture.

Or freeze slightly for scoopable ice cream.

Add your favorite toppings.

Helpful Tips

Use Frozen Bananas

They create the creamy ice cream texture naturally.

Blend Slowly

This prevents overheating the mixture.

Freeze for Firmer Texture

Short freezing gives classic ice cream consistency.

Use Ripe Bananas

Riper bananas make the dessert naturally sweeter.

Frequently asked questions 

Can I make this dairy-free?

Yes, use dairy-free yogurt.

How long does it last?

About 2 weeks frozen.

Can I use fresh fruit?

Frozen fruit works best for creamy texture.

Do I need an ice cream maker?

No.

Is it refined sugar-free?

Yes, if using only fruit or maple syrup.

Nutritional Information

Calories: 160

Protein: 5g

Carbohydrates: 30g

Fiber: 4g

Fat: 2g

Saturated Fat: 1g

Sugar: 20g

Sodium: 35mg

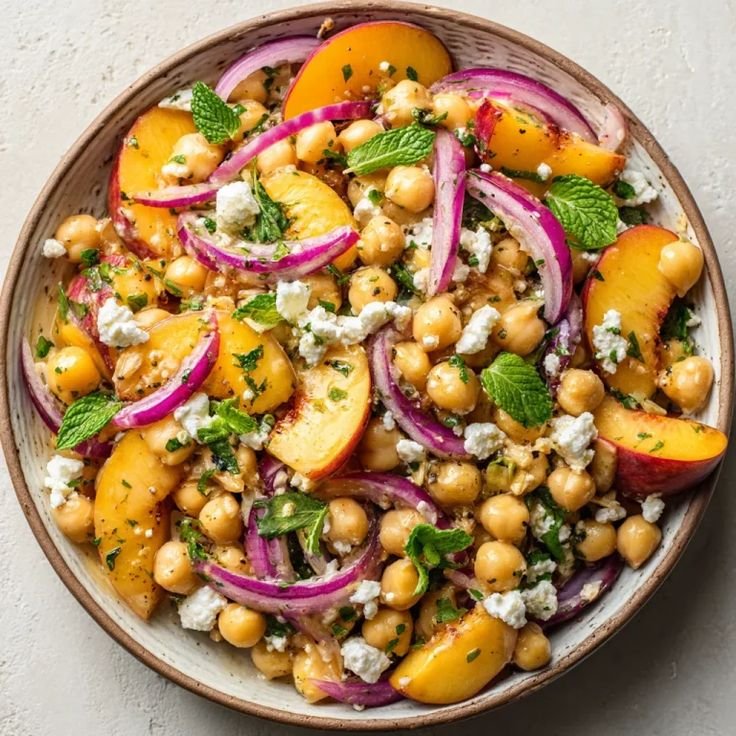
Mediterranean Peach & Chickpea Salad with lemon juice

Mediterranean Peach & Chickpea Salad

This Mediterranean Peach & Chickpea Salad is sweet, savory, fresh, and packed with vibrant summer flavor. Juicy peaches, creamy chickpeas, tangy feta, crisp red onion, and fresh mint are tossed in a bright lemon herb dressing for the perfect refreshing Mediterranean-inspired salad.

It’s light yet filling and perfect for warm-weather lunches, picnics, or healthy dinners.

Time

Prep Time: 15 minutes

Cook Time: 0 minutes

Total Time: 15 minutes

Servings: 4

Ingredients

For the Salad

1 can chickpeas, drained and rinsed

2 ripe peaches, sliced

¼ red onion, thinly sliced

⅓ cup feta cheese, crumbled

2 tablespoons fresh mint, chopped

2 tablespoons parsley, chopped

For the Dressing

3 tablespoons olive oil

Juice of 1 lemon

1 teaspoon honey

1 teaspoon Dijon mustard

Salt and black pepper, to taste

Optional Add-Ins

Avocado

Arugula

Pistachios

Cucumbers

Chili flakes

Quinoa

How to Make Mediterranean Peach Chickpea Salad

Step 1: Prepare the Ingredients

Slice peaches and red onion.

Drain and rinse chickpeas well.

Add everything to a large bowl.

Step 2: Make the Dressing

In a small bowl, whisk together:

olive oil

lemon juice

honey

Dijon mustard

salt

pepper

Step 3: Toss the Salad

Pour dressing over the salad.

Gently toss until evenly coated.

Top with:

feta cheese

fresh herbs

Step 4: Serve

Serve immediately or chill for 10–15 minutes for extra freshness.

Helpful Tips

Use Ripe but Firm Peaches

They hold their shape better in salads.

Chill Before Serving

The flavors become brighter and more refreshing.

Slice Onion Thinly

Thin onion blends better with the sweet peaches.

Add Feta Last

This keeps the cheese creamy and crumbly.

Frequently Asked Questions

Can I make this ahead?

Yes, but add peaches right before serving for best texture.

How long does it last?

About 2 days refrigerated.

Can I use nectarines?

Absolutely.

Is this salad filling?

Yes, chickpeas make it hearty and satisfying.

Nutritional Information

Calories: 310

Protein: 10g

Carbohydrates: 28g

Fiber: 7g

Fat: 18g

Saturated Fat: 4g

Cholesterol: 12mg

Sodium: 340mg