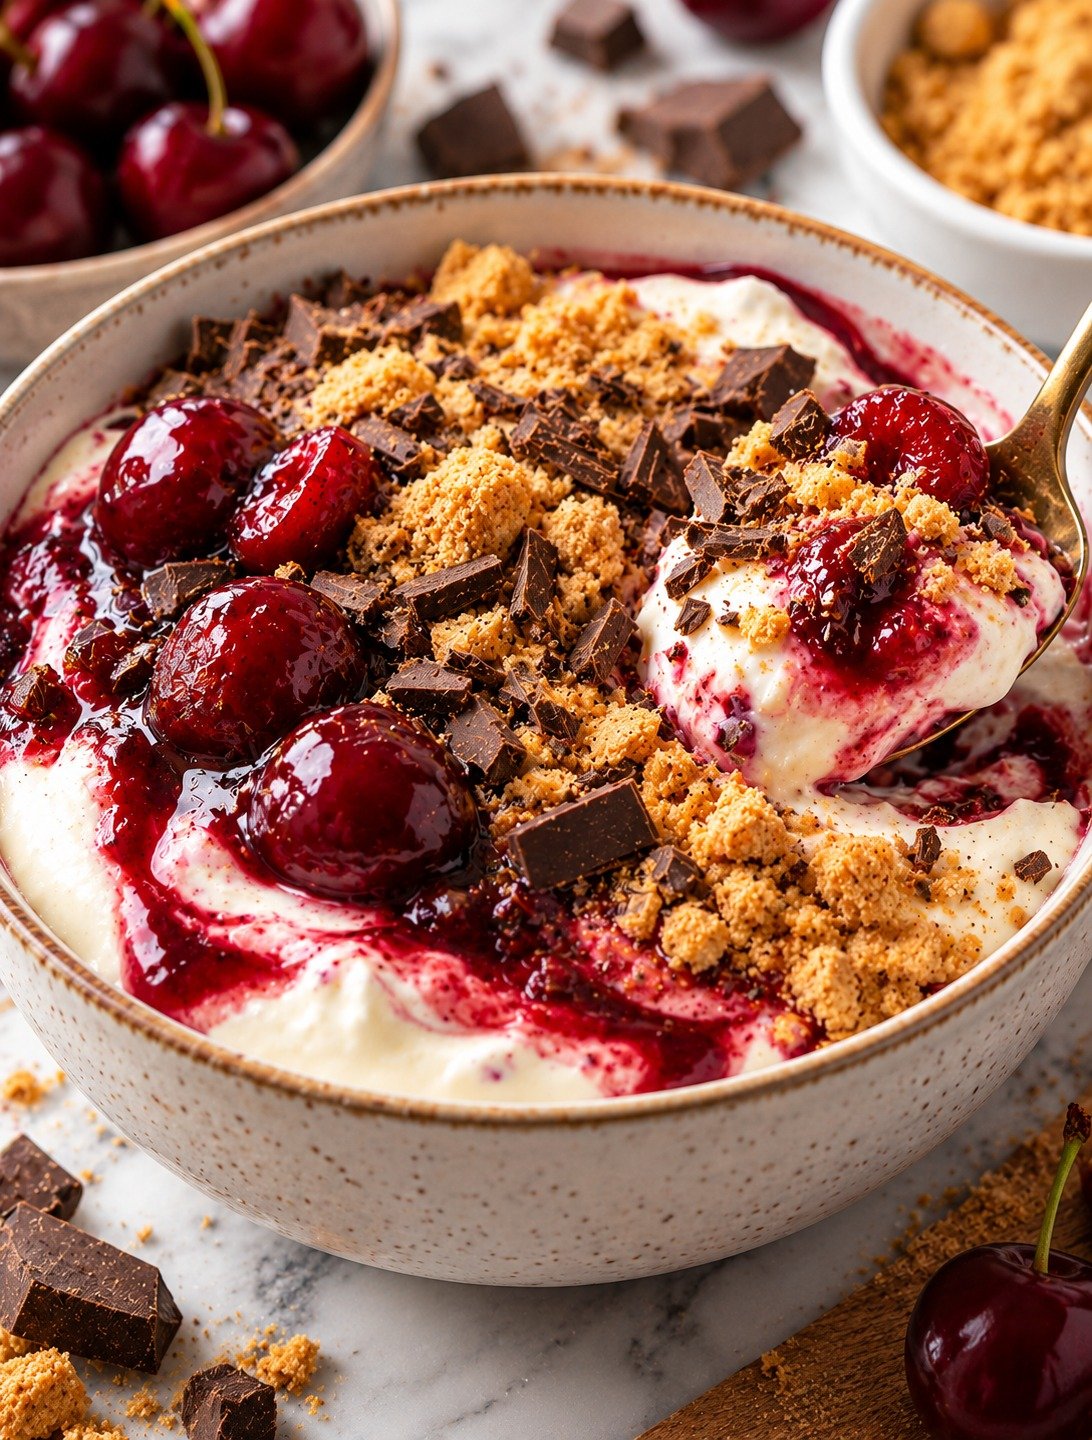
Chocolate Cherry Cheesecake Yogurt Bowl

Cherry Cheesecake Bowl with Greek yogurt, cherries, cocoa, cream cheese, dark chocolate, graham crumbs, and chopped nuts

Chocolate Cherry Cheesecake Yogurt Bowl

Cherry Cheesecake Bowl is a creamy, chocolatey, fruit-filled breakfast or dessert made with thick Greek yogurt, cream cheese, cocoa, fresh or frozen cherries, vanilla, and a simple crunchy topping. It delivers the flavor of cheesecake in a much easier bowl that takes only a few minutes to assemble.

This Cherry Cheesecake Bowl is ideal for breakfast, an afternoon snack, or a lighter dessert when you want something sweet but still filling. The combination of protein-rich yogurt, juicy cherries, and a small amount of chocolate makes it feel indulgent without requiring baking.

Prep Time: 10 minutes
Cook Time: 0 minutes
Total Time: 10 minutes
Servings: 1 large bowl or 2 small bowls

Ingredients

For the Cheesecake Yogurt Base

  • 1 cup thick plain Greek yogurt
  • 2 tablespoons cream cheese, softened
  • 1 tablespoon unsweetened cocoa powder
  • 1 to 2 tablespoons maple syrup or honey
  • 1/2 teaspoon vanilla extract
  • 1 teaspoon fresh lemon juice
  • Pinch of salt

Ingredients For the Cherry Layer

  • 3/4 cup pitted cherries, fresh or frozen
  • 1 teaspoon maple syrup or honey, optional
  • 1/4 teaspoon vanilla extract
  • 1 teaspoon chia seeds, optional

For the Topping

  • 1 tablespoon dark chocolate chips or chopped dark chocolate
  • 1 tablespoon crushed graham crackers
  • 1 tablespoon chopped almonds or walnuts
  • Extra cherries for garnish
  • A small spoonful of Greek yogurt, optional

Why You’ll Love This Recipe

Cherry Cheesecake Bowl combines creamy cheesecake flavor with the convenience of a yogurt bowl. There is no baking, no crust to prepare, and no long chilling time.

Another reason to love Cherry Cheesecake Bowl is the balance of textures. The yogurt and cream cheese create a rich base, the cherries add juicy sweetness, and the chocolate, nuts, and graham crumbs add crunch.

It is also easy to customize. You can make it more chocolatey, add extra fruit, use a different sweetener, or prepare it ahead for a quick breakfast.

How to Make Cherry Cheesecake Bowl

Step 1: Soften the Cream Cheese

Place the cream cheese in a medium bowl and let it sit at room temperature for several minutes.

Softened cream cheese blends more smoothly with yogurt and helps create the creamy cheesecake-style texture.

Step 2: Make the Yogurt Base

Add Greek yogurt, cocoa powder, maple syrup or honey, vanilla, lemon juice, and salt to the cream cheese.

Whisk until completely smooth.

The lemon adds a slight tang that makes Cherry Cheesecake Bowl taste more like classic cheesecake.

Step 3: Prepare the Cherries

If using fresh cherries, remove the pits and slice them in half.

If using frozen cherries, thaw them first and drain any excess liquid.

For a softer fruit layer, place the cherries in a small bowl and mash a few of them with a fork.

Step 4: Sweeten the Fruit

Mix the cherries with maple syrup and vanilla if desired.

If your cherries are naturally sweet, you can skip the extra sweetener.

Stir in chia seeds if you want the fruit mixture to thicken slightly.

Step 5: Build the First Layer

Spoon about half of the chocolate cheesecake yogurt mixture into a serving bowl.

Spread it evenly with the back of a spoon.

Add half of the cherry mixture over the yogurt.

Step 6: Add the Second Layer

Spoon the remaining yogurt mixture over the cherries.

Top with the rest of the fruit.

Layering Cherry Cheesecake Bowl helps distribute the cherry flavor throughout instead of leaving all the fruit on top.

Step 7: Add the Crunchy Toppings

Sprinkle dark chocolate, crushed graham crackers, and chopped nuts over the bowl.

The graham crumbs give the recipe a subtle cheesecake-crust flavor without needing to make a full crust.

Step 8: Garnish

Add a few extra cherries and a small spoonful of yogurt if desired.

For a prettier finish, shave a little dark chocolate over the top.

Step 9: Chill or Serve Immediately

You can eat Cherry Cheesecake Bowl immediately for a soft, creamy texture.

For a thicker cheesecake-like consistency, refrigerate it for 20 to 30 minutes before serving.

Step 10: Enjoy

Serve with a spoon and enjoy it as breakfast, a snack, or dessert.

For a more filling meal, pair the bowl with a boiled egg, a small handful of nuts, or whole-grain toast.

Serving Suggestions

Cherry Cheesecake Bowl is delicious on its own, but it also works well with simple additions.

For breakfast, serve it with a cup of coffee or tea and a small piece of toast.

As a snack, pair Cherry Cheesecake Bowl with almonds, walnuts, or a piece of fresh fruit.

For dessert, add extra dark chocolate, whipped Greek yogurt, or a few crushed graham crackers.

You can also divide the recipe into two small glasses and serve it as a simple layered dessert for guests.

If you enjoy easy high-protein meals, you may also like our Crockpot Steak Bites with tender beef and rich savory flavor.

Recipe Tips

Use thick Greek yogurt for the creamiest texture.

Choose full-fat or reduced-fat cream cheese depending on the richness you prefer.

Taste the cherries before adding sweetener because some varieties are naturally very sweet.

Use unsweetened cocoa powder so you can control the sugar level.

For the smoothest Cherry Cheesecake Bowl, make sure the cream cheese is softened before mixing.

Do not add too much lemon juice, because the base can become thinner.

Add crunchy toppings shortly before serving so they stay crisp.

Easy Variations

Cherry Cheesecake Bowl is easy to customize with different flavors and toppings.

For a stronger chocolate version, add an extra teaspoon of cocoa powder or a few more dark chocolate chips.

For a vanilla version, omit the cocoa and add more vanilla extract.

Swap cherries for strawberries, raspberries, or blueberries if needed.

You can also stir a spoonful of almond butter or peanut butter into the yogurt base.

For a higher-protein version, add a small scoop of chocolate or vanilla protein powder. If the mixture becomes too thick, stir in a splash of milk.

Make-Ahead Instructions

Cherry Cheesecake Bowl can be prepared the night before.

Mix the cheesecake yogurt base and store it in an airtight container in the refrigerator.

Prepare the cherries separately and refrigerate them in another small container.

Assemble the bowl in the morning and add graham crumbs, nuts, and chocolate just before eating.

This keeps the toppings fresh and prevents them from becoming soft.

Storage

Store assembled Cherry Cheesecake Bowl in the refrigerator for up to 2 days.

Keep it covered tightly so the yogurt does not absorb other refrigerator odors.

If possible, store crunchy toppings separately and add them immediately before serving.

This recipe is not ideal for freezing because Greek yogurt and cream cheese can change texture after thawing.

Nutrition Information

Approximate nutrition for one large bowl:

Calories: 390
Protein: 25 g
Carbohydrates: 45 g
Fat: 14 g
Saturated Fat: 6 g
Fiber: 6 g
Sugar: 28 g
Sodium: 210 mg

Nutrition values are estimates and will vary depending on the yogurt, cream cheese, sweetener, chocolate, and toppings used.

Frequently Asked Questions

Can I use frozen cherries?

Yes. Thaw them and drain excess liquid before adding them to the bowl.

Can I make this without cream cheese?

Yes. Use all Greek yogurt for a lighter texture, although it will taste less like cheesecake.

Can I use flavored yogurt?

Yes, but flavored yogurt usually contains more sugar. Vanilla Greek yogurt works especially well.

Can I add protein powder?

Yes. A small scoop of chocolate or vanilla protein powder can make Cherry Cheesecake Bowl even more filling.

Can I make it dairy-free?

Yes. Use thick dairy-free yogurt and dairy-free cream cheese.

What can I use instead of graham crackers?

Crushed oats, granola, digestive-style biscuits, or chopped nuts can all work.

Is this suitable for meal prep?

Yes. Prepare the yogurt and cherries ahead, then add toppings when ready to eat.

Final Thoughts

Cherry Cheesecake Bowl is an easy way to enjoy chocolate, cherries, and cheesecake-inspired flavor without turning on the oven.

Because Cherry Cheesecake Bowl uses simple ingredients and takes only a few minutes to assemble, it works well for busy mornings, afternoon snacks, or a quick dessert.

Keep this Cherry Cheesecake Bowl recipe handy whenever you want something creamy, fruity, chocolatey, and satisfying with minimal preparation.

Cherry Cheesecake Bowl also makes a convenient option when you need a fast treat without baking. For a special presentation, layer the mixture in a clear glass so the chocolate yogurt and bright cherries remain beautifully visible.

For a lighter bread option, try our Fluffy No-Flour High Protein Cloud Bread with eggs, Greek yogurt, and a soft airy texture.
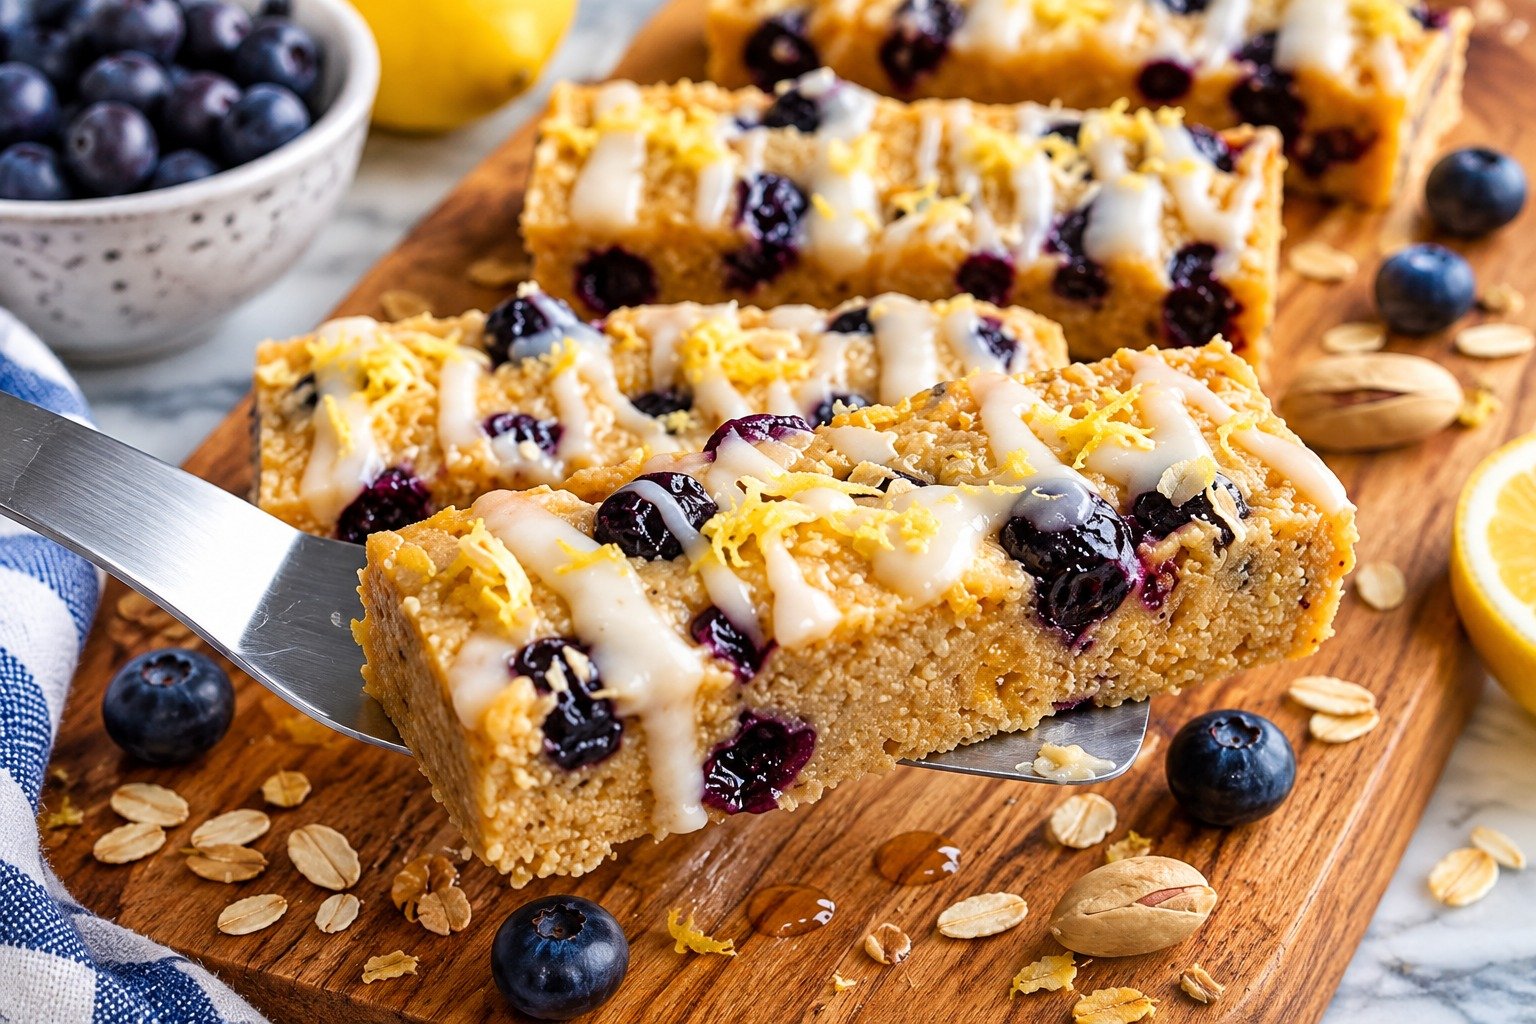
Mediterranean No-Bake Blueberry Protein Lemon Bars

Blueberry Protein Bars with Greek yogurt, fresh blueberries, lemon, oats, almond flour, and a creamy yogurt topping

Mediterranean No-Bake Blueberry Protein Lemon Bars

Blueberry Protein Bars are a fresh, creamy, and easy no-bake treat made with oats, almond flour, Greek yogurt, protein powder, blueberries, lemon, honey, and a simple yogurt topping. They have a soft, chilled texture with bright citrus flavor and natural berry sweetness, making them ideal for breakfast prep, snacks, or a light dessert.

These Blueberry Protein Bars are inspired by Mediterranean-style ingredients such as yogurt, nuts, fruit, and honey. They require no oven, can be prepared ahead, and are easy to portion for busy mornings or afternoon snacks.

Prep Time: 20 minutes
Chill Time: 3 hours
Total Time: 3 hours 20 minutes
Servings: 12 bars

Ingredients

For the Base

  • 1 1/2 cups rolled oats
  • 1 cup almond flour
  • 1/2 cup vanilla or unflavored protein powder
  • 1/2 teaspoon ground cinnamon
  • 1/4 teaspoon salt
  • 1/3 cup almond butter
  • 1/4 cup honey or maple syrup
  • 1/3 cup plain Greek yogurt
  • 2 tablespoons fresh lemon juice
  • 1 tablespoon finely grated lemon zest
  • 1 teaspoon vanilla extract
  • 3/4 cup fresh blueberries

Ingredients For the Lemon Yogurt Topping

  • 3/4 cup thick Greek yogurt
  • 2 tablespoons cream cheese, softened
  • 1 tablespoon honey
  • 1 tablespoon fresh lemon juice
  • 1 teaspoon lemon zest
  • 1/2 teaspoon vanilla extract

For Garnish

  • 1/4 cup fresh blueberries
  • 1 tablespoon chopped pistachios or almonds
  • Extra lemon zest, optional

Why You’ll Love This Recipe

Blueberry Protein Bars are simple to prepare, naturally colorful, and easy to store. Because the recipe is no-bake, there is no need to heat the kitchen or wait for a tray to cool before slicing.

Another reason to love Blueberry Protein Bars is the balance of creamy yogurt, nutty almond flour, chewy oats, juicy blueberries, and fresh lemon. The protein powder and Greek yogurt make them more satisfying than an ordinary sweet snack, while the fruit and citrus keep the flavor light.

How to Make Blueberry Protein Bars

Step 1: Prepare the Pan

Line an 8-inch square pan with parchment paper, leaving some paper hanging over the sides.

Step 2: Blend the Dry Ingredients

Add the rolled oats, almond flour, protein powder, cinnamon, and salt to a large bowl.

Stir until evenly combined.

Step 3: Mix the Wet Ingredients

In a separate bowl, stir together the almond butter, honey, Greek yogurt, lemon juice, lemon zest, and vanilla.

Mix until smooth and creamy.

The lemon zest is especially important because it gives Blueberry Protein Bars a brighter citrus flavor without adding too much liquid.

Step 4: Combine the Mixtures

Pour the wet ingredients into the bowl with the dry ingredients.

Stir until a thick, slightly sticky dough forms.

If the mixture feels too dry, add one tablespoon of Greek yogurt at a time. If it feels overly soft, add a little more almond flour or oats.

Step 5: Add the Blueberries

Gently fold in the fresh blueberries.

Try not to crush too many of them because whole berries create pretty pockets of color and fresh flavor inside Blueberry Protein Bars.

Step 6: Press into the Pan

Transfer the mixture to the prepared pan.

Use the back of a spoon or a flat spatula to press it into an even layer.

Press firmly, especially around the corners, so the bars hold together after chilling.

Step 7: Make the Yogurt Topping

In a medium bowl, whisk together Greek yogurt, softened cream cheese, honey, lemon juice, lemon zest, and vanilla.

Continue mixing until smooth.

Spread the topping evenly over the base.

This creamy layer gives Blueberry Protein Bars a cheesecake-like finish while keeping the overall recipe light and fresh.

Step 8: Add the Garnish

Scatter fresh blueberries and chopped pistachios or almonds over the yogurt layer.

Add a little extra lemon zest if desired.

Step 9: Chill Until Firm

Cover the pan and refrigerate for at least 3 hours.

For the cleanest slices, chill overnight.

The oats and almond flour absorb moisture as they rest, helping Blueberry Protein Bars become firm enough to cut without baking.

Step 10: Slice and Serve

Lift the chilled slab from the pan using the parchment paper.

Place it on a cutting board and use a sharp knife to cut it into 12 bars.

Wipe the knife between cuts for cleaner edges.

Serve Blueberry Protein Bars cold for the best texture.

Serving Suggestions

Blueberry Protein Bars are excellent straight from the refrigerator with coffee, tea, or a glass of milk.

For breakfast, pair one bar with a boiled egg, fresh fruit, or extra Greek yogurt for a more filling meal.

As an afternoon snack, enjoy Blueberry Protein Bars with berries, almonds, or a small smoothie.

They also work well as a light dessert after grilled chicken, fish, or a Mediterranean-style dinner because the lemon and berry flavors feel fresh rather than heavy.

For another bold and satisfying meal, try our Birria Tacos with tender seasoned beef, melted cheese, and rich dipping broth.

Recipe Tips

Use thick Greek yogurt rather than regular yogurt so the bars remain firm.

Choose a protein powder that tastes good on its own because the flavor will be noticeable.

Fresh blueberries work best, but frozen berries can be used if they are thawed and dried thoroughly.

Do not add too much lemon juice, or the mixture may become too soft.

For neat Blueberry Protein Bars, chill the pan completely before slicing.

Press the base firmly into the pan to prevent crumbling.

Store the bars cold because the yogurt topping softens at room temperature.

Easy Variations

Blueberry Protein Bars can be changed in several simple ways.

Replace blueberries with raspberries, chopped strawberries, or blackberries.

Swap almond butter for cashew butter or peanut butter.

Use orange zest instead of lemon for a sweeter citrus flavor.

For extra crunch, mix chopped pistachios, walnuts, or almonds into the base.

You can also add chia seeds, ground flaxseed, or shredded coconut.

For a chocolate variation, use chocolate protein powder and add a small amount of cocoa, although the result will be less citrus-forward.

If you enjoy crispy and cheesy sides, you may also like our Cheesy Broccoli Potato Tots.

Make-Ahead Instructions

Blueberry Protein Bars are especially useful for make-ahead breakfasts and snacks.

Prepare the full recipe in the evening and refrigerate it overnight.

In the morning, lift the slab from the pan, slice it, and store the individual bars in an airtight container.

You can also prepare the base one day ahead and add the yogurt topping before the final chilling period.

Storage and Freezing

Store Blueberry Protein Bars in an airtight container in the refrigerator for up to 5 days.

Place parchment paper between layers if stacking them.

For longer storage, freeze the bars without fresh blueberry garnish for up to 1 month. Arrange them in a single layer until frozen, then transfer them to a freezer-safe container.

Thaw overnight in the refrigerator.

Nutrition Information

Approximate nutrition per bar:

Calories: 215
Protein: 11 g
Carbohydrates: 22 g
Fat: 10 g
Saturated Fat: 2 g
Fiber: 4 g
Sugar: 9 g
Sodium: 115 mg

Nutrition values are estimates and will vary depending on the protein powder, yogurt, nut butter, and sweetener used.

Frequently Asked Questions

Can I use frozen blueberries?

Yes. Thaw them first and pat them dry very well. Too much moisture can soften the mixture.

What protein powder works best?

Vanilla protein powder works especially well because it complements the berries and lemon. Unflavored powder is also suitable.

Can I make these dairy-free?

Yes. Use a thick dairy-free yogurt, dairy-free cream cheese, and a plant-based protein powder.

Why are my bars too soft?

The mixture may contain too much yogurt, lemon juice, or berry moisture. Add a little more almond flour or oats and chill longer.

Can I skip the topping?

Yes. Blueberry Protein Bars can be served without the topping if you prefer a firmer, simpler snack.

Can I use another nut flour?

Cashew flour can work well. Coconut flour absorbs much more liquid, so it should not be substituted in equal amounts.

Are these bars suitable for meal prep?

Yes. They are easy to portion and stay fresh for several days when refrigerated properly.

Final Thoughts

Blueberry Protein Bars are a simple no-bake recipe that combines creamy Greek yogurt, oats, almond flour, protein powder, fresh blueberries, nuts, honey, and bright lemon flavor.

Because Blueberry Protein Bars can be prepared ahead, customized with different fruits, and stored in the refrigerator, they are convenient for breakfast, snacks, or a light dessert.

Keep these Blueberry Protein Bars chilled and ready whenever you want a fresh, satisfying homemade treat that requires no oven and uses simple Mediterranean-inspired ingredients.

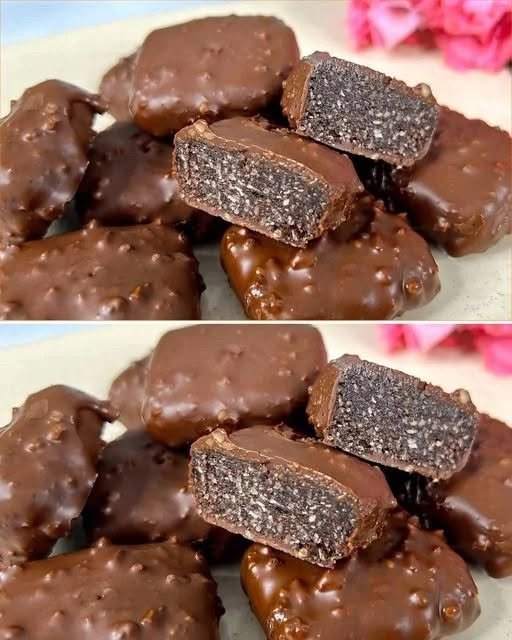
Sugar-Free Chocolate Crunch Bars

Sugar-Free Chocolate Crunch Bars with dark chocolate and crunchy nut filling

Sugar-Free Chocolate Crunch Bars

If you’re craving something chocolatey, rich, and satisfying without added sugar, these Sugar-Free Chocolate Crunch Bars are a perfect treat. They deliver all the indulgence of classic chocolate bars with a delightful crunch, but without the sugar spike. Ideal for those following low-carb, keto, or diabetic-friendly diets, these bars are made with simple, wholesome ingredients and come together with minimal effort.

What makes these bars especially appealing is their texture. The outer layer is smooth and chocolatey, while the inside has a slightly chewy, crunchy bite thanks to the combination of nuts, seeds, or low-carb crisp elements. They’re great as a snack, dessert, or even a quick energy boost during the day.

Prep Time: 15 minutes

Chill Time: 1–2 hours

Total Time: 1 hour 15 minutes

Servings: 10–12 bars

Ingredients

For the base:

1 cup almond flour

1/2 cup unsweetened shredded coconut

1/4 cup cocoa powder (unsweetened)

1/3 cup sugar-free syrup (like maple-flavored or honey alternative)

1/4 cup melted coconut oil or butter

1 teaspoon vanilla extract

Pinch of salt

For the crunch:

1/2 cup chopped nuts (almonds, peanuts, or hazelnuts)

1/4 cup sugar-free crispy cereal or puffed quinoa

For the coating:

1 1/2 cups sugar-free dark chocolate chips

1 tablespoon coconut oil

Instructions

Line a small square baking dish (8×8 inch) with parchment paper for easy removal.

In a mixing bowl, combine almond flour, shredded coconut, cocoa powder, and a pinch of salt.

Add sugar-free syrup, melted coconut oil, and vanilla extract. Mix until a thick, dough-like consistency forms.

Fold in the chopped nuts and crispy cereal or puffed quinoa for added crunch.

Press the mixture firmly and evenly into the prepared baking dish. Use the back of a spoon or your hands to smooth it out.

Place the dish in the refrigerator for about 30–40 minutes to firm up.

Once chilled, remove and cut into rectangular bar shapes.

Melt the sugar-free chocolate chips with coconut oil using a double boiler or microwave in short intervals, stirring until smooth.

Dip each bar into the melted chocolate, ensuring it’s fully coated.

Place coated bars on a parchment-lined tray and refrigerate again until the chocolate sets completely (about 30–60 minutes).

Once set, your sugar-free chocolate crunch bars are ready to enjoy.

Tips

Use high-quality sugar-free chocolate chips for the best flavor and smooth coating.

If the base mixture feels too dry, add a little more melted coconut oil.

Press the base firmly to prevent crumbling when cutting.

Chill thoroughly before dipping to keep bars intact.

Use a fork or dipping tool to coat bars evenly in chocolate.

Let excess chocolate drip off before placing bars on parchment.

Store in the fridge to maintain firmness, especially in warm climates.

Add a pinch of espresso powder to intensify the chocolate flavor.

For a smoother texture, finely chop nuts instead of leaving large chunks.

If you prefer softer bars, reduce chilling time slightly.

Variations

Keto Version: Ensure all ingredients, especially chocolate and syrup, are keto-certified with very low net carbs.

Nut-Free Option: Replace almond flour with sunflower seed flour and omit nuts.

Protein Boost: Add a scoop of sugar-free chocolate or vanilla protein powder to the base.

Peanut Butter Flavor: Mix in 2–3 tablespoons of natural peanut butter for a richer taste.

Coconut Lovers: Increase shredded coconut and add coconut cream for extra flavor.

Spiced Chocolate: Add cinnamon or a pinch of chili powder for a unique twist.

White Chocolate Coating: Use sugar-free white chocolate for a different look and flavor.

Layered Bars: Add a middle layer of sugar-free caramel or nut butter before coating.

Extra Crunch: Mix in cacao nibs for a deeper chocolate crunch.

Mini Bites: Shape into small squares or balls instead of bars for bite-sized treats.

Q&A

Are these truly sugar-free?
Yes, as long as you use sugar-free chocolate and syrup, there is no added sugar.

Can I use regular flour instead of almond flour?
Almond flour works best for texture and low-carb benefits, but oat flour can be used if not strictly low-carb.

How should I store them?
Keep in an airtight container in the refrigerator for up to one week.

Can I freeze them?
Yes, they freeze well for up to 2 months. Thaw slightly before eating.

What sweeteners work best?
Erythritol, monk fruit, or stevia-based syrups are great choices.

Can I skip the coating?
Yes, but the chocolate coating adds flavor and helps hold the bars together.

Why are my bars crumbly?
They may need more binding ingredients like coconut oil or syrup.

Can I make them dairy-free?
Yes, use coconut oil instead of butter and dairy-free chocolate.

Are they kid-friendly?
Absolutely, especially if you choose milder chocolate and avoid strong sweeteners.

Can I add dried fruit?
You can, but it may increase the sugar content, so use sparingly.

Nutrition (Per Serving, Approx.)

Calories: 220

Protein: 6g

Carbohydrates: 10g (Net carbs may be lower depending on sweetener)

Fat: 18g

Fiber: 4g

Sugar: 1g or less

Conclusion

These Sugar-Free Chocolate Crunch Bars prove that you don’t need sugar to enjoy a rich, satisfying dessert. With their perfect balance of creamy chocolate and crunchy texture, they’re a great option for mindful snacking or guilt-free indulgence. Easy to customize and simple to prepare, they fit beautifully into a variety of dietary lifestyles while still feeling like a treat. Keep a batch in your fridge, and you’ll always have a delicious, better-for-you chocolate option ready whenever cravings strike.