Chocolate Crumbs Truffle

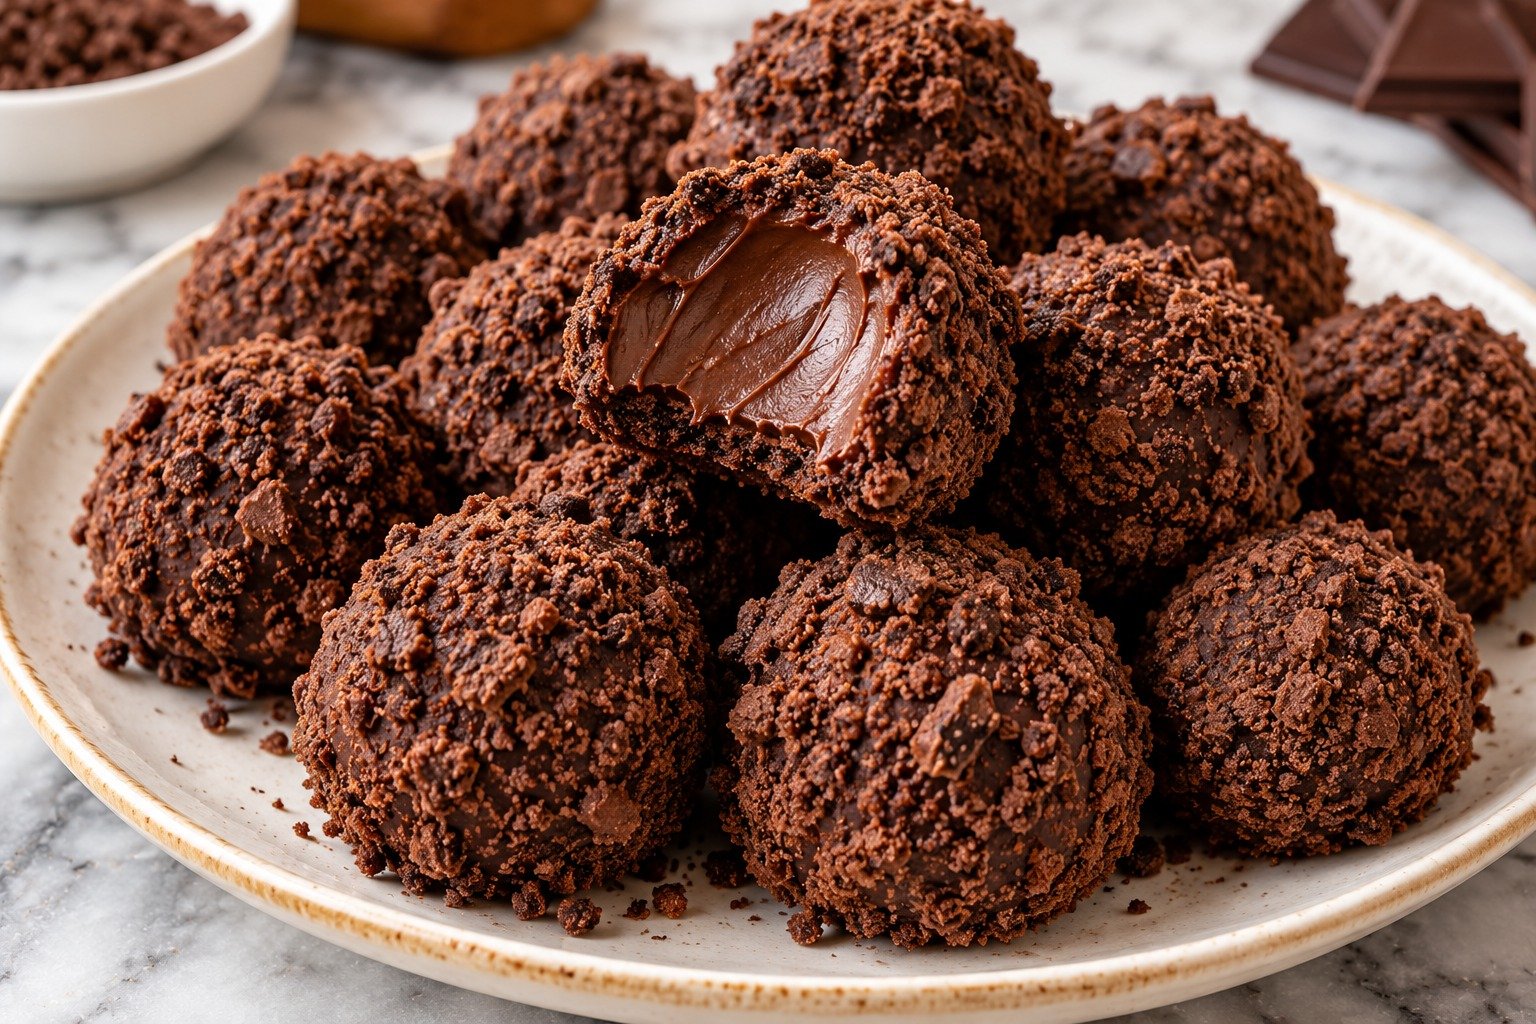
Chocolate Crumb Truffles with chocolate cookie crumbs, cream cheese, melted chocolate coating, and assorted toppings

Chocolate Crumbs Truffle

Chocolate Crumb Truffles are rich, bite-size treats made with crushed chocolate cookies, cream cheese, melted chocolate, and simple flavorings. Their soft, fudgy centers and smooth coating make them perfect for parties, holidays, dessert trays, or homemade gifts.

These Chocolate Crumb Truffles are ideal when you want an impressive no-bake dessert. Cookie crumbs form the base, cream cheese creates a soft center, and simple toppings let you change the look for any occasion.

Prep Time: 25 minutes
Chill Time: 45 minutes
Total Time: 1 hour 10 minutes
Servings: 24 truffles

Ingredients

For the Truffle Centers

  • 3 cups finely crushed chocolate sandwich cookies or plain chocolate biscuits
  • 8 ounces cream cheese, softened
  • 1 teaspoon vanilla extract
  • 1 tablespoon unsweetened cocoa powder
  • 1 tablespoon powdered sugar, optional
  • Pinch of salt

For the Chocolate Coating

  • 10 ounces semi-sweet or dark chocolate, chopped
  • 1 teaspoon coconut oil or neutral oil, optional

Ingredients For Decorating

  • 1/4 cup reserved chocolate cookie crumbs
  • 2 tablespoons cocoa powder
  • 2 tablespoons chocolate sprinkles
  • 1/4 cup finely chopped walnuts, hazelnuts, or almonds
  • 1/4 cup shredded coconut, optional
  • White chocolate drizzle, optional

Why You’ll Love This Recipe

Chocolate Crumb Truffles are easy to make with familiar ingredients and require no oven. They have the rich flavor of chocolate cake truffles but need much less preparation.

This recipe is also easy to customize with different coatings, cookie crumbs, nuts, and decorations for birthdays or holidays.

The mixture can also be prepared ahead, which makes entertaining easier.

How to Make Chocolate Crumb Truffles

Step 1: Crush the Cookies

Place the chocolate cookies in a food processor and process until they become very fine crumbs.

Without a food processor, crush the cookies in a zip-top bag with a rolling pin.

The crumbs should be fine and even so Chocolate Crumb Truffles have a smooth center rather than a chunky texture.

Reserve about 1/4 cup of crumbs for decorating.

Step 2: Prepare the Cream Cheese

Place softened cream cheese in a large mixing bowl.

Beat it briefly with a hand mixer or stir thoroughly with a sturdy spoon until smooth and creamy.

Add vanilla, cocoa powder, powdered sugar if using, and a small pinch of salt.

Mix until evenly combined.

Step 3: Add the Cookie Crumbs

Gradually add the crushed cookies to the cream cheese mixture.

Mix until the crumbs are completely incorporated and the mixture looks thick, dark, and dough-like.

Chocolate Crumb Truffles should hold together easily when you press a small amount between your fingers.

If the mixture feels too soft, refrigerate it for 10 to 15 minutes before shaping.

Step 4: Portion the Mixture

Use a small cookie scoop or tablespoon to portion the mixture into equal pieces.

Aim for about 1 tablespoon per truffle.

Keeping the portions similar in size helps the finished truffles look neat and evenly coated.

Step 5: Roll into Balls

Roll each portion gently between your palms until smooth and round.

Place the balls on a parchment-lined baking sheet or plate.

If the mixture sticks, clean and dry your hands before continuing. Roll gently so the centers stay soft.

Step 6: Chill the Centers

Refrigerate the shaped balls for at least 30 minutes.

For faster chilling, place them in the freezer for about 15 minutes.

Firm centers are much easier to dip, and chilling helps Chocolate Crumb Truffles keep their round shape when they meet the warm melted chocolate.

Step 7: Melt the Chocolate

Place chopped chocolate in a microwave-safe bowl.

Microwave in 20-second intervals, stirring after each interval, until smooth.

Alternatively, melt it in a heatproof bowl over gently simmering water. Stir in coconut oil for a thinner, shinier coating, and keep water away from the chocolate.

Step 8: Dip the Truffles

Drop one chilled ball into the melted chocolate.

Use a fork or dipping tool to turn it until fully coated. Lift it out and allow the excess chocolate to drip back into the bowl.

Return the coated truffle to the parchment.

Repeat until all Chocolate Crumb Truffles are covered.

Step 9: Decorate Before the Coating Sets

While the chocolate is still wet, sprinkle the tops with reserved cookie crumbs, cocoa, nuts, sprinkles, or coconut.

If you want a white chocolate drizzle, allow the dark coating to set first, then drizzle melted white chocolate over the tops.

Step 10: Chill and Serve

Refrigerate the finished Chocolate Crumb Truffles for 15 to 20 minutes, or until the coating is firm.

Let them sit at room temperature for about 5 minutes before serving for the creamiest center.

Serving Suggestions

Chocolate Crumb Truffles are ideal for dessert boards, birthday parties, holiday trays, afternoon coffee, or after-dinner treats.

Arrange them in mini paper liners or add them to a platter with berries, cookies, brownies, or cheesecake bites.

You can also package Chocolate Crumb Truffles in a small gift box lined with parchment paper for homemade holiday or hostess gifts.

Serve with coffee, espresso, milk, or hot chocolate.

For a fresh and protein-packed meal, try our Tex-Mex Chopped Chicken Salad with seasoned chicken, crisp vegetables, and bold flavor.

Recipe Tips

Use finely crushed cookies for the smoothest centers.

Make sure the cream cheese is softened before mixing so it blends evenly.

Chill the shaped balls before dipping them in chocolate.

Use good-quality coating chocolate for the best flavor.

Work with a few chilled centers at a time if your kitchen is warm.

If the melted chocolate becomes too thick, stir in a very small amount of coconut oil.

Decorate Chocolate Crumb Truffles immediately after dipping because toppings will not stick once the coating hardens.

For clean dipping, tap the fork gently against the bowl to remove excess chocolate.

Easy Variations

Chocolate Crumb Truffles are easy to change with different cookies and coatings.

Use chocolate graham crackers, brownie crumbs, chocolate wafer cookies, or another dry chocolate biscuit as the base.

For a mocha version, add 1 teaspoon instant espresso powder to the center mixture.

For a mint version, replace vanilla with a small amount of peppermint extract.

You can coat the truffles in milk chocolate, dark chocolate, or white chocolate.

Add finely chopped hazelnuts or walnuts to the center for extra texture.

For a coconut version, roll freshly dipped truffles in shredded coconut before the coating sets.

A pinch of orange zest also pairs beautifully with dark chocolate.

If you enjoy creamy and comforting family dinners, you may also like our Mom’s Chicken & Broccoli Baked Ziti.

Make-Ahead Instructions

Chocolate Crumb Truffles are excellent for making ahead because they need time to chill.

Prepare and shape the centers up to 2 days in advance. Keep them covered in the refrigerator until you are ready to dip.

You can also finish the recipe one or two days before serving. Store truffles in a single layer or separate layers with parchment.

Storage and Freezing

Store Chocolate Crumb Truffles in an airtight container in the refrigerator for up to 5 days because the centers contain cream cheese.

For longer storage, freeze them for up to 2 months with parchment between layers. Thaw overnight in the refrigerator before serving.

Avoid leaving them in a warm room for long periods because the coating may soften.

Nutrition Information

Approximate nutrition per truffle:

Calories: 145
Protein: 2 g
Carbohydrates: 16 g
Fat: 9 g
Saturated Fat: 5 g
Fiber: 1 g
Sugar: 11 g
Sodium: 95 mg

Nutrition values are estimates and will vary depending on the cookies, chocolate, cream cheese, and toppings used.

Frequently Asked Questions

Can I make these without cream cheese?

Yes. Thick chocolate ganache, mascarpone, or a small amount of nut butter can be used, although the texture and flavor will change.

Can I use any chocolate cookies?

Yes. Choose crisp chocolate cookies that can be crushed into fine crumbs. If the cookies contain a cream filling, you may need slightly less cream cheese.

Why is my mixture too soft?

The cream cheese may have been very warm or the cookie-to-cheese ratio may be slightly different. Refrigerate the mixture until firm enough to shape.

Why is the chocolate coating too thick?

Warm thickened chocolate briefly and stir well. A little coconut oil can make dipping easier.

Can I make them without dipping chocolate?

Yes. Roll the chilled centers in cocoa powder, cookie crumbs, coconut, or finely chopped nuts instead.

Can children help make them?

Yes. Rolling and decorating are simple steps, but an adult should supervise melting the chocolate.

Are these good for gifting?

Yes. Chocolate Crumb Truffles make excellent homemade gifts when kept chilled and packed securely.

Final Thoughts

Chocolate Crumb Truffles turn simple cookie crumbs and cream cheese into a rich homemade dessert with very little effort. The soft chocolate center contrasts beautifully with the firm chocolate shell, while different toppings make every batch easy to personalize.

Because Chocolate Crumb Truffles require no baking and can be prepared ahead, they are useful for parties, holidays, dessert tables, and edible gifts.

Keep this Chocolate Crumb Truffles recipe handy whenever you need an easy chocolate treat for sharing, gifting, or entertaining.
Raspberry Pistachio Cheesecake Parfait

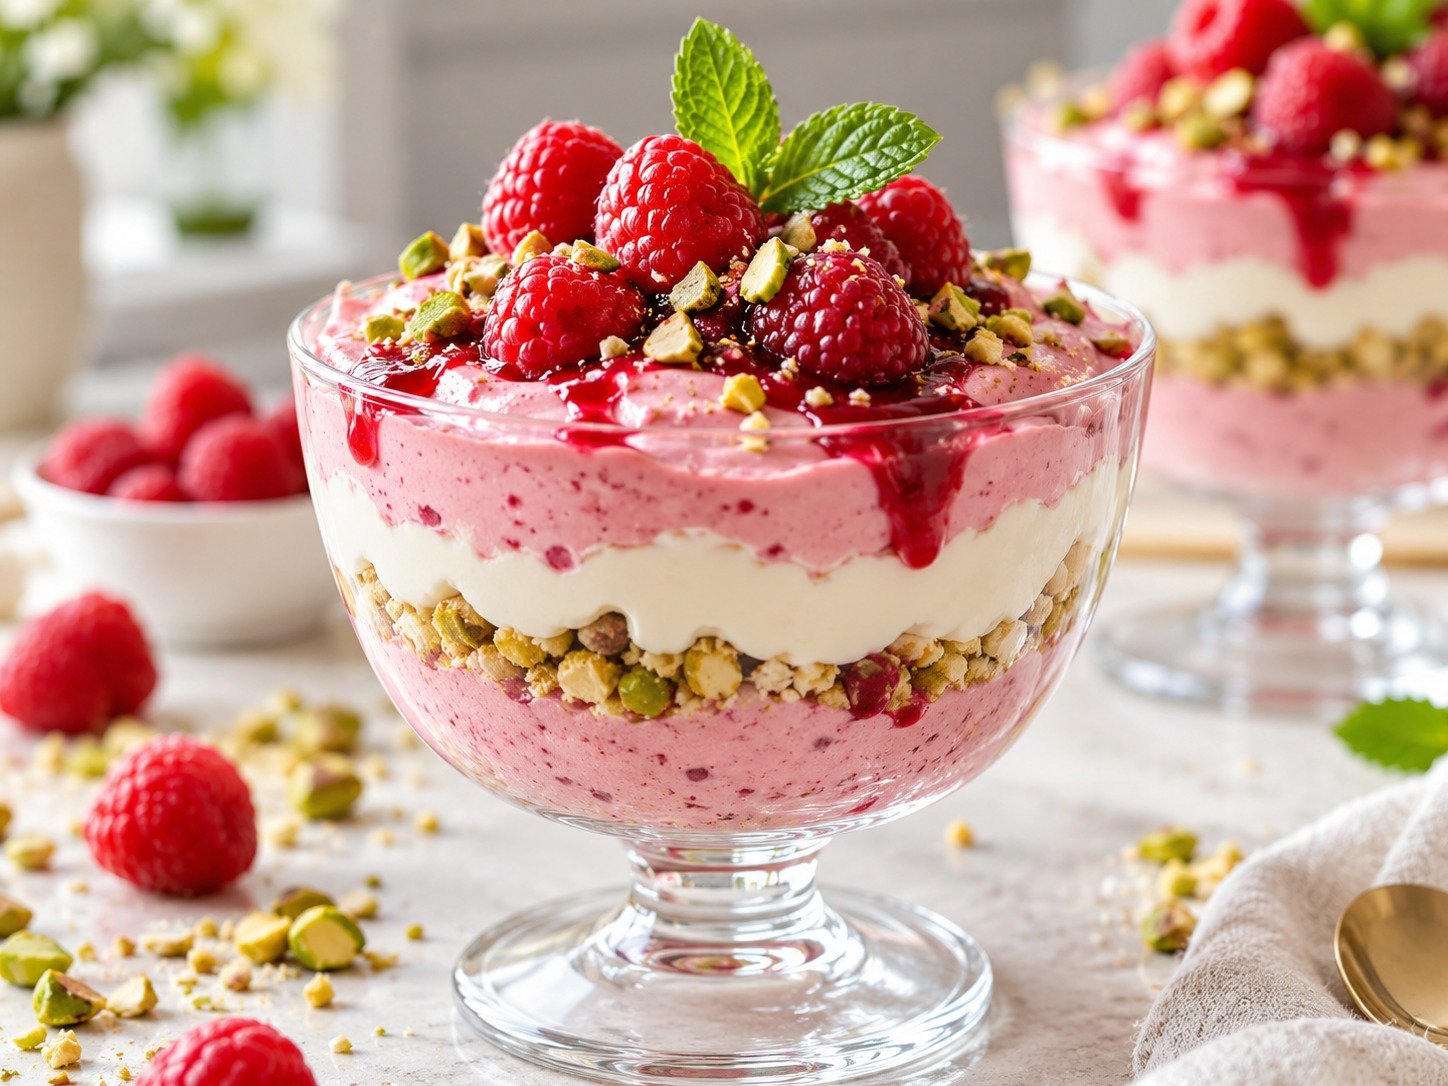
Raspberry Pistachio Cheesecake Parfait with creamy layers, raspberries, pistachios, and cookie crumbs

Raspberry Pistachio Cheesecake Parfait

Raspberry Pistachio Cheesecake Parfait is a creamy, colorful no-bake dessert made with layers of whipped cheesecake filling, juicy raspberries, crunchy pistachios, and buttery cookie crumbs. It looks elegant in individual glasses but is simple enough for an everyday treat. If you enjoy desserts that feel rich without requiring an oven, Cheesecake Parfait is an easy recipe to keep in your collection.

The contrast of tart raspberries, smooth cream cheese, and nutty pistachios makes every spoonful balanced and satisfying. Cheesecake Parfait is also easy to prepare ahead, which makes it a smart choice for holidays, dinner parties, birthdays, or warm-weather gatherings.

Prep Time: 20 minutes
Chill Time: 1 hour
Total Time: 1 hour 20 minutes
Servings: 6

Ingredients

For the Cheesecake Layer

8 ounces cream cheese, softened

1 cup heavy whipping cream

1/2 cup powdered sugar

1 teaspoon vanilla extract

1 teaspoon fresh lemon juice

1/2 teaspoon lemon zest

Pinch of salt

For the Raspberry Layer

2 cups fresh or frozen raspberries

2 tablespoons granulated sugar

1 tablespoon fresh lemon juice

1 teaspoon cornstarch

1 tablespoon water

For the Pistachio Crumb Layer

1 cup graham cracker crumbs

2 tablespoons melted butter

1/3 cup finely chopped pistachios

1 tablespoon brown sugar

Pinch of salt

For Garnish

Fresh raspberries

Chopped pistachios

Whipped cream

Lemon zest

Mint leaves, optional

Why You’ll Love This Recipe

Cheesecake Parfait gives you the flavor of classic cheesecake without baking, water baths, or waiting hours for a full cake to cool. The filling is light, creamy, and smooth, while the raspberry layer adds a bright fruit flavor.

Another reason to love Cheesecake Parfait is the texture. Buttery crumbs, soft cream cheese filling, fresh berries, and crunchy pistachios create a dessert that feels interesting from the first bite to the last.

It is also easy to portion. Individual glasses make serving simple and help the dessert look polished with very little extra effort.

How to Make Raspberry Pistachio Cheesecake Parfait

Step 1: Prepare the Raspberry Sauce

Add raspberries, sugar, and lemon juice to a small saucepan over medium heat.

Cook for 4 to 5 minutes, stirring gently, until the berries begin to break down and release their juices.

Mix the cornstarch and water in a small bowl, then stir the mixture into the raspberries.

Cook for another 1 to 2 minutes until the sauce thickens slightly.

Remove from the heat and allow it to cool completely before assembling Cheesecake Parfait.

Step 2: Make the Pistachio Crumbs

In a medium bowl, combine graham cracker crumbs, melted butter, chopped pistachios, brown sugar, and a small pinch of salt.

Stir until the mixture resembles damp sand.

The pistachio crumbs give the dessert a buttery base with a subtle nutty flavor and a pleasant crunch.

Set the crumbs aside while you prepare the cheesecake filling.

Step 3: Beat the Cream Cheese

Place softened cream cheese in a large mixing bowl.

Beat with an electric mixer for about 1 to 2 minutes until completely smooth.

Add powdered sugar, vanilla, lemon juice, lemon zest, and salt.

Continue beating until the mixture is creamy and no lumps remain.

A smooth cream cheese base is important because it gives Cheesecake Parfait its classic cheesecake texture.

Step 4: Whip the Cream

In a separate chilled bowl, beat the heavy cream until medium-stiff peaks form.

Avoid overbeating because the cream can become grainy.

Gently fold the whipped cream into the cream cheese mixture in two or three additions.

Use a spatula and fold slowly to keep the filling light and airy.

The finished cheesecake mixture should be thick enough to hold soft layers in the serving glasses.

Step 5: Start Layering

Add about 2 tablespoons of pistachio crumb mixture to the bottom of each serving glass.

Press lightly with the back of a spoon, but do not pack it too firmly.

Spoon or pipe a layer of cheesecake filling over the crumbs.

Add a small spoonful of raspberry sauce.

Repeat the layers until the glasses are nearly full.

Layering the ingredients carefully gives Cheesecake Parfait its attractive striped appearance.

Step 6: Add the Final Toppings

Finish each glass with a small spoonful of cheesecake filling.

Top with fresh raspberries, chopped pistachios, and a little whipped cream if desired.

A small amount of lemon zest or fresh mint can add extra color.

The toppings make the finished dessert look elegant while reinforcing the raspberry and pistachio flavors.

Step 7: Chill Before Serving

Cover the parfait glasses and refrigerate for at least 1 hour.

Chilling allows the filling to firm slightly and gives the flavors time to blend.

For the best texture, serve Cheesecake Parfait cold but not frozen.

Serving Suggestions

This dessert is beautiful enough to serve on its own, especially when prepared in clear glasses that show the layers.

For a dinner party, arrange the glasses on a tray and garnish each one with raspberries, pistachios, and a small mint leaf.

You can also serve Cheesecake Parfait with coffee, espresso, or tea for an elegant finish to a meal.

For a larger dessert table, pair it with fresh fruit, chocolate-covered strawberries, small cookies, or other individual desserts.

For a savory brunch option, try our Spinach, Mushroom & Cheese Crustless Quiche.

Recipe Tips

Make sure the cream cheese is fully softened before mixing so the filling stays smooth.

Use chilled heavy cream because cold cream whips more easily.

Cool the raspberry sauce completely before layering. Warm sauce can soften the cheesecake filling.

Fresh raspberries give the prettiest garnish, but frozen raspberries work well for the sauce.

Toast the pistachios lightly for a deeper nutty flavor.

Do not crush the graham crackers too finely if you want more texture.

Pipe the cheesecake filling with a pastry bag for cleaner layers.

Cheesecake Parfait tastes best after at least one hour of chilling.

Easy Variations

For a chocolate version, add a tablespoon of cocoa powder to the cheesecake filling and use chocolate cookie crumbs.

A strawberry version can be made by replacing the raspberries with chopped strawberries.

For extra pistachio flavor, stir a spoonful of pistachio butter into the filling.

You can also make Cheesecake Parfait with blueberries, blackberries, or mixed berries.

For a citrus variation, increase the lemon zest and add a little orange zest to the filling.

If you love creamy no-bake desserts, you may also like our Cheesecake Fluff Recipe.

Make-Ahead Instructions

This is an excellent make-ahead dessert.

Prepare the raspberry sauce and pistachio crumbs up to 2 days ahead and store them separately.

The cheesecake filling can be made 1 day in advance and kept covered in the refrigerator.

For the best presentation, assemble Cheesecake Parfait up to 12 hours before serving. This gives the layers time to settle without making the crumbs overly soft.

Storage

Store assembled Cheesecake Parfait covered in the refrigerator for up to 2 days.

If you want to keep the crumb layer especially crisp, store the components separately and assemble shortly before serving.

Freezing is not recommended because the whipped cheesecake filling can lose some of its smooth texture after thawing.

Keep the dessert refrigerated until you are ready to serve.

Nutrition Information

Approximate nutrition per serving:

Calories: 460
Protein: 7 g
Carbohydrates: 36 g
Fat: 33 g
Saturated Fat: 17 g
Fiber: 4 g
Sugar: 23 g
Sodium: 260 mg

Nutrition values are estimates and may vary depending on the cream cheese, cookies, pistachios, and serving size.

Frequently Asked Questions

Can I use frozen raspberries?

Yes. Frozen raspberries are excellent for the sauce. There is no need to thaw them first; simply cook them a little longer until they break down.

Can I use another type of cookie crumb?

Yes. Digestive biscuits, vanilla wafers, shortbread cookies, or even crushed chocolate cookies can replace graham crackers.

Can I make this without pistachios?

Yes. Replace the pistachios with almonds, pecans, walnuts, or extra cookie crumbs. The dessert will have a different flavor but will still work well.

Can I make it less sweet?

Yes. Reduce the powdered sugar in the filling and the sugar in the raspberry sauce slightly. The natural tartness of the berries helps keep Cheesecake Parfait balanced.

Can I use mascarpone instead of cream cheese?

Yes. Mascarpone creates a softer, richer filling. You can use it alone or combine half mascarpone and half cream cheese.

Can I serve this in one large dish?

Yes. Layer all the components in a trifle bowl or glass serving dish. Individual glasses are prettier for parties, but a large dish is quicker to assemble.

Final Thoughts

Raspberry Pistachio Cheesecake Parfait is an easy no-bake dessert that combines creamy cheesecake filling, bright raspberry sauce, and crunchy pistachio crumbs in beautiful individual layers.

Cheesecake Parfait is ideal when you want a dessert that looks impressive without complicated baking techniques. It can be prepared ahead, adjusted with different fruits, and served in small or large portions.

Whether you make Cheesecake Parfait for a holiday, dinner party, birthday, or simple family dessert, the combination of tart berries, creamy filling, and nutty pistachios makes it a recipe worth repeating.

Key Lime Pie Bars

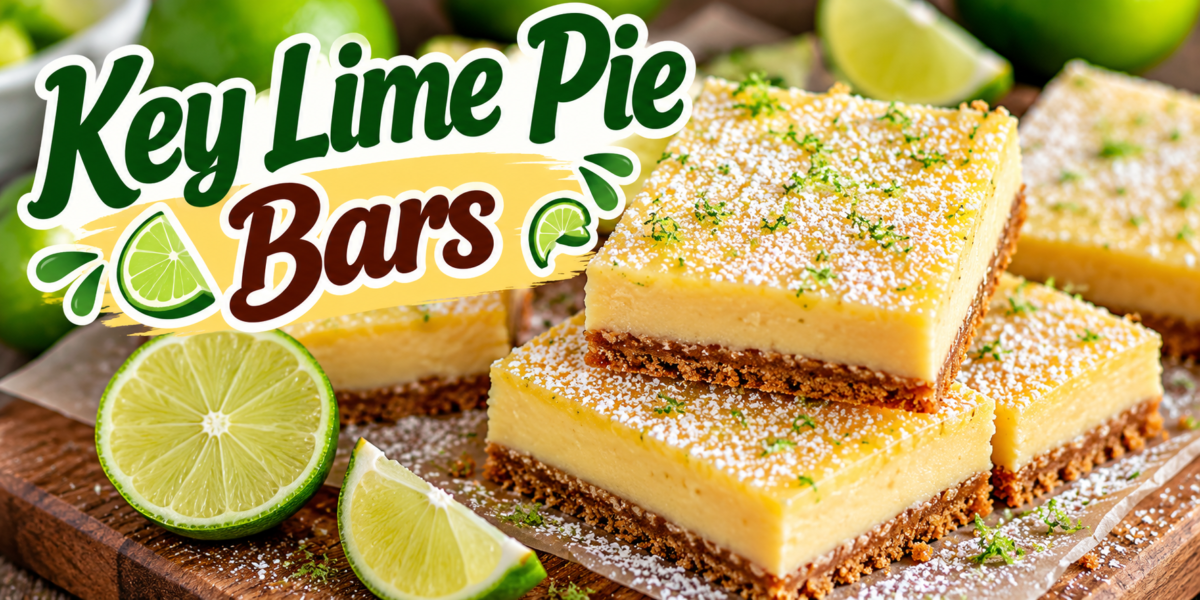
Creamy Key Lime Pie Bars with a buttery graham cracker crust, fresh lime zest, powdered sugar, and lime slices

Key Lime Pie Bars

Key Lime Pie Bars are bright, creamy, tangy, and incredibly easy to make. They combine a buttery graham cracker crust with a smooth lime filling and a refreshing citrus flavor. Each square has a crisp base and a soft, creamy center that makes it perfect for dessert tables, family gatherings, afternoon treats, and summer celebrations.

These Key Lime Pie Bars are inspired by the classic flavors of key lime pie but are easier to portion and serve. Instead of cutting a whole pie, you can chill the dessert, slice it into neat squares, and serve each piece individually.

The combination of sweet condensed milk and fresh lime juice creates a naturally creamy filling. Lime zest adds even more citrus aroma, while the graham cracker crust provides a delicious buttery crunch.

Prep Time: 20 minutes
Bake Time: 25 minutes
Chill Time: 3 hours
Total Time: About 3 hours 45 minutes
Servings: 16 bars

Ingredients

For the Graham Cracker Crust

2 cups finely crushed graham crackers

1/3 cup granulated sugar

1/2 cup unsalted butter, melted

1/4 teaspoon salt

For the Lime Filling

4 large egg yolks

2 cans sweetened condensed milk, 14 ounces each

3/4 cup fresh lime juice

2 tablespoons finely grated lime zest

1 teaspoon vanilla extract

1/4 teaspoon salt

For the Topping

1 cup heavy whipping cream

2 tablespoons powdered sugar

1/2 teaspoon vanilla extract

1 teaspoon fresh lime zest

Lime slices for garnish, optional

Extra graham cracker crumbs, optional

Step-by-Step Instructions

Prepare the Baking Pan

Preheat your oven to 350°F (175°C).

Line a 9-by-13-inch baking pan with parchment paper.

Leave some parchment hanging over the sides. This will make it easier to lift the chilled dessert from the pan later.

Lightly grease the parchment with a small amount of butter or cooking spray.

A lined pan helps you remove the finished Key Lime Pie Bars without damaging the crust.

Make the Graham Cracker Crust

Place the graham crackers in a food processor and pulse until they become fine crumbs.

If you do not have a food processor, place the crackers in a sealed bag and crush them with a rolling pin.

Transfer the crumbs to a mixing bowl.

Add sugar and salt.

Pour in the melted butter.

Stir until the mixture looks evenly moistened.

The crumbs should resemble wet sand.

If the mixture seems too dry, add another tablespoon of melted butter.

Avoid adding too much butter because an overly wet crust can become greasy.

Press the Crust

Transfer the crumb mixture to the prepared pan.

Spread it evenly across the bottom.

Use the flat bottom of a glass or measuring cup to press the crumbs firmly.

Pay special attention to the corners.

A firmly packed crust will hold together better when you slice the finished dessert.

Place the pan in the oven.

Bake the crust for about 8 to 10 minutes.

It should become lightly golden and fragrant.

Remove the pan from the oven.

Allow the crust to cool for several minutes while you prepare the filling.

A properly baked crust gives Key Lime Pie Bars a firm and buttery foundation.

Prepare the Lime Filling

Separate the eggs carefully.

Place the egg yolks in a large mixing bowl.

Add the sweetened condensed milk.

Whisk gently until the mixture becomes smooth.

Add fresh lime juice.

Continue whisking until the ingredients are fully combined.

Add lime zest, vanilla extract, and salt.

Mix again.

The filling should look smooth and creamy.

Avoid vigorous whisking because too much air can create bubbles in the filling.

Fresh lime juice provides the strongest citrus flavor.

Bottled lime juice can work in a pinch, but fresh juice and freshly grated zest give the dessert a brighter aroma.

The creamy filling is what gives Key Lime Pie Bars their smooth and refreshing texture.

Pour the Filling Over the Crust

Make sure the crust is warm rather than extremely hot.

Pour the lime filling slowly over the baked crust.

Spread it gently with a spatula if needed.

Try to create an even layer from edge to edge.

Tap the pan lightly on the counter once or twice to release large air bubbles.

Do not tap it aggressively.

Place the pan back into the oven.

Bake the Bars

Bake for approximately 15 to 18 minutes.

The edges should look set while the center should still have a very slight movement.

Do not wait until the entire surface becomes completely firm.

The filling will continue setting as it cools.

Overbaking can create a dry or cracked filling.

When the bars are finished, remove the pan from the oven.

Place it on a cooling rack.

Allow the dessert to cool at room temperature for about 30 minutes.

The warm filling will gradually become firmer.

Chill Thoroughly

Once the pan has cooled, cover it loosely with plastic wrap or foil.

Place it in the refrigerator.

Chill for at least 3 hours.

For the cleanest slices, chilling overnight works even better.

Do not rush this step.

The filling needs enough time to become firm enough to cut.

Proper chilling also allows the lime flavor to develop.

Well-chilled Key Lime Pie Bars are easier to slice and have a smoother texture.

Make the Whipped Cream

Place the heavy whipping cream in a chilled mixing bowl.

Add powdered sugar and vanilla extract.

Beat with an electric mixer until soft peaks form.

Do not overbeat the cream.

Stop when it is thick enough to hold its shape.

You can spread the whipped cream over the entire chilled dessert or add a small dollop to each individual square.

Finish with fresh lime zest.

For an elegant presentation, add a small lime slice to each serving.

Cut and Serve

Remove the chilled dessert from the refrigerator.

Lift the parchment paper carefully to remove the entire slab from the pan.

Place it on a cutting board.

Use a sharp knife to cut it into squares.

For cleaner cuts, wipe the knife with a warm damp towel between slices.

You can cut the dessert into 12 large pieces or 16 smaller bars.

Add whipped cream just before serving.

A little extra lime zest provides a fresh finishing touch.

The contrast between the golden crust and pale lime filling makes Key Lime Pie Bars especially attractive on a dessert platter.

Tips for the Best Results

Use fresh limes whenever possible.

Finely grate the lime zest before squeezing the fruit.

Avoid grating the white part of the peel because it can taste bitter.

Press the crust firmly but evenly.

Do not overbake the filling.

The center should have a slight wobble when you remove the pan from the oven.

Always allow the dessert to cool before refrigerating.

Give the bars enough time to chill.

Use a sharp knife for clean slices.

Clean the knife between cuts when you want bakery-style squares.

These simple tips help make Key Lime Pie Bars creamy, neat, and flavorful.

How to Get More Lime Flavor

If you enjoy a stronger citrus flavor, increase the lime zest slightly.

Zest contains aromatic oils that provide a strong lime fragrance.

Fresh juice provides the tartness.

Using both juice and zest creates a more noticeable citrus flavor.

You can also add a small amount of lime zest to the whipped cream.

Another option is to sprinkle fresh zest over each serving.

Avoid adding too much lime juice because excess liquid can change the texture of the filling.

The goal is to create a bright citrus flavor while keeping the creamy consistency.

Easy Variations

Coconut Lime Bars

Add 1/2 cup shredded coconut to the graham cracker crust.

The coconut pairs beautifully with lime.

Berry Lime Bars

Serve each square with fresh strawberries, raspberries, or blueberries.

The berries add natural sweetness and beautiful color.

Chocolate Crust

Replace some of the graham crackers with chocolate cookie crumbs.

The chocolate adds a rich contrast to the tangy lime filling.

Extra Creamy Version

Add a thin layer of whipped cream over the chilled filling.

Finish with lime zest.

Coconut Topping

Sprinkle toasted coconut over the whipped cream.

These variations let you create different versions of Key Lime Pie Bars without changing the basic method.

Serving Suggestions

Serve the bars chilled.

They are delicious on their own, but whipped cream makes them even more special.

Fresh berries provide a colorful side.

A few lime slices can also make the serving plate look attractive.

For a dinner party, arrange the squares on a large white platter.

Dust them lightly with powdered sugar just before serving.

For a summer gathering, serve them alongside fresh fruit and iced tea.

For a holiday dessert table, add small pieces of lime zest and fresh mint around the platter.

The bright citrus flavor makes Key Lime Pie Bars a refreshing alternative to heavier chocolate desserts.

Make-Ahead Instructions

This dessert is excellent for preparing ahead.

You can bake the entire dessert one day before serving.

After the bars have cooled, cover them tightly and refrigerate.

Keep the whipped cream separate until serving.

Add the topping shortly before your guests arrive.

You can also prepare the graham cracker crust earlier in the day.

The filling should be baked and chilled according to the recipe.

Making the dessert ahead allows the filling to become fully set and makes slicing easier.

In fact, overnight chilling often gives Key Lime Pie Bars an even better texture.

Storage Instructions

Keep the finished bars refrigerated.

Store them in an airtight container or cover the baking dish tightly.

They are best enjoyed within 3 to 4 days.

If you add whipped cream, the topping may soften over time.

For the best presentation, add fresh whipped cream just before serving.

Do not leave the dessert at room temperature for extended periods, especially during warm weather.

If transporting the bars, keep them chilled until serving.

Common Mistakes to Avoid

Do not use too much butter in the crust.

Avoid pressing the crust unevenly.

Do not overmix the filling.

Avoid overbaking the lime layer.

Do not skip the chilling time.

Do not cut the bars while they are still warm.

Avoid using a dull knife because it can drag through the filling.

Do not add whipped cream too early if the dessert will be stored for several days.

Avoid using too much lime zest because it can create bitterness.

Following these guidelines helps you create consistent Key Lime Pie Bars with a smooth filling and firm crust.

Frequently Asked Questions

Can I use regular limes instead of key limes?

Yes. Regular Persian limes work very well and are easier to find. The flavor will be slightly different but still delicious.

Why are my bars not firm?

The most common reason is insufficient chilling. Give the dessert at least 3 hours in the refrigerator.

Can I make these bars the night before?

Yes. Overnight chilling is an excellent option.

Can I freeze Key Lime Pie Bars?

Yes. Wrap the chilled bars tightly and freeze them without the whipped cream topping. Thaw them in the refrigerator before serving.

Can I use bottled lime juice?

Yes, but fresh lime juice generally provides a brighter flavor.

Why did my filling crack?

Cracking can happen when the filling is overbaked or exposed to sudden temperature changes.

How do I get clean cuts?

Chill the bars thoroughly and use a sharp knife. Wipe the knife clean between cuts.

Can I make the crust without sugar?

Yes, although sugar helps improve the flavor and texture. You can adjust it according to your preferences.

Can I add fruit to the filling?

It is better to add fresh fruit as a topping rather than mixing a large amount into the filling because additional moisture can affect the texture.

What can I use instead of graham crackers?

Digestive biscuits or similar plain sweet cookies can work as substitutes.

Nutrition Information

Approximate nutrition per bar, based on 16 servings:

Calories: 285 kcal

Protein: 5g

Carbohydrates: 39g

Fat: 13g

Fiber: 1g

Sugar: 27g

Sodium: 170mg

Nutrition values are estimates and may vary depending on the brands and exact ingredients used.

Why You Will Love This Recipe

The recipe combines a few simple ingredients into a dessert with a bright and memorable flavor.

The graham cracker crust provides buttery sweetness and crunch.

The lime filling is creamy and tangy.

The condensed milk adds sweetness and richness.

Fresh lime zest provides a fragrant citrus aroma.

Whipped cream adds a soft and creamy finish.

Another advantage is that the bars are easy to portion.

Instead of serving a whole pie, you can prepare one pan and cut it into individual squares.

The dessert also travels well when kept chilled.

That makes Key Lime Pie Bars useful for picnics, potlucks, birthdays, family dinners, and holiday gatherings.

You can make them a day ahead, which reduces last-minute preparation.

Final Thoughts

Key Lime Pie Bars are a simple and delicious dessert for anyone who loves bright citrus flavors.

The buttery graham cracker crust creates a crunchy foundation, while the creamy lime filling adds a smooth and tangy contrast.

Fresh lime juice and zest provide the characteristic citrus flavor, while whipped cream creates a soft and elegant finish.

The recipe is easy to prepare, but proper chilling is essential for the best texture.

Take your time with the crust, avoid overbaking the filling, and refrigerate the dessert until it is completely set.

For special occasions, decorate each square with whipped cream, lime zest, and a small lime slice.

You can also experiment with coconut, berries, chocolate crumbs, or toasted nuts.

Because the bars can be prepared ahead, they are especially convenient for entertaining.

Keep them refrigerated until serving and use a sharp knife for neat squares.

Whether you are preparing dessert for a family dinner, summer party, holiday table, or weekend treat, Key Lime Pie Bars offer a refreshing combination of creamy texture, buttery crunch, and bright lime flavor.

Once chilled and sliced, these Key Lime Pie Bars are ready to serve and enjoy.

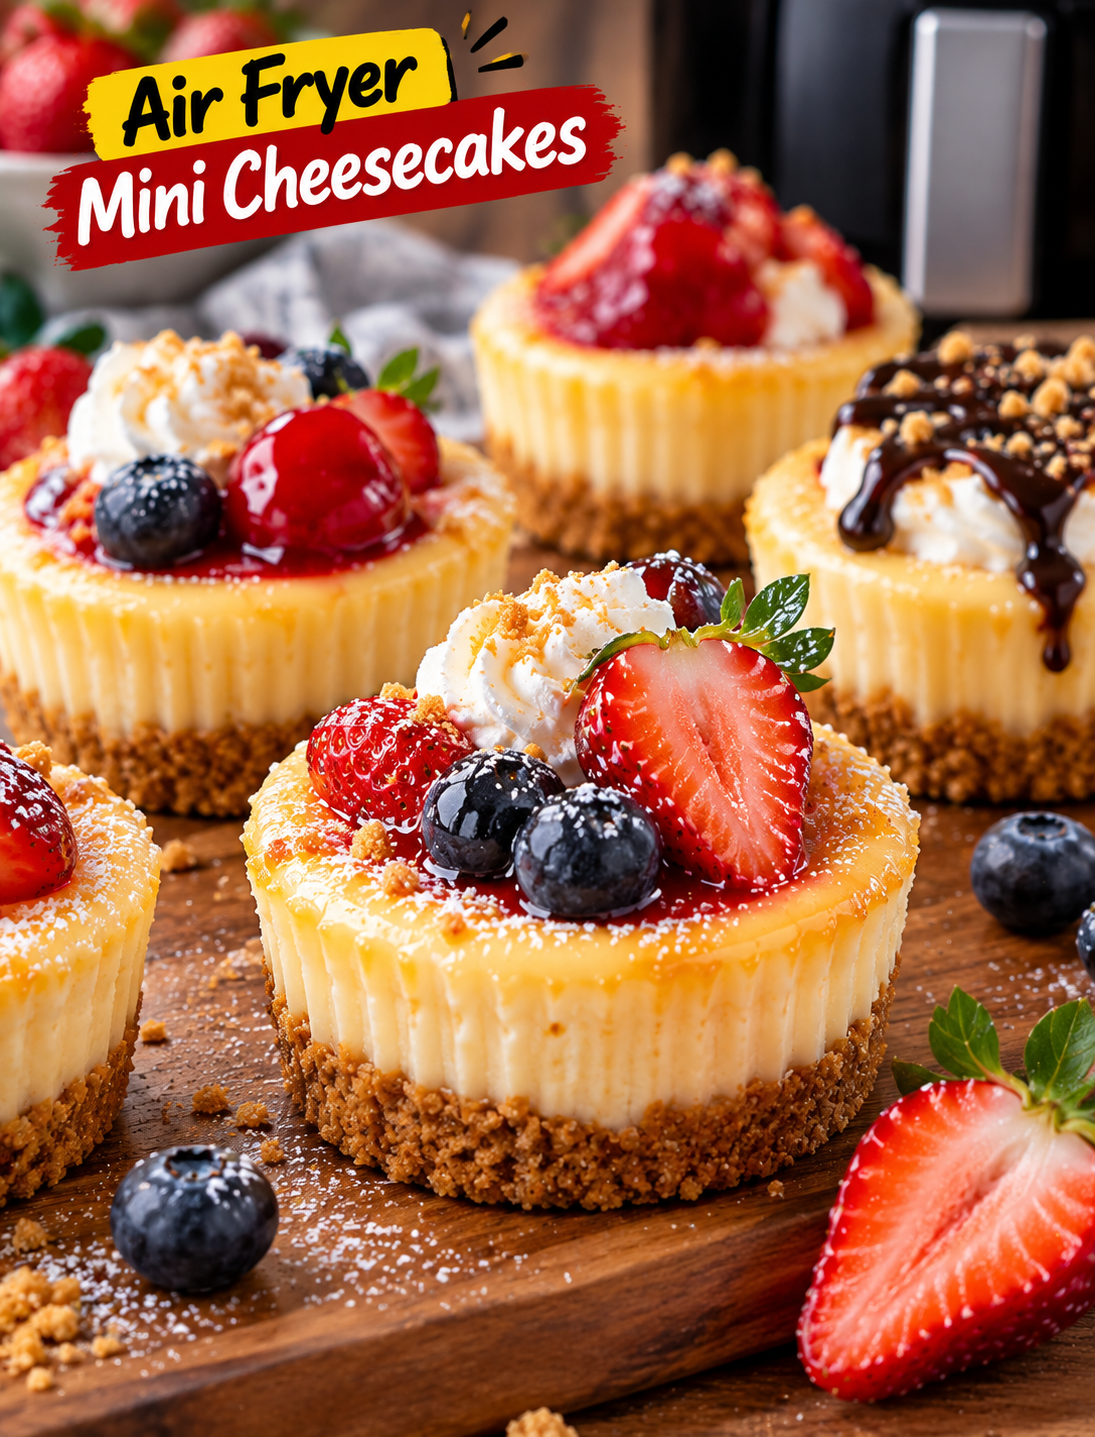
Air Fryer Mini Cheesecakes

Creamy air fryer mini cheesecakes with graham cracker crust topped with fresh berries and powdered sugar.

Air Fryer Mini Cheesecakes

Air Fryer Mini Cheesecakes are a simple way to make creamy, individual desserts without turning on a large oven. Each little cheesecake has a buttery graham cracker crust, a smooth vanilla cheesecake filling, and a lightly golden top.

These mini cheesecakes are perfect for weeknight desserts, family gatherings, birthdays, holidays, and dinner parties. They also work well when you want cheesecake without making a full-size cake.

The air fryer creates gentle, even heat that helps these small cheesecakes cook quickly. Once chilled, they have a rich, creamy texture that pairs beautifully with fresh berries, chocolate sauce, caramel, or whipped cream.

Why You’ll Love This Recipe

  • Small portions: Each cheesecake is easy to serve and enjoy.
  • Quick cooking: Small cheesecakes cook much faster than a full-size cheesecake.
  • Creamy texture: A low, controlled cooking temperature helps keep the filling smooth.
  • Simple ingredients: Most ingredients are common grocery-store staples.
  • Easy to customize: Add berries, chocolate, caramel, or your favorite topping.
  • No water bath: The air fryer makes the process much simpler.
  • Great for gatherings: Individual portions make serving easy.

Ingredients

For the Graham Cracker Crust

  • 1 cup finely crushed graham crackers
  • 2 tablespoons granulated sugar
  • 4 tablespoons unsalted butter, melted
  • Pinch of salt

For the Cheesecake Filling

  • 8 ounces full-fat cream cheese, softened
  • ¼ cup granulated sugar
  • 1 large egg
  • ½ teaspoon vanilla extract
  • 2 tablespoons sour cream
  • 1 tablespoon all-purpose flour
  • 1 teaspoon fresh lemon juice

Optional Toppings

  • Fresh strawberries
  • Fresh blueberries
  • Raspberries
  • Whipped cream
  • Strawberry sauce
  • Caramel sauce
  • Chocolate sauce
  • Powdered sugar
  • Lemon zest

Equipment

  • Air fryer
  • 6–8 silicone muffin cups or small oven-safe ramekins
  • Mixing bowls
  • Electric hand mixer or whisk
  • Measuring cups and spoons
  • Small spoon or flat-bottomed glass

How to Make Air Fryer Mini Cheesecakes

Step 1: Prepare the Crust

Place the graham crackers in a food processor and pulse until finely crushed.

Transfer the crumbs to a bowl and mix with sugar, melted butter, and a pinch of salt.

The mixture should resemble damp sand and hold together when pressed.

Divide the crust mixture between 6–8 silicone muffin cups.

Press the crumbs firmly into the bottom of each cup using the back of a spoon or a small flat-bottomed glass.

Keep the crust layer even so every cheesecake has a balanced base.

Step 2: Pre-Bake the Crust

Preheat the air fryer to 325°F (165°C) for about 3 minutes.

Place the prepared cups into the air fryer basket.

Cook the crust for approximately 3 minutes.

Remove the cups and allow the crusts to cool slightly while you prepare the filling.

This short pre-bake helps the crust become firm and prevents it from becoming too soft under the cheesecake mixture.

Step 3: Prepare the Cream Cheese

Place softened cream cheese in a mixing bowl.

Beat it on low to medium speed until smooth and creamy.

Avoid beating at high speed because too much air can cause the cheesecakes to puff up during cooking and sink afterward.

Step 4: Add the Sugar and Egg

Add the sugar and mix until combined.

Add the egg and gently mix until the batter is smooth.

Do not overmix once the egg is added.

A smooth batter with minimal air bubbles helps create a dense, creamy cheesecake texture.

Step 5: Add the Flavor

Add vanilla extract, sour cream, flour, and lemon juice.

Mix gently until everything is fully combined.

Scrape the sides and bottom of the bowl to make sure there are no pockets of cream cheese remaining.

The finished batter should be thick, smooth, and creamy.

Step 6: Fill the Cups

Divide the cheesecake batter evenly between the prepared crusts.

Fill each cup about ¾ full.

Gently tap the cups against the counter once or twice to release large air bubbles.

Do not overfill the cups because the filling needs room to expand slightly during cooking.

Step 7: Air Fry

Place the filled cups into the air fryer basket in a single layer.

Cook at 300°F (150°C) for about 10–14 minutes.

The edges should look set while the centers should still have a gentle jiggle.

The cheesecakes will continue to firm up as they cool.

Important: Air fryers vary in power, so begin checking around the 10-minute mark.

Step 8: Cool the Cheesecakes

Carefully remove the cups from the air fryer.

Let the cheesecakes cool at room temperature for about 20–30 minutes.

Do not try to remove them while they are hot because the filling will still be soft.

Step 9: Chill Before Serving

Place the cooled cheesecakes in the refrigerator for at least 2 hours.

For the best texture, chill them overnight.

Cold cheesecake becomes firmer, creamier, and easier to remove from the silicone cups.

Step 10: Add Your Favorite Toppings

Once chilled, gently remove the cheesecakes from the cups.

Top them with fresh berries, whipped cream, chocolate sauce, caramel, or powdered sugar.

For a classic American cheesecake-style dessert, add strawberries and a small drizzle of strawberry sauce.

Serve cold and enjoy.

Tips for Perfect Mini Cheesecakes

Use Softened Cream Cheese

Allow the cream cheese to soften at room temperature before mixing.

Soft cream cheese blends more easily and helps prevent lumps in the filling.

Don’t Overmix

Mix the ingredients only until combined.

Excessive mixing adds air to the batter, which can cause cracks or uneven sinking after cooking.

Don’t Overcook

The center should still jiggle slightly when the cheesecakes are finished.

A completely firm center inside the air fryer usually means the cheesecake has been cooked too long.

Chill Thoroughly

Refrigeration is important because the filling continues to set as it cools.

Give the cheesecakes at least two hours in the refrigerator before serving.

Avoid Overcrowding

Leave enough room around each cup for hot air to circulate.

If your air fryer is small, cook the cheesecakes in batches.

Use Full-Fat Cream Cheese

Full-fat cream cheese gives the filling a richer flavor and smoother texture.

Reduced-fat varieties can produce a softer or less creamy result.

Topping Ideas

Fresh Berry Cheesecakes

Add sliced strawberries, blueberries, or raspberries for a fresh and colorful topping.

Chocolate Cheesecakes

Drizzle melted chocolate or chocolate sauce over the chilled cheesecake.

Add a few chocolate shavings for extra texture.

Caramel Cheesecakes

Top each cheesecake with caramel sauce and a small pinch of flaky sea salt.

Lemon Berry Cheesecakes

Add fresh blueberries with lemon zest and a light dusting of powdered sugar.

Classic Cheesecake

Keep it simple with whipped cream, fresh strawberries, and a small drizzle of strawberry sauce.

How to Store Mini Cheesecakes

Place leftover cheesecakes in an airtight container and refrigerate them for up to 4 days.

Keep toppings such as fruit and sauces separate when possible to prevent the crust from becoming soggy.

These cheesecakes are best served cold, so reheating is not necessary.

Can You Freeze Mini Cheesecakes?

Yes, these individual cheesecakes can be frozen.

Allow them to cool and chill completely before freezing.

Wrap each cheesecake tightly in plastic wrap and place the wrapped portions in a freezer-safe container or bag.

Freeze for up to 2 months for the best quality.

Move them to the refrigerator and allow them to thaw overnight before serving.

Add fresh toppings after thawing.

Common Mistakes to Avoid

  • Using cold cream cheese can leave lumps in the filling.
  • Overmixing can add too much air to the batter.
  • Overfilling the cups can cause the filling to spill over.
  • Cooking at a high temperature can brown the tops too quickly.
  • Overcooking can make the cheesecake dry instead of creamy.
  • Removing the cheesecakes while hot can cause them to break.
  • Skipping the chilling step can leave the filling too soft.

Recipe Details

Prep Time: 15 minutes
Cook Time: 10–14 minutes
Cooling Time: 30 minutes
Chilling Time: 2 hours
Total Time: About 3 hours
Servings: 6–8 mini cheesecakes
Air Fryer Temperature: 300°F (150°C)

Frequently Asked Questions

Can I make mini cheesecakes without graham crackers?

Yes, you can use crushed vanilla wafers, digestive biscuits, or shortbread cookies for the crust.

Why are my mini cheesecakes still soft?

They need more chilling time because cheesecake becomes firmer as it cools; refrigerate them for at least 2 hours.

Can I use silicone molds in an air fryer?

Yes, food-safe silicone muffin cups work well in an air fryer when they are rated for the cooking temperature.

How do I know when the cheesecake is done?

The edges should be set while the center still has a slight jiggle when you gently move the cup.

Can I use low-fat cream cheese?

You can, but full-fat cream cheese generally produces a richer and creamier cheesecake.

Can I make these cheesecakes ahead of time?

Yes, prepare them up to 2 days ahead and keep them covered in the refrigerator until serving.

What toppings go well with mini cheesecakes?

Fresh berries, whipped cream, chocolate, caramel, lemon zest, and fruit sauces all pair well with cheesecake.

Can I freeze these mini cheesecakes?

Yes, wrap chilled cheesecakes individually and freeze them for up to 2 months for the best quality.

Final Thoughts

These mini cheesecakes are an easy way to enjoy a creamy, homemade dessert without making a full-size cheesecake. The buttery graham cracker crust, smooth vanilla filling, and simple toppings make each serving feel special.

For the best results, use softened full-fat cream cheese, avoid overmixing the batter, and watch the cooking time closely. The center should have a slight jiggle when the cheesecakes come out of the air fryer because they will continue to set as they cool.

Give them plenty of time to chill before serving, then finish each one with fresh berries, whipped cream, chocolate, or caramel. Whether you’re making dessert for your family or preparing individual treats for guests, these mini cheesecakes are an easy recipe worth keeping in your dessert rotation.

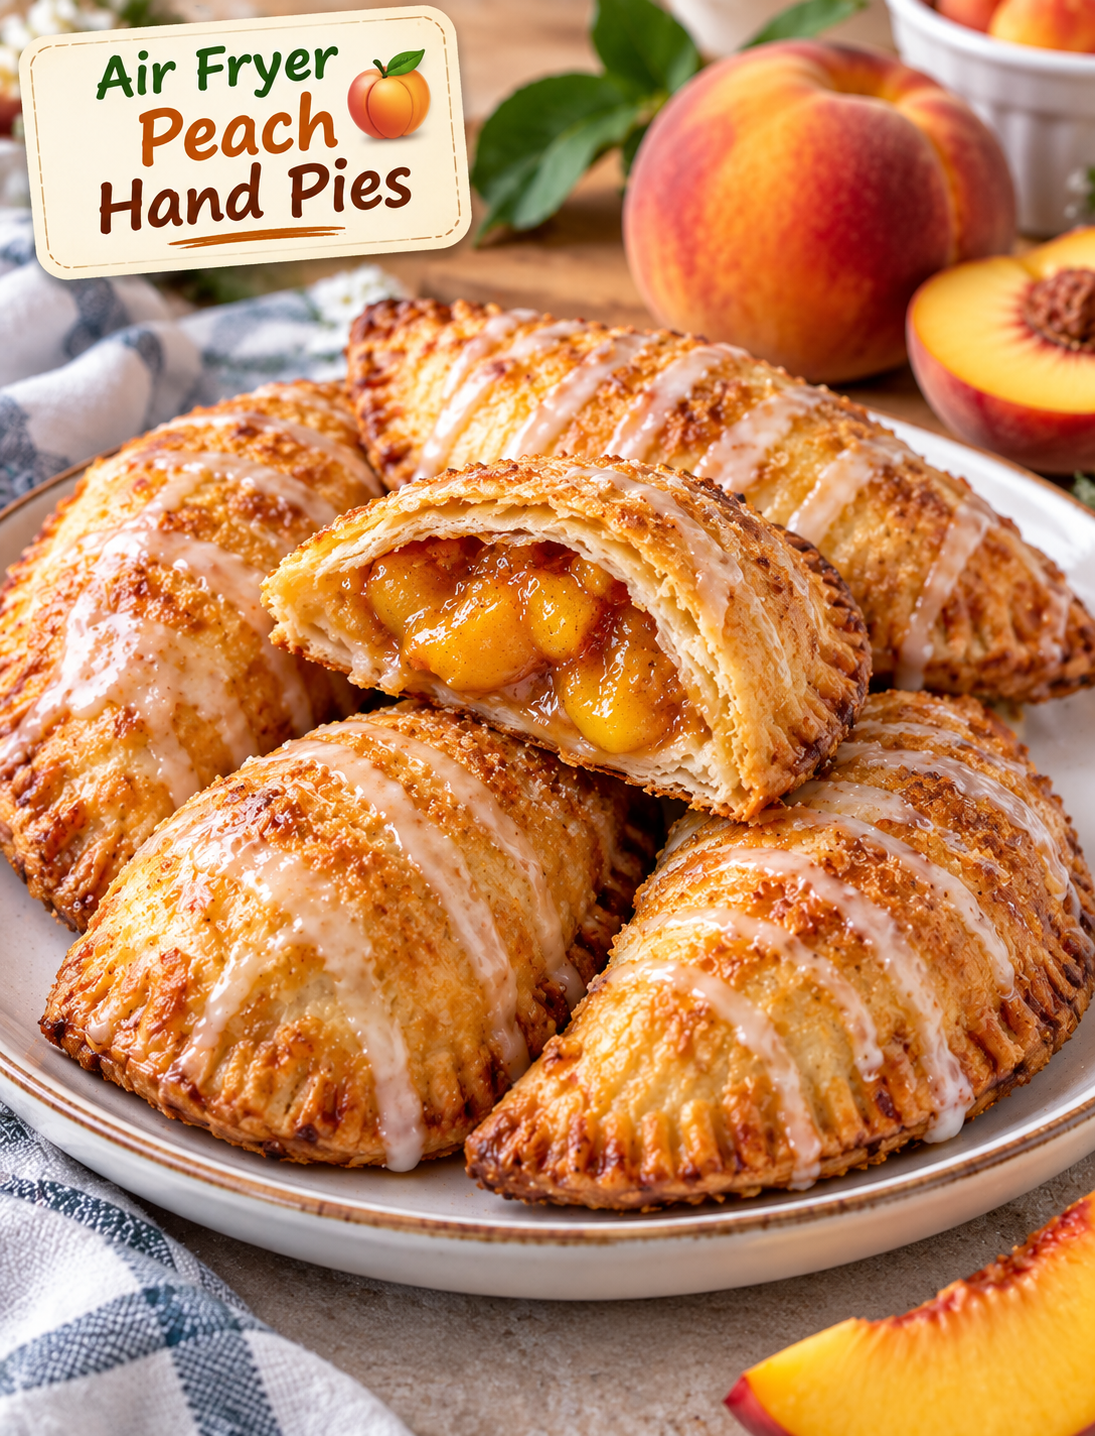
Air Fryer Peach Hand Pies

Golden Air Fryer Peach Hand Pies filled with cinnamon peaches and topped with a light glaze

Air Fryer Peach Hand Pies

These Air Fryer Peach Hand Pies are a simple way to enjoy a warm fruit dessert without making a full pie. Each small pastry has a flaky golden crust filled with sweet peaches, cinnamon, and a hint of vanilla.

The air fryer cooks the hand pies quickly and gives the pastry a crisp, lightly browned finish. They are easy enough for a weeknight dessert but special enough for a summer gathering, brunch, or family treat.

Fresh peaches work beautifully when they are ripe and juicy, while canned or frozen peaches can also be used with a few simple adjustments. The filling should be thick before it goes inside the pastry so the pies stay sealed while cooking.

Why You’ll Love These Peach Hand Pies

  • Quick dessert: The small pies cook much faster than a traditional full-size pie.
  • Crispy crust: Hot circulating air creates a golden, flaky pastry exterior.
  • Easy filling: Peaches, sugar, cinnamon, and vanilla create a classic fruit-pie flavor.
  • Small portions: Individual pies are easy to serve without slicing a whole dessert.
  • Flexible ingredients: Fresh, frozen, or canned peaches can work with the right preparation.
  • Make-ahead friendly: The assembled pastries can be refrigerated before air frying.
  • Great for sharing: They are convenient for parties, picnics, brunches, and family desserts.

Ingredients You’ll Need

For the Peach Filling

  • 2 cups peeled and diced fresh peaches
  • 2 tablespoons granulated sugar
  • 1 tablespoon brown sugar
  • 1 tablespoon cornstarch
  • ½ teaspoon ground cinnamon
  • ¼ teaspoon ground nutmeg
  • 1 teaspoon fresh lemon juice
  • ½ teaspoon vanilla extract
  • Pinch of salt

For the Pastry

  • 1 package refrigerated pie crusts, usually 2 crusts
  • 1 large egg
  • 1 tablespoon water
  • 1 tablespoon coarse sugar, optional

For the Simple Glaze

  • ½ cup powdered sugar
  • 1–2 teaspoons milk
  • ¼ teaspoon vanilla extract

Fresh peaches give the filling the best flavor when they are naturally sweet and ripe. If using canned peaches, drain them very well and pat them dry before dicing.

How to Make Air Fryer Peach Hand Pies

Step 1: Prepare the Peaches

Peel the peaches and cut them into small pieces. Smaller pieces cook more evenly and make the filling easier to spoon into the pastry.

Place the peaches in a saucepan with granulated sugar, brown sugar, cinnamon, nutmeg, lemon juice, salt, and cornstarch.

Stir everything together before turning on the heat. This helps distribute the cornstarch evenly.

Step 2: Cook the Filling

Cook the peach mixture over medium heat for about 4–6 minutes, stirring often.

The peaches should soften slightly while the juices become thick and glossy. Do not cook them until they turn completely mushy.

Remove the pan from the heat and stir in the vanilla extract.

Transfer the filling to a bowl and let it cool completely.

Important: A cool, thick filling is easier to work with and helps prevent the pastry from becoming soggy.

Step 3: Prepare the Pie Crust

Place the refrigerated pie crusts on a lightly floured surface.

Use a round cookie cutter or a small bowl to cut circles about 4–5 inches wide.

You should get several pastry rounds from the two crusts, depending on the size of your cutter.

Gather the scraps, gently press them together, and roll them out once more. Avoid overworking the dough because too much handling can make the crust tough.

Step 4: Fill the Pastry

Place about 1½ tablespoons of cooled peach filling in the center of each pastry circle.

Leave a clear border around the edges. Too much filling can make the pies difficult to seal.

Fold each circle in half to create a half-moon shape.

Press the edges together with your fingers, then use a fork to crimp the entire edge.

Step 5: Seal the Hand Pies

Check each pie carefully for open areas.

If the edges are not sealed, peach juice can leak into the air fryer during cooking.

For extra security, lightly brush the inside edge with water before pressing it closed.

Place the prepared pies on a parchment-lined tray while you finish assembling the remaining pastries.

Step 6: Add the Egg Wash

Whisk the egg with one tablespoon of water.

Lightly brush the top of each pastry with the egg wash.

The egg wash helps the crust develop a shiny, golden-brown finish.

Sprinkle a little coarse sugar over the top if you want extra crunch and sweetness.

Step 7: Preheat the Air Fryer

Preheat your air fryer to 350°F (175°C) for about 3 minutes.

A short preheat helps the pastry begin cooking evenly as soon as it enters the basket.

Step 8: Air Fry the Hand Pies

Lightly spray the air fryer basket with cooking spray.

Place the hand pies in a single layer, leaving space between them.

Air fry at 350°F (175°C) for 8–11 minutes, or until the pastry is puffed and golden brown.

Cooking time can vary between air fryer models, so begin checking around the 8-minute mark.

If your pies are browning too quickly, reduce the temperature slightly and continue cooking until the pastry is fully crisp.

Step 9: Cool Before Glazing

Carefully remove the hot pastries and place them on a wire rack.

Let them cool for about 5–10 minutes.

The peach filling will be extremely hot immediately after cooking, so allow the pies to cool before taking the first bite.

Step 10: Add the Glaze

Whisk powdered sugar, milk, and vanilla until smooth.

Drizzle the glaze over the slightly cooled pastries.

For a thicker glaze, use less milk. For a thinner drizzle, add a few extra drops of milk.

Serve warm or at room temperature.

Tips for Crispy Peach Hand Pies

  • Cool the filling completely: Warm filling can soften the pastry and make sealing difficult.
  • Do not overfill: Too much peach mixture can cause the edges to burst during cooking.
  • Seal the edges well: A fork-crimped border helps keep the fruit filling inside.
  • Avoid overcrowding: Leave room between each pastry so hot air can circulate.
  • Use parchment carefully: Use perforated air fryer parchment when appropriate so airflow is not blocked.
  • Check early: Smaller hand pies can cook faster than larger ones.
  • Keep the pastry cold: Chilled pie dough is easier to handle and usually produces a flakier crust.
  • Let them rest: The filling thickens slightly as the pies cool.

Fresh, Frozen, or Canned Peaches?

Fresh peaches are the easiest choice during peach season because they provide a bright, natural fruit flavor.

Frozen peaches can also work well. Thaw them first, drain excess liquid, and pat them dry before adding them to the filling.

Canned peaches are convenient when fresh peaches are unavailable. Choose peaches packed in juice when possible, drain them thoroughly, and reduce the added sugar if they are already very sweet.

The main goal is to control moisture. Excess liquid can make the pastry soft and may cause the filling to escape during cooking.

How to Store Peach Hand Pies

Let the pastries cool completely before storing them.

Place leftovers in an airtight container and refrigerate for up to 3 days.

For the best texture, reheat them in the air fryer at 325°F (165°C) for 3–5 minutes.

Avoid reheating them in the microwave if you want to maintain a crisp crust because microwave heat can make the pastry soft.

Can You Freeze Them?

Yes. Assemble the unbaked pies, seal the edges, and place them on a parchment-lined tray.

Freeze them until firm, then transfer them to a freezer-safe container or bag.

When ready to cook, air fry the frozen pies at 350°F (175°C) and add a few extra minutes to the cooking time.

Check that the pastry is golden and fully cooked before serving.

Serving Ideas

These little fruit pies are delicious on their own, but a few simple additions can turn them into a special dessert.

Serve them with a scoop of vanilla ice cream for a classic combination.

For a lighter option, add a spoonful of plain Greek yogurt and fresh peach slices.

A dusting of powdered sugar also works well when you want a simple finish without making a glaze.

For summer gatherings, serve the pastries on a platter with fresh berries and mint.

Common Mistakes to Avoid

Using a runny filling: A watery peach mixture can leak and make the pastry soggy.

Overfilling the crust: More filling does not always mean a better pie. Keep the amount controlled so the edges can close properly.

Skipping the egg wash: The pies will still cook without it, but the crust may not develop the same golden appearance.

Crowding the basket: Too many pastries at once can restrict airflow and lead to uneven browning.

Eating them immediately: The filling retains intense heat after cooking, so allow the pies to rest before serving.

Frequently Asked Questions

Can I use canned peaches for these hand pies?

Yes. Drain canned peaches very well, pat them dry, and adjust the sugar based on how sweet they are.

How long do peach hand pies take in an air fryer?

They usually take about 8–11 minutes at 350°F, but the exact time depends on your air fryer and pastry size.

Why did my peach filling leak out?

The pies may have been overfilled, the edges may not have been sealed firmly, or the filling may have been too warm or watery.

Can I make these with frozen peaches?

Yes. Thaw and drain frozen peaches thoroughly before cooking the filling to remove excess moisture.

Can I freeze peach hand pies?

Yes. Freeze the assembled unbaked pies, then cook them directly from frozen with a few additional minutes of air-frying time.

How do I keep the pastry crispy?

Store leftovers in an airtight container and reheat them in the air fryer rather than the microwave.

Can I make the hand pies without glaze?

Yes. They are sweet and flavorful without glaze, especially when finished with coarse sugar before air frying.

What can I serve with peach hand pies?

Vanilla ice cream, Greek yogurt, fresh berries, or a light dusting of powdered sugar all pair well with the warm peach filling.

Final Thoughts

Air Fryer Peach Hand Pies bring the flavor of classic peach pie into a smaller, easier dessert. The combination of tender peach filling, flaky pastry, cinnamon, and golden edges makes each hand pie satisfying without requiring a full-size pie.

For the best results, focus on three things: keep the peach filling thick, seal the pastry firmly, and leave enough space for air to circulate. Once you have those steps right, this recipe becomes an easy dessert you can make throughout peach season and beyond.

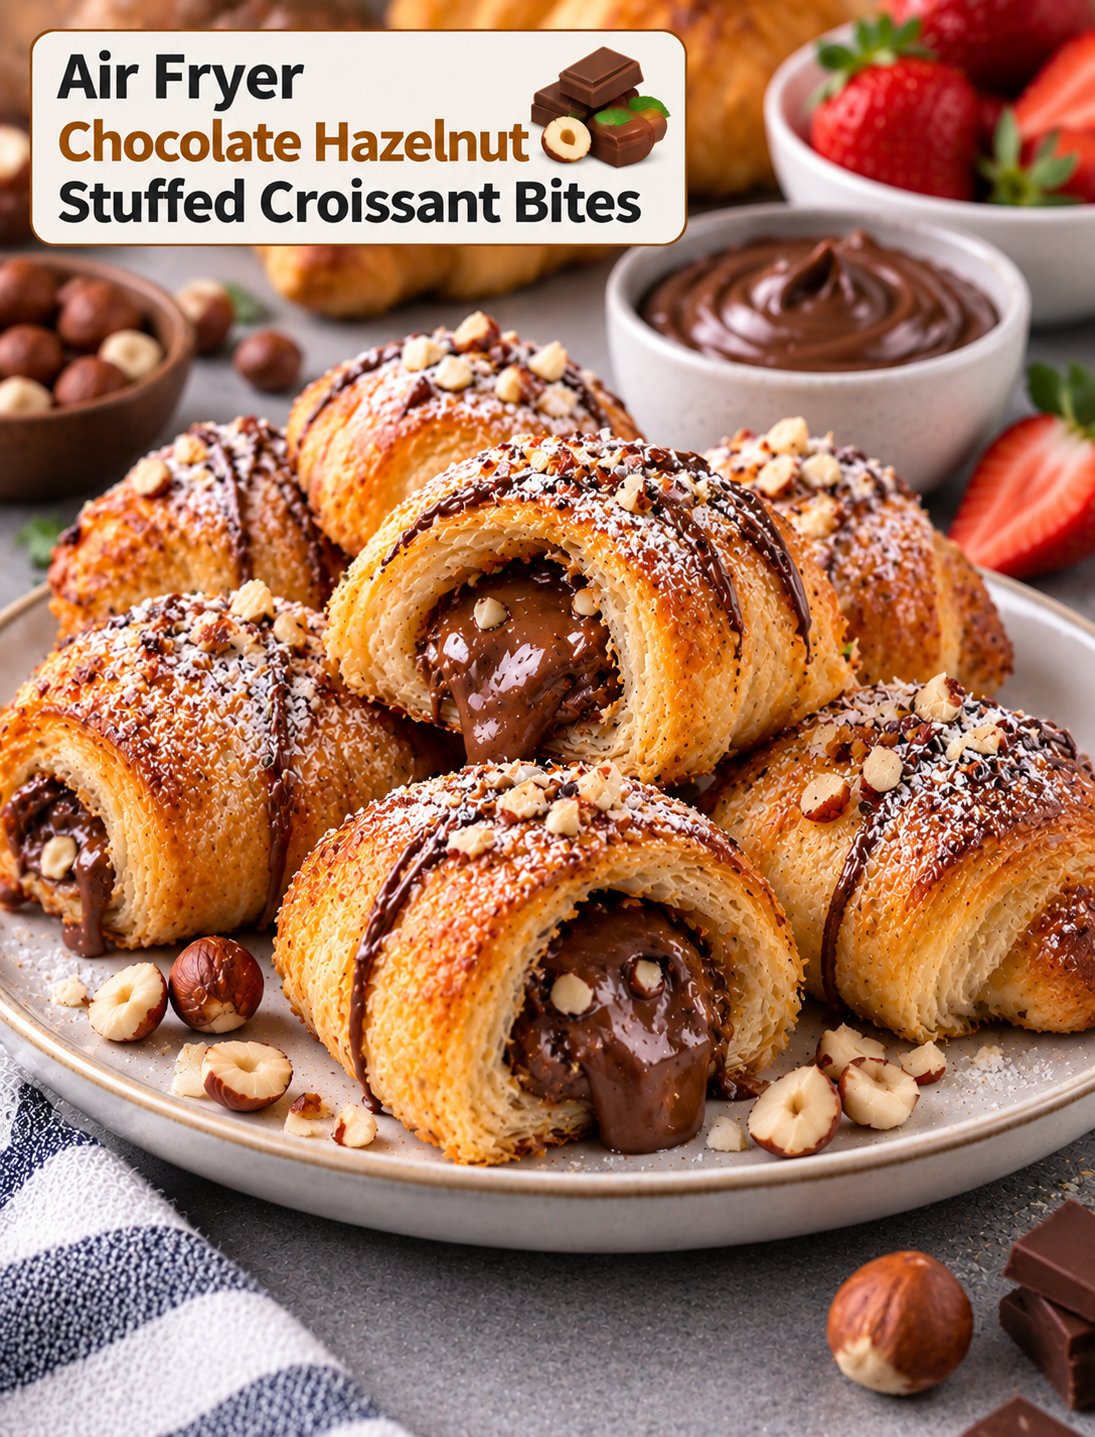
Air Fryer Chocolate Hazelnut Stuffed Croissant Bites

Golden air fryer croissant bites filled with melted chocolate hazelnut spread and topped with powdered sugar and chopped hazelnuts

Air Fryer Chocolate Hazelnut Stuffed Croissant Bites

Air Fryer Chocolate Hazelnut Stuffed Croissant Bites turn refrigerated crescent dough and creamy chocolate hazelnut spread into a warm, flaky dessert. Each bite has a golden exterior with a soft, rich chocolate center.

These small pastries are easy to prepare and cook quickly in the air fryer. The circulating heat helps the dough become crisp and golden without deep frying.

They are a great choice for breakfast treats, weekend brunch, afternoon snacks, holiday gatherings, or simple desserts. A light dusting of powdered sugar adds a bakery-style finish, while fresh berries can provide a bright contrast to the rich filling.

Why You’ll Love These Croissant Bites

These stuffed croissant bites combine flaky pastry with a smooth chocolate hazelnut center. The contrast between the crisp outside and soft filling makes each bite satisfying.

The recipe also requires only a few basic ingredients. Refrigerated crescent dough keeps preparation simple, while chocolate hazelnut spread provides most of the sweetness and chocolate flavor.

The small size makes these pastries easy to portion. You can make them for a family breakfast or prepare a larger batch for guests.

Air frying also makes cleanup easier than traditional frying. There is no large pot of hot oil, and the pastries can be cooked directly in the air fryer basket when your appliance allows it.

Ingredients You’ll Need

Crescent Dough

Refrigerated crescent roll dough provides a soft, buttery base that becomes flaky and golden during cooking. Use a fresh package that is easy to unroll and separate.

Puff pastry can also be used, but the texture will be lighter and more layered than crescent dough.

Chocolate Hazelnut Spread

A smooth chocolate hazelnut spread creates the creamy center. Use enough to provide a noticeable filling without making the dough difficult to seal.

Keep the spread chilled for a short time if it feels too soft to handle. A firmer filling is easier to portion onto small pieces of dough.

Butter

Melted butter can be brushed over the dough before air frying. It encourages browning and adds a richer pastry flavor.

Powdered Sugar

Powdered sugar provides a simple finishing touch. Add it after cooking so it stays bright and does not melt into the pastry.

Hazelnuts

Finely chopped toasted hazelnuts are optional but add crunch and reinforce the nutty flavor of the filling.

Optional Flavorings

A small amount of vanilla extract, cinnamon, or orange zest can add extra flavor. Use these additions lightly so they do not overpower the chocolate.

How to Make Air Fryer Chocolate Hazelnut Stuffed Croissant Bites

Prepare the Dough

Open the refrigerated crescent dough carefully and separate it into triangles along the existing perforations.

If the triangles are large, cut them into smaller pieces to create bite-sized pastries. Keep the pieces reasonably similar in size so they cook at the same rate.

Place each piece on a clean work surface with the wider end facing toward you.

Add the Chocolate Filling

Place a small amount of chocolate hazelnut spread near the wide end of each dough piece. Avoid adding too much because the filling can escape as the pastry cooks.

If using chopped hazelnuts, sprinkle a small amount over the spread.

Roll the dough toward the narrow tip, keeping the filling enclosed. Pinch the edges gently if needed to create a secure seal.

For smaller bites, tuck the ends inward slightly after rolling. This helps keep the filling inside during air frying.

Prepare the Air Fryer

Preheat the air fryer according to your model’s instructions if preheating is recommended.

Lightly grease the basket if necessary. Arrange the croissant bites in a single layer with space between each piece.

Do not stack the pastries. Proper airflow helps the dough become evenly browned and crisp.

Brush the tops lightly with melted butter. Avoid using too much because excess butter can make the pastry greasy.

Air Fry Until Golden

Cook the bites until the dough is puffed, golden brown, and fully cooked.

Cooking time depends on the size of the pastries, dough thickness, and air fryer model. Begin checking early during the first batch because smaller pieces can brown quickly.

If the outside becomes dark before the center is fully baked, reduce the temperature slightly and continue cooking until the dough is done.

Allow the bites to cool for several minutes before serving. The chocolate filling can remain extremely hot after cooking.

Tips for Flaky and Golden Croissant Bites

Keep the refrigerated dough cold until you are ready to use it. Cold dough is easier to handle and can produce a better flaky texture.

Use a small amount of filling in each pastry. Overfilled bites are more likely to split and leak chocolate.

Seal the dough carefully around the filling. Press the seams gently so there are no obvious openings.

Leave space between the pastries in the air fryer basket. Crowding can reduce airflow and cause uneven browning.

Brush the dough lightly with butter rather than soaking it. A thin coating is enough to support a golden exterior.

Watch the final minutes closely. Pastry can brown quickly once it reaches the right temperature.

How to Prevent Chocolate From Leaking

The most important step is controlling the amount of filling. A teaspoon or small spoonful is usually easier to contain than a large scoop.

Keep the spread toward the center of the dough and away from the edges. This gives you enough dough to close around the filling.

Do not stretch the dough too thin around the chocolate. Thin areas can tear during rolling.

Pinch or press the seams gently before placing the bites in the basket. Positioning the seam underneath can also help keep it closed.

If the chocolate hazelnut spread is very soft, chill it briefly before assembling the pastries. Firmer spread is easier to handle and less likely to run during preparation.

Best Toppings and Serving Ideas

Powdered sugar is one of the simplest toppings for these pastries. Dust it lightly over the cooled bites just before serving.

Fresh strawberries, raspberries, and blueberries add color and a slightly tart contrast to the sweet filling.

For extra crunch, sprinkle finely chopped toasted hazelnuts over the finished pastries.

A small drizzle of melted chocolate can create a richer dessert presentation. Allow the drizzle to set briefly before serving.

For brunch, serve the bites with fresh fruit, yogurt, coffee, or hot chocolate.

For dessert, pair them with vanilla ice cream or a small spoonful of whipped cream.

Easy Variations to Try

Chocolate Almond Bites

Replace the hazelnut spread with chocolate almond spread and add finely chopped toasted almonds to the filling.

Peanut Butter Chocolate Bites

Add a small amount of creamy peanut butter alongside the chocolate filling. Keep the portions small so the dough remains easy to seal.

Cinnamon Chocolate Bites

Add a light sprinkle of cinnamon to the filling before rolling. Cinnamon gives the chocolate a warm bakery-style flavor.

Strawberry Chocolate Bites

Add a very small piece of fresh strawberry with the chocolate spread. Pat the fruit dry first to reduce excess moisture.

Orange Chocolate Bites

Add a little finely grated orange zest to the chocolate filling. The citrus aroma provides a bright contrast to the rich pastry.

White Chocolate Hazelnut Bites

Use white chocolate hazelnut spread for a sweeter variation. Finish with chopped hazelnuts for extra texture.

How to Make Them for a Party

These croissant bites work well for brunches, birthdays, holiday breakfasts, and casual gatherings.

Prepare the pastries in several small batches instead of overcrowding the air fryer. This gives each piece enough room to brown evenly.

Arrange the finished bites on a serving platter and add powdered sugar shortly before guests arrive.

Serve different toppings on the side. Fresh berries, chopped nuts, chocolate drizzle, and whipped cream allow guests to customize their pastries.

For a breakfast spread, pair them with savory items such as scrambled eggs, breakfast potatoes, or turkey sausage. The sweet pastries can then serve as a simple dessert-style option.

How to Store and Reheat

Allow leftover pastries to cool completely before storing them. Place them in an airtight container and refrigerate if you plan to keep them for more than a short period.

The air fryer is the preferred method for reheating because it helps restore the flaky exterior.

Reheat the bites until warmed through, then allow them to cool briefly before eating. The chocolate center can become very hot during reheating.

Avoid adding powdered sugar before storage because moisture can cause it to disappear into the pastry.

If you want to freeze the finished bites, cool them completely and store them in a freezer-safe container. Reheat them in the air fryer until warm and crisp.

Common Mistakes to Avoid

Do not overfill the dough because excess chocolate can leak during cooking.

Avoid using dough that has become warm and difficult to handle. Refrigerated dough is easier to roll and seal.

Do not crowd the air fryer basket. Limited airflow can leave the pastries pale or unevenly cooked.

Avoid brushing the dough with too much butter because excess fat can make the exterior greasy.

Do not add powdered sugar while the pastries are extremely hot. Wait until they have cooled slightly for a cleaner finish.

Avoid eating the pastries immediately after cooking. The filling can stay much hotter than the pastry exterior.

Frequently Asked Questions

Can I use puff pastry instead of crescent dough?

Yes, puff pastry works well and creates a lighter, more layered texture than refrigerated crescent dough.

How much chocolate hazelnut spread should I use?

Use a small spoonful for each bite so the filling stays enclosed and does not leak during cooking.

Why did my chocolate filling leak out?

Overfilling, weak seams, or placing the spread too close to the dough edges can cause the filling to escape.

Can I make these ahead of time?

Yes, assemble the unbaked bites ahead and keep them refrigerated until you are ready to air fry them.

Can I freeze chocolate croissant bites?

Yes, cooled baked bites can be frozen in an airtight container and reheated in the air fryer.

How do I make them extra crispy?

Keep the dough cold, avoid overcrowding the basket, and lightly brush the pastries with butter before cooking.

Can I use other fillings?

Yes, peanut butter, almond spread, fruit preserves, caramel, or white chocolate spread can be used in small amounts.

What should I serve with these bites?

Fresh berries, coffee, hot chocolate, yogurt, whipped cream, or vanilla ice cream all pair well with the warm chocolate pastries.

Final Thoughts

Air Fryer Chocolate Hazelnut Stuffed Croissant Bites are an easy way to make a bakery-style treat with refrigerated dough and a creamy chocolate filling. The air fryer creates a golden exterior while keeping the center soft and rich.

The key to successful bites is simple: use a moderate amount of filling, seal the dough carefully, leave space between pastries, and watch the final minutes of cooking closely.

Serve them with powdered sugar and fresh berries for a simple breakfast treat, or add nuts and chocolate drizzle for a more indulgent dessert. With a few easy filling swaps, the same method can create several different sweet pastry variations.