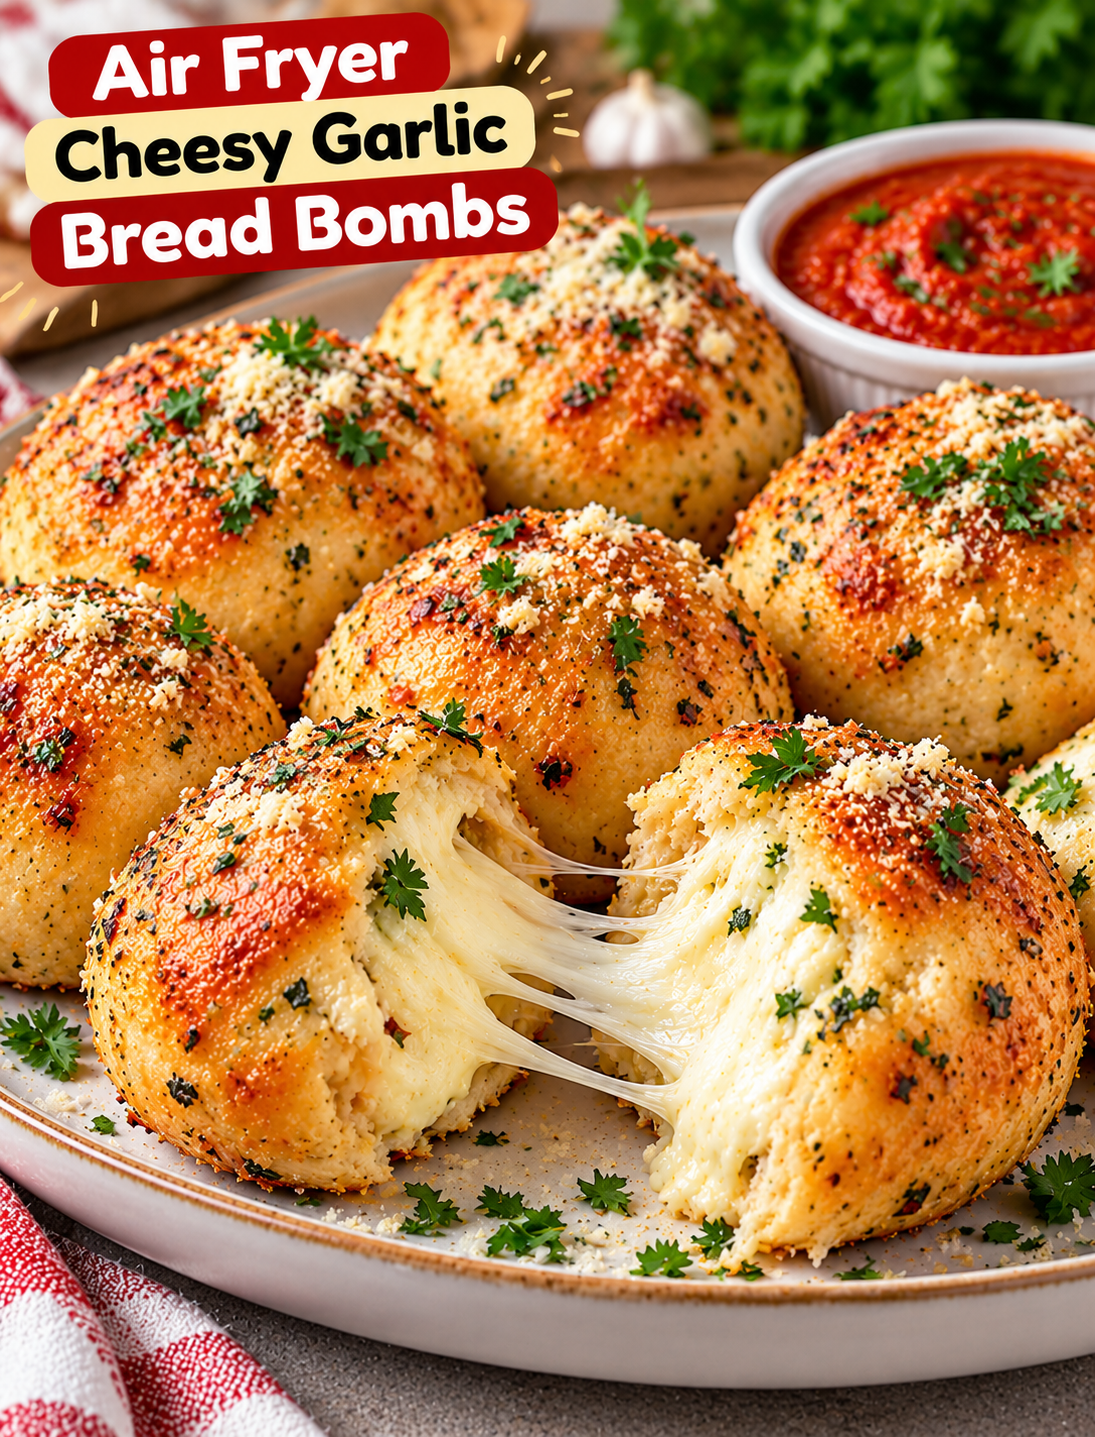
Imagine biting into a golden, buttery bread ball and finding warm, stretchy mozzarella inside. These Air Fryer Cheesy Garlic Bread Bombs combine soft bread dough, melted cheese, fresh garlic, and Italian herbs in one easy snack. They are perfect for game-day gatherings, family movie nights, holiday appetizers, or whenever you want something warm and cheesy.
The recipe uses refrigerated biscuit dough to save preparation time, so you do not need to make bread dough from scratch. Each piece is filled with mozzarella, sealed into a ball, and air-fried until the outside turns golden. A homemade garlic butter topping adds rich flavor, while a sprinkle of Parmesan and parsley gives the finished bites a savory touch.
Serve these cheesy bread bites with warm marinara sauce, ranch dressing, or your favorite dipping sauce. They also pair well with pasta, soup, and pizza. If you enjoy simple air fryer snacks made with everyday ingredients, this recipe is an easy one to add to your collection.
Why You’ll Love These Air Fryer Cheesy Garlic Bread Bombs
- Quick preparation: Refrigerated biscuit dough makes the recipe easier for busy days.
- Melted cheese center: Mozzarella creates a soft, stretchy filling in every bite.
- Golden exterior: The air fryer cooks the dough until the outside is lightly crisp.
- Fresh garlic flavor: Garlic butter adds a savory finish without complicated ingredients.
- Easy to customize: Add herbs, Parmesan, or small amounts of your favorite fillings.
- Perfect for sharing: These bite-sized snacks work well for parties, potlucks, and family gatherings.
Recipe Overview
- Prep Time: 15 minutes
- Cook Time: 8–12 minutes per batch
- Total Time: Approximately 25–35 minutes
- Servings: 4
- Yield: 8 bread bombs
- Course: Appetizer, Snack, Side Dish
- Cuisine: American-Inspired
- Cooking Method: Air Fryer
- Difficulty: Easy
Cooking time may vary depending on the size of the dough balls, the amount of filling, and your air fryer model.
Ingredients for Air Fryer Cheesy Garlic Bread Bombs
Gather these ingredients before starting to make the preparation process faster and easier.
For the Bread Bombs
- 1 can (16 ounces) refrigerated biscuit dough containing 8 biscuits
- 1 cup shredded low-moisture mozzarella cheese
- 1 tablespoon all-purpose flour, for handling sticky dough if needed
Garlic Butter Topping
- 3 tablespoons unsalted butter, melted
- 2 garlic cloves, finely minced
- 1 teaspoon Italian seasoning
- 2 tablespoons grated Parmesan cheese
- 1 tablespoon chopped fresh parsley, optional
- A pinch of black pepper, optional
Serving
- 1/2 cup warm marinara sauce
- Ranch dressing, optional
- Extra Parmesan cheese, optional
Ingredient tip: Low-moisture mozzarella melts well without releasing as much liquid as fresh mozzarella. Shred a block of cheese yourself if possible, because freshly shredded cheese often melts more smoothly than some pre-shredded varieties.
How to Make Air Fryer Cheesy Garlic Bread Bombs
Follow these steps to create soft, cheesy centers with a golden, garlic-buttered exterior.
Step 1: Preheat the Air Fryer
Preheat your air fryer to 350°F for about 3 minutes, following the instructions for your appliance.
If your air fryer does not require preheating, you can skip this step. Lightly grease the basket with an air-fryer-safe oil if needed to reduce sticking.
Step 2: Prepare the Biscuit Dough
Open the biscuit dough and separate the eight biscuits. Place them on a clean work surface.
Flatten each biscuit into a round disc about 3–4 inches wide. Press gently with your fingers so the center remains slightly thicker than the edges.
If the dough sticks to your hands, use a small amount of flour on the work surface. Avoid adding too much flour, as it can make the finished bread bombs dry.
Step 3: Add the Mozzarella Cheese
Place approximately 2 tablespoons of shredded mozzarella in the center of each flattened biscuit. Keep the cheese in a compact pile rather than spreading it to the edges.
Do not overfill the dough. Too much cheese makes sealing harder and may cause the filling to leak during cooking.
For extra flavor, mix a small pinch of Italian seasoning into the mozzarella before filling the dough.
Step 4: Seal and Shape the Bread Bombs
Bring the edges of each biscuit together over the cheese. Pinch the dough firmly to close the opening, making sure there are no visible gaps.
Roll each piece gently between your palms to form a smooth ball. Place each ball seam-side down on a clean plate.
Check every bread bomb before cooking. A secure seal helps keep the melted cheese inside and prevents it from sticking to the air fryer basket.
Step 5: Prepare the Garlic Butter
Melt the butter in a small microwave-safe bowl or saucepan. Add the minced garlic and Italian seasoning, then stir until combined.
Keep the Parmesan and parsley nearby for the finishing step. For a stronger garlic flavor, use an extra clove, but avoid burning the garlic if you choose to cook it in the butter first.
Step 6: Arrange the Bread Bombs in the Basket
Place the sealed dough balls in the air fryer basket in a single layer. Leave space between them so hot air can circulate around each piece.
Cook in batches if necessary. Overcrowding can cause uneven browning and may leave the dough undercooked in some areas.
For a more even finish, keep the balls similar in size and avoid pressing them together.
Step 7: Air Fry Until Golden
Air fry at 350°F for approximately 8–12 minutes. Begin checking at 8 minutes and continue cooking until the dough is golden brown and cooked through.
Cooking time depends on your air fryer and the thickness of the dough. If the outside browns too quickly, lower the temperature slightly and continue cooking until the center is done.
If your appliance browns unevenly, carefully rotate the basket or turn the bread bombs midway through cooking. Handle them gently to avoid opening the seams.
Step 8: Brush with Garlic Butter
Carefully remove the cooked bread bombs from the basket. Brush the tops and sides with the garlic butter mixture while they are still hot.
Sprinkle with grated Parmesan and chopped parsley. The butter adds flavor, while the Parmesan creates a savory finish.
Apply the butter in a thin layer rather than soaking the bread. Too much butter can make the outside greasy.
Step 9: Serve Warm
Let the bread bombs rest for 2–3 minutes before serving. The cheese inside will be extremely hot immediately after cooking.
Transfer them to a serving plate and add a bowl of warm marinara sauce for dipping. Serve immediately for the best contrast between the golden outside and melted cheese center.
Tips for Perfectly Crispy Garlic Bread Bombs
Use these practical tips to improve the texture and help prevent cheese leaks.
- Seal every opening: Pinch the seams firmly before placing the dough in the basket.
- Choose low-moisture mozzarella: It melts well and helps keep the filling from becoming watery.
- Keep the dough thickness even: Similar-sized pieces cook more consistently.
- Avoid overcrowding: Space between the bread bombs helps the outside brown evenly.
- Brush with butter after cooking: This gives the garlic a fresh flavor and reduces excess butter dripping into the basket.
- Check the center: The dough should look baked rather than raw or gummy.
- Rest briefly before serving: This allows the cheese to settle and reduces the risk of burns.
Easy Variations to Try
You can change the filling or seasoning to suit your taste without changing the basic cooking method.
Parmesan Herb Bread Bombs
Mix a little extra Parmesan, oregano, and basil into the mozzarella. Finish with more Parmesan and parsley after air frying for a stronger Italian-inspired flavor.
Cheesy Pizza Bread Bombs
Add a small amount of thick pizza sauce and a few finely chopped pepperoni pieces with the mozzarella. Keep the filling small enough to seal securely and avoid watery sauce.
Spicy Garlic Cheese Bombs
Add a pinch of red pepper flakes to the cheese or garlic butter. Serve with marinara sauce for a spicy, savory snack.
Cheddar Mozzarella Bread Bombs
Mix equal parts shredded cheddar and mozzarella for a sharper cheese flavor. Avoid adding too much cheese, as the filling may leak.
Herb and Cream Cheese Bread Bombs
Mix a small amount of softened cream cheese with the mozzarella and Italian seasoning. This creates a creamier filling, so use a little less cheese overall to make sealing easier.
What to Serve with Cheesy Garlic Bread Bombs
These warm bread bites pair well with dips, soups, salads, and main dishes.
- Marinara sauce: A classic tomato dip that complements the garlic and mozzarella.
- Ranch dressing: A cool, creamy option for parties and snack platters.
- Tomato soup: Serve the bread bombs alongside soup for a comforting lunch.
- Pasta dishes: Pair them with spaghetti, baked ziti, or creamy Alfredo pasta.
- Fresh green salad: Adds freshness and crunch to a rich, cheesy side.
- Air fryer chicken wings: Create a casual game-day spread with two popular finger foods.
For gatherings, offer marinara and ranch together so guests can choose between a tangy tomato dip and a creamy sauce.
Storage and Reheating Instructions
How to Store Leftover Bread Bombs
Allow the bread bombs to cool, then place them in an airtight container. Refrigerate within 2 hours of cooking and eat within 3–4 days.
Store dipping sauces separately to help maintain the bread’s texture.
How to Reheat Bread Bombs in the Air Fryer
Preheat the air fryer to 320°F. Arrange the refrigerated bread bombs in a single layer and heat for approximately 3–5 minutes, checking that the centers are hot.
Add another minute if necessary, but watch the outside closely to prevent over-browning. Let them rest briefly before eating because the cheese can retain heat.
Can You Freeze Cheesy Garlic Bread Bombs?
Yes. Freeze fully cooled bread bombs in a freezer-safe container, using parchment paper between layers. For best quality, use them within 2 months.
Thaw overnight in the refrigerator before reheating. You can also reheat them from frozen at a lower temperature first, allowing extra time until the centers are hot.
Common Mistakes to Avoid
- Overfilling the dough: Too much mozzarella can escape during cooking.
- Leaving loose seams: Small gaps allow cheese to leak out.
- Using too much flour: Excess flour can make the dough dry and tough.
- Crowding the basket: Packed dough balls may cook unevenly.
- Adding too much garlic butter: Excess butter can make the bread greasy.
- Skipping the doneness check: Golden tops do not always mean the center is fully cooked.
- Serving immediately: The melted cheese can burn your mouth, so allow a short cooling period.
Frequently Asked Questions
1. How long do cheesy garlic bread bombs take in the air fryer?
Most biscuit-dough bread bombs take 8–12 minutes at 350°F, depending on their size and your air fryer model.
2. What cheese works best for garlic bread bombs?
Low-moisture mozzarella melts well and creates a stretchy center. Parmesan adds a salty, savory flavor to the garlic butter topping.
3. Why is cheese leaking out of my bread bombs?
Overfilling or poorly sealed seams can cause leaks. Use a moderate amount of cheese and pinch the dough closed firmly.
4. Can I use pizza dough instead of biscuit dough?
Yes. Divide the pizza dough into eight portions, fill and seal each piece, then adjust the cooking time until the dough is fully baked.
5. Can I make cheesy garlic bread bombs ahead of time?
Yes. Assemble the sealed dough balls, cover, and refrigerate for a few hours before cooking. Brush with garlic butter after air frying.
6. Can I make these bread bombs without garlic?
Yes. Replace the garlic with Italian herbs or parsley butter for a milder flavor.
7. How do I know when the bread bombs are fully cooked?
The outside should be golden brown, and the dough around the cheese should look baked rather than raw or gummy. Check a test piece if needed.
8. What is the best dipping sauce for cheesy garlic bread bombs?
Warm marinara is a classic choice, while ranch dressing offers a creamy alternative. Garlic yogurt dip also works well.
Final Thoughts
Air Fryer Cheesy Garlic Bread Bombs are an easy way to enjoy warm bread, melted mozzarella, and savory garlic butter without making dough from scratch. They are ideal for parties, family snack nights, and quick sides for your favorite meals.
Keep the filling modest, seal the dough carefully, and cook the bread bombs in a single layer for the best results. Finish with garlic butter and Parmesan, then serve warm with marinara sauce.
Ready to make these cheesy bites? Save this recipe for your next snack night and share in the comments whether you prefer classic mozzarella, spicy pizza filling, or extra Parmesan and herbs.