Air Fryer Honey Harissa Chicken Thighs

Air Fryer Honey Harissa Chicken Thighs

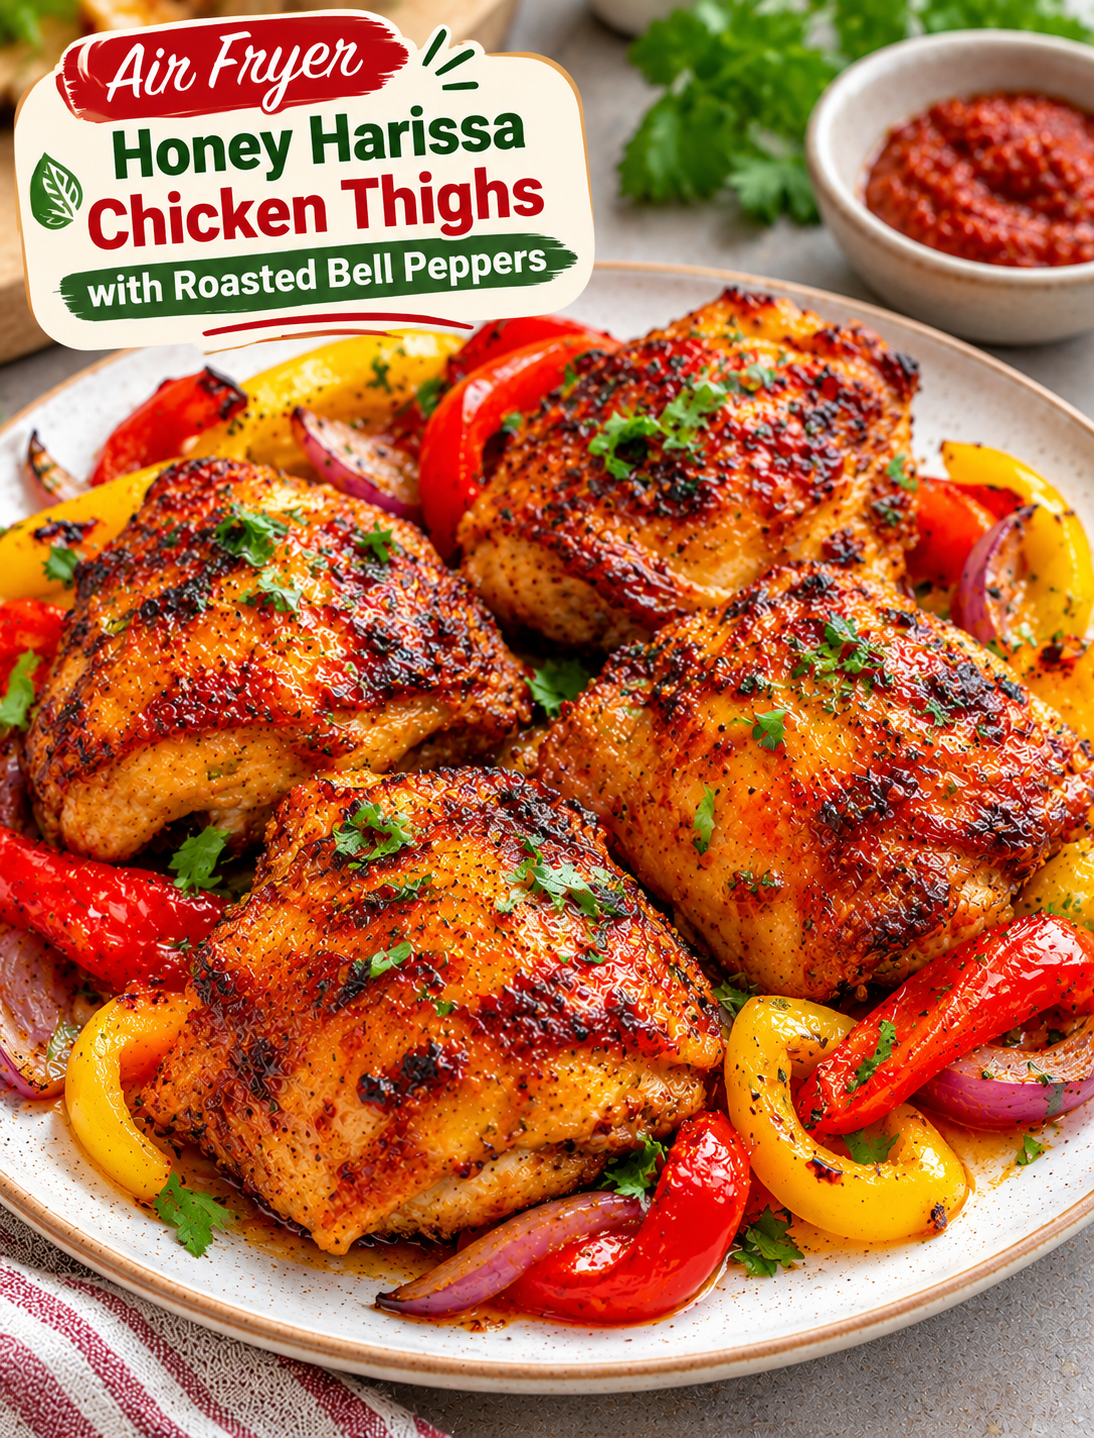
Looking for a chicken dinner with crispy skin, juicy meat, and a bold sweet-and-spicy glaze? These Air Fryer Crispy Honey Harissa Chicken Thighs with Roasted Bell Peppers bring all three together in one easy meal. The chicken gets a flavorful coating of harissa, honey, garlic, and lemon, while colorful bell peppers cook alongside it until tender and lightly caramelized.

Harissa is a North African chili paste made with ingredients such as red peppers, chili, garlic, and spices. It gives the chicken a smoky, warm heat that pairs beautifully with honey. The honey balances the spice, while lemon juice adds a fresh, bright finish.

This recipe is a practical choice for busy weeknights because the air fryer cooks the chicken without needing a large amount of oil. Serve it with rice, couscous, roasted potatoes, or a fresh salad for a satisfying dinner.

Why You’ll Love This Recipe

  • Crispy chicken skin: Air frying helps render the fat and brown the skin when the thighs are arranged properly.
  • Sweet and spicy flavor: Honey balances the bold heat of harissa without hiding its rich pepper flavor.
  • Juicy chicken: Bone-in, skin-on thighs stay moist when cooked to the correct internal temperature.
  • Colorful roasted vegetables: Red, yellow, and orange bell peppers add sweetness and texture.
  • Simple preparation: A quick marinade brings the main ingredients together before cooking.
  • Easy weeknight dinner: The recipe uses everyday ingredients and requires minimal cleanup.
  • Flexible heat level: You can adjust the amount of harissa to make the chicken milder or spicier.

Preparation and Cooking Time

  • Prep Time: 15 minutes
  • Marinating Time: 15–30 minutes
  • Cook Time: 22–28 minutes
  • Total Time: About 55–70 minutes, including marinating
  • Servings: 4
  • Air Fryer Temperature: 380°F (193°C), with a brief final crisping stage if needed

Cooking times may vary depending on the size of the chicken thighs and your air fryer model.

Ingredients You’ll Need

Chicken Thighs

  • 4 bone-in, skin-on chicken thighs, about 2–2½ pounds total
  • 1 tablespoon olive oil
  • 2 tablespoons harissa paste
  • 1½ tablespoons honey
  • 1 tablespoon fresh lemon juice
  • 3 garlic cloves, minced
  • 1 teaspoon smoked paprika
  • ½ teaspoon ground cumin
  • ½ teaspoon ground coriander
  • ½ teaspoon salt, or to taste
  • ¼ teaspoon black pepper

Roasted Bell Peppers

  • 2 bell peppers, preferably one red and one yellow
  • 1 small red onion
  • 1 tablespoon olive oil
  • ½ teaspoon dried oregano
  • ¼ teaspoon salt
  • ¼ teaspoon black pepper

Garnishing

  • 1 tablespoon chopped fresh parsley or cilantro
  • Lemon wedges
  • 1 teaspoon sesame seeds, optional

Ingredient Notes:

  • Chicken thighs: Bone-in, skin-on thighs are a good choice for juicy meat and crisp skin. Boneless thighs also work, but they cook faster.
  • Harissa paste: Different brands have different heat levels. Start with less if your paste is very spicy.
  • Honey: Use regular honey for a smooth, lightly sweet glaze. It also helps the chicken develop a beautiful browned finish.
  • Bell peppers: Red and yellow peppers are naturally sweet, while green peppers have a slightly more bitter taste.
  • Lemon juice: Fresh lemon juice cuts through the richness of the chicken and balances the harissa.

How to Make Air Fryer Crispy Honey Harissa Chicken Thighs with Roasted Bell Peppers

Follow these steps to make juicy chicken with crisp skin and tender, flavorful vegetables.

Step 1: Prepare the Chicken

  1. Remove the chicken thighs from their packaging.
  2. Pat each thigh thoroughly dry with paper towels.
  3. Trim any loose pieces of excess fat without removing the skin.
  4. Check for any remaining feather pieces and remove them.
  5. Place the thighs in a large mixing bowl or shallow dish.

Tip: Dry chicken skin is important for crisping. Avoid rinsing raw chicken because splashing water can spread bacteria around your kitchen.

Step 2: Mix the Honey Harissa Marinade

  1. Add olive oil to a small bowl.
  2. Mix in the harissa paste and honey.
  3. Add fresh lemon juice and minced garlic.
  4. Sprinkle in smoked paprika, cumin, coriander, salt, and black pepper.
  5. Stir until the ingredients form a smooth, thick marinade.
  6. Taste a small amount and adjust the honey or harissa to suit your preferred heat level.

Tip: Keep a little clean marinade aside before adding raw chicken if you want extra sauce for serving. Never reuse marinade that has touched raw chicken unless you boil it thoroughly first.

Step 3: Coat and Marinate the Chicken

  1. Pour the marinade over the chicken thighs.
  2. Rub it over the meat and underneath the skin where possible.
  3. Turn each thigh so all sides receive an even coating.
  4. Cover the bowl and refrigerate for 15–30 minutes.
  5. Remove the chicken from the refrigerator when you are ready to cook.

Tip: Do not leave raw chicken at room temperature to marinate. Keep it refrigerated until cooking time.

Step 4: Prepare the Bell Peppers and Onion

  1. Wash the bell peppers and dry them.
  2. Remove their stems, seeds, and inner membranes.
  3. Slice the peppers into medium strips.
  4. Peel the red onion and cut it into thick wedges.
  5. Place the vegetables in a separate bowl.
  6. Add olive oil, oregano, salt, and black pepper.
  7. Toss until the vegetables are evenly coated.

Tip: Cut the peppers into similar-sized pieces so they cook at a similar rate. Avoid making the strips too thin because they may soften too quickly.

Step 5: Preheat the Air Fryer

  1. Preheat the air fryer to 380°F (193°C) for about 3 minutes, if your model recommends preheating.
  2. Lightly grease the basket if needed.
  3. Make sure the basket is clean and dry.
  4. Arrange the chicken skin-side up with space between each thigh.

Important: Do not overcrowd the basket. Cook in batches if the thighs do not fit in a single layer.

Step 6: Air Fry the Chicken Thighs

  1. Place the chicken thighs skin-side up in the air fryer basket.
  2. Cook at 380°F (193°C) for 18–22 minutes.
  3. Check the chicken and rotate the pieces if your air fryer has uneven hot spots.
  4. Continue cooking until the thickest part reaches at least 165°F (74°C), measured with a food thermometer without touching the bone.
  5. If the chicken needs more browning, cook for another 2–4 minutes, checking frequently.

Tip: The honey in the marinade can brown quickly. If the skin is getting dark before the chicken is cooked through, reduce the temperature slightly and continue cooking until it reaches a safe internal temperature.

Step 7: Cook the Roasted Bell Peppers

  1. Transfer the cooked chicken to a clean plate.
  2. Loosely cover it with foil and let it rest while the vegetables cook.
  3. Add the seasoned peppers and onion to the air fryer basket.
  4. Cook at 380°F (193°C) for 6–9 minutes.
  5. Shake the basket halfway through cooking.
  6. Check that the peppers are tender with lightly browned edges.
  7. Add another 1–2 minutes if you prefer softer vegetables.

Tip: If your air fryer has enough room, you can cook the vegetables in a separate air-fryer-safe dish alongside the chicken. Make sure the dish allows enough airflow and that both foods reach their proper doneness.

Step 8: Make the Final Honey Harissa Glaze

  1. Place the reserved clean marinade in a small saucepan.
  2. Add 1 tablespoon of water to loosen it.
  3. Bring the mixture to a full boil.
  4. Let it boil while stirring for at least 1 minute.
  5. Remove it from the heat.
  6. Brush a thin layer over the cooked chicken just before serving.

If you did not reserve clean marinade, mix a little fresh harissa, honey, and lemon juice in a clean bowl instead.

Step 9: Assemble and Serve

  1. Arrange the roasted bell peppers and red onion on a serving platter.
  2. Place the rested chicken thighs on top.
  3. Brush lightly with the prepared glaze.
  4. Sprinkle chopped parsley or cilantro over the chicken.
  5. Add lemon wedges on the side.
  6. Serve while warm.

The result is a colorful meal with crisp chicken skin, juicy meat, and sweet roasted vegetables.

Tips for Crispy Chicken Skin

A few simple techniques help you get better results from your air fryer.

  • Pat the chicken dry: Moisture on the skin prevents proper browning.
  • Use skin-on thighs: The skin helps protect the meat and becomes crisp as its fat renders.
  • Avoid excess marinade on the skin: Too much wet coating can prevent crisping.
  • Arrange skin-side up: This helps the skin brown evenly.
  • Leave space between pieces: Air needs to circulate around the chicken.
  • Watch the honey: Sugary marinades can darken quickly, so check the chicken near the end.
  • Use a meat thermometer: Color alone cannot confirm that chicken is safely cooked.
  • Let the chicken rest: A short rest helps the juices settle before serving.

Easy Variations to Try

You can adjust the ingredients to create different flavor combinations while keeping the same cooking method.

1. Extra-Spicy Harissa Chicken

Add ½ teaspoon of crushed red pepper flakes to the marinade. You can also increase the harissa slightly if your brand is not too hot.

2. Mild Honey Garlic Chicken

Reduce the harissa to 1 tablespoon and add another minced garlic clove. This gives you a sweeter, gentler flavor.

3. Boneless Honey Harissa Chicken Thighs

Use boneless, skinless chicken thighs for a quicker meal. Begin checking them after about 14–16 minutes at 380°F (193°C), and cook until the thickest part reaches 165°F (74°C).

4. Lemon Herb Chicken

Add 1 teaspoon of dried oregano and extra lemon zest to the marinade. This version has a brighter, more herb-forward flavor.

5. Honey Harissa Chicken with Zucchini

Replace one bell pepper with a sliced zucchini. Cut it into thick half-moons and cook until tender with lightly browned edges.

6. Sheet Pan Version

If you do not have an air fryer, arrange the marinated chicken and seasoned vegetables on a baking sheet. Roast at 400°F (204°C) until the chicken reaches 165°F (74°C), checking the vegetables and chicken separately for doneness.

What to Serve with Honey Harissa Chicken

These chicken thighs pair well with simple sides that balance the sweet heat of the glaze.

  • Fluffy couscous: It absorbs the flavorful juices from the chicken and peppers.
  • Steamed rice: White or brown rice makes an easy base for the meal.
  • Roasted potatoes: Their mild, savory flavor works well with harissa.
  • Cucumber yogurt salad: Cool yogurt and fresh cucumber balance the spicy marinade.
  • Warm pita bread: Use it to scoop up the roasted peppers and sauce.
  • Green salad: Lettuce, tomatoes, cucumber, and lemon dressing add freshness.
  • Roasted chickpeas: These add extra texture and make the meal more filling.

How to Store and Reheat Leftovers

Store the chicken and vegetables properly to keep them fresh and safe.

Refrigerator:

  • Let the food cool slightly.
  • Transfer the chicken and peppers to airtight containers.
  • Refrigerate within 2 hours of cooking.
  • Use refrigerated leftovers within 3–4 days.

Air Fryer Reheating:

  1. Preheat the air fryer to 350°F (177°C).
  2. Place the chicken in the basket without overcrowding.
  3. Reheat for about 5–8 minutes, depending on thickness.
  4. Add the peppers during the final 2–3 minutes.
  5. Check that leftovers reach 165°F (74°C) before serving.

Microwave Reheating:

  • Place the chicken and peppers in a microwave-safe dish.
  • Cover loosely to prevent splattering.
  • Heat in short intervals until the food reaches 165°F (74°C).

Freezing:

  • Place cooled chicken and vegetables in freezer-safe containers.
  • Freeze for up to 2–3 months for best quality.
  • Thaw in the refrigerator before reheating.
  • Reheat until the chicken reaches 165°F (74°C).

Frequently Asked Questions

1. Can I use boneless chicken thighs?

Yes. Boneless thighs cook faster, so begin checking them after 14–16 minutes and cook until they reach 165°F (74°C).

2. Is harissa very spicy?

Harissa has a warm chili heat, but spice levels vary by brand. Use less paste and add more honey if you prefer a milder flavor.

3. How do I make the chicken skin extra crispy?

Pat the skin dry, avoid overcrowding the basket, and keep the thighs skin-side up while cooking.

4. Can I use chicken breasts instead?

Yes, but chicken breasts are leaner and can dry out more easily. Adjust the cooking time based on thickness and check for 165°F (74°C).

5. Can I cook the bell peppers with the chicken?

Yes, if your air fryer has enough space and the vegetables are in a suitable air-fryer-safe dish. Otherwise, cook them separately for better airflow.

6. What can I use instead of harissa paste?

Use a mixture of chili paste, smoked paprika, garlic, and a little cumin. The flavor will be different but still delicious.

7. Can I prepare the chicken ahead of time?

Yes. Coat the chicken, cover it, and refrigerate for up to 24 hours before cooking. Keep it refrigerated throughout marinating.

8. How do I know when chicken thighs are fully cooked?

Insert a food thermometer into the thickest part without touching the bone. The internal temperature must reach at least 165°F (74°C).

Final Thoughts

Air Fryer Crispy Honey Harissa Chicken Thighs with Roasted Bell Peppers make a flavorful dinner without complicated preparation. The honey brings a touch of sweetness, harissa adds bold chili flavor, and roasted peppers provide a colorful vegetable side.

Serve the chicken with couscous, rice, or warm pita for a complete meal. Adjust the harissa to your preferred spice level and finish with fresh lemon for a bright, balanced flavor.

Give this recipe a try and tell us how you served it. Did you pair it with fluffy rice, couscous, or roasted potatoes? Share your favorite combination in the comments!
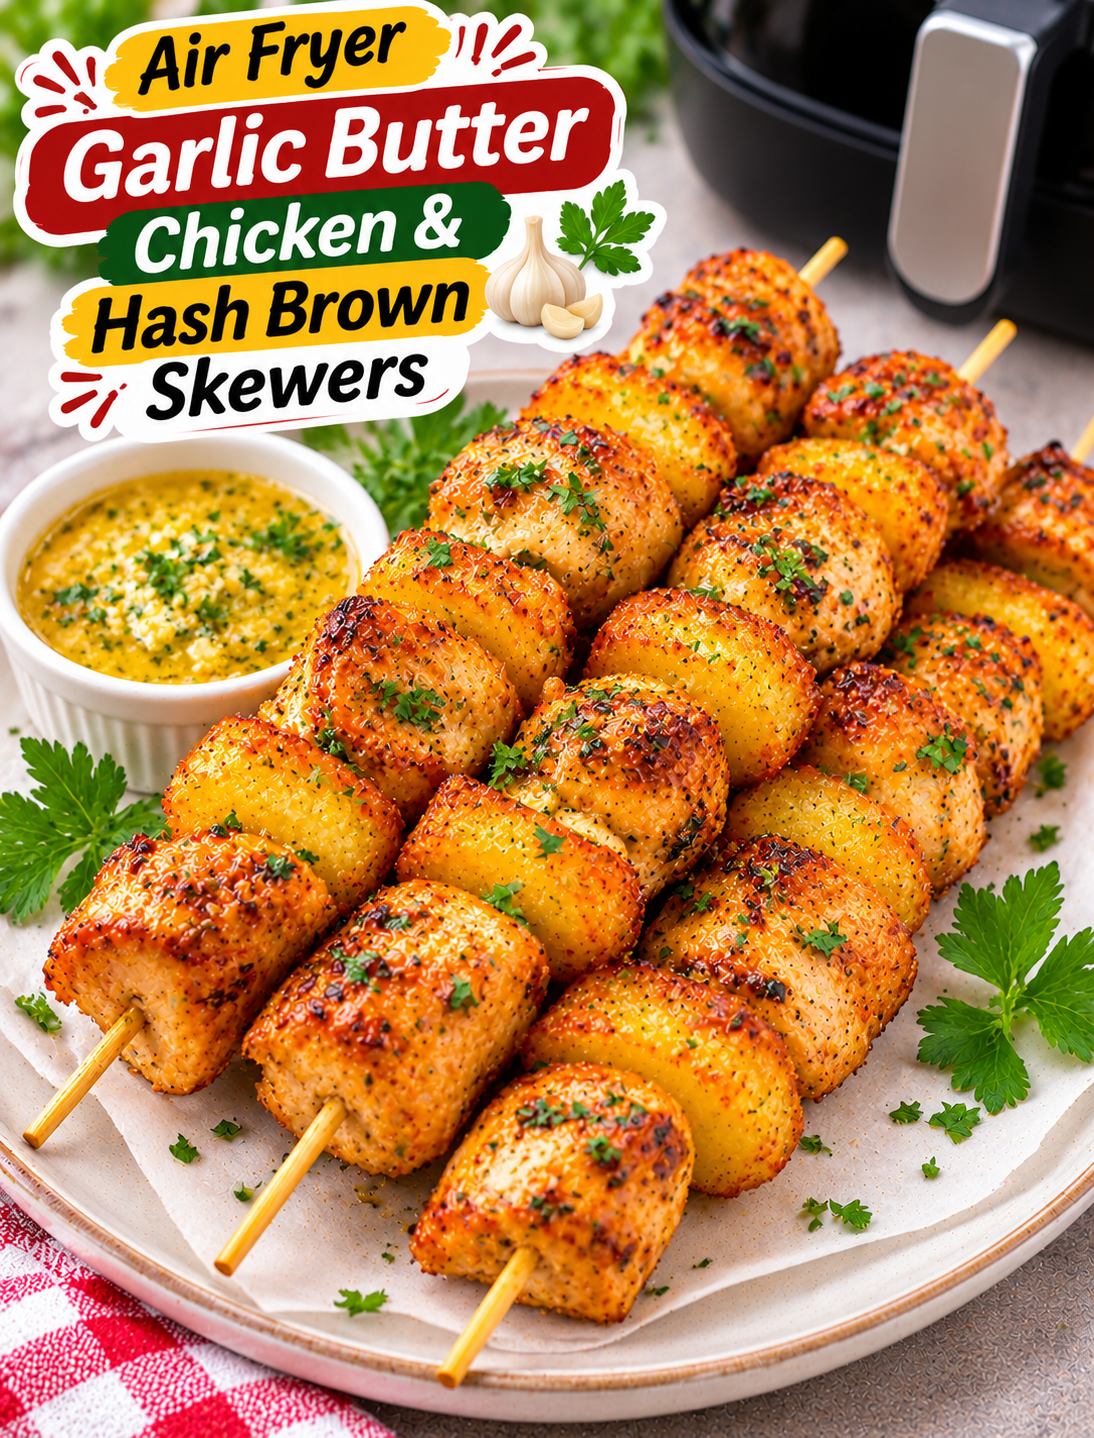
Air Fryer Garlic Butter Chicken & Hash Brown Skewers

Air Fryer Garlic Butter Chicken & Hash Brown Skewers
Crispy golden potatoes, juicy garlic butter chicken, and irresistible savory flavor on every skewer! These Air Fryer Garlic Butter Chicken & Hash Brown Skewers turn simple ingredients into a delicious meal that’s perfect for busy weeknights, weekend lunches, or family gatherings.

Imagine tender chicken pieces seasoned with garlic, paprika, and herbs, paired with crispy golden hash brown bites. Everything cooks in the air fryer until the chicken is juicy and the potatoes develop beautifully crisp edges. A final brush of homemade garlic butter brings all the flavors together.

You don’t need a grill or complicated cooking equipment to make these tasty skewers. With a few pantry seasonings, frozen hash browns, and boneless chicken, you can prepare a satisfying meal with minimal cleanup.

Why You’ll Love This Recipe

  • Juicy chicken: Garlic, paprika, and Italian seasoning give the chicken a savory flavor.
  • Crispy potato bites: Hash browns add a golden, crunchy texture to every skewer.
  • Rich garlic butter: A buttery garlic finish makes the chicken and potatoes taste even better.
  • Air fryer convenience: Enjoy a grilled-style skewer without setting up an outdoor grill.
  • Easy ingredients: The recipe uses simple ingredients available at most grocery stores.
  • Great for sharing: Individual skewers are easy to serve at parties and family dinners.
  • Customizable: Add vegetables, change the seasonings, or adjust the garlic butter to your taste.

Ingredients You’ll Need

For the Chicken

  • 1½ lbs boneless, skinless chicken thighs or breasts, cut into 1½-inch cubes
  • 1 tablespoon olive oil
  • 1 teaspoon garlic powder
  • ½ teaspoon onion powder
  • 1 teaspoon paprika
  • ½ teaspoon Italian seasoning
  • ½ teaspoon salt, or to taste
  • ¼ teaspoon black pepper
  • 1 tablespoon lemon juice

Hash Brown Potatoes

  • 2 cups frozen diced hash browns, thawed
  • 1 tablespoon olive oil
  • ½ teaspoon paprika
  • ¼ teaspoon garlic powder
  • ¼ teaspoon salt
  • ⅛ teaspoon black pepper

Garlic Butter Sauce

  • 3 tablespoons unsalted butter, melted
  • 3 garlic cloves, finely minced
  • 1 tablespoon fresh parsley, chopped
  • ½ teaspoon lemon juice
  • Pinch of black pepper
  • Pinch of red pepper flakes (optional)

Optional Add-Ins

  • 1 small red bell pepper, cut into chunks
  • ½ small red onion, cut into wedges
  • 1 teaspoon chopped fresh rosemary
  • Extra Parmesan cheese for serving

How to Make Air Fryer Garlic Butter Chicken & Hash Brown Skewers

Follow these steps to prepare flavorful chicken and crispy potato skewers with a buttery garlic finish.

Step 1: Prepare the Chicken

Cut the boneless chicken into evenly sized 1½-inch cubes. Trim away any large pieces of excess fat and pat the chicken dry with paper towels.

Try to keep the pieces similar in size so they cook evenly. Chicken thighs are naturally juicy, while chicken breasts provide a leaner option.

Step 2: Season the Chicken

Place the chicken cubes in a large mixing bowl. Add olive oil, garlic powder, onion powder, paprika, Italian seasoning, salt, black pepper, and lemon juice.

Toss until every piece is evenly coated. Cover the bowl and refrigerate for 20–30 minutes to allow the seasonings to flavor the chicken.

Step 3: Prepare the Hash Browns

Thaw the frozen diced hash browns completely. Drain away excess moisture and pat them dry with paper towels.

Place the potatoes in a separate bowl. Add olive oil, paprika, garlic powder, salt, and black pepper. Toss gently until evenly seasoned.

Dry potatoes are important because excess moisture can prevent them from becoming crispy.

Step 4: Pre-Cook the Potatoes

Preheat your air fryer to 375°F (190°C) for approximately 3 minutes if your model recommends preheating.

Arrange the seasoned potatoes in a single layer in the basket. Air fry for 6–8 minutes, shaking the basket halfway through.

The potatoes should begin to turn golden but do not need to be fully crisp at this stage. Transfer them to a plate and allow them to cool slightly.

Step 5: Prepare the Garlic Butter

Add melted butter to a small bowl. Stir in minced garlic, chopped parsley, lemon juice, black pepper, and optional red pepper flakes.

Mix until combined. Set aside half of the garlic butter for brushing after cooking, keeping it separate from any brush or utensils used on raw chicken.

Step 6: Assemble the Skewers

If using wooden skewers, soak them in water for at least 30 minutes. Metal skewers do not need soaking.

Thread the chicken pieces and partially cooked hash browns onto the skewers, alternating between them. If adding bell peppers or onions, place small pieces between the chicken and potatoes.

Leave a little space between the ingredients so hot air can circulate around them. Avoid packing everything too tightly.

Step 7: Preheat and Prepare the Air Fryer

Preheat the air fryer again to 375°F (190°C) if needed. Lightly grease the basket or use an air-fryer-safe rack.

Check that the assembled skewers fit comfortably. If they are too long, use shorter skewers or remove the sticks and arrange the ingredients in a single layer.

Step 8: Air Fry the Chicken and Potatoes

Arrange the skewers in the basket without overcrowding. Cook at 375°F (190°C) for approximately 10–14 minutes, turning halfway through.

Cooking time depends on the size of the chicken pieces, the potato texture, and your air fryer. Check the thickest chicken piece with a food thermometer. Chicken must reach 165°F (74°C) internally.

If the chicken is cooked but the potatoes need more browning, remove the chicken and cook the potatoes for another 2–3 minutes.

Step 9: Brush with Garlic Butter

When the chicken is fully cooked and the potatoes are golden, remove the skewers carefully.

Brush the hot chicken and potatoes with the reserved clean garlic butter. The warmth helps the butter spread across the ingredients and adds a fresh garlic aroma.

Step 10: Garnish and Serve

Transfer the skewers to a serving platter. Sprinkle with fresh parsley, extra black pepper, and grated Parmesan if desired.

Serve immediately with lemon wedges, ranch dressing, garlic yogurt sauce, or your favorite dipping sauce.

Tips for Perfect Chicken & Hash Brown Skewers

  • Cut evenly: Similar-sized chicken pieces cook more consistently.
  • Dry the potatoes: Removing excess moisture helps create crispier hash browns.
  • Pre-cook the potatoes: Giving them a head start helps them finish at the same time as the chicken.
  • Use chicken thighs: They tend to remain juicy and flavorful during air frying.
  • Leave space between ingredients: Air circulation helps the chicken brown and potatoes crisp.
  • Avoid overcrowding: Cook in batches if the skewers do not fit comfortably.
  • Keep garlic butter separate: Never reuse a brush or sauce that has touched raw chicken.
  • Check the temperature: Always confirm that chicken reaches 165°F (74°C).

Delicious Variations

1. Spicy Garlic Butter Chicken Skewers

Add cayenne pepper, extra red pepper flakes, or chili powder to the chicken seasoning. Finish with spicy garlic butter for a little heat.

2. Cheesy Chicken and Potato Skewers

Sprinkle grated Parmesan over the cooked skewers. For extra richness, add a little shredded mozzarella and return the skewers to the air fryer briefly until melted.

3. Lemon Herb Chicken Skewers

Add lemon zest, fresh rosemary, and extra parsley to the marinade. This variation has a bright flavor that pairs well with roasted vegetables.

4. BBQ Garlic Butter Skewers

Brush the cooked chicken lightly with barbecue sauce before adding the garlic butter. Use a small amount so the sauce does not overpower the other flavors.

5. Vegetable Chicken Skewers

Add red bell peppers, zucchini, and red onion between the chicken pieces. Cut the vegetables into similar-sized chunks for more even cooking.

6. Parmesan Ranch Chicken Skewers

Add ½ teaspoon ranch seasoning to the chicken marinade and finish with grated Parmesan. Serve with ranch dressing for dipping.

What to Serve with Chicken & Hash Brown Skewers

These skewers make a satisfying meal on their own, but they also pair well with fresh sides.

  • Fresh garden salad: Lettuce, tomatoes, cucumber, and a light dressing balance the rich garlic butter.
  • Creamy coleslaw: Crunchy cabbage adds a refreshing contrast.
  • Roasted broccoli: A simple vegetable side with a little olive oil and black pepper.
  • Garlic bread: Perfect for soaking up extra garlic butter.
  • Cucumber yogurt dip: A cool, creamy sauce complements the seasoned chicken.
  • Corn on the cob: Adds a sweet side that works well with the savory potatoes.
  • Steamed green beans: A simple option for a balanced dinner plate.

Storage and Reheating

Refrigeration

Remove the chicken and potatoes from the skewers. Store them in an airtight container and refrigerate within 2 hours.

Enjoy leftovers within 3–4 days.

Reheating

Arrange the chicken and potatoes in a single layer in the air fryer. Reheat at 325°F (163°C) until hot throughout.

Leftover chicken should reach 165°F (74°C) when reheated. Add a small amount of fresh garlic butter after warming to refresh the flavor.

Freezing

For the best quality, freeze the cooked chicken and potatoes separately in freezer-safe containers for up to 2 months.

Thaw overnight in the refrigerator before reheating. The potato texture may become softer after freezing.

Make-Ahead Preparation

Season the chicken and prepare the hash browns separately up to one day ahead. Store both covered in the refrigerator.

Assemble and cook the skewers shortly before serving for the best texture.

Frequently Asked Questions

1. Can I use frozen hash browns directly?

Thaw and drain diced hash browns before seasoning so excess moisture does not affect browning.

2. Which chicken is better for these skewers?

Boneless chicken thighs are naturally juicy, while chicken breasts are a leaner option that also works well.

3. How long should I cook chicken skewers in the air fryer?

Start with 10–14 minutes at 375°F (190°C), turning halfway through and checking for an internal temperature of 165°F (74°C).

4. Do I need to pre-cook the hash browns?

Yes. A short pre-cook gives the potatoes a head start so they can become crisp while the chicken finishes cooking.

5. Can I use wooden skewers in an air fryer?

Yes. Soak wooden skewers in water for at least 30 minutes and make sure they fit without touching the heating element.

6. Why are my hash brown potatoes not crispy?

Excess moisture, overcrowding, or too little cooking time can prevent browning. Dry the potatoes and arrange them in a single layer.

7. Can I make these skewers without butter?

Yes. Use olive oil with garlic, parsley, and lemon juice for a lighter finishing sauce.

8. Can I prepare chicken and hash brown skewers ahead of time?

You can season the chicken and prepare the potatoes in advance, but assemble and air fry them shortly before serving for the best results.

Final Thoughts

Air Fryer Garlic Butter Chicken & Hash Brown Skewers combine juicy seasoned chicken, golden potato bites, and rich garlic butter in one easy meal. The air fryer makes preparation simple while giving the ingredients a delicious browned finish.

You can adjust the seasonings, add colorful vegetables, or finish the skewers with Parmesan and fresh herbs. Serve them with a crisp salad, creamy dip, or warm garlic bread for a satisfying family dinner.

Make these skewers when you want something flavorful, easy to customize, and fun to serve. Every bite brings together tender chicken, crispy potatoes, and classic garlic butter flavor!

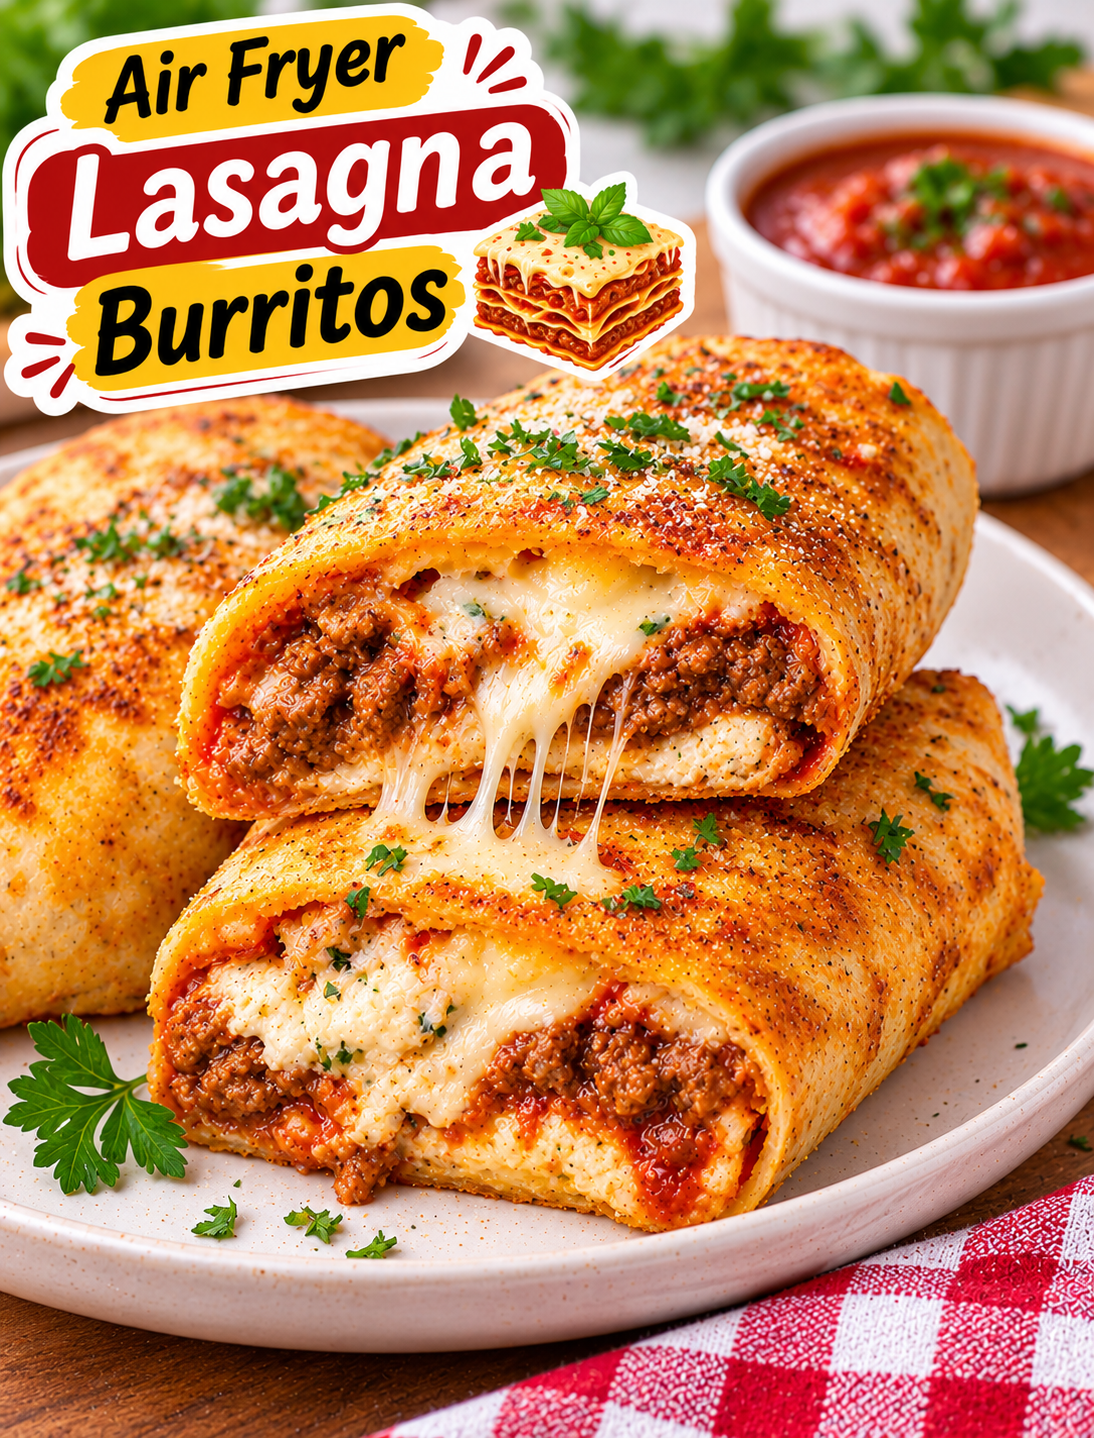
Air Fryer Lasagna Burritos

Air Fryer Lasagna Burritos
What happens when classic Italian lasagna meets a crispy, golden burrito? You get an irresistible dinner packed with seasoned meat, rich marinara sauce, creamy ricotta, and layers of melted cheese—all wrapped inside a crunchy tortilla!

These Air Fryer Lasagna Burritos bring two comfort-food favorites together in one easy recipe. Each tortilla is filled with a savory lasagna-style mixture, rolled into a neat burrito, and air-fried until beautifully golden. The outside turns crisp while the cheesy filling stays warm, creamy, and flavorful.

You don’t need to prepare a full baking dish or spend hours layering pasta. This recipe gives you the familiar flavors of homemade lasagna in a convenient handheld meal. It’s perfect for busy weeknights, family dinners, meal prep, or whenever you’re craving something cheesy and satisfying.

Why You’ll Love This Recipe

  • Two comfort foods in one: Enjoy classic lasagna flavors wrapped in a crispy tortilla.
  • Golden air-fried exterior: The air fryer creates a crunchy shell without deep frying.
  • Rich and cheesy filling: Ricotta, mozzarella, and Parmesan create a creamy center.
  • Easy weeknight dinner: The filling comes together with simple ingredients.
  • Customizable: Use ground beef, Italian sausage, ground turkey, or a meat-free filling.
  • Great for dipping: Serve with warm marinara sauce for an extra burst of flavor.
  • Easy to prepare ahead: Make the filling in advance and assemble the burritos when needed.

Ingredients You’ll Need

The Lasagna Filling

  • 1 lb lean ground beef
  • ½ cup finely diced yellow onion
  • 2 garlic cloves, minced
  • 1 cup marinara sauce
  • ½ teaspoon Italian seasoning
  • ½ teaspoon dried oregano
  • ¼ teaspoon crushed red pepper flakes (optional)
  • ¼ teaspoon black pepper
  • ½ teaspoon salt, or to taste
  • 1 tablespoon olive oil, if needed

Creamy Cheese Mixture

  • ¾ cup ricotta cheese
  • 1 cup shredded mozzarella cheese, divided
  • ¼ cup grated Parmesan cheese
  • 1 tablespoon chopped fresh parsley
  • ¼ teaspoon garlic powder
  • Pinch of black pepper

The Burritos

  • 4 large flour tortillas (10-inch size)
  • 1 tablespoon olive oil or melted butter
  • ½ teaspoon Italian seasoning
  • 2 tablespoons grated Parmesan cheese, for topping
  • Cooking spray, as needed

Serving

  • ½ cup warm marinara sauce
  • Fresh basil leaves
  • Extra grated Parmesan
  • Crushed red pepper flakes

How to Make Air Fryer Lasagna Burritos

Follow these steps to make crispy tortilla burritos filled with savory meat sauce and creamy Italian-style cheese.

Step 1: Prepare the Onion and Garlic

Peel and finely dice the yellow onion. Mince the garlic cloves and set them aside.

Small onion pieces cook evenly and blend smoothly into the meat filling. Preparing these ingredients first makes the cooking process easier.

Step 2: Brown the Ground Beef

Heat a large skillet over medium heat. Add the ground beef and break it into small pieces using a wooden spoon or spatula.

Cook for approximately 6–8 minutes, stirring regularly, until the beef is browned and no longer pink. Drain excess grease if necessary.

For food safety, ground beef should reach an internal temperature of 160°F (71°C).

Step 3: Add Onion and Garlic

Add the diced onion to the skillet and cook for 2–3 minutes until softened.

Stir in the minced garlic and cook for another 30 seconds. Avoid cooking the garlic for too long because it can develop a bitter taste.

Step 4: Make the Lasagna Meat Sauce

Pour the marinara sauce into the skillet. Add Italian seasoning, dried oregano, red pepper flakes, salt, and black pepper.

Stir until the beef is evenly coated. Simmer for 3–5 minutes to allow the flavors to combine.

The filling should be thick rather than watery. If the sauce looks too loose, simmer it for another minute or two.

Remove the skillet from the heat and allow the mixture to cool slightly before assembling.

Step 5: Prepare the Ricotta Cheese Mixture

In a medium bowl, combine ricotta cheese, Parmesan, half of the shredded mozzarella, chopped parsley, garlic powder, and a pinch of black pepper.

Mix until creamy and evenly combined.

This cheese mixture gives the burritos the familiar creamy layer found in traditional lasagna.

Step 6: Warm the Tortillas

Place the flour tortillas on a microwave-safe plate and cover them with a slightly damp paper towel.

Microwave for approximately 10–15 seconds until soft and flexible. This makes them easier to fold without tearing.

Keep the remaining tortillas covered while assembling the burritos.

Step 7: Fill the Tortillas

Place one tortilla on a clean surface. Spread a portion of the ricotta mixture across the center, leaving enough space around the edges for folding.

Add a layer of the cooled beef marinara mixture. Sprinkle with the remaining mozzarella cheese.

Avoid adding too much filling because an overstuffed tortilla can open during air frying.

Step 8: Fold the Lasagna Burritos

Fold the left and right sides of the tortilla toward the center. Bring the bottom edge over the filling and roll tightly toward the top.

Make sure the filling is enclosed and the seam is secure.

Place each assembled burrito seam-side down on a plate. Repeat with the remaining tortillas.

Step 9: Season the Outside

Mix olive oil or melted butter with Italian seasoning in a small bowl.

Lightly brush the outside of each burrito with the mixture. Sprinkle a little Parmesan over the top for extra savory flavor.

This coating helps the tortillas develop a golden, crisp finish.

Step 10: Air Fry Until Golden and Crispy

Preheat your air fryer to 375°F (190°C) for approximately 3 minutes if your model recommends preheating.

Lightly grease the basket with cooking spray. Arrange the burritos seam-side down in a single layer, leaving space between them.

Air fry at 375°F (190°C) for approximately 7–10 minutes, turning carefully halfway through cooking.

The tortillas should become golden and crisp, and the cheese filling should be hot. Cooking time may vary depending on your air fryer and the size of your burritos.

Step 11: Rest and Slice

Carefully remove the burritos from the basket and let them rest for 2–3 minutes.

This short resting time helps the melted cheese settle and makes the burritos easier to slice without spilling the filling.

Step 12: Garnish and Serve

Cut each burrito in half diagonally. Sprinkle with fresh basil or parsley and extra Parmesan.

Serve immediately with warm marinara sauce for dipping. Add crushed red pepper flakes if you enjoy a little heat.

Tips for Perfect Air Fryer Lasagna Burritos

  • Use thick meat sauce: A watery filling can leak through the tortilla and make it soggy.
  • Cool the filling slightly: Very hot sauce can soften the tortilla before cooking.
  • Choose large tortillas: Ten-inch flour tortillas provide enough space for folding.
  • Don’t overfill: A moderate amount of filling helps the burritos stay closed.
  • Roll tightly: Secure folding keeps the cheese and meat sauce inside.
  • Place seam-side down: This helps the burritos hold their shape during cooking.
  • Brush lightly with oil: A thin coating creates a crisp exterior without making the tortillas greasy.
  • Avoid overcrowding: Cook in batches if necessary so hot air reaches every side.

Delicious Variations

1. Italian Sausage Lasagna Burritos

Replace the ground beef with mild or hot Italian sausage. Brown it thoroughly before adding the onion, garlic, and marinara sauce.

2. Chicken Alfredo Lasagna Burritos

Use cooked shredded chicken, Alfredo sauce, ricotta, mozzarella, and Parmesan for a creamy alternative to traditional meat sauce.

3. Three-Cheese Lasagna Burritos

Combine ricotta, mozzarella, Parmesan, and a little provolone for an extra cheesy filling.

4. Vegetarian Lasagna Burritos

Replace the ground beef with sautéed mushrooms, spinach, zucchini, and finely chopped bell peppers. Cook the vegetables until excess moisture has evaporated.

5. Spicy Lasagna Burritos

Add extra crushed red pepper flakes, diced jalapeños, and spicy Italian sausage for a stronger flavor.

6. Turkey Lasagna Burritos

Use lean ground turkey instead of beef. Add a little olive oil if needed and season well with Italian herbs.

What to Serve with Lasagna Burritos

These cheesy burritos are filling on their own, but a few simple sides can turn them into a complete meal.

  • Garlic bread: Serve with warm garlic bread for a classic Italian-inspired dinner.
  • Fresh Caesar salad: Crisp lettuce and creamy dressing balance the rich filling.
  • Roasted vegetables: Zucchini, broccoli, and bell peppers add color and freshness.
  • Marinara dipping sauce: Extra tomato sauce brings more traditional lasagna flavor.
  • Cucumber tomato salad: A light side adds a refreshing contrast.
  • Air fryer potato wedges: Serve with crispy potatoes for a hearty comfort-food meal.
  • Steamed green beans: A simple vegetable side keeps the plate balanced.

Storage and Reheating

Refrigeration

Allow leftover burritos to cool slightly. Store them in an airtight container and refrigerate within 2 hours.

Enjoy refrigerated leftovers within 3–4 days.

Reheating

Place the burritos in the air fryer at 325°F (163°C) for approximately 4–6 minutes, turning once if needed.

Reheat until the center reaches 165°F (74°C). If the outside browns too quickly, reduce the temperature slightly.

Freezing

Allow the assembled, fully cooked burritos to cool completely. Wrap each one individually and place them in a freezer-safe container.

Freeze for up to 2 months for best quality. Thaw overnight in the refrigerator before reheating.

Make-Ahead Preparation

Prepare the beef marinara filling and ricotta mixture up to one day ahead. Store them separately in covered containers in the refrigerator.

Assemble and air fry the burritos shortly before serving for the best crispy texture.

Frequently Asked Questions

1. Can I use corn tortillas instead of flour tortillas?

Large flour tortillas work best because they are flexible and hold the filling securely; corn tortillas are more likely to crack when folded.

2. How do I keep lasagna burritos from opening?

Roll them tightly, avoid overfilling, and place them seam-side down in the air fryer basket.

3. Can I make these burritos without ground beef?

Yes. Use ground turkey, Italian sausage, cooked chicken, or sautéed vegetables instead.

4. What cheese works best for lasagna burritos?

Ricotta creates a creamy layer, mozzarella melts smoothly, and Parmesan adds a savory flavor.

5. Why are my burritos soggy?

The filling may contain too much liquid. Simmer the meat sauce until thick and allow it to cool before assembling.

6. What temperature should I use in the air fryer?

Start at 375°F (190°C) for 7–10 minutes, turning halfway through until the tortillas are golden and crisp.

7. Can I prepare lasagna burritos ahead of time?

Yes. Prepare the fillings in advance, refrigerate separately, and assemble the burritos shortly before air frying.

8. Can I freeze cooked lasagna burritos?

Yes. Cool them completely, wrap individually, and freeze for up to 2 months for the best quality.

Final Thoughts

Air Fryer Lasagna Burritos combine the rich flavors of classic lasagna with the convenience of a crispy handheld meal. Seasoned ground beef, thick marinara sauce, creamy ricotta, and melted mozzarella create a delicious filling that tastes even better inside a golden tortilla.

You can customize the recipe with sausage, chicken, turkey, or vegetables to suit your family’s preferences. Serve the burritos with warm marinara, garlic bread, or a fresh salad for an easy dinner that feels special.

Make a batch for your next busy weeknight or weekend gathering, and enjoy two comfort-food favorites in every crispy bite!

Air Fryer Malai Boti Skewers

Air Fryer Malai Boti Skewers

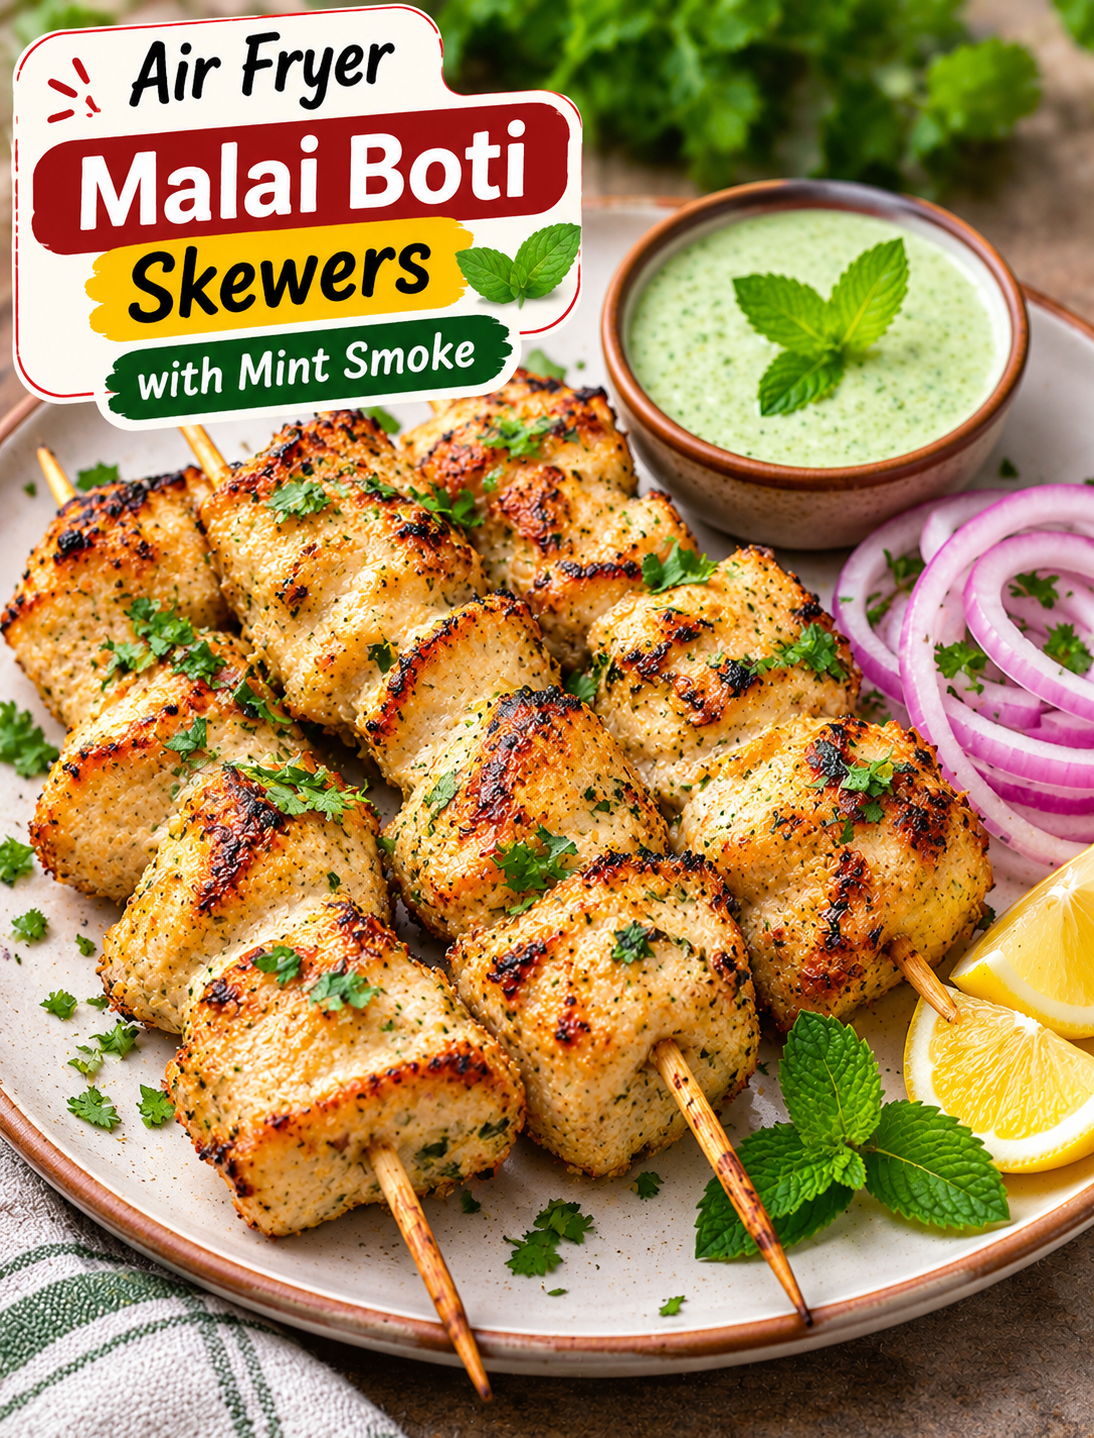
Tender, creamy, and packed with bold Pakistani-inspired flavors, these Air Fryer Malai Boti Skewers with Mint Smoke bring restaurant-style chicken straight to your kitchen! Each piece of chicken is coated in a rich marinade made with yogurt, cream, fresh mint, garlic, ginger, and aromatic spices. The air fryer gives the chicken beautifully browned edges while keeping the inside juicy and tender.

But the real highlight is the mint smoke finish. A gentle touch of fresh mint and charcoal aroma adds a delicious smoky character that makes these skewers feel special without needing an outdoor grill.

Whether you’re planning a weekend dinner, hosting friends, preparing a family meal, or craving something flavorful, this easy chicken recipe is worth adding to your menu. Serve it with mint yogurt chutney, warm naan, or a fresh cucumber salad for a satisfying meal.

What Are Malai Boti Skewers?

Malai boti is a popular South Asian-style chicken dish known for its creamy marinade and tender texture. Unlike spicy chicken tikka, which often has a stronger chili flavor, malai boti uses yogurt, cream, cheese, and mild spices to create a rich and balanced taste.

For this air fryer version, boneless chicken is cut into bite-sized pieces, marinated, threaded onto skewers, and cooked until tender. Fresh mint adds a cooling herbal flavor, while a brief charcoal-smoking technique creates a traditional smoky aroma.

These skewers are ideal for:

  • Family dinners and weekend meals.
  • Party appetizers and backyard gatherings.
  • High-protein lunch plates.
  • Homemade wraps and sandwiches.
  • Game-day snacks and sharing platters.

Why You’ll Love This Recipe

  • Creamy marinade: Yogurt, cream, and cheese help create a rich coating that keeps the chicken flavorful.
  • Air fryer convenience: You can prepare tender chicken skewers without setting up an outdoor grill.
  • Fresh mint flavor: Mint and cilantro bring freshness to the creamy marinade.
  • Smoky finish: A carefully controlled charcoal smoke adds a delicious grilled-style aroma.
  • Easy preparation: The marinade uses simple ingredients that are easy to find.
  • Versatile serving options: Enjoy the skewers with naan, rice, salads, or inside wraps.

Ingredients You’ll Need

Chicken Malai Boti

  • 1½ lbs boneless, skinless chicken thighs or breasts, cut into 1½-inch cubes
  • ½ cup plain Greek yogurt
  • ¼ cup heavy cream
  • 2 tablespoons cream cheese, softened
  • 1 tablespoon ginger-garlic paste
  • 1 tablespoon lemon juice
  • 1 tablespoon olive oil
  • 2 tablespoons fresh mint leaves, finely chopped
  • 2 tablespoons fresh cilantro, finely chopped
  • 1 teaspoon ground coriander
  • ½ teaspoon ground cumin
  • ½ teaspoon white pepper or black pepper
  • ½ teaspoon garam masala
  • ½ teaspoon salt, or to taste
  • ¼ teaspoon green chili paste (optional)

Mint Smoke Finish

  • 1 small piece of food-safe natural lump charcoal
  • ½ teaspoon ghee or butter
  • A few fresh mint leaves

Garnishing

  • Fresh mint leaves
  • Chopped cilantro
  • Lemon wedges
  • Thinly sliced red onion
  • Extra mint yogurt chutney

Serving

  • Warm naan or flatbread
  • Cucumber and tomato salad
  • Mint yogurt sauce
  • Steamed basmati rice

How to Make Air Fryer Malai Boti Skewers with Mint Smoke

Follow these steps to prepare creamy, tender chicken skewers with golden edges and a fresh smoky finish.

Step 1: Prepare the Chicken

Cut the boneless chicken into evenly sized 1½-inch cubes. Trim away any large pieces of excess fat and pat the chicken dry with paper towels.

Try to keep the pieces similar in size so they cook evenly. Chicken thighs provide a naturally juicy result, while chicken breasts offer a leaner option.

Step 2: Prepare the Creamy Marinade

In a large mixing bowl, combine Greek yogurt, heavy cream, softened cream cheese, ginger-garlic paste, lemon juice, and olive oil.

Add chopped mint, cilantro, ground coriander, cumin, white pepper, garam masala, salt, and optional green chili paste. Whisk until the mixture becomes smooth and creamy.

Step 3: Coat the Chicken

Add the chicken cubes to the marinade. Mix thoroughly until every piece is coated.

Cover the bowl and refrigerate for at least 1 hour. For a deeper flavor, marinate for 4–6 hours. Keep the chicken refrigerated throughout the marinating process.

Step 4: Prepare the Skewers

If you’re using wooden skewers, soak them in water for at least 30 minutes to reduce the chance of scorching. Metal skewers do not need soaking.

Thread the marinated chicken pieces onto the skewers, leaving a little space between each piece. Avoid packing them too tightly because hot air needs to circulate around the chicken.

Step 5: Preheat the Air Fryer

Preheat your air fryer to 375°F (190°C) for approximately 3 minutes if your model recommends preheating.

Lightly grease the air fryer basket or use an air-fryer-safe rack. Make sure the skewers fit comfortably without touching the heating element.

Step 6: Arrange the Chicken Skewers

Place the skewers in a single layer inside the air fryer basket. If they do not fit properly, cook them in batches.

Shake off any heavy excess marinade before placing the skewers in the basket. A thin coating is enough to keep the chicken flavorful without creating excess liquid.

Step 7: Air Fry Until Tender and Golden

Cook the chicken at 375°F (190°C) for approximately 12–16 minutes, turning the skewers halfway through cooking.

Cooking time depends on the thickness of the chicken pieces and your air fryer. Check the thickest piece with a food thermometer. Chicken must reach an internal temperature of 165°F (74°C) to be safe to eat.

For slightly deeper browning, increase the temperature to 400°F (200°C) for the final 1–2 minutes, watching carefully to prevent the creamy coating from burning.

Step 8: Prepare the Mint Smoke

While the chicken rests, prepare the smoky finish using a food-safe charcoal-smoking method.

Place a small metal heatproof bowl inside a larger heatproof dish. Carefully heat a small piece of natural lump charcoal with kitchen tongs until it is glowing red. Place it in the small bowl using the tongs.

Add a few fresh mint leaves beside the charcoal, then place ½ teaspoon of ghee or butter directly on the hot charcoal. It will release aromatic smoke.

Step 9: Give the Chicken a Gentle Smoke

Place the cooked chicken skewers in a large heatproof container or pot. Set the small charcoal bowl inside, making sure it does not touch the chicken or the container’s sides.

Immediately cover the container with a tight-fitting lid for approximately 1–2 minutes. Use only a brief smoking period because too much smoke can overpower the creamy mint flavor.

Carefully remove the charcoal bowl with heatproof tools and discard the charcoal safely once completely cooled. Never leave hot charcoal unattended or use this technique in an enclosed, unventilated space.

Step 10: Garnish and Serve

Transfer the malai boti skewers to a serving platter. Sprinkle with fresh mint and cilantro, then add lemon wedges and sliced red onion.

Serve warm with mint yogurt chutney, naan, or basmati rice. The combination of creamy chicken, fresh herbs, and gentle smoke makes every bite flavorful.

Tips for Perfect Air Fryer Malai Boti

  • Choose the right chicken: Boneless thighs are naturally juicy, while chicken breasts work well when cut evenly.
  • Marinate long enough: Give the chicken at least 1 hour to absorb the yogurt, cream, and spices.
  • Use thick yogurt: Greek yogurt creates a thicker marinade that clings better to the chicken.
  • Avoid excess marinade: Too much liquid can drip into the air fryer and prevent proper browning.
  • Leave space between pieces: Crowded skewers cook unevenly and may stay pale.
  • Turn halfway through: Rotating the skewers helps the chicken brown on different sides.
  • Check internal temperature: Always cook chicken to 165°F (74°C).
  • Keep the smoke brief: A short mint smoke adds aroma without overpowering the creamy flavor.

Delicious Variations

1. Spicy Malai Boti Skewers

Add extra green chili paste, crushed red pepper, or a little cayenne to the marinade for a stronger heat level.

2. Garlic Cream Chicken Skewers

Add another teaspoon of minced garlic and a little extra black pepper for a bold garlic flavor.

3. Cheese Malai Boti

Mix 2 tablespoons of finely grated Parmesan into the marinade for a richer, savory finish.

4. Lemon Mint Chicken Skewers

Increase the lemon zest and fresh mint for a brighter flavor that pairs well with summer salads.

5. Vegetable Malai Boti Skewers

Thread chunks of bell pepper, red onion, and zucchini between the chicken pieces. Cut the vegetables into similar-sized pieces and check that everything cooks evenly.

6. Extra Smoky Chicken Tikka Style

Add a small pinch of smoked paprika to the marinade for a deeper smoky flavor before applying the optional charcoal finish.

What to Serve with Malai Boti Skewers

These creamy chicken skewers pair beautifully with fresh sides and flavorful dips.

  • Mint yogurt chutney: A cool, tangy dip balances the rich chicken marinade.
  • Garlic naan: Soft flatbread is perfect for wrapping around the chicken.
  • Basmati rice: Serve the skewers over fluffy rice for a complete dinner.
  • Cucumber salad: Fresh cucumber, tomato, and lemon create a refreshing side.
  • Pickled red onions: Their tangy flavor cuts through the creamy marinade.
  • Roasted vegetables: Bell peppers, zucchini, and onions make a colorful addition.
  • Fresh green salad: A simple salad adds crunch and freshness.

Storage and Reheating

Refrigeration

Remove the chicken from the skewers and transfer leftovers to an airtight container. Refrigerate within 2 hours and enjoy within 3–4 days.

Reheating

Place the chicken pieces in the air fryer at 325°F (165°C) until heated through. Add a small splash of water or broth if the chicken looks dry. Reheated leftovers should reach 165°F (74°C).

Freezing

Freeze the cooked chicken in a freezer-safe container for up to 2 months for best quality. Thaw overnight in the refrigerator before reheating.

Make-Ahead Preparation

Prepare the marinade and coat the chicken up to 6 hours ahead. Keep it refrigerated, thread the skewers shortly before cooking, and add the mint smoke just before serving.

Frequently Asked Questions

1. Can I use chicken breast instead of chicken thighs?

Yes. Chicken breast works well, but cut it evenly and monitor the temperature to prevent it from drying out.

2. How long should I marinate malai boti?

Marinate for at least 1 hour, or up to 6 hours in the refrigerator for a deeper creamy flavor.

3. What temperature should I use in the air fryer?

Cook the skewers at 375°F (190°C) for approximately 12–16 minutes, checking that the chicken reaches 165°F (74°C).

4. Can I make these skewers without charcoal smoke?

Absolutely. The creamy mint marinade tastes delicious on its own, and a little smoked paprika can add a smoky note.

5. Why is my chicken malai boti dry?

Overcooking or cutting the chicken into very small pieces can cause dryness. Use evenly sized pieces and check the internal temperature.

6. Can I use metal skewers in the air fryer?

Yes. Metal skewers are suitable if they fit inside your air fryer without touching the heating element or interfering with the basket.

7. Can I prepare malai boti ahead of time?

Yes. Marinate the chicken in advance and refrigerate it. For the best texture, air fry the skewers shortly before serving.

8. What dipping sauce goes best with malai boti?

Mint yogurt chutney is a classic choice because its fresh, tangy flavor balances the rich cream-based marinade.

Final Thoughts

Air Fryer Malai Boti Skewers with Mint Smoke bring creamy, herb-filled flavor and a delicious smoky finish to a simple homemade chicken dinner. The yogurt and cream marinade coats every piece, while the air fryer creates beautifully browned edges without deep frying.

Serve these skewers with warm naan, fresh salad, and mint chutney for a satisfying meal. You can also customize the spice level, add vegetables, or skip the charcoal smoke when you want a quicker version.

Make these tender chicken bites for your next family dinner or gathering, and enjoy a restaurant-inspired meal right at home!

Air Fryer Stuffed Mexican Fajita Chicken Breasts

Air Fryer Stuffed Mexican Fajita Chicken Breasts

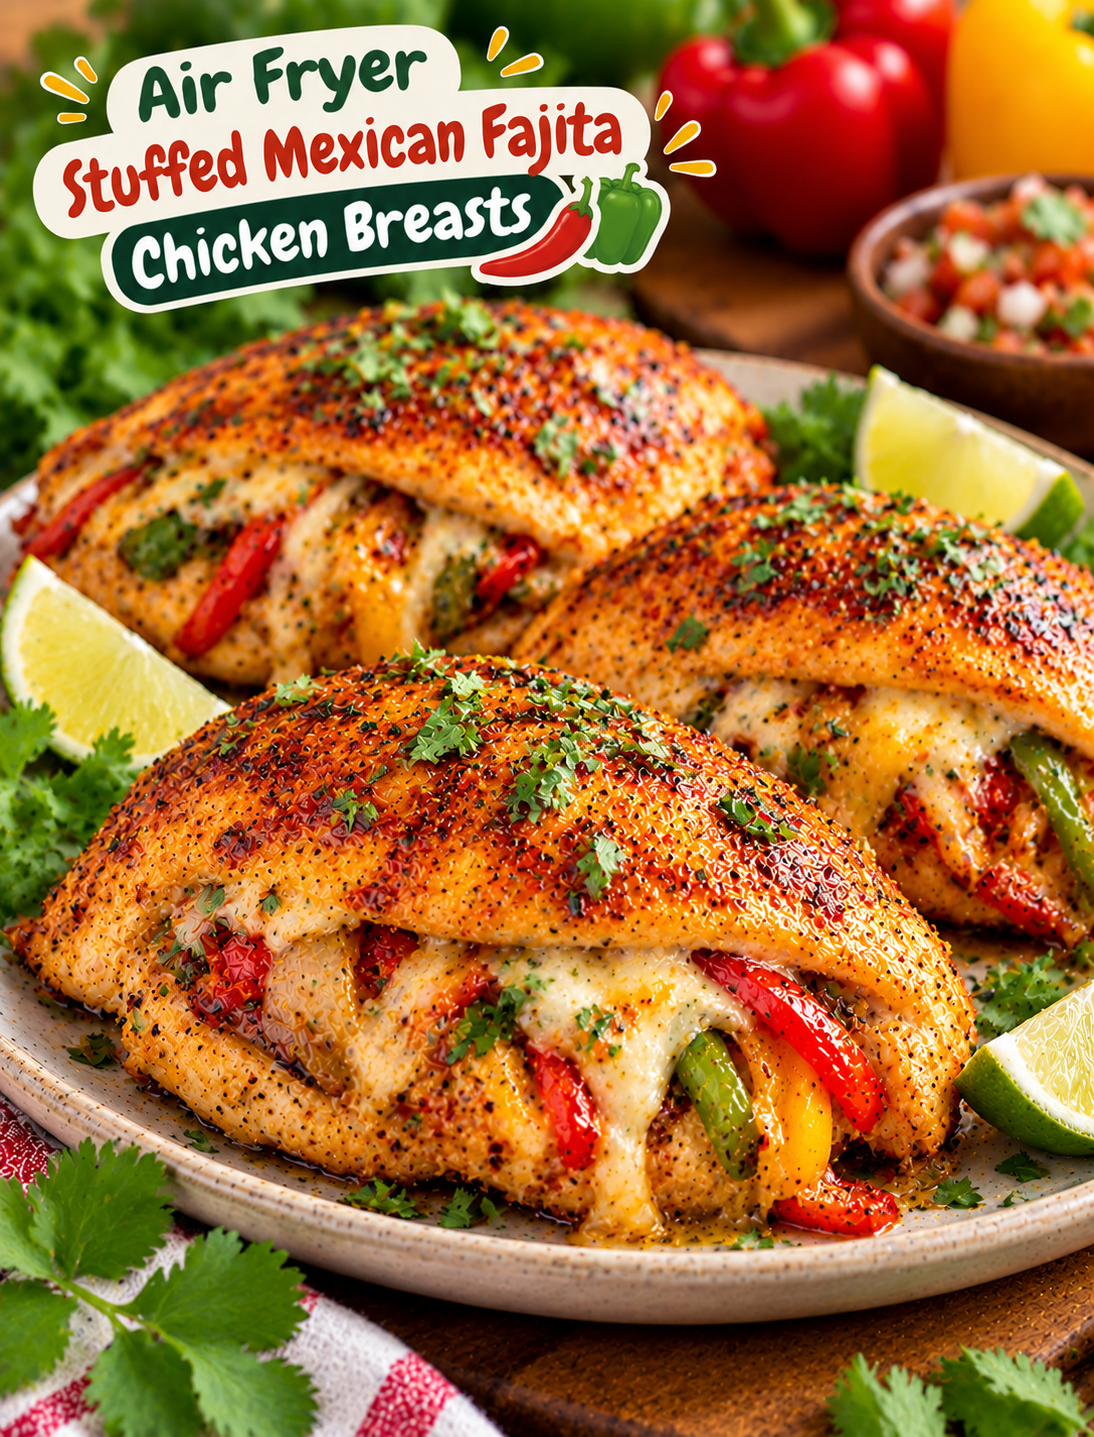
Want a chicken dinner that is juicy, cheesy, and packed with bold Mexican-inspired flavors? These Air Fryer Stuffed Mexican Fajita Chicken Breasts are a delicious way to turn simple chicken into a satisfying family meal. Each chicken breast is filled with colorful bell peppers, tender onions, melted cheese, and flavorful fajita seasoning.

The air fryer cooks the chicken until the outside is lightly golden while keeping the inside tender and juicy. The colorful vegetable filling adds a sweet, savory flavor, while melted Monterey Jack cheese brings everything together.

You do not need complicated ingredients or a long cooking process to make this recipe. A few fresh vegetables, boneless chicken breasts, cheese, and a simple seasoning blend are all you need.

These stuffed chicken breasts are perfect for busy weeknight dinners, weekend family meals, or meal prep. Serve them with Mexican rice, roasted vegetables, black beans, or a fresh avocado salad for a complete dinner.

If you enjoy cheesy chicken recipes with bold seasoning, this air fryer meal is a great addition to your dinner collection.

Why You Will Love This Recipe

  • Packed with flavor: Fajita seasoning, garlic, bell peppers, and onions give the chicken a delicious Tex-Mex flavor.
  • Cheesy filling: Melted Monterey Jack cheese creates a creamy center that pairs perfectly with the seasoned vegetables.
  • Juicy chicken: The air fryer cooks the chicken quickly while helping it retain moisture.
  • Colorful ingredients: Red, green, and yellow bell peppers make the filling look fresh and appetizing.
  • Easy preparation: Simple ingredients and straightforward steps make this recipe beginner-friendly.
  • Perfect family dinner: Each chicken breast makes a satisfying individual serving.
  • Customizable: Adjust the spice level, cheese, and vegetables to match your family’s taste.

Ingredients You Will Need

You only need a handful of everyday ingredients to make these stuffed chicken breasts. Fresh vegetables and good-quality cheese create the best filling.

Main Ingredients

  1. Boneless, skinless chicken breasts – 4 medium: Choose chicken breasts of similar size and thickness so they cook evenly.
  2. Red bell pepper – ½ cup: Adds natural sweetness and bright color to the filling.
  3. Green bell pepper – ½ cup: Provides a slightly earthy flavor that pairs well with fajita seasoning.
  4. Yellow bell pepper – ½ cup: Adds another layer of sweetness and color.
  5. Yellow onion – ½ medium: Creates a savory base for the vegetable filling.
  6. Monterey Jack cheese – 1 cup, shredded: Melts smoothly and gives the chicken a creamy, cheesy center.
  7. Olive oil – 1 tablespoon: Helps soften the vegetables and keeps the chicken seasoning moist.
  8. Fajita seasoning – 2 teaspoons: Adds classic Mexican-inspired flavors with chili, cumin, garlic, and paprika.
  9. Garlic powder – ½ teaspoon: Enhances the savory flavor of the chicken.
  10. Smoked paprika – ½ teaspoon: Adds a mild smoky taste and warm color.
  11. Black pepper – ¼ teaspoon: Adds a gentle peppery finish.
  12. Salt – ½ teaspoon, or to taste: Enhances the chicken and vegetable flavors.

Optional Ingredients

  • ¼ teaspoon cayenne pepper for extra heat
  • 2 tablespoons chopped fresh cilantro
  • 2 tablespoons sliced jalapeños
  • ½ teaspoon ground cumin
  • Fresh lime wedges for serving
  • A little shredded cheddar cheese for extra richness

Ingredient tip: Monterey Jack melts smoothly, but you can also use a Mexican cheese blend, cheddar, or pepper Jack.

Kitchen Tools You Need

Gather these kitchen tools before starting:

  • Air fryer
  • Sharp kitchen knife
  • Cutting board
  • Large mixing bowl
  • Small skillet
  • Measuring cups and spoons
  • Kitchen tongs
  • Toothpicks
  • Meat thermometer
  • Small spoon

A digital meat thermometer is especially helpful for checking the chicken’s internal temperature.

How to Make Air Fryer Stuffed Mexican Fajita Chicken Breasts

Follow these easy steps to prepare juicy chicken breasts filled with seasoned peppers, onions, and melted cheese.

Step 1: Prepare the Chicken Breasts

Place the chicken breasts on a clean cutting board and pat them dry with paper towels.

Using a sharp knife, carefully cut a pocket horizontally into the thickest side of each chicken breast. Keep the opposite side and edges intact so the filling stays inside.

Avoid cutting all the way through the chicken.

If the breasts are very thick, gently flatten the thicker areas around the pocket to help them cook more evenly.

Step 2: Prepare the Fajita Vegetables

Wash the red, green, and yellow bell peppers and remove their seeds.

Slice the peppers into thin strips, then cut the strips into small pieces.

Peel the yellow onion and chop it into small pieces.

Keep the vegetables similar in size so they cook evenly and fit easily inside the chicken pockets.

Step 3: Cook the Vegetable Filling

Heat olive oil in a small skillet over medium heat.

Add the chopped bell peppers and onions.

Cook for approximately 4–5 minutes, stirring occasionally, until the vegetables soften slightly.

Add a little fajita seasoning and garlic powder. Stir until the vegetables are evenly coated.

Remove the skillet from the heat and allow the vegetables to cool for a few minutes before adding the cheese.

Helpful tip: Do not cook the vegetables until mushy. They will continue cooking inside the chicken during air frying.

Step 4: Add the Cheese

Transfer the cooled vegetable mixture to a bowl.

Add the shredded Monterey Jack cheese and stir gently.

Mix until the cheese is distributed throughout the peppers and onions.

Reserve a small amount of cheese if you want to add extra on top of the chicken near the end of cooking.

Step 5: Season the Chicken

In a small bowl, combine the remaining fajita seasoning, smoked paprika, black pepper, salt, and a little olive oil.

Rub the mixture over the outside of each chicken breast.

Make sure the seasoning covers both sides and the edges.

Avoid putting too much seasoning inside the pocket because the filling already contains fajita spices.

Step 6: Stuff the Chicken Breasts

Carefully spoon the pepper, onion, and cheese mixture into each chicken pocket.

Fill each breast evenly, but do not overstuff it.

Leave enough room around the opening so the filling does not spill out during cooking.

Secure the opening with one or two toothpicks if needed.

Repeat with the remaining chicken breasts.

Step 7: Preheat the Air Fryer

Preheat your air fryer to 370°F (188°C) for approximately 3 minutes if your model recommends preheating.

Lightly coat the air fryer basket with a suitable cooking spray.

Make sure the basket is clean and dry before adding the chicken.

Step 8: Arrange the Stuffed Chicken

Place the stuffed chicken breasts in the air fryer basket in a single layer.

Keep the pocket openings facing upward when possible.

Leave some space between the chicken pieces so hot air can circulate properly.

If your air fryer basket is small, cook the chicken in batches rather than overcrowding it.

Step 9: Air Fry Until Fully Cooked

Air fry at 370°F (188°C) for approximately 18–22 minutes.

Cooking time depends on the thickness of the chicken breasts and your air fryer model.

Start checking the chicken around the 18-minute mark.

Insert a meat thermometer into the thickest part of the chicken without touching the filling or basket. The chicken must reach an internal temperature of 165°F (74°C).

If the chicken needs more time, continue cooking in short intervals until it reaches a safe temperature.

Step 10: Add Extra Cheese and Finish

If you reserved some shredded cheese, sprinkle it over the chicken during the final 1–2 minutes of cooking.

Allow the cheese to melt before removing the chicken from the air fryer.

Carefully transfer the cooked chicken to a clean serving plate.

Remove all toothpicks before serving.

Step 11: Rest and Serve

Let the chicken rest for approximately 3–5 minutes.

This short resting period helps the juices settle inside the meat.

Garnish with chopped fresh cilantro and a squeeze of fresh lime juice.

Serve warm with Mexican rice, black beans, roasted vegetables, or avocado salad.

Air Fryer Cooking Time and Temperature

Use this cooking guide as a starting point for your stuffed chicken breasts.

Cooking Detail Recommendation
Temperature 370°F (188°C)
Preparation Time 15 minutes
Vegetable Cooking Time 4–5 minutes
Air Fryer Cooking Time 18–22 minutes
Resting Time 3–5 minutes
Total Time Approximately 40–45 minutes
Serving Size 4 servings
Safe Internal Temperature 165°F (74°C)

Cooking tip: Chicken breast thickness affects cooking time. Always use a meat thermometer to confirm that the thickest part reaches 165°F before serving.

Expert Tips for the Best Results

Use these simple techniques to get juicy chicken and a flavorful filling.

  • Choose similar-sized chicken breasts: Similar thickness helps all four pieces cook more evenly.
  • Do not cut through the chicken: Leave the sides and bottom intact to create a pocket.
  • Cook the vegetables first: Lightly sautéing the peppers and onions removes excess moisture and improves their flavor.
  • Cool the filling: Allow the vegetable mixture to cool slightly before adding cheese and stuffing the chicken.
  • Avoid overfilling: Too much filling can spill out during cooking.
  • Secure the opening: Toothpicks help hold the pocket together while the chicken cooks.
  • Leave space in the basket: Proper air circulation helps the chicken cook evenly.
  • Check the temperature: Use a digital thermometer instead of guessing when the chicken is done.
  • Rest before slicing: A few minutes of resting helps keep the chicken juicy.

Variations and Substitutions

You can easily customize this recipe with different cheeses, vegetables, and seasonings.

1. Spicy Mexican Stuffed Chicken

Add sliced jalapeños and ¼ teaspoon of cayenne pepper to the vegetable filling. Pepper Jack cheese also gives the chicken a stronger spicy flavor.

2. Cheesy Fajita Chicken

Replace Monterey Jack with a Mexican cheese blend or shredded cheddar. Add a little extra cheese during the final minutes of cooking.

3. Creamy Fajita Chicken

Mix two tablespoons of softened cream cheese into the cooled vegetable filling. This creates a thicker, creamier center.

4. Chicken with Corn and Black Beans

Add two tablespoons of drained black beans and two tablespoons of corn to the vegetable mixture. This creates a heartier Tex-Mex filling.

5. Low-Carb Fajita Chicken

Keep the chicken, vegetables, cheese, and seasoning the same. Serve with cauliflower rice or a fresh green salad instead of traditional rice.

6. Mild Family-Friendly Version

Use mild fajita seasoning and skip the jalapeños and cayenne pepper. Monterey Jack cheese provides a creamy flavor without adding heat.

What to Serve with Stuffed Mexican Fajita Chicken Breasts

These cheesy chicken breasts pair well with many simple side dishes.

  • Mexican rice: Adds a flavorful and satisfying side to the seasoned chicken.
  • Black beans: Provide a hearty side with a mild earthy flavor.
  • Cilantro lime rice: Fresh lime and cilantro complement the fajita seasoning.
  • Avocado salad: Creamy avocado balances the warm spices.
  • Roasted vegetables: Serve with zucchini, broccoli, or carrots.
  • Fresh salsa: Tomato salsa adds a fresh and tangy finish.
  • Cauliflower rice: A lighter alternative to traditional rice.

For a complete dinner, serve one stuffed chicken breast with cilantro lime rice, black beans, and fresh salsa.

How to Store and Reheat

Proper storage helps maintain the flavor and quality of leftover stuffed chicken.

Refrigeration

Allow the cooked chicken to cool slightly.

Place the leftovers in an airtight container and refrigerate within 2 hours of cooking.

Store in the refrigerator for up to 3–4 days.

Reheating in the Air Fryer

Place the refrigerated chicken breast in an air fryer-safe dish.

Reheat at 325°F (163°C) for approximately 5–8 minutes, depending on its thickness.

Check the center with a meat thermometer and make sure the reheated chicken reaches 165°F.

Reheating in the Microwave

Place one chicken breast on a microwave-safe plate.

Cover loosely and heat in short intervals until the center is hot.

Check that the internal temperature reaches 165°F before serving.

Can You Freeze Them?

Yes. Allow the cooked chicken breasts to cool, then wrap each piece individually and place them in a freezer-safe container.

Freeze for up to 2–3 months for best quality.

Thaw overnight in the refrigerator before reheating.

Common Mistakes to Avoid

Avoid these mistakes to get better results from your air fryer.

  1. Cutting through the chicken: A complete cut can cause the filling to fall out.
  2. Using too much filling: Overstuffed pockets may open during cooking.
  3. Adding hot vegetables to the cheese: Let the filling cool slightly before mixing in the cheese.
  4. Using oversized pepper pieces: Small pieces fit better inside the chicken pockets.
  5. Overcrowding the air fryer: Crowded chicken breasts may cook unevenly.
  6. Skipping the thermometer: The chicken must reach 165°F for safe eating.
  7. Cutting immediately: Rest the chicken before slicing to help retain moisture.
  8. Forgetting toothpicks: Secure loose pocket openings when needed and remove all toothpicks before serving.

Frequently Asked Questions

1. How long do stuffed chicken breasts take in an air fryer?

They generally take 18–22 minutes at 370°F, depending on the thickness of the chicken.

2. What temperature should stuffed chicken breasts reach?

The thickest part of the chicken must reach 165°F (74°C) for food safety.

3. Can I prepare stuffed chicken breasts ahead of time?

Yes. Prepare and refrigerate the stuffed chicken in a covered container, then cook it within 24 hours.

4. What cheese works best for Mexican stuffed chicken?

Monterey Jack, Pepper Jack, cheddar, and Mexican cheese blends all work well.

5. How do I keep the filling from falling out?

Avoid overfilling the pockets and secure the openings with toothpicks before air frying.

6. Can I use frozen chicken breasts?

Thaw the chicken completely in the refrigerator before cutting pockets and adding the filling.

7. Can I use different vegetables in the filling?

Yes. Corn, black beans, zucchini, and jalapeños are tasty additions when chopped into small pieces.

8. What should I serve with Mexican fajita chicken?

Mexican rice, black beans, avocado salad, cilantro lime rice, and fresh salsa are excellent side dishes.

Final Thoughts

These Air Fryer Stuffed Mexican Fajita Chicken Breasts are a delicious way to make an ordinary chicken dinner more exciting. Juicy chicken, colorful peppers, tender onions, melted cheese, and bold fajita seasoning create a flavorful meal in every serving.

The recipe is easy to customize with spicy jalapeños, extra cheese, corn, or black beans. You can also serve it with rice, roasted vegetables, or fresh avocado salad for a complete family dinner.

For the best results, avoid overfilling the chicken, leave enough space in the air fryer basket, and always check the internal temperature before serving.

If you try this recipe, let us know in the comments: Would you add extra cheese, spicy jalapeños, or both?


Air Fryer Tandoori Butter Chicken Thighs

Air Fryer Tandoori Butter Chicken Thighs

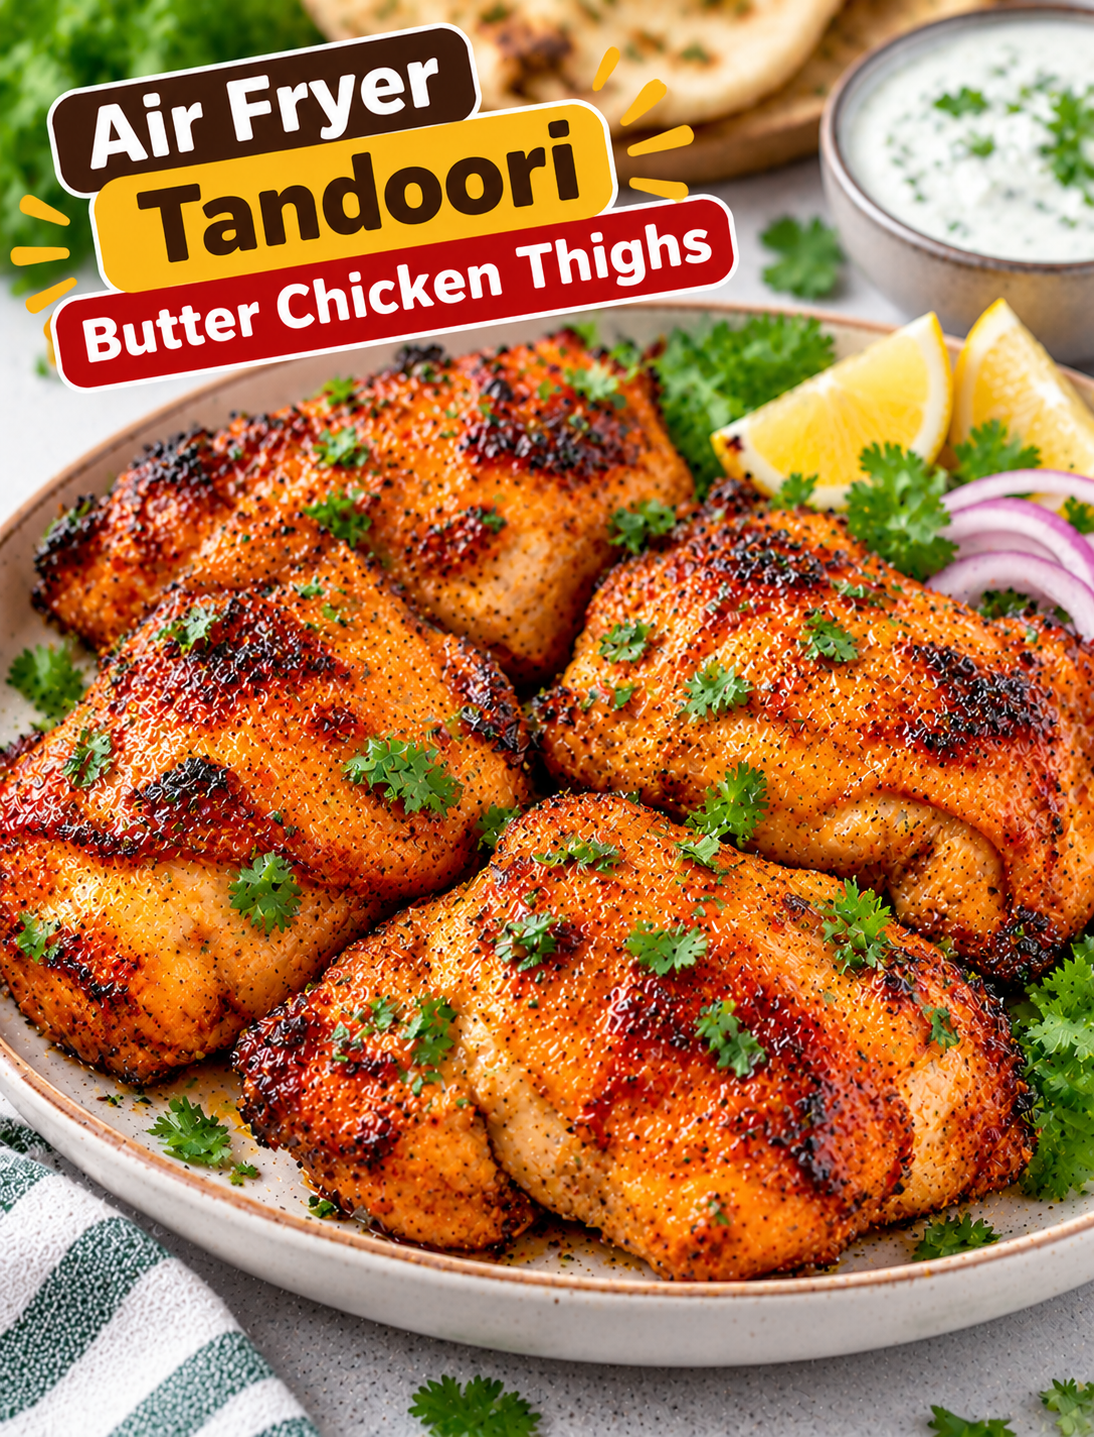
These Air Fryer Tandoori Butter Chicken Thighs bring bold Indian-inspired flavor to your dinner table with tender chicken, smoky spices, a creamy yogurt marinade, and a rich buttery finish. The air fryer helps the outside develop a deliciously roasted coating while keeping the inside juicy when cooked properly.

This recipe is perfect for busy weeknights, weekend family dinners, or anyone who enjoys restaurant-style tandoori chicken without needing a clay oven. The marinade uses easy-to-find ingredients, and the air fryer keeps cleanup simple. Serve the chicken with basmati rice, warm naan, cucumber raita, or a fresh salad for a satisfying meal.

Why You’ll Love This Recipe

  • Bold tandoori flavor: Garam masala, cumin, coriander, paprika, garlic, and ginger create a warm, savory coating.

  • Juicy chicken thighs: The natural fat in chicken thighs helps keep the meat moist during air frying.

  • Creamy butter finish: A little melted butter adds richness without making the marinade overly heavy.

  • Easy preparation: Mix the marinade, coat the chicken, and let the air fryer do most of the work.

  • Flexible ingredients: Use bone-in or boneless thighs with suitable cooking-time adjustments.

  • Great for meal prep: Pair the cooked chicken with rice and vegetables for easy lunches throughout the week.

Ingredients You’ll Need

The following ingredients make approximately four servings. For the best flavor, use plain yogurt and freshly ground spices when available.

  • 2 pounds chicken thighs: Boneless, skinless thighs cook relatively quickly, while bone-in thighs offer a deeper roasted flavor and need more time.

  • ½ cup plain Greek yogurt: Helps the spices cling to the chicken and adds a tangy flavor.

  • 2 tablespoons melted butter: Adds richness and helps create a flavorful finish.

  • 1 tablespoon lemon juice: Brightens the marinade and balances the buttery taste.

  • 1 tablespoon neutral cooking oil: Helps coat the chicken and supports browning.

  • 1 tablespoon ginger-garlic paste: Adds the classic aromatic base found in many tandoori-style marinades.

  • 1 teaspoon garam masala: Provides a warm blend of spices.

  • 1 teaspoon ground cumin: Adds earthy, savory flavor.

  • 1 teaspoon ground coriander: Brings a mild citrus-like note to the seasoning.

  • 1 teaspoon paprika: Gives the chicken a deep red color and gentle pepper flavor.

  • ½ teaspoon turmeric: Adds earthy flavor and a golden tone.

  • ½ teaspoon Kashmiri chili powder or mild chili powder: Provides color and adjustable heat.

  • ¼ teaspoon cayenne pepper, optional: Use for a hotter result.

  • ¾ teaspoon salt, or to taste: Enhances the flavor of the chicken and spices.

  • 1 tablespoon chopped fresh cilantro: Adds freshness before serving.

  • Lemon wedges: Serve alongside the chicken for extra brightness.

Ingredient tip: Kashmiri chili powder is often used for its vibrant color and moderate heat. If you cannot find it, paprika with a small amount of cayenne is a practical substitute.

How to Make Air Fryer Tandoori Butter Chicken Thighs

Step 1: Prepare the Chicken

Pat the chicken thighs dry with paper towels to remove excess surface moisture. Trim away large pieces of excess fat, but leave enough natural fat to help the meat stay juicy.

If you are using large boneless thighs, spread them out so they have a similar thickness. This helps them cook more evenly. Keep bone-in thighs intact and allow extra cooking time.

Place the prepared chicken in a clean mixing bowl or a shallow dish. Drying the surface first helps the marinade stick instead of sliding off.

Step 2: Mix the Tandoori Marinade

Add the Greek yogurt, melted butter, lemon juice, cooking oil, ginger-garlic paste, garam masala, cumin, coriander, paprika, turmeric, chili powder, cayenne if using, and salt to a bowl.

Stir until the ingredients form a smooth, evenly colored marinade. Taste a small amount before adding the raw chicken and adjust the salt or spice level if needed.

The yogurt provides a tangy base, while the spices build the warm, roasted flavor associated with tandoori-style chicken. The butter adds richness, so a small amount is enough.

Step 3: Coat and Marinate the Chicken

Add the chicken thighs to the marinade and turn each piece until thoroughly coated. Gently work the marinade into any folds in the meat so the seasoning covers the surface.

Cover the bowl and refrigerate for at least 30 minutes. For a stronger flavor, marinate for 2–4 hours.

You can marinate the chicken overnight if needed, but keep it refrigerated and avoid extending the time unnecessarily because the lemon juice can affect the texture. Never leave raw chicken at room temperature to marinate.

Step 4: Preheat the Air Fryer

Preheat your air fryer to 380°F for about 3–5 minutes, following the appliance manufacturer’s instructions.

Lightly oil the air fryer basket if your model requires it. Avoid using aerosol cooking sprays that may damage some nonstick coatings; use a suitable oil applied with a brush or mister instead.

Lift each thigh from the marinade and allow excess marinade to drip back into the bowl. A light coating is useful, but thick pools of yogurt marinade can drip, smoke, or prevent the chicken from browning evenly.

Step 5: Arrange the Chicken in the Basket

Place the thighs in a single layer with space between the pieces. Do not stack them or crowd the basket, because hot air needs room to circulate.

Cook boneless, skinless thighs at 380°F for approximately 16–22 minutes, turning them halfway through. Cooking time varies with thickness, starting temperature, air fryer design, and the number of pieces.

For bone-in thighs, allow approximately 22–30 minutes or longer, checking the internal temperature rather than relying on time alone. If your air fryer is small, cook in batches to encourage even browning.

Step 6: Check Doneness and Add the Butter Finish

Insert an instant-read food thermometer into the thickest part of each thigh, avoiding the bone when present. Chicken is safe when it reaches an internal temperature of 165°F, according to USDA food-safety guidance.

If a piece has not reached 165°F, continue cooking in short intervals and check again. Do not judge doneness by color alone.

For a richer finish, brush the cooked chicken lightly with a little additional melted butter mixed with a pinch of garam masala. If you prefer a more roasted exterior, cook for another 1–2 minutes while watching closely to prevent the yogurt coating from burning.

Step 7: Rest, Garnish, and Serve

Transfer the cooked chicken to a clean plate and let it rest for about 3–5 minutes. Resting allows the juices to settle and makes the meat easier to serve.

Sprinkle with chopped cilantro and add fresh lemon wedges. Serve immediately with basmati rice, naan, roasted vegetables, or cucumber raita.

For a complete dinner, spoon any clean, fully cooked juices over the chicken. Do not reuse marinade that has touched raw chicken unless it is thoroughly cooked first.

Tips for the Best Results

  • Use similar-sized thighs: Pieces of similar thickness finish cooking at a more consistent time.

  • Avoid excess marinade: Too much yogurt mixture can drip into the basket and interfere with browning.

  • Do not overcrowd: Cook in batches when necessary to keep the chicken from steaming.

  • Adjust the heat: Reduce the chili powder for mild flavor or add cayenne for extra spice.

  • Check each piece: The thickest thigh may take longer than smaller pieces, so check temperatures individually.

  • Use a thermometer: Reaching 165°F is more reliable than judging doneness by appearance.

  • Clean the basket carefully: Yogurt and spice residue can stick, so allow the appliance to cool before cleaning according to its instructions.

Variations and Substitutions

Boneless or Bone-In Chicken

Boneless thighs are convenient for quick weeknight meals and easy slicing. Bone-in thighs can be more forgiving and flavorful, but they need additional cooking time.

Make It Spicier

Add extra cayenne, hot chili powder, or a little finely chopped green chili to the marinade. Increase the heat gradually so the spices do not overpower the yogurt and butter.

Make It Dairy-Free

Use an unsweetened, plain dairy-free yogurt that works well in marinades and replace the butter with a dairy-free butter alternative or a little extra oil. The texture and flavor may differ slightly from the original recipe.

Add a Smoky Flavor

A small amount of smoked paprika can add a smoky note. You can also finish the chicken with a squeeze of lemon and a sprinkle of garam masala to bring out the roasted spice flavor.

Try Chicken Breasts

Chicken breasts can work with the same marinade, but they are leaner than thighs and may dry out if overcooked. Use similarly sized pieces and check the internal temperature early.

What to Serve With Tandoori Butter Chicken Thighs

Pair this chicken with simple sides that balance its rich butter flavor and warm spices.

  • Basmati rice: Fluffy rice absorbs the flavorful juices and makes the meal more filling.

  • Garlic naan: Warm naan is ideal for scooping up the yogurt-based marinade and buttery juices.

  • Cucumber raita: Cooling yogurt, cucumber, and mint help balance the chili and spices.

  • Roasted vegetables: Cauliflower, bell peppers, onions, and zucchini complement the tandoori seasoning.

  • Fresh salad: Cucumber, tomatoes, red onion, cilantro, and lemon create a crisp, refreshing side.

  • Lentil dal: A bowl of mild lentils adds a comforting, fiber-rich element to the meal.

For a simple weeknight plate, serve one chicken thigh with rice, roasted vegetables, and a spoonful of raita. For a family-style dinner, place the chicken on a platter with naan, lemon wedges, and fresh herbs.

Storage and Reheating

Allow leftover chicken to cool slightly, then refrigerate it in a shallow, airtight container within two hours of cooking. Store it in the refrigerator for 3–4 days.

To freeze, place the cooled chicken in a freezer-safe container or tightly sealed freezer bag. For best quality, use it within about 2–3 months. Thaw frozen leftovers in the refrigerator before reheating.

Reheat the chicken in an air fryer at 350°F for approximately 4–8 minutes, depending on thickness, until the center reaches 165°F. Add a small amount of butter if the surface looks dry, and check the temperature before serving.

Avoid reheating the chicken repeatedly, as each cycle can reduce its quality. Discard leftovers that have been left at room temperature for more than two hours, or one hour when the temperature is above 90°F.

Frequently Asked Questions

1. Can I use frozen chicken thighs?

Thaw the chicken completely in the refrigerator before marinating for more even cooking and better flavor. Do not marinate frozen chicken on the counter.

2. What temperature is best for air fryer tandoori chicken?

Start at 380°F for boneless thighs, then verify doneness with a thermometer. The exact cooking time depends on thickness and your air fryer.

3. How long should I marinate the chicken?

Marinate for at least 30 minutes, or 2–4 hours for a deeper flavor. Keep the chicken refrigerated throughout marinating.

4. Can I make this recipe without yogurt?

Yes, but the flavor and texture will change. Use a suitable plain dairy-free yogurt or another marinade designed for chicken if you need to avoid dairy.

5. How do I stop the yogurt marinade from burning?

Shake off excess marinade before air frying and avoid overly high temperatures. Check the chicken frequently near the end of cooking.

6. Is this recipe spicy?

It has a warm, mildly spicy flavor when made with paprika and a modest amount of chili powder. Omit the cayenne and reduce the chili powder for a milder version.

7. Can I prepare the chicken ahead of time?

Yes, mix the marinade and coat the chicken up to a day ahead, keeping it refrigerated. Cook it when ready and check that every piece reaches 165°F.

8. Can I cook the chicken in the oven instead?

Yes, arrange the marinated thighs on a lined baking tray and bake at 400°F until the thickest part reaches 165°F. Cooking time will vary by size and whether the thighs are bone-in.

Final Thoughts

Air Fryer Tandoori Butter Chicken Thighs are a practical way to enjoy Indian-inspired flavors at home without complicated equipment. The yogurt marinade, fragrant spices, and buttery finish create a satisfying meal with simple preparation and easy cleanup.

Serve the chicken with rice, naan, or fresh vegetables, and adjust the chili to suit your family’s taste. For the best results, avoid overcrowding the basket, keep the chicken refrigerated while marinating, and use a thermometer to confirm that every thigh reaches a safe internal temperature of 165°F.