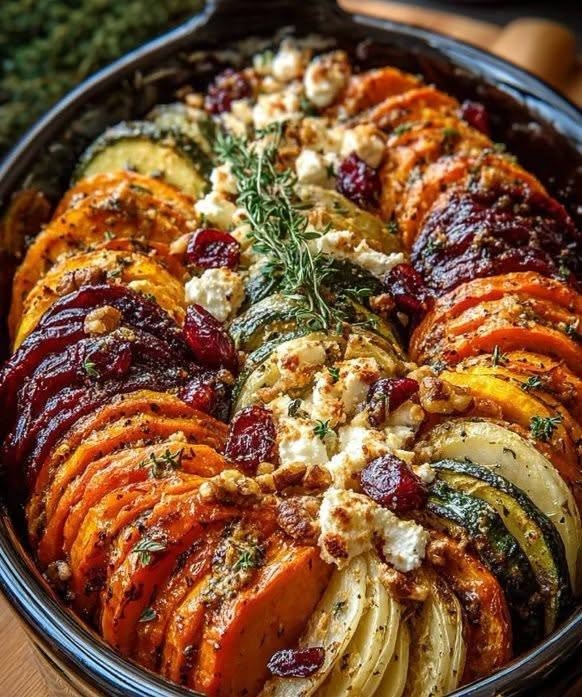
Layered Sweet Potato, Squash & Parsnip Bake with Cranberry-Honey Drizzle

Layered Sweet Potato, Squash & Parsnip Bake with Cranberry-Honey Drizzle

Description

Layered Sweet Potato, Squash & Parsnip Bake with Cranberry-Honey Drizzle is a beautiful, comforting side dish that brings together the best flavors of autumn and the holiday season. Thinly sliced sweet potatoes, creamy butternut squash, and earthy parsnips are arranged in layers, seasoned with fragrant herbs and roasted until tender and beautifully caramelized. The finished bake is topped with a glossy cranberry-honey drizzle that adds a bright, tangy sweetness to every bite.

This recipe is designed to be both impressive and practical. Instead of making several separate vegetable dishes, you can arrange three seasonal vegetables in one beautiful casserole. The combination of textures is especially satisfying: sweet potatoes become creamy and tender, squash develops a buttery richness, and parsnips add a subtle earthy sweetness.

The cranberry-honey drizzle is what makes this dish particularly special. Fresh or frozen cranberries are simmered with honey, orange juice, and a touch of cinnamon until they become a vibrant, slightly tart sauce. Drizzled over the warm vegetables, it provides the perfect contrast to the savory roasted layers.

This bake is ideal for Thanksgiving, Christmas, autumn dinner parties, Sunday roasts, or any meal when you want a vegetable side that looks as good as it tastes.

Recipe Details

Prep Time: 30 minutes
Cook Time: 55–65 minutes
Total Time: About 1 hour 30 minutes
Servings: 8
Course: Side Dish
Cuisine: American-inspired / Seasonal
Difficulty: Moderate

Ingredients

For the Vegetable Layers

  • 2 large sweet potatoes, peeled
  • 1 medium butternut squash, peeled and seeded
  • 3 medium parsnips, peeled
  • 2 tablespoons extra-virgin olive oil
  • 2 tablespoons melted unsalted butter
  • 2 garlic cloves, finely minced
  • 1 teaspoon dried thyme
  • 1 teaspoon dried rosemary
  • ½ teaspoon ground cinnamon
  • ½ teaspoon paprika
  • 1 teaspoon kosher salt
  • ½ teaspoon freshly ground black pepper

For the Cranberry-Honey Drizzle

  • 1 cup fresh or frozen cranberries
  • ⅓ cup honey
  • ¼ cup fresh orange juice
  • 1 teaspoon orange zest
  • 2 tablespoons water
  • ½ teaspoon ground cinnamon
  • Pinch of salt
  • 1 teaspoon fresh lemon juice

Optional Garnishes

  • 2 tablespoons chopped fresh parsley
  • 1 tablespoon fresh thyme leaves
  • 2 tablespoons toasted pecans
  • 1 tablespoon pumpkin seeds
  • Orange zest
  • A small drizzle of honey

Choosing the Vegetables

The success of this recipe depends partly on cutting the vegetables into similarly thin slices.

Sweet potatoes should be firm and relatively uniform in size. Choose potatoes without soft spots or visible damage.

For the squash, a medium butternut squash works particularly well because its naturally sweet flavor complements the cranberry drizzle. You can also use delicata squash, acorn squash, or another firm winter squash.

Parsnips provide a wonderful contrast. Their earthy, slightly nutty flavor becomes sweeter as they roast.

If possible, use vegetables with similar diameters. This makes the finished layers look more attractive and helps everything cook evenly.

Preparing the Vegetables

Preheat the oven to 400°F (200°C).

Lightly grease a 9×13-inch baking dish with butter or olive oil.

Peel the sweet potatoes and parsnips.

Cut the butternut squash in half lengthwise and remove the seeds. Carefully peel it using a sturdy vegetable peeler or sharp knife.

Using a mandoline slicer or sharp chef’s knife, slice all three vegetables into thin slices approximately ⅛ inch thick.

Uniform slices are important. If some pieces are very thick while others are extremely thin, the thinner vegetables may become overcooked before the thicker pieces are tender.

If using a mandoline, use the safety guard and work slowly.

Making the Herb Butter

Add the olive oil, melted butter, minced garlic, thyme, rosemary, cinnamon, paprika, salt, and black pepper to a small bowl.

Whisk until well combined.

The small amount of cinnamon is intentional. It should provide a warm background note rather than make the dish taste like dessert.

The garlic and herbs balance the natural sweetness of the root vegetables.

Layering the Vegetables

Arrange the vegetable slices in the prepared baking dish.

You can create neat rows by alternating sweet potato, squash, and parsnip slices. Another option is to arrange them in overlapping circular layers for a more elegant presentation.

Try to distribute the vegetables evenly so each serving contains all three varieties.

Once the layers are arranged, gently brush or drizzle the herb butter mixture over the vegetables.

Make sure the seasoning reaches between some of the slices.

Do not worry if the vegetables appear tightly packed. They will shrink slightly as they cook.

First Stage of Baking

Cover the baking dish tightly with aluminum foil.

Bake for approximately 30 minutes.

The foil traps steam, helping the vegetables become tender without drying out.

After 30 minutes, carefully remove the foil.

Return the uncovered dish to the oven and continue baking for another 20–30 minutes.

During this stage, the edges of the vegetables should begin to caramelize and turn golden brown.

If the top begins browning too quickly while the center is still firm, loosely cover the dish again with foil.

The vegetables are ready when a thin knife slides easily through the thickest pieces.

Preparing the Cranberry-Honey Drizzle

While the vegetables are baking, prepare the cranberry sauce.

Add the cranberries, honey, orange juice, orange zest, water, cinnamon, and salt to a small saucepan.

Place over medium heat.

Bring the mixture to a gentle simmer.

Cook for approximately 8–10 minutes, stirring occasionally.

The cranberries will begin to soften and burst, releasing their bright red color and juices.

Once the mixture has thickened slightly, remove the saucepan from the heat.

Stir in the fresh lemon juice.

The lemon juice is important because it balances the sweetness of the honey and gives the sauce a brighter flavor.

For a smoother drizzle, mash the cranberries gently with the back of a spoon.

For a rustic texture, leave some berries whole.

If the sauce becomes too thick, add 1–2 teaspoons of warm water until it reaches a spoonable consistency.

Finishing the Bake

Once the vegetables are completely tender and lightly caramelized, remove the baking dish from the oven.

Allow it to rest for approximately 10 minutes.

This short resting period helps the layers settle and makes the dish easier to serve.

Warm the cranberry-honey sauce slightly if it has cooled.

Drizzle about half of the sauce over the vegetables.

Reserve the remaining sauce for serving at the table.

Finish with fresh thyme leaves, parsley, toasted pecans, pumpkin seeds, or a little orange zest if desired.

Serve warm.

Why This Recipe Works

This recipe works because it balances several different flavors and textures.

Sweet potatoes bring creamy richness and natural sweetness.

Butternut squash contributes a buttery texture and delicate sweetness.

Parsnips add earthy depth and a subtle nuttiness.

The herb butter introduces savory notes from garlic, thyme, rosemary, and black pepper.

Then the cranberry-honey drizzle changes the dish completely. Cranberries contribute tartness, honey adds sweetness, and orange juice brings citrus brightness.

The result is not overly sweet. Instead, the dish moves between savory, earthy, sweet, tart, and aromatic flavors.

The layered presentation also makes ordinary vegetables feel special enough for a holiday table.

Tips for Perfect Results

Slice the Vegetables Evenly

Uniform slices are the most important detail. A mandoline can make this much easier.

Don’t Skip the Foil

The covered baking stage helps the vegetables steam and soften.

Finish Uncovered

Removing the foil allows the edges to caramelize and develop better flavor.

Don’t Over-Sweeten the Sauce

The vegetables are naturally sweet, so the cranberry sauce should remain slightly tart.

Taste Before Serving

Cranberries vary in acidity. Adjust the honey or lemon juice according to taste.

Let the Bake Rest

A short resting period helps the layers hold together when served.

Use Fresh Herbs

Fresh thyme or parsley added at the end gives the dish a brighter appearance and flavor.

Variations

Maple Cranberry Drizzle

Replace the honey with pure maple syrup for a deeper autumn flavor.

Orange Maple Sauce

Use maple syrup instead of honey and increase the orange zest slightly.

Balsamic Cranberry Drizzle

Add 1 teaspoon of balsamic vinegar to the cranberry sauce for extra complexity.

Goat Cheese Version

Crumble soft goat cheese over the finished vegetables. The tangy cheese pairs beautifully with the sweet and tart cranberry topping.

Feta Version

Add crumbled feta for a Mediterranean-inspired twist.

Nutty Holiday Version

Top with toasted pecans or walnuts for crunch.

Spiced Version

Add a tiny pinch of nutmeg or ground ginger to the vegetable seasoning.

Vegan Version

Replace the butter with additional olive oil and use maple syrup instead of honey.

Suggestions

This bake makes an excellent side dish for roasted meats and holiday dinners.

Serve it alongside:

  • Roast turkey
  • Herb-roasted chicken
  • Glazed ham
  • Roast beef
  • Pork tenderloin
  • Herb-crusted lamb
  • Baked salmon
  • Vegetarian grain dishes

For a vegetarian holiday meal, serve it with lentil loaf, wild rice pilaf, roasted Brussels sprouts, and a fresh green salad.

The cranberry-honey drizzle also pairs beautifully with roasted Brussels sprouts or green beans, so you can use a little extra sauce across the meal.

Make-Ahead Instructions

This recipe is excellent for entertaining because much of the preparation can be done ahead of time.

Peel and slice the vegetables up to 24 hours in advance.

Arrange them in an airtight container or covered baking dish and refrigerate.

Prepare the cranberry sauce up to 3 days ahead and store it in an airtight container in the refrigerator.

On the day of serving, bring the vegetables closer to room temperature while the oven preheats.

Add the herb butter mixture immediately before baking.

The cranberry sauce can be gently reheated in a saucepan or microwave.

Holiday Preparation Tips

If you’re making this recipe for Thanksgiving or Christmas, consider preparing the cranberry sauce several days ahead.

You can also slice the vegetables the night before.

Keep them covered and refrigerated.

About an hour before dinner, assemble the baking dish and start baking.

This allows you to focus on the main course while the vegetable side cooks.

For a beautiful holiday presentation, transfer the finished bake to a large serving platter and drizzle the cranberry sauce in thin ribbons rather than completely covering the vegetables.

This allows the colorful layers to remain visible.

Storage

Store leftovers in an airtight container in the refrigerator for up to 4 days.

Keep the cranberry sauce separately if possible.

Reheat individual portions in the microwave or place the entire baking dish in a 325°F oven until warmed through.

For best texture, cover the dish loosely with foil while reheating.

Remove the foil during the final few minutes if you want the edges to become slightly crisp again.

Can You Freeze This Bake?

The vegetable bake can technically be frozen, but the texture may become softer after thawing.

If freezing, allow the cooked vegetables to cool completely.

Transfer to a freezer-safe container and freeze for up to 2 months.

Freeze the cranberry sauce separately.

Thaw overnight in the refrigerator.

Reheat gently in a covered baking dish at 325°F until hot.

Add freshly prepared cranberry sauce and herbs just before serving.

For the best texture, however, this dish is recommended fresh or refrigerated rather than frozen.

Nutritional Information

Nutrition will vary depending on the exact vegetables, amount of butter, honey, and toppings used.

Approximate nutrition per serving:

Calories: 270–320
Protein: 4–5g
Carbohydrates: 45–50g
Fat: 9–12g
Fiber: 7–8g
Sugar: 18–22g
Sodium: Approximately 300–400mg

Using olive oil instead of butter or reducing the amount of honey can modify the nutritional profile.

Benefits of the Ingredients

Sweet potatoes provide fiber and naturally occurring carotenoids.

Butternut squash is rich in colorful plant compounds and contributes vitamin C and other nutrients.

Parsnips provide fiber and a naturally sweet, earthy flavor.

Cranberries contribute tartness and colorful plant compounds while allowing you to create a flavorful sauce without using a heavy cream-based topping.

Olive oil contributes monounsaturated fat, while herbs and garlic add plenty of flavor without requiring excessive salt.

Because the dish is based primarily on vegetables, it can be an excellent way to add variety and color to a holiday meal.

Frequently Asked Questions

Can I use frozen butternut squash?

Yes, but fresh squash generally provides better texture. If using frozen squash, thaw and drain it well before assembling the dish.

Can I make this without parsnips?

Absolutely. You can substitute carrots, rutabaga, or additional squash.

Can I use acorn squash?

Yes. Acorn squash works beautifully and adds a slightly nutty flavor.

Can I use maple syrup instead of honey?

Yes. Maple syrup is an excellent substitute and creates a delicious autumn-inspired flavor.

Can I make it vegan?

Yes. Replace the butter with olive oil and the honey with maple syrup.

Can I add cheese?

Absolutely. Goat cheese, feta, Parmesan, or Gruyère can all work well.

Can I make the cranberry sauce smoother?

Yes. After cooking, blend the sauce carefully until smooth and strain it through a fine-mesh sieve if desired.

Why is my bake watery?

Some vegetables naturally release water during cooking. Make sure the squash is not excessively wet and avoid overcrowding with additional vegetables.

How do I get more caramelization?

Bake uncovered for the final 25–30 minutes and avoid adding too much liquid to the vegetable layers.

Can I make this in a smaller dish?

Yes. Use a smaller baking dish for a half batch and reduce the cooking time slightly. Begin checking for tenderness earlier.
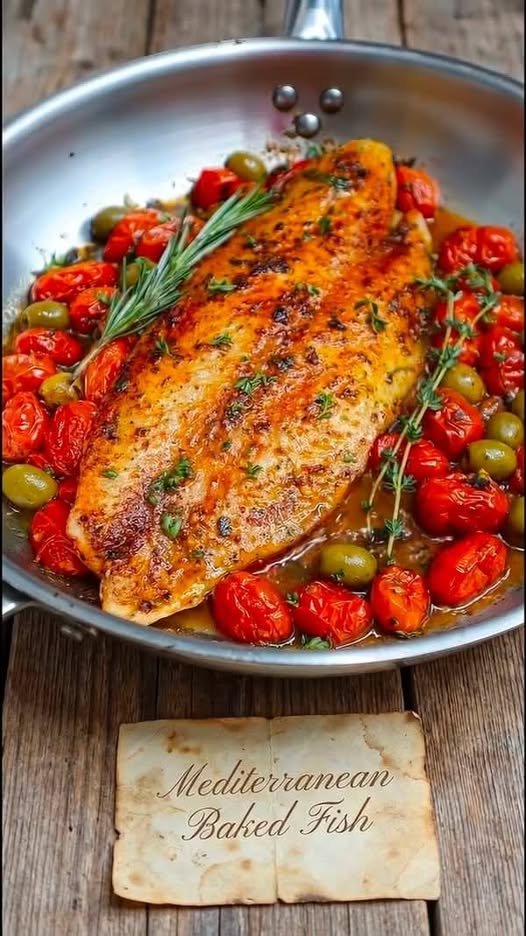
Mediterranean Baked Fish

Mediterranean Baked Fish

Description

Mediterranean Baked Fish is a fresh, colorful, and incredibly flavorful seafood dinner made with tender white fish, juicy tomatoes, garlic, lemon, olives, herbs, and extra-virgin olive oil. Everything is baked together in one dish, allowing the fish to absorb the delicious flavors of the Mediterranean-inspired sauce while remaining moist, flaky, and tender.

This easy recipe is perfect for busy weeknights because it requires minimal preparation and very little cleanup. The combination of bright lemon, aromatic garlic, sweet tomatoes, salty olives, and dried oregano creates a balanced flavor that makes simple white fish taste restaurant-worthy.

You can prepare this recipe with cod, haddock, tilapia, halibut, sea bass, pollock, or another firm white fish. The cooking time may vary depending on the thickness of the fillets, but the method remains simple.

Serve this Mediterranean Baked Fish with roasted potatoes, rice, couscous, quinoa, warm crusty bread, or a fresh Greek-style salad for a complete and satisfying meal.

Recipe Details

Prep Time: 15 minutes
Cook Time: 18–25 minutes
Total Time: About 40 minutes
Servings: 4
Course: Main Course
Cuisine: Mediterranean
Difficulty: Easy

Ingredients

For the Fish

  • 4 white fish fillets, about 5–6 ounces each
  • 2 tablespoons extra-virgin olive oil
  • 3 garlic cloves, finely minced
  • 1 teaspoon dried oregano
  • ½ teaspoon paprika
  • ½ teaspoon dried thyme
  • ½ teaspoon salt
  • ¼ teaspoon black pepper
  • Zest of 1 lemon
  • 1 tablespoon fresh lemon juice

For the Mediterranean Topping

  • 1½ cups cherry tomatoes, halved
  • ½ cup Kalamata olives, pitted and sliced
  • ½ small red onion, thinly sliced
  • 2 garlic cloves, minced
  • 1 tablespoon capers, optional
  • 2 tablespoons extra-virgin olive oil
  • 1 tablespoon fresh lemon juice
  • 1 teaspoon dried oregano
  • ½ teaspoon red pepper flakes, optional
  • 2 tablespoons chopped fresh parsley
  • 1 tablespoon chopped fresh basil
  • Salt and black pepper to taste

Optional Additions

  • ½ cup crumbled feta cheese
  • ¼ cup sun-dried tomatoes
  • 1 small zucchini, thinly sliced
  • 1 small bell pepper, sliced
  • Fresh dill
  • Lemon wedges
  • Extra fresh herbs for garnish

How to Make Mediterranean Baked Fish

Step 1: Prepare the Oven

Preheat your oven to 400°F (200°C).

Lightly grease a large baking dish with olive oil. You can also line the dish with parchment paper for easier cleanup.

If your fish has been refrigerated, take it out while the oven preheats. Pat each fillet thoroughly dry with paper towels.

Drying the fish is an important step. Excess moisture can cause the fish to steam instead of bake and can dilute the seasoning.

Arrange the fish fillets in a single layer in the baking dish.

Step 2: Season the Fish

In a small bowl, combine the olive oil, minced garlic, oregano, paprika, thyme, salt, black pepper, lemon zest, and lemon juice.

Stir until you have a fragrant herb and garlic mixture.

Brush the seasoning mixture generously over each fish fillet.

Make sure the garlic and herbs are distributed evenly across the fish.

Allow the fish to sit for about 5 minutes while you prepare the vegetables.

Step 3: Prepare the Mediterranean Vegetables

Add the halved cherry tomatoes, sliced red onion, Kalamata olives, minced garlic, and optional capers to a large bowl.

Add the olive oil, lemon juice, oregano, red pepper flakes, parsley, and basil.

Season lightly with salt and black pepper.

Gently toss everything together.

The tomatoes should be coated in olive oil and herbs, while the olives and onions should be evenly distributed.

Because Kalamata olives and capers are already salty, taste the mixture before adding a lot of additional salt.

Step 4: Arrange Everything in the Baking Dish

Scatter approximately two-thirds of the tomato mixture around the fish.

Spoon a small amount of the mixture directly over each fillet.

Keep the remaining topping aside for serving.

This creates two different textures: the vegetables that roast in the oven become tender and flavorful, while the reserved topping stays fresher and brighter.

For an extra-rich Mediterranean flavor, drizzle another teaspoon or two of olive oil over the vegetables.

Step 5: Bake the Fish

Place the baking dish in the preheated oven.

Bake for approximately 18–25 minutes, depending on the thickness of your fish.

Thin fillets may be ready closer to 15–18 minutes, while thicker pieces may need 20–25 minutes.

The fish is finished when it turns opaque in the center and flakes easily with a fork.

For food safety, the thickest part of the fish should reach an internal temperature of 145°F (63°C).

Avoid baking the fish for much longer than necessary. White fish is naturally lean and can become dry when overcooked.

Step 6: Add the Fresh Finish

Remove the baking dish from the oven and let the fish rest for 2–3 minutes.

Spoon the remaining fresh tomato and olive mixture over the fish.

Finish with fresh parsley, basil, dill, and a squeeze of lemon.

If using feta, sprinkle it over the warm fish just before serving.

The combination of warm roasted vegetables and fresh herbs creates a beautiful contrast.

Why This Recipe Works

Mediterranean cooking is all about allowing simple, fresh ingredients to work together.

The mild flavor of white fish provides the perfect base for bold ingredients such as garlic, lemon, oregano, olives, and tomatoes.

Tomatoes bring natural sweetness and acidity, while olives provide a salty, savory element. Garlic adds depth, lemon keeps the dish bright, and olive oil brings everything together.

The oven also allows the tomatoes to release their juices. Those juices mix with olive oil, lemon, garlic, and herbs to create a simple sauce that coats the fish.

Because the entire meal cooks in one baking dish, cleanup is easy and the flavors blend beautifully.

Choosing the Best Fish

Several types of fish work well for this recipe.

Cod

Cod is mild, flaky, and easy to find. It is one of the best choices for this recipe.

Haddock

Haddock has a slightly sweeter flavor and delicate texture.

Halibut

Halibut is thicker and meatier, making it excellent for a more substantial meal.

Sea Bass

Sea bass provides a rich, buttery texture that works beautifully with lemon and herbs.

Tilapia

Tilapia is affordable, mild, and cooks quickly. Watch it carefully because thinner fillets can overcook.

Pollock

Pollock is another budget-friendly option with a mild flavor.

Regardless of the fish you choose, cooking time should be adjusted according to thickness.

Tips for Perfect Mediterranean Baked Fish

Pat the Fish Dry

This helps the seasoning stick and prevents excess water from collecting in the baking dish.

Don’t Overcrowd the Dish

Give each fillet some space. Crowding can cause the fish and vegetables to steam instead of roast.

Use Fresh Lemon

Fresh lemon juice provides a brighter flavor than bottled lemon juice.

Don’t Overdo the Salt

Olives and capers already contain significant salt, so season carefully.

Check the Fish Early

Start checking thinner fillets around the 15-minute mark.

Use High-Quality Olive Oil

Extra-virgin olive oil is an important part of the flavor profile, so choose one you enjoy.

Add Fresh Herbs at the End

Parsley and basil taste brighter when added after baking.

Mediterranean Baked Fish Variations

Greek-Style Baked Fish

Add feta cheese, Kalamata olives, oregano, lemon, cucumber, and fresh parsley.

You can also add a spoonful of Greek yogurt on the side.

Italian-Style Baked Fish

Replace some of the oregano with Italian seasoning and add sun-dried tomatoes, fresh basil, and Parmesan.

Spicy Mediterranean Fish

Add extra red pepper flakes or sliced fresh chili peppers to the tomato mixture.

Garlic Butter Mediterranean Fish

Replace one tablespoon of olive oil with melted butter for a richer flavor.

Fish with Feta and Spinach

Add several handfuls of fresh spinach around the fish before baking. Finish with crumbled feta.

Fish with Zucchini

Add thinly sliced zucchini to the baking dish along with the tomatoes and onion.

Fish with Sun-Dried Tomatoes

Add chopped sun-dried tomatoes for a concentrated sweet and savory flavor.

Mediterranean Fish with Chickpeas

Add drained chickpeas to the baking dish for extra protein and texture. They absorb the delicious tomato and lemon juices.

What to Serve with Mediterranean Baked Fish

This dish pairs well with a variety of sides.

Lemon Herb Rice

Cook white or brown rice and finish it with lemon zest, parsley, olive oil, and a little black pepper.

Roasted Potatoes

Roast baby potatoes with olive oil, garlic, oregano, and lemon until golden and crispy.

Couscous

Fluffy couscous is one of the quickest side dishes and works especially well for soaking up the tomato juices.

Quinoa

Quinoa provides a nutritious base and makes the meal more filling.

Greek Salad

Combine cucumber, tomatoes, red onion, feta, olives, and oregano for a refreshing side.

Roasted Vegetables

Serve with zucchini, asparagus, broccoli, bell peppers, or green beans.

Crusty Bread

Warm crusty bread is perfect for soaking up the flavorful sauce left in the baking dish.

Make-Ahead Instructions

You can prepare the vegetables several hours in advance.

Combine the tomatoes, onion, olives, garlic, herbs, lemon juice, and olive oil in a bowl. Cover and refrigerate.

The fish can also be seasoned a few hours ahead of time. Keep it covered and refrigerated until ready to bake.

For the best texture, don’t leave the fish sitting in a highly acidic marinade for too long because lemon juice can begin changing the texture of the fish.

When ready to cook, assemble everything in the baking dish and bake according to the instructions.

Meal Prep Instructions

Mediterranean Baked Fish works well for meal preparation.

Divide cooked fish between four airtight containers.

Add a serving of rice, quinoa, couscous, or roasted vegetables.

Keep fresh herbs and lemon wedges separately and add them after reheating.

For best quality, consume refrigerated leftovers within 2–3 days.

When reheating, use gentle heat to prevent the fish from becoming dry.

Storage

Allow leftovers to cool slightly before transferring them to an airtight container.

Store in the refrigerator for up to 2–3 days.

Keep the fresh tomato topping separate when possible.

Reheat gently in a covered baking dish at 300°F (150°C) until warmed through.

Avoid microwaving the fish for too long because high heat can make it rubbery.

Leftover fish can also be flaked into salads, wraps, grain bowls, pasta, or sandwiches.

Can You Freeze Mediterranean Baked Fish?

Yes, although fresh is always best.

Allow the cooked fish to cool completely, then place it in a freezer-safe airtight container.

Freeze for up to 2 months for the best quality.

The vegetables may become softer after freezing and thawing, so consider making a fresh tomato and herb topping when serving the thawed fish.

Thaw frozen fish overnight in the refrigerator and reheat gently.

Nutritional Information

Approximate nutrition per serving will depend on the fish, olive oil, olives, and optional toppings used.

Calories: 300–350
Protein: 35–40g
Carbohydrates: 8–12g
Fat: 14–18g
Fiber: 2–3g
Sugar: 4–5g
Sodium: Approximately 500–700mg

Adding feta, additional olives, or extra olive oil will increase the calories and sodium.

Benefits of Mediterranean Baked Fish

This recipe provides a high-quality source of protein while using fresh vegetables and herbs for flavor.

White fish is naturally lean and provides nutrients such as vitamin B12, selenium, and phosphorus.

Tomatoes contain lycopene and other beneficial plant compounds. Olive oil provides predominantly monounsaturated fat, while herbs, garlic, onions, and lemon contribute additional flavor and plant nutrients.

The recipe is also naturally low in carbohydrates when served without bread, rice, or other grain-based sides.

For a balanced meal, pair it with vegetables and a moderate serving of whole grains.

Frequently Asked Questions

What type of fish is best?

Cod is an excellent choice because it is mild and flaky, but haddock, halibut, sea bass, pollock, and tilapia can also be used.

Can I use frozen fish?

Yes. Thaw it completely in the refrigerator and pat it very dry before seasoning.

How do I know when the fish is done?

The fish should be opaque and flake easily with a fork. The thickest portion should reach 145°F (63°C).

Can I use regular olives?

Yes. Kalamata olives are recommended for their Mediterranean flavor, but green or black olives can be substituted.

Can I add feta?

Absolutely. Feta pairs especially well with tomatoes, olives, lemon, and oregano.

Can I make this recipe dairy-free?

Yes. Simply omit the feta.

Is this recipe gluten-free?

The basic recipe is naturally gluten-free. Check packaged ingredients if you are preparing it for someone with celiac disease or gluten sensitivity.

Can I make it spicy?

Yes. Add red pepper flakes, sliced chili peppers, or a small amount of chili paste.

Can I add potatoes?

Yes. Use small potatoes cut into bite-sized pieces. Roast them first for approximately 15–20 minutes before adding the fish so everything finishes at the same time.

Can I use frozen vegetables?

Fresh vegetables provide the best texture, but frozen vegetables can be used if excess moisture is managed carefully.

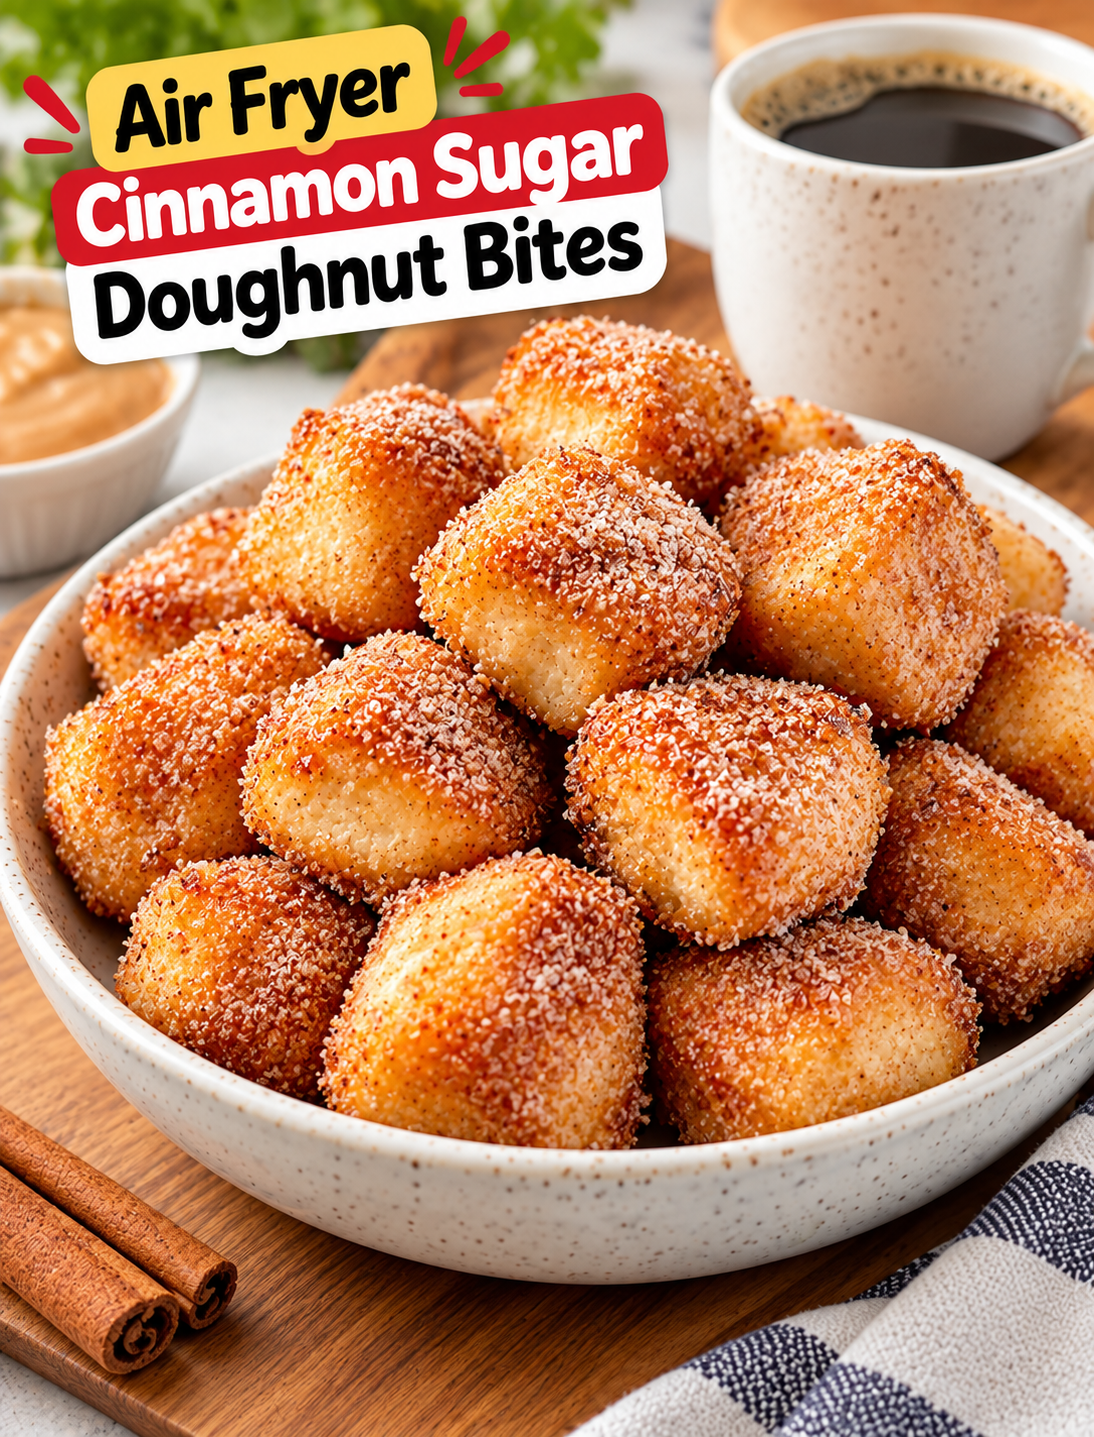
Air Fryer Cinnamon Sugar Doughnut Bites

Air Fryer Cinnamon Sugar Doughnut Bites coated with buttery cinnamon sugar

Air Fryer Cinnamon Sugar Doughnut Bites

Craving something sweet without making a full batch of traditional doughnuts? These Air Fryer Cinnamon Sugar Doughnut Bites are a quick and easy treat with a soft center, lightly crisp outside, and a buttery cinnamon-sugar coating.

The bite-sized pieces cook quickly in the air fryer, so you can enjoy warm homemade doughnut bites without deep-frying a large pot of oil. They are perfect for breakfast, brunch, an afternoon snack, or a simple dessert.

This recipe uses refrigerated biscuit dough to keep preparation simple. After cutting the dough into small pieces, the bites are air fried until puffed and golden, then brushed with melted butter and tossed in cinnamon sugar.

Why You’ll Love These Cinnamon Sugar Doughnut Bites

These sweet bites are easy enough for a weekday treat and fun enough to serve at a weekend brunch.

  • Quick preparation: The dough requires very little prep before cooking.
  • Air fryer friendly: You can make a small batch without heating a full oven.
  • No deep frying: Air frying uses much less oil than traditional deep frying.
  • Soft and fluffy: The biscuit dough creates a tender center when cooked properly.
  • Crispy edges: High circulating heat lightly browns the outside.
  • Simple coating: Butter, cinnamon, and sugar create a classic doughnut flavor.
  • Kid-friendly: Small pieces are easy to serve and share.
  • Easy to customize: Add vanilla, nutmeg, chocolate, or a simple glaze for a different finish.

The best texture comes from serving these bites while they are still warm. The cinnamon sugar sticks especially well to the melted butter on freshly cooked dough.

Ingredients You’ll Need

For the Doughnut Bites

  • 1 can refrigerated biscuit dough, preferably flaky or buttermilk style
  • Cooking spray
  • 2 tablespoons unsalted butter, melted

For the Cinnamon Sugar Coating

  • 1/2 cup granulated sugar
  • 1 1/2 teaspoons ground cinnamon
  • 1/4 teaspoon ground nutmeg, optional
  • 1/2 teaspoon vanilla extract, optional

The biscuit dough provides the base, while melted butter helps the cinnamon-sugar mixture adhere to the warm dough.

Use regular granulated sugar for a classic coating. If you prefer a slightly richer flavor, add a small amount of brown sugar to the mixture.

How to Make Air Fryer Cinnamon Sugar Doughnut Bites

Step 1: Prepare the Dough

Open the refrigerated biscuit dough and separate the biscuits.

Place the dough pieces on a clean cutting board. Cut each biscuit into approximately 4 equal pieces.

If the dough feels sticky, lightly flour your hands rather than adding a large amount of flour to the dough.

The pieces do not need to be perfectly shaped. Keeping them close in size is more important because evenly sized pieces cook more consistently.

Step 2: Prepare the Cinnamon Sugar

Add granulated sugar and cinnamon to a shallow bowl.

Stir until the cinnamon is evenly distributed throughout the sugar.

Add the optional nutmeg if you want a warmer spice flavor.

Set the mixture aside while the dough cooks.

Step 3: Preheat the Air Fryer

Preheat your air fryer to 350°F (175°C) for about 3 minutes if your model recommends preheating.

A preheated basket helps the dough begin cooking immediately and promotes more even browning.

Step 4: Arrange the Dough

Lightly spray the air fryer basket with cooking spray.

Place the dough pieces in a single layer with a little space between them.

Do not stack the pieces because they need room for hot air to circulate.

If your basket is small, cook the dough in batches rather than overcrowding it.

Step 5: Air Fry the Doughnut Bites

Cook at 350°F for approximately 5–7 minutes.

Shake the basket gently or turn the pieces halfway through cooking.

The bites should puff up and become lightly golden on the outside.

Cooking time can vary between air fryer models, so begin checking around the 5-minute mark.

Avoid cooking them too long because small pieces can become dry quickly.

Step 6: Melt the Butter

While the dough bites cook, melt the butter in a small microwave-safe bowl or saucepan.

Let it cool slightly so it is easier to handle.

For extra flavor, stir a small amount of vanilla extract into the melted butter.

Step 7: Coat With Butter

Transfer the warm doughnut bites to a large bowl.

Brush or toss them gently with the melted butter.

Use enough butter to lightly coat the surface without soaking the bites.

Step 8: Add the Cinnamon Sugar

Immediately transfer the buttered bites into the cinnamon-sugar mixture.

Toss gently until each piece has a thin, even coating.

The warm butter helps the sugar mixture cling to the surface.

Step 9: Serve Warm

Place the finished doughnut bites on a serving plate.

Serve them warm with coffee, milk, hot chocolate, or your favorite dipping sauce.

For an extra dessert-style presentation, dust them lightly with powdered sugar before serving.

Tips for the Best Air Fryer Doughnut Bites

A few simple details can improve the texture and flavor.

Keep the Pieces Similar in Size

Uniform pieces cook more evenly. Very small pieces may brown quickly while larger pieces are still soft inside.

Don’t Overcrowd the Basket

Hot air needs space to move around the dough. Overcrowding can result in uneven browning and softer surfaces.

Check Early

Air fryers vary in power and basket design. Start checking at about 5 minutes instead of relying only on the listed cooking time.

Coat While Warm

The cinnamon sugar sticks best when the bites are freshly cooked and lightly coated with melted butter.

Avoid Too Much Butter

A thin coating is enough to help the sugar adhere. Excess butter can make the bites greasy.

Serve Fresh

These bites have their best texture shortly after cooking. If left uncovered for too long, they can lose some of their crisp exterior.

Easy Cinnamon Sugar Variations

The classic cinnamon-sugar coating is simple, but you can easily change the flavor.

Vanilla Cinnamon Sugar

Add 1/2 teaspoon vanilla extract to the melted butter before coating the warm bites.

Brown Sugar Cinnamon

Replace 2 tablespoons of the granulated sugar with light brown sugar for a deeper caramel-like flavor.

Apple Pie Doughnut Bites

Add a pinch of ground nutmeg and a small amount of apple pie spice to the cinnamon-sugar mixture.

Chocolate Cinnamon Bites

Drizzle the finished doughnut bites with melted semisweet or milk chocolate.

Maple Cinnamon Bites

Add a small drizzle of maple syrup just before serving for a richer breakfast-style treat.

What to Serve With Doughnut Bites

These warm treats pair well with both drinks and simple dipping sauces.

For breakfast, serve them with hot coffee, a latte, cappuccino, or tea.

For dessert, add vanilla ice cream and a drizzle of caramel sauce.

You can also serve them with:

  • Chocolate dipping sauce
  • Vanilla glaze
  • Cream cheese frosting
  • Caramel sauce
  • Strawberry sauce
  • Whipped cream
  • Fresh berries

A small bowl of dipping sauce makes the bites especially easy to serve at brunch or parties.

How to Make a Simple Vanilla Glaze

If you want a glazed version, mix 1/2 cup powdered sugar with 1–2 tablespoons milk and a small splash of vanilla extract.

Whisk until smooth.

Drizzle the glaze over the warm doughnut bites and let it sit for a few minutes before serving.

Add a little more milk if the glaze is too thick, or more powdered sugar if it becomes too thin.

How to Store Leftovers

These doughnut bites taste best fresh, but leftovers can be stored for a short time.

Allow them to cool completely before placing them in an airtight container.

Keep them at room temperature for up to 1–2 days.

The cinnamon-sugar coating may soften during storage, so reheating can help restore some of the original texture.

How to Reheat Doughnut Bites

Place the leftover bites in the air fryer at 300°F for about 2–3 minutes.

Check them early because small pieces warm quickly.

Avoid overheating them because the dough can become dry.

After reheating, add a small amount of melted butter and fresh cinnamon sugar if you want to refresh the coating.

Frequently Asked Questions

Can I use any refrigerated biscuit dough?

Yes, most refrigerated biscuit dough works, although flaky or buttermilk-style dough produces a soft and tender center.

How long do doughnut bites take in an air fryer?

Most small pieces take about 5–7 minutes at 350°F, but cooking time varies by air fryer and dough size.

Why are my doughnut bites dry?

Overcooking or cutting the pieces too small can make them dry, so begin checking them around the 5-minute mark.

Do I need to flip the doughnut bites?

Turning or shaking them halfway through cooking helps the pieces brown more evenly.

Can I make these without butter?

Yes, but butter helps the cinnamon sugar stick and adds richness, so the coating may not adhere as well without it.

Can I use brown sugar instead of white sugar?

Yes, you can replace part or all of the granulated sugar with brown sugar for a deeper caramel-like flavor.

Can I freeze cinnamon sugar doughnut bites?

You can freeze cooked bites, but their texture is best when freshly made because freezing can soften the exterior.

How do I keep the bites crispy?

Serve them soon after cooking and avoid storing them in a sealed container while they are still warm.

Final Thoughts

These Air Fryer Cinnamon Sugar Doughnut Bites are an easy way to satisfy a doughnut craving without deep frying or spending a long time preparing homemade dough.

The combination of warm biscuit dough, melted butter, cinnamon, and sugar creates a simple treat with familiar bakery-style flavor. The air fryer keeps the cooking process quick and makes small batches easy to prepare.

For the best results, cut the dough into evenly sized pieces, leave room between each bite in the basket, and start checking them early. Coat the cooked pieces while they are warm so the cinnamon sugar sticks to every bite.

Serve them fresh with coffee for breakfast, add a dipping sauce for dessert, or make a larger batch for a weekend brunch. Once you try the basic version, experiment with vanilla, nutmeg, chocolate, caramel, or maple flavors to create your own favorite combination.

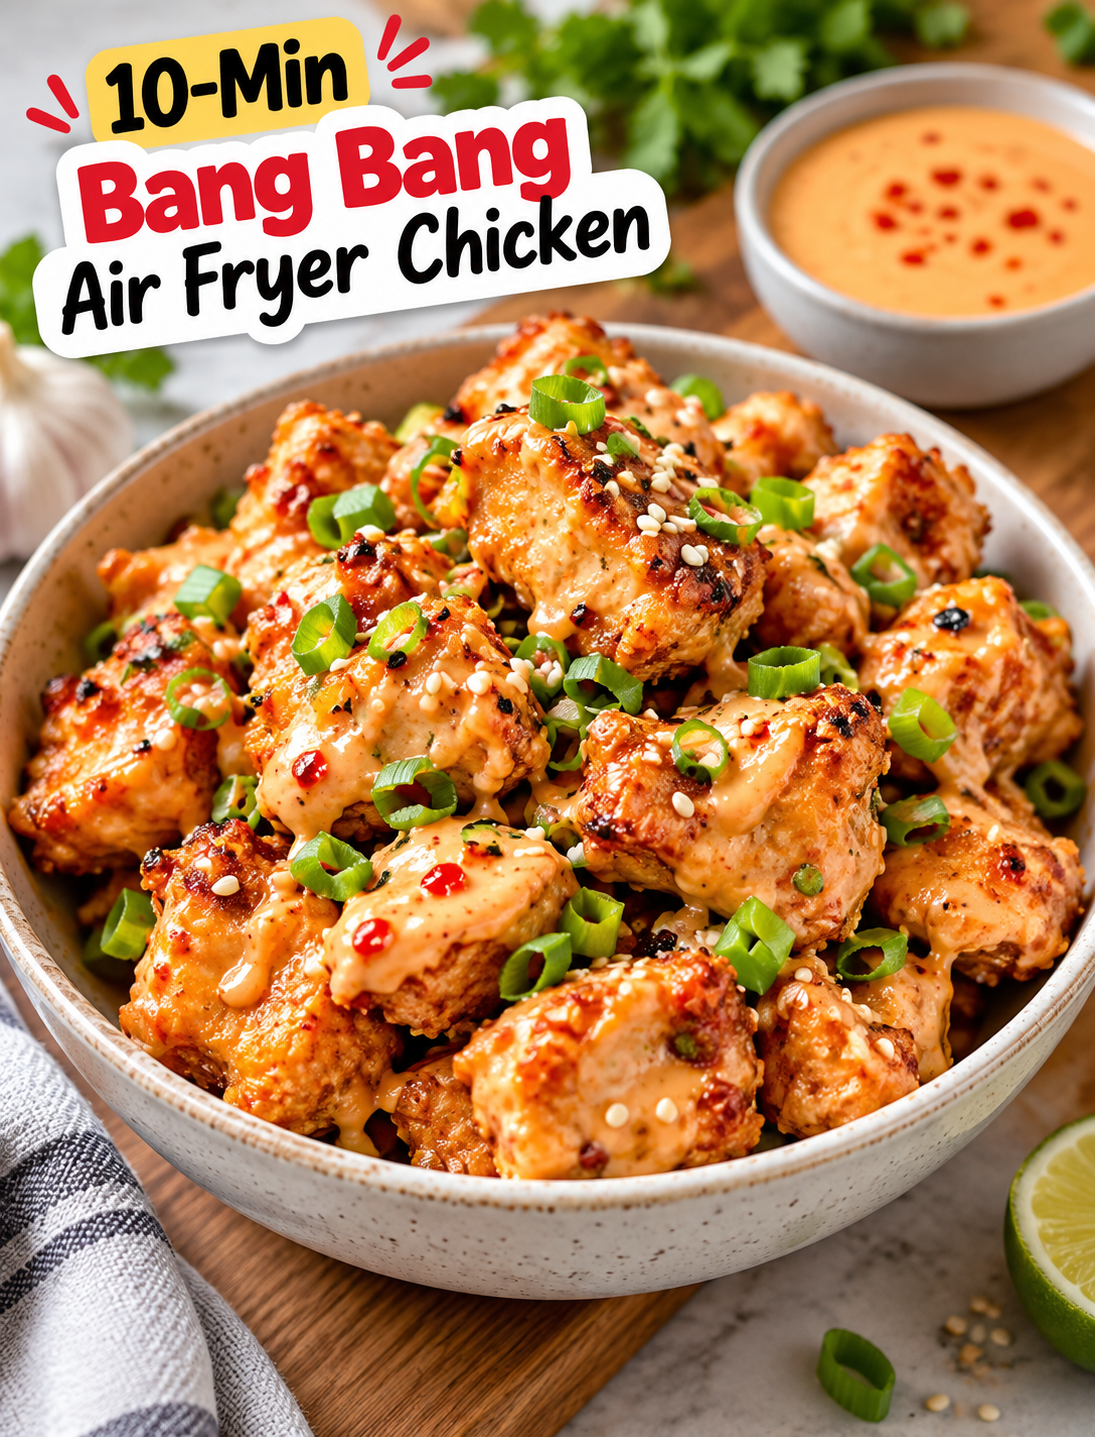
10-Min Bang Bang Air Fryer Chicken

10-Min Bang Bang Air Fryer Chicken with crispy chicken pieces and creamy spicy sauce

10-Min Bang Bang Air Fryer Chicken

Need a fast dinner that tastes like your favorite takeout but takes less time to make? This 10-Min Bang Bang Air Fryer Chicken is crispy, juicy, creamy, sweet, and slightly spicy all at once.

Small pieces of chicken are coated with a light seasoned crust, cooked in the air fryer until golden, and tossed in a creamy Bang Bang sauce. The result is a quick meal that works for busy weeknights, game-day snacks, or an easy lunch.

The air fryer gives the chicken a crisp outside without deep frying it in a large amount of oil. The sauce takes less than a minute to mix, so the whole recipe stays simple from start to finish.

Why You’ll Love This Bang Bang Chicken

This recipe is designed for busy cooks who want bold flavor without a long ingredient list or complicated cooking process.

  • Fast cooking: Small chicken pieces can cook in about 8–10 minutes at high heat.
  • Crispy texture: The air fryer creates a golden coating while keeping the chicken tender.
  • Creamy sauce: The Bang Bang sauce combines mayonnaise, sweet chili sauce, and sriracha for a balanced flavor.
  • Easy ingredients: Most of the ingredients are common pantry and refrigerator staples.
  • Flexible serving options: Serve it over rice, inside wraps, with salad, or as an appetizer.
  • Less mess: Air frying avoids the splatter and cleanup that comes with deep frying.
  • Easy to customize: You can make the sauce milder or spicier based on your preference.

The key to quick cooking is cutting the chicken into small, even pieces. Similar-sized pieces cook at roughly the same rate and are easier to check for doneness.

Ingredients You’ll Need

For the Chicken

  • 1 pound boneless, skinless chicken breasts, cut into 1-inch pieces
  • 1 tablespoon olive oil
  • 1/2 cup cornstarch
  • 1/2 teaspoon garlic powder
  • 1/2 teaspoon paprika
  • 1/2 teaspoon onion powder
  • 1/2 teaspoon salt
  • 1/4 teaspoon black pepper

Cornstarch helps create a light, crisp coating around the chicken. Chicken breast works well because it cooks quickly when cut into small pieces, but boneless chicken thighs can also be used.

For the Bang Bang Sauce

  • 1/3 cup mayonnaise
  • 2 tablespoons sweet chili sauce
  • 1 tablespoon sriracha
  • 1 teaspoon honey
  • 1 teaspoon fresh lime juice

The mayonnaise creates the creamy base, while sweet chili sauce adds sweetness and a mild chili flavor. Sriracha brings heat, and lime juice adds acidity to balance the richness.

For a milder sauce, reduce the sriracha to 1 teaspoon. For more heat, add another 1/2 teaspoon at a time until it reaches your preferred level.

For Garnishing

  • 1 tablespoon sliced green onions
  • 1 teaspoon sesame seeds
  • Chopped cilantro, optional
  • Lime wedges, optional

These toppings add fresh flavor, color, and a little crunch without making the recipe more complicated.

How to Make 10-Min Bang Bang Air Fryer Chicken

Step 1: Cut the Chicken

Pat the chicken breasts dry with paper towels.

Cut them into approximately 1-inch bite-sized pieces. Try to keep the pieces similar in size so they cook evenly.

Avoid cutting the chicken into very large chunks because the outside may brown before the center reaches a safe temperature.

Step 2: Season the Chicken

Add the chicken pieces to a bowl.

Drizzle with olive oil and toss to coat lightly. Add cornstarch, garlic powder, paprika, onion powder, salt, and black pepper.

Toss until each piece has a thin, even coating.

The cornstarch should cling to the chicken without forming a thick paste. If the pieces look heavily coated, gently shake off any excess.

Step 3: Preheat the Air Fryer

Preheat your air fryer to 400°F (200°C) for about 3 minutes if your model recommends preheating.

A hot basket helps the coating begin crisping as soon as the chicken goes in.

Step 4: Arrange the Chicken

Place the chicken pieces in the air fryer basket in a single layer.

Leave a little space between the pieces so hot air can circulate around them.

Do not pile the chicken on top of itself. If your basket is small, cook in two batches.

Step 5: Air Fry the Chicken

Cook at 400°F for about 8–10 minutes, turning or shaking the basket halfway through.

The exact time depends on the size of the chicken pieces and the performance of your air fryer.

Check the thickest piece with an instant-read thermometer. Chicken should reach a minimum internal temperature of 165°F before serving.

If the chicken needs more time, continue cooking for 1–2 minutes and check again.

Step 6: Make the Bang Bang Sauce

While the chicken cooks, add mayonnaise, sweet chili sauce, sriracha, honey, and lime juice to a small bowl.

Whisk until the sauce is smooth and evenly combined.

Taste the sauce and adjust the heat or sweetness if needed.

Step 7: Coat the Chicken

Transfer the hot cooked chicken to a clean bowl.

Pour the Bang Bang sauce over the chicken and gently toss until the pieces are evenly coated.

For extra crispiness, drizzle the sauce over the chicken instead of fully coating every piece. This keeps more of the crunchy exterior exposed.

Step 8: Garnish and Serve

Sprinkle the chicken with sliced green onions and sesame seeds.

Add fresh cilantro or a squeeze of lime if desired.

Serve immediately while the chicken is warm and crisp.

Tips for Extra Crispy Air Fryer Chicken

A few small changes can make a big difference in the texture.

  • Dry the chicken first: Excess moisture can prevent the coating from becoming crisp.
  • Use cornstarch: It creates a lighter, crispier coating than a thick flour crust.
  • Don’t overcrowd the basket: Crowding traps moisture and can make the chicken less crisp.
  • Turn halfway through: This helps the coating brown more evenly.
  • Serve soon after saucing: The sauce naturally softens the crispy coating over time.
  • Cook in batches when needed: Two small batches can produce better results than one overcrowded batch.
  • Use a thermometer: Color alone cannot confirm that chicken is safely cooked.

If you want maximum crunch, serve the sauce on the side and dip each piece just before eating.

How to Make Bang Bang Sauce Less Spicy

The classic sauce has a sweet, creamy, and spicy flavor, but you can easily adjust the heat.

Start with only 1 teaspoon of sriracha and increase it gradually. Adding more sweet chili sauce can also soften the heat while keeping the sauce flavorful.

For a very mild version, leave out the sriracha and use sweet chili sauce as the main source of chili flavor.

For extra heat, add more sriracha or a small pinch of cayenne pepper.

What to Serve With Bang Bang Chicken

This chicken works as both a main dish and an appetizer.

For a complete dinner, serve it over steamed white rice, brown rice, or jasmine rice. Add broccoli, snap peas, cucumber, or a simple green salad for a fresh side.

You can also turn the chicken into:

  • Rice bowls
  • Lettuce wraps
  • Chicken tacos
  • Tortilla wraps
  • Salad bowls
  • Sandwiches
  • Game-day appetizers

For a restaurant-style presentation, add sliced green onions, sesame seeds, lime wedges, and a small bowl of extra Bang Bang sauce.

How to Store Leftovers

Allow leftover chicken to cool before transferring it to an airtight container.

Refrigerate it promptly and use refrigerated cooked chicken within 3–4 days.

For the best texture, store the chicken and sauce separately when possible. This prevents the coating from becoming soft while sitting in the refrigerator.

How to Reheat Bang Bang Chicken

The air fryer is the easiest way to bring back some of the crisp texture.

Preheat the air fryer to 350°F and heat the chicken for several minutes until warmed through.

Avoid adding extra sauce before reheating because it can make the coating softer.

Once the chicken is hot, add fresh Bang Bang sauce, green onions, and sesame seeds.

Can You Use Chicken Thighs?

Yes. Boneless, skinless chicken thighs are an excellent alternative because they stay moist and have a richer flavor.

Cut them into the same small pieces used for chicken breast and cook until the thickest pieces reach 165°F internally.

Thigh meat can vary in size and thickness, so use a thermometer rather than relying only on the recipe’s suggested cooking time.

Easy Variations

Honey Bang Bang Chicken

Add another teaspoon of honey to the sauce for a sweeter finish.

Extra-Spicy Bang Bang Chicken

Increase the sriracha and add a small pinch of cayenne pepper to the chicken seasoning.

Garlic Bang Bang Chicken

Add 1/2 teaspoon of garlic powder to the sauce for a stronger savory flavor.

Lime Bang Bang Chicken

Increase the fresh lime juice slightly and finish the dish with fresh lime zest.

Sesame Bang Bang Chicken

Add toasted sesame seeds and sliced green onions just before serving for extra texture.

Frequently Asked Questions

Can I make Bang Bang chicken without mayonnaise?

Yes, you can use plain Greek yogurt for a lighter creamy sauce, although the flavor and texture will be slightly different.

How long does Bang Bang chicken take in the air fryer?

Small chicken pieces usually take about 8–10 minutes at 400°F, but always verify that the center reaches 165°F.

Why is my air fryer chicken not crispy?

Overcrowding, excess moisture, or too much sauce can reduce crispiness; use a single layer and sauce the chicken just before serving.

Can I use frozen chicken for this recipe?

Fresh or fully thawed chicken works best because frozen pieces can release excess moisture and cook unevenly.

Can I make the Bang Bang sauce ahead?

Yes, prepare the sauce up to 2–3 days ahead and keep it refrigerated in an airtight container.

How can I make the sauce less spicy?

Reduce or omit the sriracha and adjust the sweet chili sauce to taste.

Can I use chicken thighs instead of chicken breast?

Yes, boneless skinless chicken thighs work well and should also reach 165°F internally.

Can I make this recipe gluten-free?

Yes, use certified gluten-free ingredients and check the labels of your sweet chili sauce, seasonings, and other packaged ingredients.

Final Thoughts

This 10-Min Bang Bang Air Fryer Chicken is a simple way to turn everyday chicken into a flavorful meal with a crisp coating and creamy sweet-spicy sauce.

The most important steps are cutting the chicken evenly, keeping the air fryer basket uncrowded, and checking the internal temperature before serving. Making the sauce while the chicken cooks also keeps the total preparation quick.

Serve it over rice for an easy dinner, place it in lettuce wraps for a lighter meal, or serve the crispy pieces with extra sauce as a party appetizer.

Once you have the basic method down, adjust the sauce to your taste. Make it sweeter, spicier, tangier, or milder and create your own version of this quick air fryer favorite.

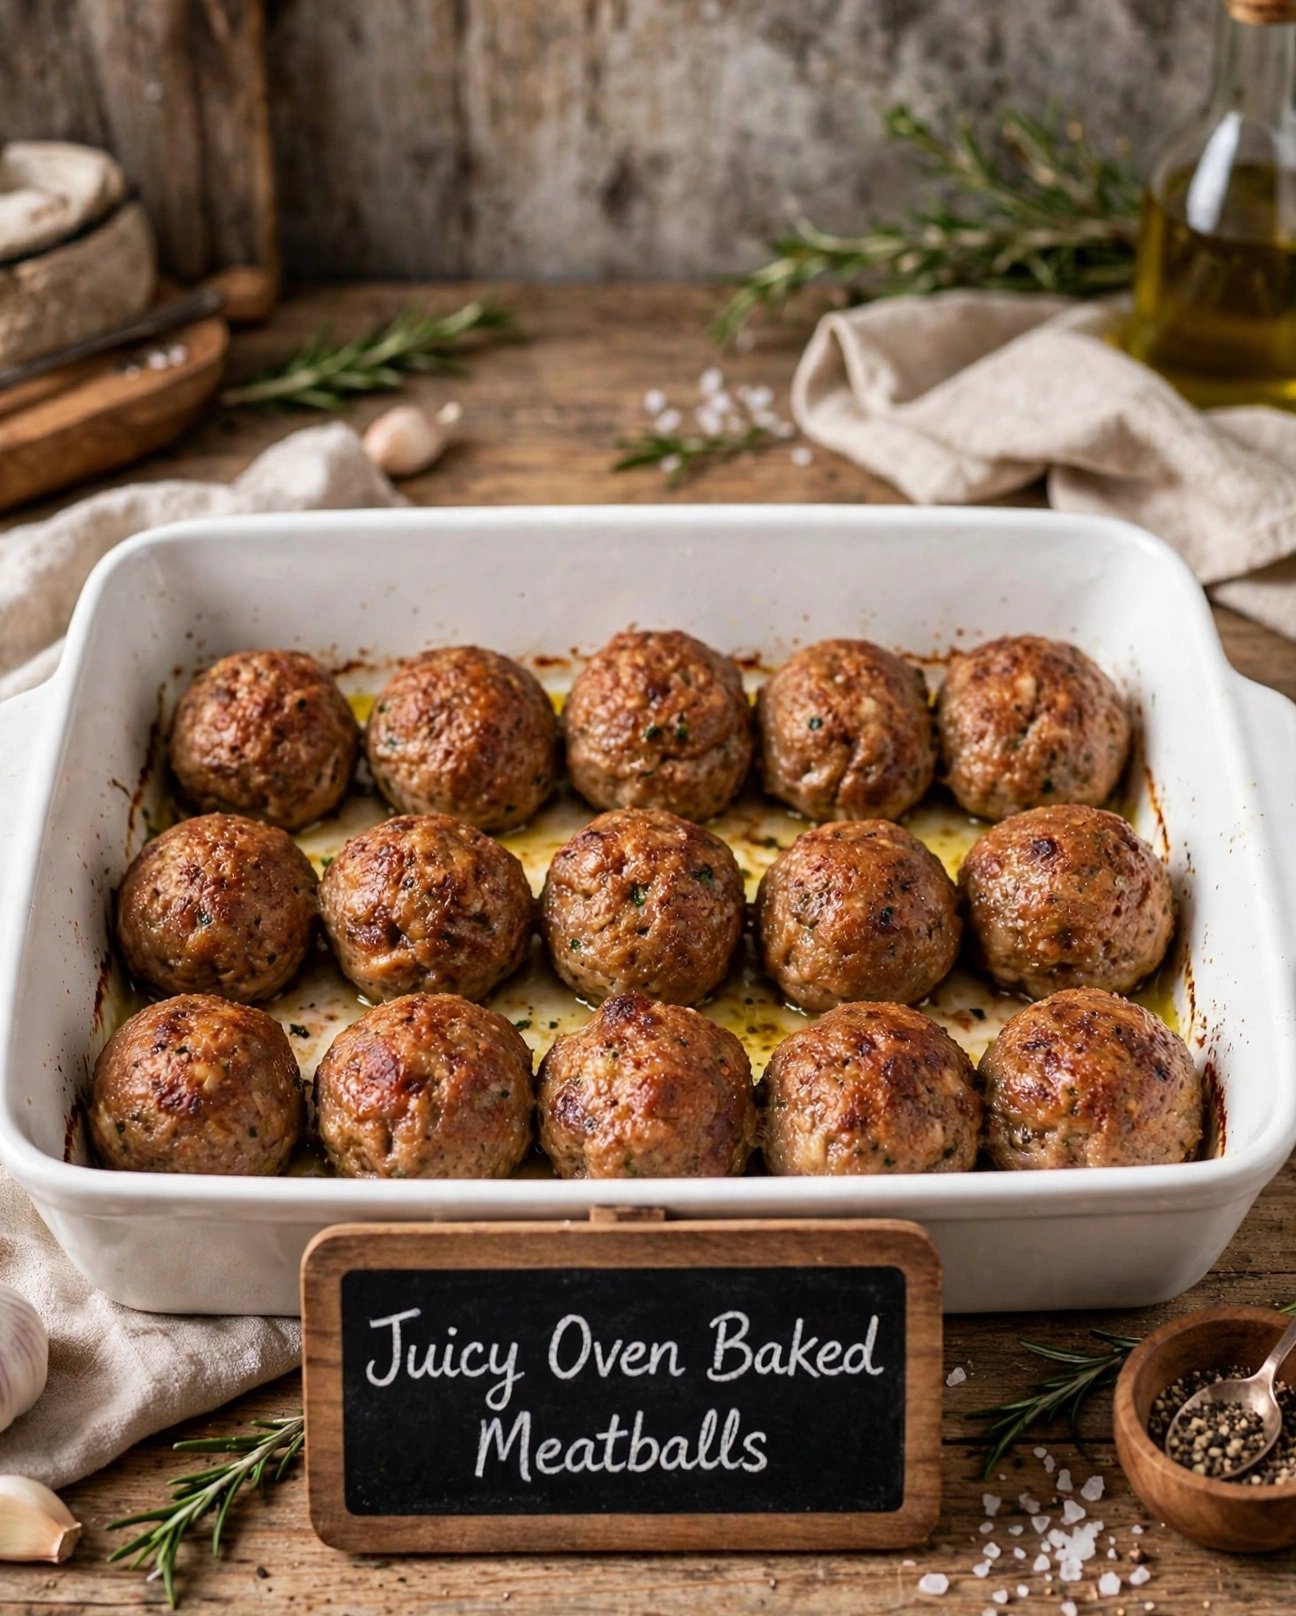
Juicy Oven Baked Meatballs

Juicy Oven Baked Meatballs

This is *Juicy Oven Baked Meatballs* – super soft, never dry! Perfect for dinner.


*FULL RECIPE:*


*Ingredients:*


– Beef Mince (Keema) – 500g (half beef + half mutton/chicken is even juicier .

– Eggs – 2 whole

– Bread Crumbs – 1/2 cup (60g) or 2 slices of bread soaked in milk

– Onion – 1 medium, very finely chopped or grated

– Garlic – 3 cloves minced / 1 tsp paste

– Milk – 1/4 cup (60ml)

– Salt – 1 tsp

– Black Pepper – 1/2 tsp

– Paprika / Red Chilli Powder – 1 tsp

– Cumin Powder – 1/2 tsp

– Fresh Parsley / Coriander – 2 tbsp chopped

– Olive Oil – 2 tbsp for tray


*Method:*


*STEP 1 – Make Mix:*

In a big glass bowl add mince, eggs , breadcrumbs, grated onion, garlic, milk, all spices, and parsley.


*IMPORTANT:* Mix gently with hands for just 1 minute. Do NOT over-mix or meatballs will become hard. Mix should be soft and sticky.


*STEP 2 – Shape:*

Oil your hands. Take 2 tbsp of mix and roll into a smooth ball, size of a golf ball. Place in an oiled baking tray . Make 15-16 balls. Leave little space between them.


*STEP 3 – Bake / Fry – 2 Options:*


*Option A – Oven (Healthier & Juicier):*

Preheat oven to 200C / 400F. Drizzle oil on balls. Bake for 18-20 mins until golden brown and cooked inside.


*Option B – Pan Fry:*

Heat oil in a pan, fry balls on medium heat for 6-7 mins turning until brown on all sides.


*STEP 4 – Serve:*

These meatballs are ready to eat as is! Or you can add them to:


1. Tomato Sauce + Pasta

2. White Creamy Sauce

3. Serve with pita bread and yogurt


*Pro Tips for Soft Meatballs:*

1. Adding bread + milk is the secret – makes them super soft, not rubbery.

2. Don’t skip eggs, they bind everything.

3. If you like, add 1/4 cup grated mozzarella cheese inside each ball – cheesy burst!


Want me to make a pic of this with the recipe name on a board for your post?

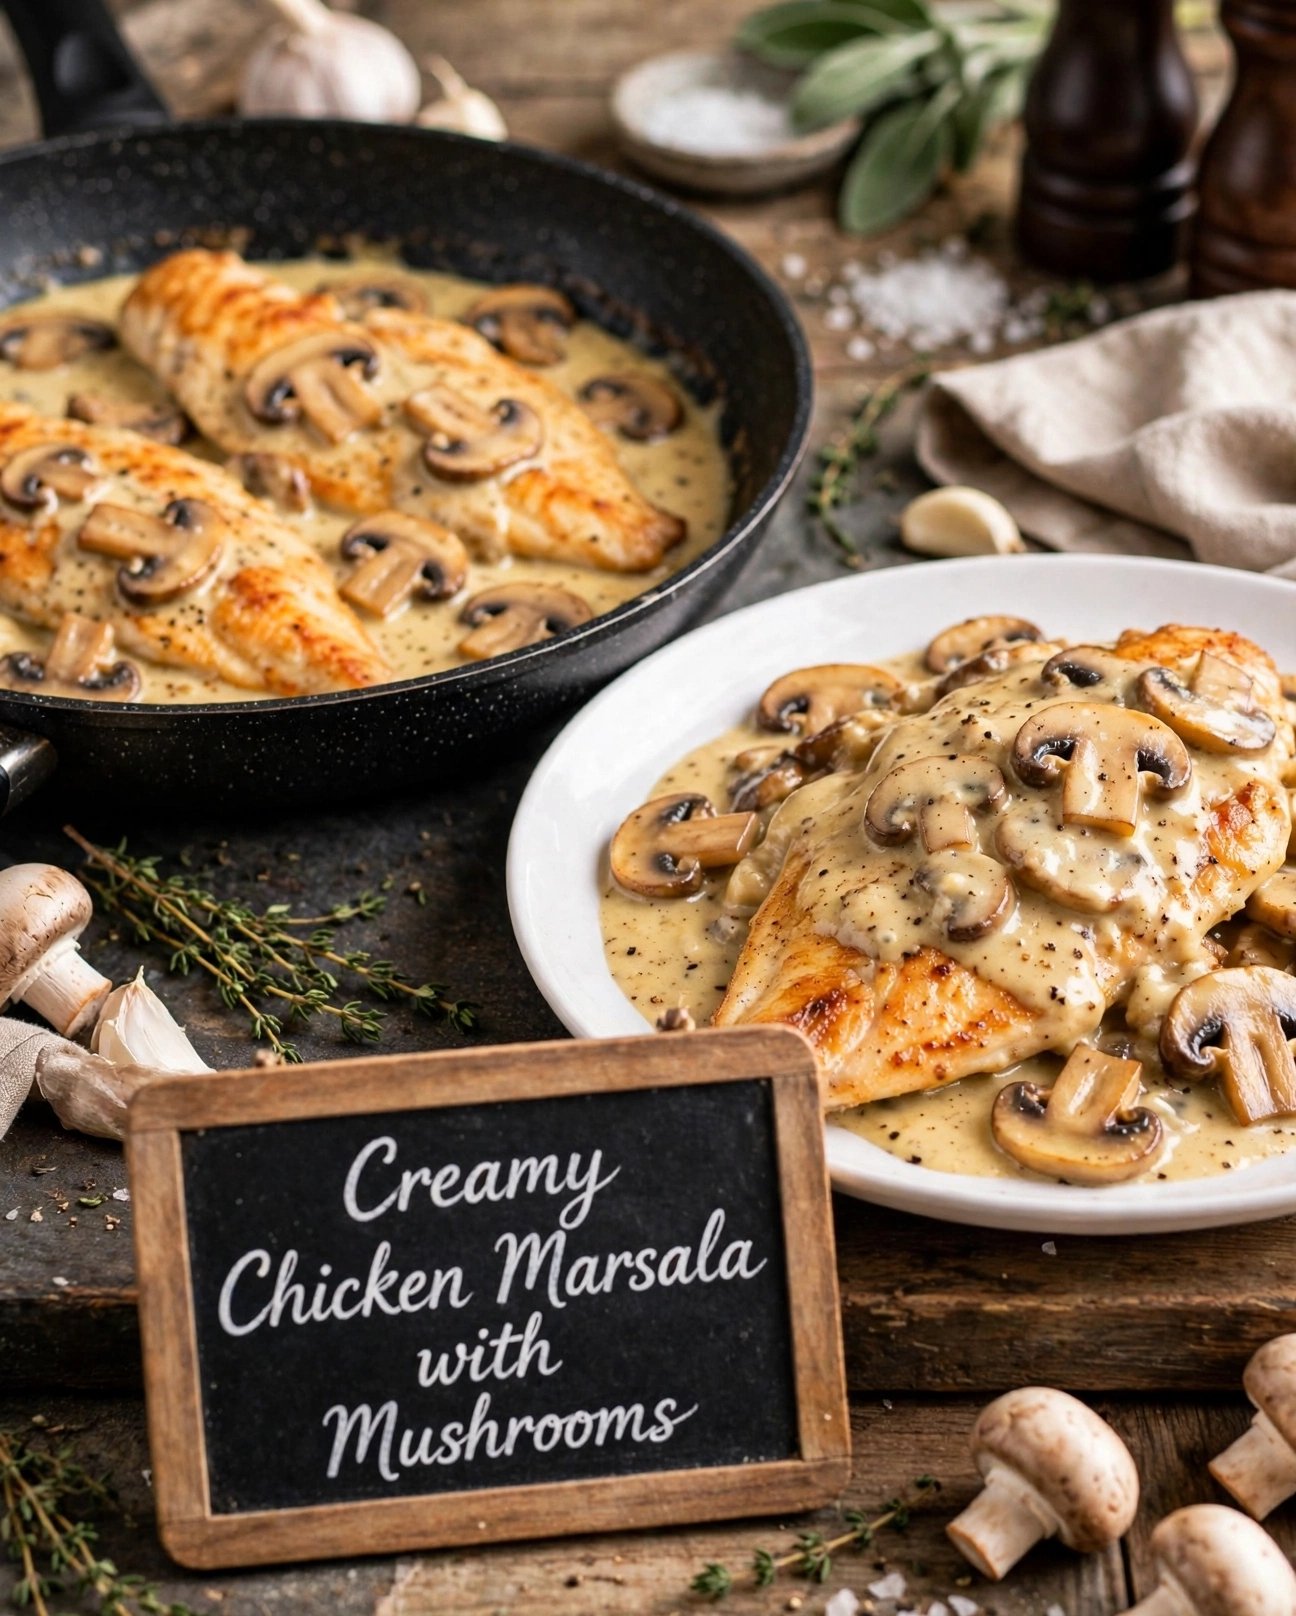
Creamy Chicken Marsala with Mushrooms* –

 *Creamy Chicken Marsala with Mushrooms* – Restaurant style but super easy! The chicken is so juicy and the sauce is creamy.


*FULL RECIPE:*


*Ingredients:*


*For Chicken:*

– Chicken Breasts – 2 large (500g), sliced in half lengthwise to make 4 thin fillets

– Salt – 1 tsp

– Black Pepper – 1/2 tsp

– Garlic Powder – 1/2 tsp

– All-purpose Flour – 1/2 cup (60g) for coating

– Olive Oil – 3 tbsp

– Butter – 2 tbsp


*For Mushroom Sauce:*

– Mushrooms – 300g sliced (white or cremini)

– Garlic – 3 cloves minced

– Chicken Stock / Broth – 1 cup (250ml)

– Heavy Cream – 3/4 cup (180ml)

– Parmesan Cheese – 1/4 cup grated (optional but tasty)

– Dried Oregano / Thyme – 1/2 tsp

– Black Pepper & Salt to taste

– Parsley – chopped for garnish


> *Note:* Original Marsala uses Marsala wine. For halal version, we replace wine with chicken stock + 1 tsp lemon juice. Same amazing taste!


*Method:*


*STEP 1 – Prep the Chicken:*

Lay chicken fillets between cling film and pound gently to even 1/4 inch thickness. This makes them soft. Season both sides with salt, pepper, garlic powder. Coat lightly in flour on both sides, shake off extra.


*STEP 2 – Sear Chicken

Heat oil + 1 tbsp butter in a big pan on medium-high heat. Fry chicken 4-5 mins per side until golden brown. Don’t overcrowd. Take out chicken on a plate.


*STEP 3 – Cook Mushrooms:*

In same pan, add 1 tbsp butter. Add mushrooms and sauté for 4-5 mins until they shrink and become golden. Add minced garlic and cook 30 seconds till fragrant.


*STEP 4 – Make Sauce

Pour in 1 cup chicken stock. Scrape the bottom of pan with spoon – that’s all flavor! Let it bubble for 2-3 mins until slightly reduced. Then lower heat and add heavy cream, oregano, and parmesan. Stir and let simmer 3-4 mins until creamy thick .


*STEP 5 – Combine:*

Put fried chicken back into the creamy mushroom sauce. Spoon sauce over chicken. Simmer together for 2 mins on low heat so chicken soaks up all flavor. Sprinkle black pepper.


*Serve With:*

Mashed potatoes, white rice, pasta, or garlic bread. This sauce is perfect with everything!


*Tips:*

1. Don’t skip pounding the chicken – that’s secret to restaurant-soft chicken.

2. If sauce is too thick, add little more chicken stock.

3. Store in fridge 3 days. Sauce will get even tastier!


Do you want me to make a pic of this dish with the recipe name on a board for your post?