
Finger Exercises for Brain

Finger exercises for brain coordination showing a person touching each fingertip to the thumb

Finger Exercises to Wake Up Your Brain: 7 Simple Movements for Focus and Coordination

Did you know that a few simple finger movements can challenge your brain and help improve hand coordination?

Your hands and brain constantly communicate whenever you write, type, hold a cup, button a shirt, or perform everyday activities. Even something as simple as touching each fingertip to your thumb requires coordination between your nervous system, muscles, and joints.

Finger exercises to wake up your brain have become popular as a quick way to practice attention, finger control, and mental engagement.

Although the phrase “wake up your brain” sounds exciting, these exercises do not literally switch your brain on. Your brain remains active throughout the day and even while you sleep.

Instead, controlled finger movements give your brain a small motor coordination challenge that requires attention and practice.

The best part? You can perform these exercises at home, at your desk, or during a short break without any expensive equipment.

In this article, you’ll discover seven simple finger exercises, their potential benefits, how to perform them correctly, and what science says about hand movements and brain health.

What Are Finger Exercises for the Brain?

Finger exercises are controlled hand movements that encourage you to use individual fingers, both hands, or specific movement patterns.

Some exercises involve touching your fingertips together. Others require switching finger positions, reversing sequences, or performing different movements with each hand.

Your brain coordinates these activities through networks involved in movement planning, sensation, attention, and motor control.

For example, when you touch your index finger to your thumb, your nervous system helps control the timing and position of that movement.

When you repeat the same exercise using your middle, ring, and little fingers, the coordination challenge changes slightly.

Performing these movements slowly can help you notice how your fingers respond and where you have difficulty maintaining control.

However, finger exercises should not be confused with scientifically proven treatments for memory loss, dementia, or neurological conditions.

7 Simple Finger Exercises to Wake Up Your Brain

1. Thumb-to-Fingertip Touches

This is one of the easiest finger exercises to practice.

It requires you to move each finger toward your thumb in a specific order.

How to Do It:

  1. Sit comfortably with your shoulders relaxed.
  2. Hold one hand in front of you, palm facing upward or forward.
  3. Touch the tip of your index finger to your thumb.
  4. Separate them and touch your middle finger to your thumb.
  5. Continue with your ring finger and little finger.
  6. Reverse the sequence until you return to your index finger.
  7. Repeat using your other hand.

Suggested Practice: Start with 3–5 complete sequences per hand.

Potential Benefit: This movement practices finger dexterity, precision, and sequential motor coordination.

Did You Know? Your ring finger may feel more difficult to move independently because finger movements are influenced by shared muscles, tendons, and overlapping neural control.

2. Finger Spreading Exercise

Finger spreading is a simple movement that activates muscles involved in separating and bringing your fingers together.

How to Do It:

  1. Hold your hands in front of you.
  2. Keep your palms open and fingers relaxed.
  3. Slowly spread your fingers apart.
  4. Hold for approximately two seconds.
  5. Bring your fingers back together.
  6. Repeat without forcing the movement.

Suggested Practice: 10 comfortable repetitions.

Potential Benefit: This exercise may help maintain finger mobility and improve awareness of hand positioning.

It can also provide a gentle movement break after extended periods of typing or using a phone.

3. Finger Tapping Sequence

Finger tapping adds a timing challenge to ordinary finger movements.

How to Do It:

  1. Place one hand comfortably on a table.
  2. Keep your palm and fingers relaxed.
  3. Lift and gently tap your index finger.
  4. Continue with your middle, ring, and little fingers.
  5. Repeat the sequence in reverse.
  6. Practice with the opposite hand.

Suggested Practice: 3–5 slow sequences per hand.

Potential Benefit: Finger tapping challenges timing, sequencing, and fine motor coordination.

Try maintaining a steady rhythm rather than moving as quickly as possible.

4. Opposite-Hand Finger Patterns

This exercise challenges you to perform different movements with each hand.

How to Do It:

  1. Raise both hands in front of you.
  2. On your left hand, touch your thumb to your index finger.
  3. On your right hand, touch your thumb to your little finger.
  4. Move through the fingertip sequence in opposite directions.
  5. Pause if you become confused.
  6. Restart slowly and focus on accuracy.

Suggested Practice: 30–60 seconds.

Potential Benefit: Performing different patterns with each hand challenges coordination and attention.

This activity may feel more difficult than repeating the same movement with both hands.

Difficulty does not necessarily indicate a brain health problem. It often reflects the unfamiliar nature of the task.

5. Finger-to-Thumb Speed Challenge

Once you are comfortable with thumb-to-fingertip touches, you can gradually increase the pace.

How to Do It:

  1. Begin with your thumb and index finger.
  2. Move through all four fingers in order.
  3. Reverse the pattern.
  4. Repeat slowly until your movements feel controlled.
  5. Increase speed slightly while maintaining accuracy.

Suggested Practice: 20–30 seconds at a comfortable pace.

Potential Benefit: This exercise provides additional practice in sequencing and movement timing.

Speed is not the main goal. Controlled, accurate movement is more important.

6. Finger Lift Exercise

Finger lifts help you practice controlling individual fingers.

How to Do It:

  1. Place your hand palm-down on a flat table.
  2. Keep your wrist relaxed.
  3. Lift your index finger slightly.
  4. Lower it gently.
  5. Continue with each remaining finger.
  6. Repeat with your other hand.

Suggested Practice: 5 gentle lifts per finger.

Potential Benefit: Finger lifts encourage movement awareness and control.

Some fingers may be harder to lift independently because of normal anatomical differences.

Do not force fingers to move beyond their comfortable range.

7. Finger Pattern Memory Challenge

This exercise combines hand movement with a simple memory task.

How to Do It:

  1. Create a short sequence, such as index finger, ring finger, middle finger, and little finger.
  2. Touch each named fingertip to your thumb.
  3. Repeat the sequence without looking at written instructions.
  4. Try reversing the order.
  5. Once comfortable, practice a different pattern.

Suggested Practice: 1–2 minutes.

Potential Benefit: Remembering and performing a movement sequence engages attention, working memory, and motor planning during the task.

However, becoming better at this exercise does not automatically mean that your general memory or intelligence will improve.

5 Potential Benefits of Regular Finger Exercises

1. Supports Hand-Eye Coordination

When you watch your fingers move and adjust their positions, your brain uses visual and sensory information to guide movement.

Practicing these movements may improve your ability to perform the practiced actions more accurately.

Hand-eye coordination is useful for everyday activities such as writing, cooking, using a phone, and handling small objects.

2. Encourages Fine Motor Control

Fine motor skills involve controlled movements of the small muscles of the hands and fingers.

Activities such as fingertip touches and individual finger lifts provide opportunities to practice these skills.

Regular practice may help some people maintain or improve dexterity, depending on their starting ability and health.

3. Challenges Attention

Some finger exercises require you to remember which finger moves next.

You may need to slow down, concentrate, and correct mistakes.

This makes the activity a simple attention challenge.

However, temporary concentration during an exercise should not be confused with proven improvements in long-term attention or cognitive performance.

4. Helps Maintain Comfortable Finger Movement

Gentle movements take finger joints through part of their normal range of motion.

For otherwise healthy hands, comfortable movement may help maintain mobility.

People with arthritis or hand injuries may require adapted exercises recommended by a clinician or hand therapist.

5. Provides a Convenient Movement Break

Finger exercises can be performed almost anywhere.

They may be a pleasant break from typing, scrolling, or other repetitive activities.

Taking short breaks and changing tasks can also help reduce prolonged static hand positions.

Finger exercises alone cannot prevent every repetitive strain injury, but they can be one component of a comfortable work routine.

Can Finger Exercises Really Wake Up Your Brain?

The phrase “wake up your brain” is best understood as a metaphor.

Your brain is already active, even when you are resting.

When you perform a new finger movement, the brain must coordinate sensory information and motor commands.

More complicated patterns may also engage attention and working memory.

Learning a movement can involve practice-related changes in motor performance.

But these facts do not establish that a brief finger routine increases IQ, reverses memory loss, or prevents dementia.

Research on hand exercises and neurological rehabilitation often involves carefully designed programs for specific populations.

Results from rehabilitation studies cannot automatically be applied to healthy adults performing a few seconds of finger movements.

Think of these exercises as small coordination challenges, not miracle brain treatments.

A Simple 3-Minute Daily Finger Exercise Routine

If you are new to finger exercises, this short routine is a practical place to start.

First Minute: Thumb-to-Fingertip Touches

Move from your index finger to your little finger and reverse the sequence.

Use slow, precise movements.

Second Minute: Finger Spreading and Tapping

Spread your fingers comfortably for a few repetitions.

Then gently tap individual fingers on a tabletop.

Third Minute: Opposite-Hand Coordination

Perform fingertip sequences in opposite directions with your left and right hands.

Keep the pace manageable.

If your hands become tired or uncomfortable, stop and rest.

There is no established requirement to perform this particular routine every day for brain health.

When Is the Best Time to Practice Finger Exercises?

You can practice finger exercises whenever they fit comfortably into your routine.

In the morning: Try a short sequence as an enjoyable coordination activity when beginning your day.

During work breaks: Practice gentle finger movements after prolonged typing or phone use.

In the afternoon: Use a new finger pattern as a brief attention challenge.

Before bedtime: Perform slow, comfortable movements if you find them relaxing.

No particular time of day has been established as providing superior brain health benefits from these exercises.

Choose a schedule that suits your preferences and comfort.

Can Finger Exercises Improve Memory?

Finger exercises may involve remembering movement sequences, especially when performing unfamiliar patterns.

Practicing a sequence can improve your ability to remember and execute that particular sequence.

However, this is not the same as demonstrating improvements in everyday memory.

There is insufficient evidence that simple fingertip exercises alone prevent age-related memory decline, treat Alzheimer’s disease, or substantially improve general cognitive functioning.

For long-term brain health, broader habits have stronger evidence, including regular physical activity, adequate sleep, managing cardiovascular risk factors, maintaining social engagement, and following appropriate medical advice.

Finger exercises can be a fun addition to these habits, not a substitute.

Are Finger Exercises Helpful for Older Adults?

Gentle finger movements may help some older adults practice hand dexterity and coordination.

These skills are relevant to many activities of daily living, including fastening buttons, handling utensils, and writing.

However, exercises should be tailored to an individual’s abilities.

People with painful arthritis, nerve conditions, weakness, recent injuries, or reduced hand sensation may need professional guidance.

An occupational therapist or hand therapist can recommend appropriate activities when hand function is limited.

Finger exercises should not be promoted as guaranteed dementia prevention.

Common Finger Exercise Mistakes to Avoid

Moving too quickly: Prioritize accurate, controlled movements before increasing speed.

Forcing painful joints: Never bend or stretch your fingers beyond a comfortable range.

Practicing through numbness: Stop if you experience persistent tingling, weakness, or unusual sensations.

Holding unnecessary tension: Keep your shoulders, wrists, and hands relaxed.

Expecting immediate brain improvements: A few repetitions will not instantly improve intelligence or memory.

Ignoring medical symptoms: Exercises should never replace evaluation of new or progressive neurological symptoms.

Who Should Be Careful With Finger Exercises?

Most healthy adults can perform gentle finger movements, but some people need extra care.

Consult a healthcare professional before starting if you have recently injured your hand, undergone hand surgery, have an unstable finger joint, or experience significant pain with movement.

People with rheumatoid arthritis, severe osteoarthritis, tendon disorders, or nerve problems may require modified exercises.

Stop if an exercise produces sharp pain, worsening swelling, or numbness.

Sudden weakness affecting one hand or arm, especially with facial drooping, difficulty speaking, or other sudden neurological symptoms, can be a sign of stroke and requires emergency medical care.

Frequently Asked Questions

Do Finger Exercises Really Stimulate the Brain?

Finger exercises engage brain networks involved in movement, sensation, and sometimes attention. However, this does not mean they have been proven to improve general brain health or intelligence.

What Is the Best Finger Exercise for Brain Coordination?

Thumb-to-fingertip touches are a simple starting exercise because they involve controlled sequencing and finger movement.

Can Finger Exercises Improve Concentration?

They can require concentration while you perform them, but there is insufficient evidence that a short finger routine creates lasting improvements in attention.

How Many Minutes Should I Practice Daily?

You can begin with one to three minutes of gentle practice. There is no scientifically established daily duration specifically required for cognitive benefits.

Can Finger Exercises Prevent Dementia?

No. There is no reliable evidence that simple finger exercises alone prevent Alzheimer’s disease or other forms of dementia.

Are Finger Exercises Good for Children?

Age-appropriate hand activities may help children practice fine motor skills and coordination. Activities should be safe, enjoyable, and matched to their developmental abilities.

Can I Do Finger Exercises Before Bed?

Yes. Gentle finger movements can be performed before bedtime if they are comfortable. However, they are not an established treatment for insomnia.

Do Finger Exercises Improve Hand Strength?

Some hand exercises can improve strength when appropriate resistance and progression are included. Gentle fingertip touching primarily practices movement and coordination rather than substantial muscle strength.

Can Finger Exercises Help After a Stroke?

Specific hand rehabilitation exercises may be useful for some stroke survivors, but they should be selected by a qualified rehabilitation professional based on the individual’s condition.

How Quickly Will I Notice Results?

You may become more comfortable with a particular finger pattern after practicing it. Improvements in coordination vary, and no specific timeframe is established for broader cognitive benefits.

Final Thoughts

Finger exercises are a simple and accessible way to practice hand coordination, movement control, and attention.

From thumb-to-fingertip touches to more challenging opposite-hand patterns, these movements provide small motor tasks that can be performed almost anywhere.

Although they are sometimes promoted as exercises that “wake up your brain,” their benefits should be understood realistically.

They may help you practice dexterity and coordination, but they are not proven treatments for dementia, memory loss, or other neurological conditions.

For better overall brain health, combine enjoyable mental and physical activities with regular exercise, adequate sleep, balanced nutrition, and appropriate healthcare.

Try touching each fingertip to your thumb, one by one, then reverse the order. It’s a quick and fun way to practice finger control today!

Medical Disclaimer

This article is for general educational purposes only and is not a substitute for professional medical advice. Individuals with hand injuries, persistent pain, weakness, numbness, or neurological conditions should seek appropriate healthcare guidance.

Air Fryer Garlic & Herb Halloumi Cheese Bites

Golden air fryer garlic and herb halloumi cheese bites garnished with fresh parsley and lemon, served with creamy yogurt dipping sauce.
Air Fryer Garlic & Herb Halloumi Cheese Bites

Looking for a quick, savory snack with golden edges and a soft, chewy center? These Air Fryer Garlic & Herb Halloumi Cheese Bites are an easy way to enjoy Mediterranean-inspired flavors at home. Halloumi cheese is seasoned with garlic, oregano, parsley, and olive oil, then air fried until lightly golden on the outside.

Unlike many soft cheeses, halloumi holds its shape when heated, making it a great choice for air frying. Its salty flavor pairs well with fresh lemon juice, fragrant herbs, and a creamy yogurt dip.

Serve these crispy cheese bites as a party appetizer, a quick afternoon snack, or a side dish with grilled chicken and fresh vegetables. They need only a handful of ingredients and cook in minutes, making them a useful recipe for busy days.

Why You’ll Love This Recipe

These halloumi bites are simple to prepare and full of savory flavor.

  • Golden edges: The air fryer helps brown the cheese without deep frying.
  • Garlic and herb flavor: Garlic, oregano, parsley, and olive oil add a Mediterranean touch.
  • Quick cooking: The cheese usually needs only a few minutes in the air fryer.
  • Simple ingredients: Most ingredients are easy to find at larger U.S. grocery stores.
  • Versatile serving options: Enjoy the bites as an appetizer, snack, or side dish.
  • Easy to customize: Add chili flakes, lemon zest, or your favorite dried herbs.
  • Great for sharing: Serve them on a platter with toothpicks and dipping sauce.

Ingredients You’ll Need

For the Halloumi Bites

  • 8 ounces halloumi cheese
  • 1 tablespoon olive oil
  • 2 cloves garlic, finely minced
  • 1 teaspoon dried oregano
  • 1 teaspoon dried parsley
  • ½ teaspoon smoked paprika
  • ¼ teaspoon black pepper
  • 1 teaspoon fresh lemon juice
  • 1 teaspoon lemon zest, optional

Halloumi is a firm cheese that browns well and keeps its shape when heated. It is naturally salty, so you usually do not need extra salt in the seasoning.

For the Optional Yogurt Dip

  • ½ cup plain Greek yogurt
  • 1 teaspoon fresh lemon juice
  • 1 small garlic clove, finely grated
  • 1 teaspoon chopped fresh parsley
  • A pinch of black pepper

The cool yogurt dip balances the warm, salty cheese. You can also serve the bites with tzatziki, marinara sauce, or a simple lemon-garlic dressing.

For Garnishing

  • Chopped fresh parsley
  • Extra lemon wedges
  • A small pinch of red pepper flakes, optional

How to Make Air Fryer Garlic & Herb Halloumi Cheese Bites

Step 1: Prepare the Halloumi

Remove the halloumi from its package and drain any liquid.

Pat the cheese dry with paper towels to remove excess moisture. This helps the outside brown more evenly in the air fryer.

Cut the cheese into bite-size cubes, about ¾ to 1 inch wide. Try to keep the pieces similar in size so they cook at the same rate.

If the cheese is very wet, let it sit on a paper towel for a few minutes before seasoning.

Step 2: Make the Garlic Herb Seasoning

Add the olive oil, minced garlic, dried oregano, dried parsley, smoked paprika, black pepper, lemon juice, and optional lemon zest to a small bowl.

Stir until the ingredients are well combined.

The olive oil helps the seasoning coat the cheese, while the garlic and herbs add flavor to its browned surface.

Step 3: Coat the Cheese Pieces

Place the halloumi cubes in a medium mixing bowl.

Pour the garlic herb mixture over the cheese.

Toss gently until the pieces are coated on all sides.

Avoid mixing too roughly because the cubes can break apart if pressed hard.

Step 4: Preheat the Air Fryer

Preheat your air fryer to 390°F for about 3 minutes, if recommended by your appliance’s instructions.

Lightly grease the basket with an air-fryer-safe cooking spray if needed.

A preheated basket helps the cheese begin browning as soon as cooking starts.

Step 5: Arrange the Halloumi Bites

Place the seasoned cheese cubes in the basket in a single layer.

Leave a little space between the pieces so hot air can circulate around them.

Avoid overcrowding the basket because closely packed pieces may brown unevenly.

If necessary, cook the halloumi in two batches.

Step 6: Air Fry Until Golden

Air fry the halloumi at 390°F for about 5–8 minutes.

Turn or shake the pieces gently halfway through cooking.

Start checking after 5 minutes because halloumi can brown quickly, depending on the size of the cubes and the air fryer model.

Remove the bites when the edges are golden and the outside has developed a lightly crisp texture. Halloumi should remain firm rather than becoming soft and stretchy like mozzarella.

Step 7: Prepare the Yogurt Dip

While the cheese cooks, add Greek yogurt, lemon juice, grated garlic, parsley, and black pepper to a small bowl.

Stir until smooth.

Taste the dip and add a little more lemon juice if you prefer a brighter flavor.

Keep the dip refrigerated until serving.

Step 8: Garnish and Serve

Transfer the cooked halloumi bites to a serving plate.

Sprinkle with fresh parsley and a little lemon zest.

Serve immediately with lemon wedges and the yogurt dip on the side.

For the best texture, eat the bites while warm because halloumi becomes firmer as it cools.

Tips for Perfect Halloumi Bites

Use these simple tips to get evenly browned cheese with plenty of flavor.

  • Dry the cheese first: Removing surface moisture helps the outside brown.
  • Cut evenly sized cubes: Similar pieces cook at the same rate.
  • Use a light coating of oil: Too much oil can make the cheese greasy.
  • Do not overcrowd the basket: Space helps the edges brown more evenly.
  • Check the cheese early: Halloumi can become too dark if cooked for too long.
  • Turn halfway through: This helps more sides develop a golden color.
  • Skip extra salt at first: Halloumi is already salty, so taste before adding more.
  • Serve immediately: The texture is best while the cheese is warm.

Easy Recipe Variations

Spicy Garlic Halloumi

Add ¼ teaspoon of red pepper flakes or cayenne pepper to the seasoning mixture. Serve with a cool yogurt dip to balance the heat.

Lemon Herb Halloumi

Add extra lemon zest and fresh parsley for a brighter flavor. Finish with a squeeze of lemon just before serving.

Mediterranean Halloumi Bites

Season the cheese with oregano, thyme, paprika, and olive oil. Serve with cherry tomatoes, cucumber, olives, and warm pita.

Honey Garlic Halloumi

Drizzle a small amount of honey over the cooked cheese and finish with minced parsley. Add the honey after air frying so it does not burn.

Smoked Paprika Halloumi

Increase the smoked paprika slightly for a deeper, smoky flavor that pairs well with grilled vegetables.

Sesame Herb Halloumi

Sprinkle sesame seeds over the seasoned cheese before cooking for a subtle nutty taste and extra texture.

What to Serve With Halloumi Cheese Bites

These bites can be served alone or as part of a larger meal.

Try pairing them with:

  • Greek salad
  • Warm pita bread
  • Tzatziki sauce
  • Hummus
  • Roasted vegetables
  • Grilled chicken
  • Couscous or rice
  • Cherry tomatoes and cucumber
  • Lemon-garlic yogurt dip

For a party platter, serve the cheese with cucumber slices, olives, pita wedges, and two dipping sauces. For a simple lunch, add the bites to a fresh salad with tomatoes and lemon dressing.

Storage and Reheating

Halloumi tastes best freshly cooked, when the edges are golden and the center is warm.

If you have leftovers, let them cool and refrigerate them in an airtight container within 2 hours.

Store cooked halloumi for up to 3–4 days in the refrigerator.

To reheat, place the bites in the air fryer at 350°F for about 2–3 minutes, checking frequently to avoid over-browning.

The cheese may become firmer after refrigeration, and reheating will not fully restore the texture of freshly cooked halloumi.

Avoid the microwave when possible because it can make the cheese rubbery.

Common Mistakes to Avoid

Leaving the Cheese Wet

Excess moisture can prevent even browning. Pat the halloumi dry before adding the seasoning.

Cutting Uneven Pieces

Large cubes may need more time than small ones. Keep the pieces close to the same size for consistent results.

Using Too Much Oil

Halloumi already contains fat, so a light coating is enough to help the herbs stick.

Overcooking the Cheese

Too much cooking can make halloumi tough and overly firm. Start checking after 5 minutes and remove it once the edges are golden.

Adding Too Much Salt

Halloumi is naturally salty. Taste the finished dish before adding extra salt to the seasoning or dip.

Forgetting to Turn the Bites

Turning the cubes halfway through cooking helps expose more surfaces to the hot air.

Frequently Asked Questions

Can I use halloumi straight from the refrigerator?

Yes. Drain and pat it dry before cutting and seasoning; there is no need to bring it to room temperature.

How long should halloumi cook in the air fryer?

Halloumi cubes usually take about 5–8 minutes at 390°F, depending on their size and your air fryer.

Does halloumi melt in the air fryer?

Halloumi generally holds its shape when heated, although it softens inside and develops browned edges.

Do I need to soak halloumi before cooking?

Most packaged halloumi can be cooked directly after draining and drying, but soaking may help if your particular cheese tastes very salty.

Can I make halloumi bites without oil?

Yes. You can air fry halloumi without added oil, although a small amount helps the garlic and herbs coat the cheese.

What dip goes best with garlic herb halloumi?

Lemon-garlic yogurt dip, tzatziki, hummus, and marinara all pair well with the salty cheese.

Can I prepare halloumi bites ahead of time?

You can cut and season the cheese shortly before cooking, but air fry it just before serving for the best texture.

Why did my halloumi turn rubbery?

Halloumi becomes firmer as it cools and can turn tough if overcooked. Reduce the cooking time and serve it immediately.

Final Thoughts

These Air Fryer Garlic & Herb Halloumi Cheese Bites are a simple way to enjoy golden, savory cheese with garlic, herbs, and fresh lemon. The air fryer helps brown the outside while keeping the cheese firm and pleasantly chewy.

For the best results, dry the halloumi well, cut it into even cubes, use a light coating of oil, and check it early during cooking. Serve the bites warm with lemon-garlic yogurt dip, fresh vegetables, or pita bread for an easy appetizer with Mediterranean flavor.

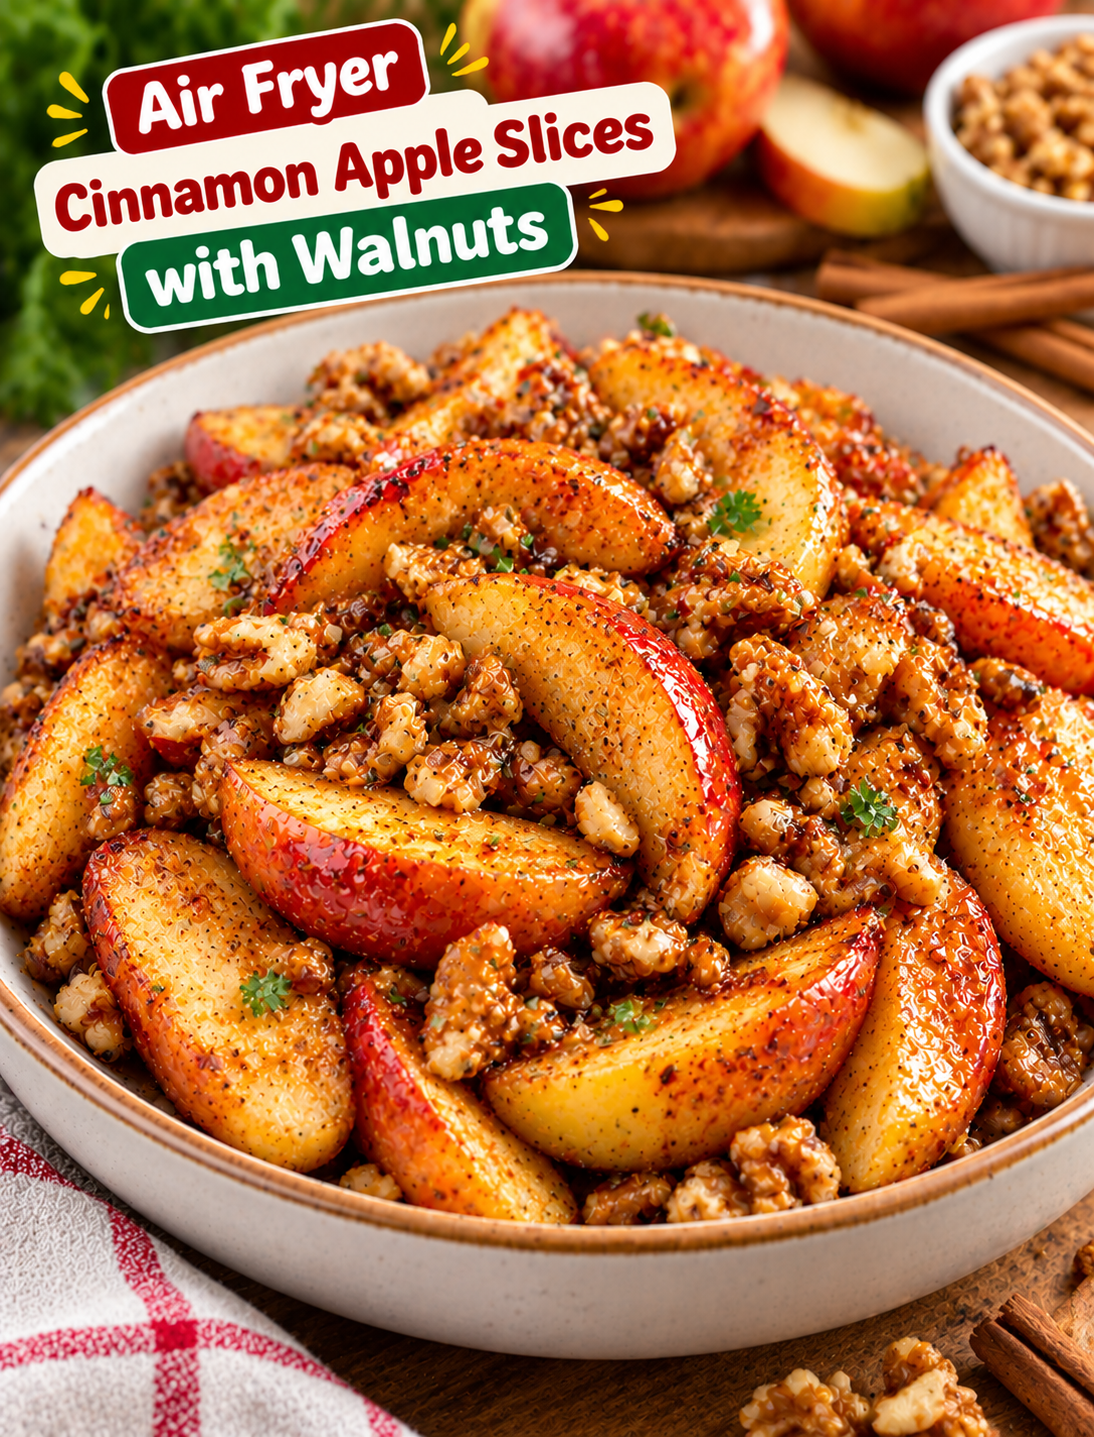
Air Fryer Roasted Cinnamon Apple Slices with Walnuts

Air fryer roasted cinnamon apple slices topped with chopped walnuts and a light maple syrup glaze in a serving bowl.
Air Fryer Roasted Cinnamon Apple Slices with Walnuts

Enjoy the warm flavor of baked apples without turning on your oven. These Air Fryer Roasted Cinnamon Apple Slices with Walnuts are tender, lightly caramelized, and coated with cinnamon, a touch of maple syrup, and crunchy walnuts.

The air fryer softens the apples while helping their edges turn golden. Cinnamon adds a cozy flavor, while chopped walnuts bring a nutty crunch to every bite. The result is a simple fall-inspired treat that works just as well for breakfast as it does for dessert.

This recipe uses everyday ingredients and takes only a few minutes to prepare. Serve the warm apple slices on their own, spoon them over oatmeal, or add them to Greek yogurt for an easy snack. You can also pair them with vanilla ice cream when you want a simple dessert.

Why You’ll Love This Recipe

These cinnamon apples are easy to make and offer plenty of ways to serve them.

  • Quick preparation: Slice the apples, add the seasonings, and let the air fryer do the work.
  • Warm cinnamon flavor: Ground cinnamon gives the apples a classic fall-inspired taste.
  • Sweet and nutty texture: Maple syrup adds sweetness, while walnuts provide a pleasant crunch.
  • No oven needed: The air fryer is convenient for small batches.
  • Easy to customize: Add nutmeg, vanilla, or a pinch of ginger to change the flavor.
  • Versatile serving options: Enjoy the apples for breakfast, as a snack, or as a dessert topping.
  • Simple ingredients: Fresh apples, walnuts, cinnamon, and a few pantry staples are all you need.

Ingredients You’ll Need

For the Cinnamon Apple Slices

  • 3 medium apples
  • 1 tablespoon melted unsalted butter or coconut oil
  • 1 tablespoon pure maple syrup
  • 1 teaspoon ground cinnamon
  • ¼ teaspoon ground nutmeg, optional
  • ½ teaspoon vanilla extract
  • 1 teaspoon fresh lemon juice
  • A small pinch of salt

Firm apples work best because they hold their shape during air frying. Honeycrisp, Fuji, Gala, and Pink Lady apples are good options. Granny Smith apples also work if you prefer a tart flavor.

For the Walnut Topping

  • ⅓ cup chopped walnuts
  • 1 teaspoon maple syrup, optional
  • ⅛ teaspoon ground cinnamon
  • 1 tablespoon raisins, optional

Walnuts add a rich, nutty flavor that pairs well with warm cinnamon apples. Chop them into small pieces so they are easy to sprinkle over the finished dish.

If you prefer a softer walnut texture, add them during the final few minutes of cooking. If you want a stronger toasted flavor, add them near the beginning and watch closely to prevent burning.

How to Make Air Fryer Roasted Cinnamon Apple Slices with Walnuts

Step 1: Wash and Slice the Apples

Rinse the apples under cool running water and pat them dry.

Remove the cores and seeds, then cut the apples into wedges or slices about ¼ to ½ inch thick.

Try to keep the slices close to the same thickness so they cook evenly. Thicker pieces stay firmer, while thinner slices soften more quickly.

You can leave the apple skins on for extra texture and color. Peel them first if you prefer a softer finish.

Step 2: Prepare the Cinnamon Mixture

Place the melted butter or coconut oil in a medium mixing bowl.

Add the maple syrup, ground cinnamon, nutmeg, vanilla extract, lemon juice, and a small pinch of salt.

Whisk until the mixture is evenly combined.

The lemon juice adds brightness and balances the sweetness, while the butter helps the cinnamon mixture coat the apple slices.

Step 3: Coat the Apple Slices

Add the sliced apples to the bowl.

Toss gently until each piece is coated with the cinnamon mixture.

Use a spatula or clean hands to spread the seasoning evenly without breaking the slices.

If the apples release a little juice, that is normal. Avoid adding extra liquid because too much moisture can make the apples soft instead of lightly caramelized.

Step 4: Preheat the Air Fryer

Preheat your air fryer to 350°F for about 3 minutes, if recommended by your appliance’s instructions.

Lightly grease the basket with an air-fryer-safe cooking spray if needed.

A preheated basket helps the apples begin cooking evenly as soon as they are added.

Step 5: Arrange the Apples in the Basket

Place the coated apple slices in the air fryer basket in a mostly single layer.

A little overlap is fine, but avoid piling the slices too high. Crowding can trap moisture and prevent the edges from browning.

If you have a small air fryer, cook the apples in batches for more even results.

Step 6: Air Fry Until Tender

Air fry the apples at 350°F for 8–12 minutes.

Shake the basket or turn the slices gently halfway through cooking.

Start checking after 8 minutes. The apples should be tender when pierced with a fork, with lightly golden edges and a warm cinnamon coating.

Cooking time depends on the apple variety, slice thickness, and air fryer model. Add another 2–3 minutes if you prefer softer apples.

Step 7: Add the Walnuts

While the apples cook, mix the chopped walnuts with the optional maple syrup and a pinch of cinnamon.

Sprinkle the walnut mixture over the apples during the final 2–3 minutes of cooking.

This timing helps the walnuts warm and toast lightly without burning.

If you prefer a stronger crunch, toast the walnuts separately in a dry skillet over medium-low heat for a few minutes, then sprinkle them over the cooked apples.

Step 8: Serve Warm

Carefully transfer the apples to a serving bowl.

Sprinkle with the optional raisins and any remaining walnuts.

Taste a slice and add a little extra cinnamon if desired.

Serve the apples warm on their own or with Greek yogurt, oatmeal, pancakes, or vanilla ice cream.

Tips for Perfect Cinnamon Apples

A few simple steps help the apples cook evenly and develop the best texture.

  • Choose firm apples: Honeycrisp, Fuji, and Pink Lady hold their shape well.
  • Cut evenly: Similar-sized slices cook at the same rate.
  • Avoid excess liquid: Too much syrup or butter can make the apples soggy.
  • Do not overcrowd the basket: Air circulation helps the edges brown.
  • Add walnuts near the end: This reduces the risk of burnt nuts.
  • Check early: Thin slices can soften faster than thick wedges.
  • Adjust the sweetness: Taste the apples before adding extra maple syrup.
  • Serve soon after cooking: The apples taste best while warm and the walnuts retain their crunch.

Easy Recipe Variations

Honey Cinnamon Apples

Replace the maple syrup with honey for a different sweet flavor. Use a small amount because honey can brown quickly.

Brown Sugar Cinnamon Apples

Replace the maple syrup with 1 tablespoon of light brown sugar. Toss well so the sugar coats the apple slices evenly.

Cinnamon Apple Slices with Pecans

Swap the walnuts for chopped pecans. Pecans offer a buttery flavor that works well with cinnamon and maple syrup.

Apple Pie Spice Version

Replace the ground cinnamon and nutmeg with about 1 teaspoon of apple pie spice. Check the blend first because some versions already contain nutmeg and ginger.

Vanilla Cinnamon Apples

Add an extra ¼ teaspoon of vanilla extract for a warmer dessert-style flavor.

Cinnamon Apples with Oats

Sprinkle a small amount of toasted rolled oats over the finished apples for added texture. Toast the oats separately because they may not cook evenly with the moist fruit.

What to Serve With Cinnamon Apple Slices

These air fryer apples work with both sweet breakfasts and simple desserts.

Try serving them with:

  • Plain Greek yogurt
  • Warm oatmeal
  • Overnight oats
  • Pancakes or waffles
  • French toast
  • Vanilla ice cream
  • Cottage cheese
  • Whole-grain toast with nut butter
  • Chia pudding

For breakfast, spoon the warm apples over oatmeal and finish with chopped walnuts. For dessert, serve them with a small scoop of vanilla ice cream and a light drizzle of maple syrup.

Storage and Reheating

Let the apples cool before placing them in an airtight container.

Refrigerate leftovers for up to 3–4 days.

To reheat, place the apples in the air fryer at 325°F for about 2–4 minutes, checking to make sure they do not become too soft.

You can also warm them in the microwave in short intervals, although the walnuts may lose some of their crunch.

For the best texture, store extra walnuts separately and add them after reheating.

Meal Prep Tips

These apples can be prepared ahead for easy breakfasts and snacks.

  • Wash and core the apples in advance.
  • Mix the cinnamon seasoning shortly before cooking.
  • Cook a batch and divide it into individual containers.
  • Refrigerate the cooked apples promptly.
  • Store walnuts separately to keep them crunchy.
  • Reheat a portion when you are ready to serve.

If cutting the apples ahead of time, toss them with a little lemon juice and refrigerate them in a sealed container to help slow browning.

Common Mistakes to Avoid

Cutting the Apples Too Thin

Very thin slices can become mushy before the edges brown. Cut the apples into evenly sized wedges or slices.

Using Too Much Syrup

Excess syrup creates more liquid in the basket and can prevent the apples from caramelizing. Start with the recommended amount and add more only after cooking if needed.

Overcrowding the Air Fryer

A packed basket traps steam and produces softer apples. Cook in batches if necessary.

Adding Walnuts Too Early

Walnuts can burn before the apples finish cooking. Add them during the last few minutes or toast them separately.

Cooking at Too High a Temperature

High heat can darken the outside before the center becomes tender. A moderate temperature of 350°F gives the apples time to soften.

Forgetting to Check the Apples

Different apple varieties soften at different rates. Check the slices early and adjust the cooking time to match your preferred texture.

Frequently Asked Questions

Which apples work best for air frying?

Honeycrisp, Fuji, Gala, and Pink Lady apples hold their shape well and offer a good balance of sweetness and tartness.

Do I need to peel the apples?

No. Apple skins are edible and help the slices hold their shape, but you can peel them for a softer texture.

How long do cinnamon apples take in the air fryer?

Most ¼- to ½-inch slices take about 8–12 minutes at 350°F, depending on their thickness and variety.

Can I make this recipe without maple syrup?

Yes. Omit the syrup for a less-sweet result or replace it with a small amount of honey or brown sugar.

Can I use pecans instead of walnuts?

Yes. Chopped pecans work well and provide a buttery, slightly sweet flavor.

How do I stop the apples from becoming mushy?

Cut the slices evenly, avoid excess liquid, cook in a single layer, and begin checking after 8 minutes.

Can I make these cinnamon apples ahead of time?

Yes. Cook them ahead, refrigerate them in an airtight container, and reheat briefly before serving.

What can I serve with roasted cinnamon apples?

Serve them with oatmeal, Greek yogurt, pancakes, waffles, or vanilla ice cream for a simple breakfast or dessert.

Final Thoughts

These Air Fryer Roasted Cinnamon Apple Slices with Walnuts are a simple way to enjoy warm fruit with cozy cinnamon flavor and a crunchy nut topping. The air fryer softens the apples, lightly browns the edges, and makes this recipe convenient for small batches.

For the best results, choose firm apples, cut them evenly, use a light coating of maple syrup and butter, and add the walnuts near the end. Serve the apples warm over oatmeal, with yogurt, or alongside vanilla ice cream for an easy treat that works throughout the year.

7 Benefits of Moving Your Toes Before Bed

Woman practicing toe exercises before bed with bare feet resting on a cream-colored bedsheet

Did You Know? 7 Benefits of Moving Your Toes Before Bed

Have you ever thought about what happens when you move your toes before going to sleep? It may seem like a tiny movement, but your toes play an important role in everyday foot function, walking, and balance.

Many people spend hours sitting at desks, standing at work, or wearing shoes that restrict natural toe movement. By the end of the day, their feet may feel tired, tight, or stiff.

Moving your toes before bed is a simple way to give your feet some gentle attention after a busy day. These movements can help maintain joint flexibility, activate small foot muscles, and ease mild stiffness associated with inactivity.

The best part is that you can perform these movements comfortably while sitting on your bed. No special equipment or gym membership is required.

But can moving your toes before sleep really improve your health? And how many repetitions should you perform?

Let’s explore seven potential benefits, a simple bedtime exercise routine, and what science says about this small but useful movement.

Why Should You Move Your Toes Before Bed?

Your feet contain numerous bones, joints, muscles, tendons, and ligaments that work together to support everyday movements.

Your big toes are especially important because they help your feet push against the ground during walking.

When you lift, lower, or spread your toes, you move their joints and activate muscles involved in controlling them.

During a busy day, some people spend long periods wearing restrictive footwear or remaining in one position.

Gentle toe movements before bedtime may be a convenient way to maintain comfortable foot mobility.

However, there is an important distinction: Toe exercises may support foot function, but they have not been proven to directly improve sleep quality or cure medical conditions.

Their primary purpose is maintaining mobility and movement control.

7 Potential Benefits of Moving Your Toes Before Bed

1. Helps Maintain Foot Flexibility

One of the main potential benefits of moving your toes before bed is supporting normal joint flexibility.

Your toe joints need a comfortable range of movement for many everyday activities.

Regular gentle movements allow these joints to move through part of their natural range.

For example, slowly lifting your big toes while keeping your feet relaxed encourages controlled movement.

This can be especially useful if your toes feel mildly stiff after being inactive.

However, toe exercises cannot necessarily reverse arthritis, joint deformities, or other structural problems.

2. May Ease Mild Toe Stiffness

Have you ever removed your shoes after a long day and noticed that your toes feel tight?

Gentle movements may help relieve the sensation of stiffness caused by inactivity.

Moving your toes upward, downward, and apart encourages normal joint motion.

You do not need to force the movement or stretch aggressively.

Simply move within a comfortable range.

If you experience persistent stiffness, swelling, or pain, consult a healthcare professional rather than relying exclusively on home exercises.

3. Activates Small Muscles in Your Feet

Your feet contain small muscles that help control toe movement and contribute to foot stability.

When you deliberately lift or spread your toes, you activate some of these muscles.

Repeated practice may improve movement awareness and coordination.

For example, trying to lift your big toe while keeping your smaller toes down can challenge your ability to control individual movements.

This exercise may feel surprisingly difficult at first.

Over time, regular practice can help you become more comfortable with the movement.

However, simply wiggling your toes does not necessarily produce the same strengthening effects as a structured resistance exercise program.

4. Supports Normal Foot Function During Walking

Your toes play an important role every time you walk.

During the final part of a normal step, the big toe bends as your foot pushes against the ground.

Adequate big toe mobility contributes to this movement.

Gentle toe exercises may help maintain the flexibility needed for comfortable everyday walking.

However, walking problems can have many causes, including nerve conditions, injuries, arthritis, and muscle weakness.

Toe exercises alone cannot correct every walking problem.

5. Encourages Better Toe Coordination

Moving your toes independently requires coordination between your muscles and nervous system.

Some people find it difficult to lift their big toes without moving their other toes.

Practicing slow, controlled movements can help develop greater awareness of these actions.

One simple exercise involves lifting both big toes and then returning them slowly to the floor or mattress.

You can also practice spreading all five toes apart before relaxing them.

The goal is smooth, comfortable movement rather than maximum speed.

6. May Support Balance as Part of a Broader Exercise Routine

Your feet help you interact with the ground while standing and walking.

Toe function is one component of balance, alongside leg strength, vision, the inner ear, and nervous system function.

Foot exercises that challenge muscle strength and coordination may contribute to balance training.

However, there is insufficient evidence that moving your toes before bedtime alone prevents falls or produces major improvements in balance.

For broader balance benefits, combine suitable foot exercises with appropriate strength and balance training.

Older adults or people with balance difficulties should choose exercises with professional guidance when necessary.

7. Creates a Simple Bedtime Movement Routine

One practical benefit of moving your toes before bed is convenience.

You can perform gentle toe exercises without leaving your bedroom.

A short routine may also encourage you to pay attention to foot comfort after a long day.

Some people find slow movement relaxing, particularly when combined with normal breathing.

Nevertheless, this personal sense of relaxation should not be confused with a scientifically established treatment for insomnia.

If you experience ongoing sleep difficulties, addressing sleep habits and seeking appropriate medical advice is more important than relying on toe movements.

How to Move Your Toes Before Bed: Step-by-Step

This beginner-friendly exercise routine requires no special equipment.

You can perform it while sitting comfortably on your bed or in a stable chair.

Step 1: Sit Comfortably

Sit on the edge of your bed or in a comfortable chair.

Keep your legs relaxed and your feet supported.

Avoid positions that place unnecessary pressure on your knees or ankles.

Step 2: Relax Your Toes

Allow both feet to rest naturally.

Take a few normal breaths and release unnecessary tension.

Do not curl or force your toes into an uncomfortable position.

Step 3: Lift Your Big Toes

Slowly raise both big toes upward while keeping the other toes as relaxed as possible.

Hold the movement for approximately one or two seconds.

If you cannot separate the movement of your big toes from the others, allow them to move together initially.

Step 4: Lower Your Big Toes

Gently lower your big toes to their starting position.

Keep the movement slow and controlled.

Avoid pressing your toes forcefully against the mattress or floor.

Step 5: Repeat 10 Times

Perform approximately 10 comfortable repetitions.

This is a reasonable starting routine rather than a medically established treatment dose.

Reduce the number if you feel tired or uncomfortable.

Step 6: Spread Your Toes

Gently spread all five toes apart.

Hold for two seconds, then relax them.

Repeat the movement five to ten times, depending on comfort.

Step 7: Rest Your Feet

Let your toes return to their natural resting position.

You can finish by gently rotating your ankles or relaxing your feet on the bed.

The routine should feel comfortable and should not cause pain.

Simple Bedtime Toe Exercise Routine

Exercise: Gentle Big Toe Lifts
Starting Repetitions: 10
Hold Time: 1–2 seconds
Additional Exercise: Toe Spreading
Toe Spreading Repetitions: 5–10
Suggested Frequency: Once daily, as tolerated
Equipment Needed: None

This routine generally takes only a few minutes.

The exact number of repetitions is not important. Comfortable, controlled movement matters more than forcing yourself to complete a particular number.

Can Moving Your Toes Before Bed Improve Blood Circulation?

One popular online claim suggests that moving your toes before bedtime can significantly improve blood circulation throughout the body.

While muscle movements involve normal blood flow to working tissues, there is limited evidence that isolated toe exercises produce meaningful whole-body circulation benefits.

For people who sit for extended periods, walking and ankle-pumping exercises engage larger muscles and are generally more useful for encouraging blood movement in the legs.

Moving your toes can still be included in a broader movement routine.

However, it should not replace medical treatment for poor circulation or conditions affecting the blood vessels.

Does Moving Your Toes Before Sleep Help You Sleep Better?

There is no strong clinical evidence that moving your toes immediately before bed directly improves sleep quality.

However, some people may find slow, gentle exercises comfortable or relaxing.

If you enjoy performing them, they can be part of your evening routine.

Other habits with better-established roles in healthy sleep include maintaining regular sleep times, limiting caffeine close to bedtime, creating a comfortable sleep environment, and getting suitable physical activity during the day.

People with persistent insomnia should seek evidence-based sleep advice rather than assuming a toe exercise will resolve the problem.

Can Toe Exercises Help With Back Pain?

Your feet contribute to the way you stand and walk, and limited big toe mobility may influence movement mechanics in some people.

However, there is no reliable evidence that simply moving your toes before bed cures lower back pain.

Back pain can develop for many reasons, including muscular strain, arthritis, nerve irritation, and other medical conditions.

Toe exercises may sometimes be included in a broader rehabilitation program, but they are not a substitute for treatment directed at the underlying cause.

Seek medical advice for persistent or worsening back pain.

Other Gentle Foot Exercises to Try Before Bed

Ankle Circles

Lift one foot slightly while seated and slowly rotate your ankle in a comfortable circle.

Repeat in the opposite direction.

Perform a few repetitions on each side.

Toe Curls

Gently curl your toes downward, then release them.

Avoid gripping tightly or causing cramps.

This movement activates muscles involved in bending your toes.

Toe Spreading

Slowly separate your toes as far as feels comfortable.

Hold briefly and relax.

Repeat several times to practice coordination.

Ankle Pumps

Pull your toes toward your shins, then gently point your feet away.

This movement activates muscles in the lower legs.

It can be a useful addition to short movement breaks after prolonged sitting.

Common Mistakes to Avoid

Moving too quickly: Fast movements make it difficult to focus on control.

Forcing stiff joints: Never push your toes into painful positions.

Ignoring discomfort: Stop the exercise if pain, numbness, or unusual symptoms appear.

Expecting overnight results: Maintaining flexibility and improving coordination generally require consistency.

Believing exaggerated claims: Toe exercises do not detoxify the body, cure arthritis, or guarantee better sleep.

Replacing physical activity: Small foot exercises are not an alternative to regular walking or other appropriate whole-body movement.

Who Should Be Careful With Toe Exercises?

Gentle toe exercises may be appropriate for many healthy adults, but certain conditions require extra care.

Consult a healthcare professional before starting exercises if you have recently undergone foot surgery, sustained a toe fracture, experienced a significant foot injury, or have an active foot wound.

People with diabetes-related neuropathy, reduced foot sensation, severe arthritis, or diagnosed circulation problems may also need individualized guidance.

Stop exercising if you develop pain, swelling, or worsening numbness.

A foot that suddenly becomes cold, pale, severely painful, or loses sensation requires urgent medical attention.

Frequently Asked Questions

Is It Good to Move Your Toes Before Bed?

Gentle toe movements may help maintain joint flexibility and improve movement awareness. However, they are not a proven treatment for sleep problems.

How Many Times Should I Move My Toes Before Sleeping?

You can start with approximately 10 comfortable repetitions and adjust based on how your feet feel.

Can Moving Your Toes Reduce Stiffness?

Gentle movements may help ease mild stiffness associated with inactivity. Persistent or painful stiffness should be assessed by a healthcare professional.

Does Moving Your Big Toes Improve Balance?

Toe function contributes to normal foot mechanics, and certain foot exercise programs may support balance. Simple toe wiggling alone has not been proven to prevent falls.

Can Toe Movements Help With Nerve Pain?

Toe movements are not an established treatment for nerve pain. Persistent tingling, burning, numbness, or weakness requires appropriate medical evaluation.

Should I Move My Toes While Lying in Bed?

Yes, you can perform gentle toe movements while lying down if the position is comfortable and you have no medical restrictions.

Are Toe Exercises Safe for Older Adults?

Many older adults can perform gentle toe movements, but people with mobility limitations or foot conditions may require individualized advice.

Can Toe Movements Help With Foot Swelling?

Toe movements alone are not a reliable treatment for swelling. New, persistent, painful, or one-sided swelling should be medically assessed. Sudden swelling with chest pain or breathlessness requires emergency care.

Will Moving My Toes Before Bed Help Me Lose Weight?

No. Toe movements require very little energy and are not an effective weight-loss method.

How Long Does It Take to See Results?

Some people may notice that gentle movement feels comfortable immediately. Changes in coordination or mobility vary, and there is no established timeline for benefits from this specific bedtime routine.

Final Thoughts

Moving your toes before bed is a simple, accessible activity that can help you pay more attention to foot mobility.

Gentle big toe lifts, toe spreading, and other controlled movements may help maintain flexibility, activate small foot muscles, and ease mild stiffness associated with inactivity.

Although these exercises are convenient, they should not be viewed as miracle treatments for poor circulation, chronic pain, sleep disorders, or other health conditions.

For healthier feet and overall well-being, combine gentle toe movements with comfortable footwear, regular walking, suitable physical activity, and medical guidance when necessary.

Before you go to sleep tonight, try a few gentle toe movements. Your feet deserve a little care after carrying you through the day.

Medical Disclaimer

This article is intended for general educational purposes only. It does not replace professional medical advice, diagnosis, or treatment. Consult a qualified healthcare professional if you have persistent foot pain, swelling, numbness, or an existing medical condition affecting your feet.

Creamy Brazilian Corn Cake

Creamy Brazilian Corn Cake

This is *Creamy Brazilian Corn Cake – the one baked in corn husks. Very soft, moist and sweet.

Ingredients:

– Fresh sweet corn – 2 cups (about 3 corn cobs) – kernels removed

– Sweetened condensed milk – 1 can (395g) –

– Eggs – 3 large

– Butter / Cream cheese – 100g (2 small cubes )

– Melted butter / oil – 3 tbsp

– Semolina / Cornmeal (suji) – 3 tbsp – _small white bowl left side_

– Baking powder – 1 tbsp

– A pinch of salt


*For lining:* Dried corn husks or butter paper


Method:


*1. Prep:*

Wash and dry corn husks and line your baking pan with them. If you don’t have husks, just grease the pan with butter and cornmeal. Preheat oven to 180°C / 350°F.


*2. Blend:*

In a blender, add corn kernels, condensed milk, eggs, cream cheese/butter, and melted butter.

Blend for 2-3 minutes until completely smooth and creamy.


*3. Add dry ingredients:*

Add the semolina, baking powder and salt to the blender. Blend again for just 10 seconds. Don’t over-mix.


*4. Pour and Bake:*

Pour the thick yellow batter into the husk-lined pan –

Bake for 40-45 minutes, until the top is golden brown and a toothpick comes out clean.


*5. Serve:*

Let it cool for 15 minutes. It will be golden brown on top and soft yellow inside


It tastes best warm! You can eat it as it is with tea. It stays soft for 2 days in the fridge.

For this Corn Cake, these tips will make it perfect:


*1. For Extra Softness:*

Don’t add any flour . The recipe is gluten-free. If you want it more creamy like custard, add 1/2 cup of normal milk.


*2. Corn Tip:*

Use fresh sweet yellow corn only. If using frozen corn, thaw it completely and drain water. Don’t use canned corn, it has too much water.


*3. Blending Tip:*

Blend for full 3 minutes. The longer you blend the corn, the smoother and less grainy your cake will be.


*4. Sweetness:*

The condensed milk is already sweet. If you like less sweet, use 3/4 can only + 1/2 cup milk. If you don’t have condensed milk, use 1 cup milk + 3/4 cup sugar.


*5. Baking Tip:*

Don’t open the oven for first 30 minutes or it will sink. Check after 40 minutes. Top should be dark golden brown. It will be a little jiggly in center when hot, it firms up after cooling.


*6. Lining Tip:*

If you don’t have corn husks, use butter paper + grease with butter. Husks just give nice village-style smell and look.


*7. Storage:*

– Room temp: 1 day

– Fridge: 3-4 days (warm in microwave for 20 sec before eating)

– Don’t freeze, it becomes watery.


Most common mistake: Too much baking powder makes it bitter. Use only 1 tbsp, not more.


Want the eggless version of this same cake?

Zucchini, Eggplant & Tomato Salad

Zucchini Eggplant Tomato Salad with roasted zucchini, eggplant, cherry tomatoes, feta, olives, fresh herbs, and lemon dressing

Zucchini, Eggplant & Tomato Salad

Zucchini Eggplant Tomato Salad is a colorful Mediterranean-inspired dish made with tender roasted vegetables, juicy tomatoes, fresh herbs, olive oil, lemon, and a simple garlic dressing. The combination of warm zucchini and eggplant with fresh or lightly roasted tomatoes creates a satisfying mix of soft, juicy, and slightly caramelized textures.

This Zucchini Eggplant Tomato Salad works beautifully as a light lunch, side dish, picnic recipe, or make-ahead vegetable plate. It can be served warm, at room temperature, or chilled, making it flexible for both everyday meals and casual entertaining.

Prep Time: 20 minutes
Cook Time: 25 minutes
Total Time: 45 minutes
Servings: 6

Ingredients

For the Vegetables

  • 2 medium zucchini, sliced into half-moons
  • 1 medium eggplant, cut into 1-inch cubes
  • 2 cups cherry tomatoes, halved
  • 1 small red onion, thinly sliced
  • 2 tablespoons extra virgin olive oil
  • 1/2 teaspoon salt
  • 1/4 teaspoon black pepper
  • 1/2 teaspoon dried oregano

Ingredients For the Dressing

  • 3 tablespoons extra virgin olive oil
  • 2 tablespoons fresh lemon juice
  • 1 tablespoon red wine vinegar
  • 1 garlic clove, finely minced
  • 1 teaspoon Dijon mustard
  • 1/2 teaspoon honey or maple syrup
  • 1/2 teaspoon dried oregano
  • 1/4 teaspoon salt
  • 1/4 teaspoon black pepper

For Finishing

  • 1/3 cup crumbled feta cheese
  • 1/4 cup chopped fresh parsley
  • 2 tablespoons chopped fresh basil
  • 2 tablespoons chopped fresh mint
  • 1/4 cup Kalamata olives, sliced
  • 2 tablespoons toasted pine nuts or walnuts, optional
  • Lemon wedges, for serving

Why You’ll Love This Recipe

Zucchini Eggplant Tomato Salad is packed with Mediterranean flavor while using simple vegetables that are easy to find. Roasting the zucchini and eggplant brings out their natural sweetness, while tomatoes add brightness and moisture.

Another reason to love Zucchini Eggplant Tomato Salad is its versatility. It can be served beside grilled chicken, fish, pasta, or bread, and it also works well as a vegetarian lunch with chickpeas or white beans added for extra protein.

How to Make Zucchini Eggplant Tomato Salad

Step 1: Preheat the Oven

Preheat the oven to 425°F or 220°C.

Line a large baking sheet with parchment paper or lightly grease it with olive oil.

A hot oven helps Zucchini Eggplant Tomato Salad develop deeply roasted vegetables with golden edges instead of soft, steamed pieces.

Step 2: Prepare the Eggplant

Cut the eggplant into evenly sized cubes.

If your eggplant is very large or slightly bitter, sprinkle it lightly with salt and let it sit for 15 minutes. Pat it dry before roasting.

For most small or medium eggplants, this extra step is not necessary.

Step 3: Season the Vegetables

Place the zucchini, eggplant, and red onion on the baking sheet.

Drizzle with olive oil and season with salt, black pepper, and oregano.

Toss gently until everything is evenly coated, then spread the vegetables into a single layer.

Giving the vegetables enough space allows Zucchini Eggplant Tomato Salad to develop golden edges instead of steaming.

Step 4: Roast Until Tender

Roast the zucchini, eggplant, and onion for 20 to 25 minutes.

Turn the vegetables once halfway through cooking.

They should be tender with lightly browned edges but still hold their shape.

During the final 8 minutes, add half of the cherry tomatoes to the baking sheet. Keep the remaining tomatoes fresh for contrast.

Step 5: Make the Dressing

While the vegetables roast, whisk together olive oil, lemon juice, red wine vinegar, garlic, Dijon mustard, honey, oregano, salt, and black pepper.

Taste and adjust the acidity or sweetness as needed.

The lemon and vinegar keep Zucchini Eggplant Tomato Salad bright and balance the richer roasted vegetables.

Step 6: Cool Slightly

Remove the vegetables from the oven and let them cool for about 10 minutes.

They can still be warm, but they should not be steaming hot when mixed with the fresh herbs and feta.

This helps the herbs stay fresh and prevents the cheese from melting completely.

Step 7: Combine the Salad

Transfer the roasted vegetables to a large serving bowl.

Add the remaining fresh cherry tomatoes, olives, parsley, basil, and mint.

Pour the dressing over the vegetables and toss gently.

Zucchini Eggplant Tomato Salad should be well coated without becoming mashed or overly wet.

Step 8: Add Feta and Nuts

Sprinkle crumbled feta over the top.

Add toasted pine nuts or walnuts if using.

Fold them in lightly, leaving some visible on top for texture and presentation.

Step 9: Rest for Better Flavor

Let the salad rest for 10 to 15 minutes before serving.

This gives the dressing time to soak into the warm vegetables and helps Zucchini Eggplant Tomato Salad taste more balanced.

Step 10: Garnish and Serve

Finish with extra herbs, a squeeze of lemon, black pepper, or a light drizzle of olive oil.

Serve Zucchini Eggplant Tomato Salad warm, at room temperature, or chilled.

Serving Suggestions

Zucchini Eggplant Tomato Salad is an excellent side for grilled chicken, baked fish, shrimp, turkey meatballs, or lamb.

It also pairs well with couscous, quinoa, orzo, pita bread, hummus, and tzatziki.

For a vegetarian meal, add chickpeas, cannellini beans, lentils, or cooked quinoa.

You can also spoon Zucchini Eggplant Tomato Salad over toasted sourdough or serve it inside warm pita pockets for a simple lunch.

For another fresh Mediterranean-inspired meal, try our Cauliflower Pita Wraps with roasted cauliflower, crisp vegetables, feta, and creamy yogurt sauce.

Recipe Tips

Cut the zucchini and eggplant into similar-size pieces so they roast evenly.

Do not crowd the baking sheet. Use two trays if necessary.

Keep some tomatoes fresh and roast the rest for a better mix of textures.

Use good-quality extra virgin olive oil because its flavor is noticeable in the dressing.

Let the roasted vegetables cool slightly before adding delicate herbs.

For the best texture, toss gently and avoid stirring too aggressively.

Easy Variations

Zucchini Eggplant Tomato Salad is easy to customize depending on what you have available.

Add roasted red peppers, artichoke hearts, cucumber, capers, or chickpeas.

For a creamier version, add avocado just before serving.

Replace feta with goat cheese, mozzarella pearls, or shaved Parmesan.

For extra protein, add grilled chicken, tuna, white beans, or lentils.

If you enjoy spice, add red pepper flakes or a chopped fresh chili to the dressing.

You can also replace the lemon dressing with a balsamic vinaigrette for a sweeter, deeper flavor.

If you enjoy hearty vegetable-packed meals, you may also like our Tuscan White Bean and Kale Soup.

Make-Ahead Instructions

Zucchini Eggplant Tomato Salad is a good make-ahead dish because the roasted vegetables can be prepared in advance.

Roast the zucchini, eggplant, onion, and tomatoes up to one day ahead. Cool completely and refrigerate them in an airtight container.

Prepare the dressing separately and refrigerate it in a jar.

For the freshest result, combine the vegetables, dressing, herbs, feta, and nuts shortly before serving.

Storage and Reheating

Store leftover Zucchini Eggplant Tomato Salad in an airtight container in the refrigerator for up to 3 days.

If you prefer it warm, heat only the vegetable portion briefly in a skillet or microwave, then add fresh herbs and feta afterward.

Freezing is not recommended because zucchini and tomatoes can become watery and soft after thawing.

Nutrition Information

Approximate nutrition per serving:

Calories: 220
Protein: 6 g
Carbohydrates: 15 g
Fat: 16 g
Saturated Fat: 4 g
Fiber: 5 g
Sugar: 8 g
Sodium: 480 mg

Nutrition values are estimates and may vary depending on the feta, olives, nuts, oil, and serving size.

Frequently Asked Questions

Can I grill the vegetables instead of roasting them?

Yes. Grill zucchini slices, eggplant, and onion until tender with light char marks, then chop and assemble the salad with the remaining ingredients.

Can I make this without feta?

Yes. Simply omit it or use a dairy-free cheese alternative.

Should this salad be served warm or cold?

Both work well. Zucchini Eggplant Tomato Salad tastes especially good slightly warm or at room temperature, but chilled leftovers are also delicious.

Can I add beans?

Yes. Chickpeas, cannellini beans, or lentils make the salad more filling and add extra protein and fiber.

How do I stop the vegetables from becoming mushy?

Roast them at high heat, avoid overcrowding the pan, and do not cut the pieces too small.

Can I use regular tomatoes instead of cherry tomatoes?

Yes. Use firm Roma or plum tomatoes and cut them into chunks.

What herbs work best?

Parsley, basil, and mint are excellent, but dill or cilantro can also be used depending on your preference.

Final Thoughts

Zucchini Eggplant Tomato Salad is a simple way to turn everyday vegetables into a colorful Mediterranean-inspired dish. Roasted zucchini, eggplant, tomatoes, olives, feta, herbs, and lemon dressing create a combination that feels fresh, savory, and satisfying.

Because Zucchini Eggplant Tomato Salad can be served warm, chilled, or at room temperature, it works well for lunches, dinners, picnics, and meal prep.

Keep this Zucchini Eggplant Tomato Salad recipe handy whenever you want an easy vegetable side with bold Mediterranean flavor and plenty of texture.