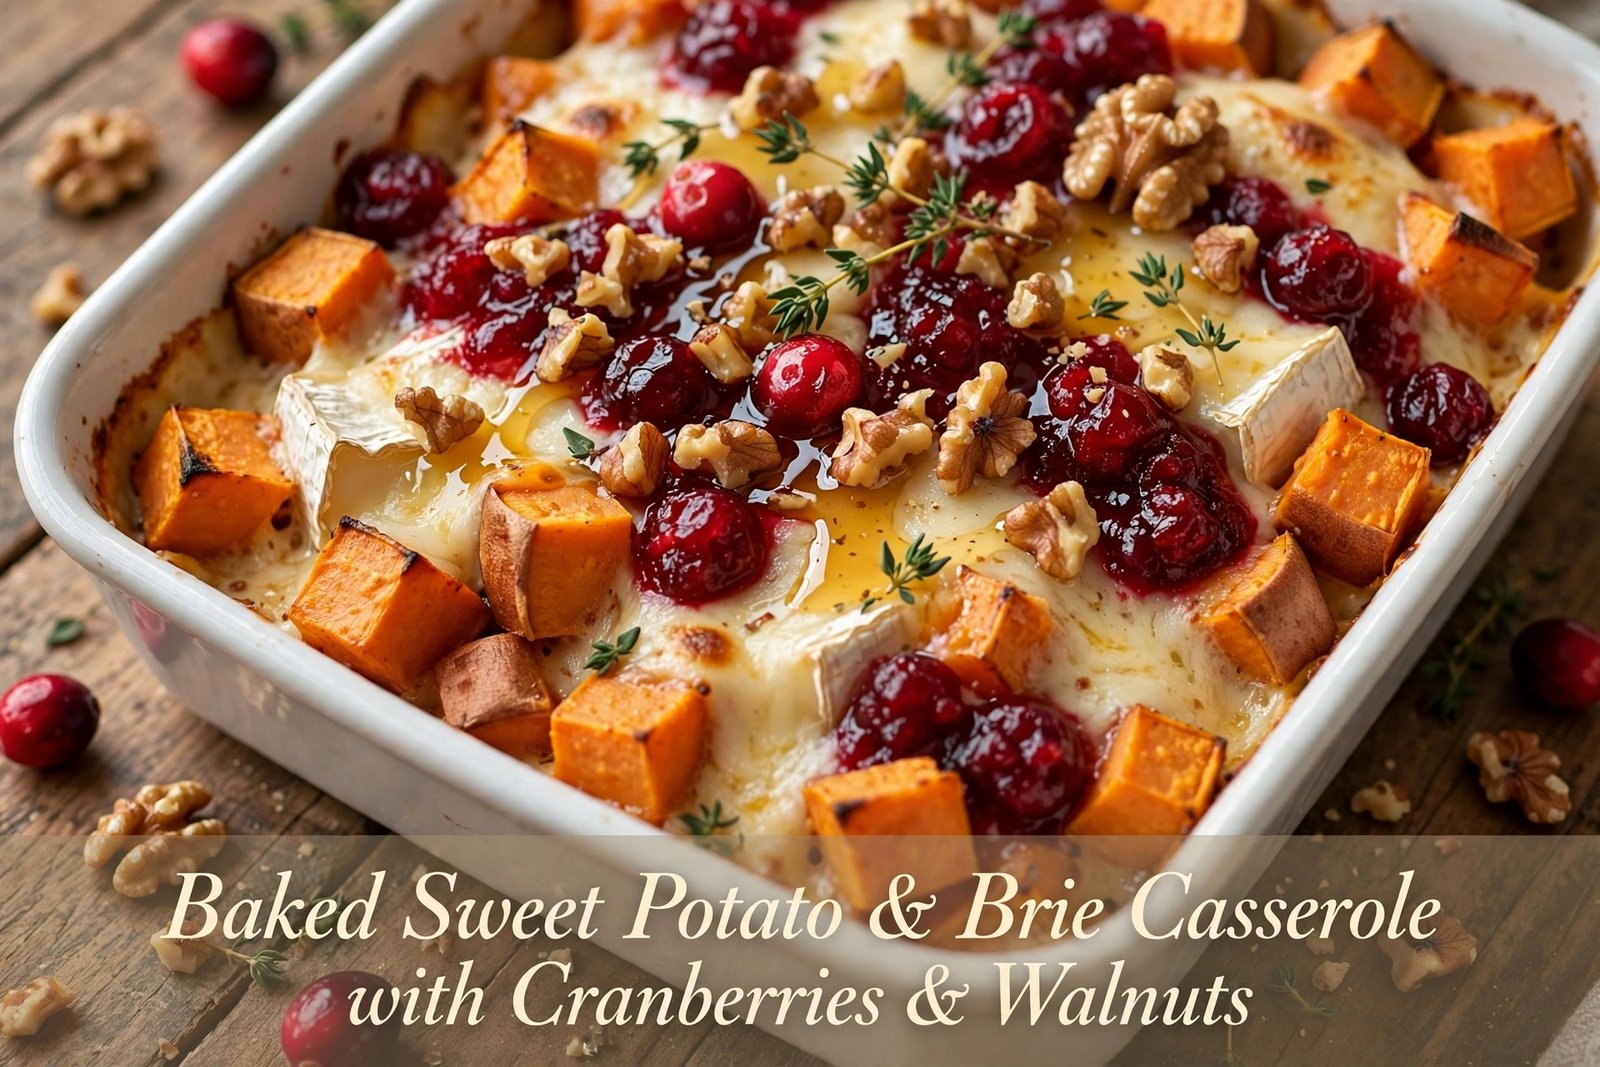
Baked Sweet Potato & Brie Casserole with Cranberries & Walnuts

Baked Sweet Potato & Brie Casserole with Cranberries & Walnuts

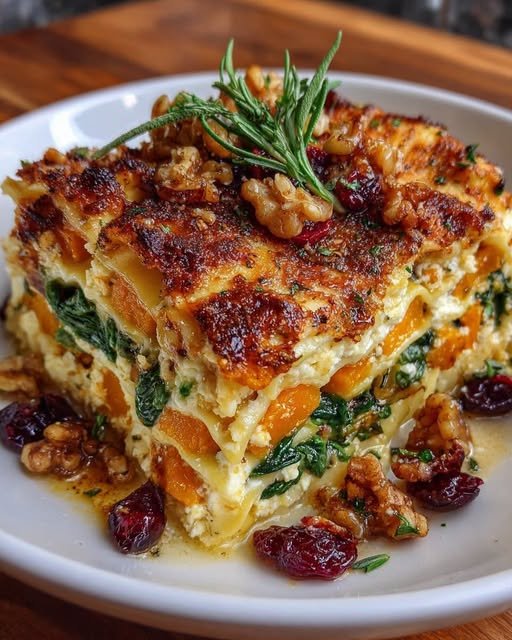
This is *Baked Sweet Potato & Brie Casserole with Cranberries & Walnuts* – sweet, salty, cheesy and perfect for holidays!


Ingredients:

– Sweet potatoes – 3 large (about 1 kg), peeled & cut into 2cm cubes

– Brie cheese – 250g, sliced into pieces (remove rind if you want)

– Walnuts – 1 cup, roughly chopped

– Cranberry sauce / dried cranberries – 3/4 cup (or cranberry jam)

– Brown sugar – 3 tbsp

– Butter – 3 tbsp, melted

– Honey or Maple syrup – 3 tbsp

– Cinnamon powder – 1/2 tsp

– Salt – 1/2 tsp

– Black pepper – 1/4 tsp

– Fresh thyme – 2-3 sprigs for garnish


Method:


*1. Roast Sweet Potatoes:*

Preheat oven to 200°C / 400°F.

In a bowl, toss sweet potato cubes with melted butter, brown sugar, cinnamon, salt and pepper.

Spread in a baking dish and roast for 20-25 minutes until they start to get soft and golden.


*2. Add Brie & Walnuts:*

Take dish out. Place Brie slices all over the top of the sweet potatoes.

Sprinkle chopped walnuts evenly.


*3. Bake Again:*

Put back in oven for 10-12 minutes until Brie is melted, bubbly and slightly golden on top.


*4. Finish:*

Take out of oven. Spoon warm cranberry sauce / jam on top while it’s hot.

Drizzle honey or maple syrup over everything.

Garnish with fresh thyme.


Serve directly from the dish with a spoon – hot and gooey. That sweet-salty-cheesy bite is amazing!


*Tip:* If you use dried cranberries instead of sauce, soak them in 2 tbsp hot water for 5 mins so they become soft and jammy.

Tips for this Sweet Potato & Brie Bake:


*1. Don’t overcook sweet potatoes in first bake:*

Roast them 75% only (20-25 mins). They will cook again with Brie. If you fully cook first, they will become mushy like halwa in second bake.


*2. Use cold Brie, cut thick:*

If you cut Brie too thin, it disappears. Cut into 1cm thick slices and place them on top, not mixed inside.

*3. Walnuts trick:*

Toast walnuts in a dry pan for 2 minutes before adding. It makes them extra crunchy and they won’t become soft in oven. You can also toss them with a little honey + pinch of salt.


*4. Cranberry balance:*

Brie is rich and sweet potato is sweet, so you NEED the sour cranberry to balance. Don’t skip it. If you use very sweet jam, add 1 tsp lemon juice to it.


*5. Don’t add honey before baking:*

Honey burns fast. Always drizzle honey / maple syrup AFTER baking, when it’s hot out of the oven.


*6. Best to serve hot:*

Brie gets firm when cold. This dish is best served within 15-20 minutes out of oven when cheese is still gooey and stretchy on the spoon.


Add a little chili flakes if you want sweet + spicy!

Brie en Croûte with Potatoes & Bacon

Brie en Croûte with Potatoes & Bacon

This is *Brie en Croûte with Potatoes & Bacon* – crispy puff pastry outside, super melty cheese with creamy potatoes inside.

Ingredients:

– Puff pastry sheet – 1 large (about 250g), thawed

– Whole Brie cheese wheel – 1 (200g – 250g)

– Potatoes – 2 medium, thinly sliced

– Bacon / Lardons / Pancetta – 1 cup (150g), diced

– Heavy cream / Crème fraîche – 1/2 cup (120ml)

– Egg – 1 for egg wash

– Black pepper – 1/2 tsp

– Salt – to taste

– Fresh thyme – few sprigs

– Olive oil or butter – 1 tbsp


Method:


*1. Prep the potatoes:*

Boil or pan-fry the thin potato slices with a little oil and salt for 6-8 minutes until just tender. Don’t overcook. Let them cool.


*2. Cook the bacon:*

Fry the bacon/lardons in a pan until golden and crispy. Drain excess fat.


*3. Make the creamy filling

In a large bowl, mix the cooked potatoes, fried bacon, heavy cream, black pepper, and a little thyme. Mix well – it should look creamy .


Assemble:

– Roll out your puff pastry on parchment paper / baking tray.

– Put half of the potato-bacon mixture in the center.

– Place the whole Brie wheel on top of it.

– Cover the top and sides with the rest of the potato mixture if you like, but the main one is underneath.


*5. Wrap it:

Fold the puff pastry corners over the Brie to make a parcel/envelope. Seal the edges well. Press with a fork on the sides so cheese doesn’t leak. Flip it so the smooth side is on top.


*6. Final touch:

– Brush all over with beaten egg (egg wash).

– Make 4-5 small slits on top with a knife for steam.

– Sprinkle fresh thyme leaves on top.


*7. Bake:*

Bake in preheated oven at 200°C / 400°F for 25-30 minutes until deep golden brown and puffed.


*8. Rest & Serve 

Let it rest for 5-10 minutes before cutting. Then cut – the Brie will be super melty and cheesy .


*Tips:*

– Keep Brie cold from fridge, don’t use room temp or it will melt too fast.

– You can add caramelized onions or mushrooms inside for extra flavor.


Serve hot with green salad!

Tips for this Brie Parcel to make it .


*1. Don’t get a soggy bottom:*

This is the biggest problem. Your potato slices must be COOL and DRY before you mix with cream. If they are hot/wet, the pastry will become soggy and not puff. Pat them with a paper towel.


*2. Seal it tight:*

Cheese WILL leak if not sealed. After folding, press the edges with a fork and use a little egg wash as glue. Put the parcel seam-side down on the tray.


*3. Cold Brie is best:*

Use Brie directly from the fridge. If it’s soft/warm, it melts too quickly and bursts out of the pastry before the pastry gets golden.


*4. Don’t use too much cream:*

You need just 1/2 cup. This looks creamy but not liquid. If you add too much cream, it will leak out while baking. It should coat the potatoes, not swim in it.


*5. Egg wash is a must:*

Brush egg on all sides, not just top. That’s what gives it that shiny deep golden color .


*6. Let it rest:*

Don’t cut immediately. Wait 10 minutes after baking. If you cut hot, all the melted cheese will run out onto the board. Resting lets it stay gooey but not watery.


*7. Puff pastry tip:*

Don’t roll it too thin or too thick. If too thin it tears, if too thick it won’t cook inside. Thaw it but keep it cold while working.


Add a little honey or onion jam under the Brie if you want sweet + salty flavor – tastes amazing.

Coconut Chocolate Chip Cookies*

Coconut Chocolate Chip Cookies* 

*Coconut Chocolate Chip Cookies* – soft, chewy from inside and crunchy outside.


Ingredients:

– All-purpose flour  – 1 & 1/2 cup (190g)

– Butter – 3/4 cup (170g) soft, room temp

– Brown sugar – 3/4 cup (150g)

– White sugar – 1/2 cup (100g)

– Egg – 1 large

– Shredded / Desiccated Coconut (toasted) – 1 cup (80g)

– Chocolate chips – 1 cup (170g)

– Vanilla essence – 1 tsp

– Baking soda – 1/2 tsp

– Baking powder – 1/2 tsp

– Salt – 1/4 tsp

Method:


*1. Mix dry ingredients:*

In a bowl, add flour, baking soda, baking powder and salt. Mix and set aside.


*2. Cream butter & sugar:*

In a big bowl, beat soft butter, brown sugar and white sugar for 2-3 minutes until fluffy and light. Add egg and vanilla, beat again.


*3. Make dough:*

Add the dry flour mix into the butter mix. Fold with spatula, don’t over-mix.

Now add toasted coconut and chocolate chips. Mix. The dough will be thick and chunky .


*4. Chill (Important):*

Cover and put dough in fridge for 30 minutes. This makes cookies thick and chewy, not flat.


*5. Shape & Bake:*

Make small balls with hands or ice cream scoop  and place on baking paper.

Bake at 175°C / 350°F for 10-12 minutes only. Top should be light golden, center will be soft.


*6. Cool:*

Let them cool on tray for 10 minutes. They will become firm as they cool.


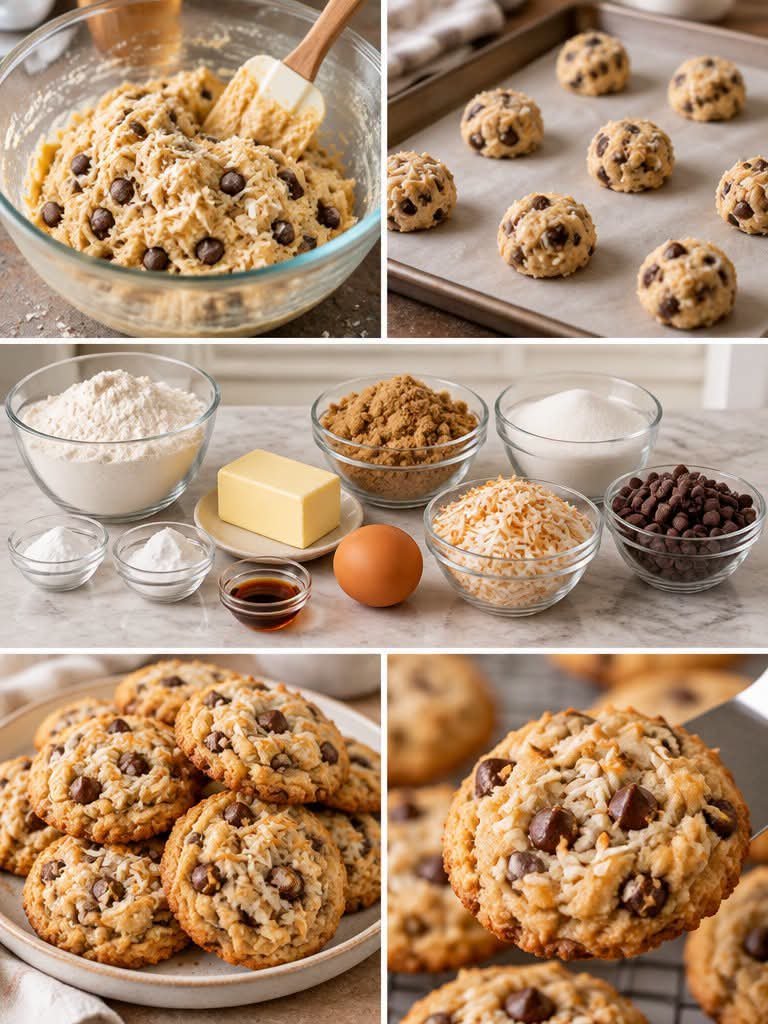
Ready! You will get 18-20 cookies exactly like the bottom pictures – soft, coconutty and full of chocolate.


*Tips:*

– Toast your coconut for 3-4 mins in a pan for better flavor.

– Don’t over-bake or they will become hard.

– You can store in a box for 4-5 days.


*For Perfect Coconut Chocolate Chip Cookies:*


*1. Don’t Over-Bake:*

This is the #1 rule. Take them out after 10-12 minutes when the center still looks soft and underbaked. They will firm up as they cool. If you wait till they look fully hard in the oven, they will be hard later.


*2. Chill The Dough:*

Always chill the dough for 30 minutes in the fridge. Warm dough spreads into thin, flat cookies. Cold dough gives you thick, soft, chewy cookies .


*3. Toast Your Coconut:*

Don’t use raw white coconut. Toast it in a dry pan for 2-3 minutes until light golden. It adds a nutty, amazing flavor.


*4. Use Soft Butter, Not Melted:*

Your butter should be soft to the touch, not melted. Melted butter makes cookies greasy and flat.


*5. Add Extra Chips on Top:*

Before baking, press 2-3 extra chocolate chips on top of each dough ball. This gives you that bakery-style


*6. Same Size:*

Make all cookie balls the same size. Use a spoon or ice cream scoop so they bake evenly.


*Storage:* Keep in an airtight jar for 4-5 days. They will stay soft and chewy.

Garlic Butter & Herb Baked Fish

Garlic Butter & Herb Baked Fish

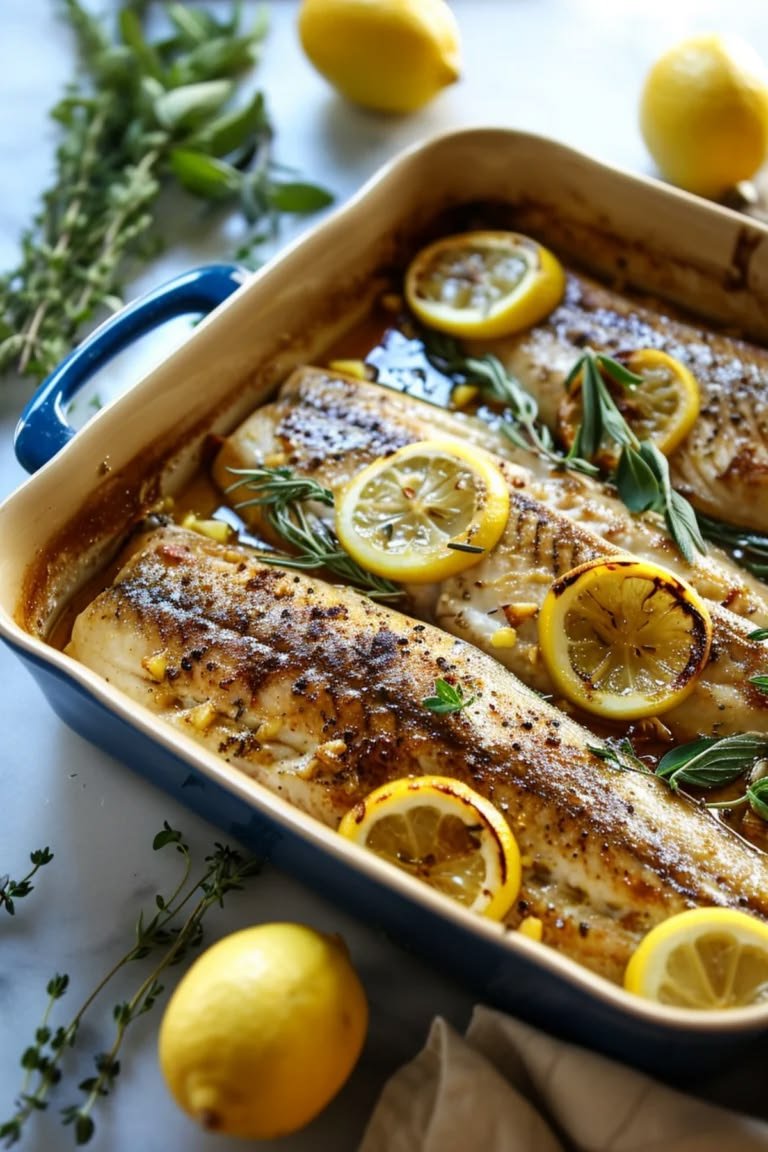
The best part is that you do not need complicated ingredients or hours in the kitchen. A few fresh ingredients, a baking dish, and your oven are all you need to create a beautiful restaurant-style meal at home. Serve it with roasted potatoes, steamed vegetables, fluffy rice, or a fresh Mediterranean salad for a satisfying dinner.

Recipe Details

  • Prep Time: 15 minutes

  • Cook Time: 15–20 minutes

  • Total Time: 30–35 minutes

  • Servings: 4

  • Course: Main Course

  • Cuisine: Mediterranean-inspired

  • Cooking Method: Baking

  • Difficulty: Easy

Ingredients

For the Fish

  • 4 white fish fillets, approximately 5–6 ounces each

  • 2 tablespoons olive oil

  • ½ teaspoon salt

  • ½ teaspoon black pepper

  • ½ teaspoon paprika

  • ¼ teaspoon onion powder

  • 1 lemon, sliced

For the Garlic Butter Herb Sauce

  • 4 tablespoons unsalted butter, melted

  • 4 garlic cloves, finely minced

  • 1 tablespoon fresh parsley, chopped

  • 1 teaspoon fresh thyme leaves

  • ½ teaspoon fresh rosemary, finely chopped

  • 1 tablespoon fresh lemon juice

  • 1 teaspoon lemon zest

  • ¼ teaspoon red pepper flakes, optional

  • 1 tablespoon fresh dill, optional

Best fish choices: Cod, haddock, pollock, and tilapia all work well. Cod is especially good because its thick, flaky texture holds together beautifully during baking.

Instructions

Step 1: Preheat the Oven

Preheat your oven to 400°F (200°C). This temperature cooks the fish quickly while allowing the garlic butter to melt into the fillets and the herbs to release their aroma.

Lightly grease a baking dish with olive oil or a small amount of butter. Choose a dish large enough to hold the fish in one layer without overlapping.

Step 2: Prepare the Fish

Pat the fish fillets dry with paper towels. Removing excess moisture helps the seasonings stick and prevents unnecessary liquid from collecting in the baking dish.

Check the fillets for any remaining bones and remove them carefully. Arrange the fish in the prepared baking dish.

Brush the fillets lightly with olive oil, then season both sides with salt, black pepper, paprika, and onion powder. Rub the seasoning gently over the surface so each piece receives an even coating.

The paprika adds a beautiful color and mild warmth, while the black pepper and onion powder provide extra savory flavor.

Step 3: Prepare the Garlic Butter Sauce

In a small bowl, combine the melted butter, minced garlic, chopped parsley, thyme, rosemary, lemon juice, and lemon zest.

Stir thoroughly until the garlic and herbs are evenly distributed throughout the butter.

For a little heat, add red pepper flakes. If you enjoy a fresh, bright flavor, include the optional dill. Taste the mixture and adjust the lemon juice or herbs according to your preference.

Freshly minced garlic gives the sauce its signature aroma. Finely chopping the herbs also helps distribute their flavor evenly over the fish.

Step 4: Coat the Fish

Pour the garlic butter mixture over the seasoned fish fillets. Use a spoon to spread the butter, garlic, and herbs across each piece.

Make sure the tops and sides are coated. The butter helps keep the fish moist and creates a flavorful sauce as the fish bakes.

Arrange the lemon slices around the fillets and place a few on top. As they warm in the oven, they release their citrus fragrance into the sauce.

Before baking, spoon some of the garlic butter from the dish over the fish one more time for extra flavor.

Step 5: Bake Until Tender

Place the baking dish in the preheated oven and bake for approximately 12–20 minutes, depending on the thickness of the fillets.

Thin tilapia fillets may cook in 10–12 minutes, while thicker cod fillets may need 15–20 minutes.

Check the fish toward the end of the cooking time. It should become opaque and separate easily into flakes when gently tested with a fork.

For food safety, cook the fish to an internal temperature of 145°F (63°C) at its thickest point. A food thermometer provides the most reliable result.

Avoid baking the fish longer than necessary, as overcooking can make the flesh dry and less tender.

Step 6: Spoon Over the Garlic Butter

Remove the baking dish from the oven and let the fish rest for about 2 minutes.

Using a spoon, collect the melted garlic butter and herb juices from the bottom of the dish. Drizzle them over each fillet.

Finish with freshly chopped parsley, a squeeze of lemon juice, and a little extra black pepper if desired.

This final step gives the fish a glossy appearance and ensures that every bite carries the delicious garlic and herb flavor.

Step 7: Serve and Enjoy

Carefully transfer the fish to individual plates using a wide spatula. Add lemon wedges and spoon extra sauce over each serving.

Serve immediately with roasted potatoes, steamed asparagus, rice, or a crisp Mediterranean salad.

For a special presentation, arrange the fillets on a large serving platter with roasted cherry tomatoes, fresh parsley, and lemon slices. The vibrant colors and buttery aroma make this dish especially inviting.

Helpful Tips for the Best Results

Choose evenly sized fillets. Fish pieces of similar thickness cook more evenly, reducing the risk of some portions drying out before others are ready.

Dry the fish before seasoning. Excess moisture can dilute the sauce. Patting the fillets dry helps the seasoning adhere and improves the final texture.

Use fresh herbs when possible. Parsley, thyme, rosemary, and dill provide wonderful aroma. If using dried herbs, use smaller amounts because their flavors are more concentrated.

Do not overcook. Begin checking thinner fillets early. Fish continues cooking briefly after leaving the oven, so remove it once it reaches the safe temperature.

Adjust the lemon to taste. Lemon zest adds fragrant citrus flavor, while lemon juice contributes acidity. Together, they balance the richness of the butter.

Add vegetables for a complete meal. Cherry tomatoes, asparagus, and thin zucchini slices can be baked alongside the fish. Allow longer-cooking vegetables a head start if necessary.

Delicious Recipe Variations

1. Lemon Parmesan Garlic Fish

Add 2 tablespoons of finely grated Parmesan to the garlic butter mixture. Sprinkle a little extra Parmesan over the fish during the final few minutes of baking for a savory finish.

2. Mediterranean Tomato and Olive Fish

Add halved cherry tomatoes, sliced Kalamata olives, and a pinch of oregano to the baking dish. The tomatoes release their juices and combine with the garlic butter to create a delicious Mediterranean-inspired sauce.

3. Spicy Garlic Butter Fish

Add extra red pepper flakes and a pinch of cayenne pepper. This variation is ideal for anyone who enjoys a little heat alongside the buttery garlic flavor.

4. Garlic Butter Salmon

Replace the white fish with salmon fillets. Salmon has a richer flavor and naturally oily texture that pairs beautifully with lemon, butter, and herbs. Adjust the cooking time for the thickness of the fillets.

What to Serve with Garlic Butter & Herb Baked Fish

This fish is versatile enough to pair with many side dishes.

  • Roasted baby potatoes: Crispy on the outside and tender inside, they soak up the garlic butter sauce beautifully.

  • Lemon herb rice: A light, fluffy side that complements the citrus and herbs.

  • Steamed asparagus: Adds freshness, color, and a pleasant tender-crisp texture.

  • Mediterranean salad: Combine cucumber, tomatoes, red onion, olives, and feta with olive oil and lemon juice.

  • Garlic green beans: A simple vegetable side that enhances the savory flavors.

  • Crusty bread: Perfect for enjoying every drop of the delicious sauce.

For a lighter dinner, serve the fish with steamed vegetables and salad. For a heartier meal, choose roasted potatoes or rice.

Storage and Reheating

Refrigeration: Store leftover fish in an airtight container in the refrigerator within 2 hours of cooking. Use within 3–4 days.

Reheating: Place the fish in an oven-safe dish with a spoonful of garlic butter or a little water. Cover loosely and heat in a 300°F (150°C) oven until warmed through. Reheat gently to prevent dryness.

Microwave: Heat at reduced power in short intervals, checking frequently.

Freezing: Cooked fish can be frozen in a freezer-safe container, although its texture may become softer after thawing. For best quality, use within 2–3 months.

Nutritional Information

Estimated nutrition per serving, assuming four servings with cod:

Nutrient Approximate Amount
Calories 300–360
Protein 32–38 g
Fat 18–23 g
Carbohydrates 2–4 g
Fiber Less than 1 g

Actual values depend on the fish, portion size, and amount of butter used.

Potential Benefits

  • Protein-rich: Fish provides high-quality protein that supports muscle maintenance and normal body functions.

  • Vitamin B12: Many fish varieties supply vitamin B12, which supports nerve function and red blood cell formation.

  • Flavorful ingredients: Garlic, lemon, and herbs add flavor without requiring a heavy cream-based sauce.

  • Balanced meal potential: Pairing the fish with vegetables and whole grains adds fiber, vitamins, and minerals.

  • Flexible preparation: Baking uses less added oil than deep-frying and allows you to control the amount of butter and salt.

Frequently Asked Questions

Can I use frozen fish?

Yes. Thaw it safely in the refrigerator and pat it dry before seasoning for the best texture.

Can I prepare the sauce ahead of time?

Yes. Combine the butter, garlic, and herbs in advance and refrigerate in a covered container. Melt gently before using.

How do I know when the fish is ready?

The flesh should be opaque and flake easily. Check that the thickest part reaches 145°F (63°C).

Can I make it dairy-free?

Yes. Replace the butter with a dairy-free alternative or use olive oil.

Can I prepare the recipe for meal prep?

Yes. Divide the cooked fish into portions and refrigerate promptly. Reheat gently and avoid repeatedly reheating the same portion.

Why is my baked fish watery?

Frozen fish that has not been properly thawed and dried can release excess liquid. Dry the fillets thoroughly and avoid overcrowding the baking dish.

Crispy Flatbread with Brie, Cranberries & Toasted Walnuts with a Hot Honey Drizzle

Crispy Flatbread with Brie, Cranberries & Toasted Walnuts with a Hot Honey Drizzle

The buttery flavor of Brie pairs wonderfully with tart cranberries, while toasted walnuts add an earthy crunch. A drizzle of warm hot honey brings everything together, offering a delicate sweetness followed by a pleasant spicy finish. Fresh rosemary adds an aromatic touch that makes the flatbread even more inviting.

Serve it as an appetizer, a light lunch, or a shareable snack. Once sliced into small pieces, this colorful flatbread becomes an impressive centerpiece for any gathering.

Recipe Overview

Prep Time

15 minutes

Cook Time

10–15 minutes

Total Time

25–30 minutes

Servings

4–6 people as an appetizer

Difficulty

Easy

Cuisine

Modern American-inspired

Ingredients

For the crispy flatbread

  • 2 medium flatbreads, naan breads, or prepared pizza flatbreads

  • 6–8 ounces Brie cheese, sliced into thin wedges

  • ⅓ cup dried cranberries

  • ½ cup walnuts, roughly chopped

  • 1 tablespoon olive oil

  • 1 teaspoon fresh rosemary, finely chopped

  • ½ teaspoon fresh thyme leaves, optional

  • Freshly ground black pepper, to taste

  • A small pinch of flaky sea salt, optional

For the hot honey drizzle

  • ¼ cup honey

  • ½–1 teaspoon red pepper flakes, according to your preferred heat level

  • 1 teaspoon apple cider vinegar or fresh lemon juice

  • ½ teaspoon olive oil, optional

  • A tiny pinch of smoked paprika, optional

Optional toppings

  • 1 tablespoon balsamic glaze

  • A handful of fresh arugula

  • A few extra dried cranberries

  • Additional toasted walnuts

  • Fresh rosemary sprigs

  • A small amount of crumbled goat cheese

Ingredient tip: Brie has a soft, creamy interior and a mild buttery flavor. You can leave the rind on because it is edible and helps the cheese hold its shape. If you prefer a smoother appearance, trim a little of the rind from the areas you want to expose.

Instructions

Step 1: Preheat the oven

Preheat your oven to 400°F (200°C).

Place a baking sheet inside the oven while it heats if you want the bottom of the flatbread to become especially crisp. A preheated baking sheet helps transfer heat directly to the crust.

Line the sheet with parchment paper if desired, ensuring the paper is suitable for the oven temperature specified by its manufacturer.

Prepare all your ingredients before assembling the flatbread. Slice the Brie, chop the walnuts, measure the cranberries, and finely chop the rosemary.

Having everything ready makes assembly quick and helps prevent the flatbread from becoming soggy while you work.

Step 2: Prepare the flatbread base

Place the flatbreads on a cutting board or clean work surface.

Brush the surface lightly with olive oil, concentrating on the edges. The oil helps the crust develop a golden color and adds a subtle savory flavor.

For an extra-crispy result, place the flatbreads on the hot baking sheet and pre-bake them for 2–3 minutes before adding the toppings.

Avoid adding too much oil because excessive moisture or fat can make the base less crisp.

If your flatbreads are particularly thick, pre-baking for a few minutes is especially helpful. Thin flatbreads may not need this step.

Step 3: Slice the Brie

Cut the Brie into thin slices or small wedges.

Distribute the pieces evenly across both flatbreads, leaving a small border around the edges. This allows the crust to become crisp while the cheese melts into creamy pockets.

Brie melts beautifully in the oven, creating a rich base that complements the cranberries and walnuts. Avoid covering every inch of the flatbread with thick cheese slices, as a very heavy topping can make the center soft.

If the Brie is too soft to slice neatly, refrigerate it for 10–15 minutes before cutting.

Step 4: Add the cranberries

Sprinkle the dried cranberries over the Brie.

Distribute them evenly so each slice contains a mixture of creamy cheese and sweet-tart fruit.

Cranberries bring a bright, fruity flavor that balances the richness of Brie. Their slightly chewy texture also contrasts nicely with the crisp flatbread and crunchy walnuts.

If your cranberries seem unusually dry, you can soak them in warm water for about five minutes, then drain and pat them dry before using. This is optional; standard dried cranberries work perfectly well without soaking.

For a less sweet result, reduce the cranberries slightly and add a few thin slices of fresh pear or apple.

Step 5: Toast the walnuts

Place the chopped walnuts in a dry skillet over medium-low heat.

Toast them for approximately 3–5 minutes, stirring frequently, until they become fragrant and lightly golden. Watch them carefully because nuts can burn quickly.

Transfer the walnuts to a plate immediately to prevent them from continuing to cook in the hot pan.

Toasting enhances the walnuts’ natural earthy flavor and creates a satisfying crunch that complements the soft Brie.

Reserve a small handful for sprinkling over the flatbread after baking if you want a more pronounced nutty texture.

If you prefer a milder crunch, you can add all the walnuts before baking. For maximum crunch, add most before baking and the remainder afterward.

Step 6: Assemble the toppings

Sprinkle the toasted walnuts over the cranberries and Brie.

Add the chopped rosemary and optional thyme. Finish with a small amount of freshly ground black pepper.

The rosemary provides a fragrant, slightly pine-like aroma that works particularly well with the buttery cheese and honey. Thyme offers a softer herbal note.

Avoid using too much rosemary, as its strong flavor can overpower the delicate Brie.

At this stage, the flatbread should have an attractive balance of pale cheese, deep-red cranberries, golden-brown walnuts, and green herbs.

Step 7: Bake until golden and crispy

Carefully transfer the assembled flatbreads to the oven.

Bake for approximately 10–15 minutes, checking around the 8-minute mark if your flatbreads are thin.

The flatbread is ready when the edges are golden and crisp, the Brie is soft and melted, and the toppings are warmed through.

If you prefer a little extra color, switch to the broiler for the final 30–60 seconds, watching constantly to prevent burning.

Remove the flatbreads from the oven and let them rest for approximately two minutes before slicing. This gives the melted cheese a moment to settle and makes serving easier.

Step 8: Prepare the hot honey

While the flatbreads bake, prepare the hot honey.

Pour the honey into a small saucepan. Add the red pepper flakes and warm over low heat for approximately 2–3 minutes, stirring gently.

Do not allow the honey to boil vigorously. Gentle heating helps the pepper flavor infuse without scorching the honey.

Remove the saucepan from the heat and stir in the apple cider vinegar or lemon juice. This small amount of acidity brightens the sweetness and makes the drizzle more balanced.

Let the mixture stand for about two minutes, then taste carefully. Add more pepper flakes if you want extra heat, or a little more honey if you prefer a milder flavor.

For a smoother drizzle, strain out the pepper flakes before serving. For a more rustic appearance and stronger pepper flavor, leave them in.

Take care when handling hot honey because it can become very hot and sticky.

Step 9: Drizzle and garnish

Place the baked flatbreads on a serving board.

Use a spoon to drizzle the hot honey in thin lines across the melted Brie, cranberries, and walnuts. Start with a small amount and add more as needed; too much honey can overwhelm the other flavors and soften the crust.

Sprinkle over the reserved toasted walnuts and a little fresh rosemary.

For a sweet-and-savory finish, add a light balsamic glaze. If you enjoy a fresh, peppery contrast, top the flatbread with a handful of arugula just before serving.

A small pinch of flaky sea salt can intensify the contrast between the sweet honey and creamy cheese.

Step 10: Slice and serve

Use a sharp knife or pizza cutter to slice each flatbread into wedges or small rectangular pieces.

Serve while warm, when the Brie is creamy and the base is crisp.

Arrange the slices on a wooden serving board with extra cranberries, walnuts, and fresh rosemary for a beautiful presentation.

This flatbread is delicious on its own, but it also pairs well with a green salad, roasted vegetables, or a platter of fresh fruit.

Tips for Perfect Flatbread

1. Choose a sturdy base. Naan and prepared pizza flatbreads are good choices because they support the toppings without collapsing.

2. Pre-bake for extra crunch. A brief pre-bake helps thin or soft flatbreads remain crisp under the melted cheese.

3. Do not overload the toppings. A generous layer of Brie is delicious, but too much cheese or honey can make the center soggy.

4. Toast the walnuts carefully. Toasting adds depth of flavor, but burnt walnuts can taste bitter.

5. Balance the sweetness. Dried cranberries and honey are both sweet. Add a little vinegar or lemon juice to the honey to keep the flavor lively.

6. Adjust the heat. Start with ½ teaspoon of red pepper flakes for mild heat, then increase gradually.

7. Add delicate greens after baking. Arugula and fresh herbs look brighter and taste fresher when added at the end.

8. Serve immediately. This flatbread is at its best shortly after baking, before the cheese cools and the crust absorbs moisture.

Delicious Variations

Pear, Brie, and Walnut Flatbread

Replace half of the cranberries with thin slices of ripe pear. The pear adds natural sweetness and a delicate texture that pairs beautifully with Brie and walnuts.

Fig and Brie Flatbread

Use fig jam in place of some of the cranberries. Spread a thin layer over the flatbread before adding the Brie, then finish with walnuts and hot honey.

Apple and Rosemary Flatbread

Add thin slices of crisp apple and extra rosemary. This variation has a fresh, autumn-inspired flavor and works particularly well for holiday gatherings.

Spicy Cranberry Flatbread

Increase the red pepper flakes in the hot honey and add a small pinch of smoked paprika. The deeper, spicier flavor contrasts nicely with the creamy cheese.

Goat Cheese and Cranberry Flatbread

Replace part of the Brie with goat cheese for a tangier flavor. The combination of two cheeses creates a more complex appetizer while keeping the cranberries and walnuts at the center.

What to Serve With This Flatbread

This recipe can be served as an appetizer or combined with other dishes for a more substantial meal.

  • Arugula salad: Peppery greens with lemon vinaigrette balance the richness of the Brie.

  • Roasted vegetables: Carrots, Brussels sprouts, or butternut squash complement the sweet and savory toppings.

  • Fresh pear slices: Add a refreshing fruit element to the serving board.

  • Tomato soup: A warm bowl of soup turns the flatbread into a cozy lunch.

  • Olives and nuts: A small antipasto platter creates a lovely spread for entertaining.

  • Fresh grapes: Their juicy sweetness works well with the creamy cheese and toasted walnuts.

For a party, cut the flatbread into small squares so guests can enjoy it as finger food.

Storage and Reheating

Refrigeration: Store leftover flatbread in an airtight container in the refrigerator for up to 3 days.

Reheating: Place slices on a baking sheet and warm in a 350°F (175°C) oven for approximately 5–8 minutes, or until heated through and crisp. An air fryer can also work well; check frequently to prevent the cheese from overcooking.

Microwave: You can microwave leftovers briefly, but the base will usually become softer rather than crispy.

Hot honey storage: Store any leftover hot honey in a clean, sealed container. For the best quality, refrigerate if you’ve added fresh ingredients such as lemon juice or vinegar, and follow safe food-handling practices. Warm it gently before using again.

Make-ahead tip: Toast the walnuts and prepare the hot honey in advance. Assemble and bake the flatbread just before serving for the best texture.

Nutritional Information

The following values are estimates per serving, assuming the recipe makes six appetizer servings and uses Brie, two flatbreads, dried cranberries, walnuts, olive oil, and hot honey.

Nutrient Estimated amount
Calories 350–430 kcal
Protein 10–14 g
Carbohydrates 35–45 g
Total fat 19–25 g
Saturated fat 6–9 g
Fiber 2–4 g
Sugar 12–19 g
Sodium 400–650 mg

Actual nutrition varies with flatbread size, the amount of Brie, the brand of dried cranberries, and how much hot honey is used.

Benefits of the Ingredients

Brie cheese: Provides protein, calcium, and fat. Its creamy texture brings richness to the dish.

Cranberries: Contribute fruity flavor and plant compounds. Unsweetened varieties can be used to reduce added sugar.

Walnuts: Supply unsaturated fats, including the plant-based omega-3 fatty acid ALA, along with fiber and minerals.

Honey: Adds sweetness and helps create the signature glossy finish. It is still an added sugar, so a light drizzle is usually enough.

Rosemary and thyme: Provide aromatic flavor that allows the dish to taste complex without requiring many additional ingredients.

Olive oil: Adds flavor and predominantly monounsaturated fat.

This recipe is best enjoyed as part of a varied diet. Because Brie, flatbread, and honey contribute fat, carbohydrates, and calories, portion size can be adjusted to suit your meal.

Frequently Asked Questions

1. Can I use store-bought flatbread?

Yes. Store-bought naan, pita-style flatbread, or prepared pizza crust can all work. Choose a sturdy base and adjust the baking time according to its thickness.

2. Do I need to remove the Brie rind?

No. The rind is edible and softens during baking. Remove it only if you prefer a smoother texture or appearance.

3. Can I use fresh cranberries instead of dried?

Yes, but fresh cranberries are much more tart. Consider tossing them with a small amount of honey before baking and allow enough time for them to soften.

4. How spicy should the hot honey be?

That depends on your preference. Begin with ½ teaspoon of red pepper flakes for a gentle warmth, then add more after tasting.

5. Can I make this recipe without walnuts?

Absolutely. Pecans, sliced almonds, or pumpkin seeds can provide a similar crunch. For a nut-free version, omit the walnuts and check ingredient labels for cross-contact warnings if allergies are a concern.

6. Can I prepare the flatbread ahead of time?

You can prepare the toppings and hot honey ahead, but assemble and bake shortly before serving. This keeps the base crisp.

7. Why did my flatbread become soggy?

The most common reasons are too many toppings, a soft base, or excessive honey. Pre-baking the flatbread and using moderate amounts of cheese and drizzle will help.

8. Can I make it in an air fryer?

Yes, if your flatbread fits comfortably in the basket. Cook at approximately 350°F (175°C) for 5–8 minutes, checking frequently because air fryers vary in strength and size.

9. What can replace the hot honey?

Regular honey, balsamic glaze, or a small drizzle of maple syrup can be used. For a savory alternative, finish with olive oil and freshly cracked black pepper.

10. Is this recipe suitable for a holiday party?

Yes. Its festive red cranberries, golden Brie, toasted walnuts, and rosemary make it especially attractive for autumn and winter gatherings.

Pan-Baked Lemon Herb White Fish with Roasted Cherry Tomatoes

Pan-Baked Lemon Herb White Fish with Roasted Cherry Tomatoes

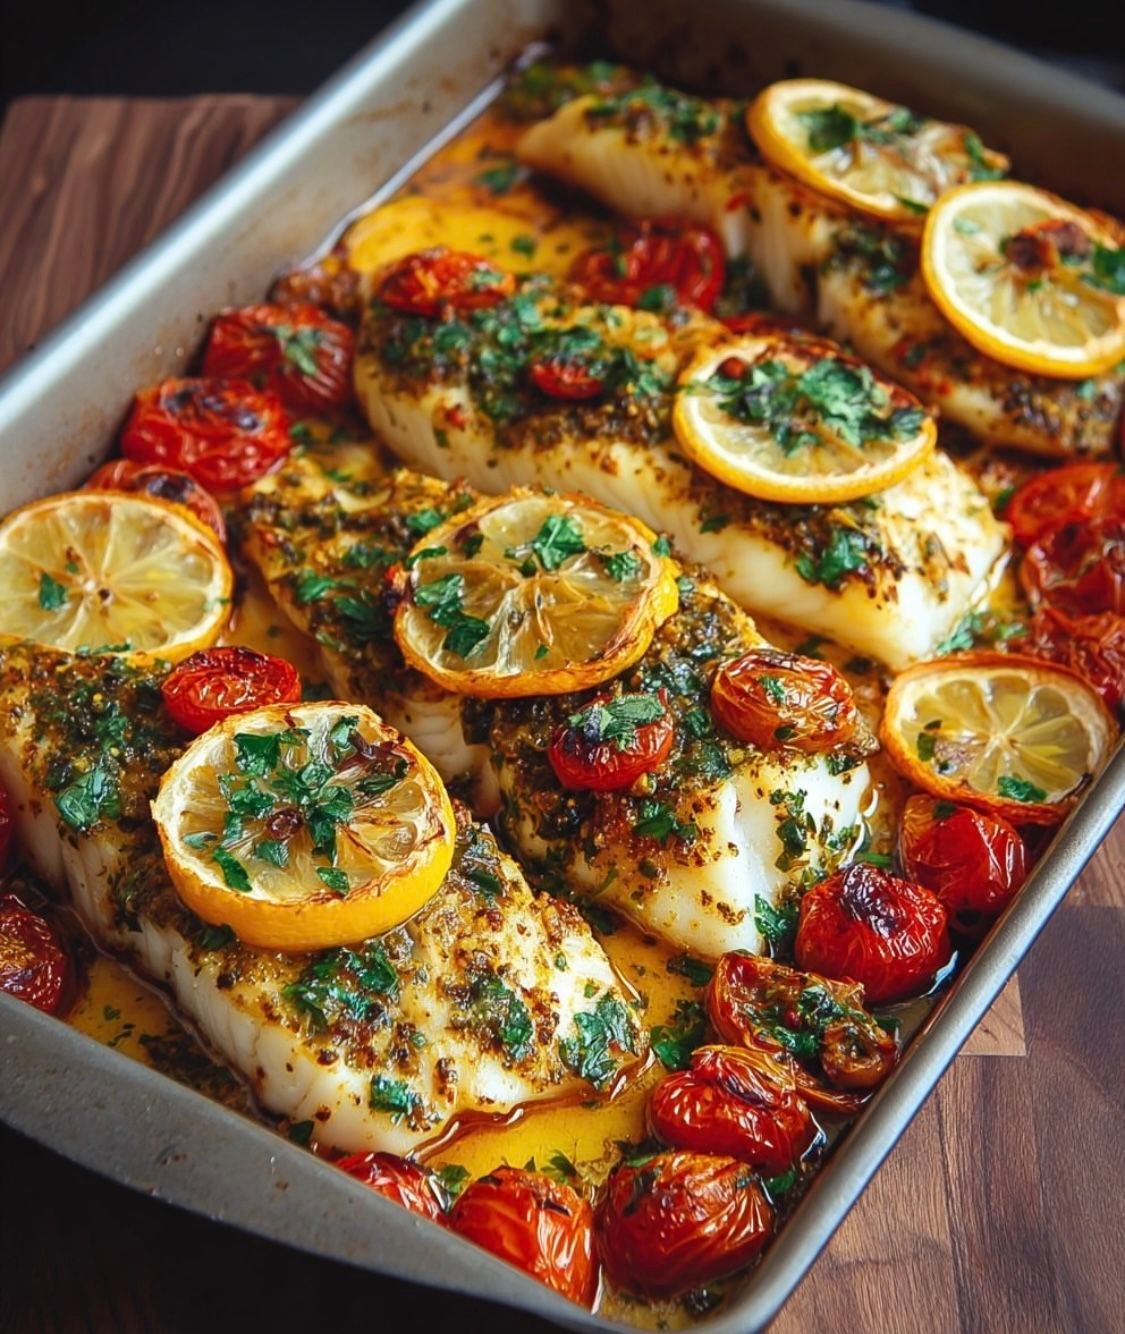
Whether you’re preparing a quick weeknight dinner or serving guests on the weekend, this recipe is a wonderful choice. Serve it with roasted potatoes, rice, couscous, or a fresh green salad for a complete and satisfying meal.

Recipe Details

  • Prep Time: 15 minutes

  • Cook Time: 18–25 minutes

  • Total Time: Approximately 35–40 minutes

  • Servings: 4

  • Cuisine: Mediterranean-inspired

  • Course: Lunch or dinner

  • Difficulty: Easy

  • Cooking Method: Pan-seared and oven-finished

Ingredients

For the fish

  • 4 white fish fillets, approximately 5–6 ounces each

  • 2 tablespoons extra-virgin olive oil, divided

  • 3 garlic cloves, minced

  • Juice of 1 large lemon

  • 1 teaspoon lemon zest

  • 1 teaspoon dried oregano

  • ½ teaspoon dried thyme

  • ½ teaspoon paprika

  • ½ teaspoon salt, or to taste

  • ¼ teaspoon freshly ground black pepper

  • 1 tablespoon fresh parsley, chopped

  • 1 tablespoon butter, optional

For the roasted cherry tomatoes

  • 2 cups cherry tomatoes, halved

  • ½ small red onion, thinly sliced, optional

  • 2 garlic cloves, thinly sliced

  • 1 tablespoon olive oil

  • ½ teaspoon dried oregano

  • ¼ teaspoon salt

  • ⅛ teaspoon black pepper

  • 1 teaspoon balsamic vinegar, optional

  • A pinch of red pepper flakes, optional

For serving

  • Fresh lemon wedges

  • Chopped parsley or fresh basil

  • Steamed rice, quinoa, or couscous

  • Roasted potatoes or green vegetables

Instructions

Step 1: Prepare the fish

Pat the fish fillets dry with paper towels. Removing excess moisture helps the fish develop a lightly golden exterior when seared.

Check for any remaining bones and remove them carefully. Place the fillets on a plate and season both sides with salt, black pepper, paprika, oregano, and thyme.

In a small bowl, mix one tablespoon of olive oil with the minced garlic, lemon juice, and lemon zest. Brush this mixture over the fish, distributing the seasoning evenly.

Allow the fish to rest for about 5–10 minutes while you prepare the tomatoes.

Cod is an excellent choice because its mild flavor and flaky texture pair beautifully with lemon and herbs. Haddock, pollock, halibut, and tilapia can also be used.

Step 2: Prepare the tomatoes

Wash and dry the cherry tomatoes, then cut them in half. Thinly slice the optional red onion and garlic.

Place the tomatoes, onion, and garlic in a bowl. Add one tablespoon of olive oil, oregano, salt, black pepper, and red pepper flakes if desired.

Toss gently until everything is evenly coated.

Cherry tomatoes become naturally sweet and juicy when roasted. Their juices combine with the garlic and olive oil to form a delicious sauce, so there is no need for heavy cream or complicated ingredients.

Step 3: Preheat the oven

Preheat your oven to 400°F (200°C).

Place a large oven-safe skillet over medium-high heat. Add the remaining tablespoon of olive oil and allow it to heat until shimmering but not smoking.

A cast-iron skillet works especially well because it distributes heat evenly and allows you to sear the fish before finishing it in the oven.

If you do not have an oven-safe skillet, you can transfer the ingredients to a baking dish before baking.

Step 4: Sear the fish

Carefully place the seasoned fillets into the hot skillet. Leave space between them to prevent overcrowding.

Sear for approximately 2–3 minutes on the first side, then gently turn and cook for another minute.

The fish does not need to be completely cooked at this stage because it will finish cooking in the oven.

Use a wide spatula when turning the fillets to keep them from breaking apart. If the fish sticks slightly, give it another moment before attempting to turn it.

Transfer the fish to a clean plate if necessary while you prepare the tomato mixture.

Step 5: Cook the cherry tomatoes

Reduce the heat to medium and add the prepared tomatoes, onion, and garlic to the skillet.

Stir gently, scraping up any flavorful browned bits from the bottom of the pan. Cook for approximately 3–5 minutes, until the tomatoes begin to soften and release their juices.

If you enjoy a slightly sweet and tangy flavor, add the optional balsamic vinegar and stir.

Spread the tomatoes evenly across the skillet. Their juices will create a flavorful base for the fish.

Step 6: Combine and bake

Return the fish fillets to the skillet, nestling them among the tomatoes.

Spoon some of the tomato juices over the fish. Add the optional butter in small pieces around the skillet for extra richness.

Transfer the skillet to the preheated oven and bake for approximately 8–12 minutes, depending on the thickness of the fillets.

Check the fish early to prevent overcooking. It should become opaque and flake easily when gently tested with a fork. For food safety, fish should reach an internal temperature of 145°F (63°C) at its thickest point.

The tomatoes should be soft, glossy, and slightly blistered, with their juices mingling with the lemon, garlic, and herbs.

Step 7: Finish with fresh herbs

Carefully remove the skillet from the oven using oven mitts, as the handle will be extremely hot.

Sprinkle freshly chopped parsley over the fish and tomatoes. Add fresh basil or dill if desired.

Taste the sauce and adjust the seasoning with additional lemon juice, salt, or black pepper.

Let the dish rest for about two minutes before serving. This gives the flavors a moment to settle while keeping everything warm.

Step 8: Serve and enjoy

Transfer each fillet to a serving plate and spoon the roasted cherry tomatoes and their juices over the top.

Garnish with fresh lemon wedges, parsley, and a light drizzle of olive oil.

Serve immediately with rice, roasted potatoes, couscous, quinoa, steamed green beans, or a crisp Mediterranean salad.

The combination of tender fish, sweet tomatoes, citrus, and herbs creates a beautiful meal that looks impressive but requires very little effort.

Tips for the Best Results

Choose similar-sized fillets. Fish pieces of similar thickness cook more evenly and are easier to serve.

Dry the fish well. Removing excess moisture improves the sear and helps the seasoning adhere.

Avoid overcooking. White fish is delicate and can become dry quickly. Begin checking early and use a food thermometer if available.

Use fresh lemon. Fresh juice and zest provide a brighter flavor than bottled juice.

Let the tomatoes soften. Cooking them briefly before baking helps release their juices and develops their natural sweetness.

Add herbs at the end. Fresh parsley, basil, and dill retain their color and provide a bright finish when added after cooking.

Customize the flavor. Add Kalamata olives, capers, crumbled feta, or a pinch of chili flakes for a different Mediterranean-inspired variation.

Serving Suggestions

This recipe pairs beautifully with several side dishes:

  • Lemon rice: Absorbs the delicious garlic-tomato sauce.

  • Roasted baby potatoes: Add a crispy, hearty element to the meal.

  • Couscous: Offers a quick and fluffy Mediterranean-style accompaniment.

  • Quinoa: Adds texture, fiber, and plant-based protein.

  • Steamed asparagus: Provides a fresh, tender-crisp vegetable side.

  • Greek salad: Cucumber, olives, tomatoes, and feta add refreshing flavors.

  • Garlic bread: Perfect for soaking up the lemony juices.

For a balanced dinner, serve one fillet with vegetables and a moderate portion of rice, potatoes, or whole grains.

Storage and Reheating

Refrigerate leftovers in an airtight container within two hours of cooking. They can generally be kept in the refrigerator for 3–4 days.

To reheat, place the fish and tomatoes in a covered baking dish and warm in a 300°F (150°C) oven until heated through. You can also use a microwave at medium power in short intervals.

Add a spoonful of the reserved tomato juices or a little olive oil if the fish appears dry.

Cooked fish can also be frozen in a freezer-safe container, although its texture may soften after thawing. For best quality, use within about two months and thaw in the refrigerator before reheating.

Nutritional Information

Estimated nutrition per serving, based on four servings using cod and the basic ingredients:

Nutrient Amount
Calories 280–340 kcal
Protein 32–38 g
Carbohydrates 7–10 g
Total fat 12–17 g
Fiber 2–3 g
Sugar 4–6 g

Actual nutrition will vary depending on the fish species, portion size, and amount of olive oil or butter used. Side dishes are not included.

Benefits of This Recipe

  • Protein-rich: White fish supplies protein that supports normal tissue maintenance and repair.

  • Contains healthy fats: Olive oil provides predominantly monounsaturated fats.

  • Provides essential nutrients: Fish supplies nutrients such as vitamin B12 and selenium, depending on the species.

  • Includes vegetables: Cherry tomatoes provide vitamin C and lycopene, while garlic and herbs add flavor and plant compounds.

  • Light yet satisfying: The recipe relies on olive oil, lemon, and tomato juices instead of a heavy cream sauce.

  • Easy to customize: It can be served with low-carbohydrate vegetables or more substantial whole-grain sides.

These benefits are part of a balanced eating pattern; no single recipe can guarantee a particular health outcome.

Frequently Asked Questions

1. What is the best fish for this recipe?

Cod is an excellent choice, but haddock, tilapia, pollock, and halibut also work well. Adjust the cooking time according to the thickness of the fillets.

2. Can I bake the fish without searing it?

Yes. Place the seasoned fish and prepared tomatoes in a baking dish and cook at 400°F (200°C) until the fish reaches 145°F (63°C). Baking time will vary with thickness.

3. Can I use frozen fish?

Yes. Thaw it safely in the refrigerator and pat it dry before seasoning for the best texture.

4. Can I make this recipe dairy-free?

Absolutely. Simply leave out the optional butter and use olive oil.

5. How can I make the dish spicy?

Add red pepper flakes, chili powder, or a small amount of finely chopped fresh chili to the tomatoes.

6. Is this recipe suitable for meal prep?

Yes. Divide the cooked fish and tomatoes into individual containers and refrigerate promptly. Reheat gently to preserve moisture.

7. How can I make the tomato sauce thicker?

Let the tomatoes simmer a little longer before adding the fish. You can also mash a few softened tomatoes into the juices.