Cheesy Zucchini Stacks

Cheesy Zucchini Stacks

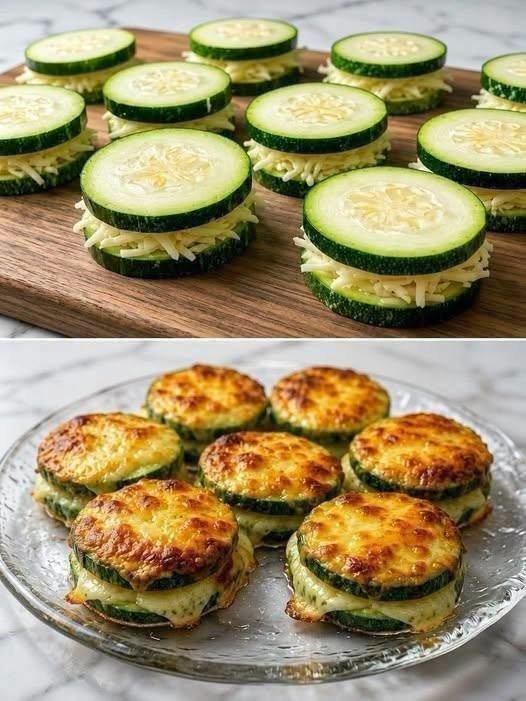
These  Cheesy Zucchini Stacks are a delicious way to turn simple zucchini into a crispy,  cheesy, flavor-packed side dish. Thin zucchini slices are layered with mozzarella, Parmesan,  garlic, and Italian herbs, then baked until tender in the middle and beautifully golden on top.

 Ingredients

For the Zucchini Stacks

  • 3 medium zucchini
  • 1½ cups shredded mozzarella cheese
  • ½ cup freshly grated Parmesan cheese
  • ½ cup shredded cheddar cheese
  • 2 cloves garlic, finely minced
  • 2 tbsp olive oil
  • 1 tsp Italian seasoning
  • ½ tsp garlic powder
  • ½ tsp onion powder
  • ¼ tsp black pepper
  • ½ tsp salt
  • 2 tbsp fresh parsley, chopped
  • ¼ cup breadcrumbs or panko, optional

Optional Additions

  • ¼ tsp red pepper flakes
  • ½ tsp smoked paprika
  • 2 tbsp chopped fresh basil
  • Thin slices of tomato
  • Cooked crumbled bacon
  • A little marinara sauce for serving

 Instructions

1. Prepare the Zucchini

Preheat your oven to 400°F (200°C).

Wash and dry the zucchini thoroughly. Trim off both ends and slice the zucchini into thin, even rounds, approximately ⅛–¼ inch thick.

Try to keep the slices similar in size so the stacks cook evenly.

Place the zucchini slices on a large plate or baking sheet and lightly sprinkle them with salt.

Let them sit for about 10 minutes. This draws out excess moisture and helps prevent watery stacks.

Pat the zucchini very well with paper towels.

2. Prepare the Cheese Mixture

In a bowl, combine:

  • Mozzarella
  • Parmesan
  • Cheddar
  • Italian seasoning
  • Garlic powder
  • Onion powder
  • Black pepper
  • Chopped parsley

Mix everything together.

If you’re using breadcrumbs, stir them into the cheese mixture. The breadcrumbs add a lightly crispy texture to the finished stacks.

3. Season the Zucchini

Place the zucchini slices in a bowl.

Add olive oil and minced garlic. Toss gently until the zucchini is lightly coated.

Be careful not to add too much oil because zucchini naturally releases moisture while cooking.

4. Build the Stacks

Line a baking sheet with parchment paper.

For each stack, place one zucchini slice on the sheet.

Sprinkle a small amount of the cheese mixture over it.

Add another zucchini slice, followed by more cheese.

Continue layering until you have approximately 4–5 zucchini slices per stack.

Finish each stack with a generous layer of the cheese mixture.

Don’t make the stacks too tall, or they may become difficult to keep together while baking.

5. Bake

Place the baking sheet in the preheated oven.

Bake for approximately 20–25 minutes, or until the zucchini is tender and the cheese is melted.

For a beautifully golden top, switch the oven to broil during the final 1–2 minutes.

Watch carefully because the cheese can brown very quickly under the broiler.

6. Let Them Rest

Remove the zucchini stacks from the oven and allow them to rest for 5 minutes.

This gives the melted cheese a chance to firm slightly and helps the stacks hold their shape.

7. Garnish & Serve

Sprinkle the finished stacks with fresh parsley or basil.

For extra flavor, drizzle with a little marinara sauce or serve with warm tomato sauce on the side.

Serve immediately while the cheese is warm and stretchy.

 Tips for Perfect Cheesy Zucchini Stacks

Pat the zucchini dry: This is one of the most important steps. Zucchini contains a lot of water, and removing some of that moisture helps the stacks become less soggy.

Use freshly grated cheese: Freshly grated mozzarella and Parmesan generally melt more smoothly than pre-shredded cheese.

Don’t over-oil: A little olive oil is enough. Too much can make the finished dish greasy.

Keep the slices thin: Thin, even slices cook faster and make beautiful layers.

Want them crispier? Add panko breadcrumbs to the cheese mixture and finish the stacks under the broiler for 1–2 minutes.

Want more protein? Add a small amount of  cooked crumbled bacon, seasoned ground beef, or shredded chicken between the layers.

 What to Serve With

These zucchini stacks make a fantastic side dish alongside:

  • Grilled chicken
  • Steak
  • Roasted beef
  • Italian meatballs
  •  Baked fish
  • Grilled shrimp
  • Pasta
  • Roasted potatoes
  • Fresh green  salad

They can also be served as a vegetarian appetizer or light lunch with marinara sauce for dipping.

Extra-Cheesy Variation

For an even richer version, use:

  • 1 cup mozzarella
  • ½ cup provolone
  • ½ cup Parmesan
  • ½ cup cheddar

Layer the cheeses between the zucchini and finish with extra mozzarella on top. The combination creates a beautifully melted, golden cheese crust.

Spicy Version

For a little heat, add:

  • ¼–½ tsp red pepper flakes
  • A pinch of cayenne
  • Sliced jalapeños
  • Hot Italian seasoning

Serve with a creamy garlic dipping sauce or marinara.

Storage & Reheating

Store leftover zucchini stacks in an airtight container in the refrigerator for up to 3 days.

For the best texture, reheat them in an air fryer at 375°F (190°C) for 4–6 minutes or in a 400°F oven for 8–10 minutes.

Avoid microwaving if possible because it can make the zucchini soft and watery.

Final Result

You’ll get tender zucchini layered with gooey mozzarella, savory Parmesan, golden cheddar, garlic, and Italian herbs, with crisp, browned cheese around the edges. It’s an easy, comforting recipe that’s perfect when you have extra zucchini on hand!


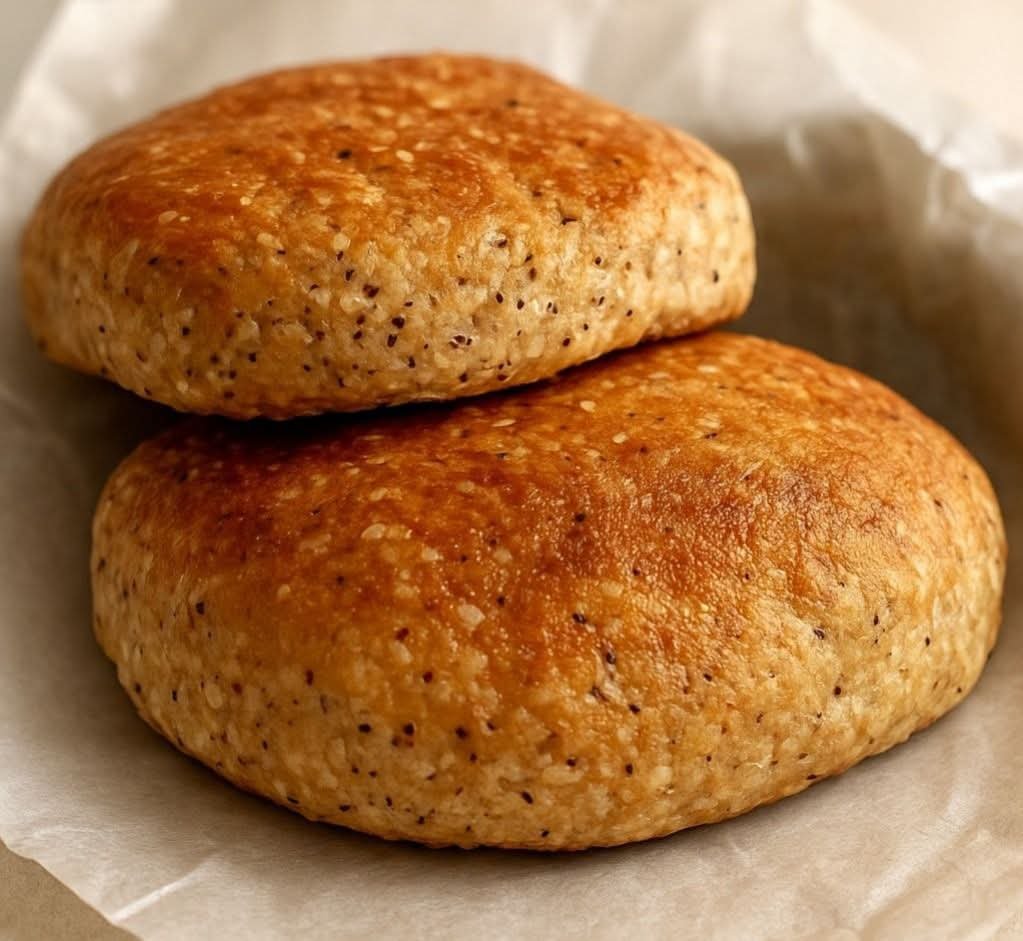
GARLIC AND BUTTER FLATBREAD

Welcome to a recipe for  Garlic and  Butter Flatbread, a versatile and delicious side that pairs well with many dishes. This flatbread is crispy on the outside, soft on the inside, and bursting with the rich flavors of  garlic and butter. Perfect for dipping, as a side, or even as a base for pizzas, this flatbread is sure to be a hit. Follow this detailed guide to create mouthwatering garlic and butter flatbread.

Ingredients

Table of Contents

Before we start, let’s gather all the necessary ingredients for the garlic and butter flatbread.

For the Flatbread Dough:

  • 2 cups all-purpose flour
  • 1 teaspoon salt
  • 1 teaspoon sugar
  • 1 teaspoon baking powder
  • 3/4 cup warm water
  • 2 tablespoons olive oil

For the Garlic Butter:

  • 1/4 cup unsalted butter, melted
  • 3 cloves garlic, minced
  • 1 tablespoon fresh parsley, chopped (or 1 teaspoon dried parsley)
  • 1/2 teaspoon salt
  • 1/4 teaspoon black pepper

Instructions

Step 1: Preparing the Dough

  1. Mix Dry Ingredients: In a large mixing bowl, combine the all-purpose flour, salt, sugar, and baking powder. Mix well.
  2. Add Wet Ingredients: Add the warm water and olive oil to the dry ingredients. Mix until a dough forms.
  3. Knead the Dough: Turn the dough out onto a lightly floured surface and knead for about 5-7 minutes, or until the dough is smooth and elastic. If the dough is too sticky, add a little more flour; if it’s too dry, add a bit more water.
  4. Rest the Dough: Place the dough in a lightly oiled bowl, cover with a damp cloth, and let it rest for about 20 minutes.

Step 2: Preparing the Garlic Butter

  1. Melt the Butter: In a small saucepan, melt the butter over low heat.
  2. Add Garlic and Seasonings: Add the minced garlic, chopped parsley, salt, and black pepper to the melted butter. Cook over low heat for about 2-3 minutes, stirring frequently, until the garlic is fragrant. Remove from heat and set aside.

Step 3: Shaping and Cooking the Flatbread

  1. Divide the Dough: After the dough has rested, divide it into 4-6 equal pieces, depending on the desired size of your flatbreads.
  2. Roll Out the Dough: On a lightly floured surface, roll out each piece of dough into a thin circle or oval, about 1/4 inch thick.
  3. Heat the Skillet: Heat a large skillet or griddle over medium-high heat. Brush lightly with olive oil.
  4. Cook the Flatbread: Place one piece of rolled dough onto the hot skillet. Cook for about 2-3 minutes, or until bubbles form on the surface and the underside is golden brown. Flip and cook the other side for another 2-3 minutes.
  5. Brush with Garlic Butter: Remove the cooked flatbread from the skillet and immediately brush with the garlic butter mixture. Repeat with the remaining pieces of dough.

Step 4: Serving the Garlic and Butter Flatbread

  1. Serve Warm: Serve the garlic and butter flatbread warm, either on its own, with a dipping sauce, or as a side to your favorite dishes.

Tips for Perfect Garlic and Butter Flatbread

  • Resting the Dough: Letting the dough rest helps it become more pliable and easier to roll out.
  • Even Cooking: Ensure the skillet is hot enough before adding the dough to achieve a nice golden brown color and even cooking.
  • Fresh Garlic: Use fresh garlic for the best flavor in your garlic butter.

Variations and Add-Ins

  • Cheesy Flatbread: Sprinkle grated Parmesan or mozzarella cheese over the flatbread after brushing with garlic butter.
  • Herbed Flatbread: Add fresh herbs like rosemary or thyme to the dough for an herby flavor.
  • Spicy Flatbread: Add a pinch of red pepper flakes to the garlic  butter for a spicy kick.

Pairing Suggestions

Enhance your garlic and butter flatbread experience with complementary sides and beverages:

  • Sides: Serve with marinara sauce, hummus, or tzatziki for dipping.
  • Beverages: Pair with a glass of white wine, sparkling water with lemon, or a light beer.
  • Main Dishes: Pair with soups, salads, or grilled meats for a complete meal.

Troubleshooting Common Issues

  • Dry Dough: If the dough is too dry, add a bit more water, one tablespoon at a time, until the desired consistency is achieved.
  • Sticky Dough: If the dough is too sticky, add a bit more flour, one tablespoon at a time, until it is smooth and elastic.
  • Undercooked Flatbread: Ensure the skillet is hot enough before adding the dough and  cook until golden brown on both sides.

The Joy of Baking: A Satisfying Experience

Making  garlic and butter flatbread is not only about the delicious result but also the joy of creating something savory and satisfying. Here are some tips to make your baking experience even more enjoyable:

  • Music and Ambiance: Play your favorite music or a relaxing playlist to set a cheerful mood in the kitchen.
  • Involve Others: Invite family or friends to help with the preparation. Baking together can be a fun and bonding experience.
  • Savor the Process: Take your time with each step, enjoying the aromas, textures, and flavors as you cook.

Conclusion

Congratulations! You’ve mastered the art of making Garlic and Butter Flatbread. This savory and versatile flatbread is perfect for any occasion, combining the rich flavors of garlic and butter with a soft, crispy texture.

Enjoy the process of baking and sharing this delicious flatbread with your loved ones. Serve it with your favorite sides and beverages, and savor every bite. Happy baking!

Key Takeaway

Garlic and Butter Flatbread is a quick, delicious, and easy-to-make savory treat that combines the rich flavors of garlic and butter with a soft, crispy texture. This detailed recipe ensures a perfect result every time, making it an ideal choice for a side, snack, or base for other dishes. Embrace the joy of baking to create a memorable and satisfying experience.

Air Fryer Crispy Feta & Onion Stuffed Jalapeño Poppers

Air fryer crispy feta and onion stuffed jalapeño poppers with golden panko breadcrumbs and creamy cheese filling, served with ranch dipping sauce.
Air Fryer Crispy Feta & Onion Stuffed Jalapeño Poppers

Want a party snack with a crispy coating, creamy cheese filling, and a little spicy kick? These Air Fryer Crispy Feta & Onion Stuffed Jalapeño Poppers bring together fresh jalapeños, tangy feta cheese, sweet onion, and a crunchy golden crust. They are easy to prepare and make a tasty addition to game-day spreads, backyard cookouts, family gatherings, and casual movie nights.

Each jalapeño is filled with a savory cheese mixture that balances the pepper’s heat. Crumbled feta adds a salty, tangy flavor, while cream cheese makes the filling smooth and creamy. Finely chopped onion adds a little sweetness, and a crisp breadcrumb coating creates a satisfying crunch.

Using an air fryer gives these stuffed jalapeños a golden exterior without deep-frying them in a pot of oil. Serve them hot with ranch dressing, garlic yogurt dip, or your favorite dipping sauce. If you enjoy easy appetizers with bold flavor, this recipe is worth adding to your snack menu.

Why You’ll Love These Air Fryer Crispy Feta & Onion Stuffed Jalapeño Poppers

  • Crispy outside: A seasoned breadcrumb coating creates a crunchy finish in the air fryer.
  • Creamy cheese filling: Feta and cream cheese make a smooth, tangy center.
  • Balanced flavor: Onion adds mild sweetness that complements the spicy peppers.
  • Less oil needed: Air frying uses much less oil than traditional deep-frying.
  • Easy to customize: Adjust the heat, herbs, and cheese to suit your taste.
  • Great for sharing: Serve these bite-sized appetizers at parties, game nights, or family dinners.

Recipe Overview

  • Prep Time: 20 minutes
  • Cook Time: 8–12 minutes per batch
  • Total Time: Approximately 30–40 minutes
  • Servings: 4
  • Yield: 12 jalapeño poppers
  • Course: Appetizer, Snack
  • Cuisine: American-Inspired
  • Cooking Method: Air Fryer
  • Difficulty: Easy

Cooking time may vary depending on the size of the peppers, the thickness of the coating, and your air fryer model.

Ingredients for Air Fryer Crispy Feta & Onion Stuffed Jalapeño Poppers

Use fresh jalapeños and a thick cheese filling for the best texture. The quantities below make approximately 12 poppers.

For the Jalapeño Poppers

  • 6 medium fresh jalapeño peppers
  • 4 ounces cream cheese, softened
  • 1/2 cup crumbled feta cheese
  • 1/4 cup finely chopped yellow or red onion
  • 1 garlic clove, minced
  • 1 tablespoon chopped fresh parsley
  • 1/4 teaspoon smoked paprika
  • 1/4 teaspoon black pepper

For the Crispy Coating

  • 1/2 cup all-purpose flour
  • 1 large egg
  • 1 tablespoon water
  • 3/4 cup panko breadcrumbs
  • 1/2 teaspoon garlic powder
  • 1/2 teaspoon paprika
  • Olive oil spray suitable for air fryers

Serving

  • Ranch dressing
  • Garlic yogurt dip
  • Marinara sauce, optional
  • Fresh parsley, optional

Ingredient tip: Feta is naturally salty, so taste the filling before adding extra salt. Finely chop the onion to help the filling hold together, and choose jalapeños that are similar in size so they cook evenly.

How to Make Air Fryer Crispy Feta & Onion Stuffed Jalapeño Poppers

Follow these steps to prepare the peppers, mix the filling, create a crunchy coating, and air fry the poppers until golden.

Step 1: Prepare the Jalapeños

Wash the jalapeños and dry them with a clean towel. Slice each pepper in half lengthwise, then use a small spoon to remove the seeds and pale inner membranes.

Wear food-safe gloves while handling the peppers, especially if you have sensitive skin. Avoid touching your eyes or face, and wash your hands and utensils thoroughly after preparation.

Removing the seeds and membranes reduces some of the heat, but the peppers may still be spicy. Leave a small amount of membrane inside if you prefer a hotter appetizer.

Step 2: Mix the Feta and Onion Filling

Place the softened cream cheese in a medium bowl. Add the crumbled feta, finely chopped onion, minced garlic, parsley, smoked paprika, and black pepper.

Stir until the ingredients form a thick, evenly mixed filling. Break up large feta pieces so they distribute well throughout the mixture.

If the filling seems too loose, refrigerate it for 10–15 minutes before stuffing the peppers. A firmer filling is easier to portion and less likely to spill out during cooking.

Step 3: Fill the Jalapeño Halves

Arrange the pepper halves on a clean tray with the cut sides facing up. Spoon the cheese mixture into each half, spreading it evenly from end to end.

Keep the filling level with the pepper edges rather than piling it too high. Excess filling can leak during air frying and make the coating less crisp.

If you have a small piping bag or a zip-top bag with a corner snipped off, use it to fill the peppers neatly.

Step 4: Prepare the Breading Station

Place the flour in one shallow bowl. In a second bowl, whisk the egg with 1 tablespoon of water until smooth.

In a third bowl, combine the panko breadcrumbs, garlic powder, and paprika. Panko creates a light, crunchy crust, while the seasonings add extra flavor.

Arrange the bowls in order so you can coat each stuffed pepper without making a mess.

Step 5: Coat Each Stuffed Pepper

Dip the outside and sides of each filled pepper into the flour, shaking off any excess. Brush or lightly dip the coated pepper into the egg mixture, then press it gently into the seasoned breadcrumbs.

Keep the cut side and filling covered with a light, even layer of crumbs. Press gently so the coating sticks without squeezing the cheese mixture out.

For a thicker crust, repeat the egg and breadcrumb steps once. Avoid making the coating too thick, as it may brown before the pepper becomes tender.

Step 6: Preheat the Air Fryer

Preheat your air fryer to 375°F for about 3 minutes, following your appliance instructions.

Lightly spray the basket with an air-fryer-safe oil if needed. Arrange the poppers in a single layer with space between them.

If your basket is small, cook in batches rather than stacking the peppers. Good airflow helps the breadcrumb coating become crisp and golden.

Step 7: Air Fry Until Golden and Crispy

Place the stuffed jalapeños in the basket with the cut side facing up. Lightly spray the breadcrumb coating with oil to encourage even browning.

Air fry at 375°F for approximately 8–12 minutes. Begin checking at 8 minutes and continue cooking until the coating is golden and crisp and the peppers are tender.

The filling should be hot throughout. If your poppers are large or heavily coated, they may need a few extra minutes.

Avoid turning them if the filling is loose, because moving them can cause the cheese mixture to spill. If your air fryer browns unevenly, carefully rotate the basket or rearrange the poppers midway through cooking.

Step 8: Let the Poppers Rest

Transfer the cooked poppers to a plate using tongs or a spatula. Let them rest for 2–3 minutes before serving.

The cheese filling can be extremely hot immediately after cooking. A short rest also helps the coating firm up, making the poppers easier to pick up.

Sprinkle with fresh parsley or a small amount of crumbled feta for extra flavor.

Step 9: Serve with Your Favorite Dip

Arrange the crispy jalapeño poppers on a serving platter. Add small bowls of ranch dressing, garlic yogurt dip, or marinara sauce.

For a fresh contrast, serve them with cucumber slices, cherry tomatoes, or a simple green salad. These poppers are best served warm while the coating is crisp and the filling is creamy.

Tips for Perfectly Crispy Jalapeño Poppers

Use these simple techniques to improve the texture and reduce filling leaks.

  • Dry the peppers thoroughly: Excess water can prevent the coating from sticking.
  • Chop the onion finely: Small pieces blend into the filling and help it stay in place.
  • Soften the cream cheese: Room-temperature cream cheese mixes more smoothly with feta.
  • Use panko breadcrumbs: Their larger flakes help create a crunchy exterior.
  • Coat evenly: Cover the sides and edges without adding too much breading.
  • Spray lightly with oil: A thin coating helps the crumbs brown in the air fryer.
  • Avoid overcrowding: Cook in batches so hot air can circulate around the peppers.
  • Check early: Air fryers differ in heat output, so begin checking at 8 minutes.

Easy Variations to Try

You can change the cheese, herbs, or coating to create different flavors without changing the basic preparation method.

Bacon and Feta Jalapeño Poppers

Add 2 tablespoons of finely chopped, fully cooked bacon to the filling. The smoky, savory flavor complements the tangy feta and creamy cheese.

Extra-Cheesy Jalapeño Poppers

Mix 2 tablespoons of shredded mozzarella into the filling. Mozzarella creates a milder cheese flavor and a softer, stretchy texture.

Mediterranean Herb Poppers

Add chopped fresh dill or oregano, a little lemon zest, and extra parsley to the cheese mixture. These ingredients bring a fresh Mediterranean-inspired flavor to the appetizer.

Spicy Jalapeño Poppers

Mix a pinch of red pepper flakes into the filling or leave some of the jalapeño membranes intact. Taste carefully because the heat level varies from pepper to pepper.

Gluten-Free Jalapeño Poppers

Use a gluten-free all-purpose flour blend and gluten-free panko breadcrumbs. Check all ingredient labels to ensure the products meet your dietary needs.

What to Serve with Crispy Feta and Onion Jalapeño Poppers

These stuffed peppers pair well with creamy dips, fresh vegetables, and other party snacks.

  • Ranch dressing: Its cool, creamy flavor balances the jalapeño heat.
  • Garlic yogurt dip: Adds a fresh, tangy contrast to the salty feta.
  • Marinara sauce: Provides a tomato-based dip with mild acidity.
  • Fresh vegetable sticks: Carrots, celery, and cucumber add crunch and freshness.
  • Chicken wings: Serve both appetizers together for a game-day spread.
  • Loaded potato wedges: Create a more filling snack platter with potatoes and dipping sauce.

For a party, offer two dipping sauces with different flavors so guests can choose their favorite.

Storage and Reheating Instructions

How to Store Leftover Jalapeño Poppers

Allow the poppers to cool slightly, then place them in an airtight container. Refrigerate within 2 hours of cooking and eat within 3–4 days.

Store the dipping sauces separately to help preserve the breadcrumb coating.

How to Reheat Jalapeño Poppers in the Air Fryer

Preheat the air fryer to 350°F. Arrange the refrigerated poppers in a single layer and heat for approximately 3–5 minutes, checking that the filling is hot throughout.

Add another minute if needed, but watch the coating closely to prevent over-browning.

Can You Freeze Stuffed Jalapeño Poppers?

Yes. For better texture, freeze the filled and breaded poppers before cooking on a lined tray until firm, then transfer them to a freezer-safe container.

Cook from frozen at 375°F, allowing extra time and checking that the filling is hot throughout. For best quality, use within 2 months.

Common Mistakes to Avoid

  • Leaving too much moisture on the peppers: Wet surfaces make breading less likely to stick.
  • Using large onion pieces: Large pieces can make the filling uneven and difficult to portion.
  • Overfilling the peppers: Excess filling may leak during cooking.
  • Skipping the oil spray: The breadcrumbs may stay pale and dry without a little oil.
  • Crowding the air fryer: Packed peppers can brown unevenly.
  • Cooking at too high a temperature: The coating may brown before the peppers soften.
  • Serving immediately: The hot cheese filling can burn your mouth, so allow a short resting period.

Frequently Asked Questions

1. How long do jalapeño poppers take in the air fryer?

Most breaded jalapeño poppers take 8–12 minutes at 375°F, depending on pepper size, filling quantity, and your air fryer.

2. Can I make jalapeño poppers without cream cheese?

Yes. Use a thick soft cheese such as ricotta, or increase the feta slightly, keeping the filling firm enough to stay inside the peppers.

3. How do I make jalapeño poppers less spicy?

Remove the seeds and inner membranes before filling the peppers, and serve them with a cool ranch or yogurt dip.

4. Why is my breadcrumb coating not crispy?

Dry the peppers well, coat them evenly, use panko breadcrumbs, and apply a light spray of oil before air frying.

5. Can I prepare these poppers ahead of time?

Yes. Fill and bread the peppers, cover them, and refrigerate for several hours before cooking for easier party preparation.

6. Can I use regular breadcrumbs instead of panko?

Yes. Regular breadcrumbs work, but the coating may be finer and less crunchy than panko.

7. Do I need to turn jalapeño poppers while air frying?

Usually not. Cook them cut-side up, and rotate the basket or carefully rearrange them only if your air fryer browns unevenly.

8. Can I make these jalapeño poppers gluten-free?

Yes. Replace the regular flour and panko with certified gluten-free alternatives and check the labels on all other ingredients.

Final Thoughts

Air Fryer Crispy Feta & Onion Stuffed Jalapeño Poppers combine spicy peppers, tangy feta, creamy cheese, and a crunchy breadcrumb coating in one easy appetizer. They are a practical choice for game-day gatherings, family snack nights, and casual parties.

For the best results, dry the peppers, keep the filling thick, coat each piece evenly, and leave enough space in the air fryer basket. Serve the poppers warm with your favorite dipping sauce for a flavorful snack with a satisfying crunch.

Ready to make these crispy bites? Save this recipe for your next gathering and tell us in the comments: would you add bacon, mozzarella, or extra garlic to your jalapeño poppers?

Homemade Alkaline Water Recipe – Easy & Refreshing

Homemade Alkaline Water with cucumber slices, lemon, fresh mint, ice, and filtered water in a clear glass pitcher

Homemade Alkaline Water Recipe – Easy & Refreshing

Homemade Alkaline Water is a simple infused-water recipe made with filtered water, cucumber, lemon, fresh mint, and a carefully measured amount of baking soda if you want to raise the water’s pH. It is crisp, refreshing, and easy to prepare in a large pitcher for everyday hydration.

This Homemade Alkaline Water is best treated as a flavored hydration option rather than a medical drink. Lemon, cucumber, and mint add fresh flavor, while baking soda is the ingredient that can actually increase alkalinity. Because baking soda contains sodium, only a small amount should be used, and people who need to limit sodium should skip it unless their clinician says otherwise.

Prep Time: 10 minutes
Infusion Time: 30 minutes
Total Time: 40 minutes
Servings: About 8 cups

Ingredients

For the Water

8 cups filtered water

1/2 medium cucumber, thinly sliced

1 lemon, thinly sliced

8 to 10 fresh mint leaves

1/8 teaspoon baking soda, optional

Ice cubes, as needed

Optional Additions

A few fresh basil leaves

2 to 3 thin slices of fresh ginger

A few lime slices

Extra cucumber for serving

Why You’ll Love This Recipe

Homemade Alkaline Water is quick to prepare, visually refreshing, and easy to keep chilled in the refrigerator. The cucumber gives the water a clean, mild flavor, lemon adds brightness, and mint makes every glass feel especially fresh.

Another reason to enjoy Homemade Alkaline Water is that it can make plain water more appealing without relying on sugary drink mixes or syrups.

It is important to know that lemon water by itself is not alkaline in the glass. Lemon juice is acidic. If your goal is specifically to increase the pH of the water, the small amount of baking soda is the ingredient that does that.

How to Make Homemade Alkaline Water

Step 1: Wash the Produce

Rinse the cucumber, lemon, and mint thoroughly under cool running water.

Because the lemon and cucumber are added with their skins, washing them well helps remove dirt and surface residue.

Step 2: Slice the Cucumber

Cut the cucumber into thin rounds.

Thin slices release more flavor into Homemade Alkaline Water and also look attractive in a clear pitcher.

Step 3: Slice the Lemon

Slice the lemon into thin rounds and remove any visible seeds.

If you want a gentler lemon flavor, use only half of the lemon.

Avoid squeezing a large amount of lemon juice into the pitcher if you are trying to keep the water less acidic.

Step 4: Add the Mint

Lightly clap or bruise the mint leaves between your hands.

This releases some aromatic oils without tearing the leaves into tiny pieces.

Add the mint to the pitcher with the cucumber and lemon.

Step 5: Add the Water

Pour 8 cups of cold filtered water into the pitcher.

Stir gently so the cucumber, lemon, and mint are distributed throughout.

At this stage, the drink is essentially a refreshing infused water.

Step 6: Add Baking Soda if Desired

If your goal is to actually increase the water’s alkalinity, add 1/8 teaspoon of baking soda to the full 8-cup pitcher.

Stir thoroughly until it dissolves.

Do not add extra baking soda simply to make the water “more alkaline.” More is not necessarily better, and too much baking soda increases sodium and can cause stomach upset or other problems.

Step 7: Chill the Pitcher

Cover the pitcher and refrigerate it for at least 30 minutes.

For stronger cucumber and mint flavor, chill for 1 to 2 hours.

The longer Homemade Alkaline Water sits, the more noticeable the infused flavors become.

Step 8: Taste Before Serving

Stir the water and taste a small amount.

If the flavor is too strong, dilute it with more filtered water.

If it tastes flat, add a few fresh cucumber slices or mint leaves rather than extra baking soda.

Step 9: Add Ice

Fill serving glasses with ice and pour the chilled drink over the top.

Add a fresh lemon slice, cucumber round, or mint sprig to each glass if desired.

Step 10: Serve Fresh

Serve Homemade Alkaline Water cold.

For the freshest flavor, drink it the same day or within 24 hours.

Serving Suggestions

Homemade Alkaline Water is especially refreshing with breakfast, lunch, outdoor meals, or after light everyday activity.

Serve it in a large glass pitcher so the cucumber, lemon, and mint remain visible.

For another refreshing homemade drink, try our Lemon Ginger Detox Drink Recipe with bright citrus and warming ginger flavor.

Recipe Tips

Use cold filtered water for the cleanest flavor.

Slice the cucumber thinly so it infuses quickly.

Do not leave lemon slices in the pitcher for several days because the rind can eventually create a bitter taste.

Use only a very small amount of baking soda.

If you are watching your sodium intake, leave the baking soda out and enjoy the recipe simply as cucumber-lemon-mint infused water.

For prettier Homemade Alkaline Water, reserve a few fresh cucumber slices and mint leaves for each glass.

Easy Variations

Homemade Alkaline Water can be customized with different fresh ingredients.

For a cucumber-mint version, leave out the lemon and use extra cucumber.

For a ginger version, add two or three thin slices of fresh ginger.

For a citrus blend, add a few lime or orange slices, keeping in mind that citrus fruits are acidic even though they taste refreshing.

A basil-cucumber version is also delicious. Replace half of the mint with fresh basil leaves.

Does Alkaline Water Have Special Health Benefits?

Homemade Alkaline Water can be a pleasant way to drink more fluids, but it should not be presented as a cure, detox treatment, or way to change the pH of your blood.

Your body tightly regulates blood pH through the lungs and kidneys. Drinking alkaline water does not meaningfully override those systems in healthy people.

Some people simply prefer the taste of slightly alkaline water, while others like infused water because it encourages them to drink more. The main practical benefit is hydration and enjoyment, not changing the body’s overall acidity.

Important Baking Soda Safety

Baking soda, also called sodium bicarbonate, contains sodium.

The tiny quantity used in this pitcher is intentionally conservative. Do not repeatedly add spoonfuls of baking soda to drinking water.

People with high blood pressure, kidney disease, heart conditions, fluid restrictions, or medically prescribed low-sodium diets should speak with a healthcare professional before regularly drinking water with added sodium bicarbonate.

Make-Ahead Instructions

Homemade Alkaline Water can be prepared several hours before serving.

Combine the water, cucumber, mint, and lemon in a covered pitcher and refrigerate.

If using baking soda, stir it in thoroughly when preparing the pitcher.

For the brightest appearance, add a few fresh mint leaves shortly before serving because older mint can darken after sitting in water.

Storage

Store Homemade Alkaline Water covered in the refrigerator.

For the best flavor, use it within 24 hours, especially when fresh fruit, cucumber, and herbs remain in the pitcher.

If you want to keep the water longer, strain out the produce after several hours and refrigerate the flavored water separately.

Nutrition Information

Approximate nutrition per 1-cup serving, without added sweetener:

Calories: 3
Protein: 0 g
Carbohydrates: 1 g
Fat: 0 g
Fiber: 0 g
Sugar: Less than 1 g
Sodium: About 20 mg when 1/8 teaspoon baking soda is divided across 8 cups

Nutrition values are estimates and depend on how much flavor and juice are released from the produce.

Frequently Asked Questions

Is lemon water actually alkaline?

No. Lemon juice is acidic. Adding lemon to water does not make the drink alkaline. If you want to raise the pH, a carefully measured alkaline ingredient such as baking soda is required.

Can I make this without baking soda?

Yes. Homemade Alkaline Water can be made without baking soda, but in that case it is more accurately described as lemon-cucumber-mint infused water rather than truly alkaline water.

Can I use bottled water?

Yes. Filtered or bottled water both work.

Can I add more baking soda?

It is not recommended. More baking soda adds more sodium and can cause side effects.

How long can I keep it?

Use it within 24 hours for the freshest flavor.

Can I use lime instead of lemon?

Yes. Lime gives a similar bright citrus flavor, although it is also acidic.

Final Thoughts

Homemade Alkaline Water is an easy, refreshing pitcher drink made with cucumber, lemon, mint, filtered water, and an optional small amount of baking soda.

Because Homemade Alkaline Water takes only minutes to prepare and looks beautiful in a glass pitcher, it is useful for everyday hydration, brunches, family meals, and warm-weather gatherings.

Keep this Homemade Alkaline Water recipe handy whenever you want a crisp, fresh pitcher drink.

For most people, the best reason to enjoy Homemade Alkaline Water is simply that it makes hydration feel more enjoyable without added sugar.

If you enjoy simple homemade drinks, explore our 3 Natural Wellness Drinks to Try at Home for more refreshing ideas.

Flourless Oat and Chia Bread

Oat Chia Bread with oats, chia seeds, eggs, Greek yogurt, and a soft golden flourless texture

Flourless Oat and Chia Bread

Oat Chia Bread is a hearty, wholesome, flourless loaf made with rolled oats, chia seeds, eggs, Greek yogurt, baking powder, and a few simple pantry ingredients. It has a soft, slightly chewy crumb, a golden crust, and a naturally nutty flavor that works beautifully for breakfast, sandwiches, snacks, or as a side with soups and salads.

This Oat Chia Bread is especially useful when you want a homemade bread without traditional flour or yeast. The oats provide structure, the chia seeds help bind the mixture, and the eggs and yogurt keep the loaf moist and tender. It is simple to prepare, easy to slice, and convenient for meal prep.

Prep Time: 15 minutes
Rest Time: 10 minutes
Bake Time: 40–45 minutes
Total Time: About 1 hour 10 minutes
Servings: 10 slices

Ingredients

For the Bread

2 cups rolled oats

3 tablespoons chia seeds

3 large eggs

1 cup plain Greek yogurt

1/3 cup milk

2 tablespoons olive oil

1 tablespoon honey or maple syrup

2 teaspoons baking powder

1/2 teaspoon baking soda

1/2 teaspoon salt

1 teaspoon apple cider vinegar or lemon juice

Optional Toppings

1 tablespoon rolled oats

1 teaspoon chia seeds

1 teaspoon sesame seeds

Why You’ll Love This Recipe

Oat Chia Bread is a practical recipe when you want something more filling than ordinary toast. The combination of oats, chia seeds, eggs, and Greek yogurt gives the loaf a satisfying texture and makes each slice sturdy enough for toppings.

Another reason to love Oat Chia Bread is that it requires no kneading, yeast, or long rising time. Everything is mixed in a bowl, allowed to rest briefly, and then baked.

It is also flexible. You can keep it plain, add seeds, herbs, or spices, or make a slightly sweeter version for breakfast.

How to Make This Bread

Step 1: Preheat the Oven

Preheat the oven to 350°F or 175°C.

Line an 8 x 4-inch loaf pan with parchment paper, leaving some paper over the sides so the bread is easy to lift out after baking.

Lightly grease any exposed sides of the pan.

Step 2: Blend the Oats

Place the rolled oats in a blender or food processor.

Pulse until they become a coarse oat flour. The texture does not need to be perfectly fine.

This step helps Oat Chia Bread hold together while still keeping a little texture from the oats.

Step 3: Mix the Dry Ingredients

Add the ground oats to a large mixing bowl.

Stir in the chia seeds, baking powder, baking soda, and salt.

Mix well so the leavening ingredients are evenly distributed throughout the oat mixture.

Step 4: Mix the Wet Ingredients

In a separate bowl, whisk together the eggs, Greek yogurt, milk, olive oil, honey or maple syrup, and apple cider vinegar.

Whisk until the mixture is smooth and creamy.

The yogurt adds moisture, while the vinegar reacts with the baking soda to help Oat Chia Bread rise slightly in the oven.

Step 5: Combine Wet and Dry Mixtures

Pour the wet ingredients into the bowl with the dry ingredients.

Stir with a spatula until everything is evenly combined.

The batter will be thicker than cake batter but softer than traditional bread dough.

Do not worry if it looks a little sticky.

Step 6: Let the Batter Rest

Allow the batter to sit for about 10 minutes.

During this time, the chia seeds absorb liquid and the oats soften.

This resting step helps Oat Chia Bread develop a more stable texture and makes the batter easier to spread in the pan.

Step 7: Transfer to the Pan

Spoon the batter into the prepared loaf pan.

Smooth the top with the back of a spoon or spatula.

Sprinkle rolled oats, chia seeds, or sesame seeds over the top if desired.

Step 8: Bake Until Golden

Place the loaf in the center of the oven.

Bake for 40 to 45 minutes, or until the top is golden and a toothpick inserted into the center comes out clean.

The loaf should feel firm when gently pressed.

If the top browns too quickly, cover it loosely with foil during the final 10 minutes.

Step 9: Cool in the Pan

Remove the pan from the oven and let the loaf cool for 10 minutes.

Then use the parchment paper to lift it out of the pan.

Transfer it to a wire rack.

Step 10: Cool Completely Before Slicing

Let Oat Chia Bread cool completely before slicing.

This is important because flourless oat breads continue to set as they cool. Cutting too early may make the center seem overly soft or gummy.

Use a sharp serrated knife for clean slices.

Serving Suggestions

Oat Chia Bread is versatile enough for both savory and sweet toppings.

For breakfast, spread a slice with almond butter, peanut butter, Greek yogurt, cream cheese, or mashed avocado.

For a savory meal, top Oat Chia Bread with eggs, cottage cheese, sliced tomato, smoked salmon, hummus, or turkey.

It also works well beside soups, stews, and salads. Toasting the slices gives the edges a slightly crisp texture while keeping the center tender.

For another easy flourless bread idea, try our Healthy Bread in a Jar (No Flour, No Yeast, No Sugar) for a simple homemade option.

Recipe Tips

Use rolled oats rather than instant oats for the best structure.

Blend the oats into a coarse flour before mixing.

Let the batter rest so the chia seeds can absorb moisture.

Do not overmix once the wet and dry ingredients are combined.

Use thick Greek yogurt rather than a very thin yogurt.

For the best Oat Chia Bread texture, cool the loaf completely before cutting it.

If the center seems too moist after baking, return the loaf to the oven for another 5 to 10 minutes.

Store the bread only after it is completely cool to prevent condensation.

Easy Variations

Oat Chia Bread can be changed in several simple ways.

For a seedier loaf, add sunflower seeds, pumpkin seeds, flaxseed, or sesame seeds to the batter.

For a savory version, add garlic powder, dried rosemary, oregano, or grated Parmesan.

A sweeter breakfast loaf can include cinnamon, vanilla, raisins, or a little extra honey.

For more texture, stir in chopped walnuts or pecans.

You can also make Oat Chia Bread in muffin cups for individual portions. Reduce the baking time and begin checking them around 20 minutes.

Make-Ahead Instructions

Oat Chia Bread is well suited to meal prep because it keeps well for several days.

Bake the loaf, cool it completely, and slice it before storing.

You can prepare individual slices for quick breakfasts by placing parchment paper between them.

The bread can also be made the evening before and left to cool completely before refrigerating in the morning.

Storage and Freezing

Store Oat Chia Bread in an airtight container in the refrigerator for up to 5 days.

For longer storage, freeze individual slices for up to 2 months.

Place parchment paper between slices before freezing so you can remove only what you need.

Thaw a slice overnight in the refrigerator or reheat it directly from frozen in a toaster or toaster oven.

Nutrition Information

Approximate nutrition per slice:

Calories: 175
Protein: 8 g
Carbohydrates: 22 g
Fat: 7 g
Saturated Fat: 1.5 g
Fiber: 4 g
Sugar: 3 g
Sodium: 230 mg

Nutrition values are estimates and may vary depending on the yogurt, milk, sweetener, and toppings used.

Frequently Asked Questions

Can I make this without blending the oats?

Yes, but the loaf will have a rougher texture and may be more crumbly. Blending the oats helps the bread hold together.

Can I use quick oats?

Yes. Quick oats can work, although the finished loaf may be softer and slightly denser.

Can I make it dairy-free?

Yes. Use a thick dairy-free yogurt and unsweetened plant milk.

Why is my bread gummy in the middle?

It may need more baking time or more cooling time. Oat Chia Bread firms significantly as it cools.

Can I toast it?

Yes. Toasting gives the slices a crisp edge and makes them especially good for breakfast toppings.

Can I add extra seeds?

Yes. Pumpkin, sunflower, flax, and sesame seeds all work well.

Can I freeze it?

Yes. Freeze sliced Oat Chia Bread for up to 2 months and thaw or toast individual slices as needed.

Final Thoughts

Oat Chia Bread is a simple flourless loaf made with oats, chia seeds, eggs, yogurt, and everyday pantry ingredients.

Because this flourless loaf requires no yeast, kneading, or traditional flour, it is an easy option for homemade breakfasts, snacks, and sandwich-style meals.

Keep this Oat Chia Bread recipe handy whenever you want a tender, hearty loaf that is easy to prepare, easy to slice, and convenient for meal prep.

With its golden crust, soft center, and subtle nutty flavor, Oat Chia Bread is a satisfying homemade recipe that works just as well with sweet toppings as it does with savory ones.

If you love homemade bread recipes, explore our 26 Loaf Bread Recipes – Easy, Homemade & Absolutely Delicious for even more baking inspiration.

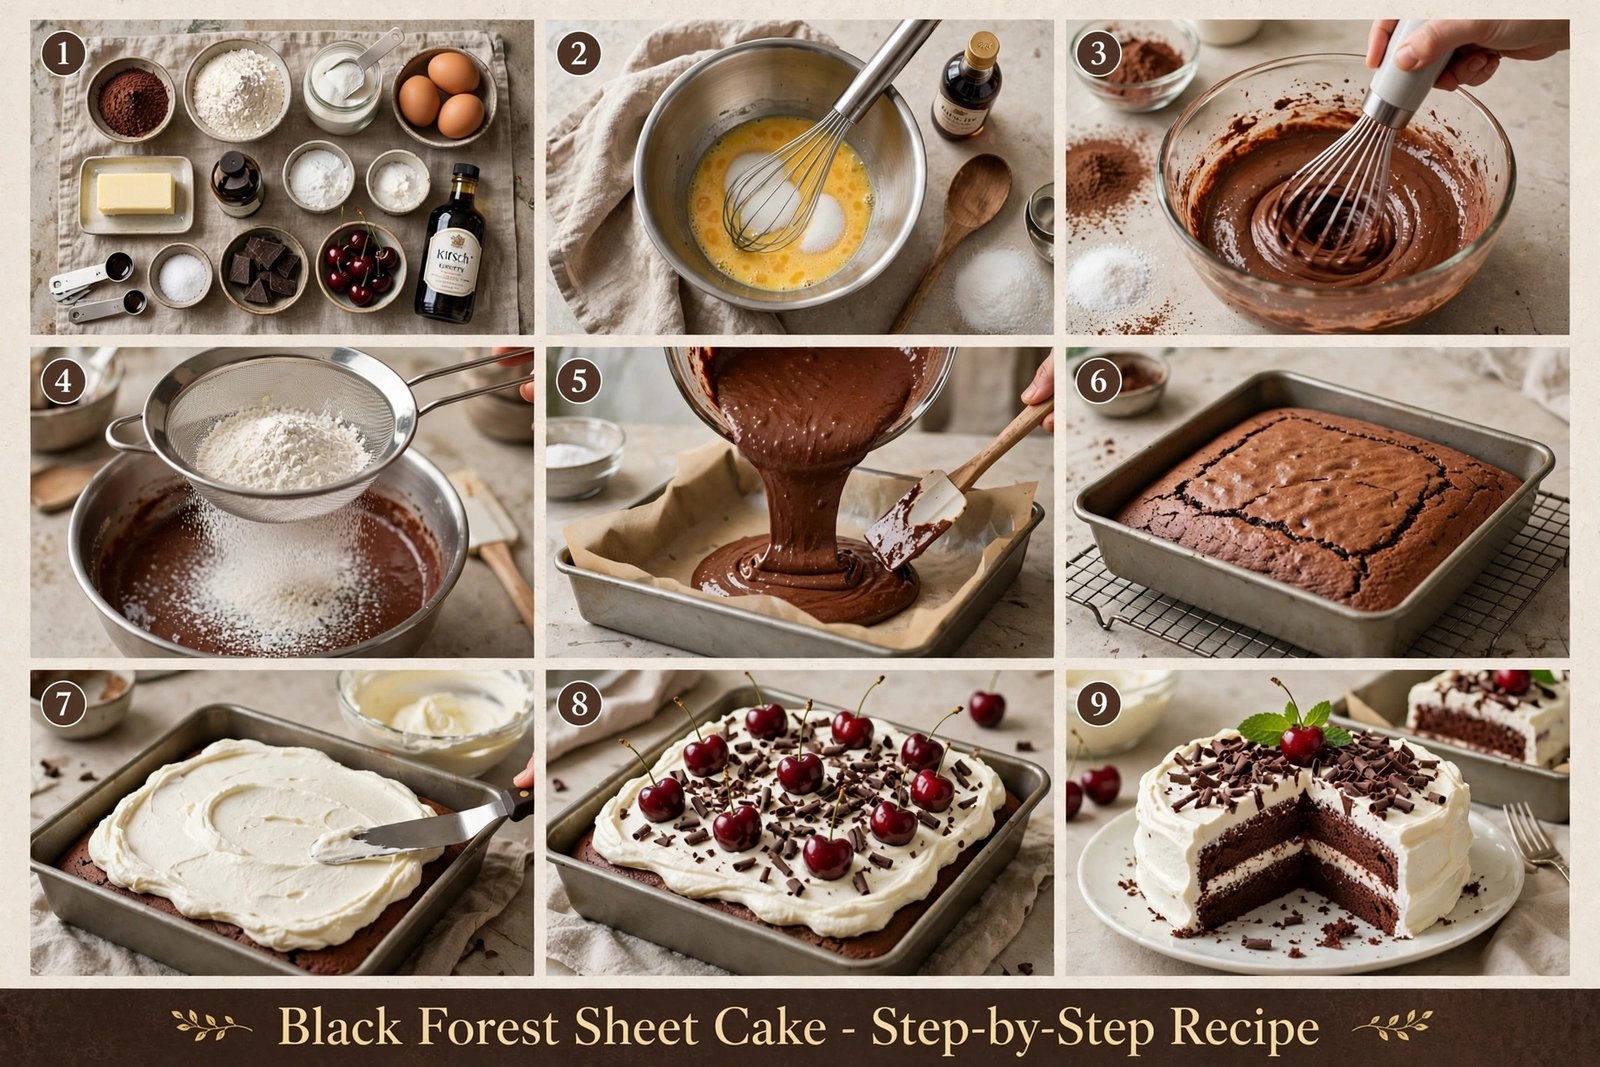
Black Forest Sheet Cake

Black Forest Sheet Cake

This is *Black Forest Sheet Cake* – super easy version of Black Forest cake made in a tray!


Ingredients:


*For Chocolate Cake:*

– All-purpose flour – 2 cups (250g)

– Cocoa powder – 3/4 cup (75g)

– Sugar – 1 3/4 cups (350g)

– Eggs – 4 large

– Butter – 200g, softened

– Milk – 1 cup (240ml)

– Baking powder – 2 tsp

– Baking soda – 1 tsp

– Salt – 1/2 tsp

– Vanilla essence – 2 tsp


*For Filling & Frosting:*

– Whipping cream – 4 cups (about 600ml), cold

– Powdered sugar – 1/2 cup

– Vanilla – 1 tsp

– Chocolate shavings – 2 cups (use dark chocolate)

– Maraschino cherries – 12-15 pieces

– Cherry syrup / juice – 1/2 cup (from cherry jar, to soak cake)


Method:


*1. Make Batter:*

Preheat oven to 180°C / 350°F. Grease a rectangular pan (9×13 inch).

Beat butter + sugar until creamy and fluffy .

Add eggs one by one, add vanilla.

In another bowl mix flour + cocoa + baking powder + baking soda + salt.

Add dry mix and milk alternately to butter mix. Don’t overmix.


*2. Bake:*

Pour batter into pan and bake 30-35 minutes.

Check with toothpick – should come out clean.

Let it cool completely on wire rack .This is very important – if hot, cream will melt.


*3. Soak:*

Poke holes with fork and brush cherry juice/syrup all over the cake. This makes it moist like authentic Black Forest.


*4. Frost:*

Whip cold cream + powdered sugar + vanilla till stiff peaks.

Spread thick layer all over cake top and sides .


*5. Decorate:*

Press chocolate shavings all over top and sides with your hands.

Place cherries on top as shown – 8-10 pieces.

Chill in fridge for at least 2 hours before cutting. It tastes best cold!


Keeps 3 days in fridge.

Tips for this Black Forest Sheet Cake – this is where most people fail:


*1. Cream will not whip? – The #1 problem:*

Your bowl, beaters and cream must be VERY cold. Put bowl + beaters in freezer for 20 mins before whipping. And use 35% fat whipping cream, not light cream. If room is hot, place your bowl over another bowl with ice while whipping.


*2. Cake is dry or hard:*

Don’t overmix after adding flour. Mix just until combined. And don’t overbake. Check at 30 mins. The toothpick should have a few moist crumbs, not be completely dry.


*3. For perfect chocolate shavings:*

Use room temperature chocolate bar, not cold from fridge. Use a vegetable peeler on the side of the bar. If chocolate is too cold, it will break into small pieces, not curls.


*4. Don’t skip the cherry syrup soak:*

This is what makes it a real Black Forest cake, not just chocolate cake. The syrup makes it super moist. Brush it when cake is still slightly warm so it absorbs better.


*5. Cutting trick:*

To get clean slices like bakery, use a hot knife. Dip knife in hot water, wipe dry, then cut. Chocolate won’t drag and cream will stay clean.


*6. Make it Halal / Alcohol-free:*

Original Black Forest uses kirsch (cherry alcohol). You’re already doing right thing by using cherry juice from the jar – tastes.


Fridge is mandatory – this cake cannot stay outside more than 1 hour, cream will melt!