Honey Garlic Shrimp, Sausage, and Broccoli

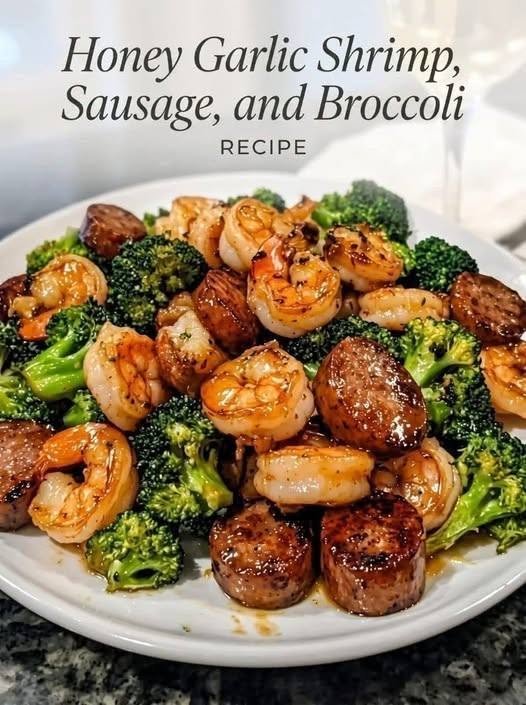
Honey Garlic Shrimp, Sausage, and Broccoli

Recipe Description

Honey Garlic Shrimp, Sausage, and Broccoli is a delicious one-pan meal that combines juicy shrimp, smoky sausage, tender-crisp broccoli, and a sweet, savory garlic sauce. Every bite brings together the natural sweetness of honey, the rich flavor of browned sausage, the delicate texture of shrimp, and the freshness of broccoli.

This easy skillet recipe is perfect for busy weeknights when you want a flavorful homemade dinner without spending hours in the kitchen. The ingredients cook quickly, and the honey garlic sauce coats everything in a glossy finish that makes the dish especially appetizing.

The combination of seafood and sausage creates a satisfying balance of flavors. Garlic and butter add richness, soy sauce brings savory depth, and a squeeze of lemon juice brightens the entire dish. Broccoli provides color, texture, and a serving of vegetables.

Serve this recipe over steamed rice, noodles, quinoa, or cauliflower rice. You can also enjoy it on its own for a lighter meal.

Recipe Details

  • Prep Time: 15 minutes

  • Cook Time: 20 minutes

  • Total Time: 35 minutes

  • Servings: 4

  • Cuisine: Asian-inspired fusion

  • Course: Lunch or dinner

  • Cooking Method: One-pan skillet

  • Difficulty: Easy

Ingredients

For the Main Dish

  • 1 pound (450 g) large shrimp, peeled and deveined

  • 12 ounces (340 g) smoked sausage, sliced into rounds

  • 4 cups broccoli florets

  • 1 tablespoon olive oil

  • 1 tablespoon unsalted butter

  • 4 garlic cloves, minced

  • 1/2 teaspoon smoked paprika

  • 1/2 teaspoon black pepper

  • Salt to taste, if needed

  • 2 tablespoons water, for steaming the broccoli

  • 2 green onions, sliced, for garnish

  • 1 teaspoon sesame seeds, optional

  • Lemon wedges, for serving

For the Honey Garlic Sauce

  • 3 tablespoons honey

  • 3 tablespoons low-sodium soy sauce

  • 1 tablespoon lemon juice

  • 1 teaspoon rice vinegar

  • 1 teaspoon cornstarch

  • 1 tablespoon cold water

  • 1/4 teaspoon red pepper flakes, optional

Step-by-Step Instructions

Step 1: Prepare the Shrimp and Sausage

If using frozen shrimp, thaw them completely according to the package instructions. Peel and devein the shrimp if necessary, then pat them dry with paper towels.

Dry shrimp brown more effectively and help prevent excess water from collecting in the skillet.

Slice the smoked sausage into even rounds approximately 1/4 inch thick. Prepare the broccoli by washing it, drying it, and cutting it into bite-sized florets.

Mince the garlic and slice the green onions. Having all the ingredients ready before cooking makes the process faster and easier.

Step 2: Mix the Honey Garlic Sauce

In a small bowl, combine the honey, soy sauce, lemon juice, and rice vinegar.

In a separate small cup, mix the cornstarch with one tablespoon of cold water until smooth. Add this mixture to the sauce and whisk thoroughly.

If you enjoy a little heat, add the red pepper flakes.

The honey provides sweetness, soy sauce adds savory flavor, lemon juice balances the richness, and cornstarch helps the sauce thicken into a glossy coating.

Set the sauce aside.

Step 3: Brown the Sausage

Heat the olive oil in a large skillet over medium-high heat.

Add the sliced sausage in a single layer and cook for approximately 4–5 minutes, turning occasionally. Allow the edges to become nicely browned.

Browning develops deeper flavor and adds a slightly crisp texture to the sausage.

Once browned, transfer the sausage to a plate and set aside. Leave a small amount of the flavorful oil in the skillet.

If the sausage releases a lot of fat, carefully remove the excess before continuing.

Step 4: Cook the Broccoli

Add the broccoli florets to the same skillet.

Pour in two tablespoons of water and cover the skillet with a lid. Steam the broccoli for approximately 3–4 minutes, depending on the size of the florets.

The broccoli should become bright green and slightly tender while retaining some firmness.

Remove the lid and allow any remaining water to evaporate. Transfer the broccoli to the plate with the sausage.

Avoid cooking the broccoli for too long because it will continue to heat when returned to the skillet with the sauce.

Step 5: Cook the Shrimp

Reduce the heat to medium and add the butter to the skillet.

Once melted, add the minced garlic and cook for approximately 30 seconds, stirring continuously until fragrant. Avoid browning the garlic too much, as burnt garlic can taste bitter.

Add the shrimp in a single layer. Sprinkle with smoked paprika and black pepper.

Cook for approximately 1–2 minutes per side, depending on the size of the shrimp. They should turn pink and opaque throughout.

Shrimp cook quickly, so watch them carefully. Overcooking can make them rubbery.

For food safety, cook shrimp to an internal temperature of 145°F (63°C).

Step 6: Combine the Ingredients

Return the browned sausage and broccoli to the skillet.

Gently toss everything together so the ingredients are evenly distributed. Keep the heat at medium to prevent the garlic from burning.

Give the prepared honey garlic sauce another quick stir to ensure the cornstarch has not settled at the bottom of the bowl.

Pour the sauce over the shrimp, sausage, and broccoli.

Use a spatula to coat everything evenly.

Step 7: Thicken the Sauce

Allow the mixture to simmer gently for approximately 2–3 minutes, stirring carefully.

As the sauce heats, the cornstarch will help it thicken and cling to the shrimp, sausage, and broccoli.

If the sauce becomes too thick, add one tablespoon of water at a time until it reaches your preferred consistency.

If it appears too thin, allow it to simmer briefly longer while stirring.

Taste the sauce before adding salt because the sausage and soy sauce may already provide enough seasoning.

The finished dish should have a glossy honey garlic coating, tender shrimp, browned sausage, and bright green broccoli.

Step 8: Garnish and Serve

Remove the skillet from the heat.

Sprinkle sliced green onions and sesame seeds over the top. Add a squeeze of fresh lemon juice for extra brightness.

Serve immediately while the sauce is warm and glossy.

For a complete dinner, spoon the mixture over steamed jasmine rice, brown rice, or noodles. If you prefer a lower-carbohydrate option, serve it with cauliflower rice or enjoy it as a standalone skillet meal.

Recipe Notes

Choose the right shrimp: Large shrimp are ideal because they remain juicy and are easy to cook without overcooking.

Use your favorite sausage: Smoked beef or chicken sausage works well. Check the package because salt and fat levels vary considerably between brands.

Adjust the sweetness: If you prefer a less-sweet sauce, reduce the honey to two tablespoons and taste before adding more.

Control the salt: Low-sodium soy sauce is useful because sausage can already be salty.

Keep the vegetables crisp: Steam broccoli only until slightly tender, then finish cooking it briefly in the sauce.

Make it dairy-free: Replace butter with additional olive oil.

Expert Tips for the Best Results

  • Pat the shrimp dry before cooking to improve browning.

  • Do not overcrowd the skillet; cook the shrimp in batches if necessary.

  • Prepare the sauce before starting to cook because the shrimp and garlic cook quickly.

  • Use medium-high heat to brown the sausage, then reduce the heat for the shrimp and sauce.

  • Stir the sauce before pouring because cornstarch settles at the bottom.

  • Add fresh lemon juice at the end to balance the sweet and savory flavors.

  • Serve immediately for the best shrimp texture.

Delicious Variations

Spicy Honey Garlic Shrimp and Sausage

Add extra red pepper flakes or a teaspoon of chili garlic sauce to the honey garlic mixture. This creates a sweet, spicy sauce that pairs beautifully with smoky sausage.

Honey Garlic Chicken and Broccoli

Replace the shrimp with bite-sized chicken pieces. Cook the chicken thoroughly to an internal temperature of 165°F (74°C) before combining it with the other ingredients.

Extra Vegetable Skillet

Add sliced bell peppers, mushrooms, snap peas, or zucchini. Cook vegetables according to their firmness so they retain their texture.

Lemon Butter Version

Increase the lemon juice slightly and use a little extra butter in place of some of the olive oil. This creates a brighter, richer sauce.

Low-Carbohydrate Version

Serve the skillet with cauliflower rice instead of regular rice. Reduce the honey if desired, remembering that honey contributes carbohydrates even when used in a savory sauce.

Serving Suggestions

This versatile skillet pairs well with a variety of side dishes.

  • Steamed jasmine rice: Absorbs the sweet and savory sauce.

  • Brown rice: Adds a nuttier flavor and more fiber.

  • Garlic noodles: Create a hearty meal with Asian-inspired flavors.

  • Cauliflower rice: A lower-carbohydrate alternative.

  • Fresh cucumber salad: Adds a cool, refreshing contrast.

  • Roasted potatoes: Provide a comforting side for a family dinner.

For meal presentation, place rice in a shallow bowl, arrange the shrimp and sausage on top, and spoon extra sauce over everything. Finish with green onions, sesame seeds, and a lemon wedge.

Nutritional Information

Estimated per serving, assuming four servings and excluding rice or other side dishes.

Nutrient Approximate Amount
Calories 350–450
Protein 25–32 g
Carbohydrates 18–25 g
Fat 18–27 g
Fiber 3–5 g
Sugar 12–17 g
Sodium 650–1,100 mg

Actual values depend on the sausage, shrimp size, sauce ingredients, and portion sizes. Adding rice or noodles increases the total calories and carbohydrates.

Benefits of This Recipe

Provides protein: Shrimp and sausage contribute protein, which supports muscle maintenance and normal body functions.

Includes vegetables: Broccoli provides fiber, vitamin C, vitamin K, and other beneficial nutrients.

Offers a quick cooking method: Shrimp cook quickly, making this a convenient option when time is limited.

Customizable ingredients: You can adjust the vegetables, sweetness, spice, and side dishes to match your preferences.

Useful for balanced meals: Pairing the skillet with a suitable portion of rice or another side can help create a satisfying meal.

Nutritional benefits depend on the ingredients used and the overall balance of your diet.

Storage and Reheating

Allow leftovers to cool promptly and refrigerate them in an airtight container within two hours of cooking.

Store in the refrigerator for up to 3 days. For the best texture, reheat only the portion you plan to eat.

To reheat on the stove, place the leftovers in a skillet over medium-low heat with a small splash of water. Stir gently until thoroughly hot.

For microwave reheating, cover loosely and heat in short intervals, stirring between intervals.

Avoid prolonged reheating because shrimp can become tough. Discard leftovers that have been left at room temperature for too long.

Freezing is possible, but shrimp and broccoli may become softer after thawing, so refrigeration is preferable for the best texture.

Frequently Asked Questions

1. Can I use frozen shrimp?

Yes. Thaw them completely, drain any excess liquid, and pat them dry before cooking.

2. Can I use chicken sausage instead of smoked beef sausage?

Absolutely. Chicken sausage is a suitable alternative, although the flavor and fat content may differ.

3. How can I make the sauce thicker?

Mix one teaspoon of cornstarch with one tablespoon of cold water, add it to the sauce, and simmer briefly until thickened.

4. Can I prepare this meal ahead of time?

You can wash and cut the vegetables, slice the sausage, and mix the sauce ahead. For the best shrimp texture, cook the shrimp shortly before serving.

5. What if I do not have sesame oil?

You can omit it or use a little olive oil. The dish will still have plenty of flavor from the garlic, honey, soy sauce, and lemon.

6. Is this recipe spicy?

Not by default. Leave out the red pepper flakes for a mild version or increase them to add heat.

7. Can I make this recipe gluten-free?

Yes. Use certified gluten-free tamari or soy sauce and verify that the sausage and other packaged ingredients are gluten-free.

8. What is the best way to keep shrimp tender?

Cook the shrimp just until pink and opaque, avoid overcrowding the pan, and return them to the sauce only long enough to finish the dish.
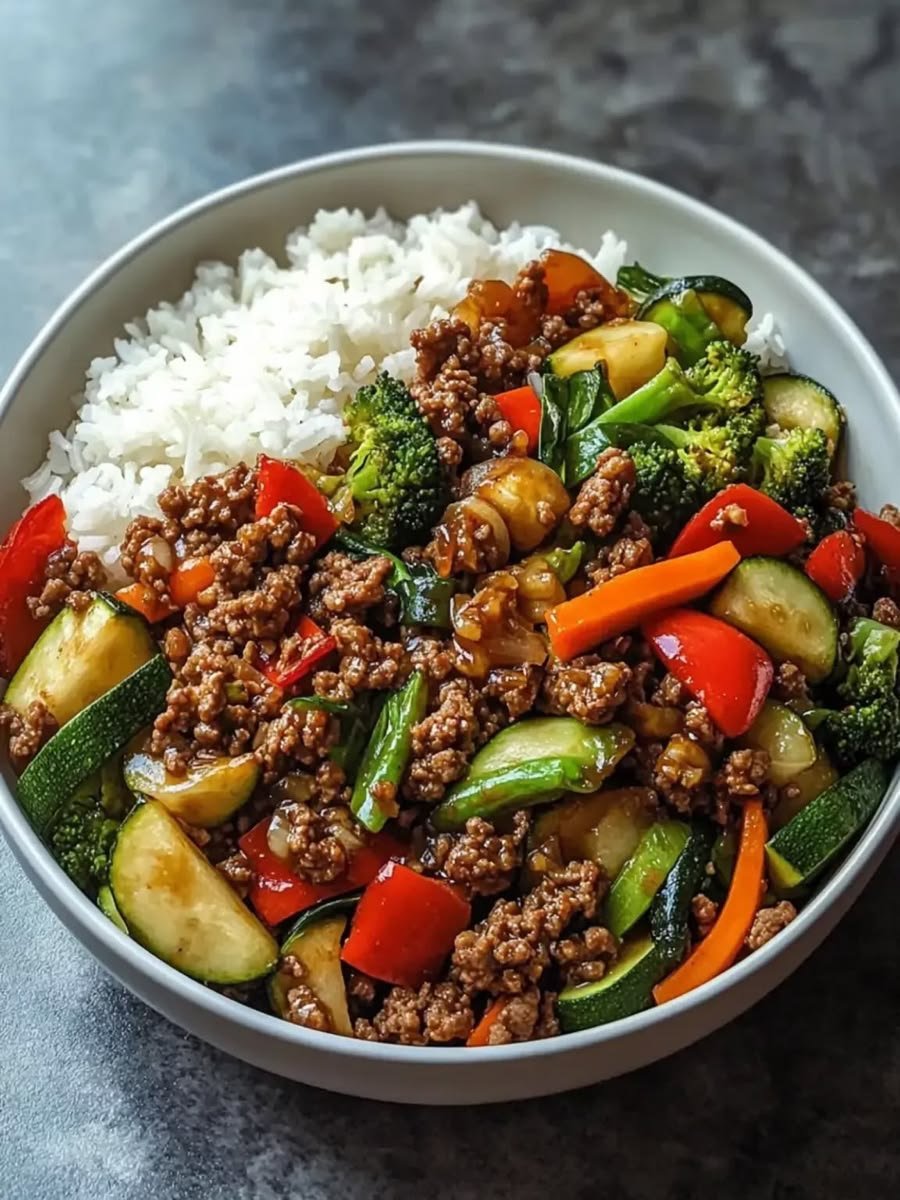
Ground Beef & Vegetable Stir-Fry Rice Bowl

Ground Beef & Vegetable Stir-Fry Rice Bowl

Recipe Description

Ground Beef & Vegetable Stir-Fry Rice Bowl is a delicious, satisfying meal that combines juicy seasoned ground beef, colorful vegetables, fluffy rice, and a savory garlic-soy stir-fry sauce. Every bite delivers a wonderful balance of tender beef, crisp vegetables, and rich, slightly sweet and savory flavors.

This easy homemade recipe is perfect for busy weeknights when you want something comforting without spending hours in the kitchen. Ground beef cooks quickly, vegetables add freshness and color, and rice creates a hearty base that brings everything together.

The best part is how customizable this bowl can be. You can use broccoli, carrots, bell peppers, snap peas, or any vegetables you have available. A simple sauce made with soy sauce, garlic, ginger, honey, and sesame oil gives the ingredients a delicious Asian-inspired flavor.

Serve it as a warm family dinner, prepare it for weekday lunches, or customize each bowl with your favorite toppings. This recipe is easy to prepare, budget-friendly, and ideal for meal preparation.

Recipe details

  • Prep time: 15 minutes

  • Cook time: 20 minutes

  • Total time: 35 minutes

  • Servings: 4

  • Cuisine: Asian-inspired

  • Course: Lunch or dinner

  • Difficulty: Easy

Ingredients

For the Rice Bowl

  • 1 pound (450 g) lean ground beef

  • 3 cups cooked white or brown rice

  • 1 tablespoon olive oil

  • 1 medium red bell pepper, diced

  • 1 medium carrot, thinly sliced

  • 1 cup broccoli florets

  • 1 cup shredded cabbage

  • 1/2 cup snap peas, trimmed

  • 1 small onion, thinly sliced

  • 3 garlic cloves, minced

  • 1 teaspoon freshly grated ginger

  • 2 green onions, sliced

  • 1 teaspoon sesame seeds, for garnish

For the Stir-Fry Sauce

  • 1/4 cup low-sodium soy sauce

  • 2 tablespoons water

  • 1 tablespoon honey or brown sugar

  • 1 tablespoon rice vinegar

  • 1 teaspoon sesame oil

  • 1 teaspoon cornstarch

  • 1/4 teaspoon black pepper

  • 1/4 teaspoon red pepper flakes, optional

Instructions

Step 1: Prepare the Rice

Cook the rice according to the package instructions. You can use white rice, jasmine rice, or brown rice, depending on your preference.

For fluffy rice, rinse it before cooking if appropriate for the variety you are using. Once cooked, fluff it gently with a fork and keep it covered until serving.

Leftover rice is also an excellent option. If using refrigerated rice, make sure it has been stored safely and reheat it thoroughly before serving.

Step 2: Prepare the Vegetables

Wash and prepare all the vegetables before beginning to cook. Cut the bell pepper into small pieces, slice the carrot thinly, and separate the broccoli into bite-sized florets.

Slice the onion, shred the cabbage, and trim the snap peas. Mince the garlic and grate the ginger.

Keeping everything ready makes stir-frying easier because the cooking process moves quickly once the pan becomes hot.

For evenly cooked vegetables, try to cut them into similar-sized pieces.

Step 3: Mix the Sauce

In a small bowl, whisk together the soy sauce, water, honey, rice vinegar, sesame oil, cornstarch, black pepper, and red pepper flakes if using.

Stir until the cornstarch dissolves completely.

The soy sauce provides a savory base, honey adds mild sweetness, rice vinegar creates a pleasant tang, and sesame oil contributes a nutty aroma.

The cornstarch helps the sauce thicken and coat the beef and vegetables evenly.

Set the sauce aside.

Step 4: Brown the Ground Beef

Heat the olive oil in a large skillet or wok over medium-high heat.

Add the ground beef and break it into small pieces using a wooden spoon or spatula. Cook for approximately 6–8 minutes, stirring occasionally, until browned and cooked through.

Ground beef should reach an internal temperature of 160°F (71°C).

If there is excessive fat in the skillet, carefully drain the excess, leaving a small amount to help flavor the vegetables.

Avoid overcrowding the pan. If necessary, brown the beef in batches to encourage better browning instead of steaming.

Step 5: Add Garlic, Ginger, and Onion

Add the sliced onion to the browned beef and cook for approximately 2 minutes until it begins to soften.

Stir in the minced garlic and grated ginger. Cook for another 30–60 seconds, stirring constantly so the garlic does not burn.

The mixture should become fragrant, with the ginger adding a gentle warmth and the garlic contributing a rich savory flavor.

Step 6: Stir-Fry the Vegetables

Add the carrots and broccoli to the skillet. Stir-fry for approximately 3 minutes.

Add the bell pepper and snap peas, cooking for another 2 minutes. Finally, stir in the shredded cabbage.

Cook until the vegetables are slightly tender but still retain some crispness.

If the pan looks dry, add a tablespoon of water to help steam the broccoli briefly. Avoid adding too much water, as it can dilute the sauce.

The combination of green broccoli, orange carrots, red bell pepper, and cabbage makes the dish colorful and appealing.

Step 7: Add the Stir-Fry Sauce

Whisk the prepared sauce once more to redistribute the cornstarch.

Pour it into the skillet over the beef and vegetables. Stir everything together so the sauce coats the ingredients evenly.

Allow the mixture to simmer for approximately 1–2 minutes, stirring frequently, until the sauce thickens and becomes glossy.

If the sauce becomes too thick, add a small splash of water. If it seems too thin, let it simmer briefly longer.

Taste and adjust the seasoning if needed. Remember that soy sauce already contains salt, so additional salt may not be necessary.

Step 8: Assemble the Rice Bowls

Divide the cooked rice among four serving bowls.

Spoon the ground beef and vegetable stir-fry over the rice, distributing the beef, vegetables, and sauce evenly.

Garnish with sliced green onions and sesame seeds.

For extra flavor, add a squeeze of lime juice or a little chili sauce. You can also serve the bowls with sliced cucumber or a simple side salad.

Serve immediately while the rice is warm and the beef mixture is glossy and flavorful.

Recipe Tips and Notes

  • Use lean ground beef: Lean beef reduces excess grease while still providing plenty of flavor.

  • Avoid overcooking vegetables: Slightly crisp vegetables add texture and make the bowl more enjoyable.

  • Prepare everything first: Stir-frying moves quickly, so chopping ingredients in advance helps prevent overcooking.

  • Adjust the sauce: Add extra honey for sweetness or rice vinegar for more tang.

  • Choose your rice: Jasmine rice works beautifully, while brown rice provides more fiber.

  • Make it spicy: Add red pepper flakes, chili garlic sauce, or sliced fresh chili.

  • Use a large skillet: A wide pan gives the ingredients enough space to brown and cook evenly.

Variations

Low-Carb Bowl: Replace the rice with cauliflower rice and use a small amount of honey or a suitable alternative in the sauce.

Extra-Protein Bowl: Add edamame or serve with an egg cooked to your liking.

Spicy Beef Bowl: Increase the chili flakes and finish with chili oil.

Vegetable-Packed Bowl: Add mushrooms, zucchini, baby corn, or bok choy.

Gluten-Free Bowl: Use certified gluten-free tamari instead of regular soy sauce and verify that the remaining ingredients are gluten-free.

Nutritional Information

Estimated values per serving, assuming four servings and approximately 3/4 cup cooked rice per bowl:

Nutrient Approximate Amount
Calories 480–550
Protein 27–32 g
Carbohydrates 45–55 g
Fat 18–23 g
Fiber 4–6 g
Sugar 6–9 g
Sodium 550–850 mg

Actual nutritional values depend on the beef’s fat content, rice portion, sauce ingredients, and vegetable quantities.

Benefits of Ground Beef & Vegetable Stir-Fry Rice Bowl

Protein for everyday nutrition: Ground beef provides protein, which supports muscle maintenance and normal body functions.

Vegetable variety: Broccoli, carrots, cabbage, and bell peppers contribute vitamins, minerals, and beneficial plant compounds.

Energy from rice: Rice supplies carbohydrates that the body uses for energy.

Flexible portion sizes: You can adjust the amount of rice, beef, and vegetables to suit your appetite and nutritional goals.

Convenient meal preparation: The beef and vegetables can be cooked in advance and portioned for several meals.

This recipe can fit into a balanced eating pattern when portions and ingredients are chosen according to individual needs.

Storage and Reheating

Allow leftovers to cool promptly and refrigerate them in airtight containers within two hours of cooking.

Store the beef and rice together or separately for up to 3–4 days in the refrigerator.

For reheating, add a small splash of water and microwave until steaming hot throughout, stirring halfway through. Alternatively, reheat in a skillet over medium heat until thoroughly hot.

If preparing rice ahead, cool it quickly, refrigerate it promptly, and avoid leaving cooked rice at room temperature for extended periods.

You can also freeze the cooked beef and vegetable mixture for up to 2–3 months for best quality. Rice may be frozen separately. Thaw in the refrigerator and reheat thoroughly.

Frequently Asked Questions

1. Can I use frozen vegetables?

Yes. Frozen broccoli, carrots, and mixed vegetables work well. Add them directly to the skillet according to their package directions, allowing excess moisture to evaporate before adding the sauce.

2. Can I prepare this recipe ahead of time?

Absolutely. Cook the beef and vegetables, prepare the rice, and divide everything into meal-prep containers. Store promptly in the refrigerator and reheat thoroughly before eating.

3. What can I use instead of ground beef?

Ground turkey, ground chicken, or plant-based crumbles can replace the beef. Cooking times may vary depending on the ingredient.

4. How do I prevent watery stir-fry?

Use a large, hot skillet, avoid overcrowding, and allow vegetables to release excess moisture before adding the sauce. Mix the cornstarch thoroughly into the sauce before pouring it into the pan.

5. Can I make it without honey?

Yes. Leave out the honey for a less-sweet sauce, or use a suitable alternative according to your dietary preferences.

6. Which rice works best?

Jasmine rice provides a fragrant, soft base. Brown rice offers a chewier texture and generally more fiber. Both are delicious choices.

7. Is this recipe good for family dinners?

Yes. It is easy to customize, and you can serve the beef mixture and rice separately so everyone can assemble a bowl according to their preferences.

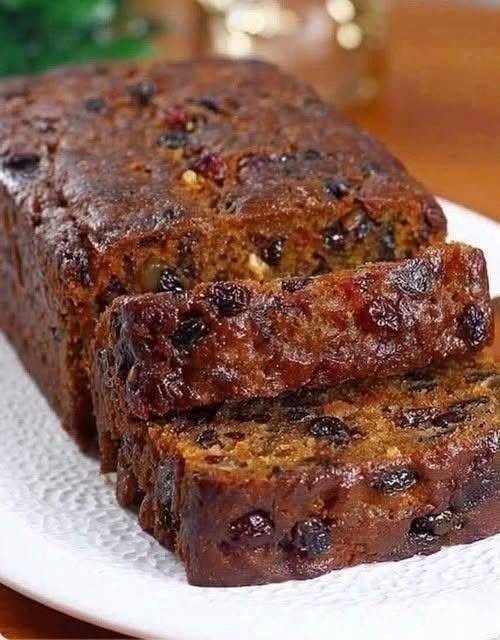
traditional fruit cake,,

Traditional  fruit  cake is one of those  cakes that, in my opinion, feels like more than just dessert. It has small pockets of delicious dried fruit, a rich, buttery flavor, and a cozy scent that permeates the kitchen as it bakes.

Last weekend, my family and I really tried this recipe. I was given the recipe for an old-fashioned fruit cake by a friend, who told me that it improves with time. At first, I was a little dubious, but after taking a taste, I realized exactly what she meant.,

Traditional Fruit Cake — Spice-Rich, Anti-Inflammatory-Inspired Version

This traditional fruit cake is a moist, dense, richly spiced dessert packed with raisins, currants, dates, nuts, and warming spices. The recipe can be adapted to emphasize ingredients commonly associated with an anti-inflammatory diet, such as ginger, cinnamon, walnuts, and dried fruit.

Important note: This is still a dessert, not a medical treatment or an “anti-inflammatory food.” Turmeric and ginger have been studied for inflammatory conditions, but evidence is not strong enough to claim that eating this cake treats or prevents inflammation.

🍰 Recipe at a glance

  • Prep time: 25 minutes
  • Soaking time: 30 minutes to overnight
  • Baking time: 60–75 minutes
  • Yield: 10–12 servings
  • Pan: 9 × 5-inch loaf pan
  • Difficulty: Easy to moderate
  • Cuisine: Traditional British-inspired baking
  • Best for: Christmas dessert, holiday baking, afternoon tea, family gatherings

Ingredients

For the fruit mixture

  • 1 cup raisins
  • ½ cup currants
  • ½ cup chopped dates
  • ½ cup dried cranberries
  • ½ cup chopped dried apricots
  • ½ cup orange juice
  • 1 teaspoon orange zest

For the cake

  • 1½ cups all-purpose flour
  • ½ cup whole-wheat flour
  • 1 teaspoon baking powder
  • ½ teaspoon baking soda
  • ½ teaspoon salt
  • 1 teaspoon ground cinnamon
  • 1 teaspoon ground ginger
  • ½ teaspoon ground nutmeg
  • ¼ teaspoon ground cloves
  • ¼ teaspoon turmeric, optional
  • ½ cup unsalted butter, softened
  • ½ cup brown sugar
  • 2 large eggs
  • 1 teaspoon vanilla extract
  • ½ cup chopped walnuts or pecans
  • 2–4 tablespoons milk, as needed

Optional glaze

  • 2 tablespoons orange juice
  • 2 tablespoons honey or maple syrup

How to Make Traditional Fruit Cake

1. Soak the dried fruit

Combine the raisins, currants, dates, cranberries, apricots, orange juice, and orange zest.

Let them sit for 30 minutes, or refrigerate overnight for an even more flavorful and moist fruit cake.

2. Prepare the oven

Preheat the oven to 325°F (165°C).

Grease a 9 × 5-inch loaf pan and line it with parchment paper.

3. Mix the dry ingredients

In a bowl, whisk together:

  • All-purpose flour
  • Whole-wheat flour
  • Baking powder
  • Baking soda
  • Salt
  • Cinnamon
  • Ginger
  • Nutmeg
  • Cloves
  • Optional turmeric

The cinnamon and ginger give this cake its characteristic warm flavor. Turmeric can be added for color and culinary variety, but shouldn’t be considered a therapeutic ingredient.

4. Cream the butter and sugar

Beat the softened butter and brown sugar until light and creamy, about 2–3 minutes.

Add the eggs one at a time, beating after each addition. Mix in vanilla.

5. Combine

Gradually add the dry ingredients to the wet mixture.

Fold in the soaked fruit and chopped walnuts. If the batter seems extremely thick, add 2–4 tablespoons of milk.

The finished batter should be thick but spreadable.

6. Bake

Transfer the batter to the prepared loaf pan and smooth the top.

Bake for approximately 60–75 minutes, or until a toothpick inserted into the center comes out with only a few moist crumbs.

If the top becomes dark too quickly, loosely cover it with foil during the final portion of baking.

7. Cool

Allow the cake to cool in the pan for about 15 minutes, then transfer it to a wire rack.

For the best texture, let it cool completely before slicing.

8. Optional orange glaze

Mix orange juice with honey or maple syrup and lightly brush it over the cooled  cake.

For a classic fruit-cake flavor, wrap the cooled cake and let it rest overnight before serving.


Why Add Ginger, Cinnamon and Turmeric?

This version uses culinary amounts of ginger, cinnamon and optional turmeric to create a spice-forward recipe.

Turmeric contains curcumin, which has been investigated for potential anti-inflammatory effects, but the evidence isn’t sufficient to describe turmeric as a treatment for inflammatory diseases.

Likewise, evidence regarding ginger supplementation for inflammatory and joint conditions remains uncertain.

So the more accurate description is “anti-inflammatory-inspired  fruit cake” rather than claiming that the cake itself is an anti-inflammatory treatment.


Serving Suggestions

Serve slices:

  • Warm with unsweetened tea or coffee
  • With Greek yogurt and fresh berries
  • With a spoonful of unsweetened applesauce
  • With fresh orange slices
  • With a small amount of nut butter
  • As an afternoon tea  dessert
  • As a Christmas or Thanksgiving dessert
  • As part of a holiday brunch

For a lighter serving, cut the loaf into 12 thinner slices rather than large cake portions.


Healthy & Anti-Inflammatory-Inspired Variations

1. Lower-sugar fruit cake

Reduce the brown sugar to ¼ cup and rely more heavily on the natural sweetness of dates and dried fruit.

Remember that dried fruit is still concentrated in natural sugar, so portion size matters.

2. Whole-grain fruit cake

Use:

  • 1 cup whole-wheat flour
  • 1 cup all-purpose flour

This gives the cake more fiber while maintaining a reasonably tender texture.

3. Nutty antioxidant-inspired version

Add ½ cup walnuts or pecans and reduce the dried cranberries slightly.

4. Orange-ginger fruit cake

Increase orange zest to 2 teaspoons and add 1 tablespoon finely grated fresh ginger.

5. Apple fruit cake

Replace half of the dried apricots with ½ cup finely diced fresh apple. Because fresh fruit adds moisture, you may need a slightly longer baking time.

6. Dairy-free fruit cake

Replace butter with a neutral-flavored plant-based butter or another suitable baking fat.

7. Egg-free version

Use a suitable commercial egg replacer according to its package directions. Because fruit cake is dense, egg-free versions may have a somewhat different texture.

8. Gluten-free fruit cake

Use a 1:1 gluten-free baking flour blend designed to replace wheat flour in cakes.


Estimated Nutrition

Per 1 of 12 slices, using the recipe above and walnuts, the approximate nutrition is:

Nutrient Approximate amount
Calories 300–330 kcal
Carbohydrates 48–52 g
Protein 4–5 g
Fat 10–12 g
Saturated fat 4–5 g
Fiber 3–4 g
Total sugars 28–32 g
Sodium 150–200 mg

These are estimates, not laboratory-tested nutrition facts. The actual numbers vary substantially depending on the dried fruit, butter, sugar, nuts and portion size.

Because traditional fruit cake contains concentrated dried fruit and added sugar, it’s best viewed as an occasional dessert, even when made with whole grains and nuts. Dietary guidance recommends limiting foods high in added sugars and saturated fat as part of an overall healthy dietary pattern.


Frequently Asked Questions

Is traditional fruit cake healthy?

Traditional fruit cake can provide some nutrients from dried fruit and nuts, but it is still a calorie-dense dessert. A smaller serving can fit into a balanced diet.

Is fruit cake anti-inflammatory?

Not scientifically in the sense of being a treatment for inflammation. This recipe includes spices and nuts associated with healthy dietary patterns, but there isn’t evidence that eating this cake will treat an inflammatory condition.

Can I make fruit cake without alcohol?

Absolutely. Orange juice, apple juice or strong black tea can be used to soak the dried fruit.

How long does homemade fruit cake last?

Store it tightly wrapped at room temperature for several days or refrigerate it for longer storage. Because storage life depends on moisture, ingredients and conditions, check for changes in smell, appearance or mold before eating.

Can I freeze fruit cake?

Yes. Wrap individual slices or the whole cooled loaf tightly and freeze. Thaw overnight in the refrigerator or at room temperature.

Why is my fruit  cake dry?

Common causes include overbaking, insufficient liquid, inaccurate flour measurement or slicing the cake while it’s still very hot.

Why did my dried fruit sink?

Very wet or heavy fruit can sink. Drain excess soaking liquid and lightly coat particularly large pieces of fruit with flour before folding them into the batter.

Can I make this recipe diabetic-friendly?

Don’t assume that simply replacing sugar with honey, maple syrup or dates makes the recipe suitable for diabetes. Those ingredients still contribute carbohydrates. Anyone managing diabetes should consider the complete recipe and serving size with their individual dietary plan.


Related Questions

Can I make a healthy Christmas  fruit cake?
Yes. Reduce added sugar, increase nuts and whole grains, and keep portions moderate.

What are the best spices for fruit cake?
Cinnamon, ginger, nutmeg and cloves provide the classic warm flavor profile.

Can I make a sugar-free fruit cake?
A truly sugar-free version requires careful ingredient selection because  dried fruits naturally contain significant sugars.

What can I use instead of alcohol in fruit cake?
Orange juice, apple juice, strong black tea or a combination of fruit juice and water.

What nuts go best with fruit cake?
Walnuts, pecans, almonds and hazelnuts all work well.

How do I make moist fruit cake?
Soak the dried fruit, avoid overbaking, and allow the cake to cool completely before wrapping.


Final Thoughts

This traditional fruit cake recipe gives you the rich, moist texture and festive flavor associated with classic fruit cake while adding whole-wheat flour, walnuts, orange, ginger and warming spices.

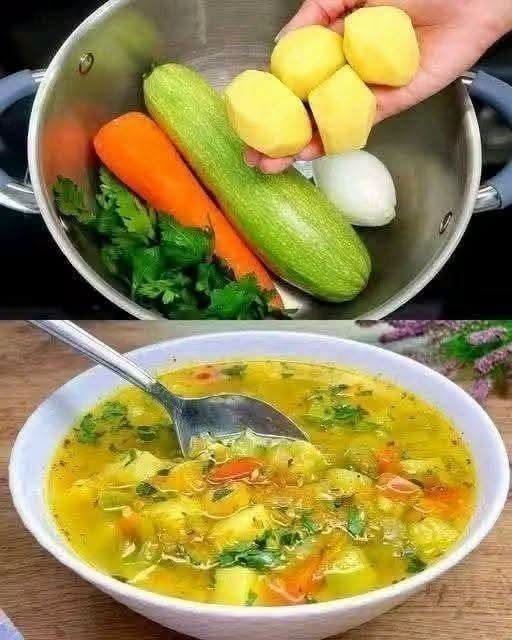
Healthy Vegetable Soup Recipe

Ingredients:

We use your personal data for interest-based advertising, as outlined in our Privacy Notice.
  • 2 medium carrots
  • 2 medium zucchinis
  • 2 medium potatoes
  • 1 onion
  • 1 cup of green peas (fresh or frozen)
  • 1 red bell pepper (optional for added flavor and color)
  • 1-2  garlic cloves, minced
  • 1 tablespoon of olive oil or any   cooking oil
  • 1 teaspoon of dried herbs (like thyme or oregano)
  • Salt and pepper to taste
  • 4-6 cups of vegetable broth or water
  • Fresh parsley or cilantro for garnish

Instructions:

Prepare the Vegetables:

Peel and chop the carrots, zucchinis, and potatoes into bite-sized pieces.


Dice the onion and red bell pepper (if using).

Sauté the Onion and  Garlic:

We use your personal data for interest-based advertising, as outlined in our Privacy Notice.

In a large pot, heat the olive oil over medium heat.

Add the diced onion and sauté until it becomes translucent.

Add the minced garlic and cook for another minute until fragrant.

Add the Vegetables:

Add the chopped carrots, zucchinis, and potatoes to the pot.

Sauté for a few minutes, stirring occasionally.

Add Broth and  Seasonings:

Pour in the vegetable broth or water until the vegetables are fully covered.

Add the dried herbs, salt, and pepper.

Bring the mixture to a boil.

Cook the  Soup:

Once boiling, reduce the heat to low and let the soup simmer for about 20-25 minutes or until the vegetables are tender.

Add Green Peas:

Add the green peas during the last 5 minutes of cooking to prevent them from getting mushy.

Adjust Seasoning and Serve:

Taste the soup and adjust the seasoning if necessary.

Serve hot, garnished with fresh parsley or cilantro.

This soup is hearty, healthy, and perfect for a light meal. You can customize it by adding other vegetables you like, such as celery, tomatoes, or even some beans for extra protein.

blueberry sourdough bread….

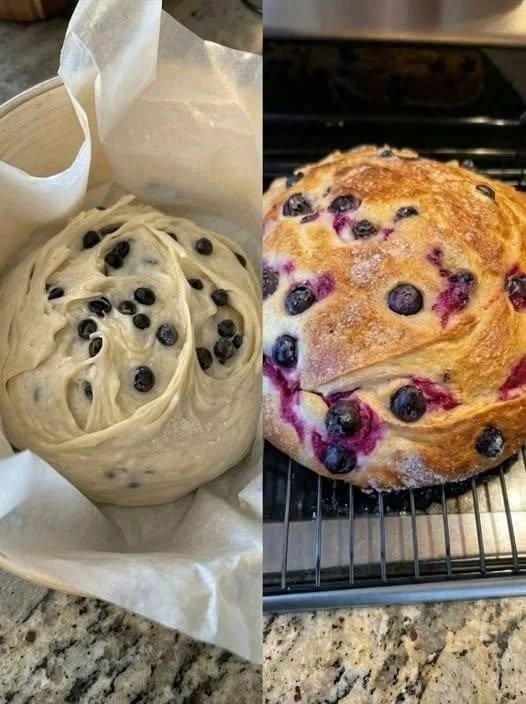
Anti-Inflammatory Blueberry Sourdough Bread Recipe

Description

This Anti-Inflammatory  Blueberry  Sourdough Bread combines the gut-friendly benefits of naturally fermented  sourdough with antioxidant-rich blueberries. The slow fermentation process may improve digestibility, while blueberries provide powerful polyphenols and anthocyanins that support overall wellness. This artisan-style loaf has a crisp golden crust, a soft chewy crumb, and bursts of juicy blueberries in every slice.

Prep Time: 30 minutes
Fermentation Time: 8–12 hours
Bake Time: 40–45 minutes
Total Time: 10–13 hours
Yield: 1 large loaf (10–12 slices)


Ingredients

For the Dough

  • 500g bread flour
  • 350g filtered water (room temperature)
  • 100g active sourdough starter
  • 10g sea salt

Anti-Inflammatory Additions

  • 1½ cups fresh blueberries
  • 1 tablespoon lemon zest
  • 1 teaspoon cinnamon
  • 1 tablespoon raw honey (optional)

Instructions

Step 1: Mix the Dough

  1. In a large bowl, combine water and sourdough starter.
  2. Add flour and mix until no dry flour remains.
  3. Cover and rest for 30 minutes.

Step 2: Add Salt and Flavorings

  1. Add sea salt, lemon zest, cinnamon, and honey.
  2. Mix thoroughly until incorporated.

Step 3: Bulk Fermentation

  1. Cover and let rest for 30 minutes.
  2. Perform 4 sets of stretch-and-folds every 30 minutes.
  3. During the second fold, gently incorporate blueberries.

Step 4: First Rise

  1. Cover and allow dough to ferment at room temperature for 4–6 hours or until increased by about 50%.

Step 5: Shape the Loaf

  1. Turn dough onto a lightly floured surface.
  2. Shape into a round boule.
  3. Place seam-side up into a floured banneton or bowl lined with parchment paper.

Step 6: Cold Proof

  1. Refrigerate 8–12 hours for enhanced flavor.

Step 7: Bake

  1. Preheat oven and Dutch oven to 450°F (232°C).
  2. Carefully transfer dough onto parchment.
  3. Score the top with a sharp blade.
  4. Bake covered for 25 minutes.
  5. Remove lid and bake another 15–20 minutes until golden brown.

Step 8: Cool

Allow bread to cool completely for at least 1 hour before slicing.


Why This Bread Is Considered Anti-Inflammatory

Blueberries

Rich in anthocyanins, antioxidants associated with reduced oxidative stress and inflammation.

Sourdough Fermentation

Natural fermentation may improve nutrient availability and support digestive health.

Cinnamon

Contains plant compounds that may help support healthy inflammatory responses.

Lemon Zest

Provides vitamin C and beneficial flavonoids.


Serving Suggestions

Healthy Breakfast

  • Toasted with almond butter
  • Topped with Greek yogurt and fresh berries

High-Protein Snack

  • Cottage cheese and sliced blueberries
  • Ricotta with cinnamon

Gourmet Brunch

  • Served with smoked salmon and cream cheese
  • Paired with herbal tea

Healthy Dessert

  • Lightly toasted with honey drizzle
  • Served alongside berry compote

Delicious Variations

Lemon Blueberry Sourdough

Double the lemon zest for a brighter citrus flavor.

Blueberry Walnut Sourdough

Add ¾ cup chopped walnuts for healthy omega-3 fats.

Mixed Berry Sourdough

Use a combination of blueberries, blackberries, and raspberries.

Turmeric Blueberry Sourdough

Add 1 teaspoon turmeric powder for additional anti-inflammatory compounds.

Blueberry Chia Sourdough

Mix in 2 tablespoons chia seeds for extra fiber and omega-3s.


Approximate Nutrition (Per Slice)

Based on 12 slices per loaf.

Nutrient Amount
Calories 170
Carbohydrates 32g
Protein 5g
Fat 1.5g
Fiber 2g
Sugar 4g
Sodium 190mg
Potassium 85mg

Values are estimates and may vary based on ingredients used.


Frequently Asked Questions

Can I use frozen blueberries?

Yes. Add them frozen to prevent excessive juice release.

Why did my blueberries burst?

This is normal and creates beautiful pockets of flavor throughout the loaf.

Is sourdough healthier than regular bread?

Many people find sourdough easier to digest due to the fermentation process.

How long does blueberry sourdough stay fresh?

2–3 days at room temperature or up to 5 days refrigerated.

Can I freeze it?

Yes. Slice and freeze for up to 3 months.

Can I make it without a Dutch oven?

Yes. Use a baking stone and create steam in the oven with a tray of hot water.

Is this bread vegan?

Omit the honey or substitute maple syrup.


Storage Tips

  • Store wrapped in a  bread bag or linen cloth.
  • Avoid refrigeration if consuming within 2 days.
  • Freeze individual slices for convenient breakfasts.

Final Thoughts

This Anti-Inflammatory  Blueberry  Sourdough Bread is a nutrient-dense artisan loaf that combines gut health, antioxidant-rich ingredients, and natural fermentation into one delicious recipe. Whether you’re looking for a healthy sourdough bread recipe, anti-inflammatory breakfast ideas, high-fiber homemade bread, or a naturally fermented blueberry bread, this loaf delivers exceptional flavor and wellness benefits. The sweet-tart blueberries, crisp crust, and tender crumb make it perfect for breakfast, meal prep, or wholesome snacking throughout the week.

Air Fryer Cheesy Garlic Bread Bombs

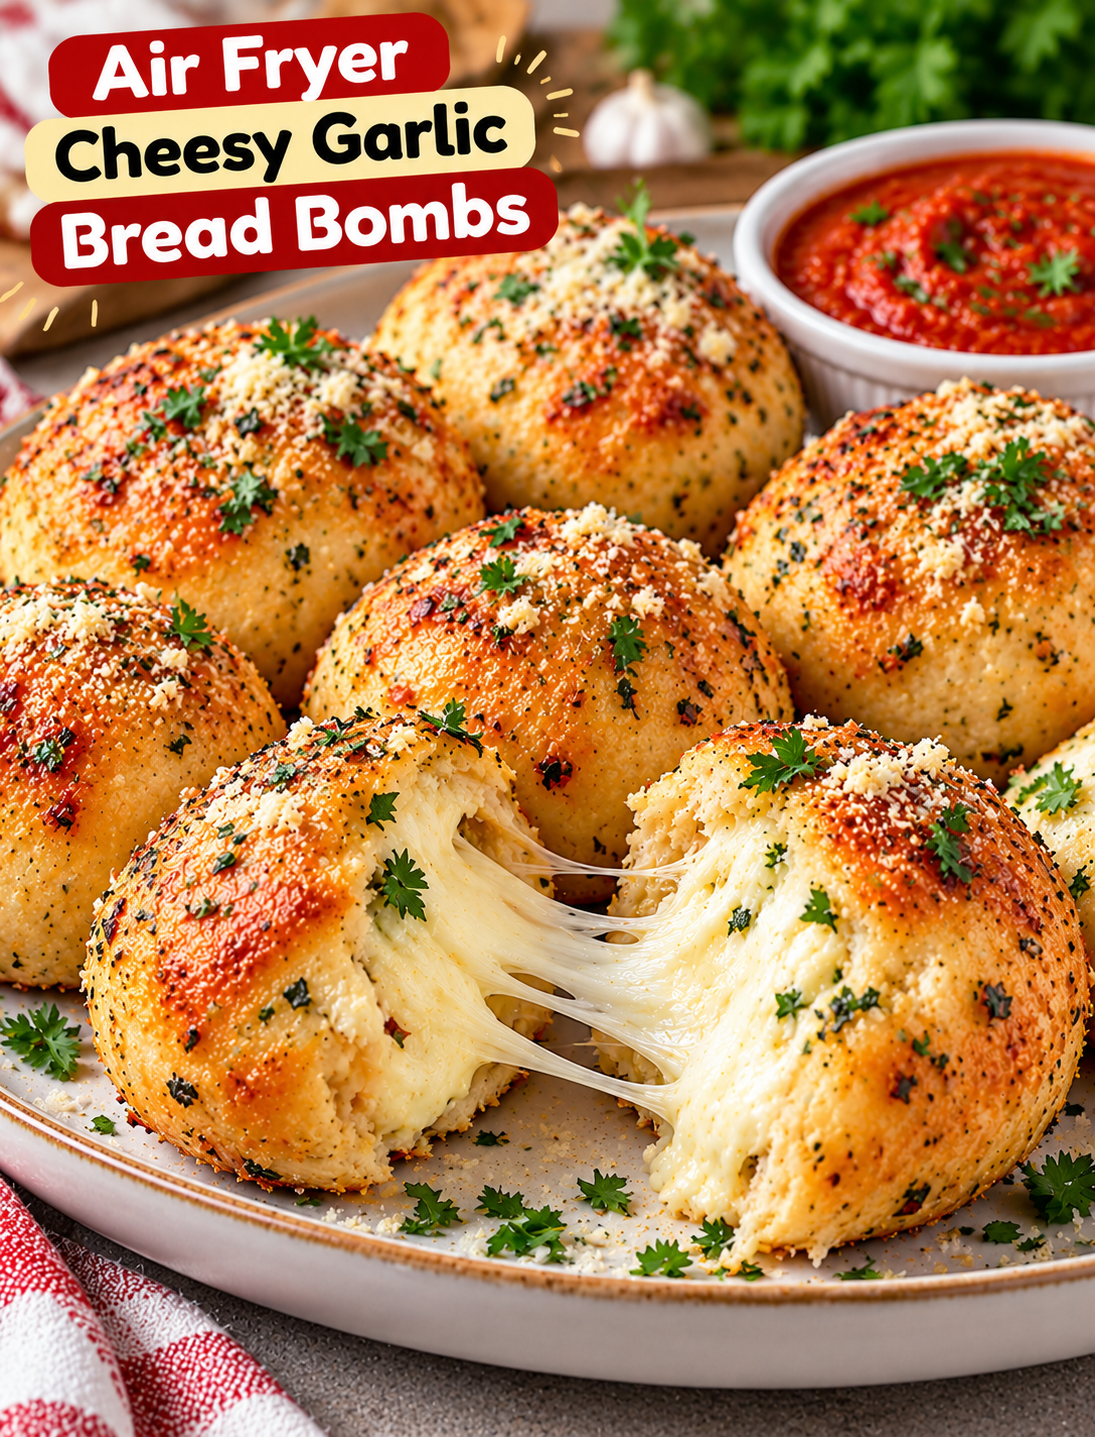
Air fryer cheesy garlic bread bombs with golden crusts, melted mozzarella centers, garlic butter, Parmesan, and marinara dipping sauce.
Air Fryer Cheesy Garlic Bread Bombs

Imagine biting into a golden, buttery bread ball and finding warm, stretchy mozzarella inside. These Air Fryer Cheesy Garlic Bread Bombs combine soft bread dough, melted cheese, fresh garlic, and Italian herbs in one easy snack. They are perfect for game-day gatherings, family movie nights, holiday appetizers, or whenever you want something warm and cheesy.

The recipe uses refrigerated biscuit dough to save preparation time, so you do not need to make bread dough from scratch. Each piece is filled with mozzarella, sealed into a ball, and air-fried until the outside turns golden. A homemade garlic butter topping adds rich flavor, while a sprinkle of Parmesan and parsley gives the finished bites a savory touch.

Serve these cheesy bread bites with warm marinara sauce, ranch dressing, or your favorite dipping sauce. They also pair well with pasta, soup, and pizza. If you enjoy simple air fryer snacks made with everyday ingredients, this recipe is an easy one to add to your collection.

Why You’ll Love These Air Fryer Cheesy Garlic Bread Bombs

  • Quick preparation: Refrigerated biscuit dough makes the recipe easier for busy days.
  • Melted cheese center: Mozzarella creates a soft, stretchy filling in every bite.
  • Golden exterior: The air fryer cooks the dough until the outside is lightly crisp.
  • Fresh garlic flavor: Garlic butter adds a savory finish without complicated ingredients.
  • Easy to customize: Add herbs, Parmesan, or small amounts of your favorite fillings.
  • Perfect for sharing: These bite-sized snacks work well for parties, potlucks, and family gatherings.

Recipe Overview

  • Prep Time: 15 minutes
  • Cook Time: 8–12 minutes per batch
  • Total Time: Approximately 25–35 minutes
  • Servings: 4
  • Yield: 8 bread bombs
  • Course: Appetizer, Snack, Side Dish
  • Cuisine: American-Inspired
  • Cooking Method: Air Fryer
  • Difficulty: Easy

Cooking time may vary depending on the size of the dough balls, the amount of filling, and your air fryer model.

Ingredients for Air Fryer Cheesy Garlic Bread Bombs

Gather these ingredients before starting to make the preparation process faster and easier.

For the Bread Bombs

  • 1 can (16 ounces) refrigerated biscuit dough containing 8 biscuits
  • 1 cup shredded low-moisture mozzarella cheese
  • 1 tablespoon all-purpose flour, for handling sticky dough if needed

Garlic Butter Topping

  • 3 tablespoons unsalted butter, melted
  • 2 garlic cloves, finely minced
  • 1 teaspoon Italian seasoning
  • 2 tablespoons grated Parmesan cheese
  • 1 tablespoon chopped fresh parsley, optional
  • A pinch of black pepper, optional

Serving

  • 1/2 cup warm marinara sauce
  • Ranch dressing, optional
  • Extra Parmesan cheese, optional

Ingredient tip: Low-moisture mozzarella melts well without releasing as much liquid as fresh mozzarella. Shred a block of cheese yourself if possible, because freshly shredded cheese often melts more smoothly than some pre-shredded varieties.

How to Make Air Fryer Cheesy Garlic Bread Bombs

Follow these steps to create soft, cheesy centers with a golden, garlic-buttered exterior.

Step 1: Preheat the Air Fryer

Preheat your air fryer to 350°F for about 3 minutes, following the instructions for your appliance.

If your air fryer does not require preheating, you can skip this step. Lightly grease the basket with an air-fryer-safe oil if needed to reduce sticking.

Step 2: Prepare the Biscuit Dough

Open the biscuit dough and separate the eight biscuits. Place them on a clean work surface.

Flatten each biscuit into a round disc about 3–4 inches wide. Press gently with your fingers so the center remains slightly thicker than the edges.

If the dough sticks to your hands, use a small amount of flour on the work surface. Avoid adding too much flour, as it can make the finished bread bombs dry.

Step 3: Add the Mozzarella Cheese

Place approximately 2 tablespoons of shredded mozzarella in the center of each flattened biscuit. Keep the cheese in a compact pile rather than spreading it to the edges.

Do not overfill the dough. Too much cheese makes sealing harder and may cause the filling to leak during cooking.

For extra flavor, mix a small pinch of Italian seasoning into the mozzarella before filling the dough.

Step 4: Seal and Shape the Bread Bombs

Bring the edges of each biscuit together over the cheese. Pinch the dough firmly to close the opening, making sure there are no visible gaps.

Roll each piece gently between your palms to form a smooth ball. Place each ball seam-side down on a clean plate.

Check every bread bomb before cooking. A secure seal helps keep the melted cheese inside and prevents it from sticking to the air fryer basket.

Step 5: Prepare the Garlic Butter

Melt the butter in a small microwave-safe bowl or saucepan. Add the minced garlic and Italian seasoning, then stir until combined.

Keep the Parmesan and parsley nearby for the finishing step. For a stronger garlic flavor, use an extra clove, but avoid burning the garlic if you choose to cook it in the butter first.

Step 6: Arrange the Bread Bombs in the Basket

Place the sealed dough balls in the air fryer basket in a single layer. Leave space between them so hot air can circulate around each piece.

Cook in batches if necessary. Overcrowding can cause uneven browning and may leave the dough undercooked in some areas.

For a more even finish, keep the balls similar in size and avoid pressing them together.

Step 7: Air Fry Until Golden

Air fry at 350°F for approximately 8–12 minutes. Begin checking at 8 minutes and continue cooking until the dough is golden brown and cooked through.

Cooking time depends on your air fryer and the thickness of the dough. If the outside browns too quickly, lower the temperature slightly and continue cooking until the center is done.

If your appliance browns unevenly, carefully rotate the basket or turn the bread bombs midway through cooking. Handle them gently to avoid opening the seams.

Step 8: Brush with Garlic Butter

Carefully remove the cooked bread bombs from the basket. Brush the tops and sides with the garlic butter mixture while they are still hot.

Sprinkle with grated Parmesan and chopped parsley. The butter adds flavor, while the Parmesan creates a savory finish.

Apply the butter in a thin layer rather than soaking the bread. Too much butter can make the outside greasy.

Step 9: Serve Warm

Let the bread bombs rest for 2–3 minutes before serving. The cheese inside will be extremely hot immediately after cooking.

Transfer them to a serving plate and add a bowl of warm marinara sauce for dipping. Serve immediately for the best contrast between the golden outside and melted cheese center.

Tips for Perfectly Crispy Garlic Bread Bombs

Use these practical tips to improve the texture and help prevent cheese leaks.

  • Seal every opening: Pinch the seams firmly before placing the dough in the basket.
  • Choose low-moisture mozzarella: It melts well and helps keep the filling from becoming watery.
  • Keep the dough thickness even: Similar-sized pieces cook more consistently.
  • Avoid overcrowding: Space between the bread bombs helps the outside brown evenly.
  • Brush with butter after cooking: This gives the garlic a fresh flavor and reduces excess butter dripping into the basket.
  • Check the center: The dough should look baked rather than raw or gummy.
  • Rest briefly before serving: This allows the cheese to settle and reduces the risk of burns.

Easy Variations to Try

You can change the filling or seasoning to suit your taste without changing the basic cooking method.

Parmesan Herb Bread Bombs

Mix a little extra Parmesan, oregano, and basil into the mozzarella. Finish with more Parmesan and parsley after air frying for a stronger Italian-inspired flavor.

Cheesy Pizza Bread Bombs

Add a small amount of thick pizza sauce and a few finely chopped pepperoni pieces with the mozzarella. Keep the filling small enough to seal securely and avoid watery sauce.

Spicy Garlic Cheese Bombs

Add a pinch of red pepper flakes to the cheese or garlic butter. Serve with marinara sauce for a spicy, savory snack.

Cheddar Mozzarella Bread Bombs

Mix equal parts shredded cheddar and mozzarella for a sharper cheese flavor. Avoid adding too much cheese, as the filling may leak.

Herb and Cream Cheese Bread Bombs

Mix a small amount of softened cream cheese with the mozzarella and Italian seasoning. This creates a creamier filling, so use a little less cheese overall to make sealing easier.

What to Serve with Cheesy Garlic Bread Bombs

These warm bread bites pair well with dips, soups, salads, and main dishes.

  • Marinara sauce: A classic tomato dip that complements the garlic and mozzarella.
  • Ranch dressing: A cool, creamy option for parties and snack platters.
  • Tomato soup: Serve the bread bombs alongside soup for a comforting lunch.
  • Pasta dishes: Pair them with spaghetti, baked ziti, or creamy Alfredo pasta.
  • Fresh green salad: Adds freshness and crunch to a rich, cheesy side.
  • Air fryer chicken wings: Create a casual game-day spread with two popular finger foods.

For gatherings, offer marinara and ranch together so guests can choose between a tangy tomato dip and a creamy sauce.

Storage and Reheating Instructions

How to Store Leftover Bread Bombs

Allow the bread bombs to cool, then place them in an airtight container. Refrigerate within 2 hours of cooking and eat within 3–4 days.

Store dipping sauces separately to help maintain the bread’s texture.

How to Reheat Bread Bombs in the Air Fryer

Preheat the air fryer to 320°F. Arrange the refrigerated bread bombs in a single layer and heat for approximately 3–5 minutes, checking that the centers are hot.

Add another minute if necessary, but watch the outside closely to prevent over-browning. Let them rest briefly before eating because the cheese can retain heat.

Can You Freeze Cheesy Garlic Bread Bombs?

Yes. Freeze fully cooled bread bombs in a freezer-safe container, using parchment paper between layers. For best quality, use them within 2 months.

Thaw overnight in the refrigerator before reheating. You can also reheat them from frozen at a lower temperature first, allowing extra time until the centers are hot.

Common Mistakes to Avoid

  • Overfilling the dough: Too much mozzarella can escape during cooking.
  • Leaving loose seams: Small gaps allow cheese to leak out.
  • Using too much flour: Excess flour can make the dough dry and tough.
  • Crowding the basket: Packed dough balls may cook unevenly.
  • Adding too much garlic butter: Excess butter can make the bread greasy.
  • Skipping the doneness check: Golden tops do not always mean the center is fully cooked.
  • Serving immediately: The melted cheese can burn your mouth, so allow a short cooling period.

Frequently Asked Questions

1. How long do cheesy garlic bread bombs take in the air fryer?

Most biscuit-dough bread bombs take 8–12 minutes at 350°F, depending on their size and your air fryer model.

2. What cheese works best for garlic bread bombs?

Low-moisture mozzarella melts well and creates a stretchy center. Parmesan adds a salty, savory flavor to the garlic butter topping.

3. Why is cheese leaking out of my bread bombs?

Overfilling or poorly sealed seams can cause leaks. Use a moderate amount of cheese and pinch the dough closed firmly.

4. Can I use pizza dough instead of biscuit dough?

Yes. Divide the pizza dough into eight portions, fill and seal each piece, then adjust the cooking time until the dough is fully baked.

5. Can I make cheesy garlic bread bombs ahead of time?

Yes. Assemble the sealed dough balls, cover, and refrigerate for a few hours before cooking. Brush with garlic butter after air frying.

6. Can I make these bread bombs without garlic?

Yes. Replace the garlic with Italian herbs or parsley butter for a milder flavor.

7. How do I know when the bread bombs are fully cooked?

The outside should be golden brown, and the dough around the cheese should look baked rather than raw or gummy. Check a test piece if needed.

8. What is the best dipping sauce for cheesy garlic bread bombs?

Warm marinara is a classic choice, while ranch dressing offers a creamy alternative. Garlic yogurt dip also works well.

Final Thoughts

Air Fryer Cheesy Garlic Bread Bombs are an easy way to enjoy warm bread, melted mozzarella, and savory garlic butter without making dough from scratch. They are ideal for parties, family snack nights, and quick sides for your favorite meals.

Keep the filling modest, seal the dough carefully, and cook the bread bombs in a single layer for the best results. Finish with garlic butter and Parmesan, then serve warm with marinara sauce.

Ready to make these cheesy bites? Save this recipe for your next snack night and share in the comments whether you prefer classic mozzarella, spicy pizza filling, or extra Parmesan and herbs.