Jalapeño Cornbread Poppers

Crispy Jalapeño Cornbread Poppers with sweet corn, cheese, and fresh herbs served as a delicious party appetizer

Jalapeño Cornbread Poppers

Description

Jalapeño Cornbread Poppers are a fun and flavorful twist on classic cornbread. These bite-sized appetizers combine sweet cornmeal flavor, spicy jalapeños, creamy cheese, and a golden crispy outside to create the perfect snack for any occasion.

These cheesy poppers are easy to prepare and make a fantastic addition to game nights, family gatherings, holiday parties, or quick evening snacks. The combination of buttery cornbread texture with the spicy kick of jalapeños makes every bite delicious and satisfying.

Whether you serve them with ranch dressing, sour cream, or your favorite dipping sauce, Jalapeño Cornbread Poppers are guaranteed to become a crowd favorite.

Preparation Time: 15 minutes
Cooking Time: 20 minutes
Total Time: 35 minutes

Servings: 24 poppers

Ingredients

For Jalapeño Cornbread Poppers:

1 cup cornmeal

½ cup all-purpose flour

1 tablespoon baking powder

½ teaspoon salt

¼ teaspoon black pepper

1 tablespoon sugar (optional)

1 large egg

¾ cup milk

¼ cup melted butter

1 cup shredded cheddar cheese

½ cup cream cheese, softened

3 fresh jalapeños, finely chopped

½ cup sweet corn kernels

2 tablespoons chopped fresh cilantro

¼ teaspoon garlic powder

For Topping:

¼ cup shredded cheddar cheese

Extra sliced jalapeños

Fresh herbs for garnish

Step-by-Step Instructions

Step 1: Prepare the Batter

Preheat your oven to 375°F (190°C). Grease a mini muffin pan with cooking spray or butter.

In a large bowl, combine cornmeal, flour, baking powder, salt, black pepper, sugar, and garlic powder. Mix well until all dry ingredients are combined.

In another bowl, whisk together egg, milk, and melted butter. Slowly add the wet ingredients into the dry mixture and stir until combined.

Step 2: Add Cheese and Jalapeños

Fold in shredded cheddar cheese, cream cheese, chopped jalapeños, sweet corn, and cilantro. Mix gently until everything is evenly distributed.

Avoid overmixing because it can make the poppers dense instead of soft and fluffy.

Step 3: Fill the Muffin Pan

Spoon the mixture into the prepared mini muffin pan, filling each cup about three-fourths full.

Top each popper with a little extra cheddar cheese and a small slice of jalapeño for extra flavor.

Step 4: Bake the Poppers

Bake for 18–20 minutes or until the tops become golden and a toothpick inserted in the center comes out clean.

Allow them to cool for a few minutes before removing them from the pan.

Step 5: Serve

Serve warm with ranch dressing, sour cream, honey butter, or spicy dipping sauce.

Tips & Notes

Use fresh jalapeños for the best flavor and texture.

Remove jalapeño seeds if you prefer a milder taste.

For extra crispy edges, lightly brush the muffin pan with butter before adding the batter.

Freshly shredded cheese melts better compared to pre-packaged shredded cheese.

Do not overbake the poppers because they can become dry.

These poppers taste best when served warm and fresh.

Variations

Bacon Jalapeño Cornbread Poppers

Add cooked crispy bacon pieces for a smoky flavor.

Mexican Style Poppers

Add taco seasoning, black beans, and pepper jack cheese for a Mexican-inspired version.

Healthier Version

Use whole wheat flour, reduced-fat cheese, and Greek yogurt instead of cream cheese.

Extra Spicy Version

Add crushed red pepper flakes or extra jalapeños for more heat.

Serving Suggestions

Serve Jalapeño Cornbread Poppers as:

Party appetizers

Game-day snacks

Holiday starters

Side dishes with chili or soup

Lunchbox snacks

They pair especially well with barbecue dishes, grilled chicken, and creamy dips.

Serve this soup with a healthy side dish like Healthy Marry Me Chickpeas for a complete and satisfying meal.

Health Benefits

Jalapeño Cornbread Poppers can provide several nutritional benefits when prepared with quality ingredients.

Cornmeal provides carbohydrates that give your body energy.

Jalapeños contain antioxidants and vitamin C.

Cheese provides calcium and protein that support healthy bones and muscles.

Adding fresh herbs and vegetables increases the overall nutritional value.

Using whole grain ingredients can make this snack higher in fiber.

Storage Instructions

Store leftover Jalapeño Cornbread Poppers in an airtight container in the refrigerator for up to 4 days.

To reheat, warm them in an oven or air fryer for a few minutes to restore their crispy texture.

They can also be frozen for up to 2 months. Thaw and reheat before serving.

Q/A

Can I make Jalapeño Cornbread Poppers ahead of time?

Yes, you can prepare them a day before and reheat before serving.

Can I make these without jalapeños?

Yes, replace jalapeños with bell peppers for a mild version.

Can I use frozen corn?

Yes, frozen corn works well. Thaw and drain before adding.

Can I bake these in a regular muffin pan?

Yes, but the cooking time may increase because regular muffins are larger.

How do I make them more cheesy?

Add extra cheddar, mozzarella, or pepper jack cheese.

Nutrition Information (Approximate Per Serving)

Calories: 95 kcal

Protein: 3g

Carbohydrates: 12g

Fat: 4g

Fiber: 1g

Calcium: 60mg

Sugar: 2g

Final Thoughts

Jalapeño Cornbread Poppers are the perfect combination of sweet, spicy, cheesy, and comforting flavors. They are simple to make, easy to customize, and perfect for sharing with friends and family.

Whether you need a quick appetizer for a party or a delicious snack for your family, these Jalapeño Cornbread Poppers deliver amazing flavor in every bite.

For more comforting and nutritious recipes, try our Stuffed Pepper Soup a creamy and delicious plant-based recipe your family will love.
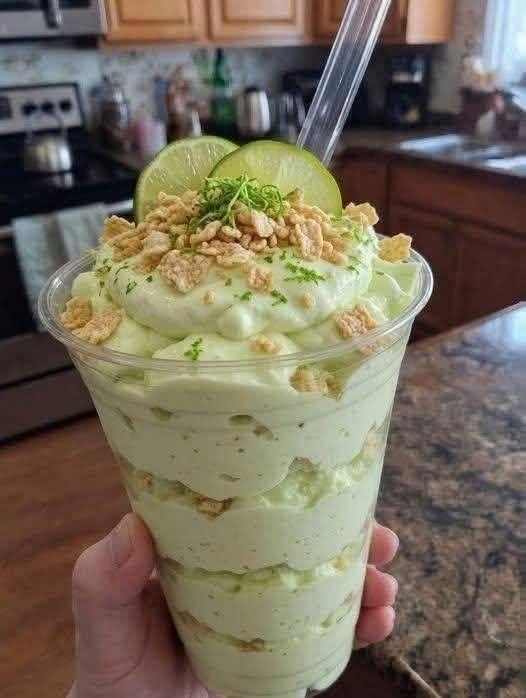
Key Lime Pie Parfait/Smoothie Cup

Key Lime Pie Parfait/Smoothie Cup

Bright, creamy, tangy, and irresistibly refreshing, this Key Lime Pie Parfait/Smoothie Cup combines the flavors of classic key lime pie with the convenience of a chilled dessert cup. Layers of buttery graham cracker crumbs, silky key lime cream, and fluffy yogurt create a dessert that looks beautiful in individual glasses while delivering the perfect balance of sweet and tart flavors.

You can prepare it as a layered parfait for a spoonable dessert or blend the creamy filling into a thick smoothie for a drinkable treat. Both versions are easy to make, require no baking, and are perfect for warm-weather gatherings, brunches, parties, or a simple after-dinner dessert.

Ingredients

For the Graham Cracker Crust Layer

  • 1½ cups graham cracker crumbs
  • 3 tablespoons unsalted butter, melted
  • 1 tablespoon granulated sugar
  • Pinch of salt

For the Creamy Key Lime Filling

  • 1½ cups plain or vanilla Greek yogurt
  • 4 ounces cream cheese, softened
  • ½ cup sweetened condensed milk
  • ¼ cup fresh key lime juice
  • 1 tablespoon finely grated key lime zest
  • 1 teaspoon vanilla extract
  • 2 tablespoons honey or powdered sugar, optional
  • Pinch of salt

For the Smoothie Version

  • 1 cup Greek yogurt
  • ½ cup milk
  • ½ cup frozen pineapple or frozen mango
  • ¼ cup key lime juice
  • ¼ cup sweetened condensed milk
  • 1 teaspoon lime zest
  • ½ cup ice
  • 2 tablespoons graham cracker crumbs

For Topping

  • Whipped cream
  • Extra graham cracker crumbs
  • Thin lime slices
  • Key lime zest
  • Small mint leaves, optional

Instructions

1. Prepare the Graham Cracker Layer

Start by making the crumb mixture. Add the graham cracker crumbs, melted butter, sugar, and a small pinch of salt to a bowl.

Mix until the crumbs are evenly coated and resemble damp sand. The butter helps create a rich, buttery pie-crust flavor while keeping the crumbs slightly crisp.

For a more intense toasted flavor, spread the mixture on a baking sheet and bake at 350°F (175°C) for about 6–8 minutes. Allow the crumbs to cool completely before assembling the parfaits.

If you prefer a completely no-bake dessert, simply use the mixture as it is.

2. Make the Key Lime Cream

In a medium mixing bowl, beat the softened cream cheese until smooth and creamy. Add the Greek yogurt and sweetened condensed milk.

Mix until the ingredients are fully combined and silky.

Add the fresh key lime juice, lime zest, vanilla extract, and a tiny pinch of salt. Mix again until smooth.

Taste the filling. If you prefer a sweeter dessert, add honey or powdered sugar a little at a time. If you love a stronger citrus flavor, add a little extra lime zest.

The finished filling should be creamy, thick, smooth, and pleasantly tangy.

3. Assemble the Parfaits

Choose small clear dessert glasses, jars, or cups so the beautiful layers are visible.

Begin with a spoonful of graham cracker crumbs at the bottom of each cup. Gently press them down without packing them too firmly.

Add a generous layer of key lime cream.

Repeat the layers with another spoonful of graham crumbs followed by another layer of creamy filling.

Continue until the cups are filled, finishing with the key lime cream on top.

Cover the cups and refrigerate for at least 1 hour. For an even firmer texture and stronger flavor, chill them for 2–3 hours.

4. Add the Toppings

Just before serving, top each parfait with a swirl of whipped cream.

Sprinkle over a little graham cracker crumb mixture and add a small amount of freshly grated lime zest.

Finish with a thin lime slice or small lime wedge. A tiny mint leaf can add a beautiful fresh touch.

For the best presentation, serve the parfaits cold and garnish immediately before bringing them to the table.

Smoothie Cup Version

If you prefer to enjoy these flavors as a thick smoothie, the ingredients can easily be transformed into a creamy drink.

Add Greek yogurt, milk, frozen pineapple or mango, key lime juice, sweetened condensed milk, lime zest, and ice to a high-speed blender.

Blend until completely smooth and creamy. If the smoothie is too thick, add a splash more milk. If you want a thicker smoothie bowl-style consistency, add a little more frozen fruit or ice.

Taste and adjust the sweetness or lime flavor as desired.

Pour the smoothie into a chilled glass or serving cup.

For the signature pie flavor, sprinkle graham cracker crumbs over the top. You can also dip the rim of the glass in a little lime juice and coat it with graham cracker crumbs before pouring in the smoothie.

Top with whipped cream, lime zest, and a small lime slice.

How to Make It Extra Creamy

For an especially luxurious texture, use full-fat Greek yogurt and softened cream cheese. Sweetened condensed milk adds richness while balancing the natural tartness of the lime.

For a lighter version, replace some of the cream cheese with additional Greek yogurt and use reduced-fat milk in the smoothie.

If using bottled lime juice, choose a high-quality variety, but fresh key lime juice provides the brightest flavor.

Make-Ahead Instructions

The parfaits are excellent for meal preparation because they can be assembled several hours before serving.

Prepare the crumb mixture and lime filling separately if you want maximum crunch. When assembled ahead of time, the graham cracker layer gradually softens as it absorbs moisture from the cream.

For a softer, cheesecake-like texture, assemble the cups several hours in advance.

Store covered in the refrigerator and add whipped cream and final garnishes shortly before serving.

The smoothie is best enjoyed immediately because its texture can change after refrigeration.

Helpful Tips

Use fresh lime zest: Lime zest contains concentrated citrus oils that make the dessert taste much brighter.

Don’t overmix: Once the filling becomes smooth, stop mixing to maintain its thick texture.

Chill before serving: Refrigeration allows the flavors to blend and gives the parfait a firmer, more luxurious consistency.

Balance the tartness: Key limes can vary in acidity, so taste the filling before assembling and adjust sweetness as needed.

Keep the crumbs crunchy: Add a small amount of fresh graham cracker crumbs immediately before serving for extra texture.

Customize the fruit: Mango, pineapple, strawberries, or coconut can be added to the parfait for a tropical variation.

Serving Suggestions

Serve Key Lime Pie Parfaits as an elegant dessert after grilled chicken, seafood, tacos, or a summer barbecue. They are also perfect for brunch tables, birthday celebrations, potlucks, and holiday gatherings.

For a tropical twist, add a thin layer of diced mango or pineapple between the lime cream layers. Toasted coconut can also be sprinkled over the top.

For individual party desserts, prepare the parfaits in small clear cups and arrange them on a serving tray with lime slices and fresh mint.

Recipe Details

Prep Time: 20 minutes
Chill Time: 1–3 hours
Cook Time: 0 minutes
Total Time: About 1 hour 20 minutes
Servings: 6 parfait cups

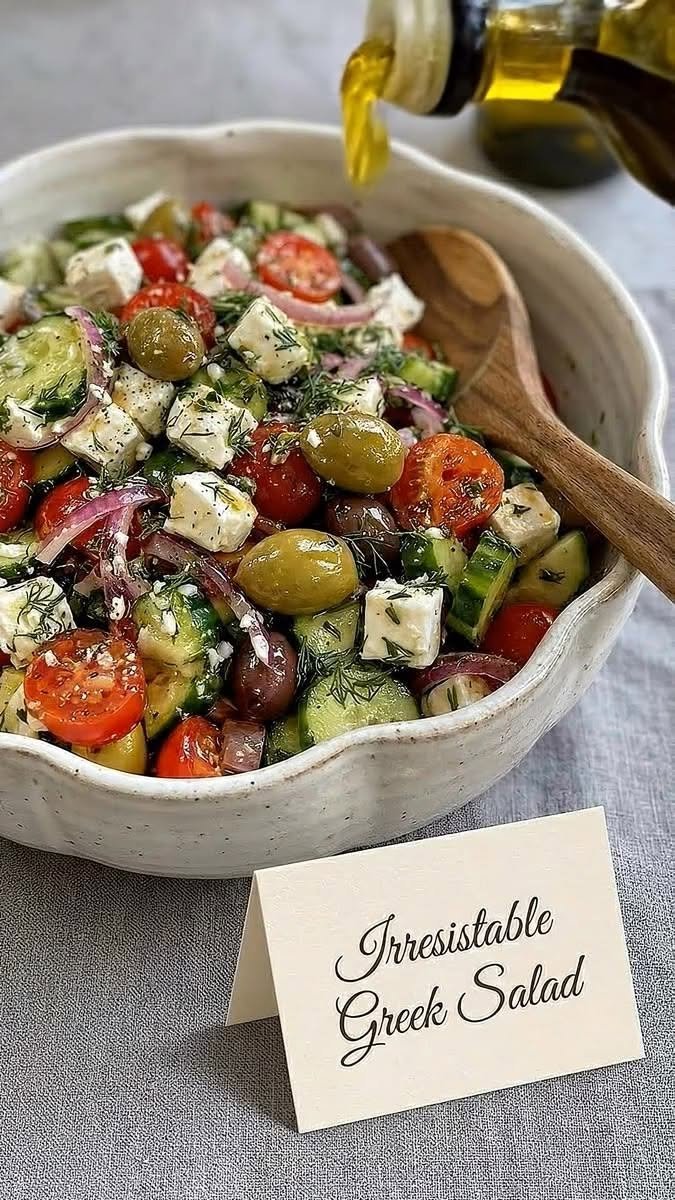
Irresistible Greek Salad

Irresistible Greek Salad

Ingredients

For the Salad
4 cups chopped romaine or crisp lettuce
1 large cucumber, sliced
1½ cups cherry tomatoes, halved
½ red onion, thinly sliced
½ green bell pepper, sliced
½ cup Kalamata olives, pitted
¾ cup crumbled feta cheese
2 tablespoons fresh parsley, chopped
1 tablespoon fresh oregano, optional
For the Dressing
¼ cup extra-virgin olive oil
2 tablespoons fresh lemon juice
1 tablespoon red wine vinegar
1 teaspoon dried oregano
1 small garlic clove, minced
½ teaspoon Dijon mustard
½ teaspoon salt
¼ teaspoon black pepper

Instructions

Prepare the vegetables: Wash and dry all vegetables thoroughly. Chop the lettuce, slice the cucumber, halve the tomatoes, and thinly slice the red onion and bell pepper.
Combine the salad: Add the lettuce, cucumber, tomatoes, red onion, bell pepper, and Kalamata olives to a large bowl. Sprinkle the feta cheese, parsley, and fresh oregano over the top.
Make the dressing: In a small bowl or jar, whisk together olive oil, lemon juice, red wine vinegar, oregano, garlic, Dijon mustard, salt, and black pepper until smooth and well combined.
Dress the salad: Pour the dressing over the vegetables just before serving. Gently toss everything together so the vegetables are evenly coated without breaking apart the feta.
Serve: Let the salad rest for 5 minutes to allow the flavors to blend. Serve immediately with warm pita, grilled chicken, baked fish, or your favorite Mediterranean meal

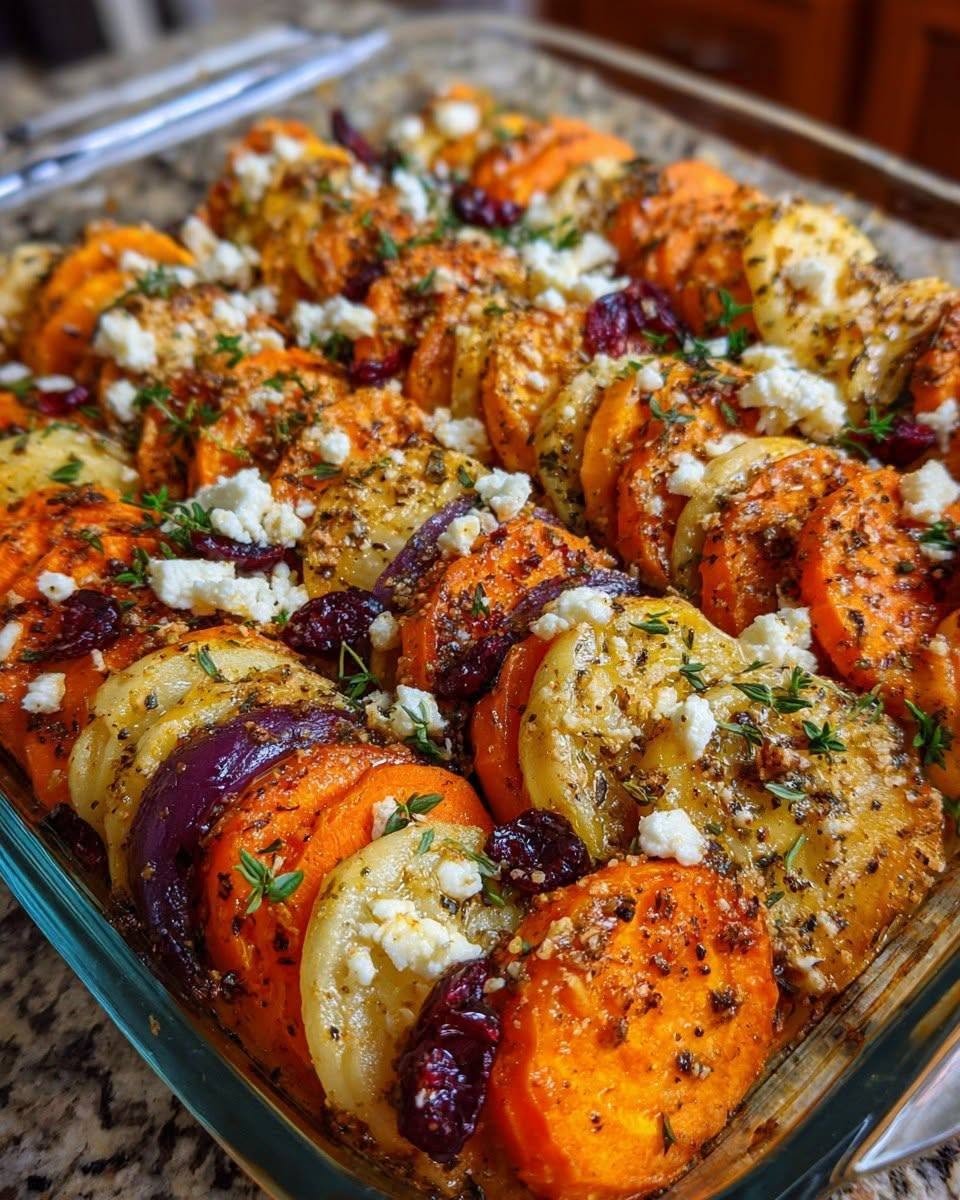
Layered Sweet Potato, Squash & Carrot Bake with Cranberry-Honey Drizzle

Layered Sweet Potato, Squash & Carrot Bake with Cranberry-Honey Drizzle

Ingredients

2 medium sweet potatoes, thinly sliced
2 cups butternut squash, thinly sliced
3 large carrots, thinly sliced
1 small onion, thinly sliced
¾ cup crumbled feta cheese
½ cup fresh or frozen cranberries
2 tbsp honey
2 tbsp olive oil
1 tsp fresh thyme
Salt & black pepper

Directions

Preheat oven to 400°F (200°C) and lightly grease a baking dish with olive oil
.Arrange alternating layers of sweet potato, squash, carrots, and onion in the dish.
Drizzle with olive oil and season each layer lightly with salt, pepper, and thyme.
Sprinkle feta between a few of the layers for creamy, salty flavor.
Cover with foil and bake for 35 minutes.
Meanwhile, simmer cranberries with honey and 1 tbsp water for 4–5 minutes, until softened and syrupy.
Remove the foil and bake for another 20–25 minutes, until the vegetables are tender and caramelized.
Drizzle the warm cranberry-honey sauce over the baked vegetables.
Finish with fresh thyme and serve warm.

Nutritional Information

Servings: 6
Calories: 285 kcal
Protein: 7g
Carbohydrates: 43g
Fat: 11g
Fiber: 7g
Sodium: 320mg

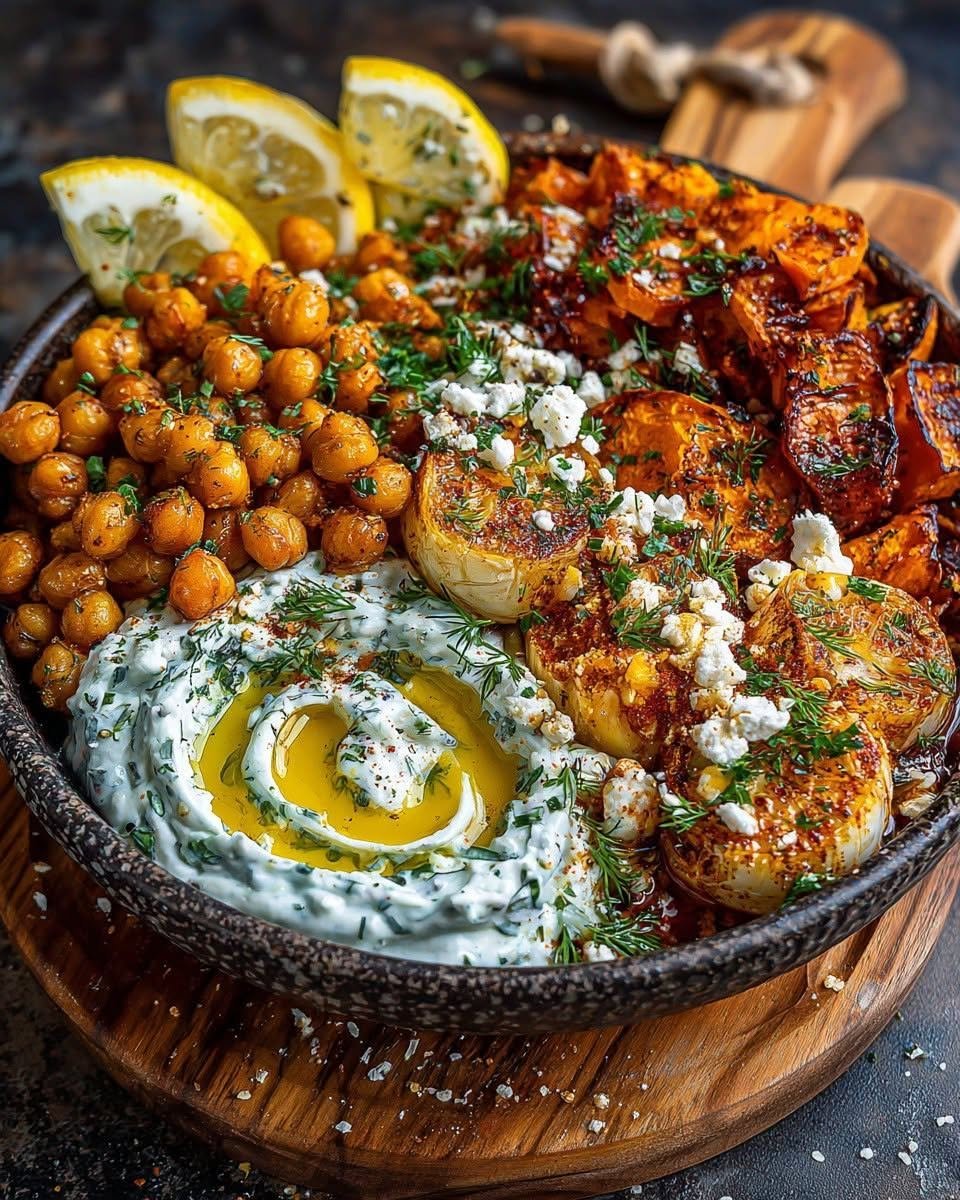
Smashed Crispy Chickpea Bowl with Roasted Sweet Potato, Whipped Feta & Garlic Honey Swirl

Smashed Crispy Chickpea Bowl with Roasted Sweet Potato, Whipped Feta & Garlic Honey Swirl

 What You Need

For the Crispy Smashed Chickpeas
2 cans (15 oz / 425 g each) chickpeas, drained, rinsed, and patted dry
2 tbsp extra virgin olive oil
1 tsp smoked paprika
1 tsp garlic powder
1 tsp ground cumin
1/2 tsp onion powder
1/2 tsp dried oregano
Salt & freshly ground black pepper
For the Roasted Sweet Potatoes
2 medium sweet potatoes, peeled and cut into 1-inch cubes
2 tbsp extra virgin olive oil
1 tsp smoked paprika
1/2 tsp ground cinnamon
1/2 tsp garlic powder
Salt & freshly ground black pepper
For the Whipped Feta
7 oz (200 g) feta cheese, crumbled
3/4 cup (180 g) plain Greek yogurt
2 tbsp extra virgin olive oil
2 tbsp fresh lemon juice
1 tsp lemon zest
2 roasted garlic cloves
Freshly ground black pepper
For the Garlic Honey Swirl
1/4 cup (60 ml) honey
2 garlic cloves, finely grated
1 tbsp fresh lemon juice
1 tsp chili flakes (optional)
1 tsp extra virgin olive oil
Pinch of flaky sea salt
For the Fresh Toppings
1 cup cucumber, diced
1 cup cherry tomatoes, halved
2 tbsp chopped fresh parsley
2 tbsp chopped fresh dill
2 tbsp roasted pistachios, roughly chopped
Optional Toppings
Microgreens
Extra crumbled feta
Lemon wedges
Toasted pumpkin seeds
Fresh mint leaves
Freshly cracked black pepper

 How to make it

Preheat the oven to 425°F (220°C) and line two baking trays with parchment paper.
Place the chickpeas on one tray and gently flatten each one with the bottom of a glass. Drizzle with olive oil and season with smoked paprika, garlic powder, cumin, onion powder, oregano, salt, and black pepper.
Toss the sweet potato cubes with the olive oil, smoked paprika, cinnamon, garlic powder, salt, and black pepper, then spread them on the second baking tray.
Roast both trays for 25–30 minutes, turning halfway through, until the chickpeas are crispy and the sweet potatoes are caramelized and tender.
Meanwhile, blend the feta, Greek yogurt, olive oil, lemon juice, lemon zest, roasted garlic, and black pepper until smooth and creamy.
In a small saucepan, gently warm the honey with the grated garlic, lemon juice, chili flakes (if using), olive oil, and flaky sea salt for 2–3 minutes. Do not boil.
Spread a generous layer of whipped feta into the bottom of four serving bowls.
Divide the roasted sweet potatoes and crispy smashed chickpeas evenly among the bowls.
Add the cucumber and cherry tomatoes around the bowls.
Drizzle the warm garlic honey generously over everything, creating a beautiful swirl over the whipped feta.
Sprinkle with chopped parsley, dill, roasted pistachios, and extra crumbled feta if desired.
Garnish with microgreens, lemon wedges, toasted pumpkin seeds, fresh mint, and freshly cracked black pepper. Serve immediately while warm.

 Nutritional Info (per serving, serves 4)

Calories: 584
Protein: 20 g
Carbohydrates: 58 g
Fat: 31 g
Fiber: 12 g
Sugar: 19 g
Sodium: 642 mg

Perfectly Seared Scallops in Creamy Lemon-Herb Sauce

Perfectly Seared Scallops in Creamy Lemon-Herb Sauce

Tender, buttery scallops with a beautifully golden crust are paired with a silky, creamy lemon-herb sauce in this elegant yet surprisingly simple seafood recipe. The scallops cook quickly, making this dish perfect for a special dinner, date night, or an impressive weeknight meal. Fresh lemon, garlic, parsley, and herbs brighten the rich sauce while allowing the naturally sweet flavor of the scallops to shine.

Ingredients

For the Scallops

  • 1½ pounds large sea scallops, side muscle removed
  • 1 tablespoon olive oil
  • 2 tablespoons unsalted butter
  • ½ teaspoon salt
  • ¼ teaspoon freshly ground black pepper
  • ½ teaspoon garlic powder
  • 1 teaspoon fresh lemon zest

For the Creamy Lemon-Herb Sauce

  • 2 tablespoons unsalted butter
  • 3 garlic cloves, finely minced
  • ½ cup chicken or seafood broth
  • ¾ cup heavy cream
  • 1 tablespoon fresh lemon juice
  • 1 teaspoon lemon zest
  • 1 teaspoon Dijon mustard
  • 2 tablespoons freshly chopped parsley
  • 1 tablespoon freshly chopped dill
  • 1 tablespoon freshly chopped chives
  • ¼ teaspoon salt, or to taste
  • ¼ teaspoon black pepper
  • ¼ cup freshly grated Parmesan cheese, optional

For Serving

  • Fresh parsley or dill
  • Lemon wedges
  • Steamed asparagus, roasted vegetables, pasta, rice, or crusty bread

Instructions

1. Prepare the Scallops

Begin by preparing the scallops carefully. Remove the small, tough side muscle if it is still attached. Pat each scallop completely dry with paper towels. This step is extremely important because excess moisture can prevent the scallops from developing that beautiful golden-brown crust.

Season both sides lightly with salt, black pepper, garlic powder, and lemon zest. Let them sit for about 5 minutes while you prepare your skillet.

2. Heat the Skillet

Place a large heavy-bottomed skillet over medium-high to high heat. A stainless-steel or cast-iron skillet works especially well for achieving a deep sear.

Add the olive oil and allow it to heat until shimmering. The pan should be hot before the scallops touch it. Carefully place the scallops into the skillet, leaving a little space between each one. Avoid overcrowding the pan; cook in batches if necessary.

3. Sear the Scallops

Let the scallops cook undisturbed for about 2–3 minutes. Do not move them around the pan. When the bottom develops a deep golden-brown crust and the scallops release easily from the skillet, flip them.

Add 2 tablespoons of butter and allow it to melt around the scallops. Continue cooking for another 1½–2 minutes, spooning the melted butter over the tops.

The scallops should be golden on the outside and tender inside. Avoid overcooking, as scallops can quickly become rubbery.

Transfer the cooked scallops to a clean plate and loosely cover them while you make the sauce.

4. Make the Lemon-Herb Sauce

Reduce the heat to medium. Add 2 tablespoons of butter to the same skillet, using all those flavorful browned bits left behind by the scallops.

Add the minced garlic and sauté for about 30–45 seconds, just until fragrant. Be careful not to burn it.

Pour in the chicken or seafood broth and scrape the bottom of the skillet with a wooden spoon. Simmer for 2–3 minutes, allowing the liquid to reduce slightly.

Lower the heat and add the heavy cream. Stir gently and simmer for another 2–3 minutes until the sauce begins to thicken.

Whisk in the Dijon mustard, lemon juice, and lemon zest. The lemon adds a bright, fresh contrast to the creamy sauce.

5. Add the Fresh Herbs

Stir in the chopped parsley, dill, and chives. Season with salt and freshly ground black pepper.

For an extra-rich sauce, add Parmesan cheese and stir until completely melted and smooth. If the sauce becomes too thick, add a tablespoon or two of broth or cream until it reaches your preferred consistency.

Taste the sauce and adjust the lemon, salt, or pepper as needed.

6. Return the Scallops to the Pan

Gently place the seared scallops back into the skillet. Spoon some of the creamy lemon-herb sauce over each scallop.

Allow them to warm in the sauce for about 30–60 seconds. Avoid prolonged cooking because the scallops are already perfectly seared.

Remove the skillet from the heat and garnish with additional fresh parsley, dill, and a little lemon zest.

Serving Suggestions

Serve these creamy lemon-herb scallops immediately while they are hot and tender. They pair beautifully with angel hair pasta, linguine, creamy mashed potatoes, fluffy rice, roasted asparagus, green beans, or a simple Mediterranean salad.

For a lighter meal, serve the scallops over cauliflower rice or alongside steamed vegetables. Crusty bread is also perfect for soaking up every drop of the creamy lemon sauce.

Tips for Perfect Scallops

Dry them thoroughly: Moisture is the biggest enemy of a good sear. Pat the scallops very dry before seasoning.

Use a hot skillet: A properly heated pan creates the golden crust without requiring a long cooking time.

Don’t overcrowd: Give each scallop enough space so it sears rather than steams.

Don’t move them: Let the first side cook undisturbed until a golden crust forms.

Avoid overcooking: Large scallops generally need only a few minutes total. They should be opaque and tender with a lightly springy texture.

Use fresh lemon: Fresh lemon juice and zest provide a much brighter flavor than bottled lemon juice.

Recipe Details

Prep Time: 15 minutes
Cook Time: 15 minutes
Total Time: 30 minutes
Servings: 4