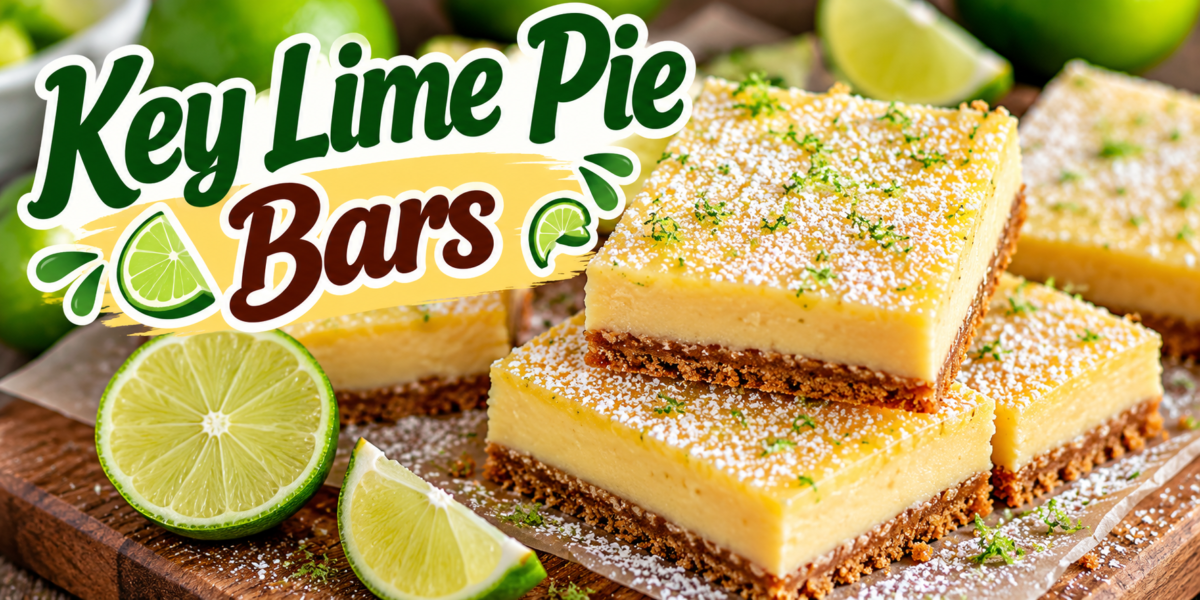
Key Lime Pie Bars

Creamy Key Lime Pie Bars with a buttery graham cracker crust, fresh lime zest, powdered sugar, and lime slices

Key Lime Pie Bars

Key Lime Pie Bars are bright, creamy, tangy, and incredibly easy to make. They combine a buttery graham cracker crust with a smooth lime filling and a refreshing citrus flavor. Each square has a crisp base and a soft, creamy center that makes it perfect for dessert tables, family gatherings, afternoon treats, and summer celebrations.

These Key Lime Pie Bars are inspired by the classic flavors of key lime pie but are easier to portion and serve. Instead of cutting a whole pie, you can chill the dessert, slice it into neat squares, and serve each piece individually.

The combination of sweet condensed milk and fresh lime juice creates a naturally creamy filling. Lime zest adds even more citrus aroma, while the graham cracker crust provides a delicious buttery crunch.

Prep Time: 20 minutes
Bake Time: 25 minutes
Chill Time: 3 hours
Total Time: About 3 hours 45 minutes
Servings: 16 bars

Ingredients

For the Graham Cracker Crust

2 cups finely crushed graham crackers

1/3 cup granulated sugar

1/2 cup unsalted butter, melted

1/4 teaspoon salt

For the Lime Filling

4 large egg yolks

2 cans sweetened condensed milk, 14 ounces each

3/4 cup fresh lime juice

2 tablespoons finely grated lime zest

1 teaspoon vanilla extract

1/4 teaspoon salt

For the Topping

1 cup heavy whipping cream

2 tablespoons powdered sugar

1/2 teaspoon vanilla extract

1 teaspoon fresh lime zest

Lime slices for garnish, optional

Extra graham cracker crumbs, optional

Step-by-Step Instructions

Prepare the Baking Pan

Preheat your oven to 350°F (175°C).

Line a 9-by-13-inch baking pan with parchment paper.

Leave some parchment hanging over the sides. This will make it easier to lift the chilled dessert from the pan later.

Lightly grease the parchment with a small amount of butter or cooking spray.

A lined pan helps you remove the finished Key Lime Pie Bars without damaging the crust.

Make the Graham Cracker Crust

Place the graham crackers in a food processor and pulse until they become fine crumbs.

If you do not have a food processor, place the crackers in a sealed bag and crush them with a rolling pin.

Transfer the crumbs to a mixing bowl.

Add sugar and salt.

Pour in the melted butter.

Stir until the mixture looks evenly moistened.

The crumbs should resemble wet sand.

If the mixture seems too dry, add another tablespoon of melted butter.

Avoid adding too much butter because an overly wet crust can become greasy.

Press the Crust

Transfer the crumb mixture to the prepared pan.

Spread it evenly across the bottom.

Use the flat bottom of a glass or measuring cup to press the crumbs firmly.

Pay special attention to the corners.

A firmly packed crust will hold together better when you slice the finished dessert.

Place the pan in the oven.

Bake the crust for about 8 to 10 minutes.

It should become lightly golden and fragrant.

Remove the pan from the oven.

Allow the crust to cool for several minutes while you prepare the filling.

A properly baked crust gives Key Lime Pie Bars a firm and buttery foundation.

Prepare the Lime Filling

Separate the eggs carefully.

Place the egg yolks in a large mixing bowl.

Add the sweetened condensed milk.

Whisk gently until the mixture becomes smooth.

Add fresh lime juice.

Continue whisking until the ingredients are fully combined.

Add lime zest, vanilla extract, and salt.

Mix again.

The filling should look smooth and creamy.

Avoid vigorous whisking because too much air can create bubbles in the filling.

Fresh lime juice provides the strongest citrus flavor.

Bottled lime juice can work in a pinch, but fresh juice and freshly grated zest give the dessert a brighter aroma.

The creamy filling is what gives Key Lime Pie Bars their smooth and refreshing texture.

Pour the Filling Over the Crust

Make sure the crust is warm rather than extremely hot.

Pour the lime filling slowly over the baked crust.

Spread it gently with a spatula if needed.

Try to create an even layer from edge to edge.

Tap the pan lightly on the counter once or twice to release large air bubbles.

Do not tap it aggressively.

Place the pan back into the oven.

Bake the Bars

Bake for approximately 15 to 18 minutes.

The edges should look set while the center should still have a very slight movement.

Do not wait until the entire surface becomes completely firm.

The filling will continue setting as it cools.

Overbaking can create a dry or cracked filling.

When the bars are finished, remove the pan from the oven.

Place it on a cooling rack.

Allow the dessert to cool at room temperature for about 30 minutes.

The warm filling will gradually become firmer.

Chill Thoroughly

Once the pan has cooled, cover it loosely with plastic wrap or foil.

Place it in the refrigerator.

Chill for at least 3 hours.

For the cleanest slices, chilling overnight works even better.

Do not rush this step.

The filling needs enough time to become firm enough to cut.

Proper chilling also allows the lime flavor to develop.

Well-chilled Key Lime Pie Bars are easier to slice and have a smoother texture.

Make the Whipped Cream

Place the heavy whipping cream in a chilled mixing bowl.

Add powdered sugar and vanilla extract.

Beat with an electric mixer until soft peaks form.

Do not overbeat the cream.

Stop when it is thick enough to hold its shape.

You can spread the whipped cream over the entire chilled dessert or add a small dollop to each individual square.

Finish with fresh lime zest.

For an elegant presentation, add a small lime slice to each serving.

Cut and Serve

Remove the chilled dessert from the refrigerator.

Lift the parchment paper carefully to remove the entire slab from the pan.

Place it on a cutting board.

Use a sharp knife to cut it into squares.

For cleaner cuts, wipe the knife with a warm damp towel between slices.

You can cut the dessert into 12 large pieces or 16 smaller bars.

Add whipped cream just before serving.

A little extra lime zest provides a fresh finishing touch.

The contrast between the golden crust and pale lime filling makes Key Lime Pie Bars especially attractive on a dessert platter.

Tips for the Best Results

Use fresh limes whenever possible.

Finely grate the lime zest before squeezing the fruit.

Avoid grating the white part of the peel because it can taste bitter.

Press the crust firmly but evenly.

Do not overbake the filling.

The center should have a slight wobble when you remove the pan from the oven.

Always allow the dessert to cool before refrigerating.

Give the bars enough time to chill.

Use a sharp knife for clean slices.

Clean the knife between cuts when you want bakery-style squares.

These simple tips help make Key Lime Pie Bars creamy, neat, and flavorful.

How to Get More Lime Flavor

If you enjoy a stronger citrus flavor, increase the lime zest slightly.

Zest contains aromatic oils that provide a strong lime fragrance.

Fresh juice provides the tartness.

Using both juice and zest creates a more noticeable citrus flavor.

You can also add a small amount of lime zest to the whipped cream.

Another option is to sprinkle fresh zest over each serving.

Avoid adding too much lime juice because excess liquid can change the texture of the filling.

The goal is to create a bright citrus flavor while keeping the creamy consistency.

Easy Variations

Coconut Lime Bars

Add 1/2 cup shredded coconut to the graham cracker crust.

The coconut pairs beautifully with lime.

Berry Lime Bars

Serve each square with fresh strawberries, raspberries, or blueberries.

The berries add natural sweetness and beautiful color.

Chocolate Crust

Replace some of the graham crackers with chocolate cookie crumbs.

The chocolate adds a rich contrast to the tangy lime filling.

Extra Creamy Version

Add a thin layer of whipped cream over the chilled filling.

Finish with lime zest.

Coconut Topping

Sprinkle toasted coconut over the whipped cream.

These variations let you create different versions of Key Lime Pie Bars without changing the basic method.

Serving Suggestions

Serve the bars chilled.

They are delicious on their own, but whipped cream makes them even more special.

Fresh berries provide a colorful side.

A few lime slices can also make the serving plate look attractive.

For a dinner party, arrange the squares on a large white platter.

Dust them lightly with powdered sugar just before serving.

For a summer gathering, serve them alongside fresh fruit and iced tea.

For a holiday dessert table, add small pieces of lime zest and fresh mint around the platter.

The bright citrus flavor makes Key Lime Pie Bars a refreshing alternative to heavier chocolate desserts.

Make-Ahead Instructions

This dessert is excellent for preparing ahead.

You can bake the entire dessert one day before serving.

After the bars have cooled, cover them tightly and refrigerate.

Keep the whipped cream separate until serving.

Add the topping shortly before your guests arrive.

You can also prepare the graham cracker crust earlier in the day.

The filling should be baked and chilled according to the recipe.

Making the dessert ahead allows the filling to become fully set and makes slicing easier.

In fact, overnight chilling often gives Key Lime Pie Bars an even better texture.

Storage Instructions

Keep the finished bars refrigerated.

Store them in an airtight container or cover the baking dish tightly.

They are best enjoyed within 3 to 4 days.

If you add whipped cream, the topping may soften over time.

For the best presentation, add fresh whipped cream just before serving.

Do not leave the dessert at room temperature for extended periods, especially during warm weather.

If transporting the bars, keep them chilled until serving.

Common Mistakes to Avoid

Do not use too much butter in the crust.

Avoid pressing the crust unevenly.

Do not overmix the filling.

Avoid overbaking the lime layer.

Do not skip the chilling time.

Do not cut the bars while they are still warm.

Avoid using a dull knife because it can drag through the filling.

Do not add whipped cream too early if the dessert will be stored for several days.

Avoid using too much lime zest because it can create bitterness.

Following these guidelines helps you create consistent Key Lime Pie Bars with a smooth filling and firm crust.

Frequently Asked Questions

Can I use regular limes instead of key limes?

Yes. Regular Persian limes work very well and are easier to find. The flavor will be slightly different but still delicious.

Why are my bars not firm?

The most common reason is insufficient chilling. Give the dessert at least 3 hours in the refrigerator.

Can I make these bars the night before?

Yes. Overnight chilling is an excellent option.

Can I freeze Key Lime Pie Bars?

Yes. Wrap the chilled bars tightly and freeze them without the whipped cream topping. Thaw them in the refrigerator before serving.

Can I use bottled lime juice?

Yes, but fresh lime juice generally provides a brighter flavor.

Why did my filling crack?

Cracking can happen when the filling is overbaked or exposed to sudden temperature changes.

How do I get clean cuts?

Chill the bars thoroughly and use a sharp knife. Wipe the knife clean between cuts.

Can I make the crust without sugar?

Yes, although sugar helps improve the flavor and texture. You can adjust it according to your preferences.

Can I add fruit to the filling?

It is better to add fresh fruit as a topping rather than mixing a large amount into the filling because additional moisture can affect the texture.

What can I use instead of graham crackers?

Digestive biscuits or similar plain sweet cookies can work as substitutes.

Nutrition Information

Approximate nutrition per bar, based on 16 servings:

Calories: 285 kcal

Protein: 5g

Carbohydrates: 39g

Fat: 13g

Fiber: 1g

Sugar: 27g

Sodium: 170mg

Nutrition values are estimates and may vary depending on the brands and exact ingredients used.

Why You Will Love This Recipe

The recipe combines a few simple ingredients into a dessert with a bright and memorable flavor.

The graham cracker crust provides buttery sweetness and crunch.

The lime filling is creamy and tangy.

The condensed milk adds sweetness and richness.

Fresh lime zest provides a fragrant citrus aroma.

Whipped cream adds a soft and creamy finish.

Another advantage is that the bars are easy to portion.

Instead of serving a whole pie, you can prepare one pan and cut it into individual squares.

The dessert also travels well when kept chilled.

That makes Key Lime Pie Bars useful for picnics, potlucks, birthdays, family dinners, and holiday gatherings.

You can make them a day ahead, which reduces last-minute preparation.

Final Thoughts

Key Lime Pie Bars are a simple and delicious dessert for anyone who loves bright citrus flavors.

The buttery graham cracker crust creates a crunchy foundation, while the creamy lime filling adds a smooth and tangy contrast.

Fresh lime juice and zest provide the characteristic citrus flavor, while whipped cream creates a soft and elegant finish.

The recipe is easy to prepare, but proper chilling is essential for the best texture.

Take your time with the crust, avoid overbaking the filling, and refrigerate the dessert until it is completely set.

For special occasions, decorate each square with whipped cream, lime zest, and a small lime slice.

You can also experiment with coconut, berries, chocolate crumbs, or toasted nuts.

Because the bars can be prepared ahead, they are especially convenient for entertaining.

Keep them refrigerated until serving and use a sharp knife for neat squares.

Whether you are preparing dessert for a family dinner, summer party, holiday table, or weekend treat, Key Lime Pie Bars offer a refreshing combination of creamy texture, buttery crunch, and bright lime flavor.

Once chilled and sliced, these Key Lime Pie Bars are ready to serve and enjoy.
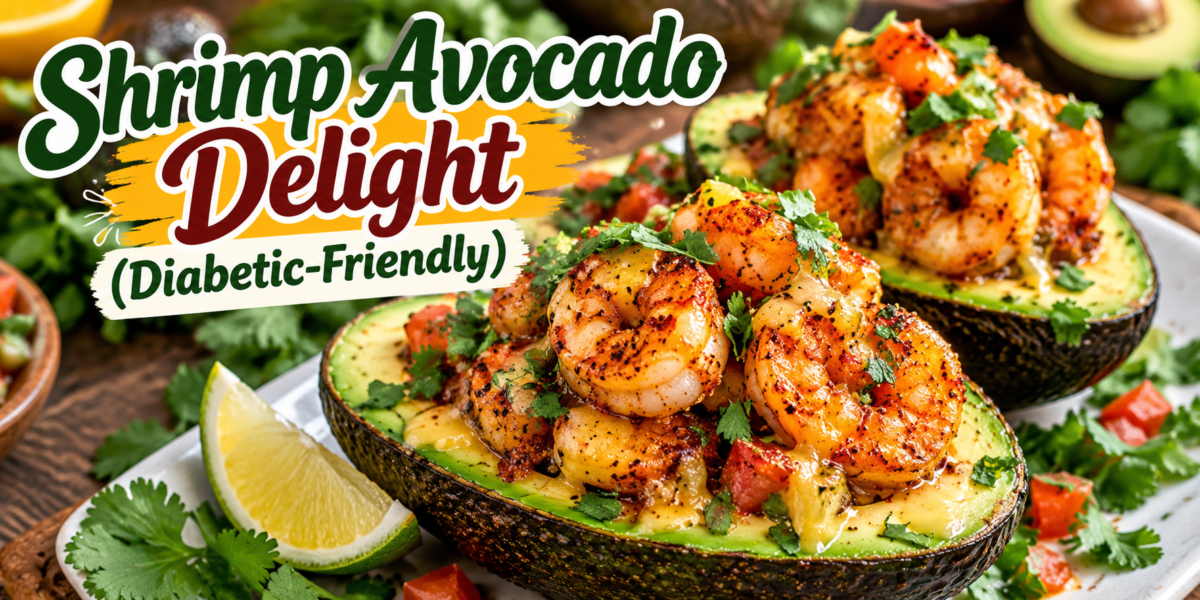
Shrimp Avocado Delight (Diabetic-Friendly)

Shrimp Avocado Delight with seasoned shrimp, creamy avocado, fresh herbs, tomatoes, lime, and a light dressing

Shrimp Avocado Delight (Diabetic-Friendly)

Shrimp Avocado Delight is a fresh, colorful, and satisfying meal made with juicy seasoned shrimp, creamy avocado, crisp vegetables, lime juice, herbs, and a light savory dressing. It comes together quickly and works well for lunch, dinner, or a simple meal-prep option.

This Shrimp Avocado recipe combines lean protein with avocado and non-starchy vegetables. The result is a flavorful meal that does not need a heavy sauce or a large amount of added sugar. If you are managing diabetes, remember that individual carbohydrate needs vary, so portion size and the full meal plan matter.

The bright flavors make this recipe feel satisfying rather than restrictive. Garlic, paprika, cumin, chili powder, lime, and fresh cilantro give the shrimp plenty of flavor. Tomatoes and cucumber add freshness, while avocado creates a creamy texture.

Prep Time: 15 minutes
Cook Time: 8 minutes
Total Time: 23 minutes
Servings: 4

Ingredients

For the Shrimp

1 1/2 pounds large shrimp, peeled and deveined
1 tablespoon olive oil
1 tablespoon fresh lime juice
2 cloves garlic, minced
1 teaspoon chili powder
1 teaspoon smoked paprika
1/2 teaspoon ground cumin
1/2 teaspoon garlic powder
1/2 teaspoon onion powder
1/2 teaspoon salt
1/4 teaspoon black pepper
1/4 teaspoon red pepper flakes, optional

For the Avocado Mixture

3 large ripe avocados
1 cup cherry tomatoes, halved
1/2 cup cucumber, diced
1/4 cup red onion, finely chopped
1/4 cup fresh cilantro, chopped
2 tablespoons fresh lime juice
1 tablespoon extra virgin olive oil
1/4 teaspoon salt
1/4 teaspoon black pepper

For the Optional Dressing

1/4 cup plain unsweetened Greek yogurt
1 tablespoon fresh lime juice
1 tablespoon chopped cilantro
1/2 teaspoon garlic powder
1/4 teaspoon cumin
2 tablespoons water
A pinch of salt

Step-by-Step Instructions

Prepare the Shrimp

Pat the shrimp dry with paper towels. This helps them brown instead of releasing too much water into the pan.

Place the shrimp in a bowl. Add olive oil, lime juice, garlic, chili powder, smoked paprika, cumin, garlic powder, onion powder, salt, black pepper, and red pepper flakes if using.

Toss until every shrimp is evenly coated. Let the shrimp rest for 5 minutes while you prepare the vegetables.

The seasoning gives this Shrimp Avocado dish a warm, smoky, and slightly spicy flavor.

Prepare the Fresh Ingredients

Cut the avocados in half and remove the pits. Scoop the flesh into a medium bowl and cut it into bite-sized pieces.

Add the cherry tomatoes, cucumber, red onion, and cilantro.

Drizzle with lime juice and olive oil. Add salt and black pepper.

Fold everything together gently. Avoid overmixing because the avocado can become mashed.

Keep the mixture chilled while you cook the shrimp.

Fresh vegetables are important because they give the Shrimp Avocado mixture a crisp texture that balances the tender shrimp.

Cook the Shrimp

Heat a large skillet over medium-high heat.

Place the seasoned shrimp in a single layer. Cook for about 2 minutes on the first side.

Turn the shrimp and cook for another 2 to 3 minutes.

The shrimp should become opaque and curl into a loose C shape. For food safety, cook shrimp to an internal temperature of 145°F.

Remove the skillet from the heat as soon as the shrimp are cooked. Overcooked shrimp can become firm and rubbery.

Let the shrimp rest for 2 minutes before assembling the dish.

The quick cooking method keeps this Shrimp Avocado meal tender and flavorful.

Make the Optional Dressing

Add Greek yogurt, lime juice, cilantro, garlic powder, cumin, water, and a pinch of salt to a small bowl.

Whisk until smooth.

Add another teaspoon of water if the dressing is too thick.

Taste and adjust the lime juice or salt.

Use plain unsweetened Greek yogurt rather than sweetened yogurt.

For a brighter Shrimp Avocado dressing, add a little extra fresh lime juice just before serving.

Assemble the Dish

Divide the avocado mixture among four plates or shallow bowls.

Place the warm shrimp on top.

Drizzle with the yogurt-lime dressing if using.

Finish with fresh cilantro and a squeeze of lime.

For extra color, add a few thin slices of red onion or a sprinkle of chili flakes.

The creamy avocado and warm shrimp create a satisfying contrast in every bite. This Shrimp Avocado combination is especially good when served immediately.

Tips for the Best Results

Choose avocados that are ripe but still firm. Very soft avocados can become mushy during mixing.

Pat the shrimp dry before seasoning. This small step helps them sear properly.

Do not overcrowd the skillet. Cook the shrimp in batches if your pan is small.

Use fresh lime juice for a brighter flavor.

Add the avocado shortly before serving to reduce browning.

Keep the dressing unsweetened.

If you prefer a milder dish, skip the red pepper flakes.

For more heat, add fresh jalapeño or extra chili flakes.

These simple steps help keep the Shrimp Avocado mixture fresh, colorful, and balanced.

For an even fresher finish, add chopped cilantro immediately before serving. The herb adds a clean aroma without making the dish complicated.

Ingredient Substitutions

Shrimp

Large shrimp work well, but medium shrimp can also be used. Adjust the cooking time because smaller shrimp cook faster.

Avocado

If you need a substitute, mashed white beans can provide creaminess, although the flavor will be different.

Greek Yogurt

Use plain unsweetened yogurt. You can also skip the dressing and serve the dish with extra lime.

Cilantro

Fresh parsley can replace cilantro if you prefer a milder herb flavor.

Cucumber

Try diced bell pepper or celery for additional crunch.

Lime

Fresh lemon juice can be used when lime is unavailable.

The flexible ingredients make this Shrimp Avocado recipe easy to adapt to what you already have.

Serving Suggestions

Serve the shrimp and avocado mixture as a complete light meal.

For a larger meal, add a small portion of brown rice, quinoa, or another whole grain that fits your eating plan.

You can also serve it with leafy greens to create a larger salad.

A side of roasted vegetables works well too.

For a lower-carbohydrate option, serve the mixture over lettuce leaves or cauliflower rice.

Avoid adding a sugary sauce. The lime, herbs, spices, and natural creaminess of avocado already provide plenty of flavor.

A squeeze of lime just before eating makes the dish taste brighter.

This Shrimp Avocado plate is also attractive enough for a casual lunch with guests.

Meal Prep Instructions

This recipe can be prepared in separate components.

Cook the shrimp and allow them to cool.

Store the shrimp in an airtight container in the refrigerator.

Prepare the cucumber, tomatoes, and onion separately.

Keep the avocado whole until you are ready to eat whenever possible.

Prepare the dressing and refrigerate it in a small sealed container.

When ready to serve, cut the avocado and combine it with the vegetables.

Add the chilled or gently warmed shrimp.

Drizzle with dressing just before eating.

For the best quality, use refrigerated cooked shrimp within 3 to 4 days.

Keeping the components separate helps maintain the texture of the Shrimp Avocado mixture.

Storage and Reheating

Store cooked shrimp in the refrigerator at 40°F or below.

Keep the avocado mixture in a separate airtight container.

Because avocado can brown and soften, it is best prepared close to serving time.

The shrimp can be eaten chilled or gently warmed.

If reheating, use short intervals and stop as soon as the shrimp are warm.

Do not repeatedly reheat shrimp.

The fresh vegetables and avocado should not be heated.

If the avocado mixture has darkened slightly on the surface, stir gently and check its smell and texture before serving. When in doubt about food safety, discard it.

Diabetes-Friendly Meal Notes

The recipe uses shrimp, avocado, vegetables, and unsweetened yogurt instead of a sugary sauce.

However, calling a recipe “diabetic-friendly” does not mean it is appropriate for every person with diabetes. Blood glucose responses vary from person to person.

If you are managing diabetes, consider your individual meal plan, medication, activity level, and portion size.

Adding rice, tortillas, bread, or other carbohydrate-rich foods will change the total carbohydrate content of the meal.

For a lower-carbohydrate plate, serve the shrimp and avocado over leafy greens.

For additional fiber, add non-starchy vegetables such as cucumber, bell pepper, broccoli, or leafy greens.

The key is to build the meal around ingredients that fit your personal nutrition goals.

This Shrimp Avocado recipe is easy to portion because the ingredients can be divided into four servings.

Flavor Variations

Spicy Lime Version

Add sliced jalapeño, extra red pepper flakes, and a little lime zest.

Garlic Herb Version

Increase the fresh garlic and add chopped parsley.

Mediterranean Version

Add cucumber, tomatoes, olives, feta, oregano, and parsley.

Creamy Version

Use the optional Greek yogurt dressing and add a small amount of avocado to the dressing.

Crunchy Version

Add chopped cucumber, radish, celery, or toasted pumpkin seeds.

Tropical Version

Add a small amount of diced mango. Remember that fruit adds carbohydrates, so adjust the portion according to your meal plan.

Each variation keeps the Shrimp Avocado base simple while giving you a different flavor.

Common Mistakes to Avoid

Do not overcook the shrimp.

Avoid using very soft avocados because they can become mushy.

Do not add the dressing too early.

Avoid sweetened yogurt or sugary sauces if you are trying to keep added sugar low.

Do not leave cooked shrimp at room temperature for long periods.

Avoid cutting all of the avocado several hours before serving.

Do not overcrowd the skillet.

Do not skip the lime juice because it helps balance the rich avocado.

Frequently Asked Questions

Can I use frozen shrimp?

Yes. Thaw the shrimp completely and pat them dry before seasoning.

Can I make this recipe without yogurt?

Yes. The yogurt dressing is optional. Lime juice, olive oil, and herbs are enough for a simple dressing.

Can I use cooked shrimp?

Yes. Add cooked shrimp near the end and warm them briefly. Avoid prolonged cooking.

Can I prepare the avocado ahead?

It is better to cut the avocado close to serving time. Fresh lime juice can help slow browning.

What can I serve with this recipe?

Leafy greens, roasted vegetables, cauliflower rice, or a measured portion of whole grains can work well.

Is this recipe low in carbohydrates?

The main ingredients are relatively low in carbohydrates, but total carbohydrate intake depends on portions and any side dishes. Individual nutrition needs vary.

Can I make it spicy?

Yes. Add jalapeño, cayenne, or extra red pepper flakes.

Can I use lemon instead of lime?

Yes. Lemon provides a slightly different but still fresh flavor.

How long does it keep?

For best quality, keep the cooked shrimp refrigerated and use them within 3 to 4 days. Prepare the avocado mixture closer to serving time.

Can I use chicken instead of shrimp?

Yes. Cooked chicken can replace shrimp, although the cooking method and time will change.

Nutrition Information

Approximate nutrition per serving, without optional rice or other sides:

Calories: 420 kcal
Protein: 32g
Carbohydrates: 18g
Fat: 27g
Fiber: 9g
Sugar: 3g
Sodium: 610mg

Nutrition values are estimates and can vary based on ingredient brands, avocado size, shrimp size, and serving portions.

Why You Will Love This Recipe

The biggest advantage of this recipe is how quickly it comes together.

The shrimp cook in only a few minutes.

The avocado mixture requires no cooking.

The dressing takes less than five minutes.

That makes the dish practical for busy days.

It is also colorful. Green avocado, red tomatoes, purple onion, fresh cilantro, and golden shrimp create an appealing plate.

The texture is just as enjoyable. Tender shrimp pair with creamy avocado and crisp vegetables.

The flavors are balanced without requiring a complicated sauce.

Lime adds brightness. Garlic provides savory depth. Smoked paprika adds warmth. Chili powder provides gentle heat.

This combination makes the Shrimp Avocado dish feel satisfying while keeping the preparation simple.

The recipe is also easy to adjust. You can increase the vegetables, change the herbs, or make the seasoning milder without changing the basic cooking method.

Final Thoughts

Shrimp Avocado Delight is a fresh and flexible recipe that can fit into many meal styles.

The seasoned shrimp bring protein and savory flavor.

Creamy avocado adds richness.

Cucumber and tomatoes provide freshness and crunch.

Lime juice keeps the flavors bright.

Fresh cilantro adds an aromatic finish.

The optional yogurt dressing creates an extra creamy layer without relying on a sugary sauce.

For meal preparation, keep the shrimp, vegetables, avocado, and dressing separate until you are ready to eat.

You can also change the seasoning to match your preferences. Add chili flakes for heat, herbs for freshness, or extra vegetables for more volume.

If you are managing diabetes, consider the full meal and your individual carbohydrate needs rather than relying on a recipe label alone.

The recipe is especially useful when you want something quick. It can move from refrigerator to table in a short time, and the colorful presentation makes it suitable for both everyday meals and casual entertaining.

For a lighter plate, serve it over leafy greens. For a more substantial meal, add a measured portion of whole grains or another side that fits your eating plan.

The combination of warm shrimp and cool avocado makes this Shrimp Avocado recipe especially enjoyable.

With simple ingredients, fresh flavors, and plenty of texture, Shrimp Avocado Delight can become an easy option for lunch, dinner, or meal prep.

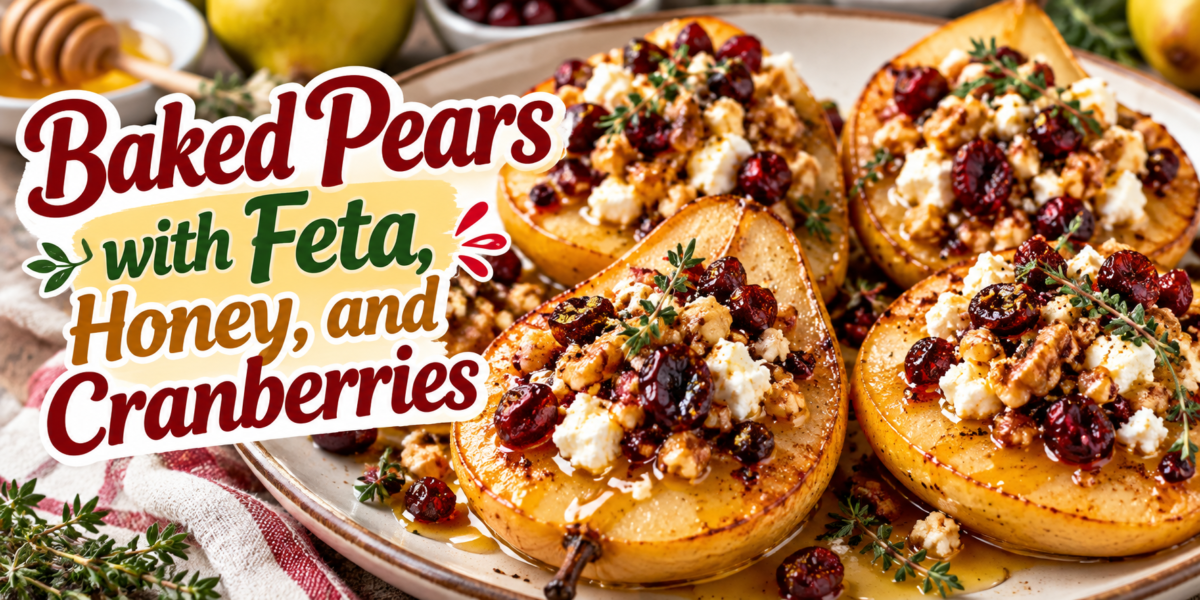
Baked Pears with Feta and Cranberries

Baked pears topped with feta cheese, dried cranberries, walnuts, honey, and fresh thyme

Baked Pears with Feta and Cranberries

Baked Pears with feta and cranberries are a delicious combination of sweet, salty, creamy, and crunchy flavors. Ripe but firm pears are roasted until tender, then topped with creamy feta cheese, tart dried cranberries, crunchy walnuts, fresh thyme, and a generous drizzle of honey.

These Baked Pears make a beautiful appetizer, side dish, light dessert, or brunch recipe. The natural sweetness of the pears becomes richer in the oven, while the feta adds a pleasant salty contrast. Cranberries bring a chewy texture and bright flavor, while walnuts add a satisfying crunch.

The recipe is simple enough for a weekday meal but attractive enough for a holiday table. It also requires only a handful of everyday ingredients.

Prep Time: 10 minutes
Cook Time: 25 minutes
Total Time: 35 minutes
Servings: 4 servings

Ingredients

For the Pears

4 ripe but firm pears, halved and cored

1 tablespoon olive oil

1/2 teaspoon ground cinnamon

1/4 teaspoon black pepper

1/4 teaspoon salt

For the Topping

1/2 cup crumbled feta cheese

1/2 cup dried cranberries

1/3 cup chopped walnuts

3 tablespoons honey

1 teaspoon fresh thyme leaves

1 tablespoon fresh lemon juice

1/2 teaspoon lemon zest

Optional Additions

1 tablespoon maple syrup

2 tablespoons chopped pecans

1/4 teaspoon red pepper flakes

2 tablespoons fresh mint

1 tablespoon balsamic glaze

Step-by-Step Instructions

Prepare the Pears

Start by preheating the oven to 375°F (190°C).

Wash the pears thoroughly and dry them with a clean kitchen towel.

Cut each pear in half lengthwise.

Use a small spoon or melon baller to remove the seeds and core from the center.

Try to keep a small cavity in each pear. This space will hold the feta, cranberries, and walnuts later.

Place the pear halves cut-side up in a baking dish.

Brush the pears lightly with olive oil.

Sprinkle them with cinnamon, salt, and black pepper.

Add fresh lemon juice over the pears.

The lemon juice adds brightness and also balances the natural sweetness of the fruit.

Firm pears work best because they soften during baking without falling apart.

For particularly sweet and tender Baked Pears, choose pears that are ripe but still firm when gently pressed.

Prepare the Topping

While the oven heats, prepare the topping.

Place the crumbled feta in a small bowl.

Add the dried cranberries and chopped walnuts.

Add the fresh thyme leaves and lemon zest.

Mix the ingredients gently.

Do not overmix the feta because you want some larger pieces to remain visible after baking.

The salty feta, sweet cranberries, and crunchy walnuts create a balanced topping.

If you prefer a sweeter flavor, add one teaspoon of maple syrup to the mixture.

For a more savory version, add a small pinch of black pepper.

Fill the Pears

Spoon the feta and cranberry mixture into the center of each pear half.

Do not pack the filling too tightly.

A light mound over each pear creates a beautiful presentation and allows the cheese to warm evenly.

Arrange the filled pears in the baking dish with a little space between each piece.

Drizzle approximately one tablespoon of honey over the pears.

Reserve the remaining honey for serving.

The honey will become warm and glossy as the pears bake.

This simple combination gives Baked Pears their signature sweet and savory flavor.

Bake the Pears

Place the baking dish in the preheated oven.

Bake for approximately 20 to 25 minutes.

The exact cooking time depends on the size and firmness of the pears.

Check them after 20 minutes.

The pears should become tender when pierced with a fork.

The feta should be warm, and the cranberries should become slightly plump.

The walnuts should develop a lightly toasted aroma.

Avoid overbaking the fruit.

Very soft pears can lose their shape and become difficult to serve.

The ideal texture is tender enough to cut easily while still holding the pear half together.

Add the Final Honey

Remove the baking dish from the oven.

Allow the pears to rest for approximately 5 minutes.

Drizzle the remaining honey over the top.

Add a few fresh thyme leaves.

For an extra elegant finish, add a small amount of lemon zest.

You can also drizzle a little balsamic glaze over the finished dish.

The combination of warm fruit, creamy feta, tart cranberries, and honey makes these Baked Pears especially delicious when served warm.

Tips for the Best Results

Choose pears that are ripe but firm.

Very soft pears can become mushy during baking.

Bosc, Anjou, and Bartlett pears can all work well. Choose pears that hold their shape when cooked.

Cut the pears evenly so they finish baking at approximately the same time.

Do not remove too much of the center when coring.

A small cavity gives the filling somewhere to sit.

Use good-quality feta for the best flavor.

Fresh thyme provides a bright herbal note, but dried thyme can be used when fresh herbs are unavailable.

Add honey according to your preferred sweetness.

If your pears are naturally very sweet, use a smaller amount of honey.

For a more savory dish, increase the black pepper slightly.

These simple tips help ensure that your Baked Pears are tender, flavorful, and attractive.

Easy Variations

Apple and Pear Version

Use a mixture of pear and apple halves.

Choose firm apples that hold their shape during baking.

The combination creates a delicious fruit variation with different textures.

Pecan Version

Replace the walnuts with chopped pecans.

Pecans have a naturally buttery flavor that works beautifully with honey and feta.

Maple Version

Replace the honey with pure maple syrup.

Maple syrup provides a warm flavor that pairs especially well with cinnamon.

Spicy Version

Add a tiny pinch of red pepper flakes to the feta mixture.

The mild heat creates an interesting contrast with the sweet fruit.

Herb Version

Add fresh rosemary or mint alongside the thyme.

Use herbs lightly so they do not overpower the pears.

Extra Creamy Version

Add a small amount of soft goat cheese with the feta.

The combination creates a richer filling.

These variations allow you to customize Baked Pears for different occasions and flavor preferences.

Serving Suggestions

Serve the warm pears as an appetizer before dinner.

They also make an excellent side dish for roasted chicken or turkey.

For brunch, place them on a large serving platter with fresh herbs.

You can serve them with warm crusty bread.

The bread is excellent for soaking up the honey and juices that collect in the baking dish.

For a lighter meal, pair the pears with a simple green salad.

A salad with arugula, cucumber, and lemon dressing provides a refreshing contrast.

You can also serve the pears as a dessert.

For dessert, add a small spoonful of Greek yogurt alongside each pear.

A little extra honey creates a naturally sweet finish.

These Baked Pears are especially attractive during autumn and winter gatherings.

Holiday Serving Ideas

This recipe works beautifully for Thanksgiving, Christmas, family dinners, and holiday brunches.

Arrange the pears on a large white serving platter.

Scatter extra cranberries and walnuts around the edges.

Add fresh thyme sprigs for decoration.

Drizzle honey over the entire platter just before serving.

You can also add a few thin pear slices around the cooked halves.

The warm golden color of the pears looks beautiful against the white feta and deep red cranberries.

For a festive presentation, use a combination of red and green herbs around the serving platter.

The simple presentation makes Baked Pears look more elaborate than they actually are.

Make-Ahead Instructions

You can prepare several parts of the recipe ahead of time.

Wash and halve the pears.

Remove the cores and brush them lightly with lemon juice.

Prepare the feta, cranberry, and walnut mixture.

Keep the components covered in the refrigerator.

When ready to cook, fill the pears and place them in the baking dish.

Bake shortly before serving.

For the best texture, avoid baking the pears several hours before you plan to serve them.

Freshly baked fruit has a better texture and aroma.

If you need to reheat leftovers, use a moderate oven rather than high heat.

Storage Instructions

Allow leftover pears to cool before storing.

Place them in an airtight container.

Refrigerate for up to 3 days.

Keep the pears covered to prevent them from absorbing odors from other foods.

When ready to serve, gently reheat them in a 350°F oven.

Heat until the center is warm.

Avoid overheating because the feta can become dry and the pears can become too soft.

Add fresh honey and thyme after reheating.

The fresh toppings will make leftover Baked Pears taste brighter.

Health and Nutrition Notes

Pears provide fiber and naturally occurring carbohydrates.

Cranberries contribute flavor and texture, although dried cranberries can contain added sugar.

Feta provides protein and calcium but can also contain a significant amount of sodium.

Walnuts contribute healthy fats and a pleasant crunch.

Honey provides sweetness, so the amount can be adjusted according to taste.

For a lighter version, reduce the honey and use a smaller amount of feta.

You can also increase the walnuts and herbs while reducing the sweet toppings.

Serving the pears with a green salad creates a balanced meal with fruit, vegetables, protein, and healthy fats.

These Baked Pears can be enjoyed as part of a varied and balanced eating pattern.

Common Mistakes to Avoid

Do not use pears that are already very soft.

Avoid cutting the pears into uneven sizes.

Do not overfill the pear cavities.

Too much filling can fall off during baking.

Avoid using excessive honey before baking because it can become too dark.

Do not bake the pears at an extremely high temperature.

High heat can soften the fruit too quickly.

Allow the pears to rest briefly after baking.

This helps the filling settle and makes them easier to serve.

Adding fresh herbs after baking keeps their color and flavor brighter.

Frequently Asked Questions

What are the best pears for baking?

Bosc, Anjou, and firm Bartlett pears are excellent choices. They soften during baking while still maintaining their shape.

Can I use soft pears?

You can, but very soft pears may become mushy. Firm pears provide a better texture.

Can I replace feta cheese?

Yes. Goat cheese, ricotta, or soft cream cheese can be used. Feta provides the strongest salty contrast.

Can I use fresh cranberries?

Yes, but dried cranberries provide a sweeter and chewier texture. Fresh cranberries will be more tart.

Can I replace walnuts?

Absolutely. Pecans, almonds, hazelnuts, or pistachios can all work well.

Can I make this recipe without honey?

Yes. Maple syrup can replace honey, or you can reduce the sweetener if your pears are naturally sweet.

Can I serve the pears cold?

Yes. They can be served at room temperature or chilled, although they are particularly enjoyable when warm.

Can I make Baked Pears for a party?

Yes. Prepare several pear halves and arrange them on a large platter just before serving.

Can I add cinnamon?

Yes. Cinnamon works beautifully with pears, cranberries, walnuts, and honey.

What can I serve with Baked Pears?

Green salad, crusty bread, roasted chicken, turkey, Greek yogurt, or a light grain dish all pair well.

Nutrition Information

Approximate nutrition per serving:

Calories: 285 kcal

Protein: 7g

Carbohydrates: 39g

Fat: 12g

Fiber: 6g

Sugar: 27g

Sodium: 330mg

Nutrition values are estimates and may vary depending on the pear size, feta, honey, cranberries, and walnuts used.

Why This Recipe Works

The success of this recipe comes from its balance of contrasting flavors.

Pears provide natural sweetness and a tender texture.

Feta contributes saltiness and creaminess.

Cranberries add tartness and chewiness.

Walnuts provide crunch.

Honey adds a smooth sweetness that brings the ingredients together.

Thyme adds an earthy herbal note.

Lemon prevents the dish from becoming overly sweet.

The oven brings all of these ingredients together while gently softening the pears.

The result is a dish that feels elegant but requires very little preparation.

Another advantage is its versatility.

You can serve Baked Pears as an appetizer, side dish, brunch recipe, or dessert.

The same basic recipe can also be adjusted with different nuts, cheeses, herbs, and sweeteners.

Final Thoughts

Baked Pears with feta and cranberries are a simple yet impressive recipe that combines sweet fruit with savory and salty ingredients.

The pears become tender and fragrant in the oven, while the feta warms and the cranberries become slightly plump.

Walnuts add a delicious crunch, and honey creates a glossy finish.

Fresh thyme and lemon keep the flavors balanced.

The recipe is easy enough for a normal weeknight but elegant enough for holiday dinners and special occasions.

You can serve the pears alongside roasted meats, add them to a brunch spread, or enjoy them as a light dessert with Greek yogurt.

For extra flavor, experiment with pecans, maple syrup, goat cheese, cinnamon, or fresh mint.

When choosing pears, remember that firm fruit gives the best results.

Allow the pears to bake until tender but not mushy.

Finish them with fresh honey and herbs immediately before serving.

With their beautiful colors and contrasting flavors, Baked Pears are a wonderful way to turn simple ingredients into an eye-catching dish.

Whether you serve them as an appetizer, side, brunch recipe, or dessert, Baked Pears offer a delicious combination of warm fruit, creamy feta, tart cranberries, crunchy nuts, and sweet honey in every bite.

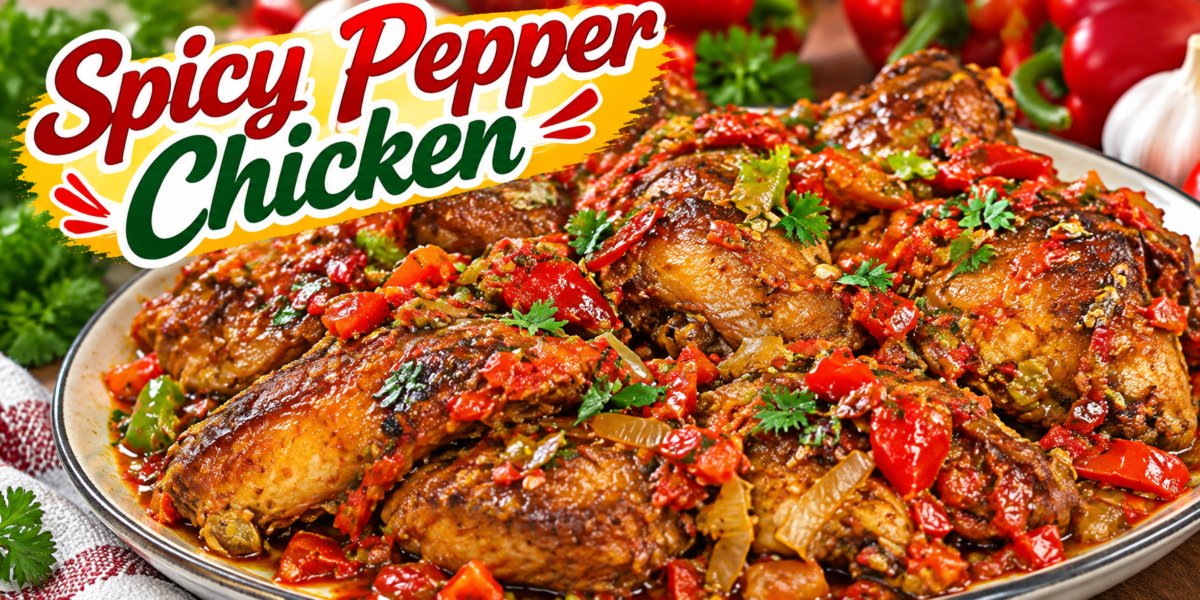
Spicy Pepper Chicken

Spicy Pepper Chicken with golden chicken pieces, red and green peppers, tomatoes, onions, fresh herbs, and savory sauce

Spicy Pepper Chicken

Spicy Pepper Chicken is a rich, flavorful chicken dish made with tender chicken, colorful bell peppers, onions, garlic, tomatoes, and aromatic spices. The chicken is browned until golden and then cooked with a savory pepper sauce that coats every piece.

This recipe is inspired by the delicious, glossy chicken dish shown in your reference image. It has a beautiful combination of roasted color, tender meat, sweet peppers, mild heat, and fresh herbs.

The secret to great Spicy Pepper Chicken is building flavor in layers. First, season and brown the chicken. Then sauté the onions, peppers, garlic, and tomatoes until they become soft and fragrant. Finally, combine everything and let the chicken simmer gently so it absorbs the flavorful sauce.

You can serve this dish with white rice, brown rice, mashed potatoes, couscous, flatbread, or a simple salad. It also works beautifully for family dinners because the ingredients are simple and the preparation is straightforward.

Prep Time: 20 minutes
Cook Time: 40 minutes
Total Time: 1 hour
Servings: 6 servings

Ingredients

For the Chicken

1 teaspoon smoked paprika

2 1/2 pounds bone-in chicken thighs and drumsticks

1/2 teaspoon garlic powder

1 teaspoon black pepper

3 tablespoons olive oil

1 teaspoon salt

1 teaspoon paprika

1/2 teaspoon onion powder

1/2 teaspoon dried oregano

1/4 teaspoon cayenne pepper, optional

1/2 teaspoon dried thyme

For the Pepper Sauce

1 large onion, chopped

1 yellow bell pepper, chopped

4 cloves garlic, minced

1 green bell pepper, chopped

2 medium tomatoes, diced

1 red bell pepper, chopped

1/2 teaspoon salt

2 tablespoons tomato paste

1 cup chicken broth

1/2 teaspoon ground cumin

1 teaspoon smoked paprika

1/2 teaspoon dried oregano

1 tablespoon fresh lemon juice

1/2 teaspoon black pepper

2 tablespoons fresh parsley, chopped

1/2 teaspoon red pepper flakes

2 tablespoons fresh cilantro, optional

Step-by-Step Instructions

Season the Chicken

Pat the chicken pieces dry with paper towels. Removing excess moisture helps the skin and surface develop a beautiful golden-brown color.

Place the chicken in a large bowl.

Add salt, black pepper, paprika, smoked paprika, garlic powder, onion powder, thyme, oregano, and cayenne pepper if you want extra heat.

Rub the seasoning over every piece.

Allow the chicken to rest for 10 minutes while you prepare the vegetables.

This seasoning mixture gives the Spicy Pepper Chicken its deep color and savory flavor.

Brown the Chicken

Heat a large, heavy skillet or Dutch oven over medium-high heat.

Add the olive oil.

Once the oil is hot, carefully place the chicken pieces into the pan.

Cook the chicken for about 4 to 5 minutes on each side.

The goal is not to cook the chicken completely at this stage. Instead, brown the outside and develop a flavorful crust.

Avoid overcrowding the pan. If necessary, brown the chicken in two batches.

Transfer the browned chicken to a clean plate.

The browned pieces create a flavorful base for Spicy Pepper Chicken and give the finished dish a richer appearance.

Cook the Onion and Peppers

Reduce the heat to medium.

Add the chopped onion to the same pan.

Cook for 3 to 4 minutes until the onion begins to soften.

Add the red, green, and yellow bell peppers.

Stir everything together.

Cook for another 5 to 6 minutes.

The peppers should become tender while still retaining some texture.

Add the minced garlic and cook for about 30 seconds.

The garlic should become fragrant without burning.

This colorful mixture forms the vegetable base of the Spicy Pepper Chicken.

Add the Tomatoes

Add the diced tomatoes to the pan.

Stir in the tomato paste.

Add smoked paprika, cumin, oregano, black pepper, salt, and red pepper flakes.

Cook for about 3 minutes.

The tomatoes will begin releasing their juices while the tomato paste becomes richer and slightly caramelized.

Stir frequently so nothing sticks to the bottom of the pan.

The combination of tomatoes and peppers creates a thick, flavorful sauce for Spicy Pepper Chicken.

Add the Chicken Broth

Pour the chicken broth into the pan.

Use a wooden spoon to gently scrape the bottom of the skillet.

Those browned bits contain plenty of flavor.

Stir the sauce until the tomato paste is fully incorporated.

Bring the mixture to a gentle simmer.

The sauce should look rich and slightly thick.

Return the Chicken

Place the browned chicken pieces back into the pan.

Arrange them so the pieces are partially surrounded by the pepper and tomato sauce.

Cover the skillet with a lid.

Reduce the heat to low.

Allow the chicken to simmer for about 25 to 30 minutes.

Turn the chicken once halfway through cooking.

The chicken should become tender and fully cooked.

For food safety, poultry should reach an internal temperature of 165°F (74°C) at the thickest part.

The slow simmer allows the chicken to absorb the flavors from the peppers, tomatoes, garlic, and spices.

Finish the Sauce

Remove the lid during the final 5 minutes.

Allow some of the liquid to evaporate.

The sauce should become thick enough to coat the chicken without becoming dry.

Taste the sauce.

Add more salt, black pepper, or red pepper flakes if needed.

Add fresh lemon juice just before turning off the heat.

The lemon brightens the rich sauce and balances the smoky spices.

This final step makes the Spicy Pepper Chicken taste fresher and more balanced.

Garnish and Serve

Turn off the heat.

Sprinkle fresh parsley and cilantro over the chicken.

Allow the dish to rest for about 5 minutes before serving.

The short resting period allows the juices to settle and gives the sauce time to thicken slightly.

Serve the chicken warm with plenty of the pepper sauce spooned over the top.

Tips for the Best Results

Use bone-in chicken pieces for deeper flavor and a tender texture.

Pat the chicken dry before seasoning.

Brown the chicken properly before adding the vegetables.

Do not rush the onion and pepper step because softened vegetables create a better sauce.

Fresh garlic gives the dish a stronger aroma.

Use a mixture of red, green, and yellow peppers for a colorful presentation.

Adjust the red pepper flakes according to your preferred level of heat.

For a milder version, skip the cayenne and reduce the red pepper flakes.

For extra heat, add sliced fresh chili peppers.

A small amount of lemon juice at the end keeps the flavors bright.

These simple techniques help create tender, flavorful Spicy Pepper Chicken every time. Fresh peppers and herbs can make Spicy Pepper Chicken taste even brighter.

Easy Variations

Extra Spicy Version

Add sliced jalapeños or fresh red chilies with the bell peppers.

You can also increase the cayenne pepper.

Creamy Version

Stir in 1/4 cup of heavy cream during the final few minutes.

The cream creates a smoother sauce and balances the heat.

Mediterranean Version

Add sliced olives, oregano, fresh parsley, and a little feta cheese before serving.

Tomato-Rich Version

Add another cup of diced tomatoes or crushed tomatoes for a saucier dish.

Boneless Version

Boneless chicken thighs can replace bone-in pieces.

Reduce the cooking time and check the chicken earlier to prevent overcooking.

Each variation gives Spicy Pepper Chicken a slightly different character while keeping the basic recipe easy.

Serving Suggestions

Serve the chicken over fluffy white rice to soak up the flavorful sauce.

Brown rice also works well for a heartier meal.

Warm naan, pita, or another flatbread is perfect for scooping up the pepper sauce.

You can also serve the chicken with mashed potatoes.

For a lighter meal, pair it with a fresh cucumber and tomato salad.

Roasted vegetables are another excellent side.

Couscous or quinoa can also be used as a grain base.

For entertaining, arrange the chicken on a large serving platter and spoon the colorful pepper sauce around the pieces.

The vibrant vegetables make Spicy Pepper Chicken especially attractive on a dinner table. Serve Spicy Pepper Chicken with rice or warm bread to soak up the flavorful sauce.

Storage and Reheating

Allow leftovers to cool before storing.

Place the chicken and sauce in an airtight container.

Refrigerate for up to 4 days.

For the best texture, reheat the chicken gently in a covered skillet.

Add a small splash of chicken broth if the sauce has become too thick.

You can also reheat individual portions in the microwave.

Heat until the chicken is completely warmed through.

Avoid repeatedly reheating the entire batch.

The flavors often become even richer after resting overnight, making Spicy Pepper Chicken a useful make-ahead dinner. Leftover Spicy Pepper Chicken can be enjoyed again after gentle reheating.

Frequently Asked Questions

Can I use chicken breast?

Yes. Chicken breasts can be used, but they cook faster than thighs. Watch them carefully so they remain tender.

Can I make this recipe without spicy peppers?

Yes. Reduce or remove the cayenne and red pepper flakes for a mild version.

Can I use frozen peppers?

Yes. Frozen peppers can work, although fresh peppers provide better texture.

Can I make this recipe ahead of time?

Yes. Prepare the dish, cool it properly, and refrigerate it. Reheat gently before serving.

What can I serve with it?

Rice, couscous, quinoa, potatoes, naan, pita, and fresh salads all pair well with the chicken.

Can I use boneless chicken thighs?

Absolutely. Boneless thighs are tender and flavorful. Adjust the cooking time because they cook faster.

How can I make the sauce thicker?

Simmer the dish uncovered for several minutes until some of the liquid evaporates.

How can I make it hotter?

Add fresh chilies, cayenne pepper, or additional red pepper flakes.

Can I add cheese?

Yes. A small amount of feta can provide a delicious salty contrast.

Nutrition Information

Approximate nutrition per serving:

Calories: 430 kcal

Protein: 38g

Carbohydrates: 13g

Fat: 25g

Fiber: 3g

Sugar: 6g

Sodium: 720mg

Nutrition values are estimates and can vary depending on the chicken pieces, amount of oil, and serving size.

Why You Will Love This Recipe

This recipe brings together tender chicken and colorful vegetables in one flavorful skillet.

The browned chicken provides a rich foundation.

Bell peppers add sweetness and color.

Tomatoes create a naturally flavorful sauce.

Garlic adds savory depth.

Smoked paprika gives the dish a warm, smoky character.

Fresh lemon juice balances the richness at the end.

The recipe also uses everyday ingredients, so you do not need a long shopping list.

It is easy to adjust the heat, making it suitable for both mild and spicy food lovers.

Another advantage is its versatility. You can serve Spicy Pepper Chicken with rice for a complete dinner or with warm bread for a more casual meal.

Final Thoughts

Spicy Pepper Chicken is a comforting, colorful, and flavorful meal that brings together golden chicken, sweet peppers, tomatoes, onions, garlic, and warm spices.

The chicken is first browned to create a rich exterior. The vegetables are then cooked until tender and fragrant. Finally, everything simmers together in a savory tomato-pepper sauce.

The result is juicy chicken coated in a glossy sauce with plenty of colorful peppers in every bite.

Serve it over rice, with warm bread, or alongside a fresh salad.

You can also adjust the spice level, use different chicken cuts, or add your favorite vegetables.

Whether you are preparing a family dinner or looking for a flavorful meal for guests, Spicy Pepper Chicken is a simple recipe with plenty of bold flavor. Spicy Pepper Chicken is a delicious option for family dinners, weekend meals, and casual entertaining.

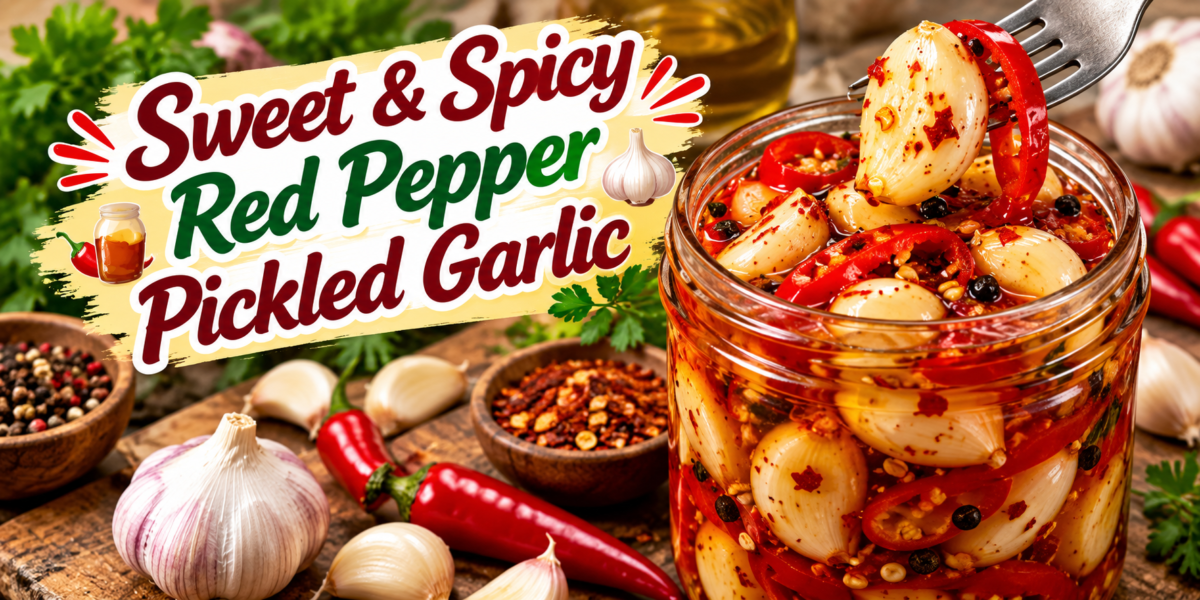
Sweet & Spicy Red Pepper Pickled Garlic

Sweet and spicy pickled garlic cloves with red pepper slices, vinegar, chili flakes, and herbs in a glass jar

Sweet & Spicy Red Pepper Pickled Garlic

Pickled Garlic is a sweet, tangy, crunchy, and spicy refrigerator condiment made with fresh garlic cloves, red peppers, vinegar, sugar, and simple seasonings. The garlic becomes flavorful and tender while keeping a pleasant bite.

This Pickled Garlic recipe is inspired by the sweet-and-spicy garlic shown in your reference image. It is delicious straight from the refrigerator and works beautifully with sandwiches, salads, grilled meats, cheese boards, burgers, wraps, and rice bowls.

The combination of vinegar and sugar creates a balanced sweet-and-sour flavor. Red pepper adds warmth without overpowering the garlic, while a few simple spices give the brine extra depth.

Because this is a refrigerator pickle, it should be kept refrigerated rather than treated as a shelf-stable canned product. Properly acidified pickled foods can be stored safely in the refrigerator, while shelf-stable preservation requires a tested canning recipe and process.

Prep Time: 15 minutes
Cook Time: 5 minutes
Pickling Time: 24 hours
Total Time: About 25 minutes plus chilling

Ingredients

For the Pickled Garlic

2 cups fresh garlic cloves, peeled

1 cup white vinegar, preferably 5% acidity

1/2 cup water

1/3 cup granulated sugar

1 teaspoon salt

1/2 cup thinly sliced red chili peppers or red bell peppers

1 teaspoon black peppercorns

1/2 teaspoon red pepper flakes

1 teaspoon mustard seeds

1/2 teaspoon dried oregano

1 bay leaf

1/2 teaspoon smoked paprika

Optional Additions

1 tablespoon honey for a softer sweetness

1/2 teaspoon chili flakes for extra heat

2 tablespoons sliced jalapeños

1 small strip of lemon peel

1 tablespoon fresh parsley for serving

Step-by-Step Instructions

Prepare the Garlic

Start by separating the garlic cloves from the bulb.

Remove the loose outer skin.

Peel each clove carefully and trim away any damaged areas.

Wash the cloves briefly under cool running water and dry them thoroughly.

For larger cloves, you can leave them whole. Smaller cloves can also remain whole because they will absorb the pickling liquid gradually.

Fresh garlic gives Pickled Garlic its best flavor and texture, so choose firm cloves without soft spots, mold, or bruising.

Prepare the Red Peppers

Wash the red peppers and remove the stems.

Slice them into thin rings.

If you prefer a milder pickle, remove most of the seeds.

Keep some seeds if you enjoy a stronger spicy flavor.

The red peppers add beautiful color and create the sweet-and-spicy character of the finished Pickled Garlic.

Make the Pickling Liquid

Place the white vinegar, water, sugar, and salt in a small saucepan.

Add the black peppercorns, mustard seeds, red pepper flakes, oregano, smoked paprika, and bay leaf.

Stir the mixture gently.

Bring it to a gentle simmer over medium heat.

Continue heating until the sugar and salt dissolve completely.

Do not boil the mixture aggressively for a long time.

The goal is simply to create a hot, well-mixed brine.

A vinegar-based brine is an important part of pickling because acidification lowers the pH of the food. Research-based guidance emphasizes using appropriate acid levels for safe preservation.

Add the Garlic

Add the peeled garlic cloves to the warm pickling liquid.

Let them simmer gently for about 2 minutes.

Do not cook the garlic until completely soft.

A short heating time helps take away some of the raw sharpness while keeping the cloves pleasantly firm.

Add the sliced red peppers during the final minute.

Turn off the heat.

The garlic should still have some texture because it will continue absorbing flavor while it chills.

This quick step gives Pickled Garlic a balanced texture instead of making the cloves mushy.

Fill the Jar

Use a clean glass jar with a tight-fitting lid.

Carefully transfer the garlic and peppers into the jar.

Pour the warm pickling liquid over the garlic until the cloves are completely covered.

Leave a little space at the top of the jar.

Make sure there are no large air pockets trapped between the garlic cloves.

Allow the jar to cool briefly.

Close the lid securely.

Place the jar in the refrigerator once it has cooled.

For refrigerator pickles, clean jars and utensils help reduce the risk of contamination because the filled jars are not being processed as shelf-stable canned foods.

Let the Flavors Develop

For the best flavor, let the Pickled Garlic chill for at least 24 hours before serving.

The garlic will gradually absorb the vinegar, sugar, pepper, and herbs.

After 24 hours, the flavor will be tangy, slightly sweet, savory, and spicy.

After several days, the flavor becomes even more developed.

Always use a clean utensil when removing garlic from the jar.

Tips for the Best Pickled Garlic

Choose firm, fresh garlic cloves.

Avoid cloves with mold, soft areas, or visible damage.

Use vinegar with a clearly stated acidity, preferably 5% acidity, rather than an unknown homemade vinegar.

Keep the garlic completely covered by the pickling liquid.

Do not add fresh oil to the jar.

Store the finished pickle in the refrigerator.

Use a clean fork or spoon each time you remove garlic.

If you want more heat, increase the red pepper flakes or add sliced chili peppers.

For a sweeter flavor, slightly increase the sugar.

A little honey can also be added for flavor, although sugar is not the food-safety component of the pickle.

How to Serve Pickled Garlic

There are many delicious ways to enjoy this recipe.

Serve Pickled Garlic directly from the refrigerator as a snack.

Add chopped cloves to sandwiches for a sharp, tangy bite.

Mix sliced garlic into green salads.

Serve it alongside grilled chicken or steak.

Add it to burgers and wraps.

Place it on a Mediterranean-style cheese board with olives, feta, and fresh vegetables.

Chop the cloves and stir them into hummus.

Add them to grain bowls with rice, quinoa, cucumber, and tomatoes.

The sweet-and-spicy flavor also works well with roasted vegetables.

Flavor Variations

Extra Spicy

For a hotter version, use fresh red chilies and increase the red pepper flakes.

Mild and Sweet

Remove most of the pepper seeds and add a little extra sugar.

Mediterranean Style

Add oregano, thyme, lemon peel, and a few black peppercorns.

Smoky Version

Increase the smoked paprika slightly.

Honey Garlic Pickle

Add a small amount of honey after removing the brine from the heat.

These variations allow you to create different versions of Pickled Garlic without changing the basic method.

Storage Instructions

Keep the finished jar refrigerated at 40°F (4°C) or below.

This recipe is intended as a refrigerator pickle, not a shelf-stable canned product. Refrigerator pickles are specifically different from properly processed canned pickles.

Do not store the jar at room temperature.

Do not place the jar in a pantry or cupboard.

Keep the garlic covered with the brine.

Always use clean utensils when serving.

If you notice mold, unusual bubbling, an off smell, leaking, or another unexpected change, discard the product without tasting it. USDA guidance also recommends avoiding questionable foods rather than tasting them to determine safety.

For this homemade version, making smaller batches is a practical way to maintain quality.

Important Food Safety Note

Garlic preservation needs extra care because garlic is a low-acid vegetable. Vinegar-based pickling can make foods safer by lowering their pH, but safe shelf-stable canning requires a research-tested recipe and processing method.

This recipe is therefore written as a refrigerator pickle.

Do not leave the finished jar sitting on the counter for extended periods.

Do not add oil to the jar for storage. USDA specifically warns about the risks associated with garlic stored in oil at room temperature

If you want to make a shelf-stable canned product, use a tested preservation recipe from a recognized food-preservation authority rather than adapting a refrigerator recipe.

Frequently Asked Questions

How long does Pickled Garlic need before eating?

You can taste it after about 24 hours. The flavor becomes stronger as the garlic continues to sit in the brine.

Does Pickled Garlic need to be refrigerated?

Yes. This recipe is designed specifically for refrigerator storage.

Can I use apple cider vinegar?

You can use it for flavor if it has the appropriate labeled acidity, but white vinegar provides a cleaner color and sharper traditional pickle flavor.

Can I make the garlic less spicy?

Yes. Reduce the red pepper flakes and remove the seeds from the fresh peppers.

Can I make it sweeter?

Yes. Add a little more sugar according to your taste.

Can I use peeled store-bought garlic?

Yes, provided the garlic is fresh and in good condition.

Why does the garlic change color?

Garlic can sometimes develop a blue or green tint during pickling because of natural compounds reacting to acidity. Color changes can occur during pickling and do not automatically mean spoilage, but always discard food showing mold, unusual odors, or other signs of spoilage.

Can I use Pickled Garlic in salads?

Absolutely. Chop the cloves finely and mix them with lettuce, tomatoes, cucumber, olives, and feta.

Can I serve it with grilled meat?

Yes. The tangy flavor works particularly well alongside grilled chicken, beef, lamb, or vegetables.

Can I add onions?

Yes. Thinly sliced red onions can be added to the jar for extra sweetness and crunch.

Nutrition Information

Approximate nutrition per serving:

Calories: 45 kcal

Protein: 1g

Carbohydrates: 9g

Fat: 0g

Fiber: 1g

Sugar: 7g

Sodium: 190mg

Nutrition values are estimates and can vary depending on the exact amount of sugar, garlic, vinegar, and peppers used.

Why You Will Love This Recipe

Pickled Garlic is one of those simple homemade condiments that can transform everyday meals.

The cloves are tangy from vinegar, slightly sweet from sugar, and spicy from red peppers.

They add a powerful flavor without requiring a complicated cooking process.

The recipe is also flexible. You can adjust the sweetness and heat according to your preference.

Another advantage is that the garlic can be prepared ahead of time. Once it has chilled and absorbed the brine, you can add it to meals whenever you need an extra burst of flavor.

The combination of garlic and red pepper is especially good with rich foods because the acidity helps provide contrast.

Try it with grilled meats, creamy dips, sandwiches, roasted vegetables, or a simple salad.

Final Thoughts

Sweet and Spicy Pickled Garlic is a flavorful refrigerator condiment that combines fresh garlic, vinegar, sweetness, red peppers, and aromatic spices.

The preparation is straightforward. Prepare the garlic, make the brine, warm the cloves briefly, transfer everything to a clean jar, and refrigerate.

After the garlic rests, the cloves develop a delicious combination of tangy, sweet, savory, and spicy flavors.

This Pickled Garlic can become a useful addition to your refrigerator because a small amount can add plenty of character to everyday meals.

Use it on sandwiches, salads, burgers, rice bowls, grilled meats, cheese boards, or simply enjoy a chilled clove when you want a bold snack.

For best results, remember that this is a refrigerator recipe rather than a shelf-stable canning recipe. Keep it cold, use clean utensils, and discard it if you notice signs of spoilage.

With its bright red peppers, tender garlic cloves, and flavorful vinegar brine, this Pickled Garlic is an easy homemade condiment that brings a sweet and spicy kick to almost any meal.

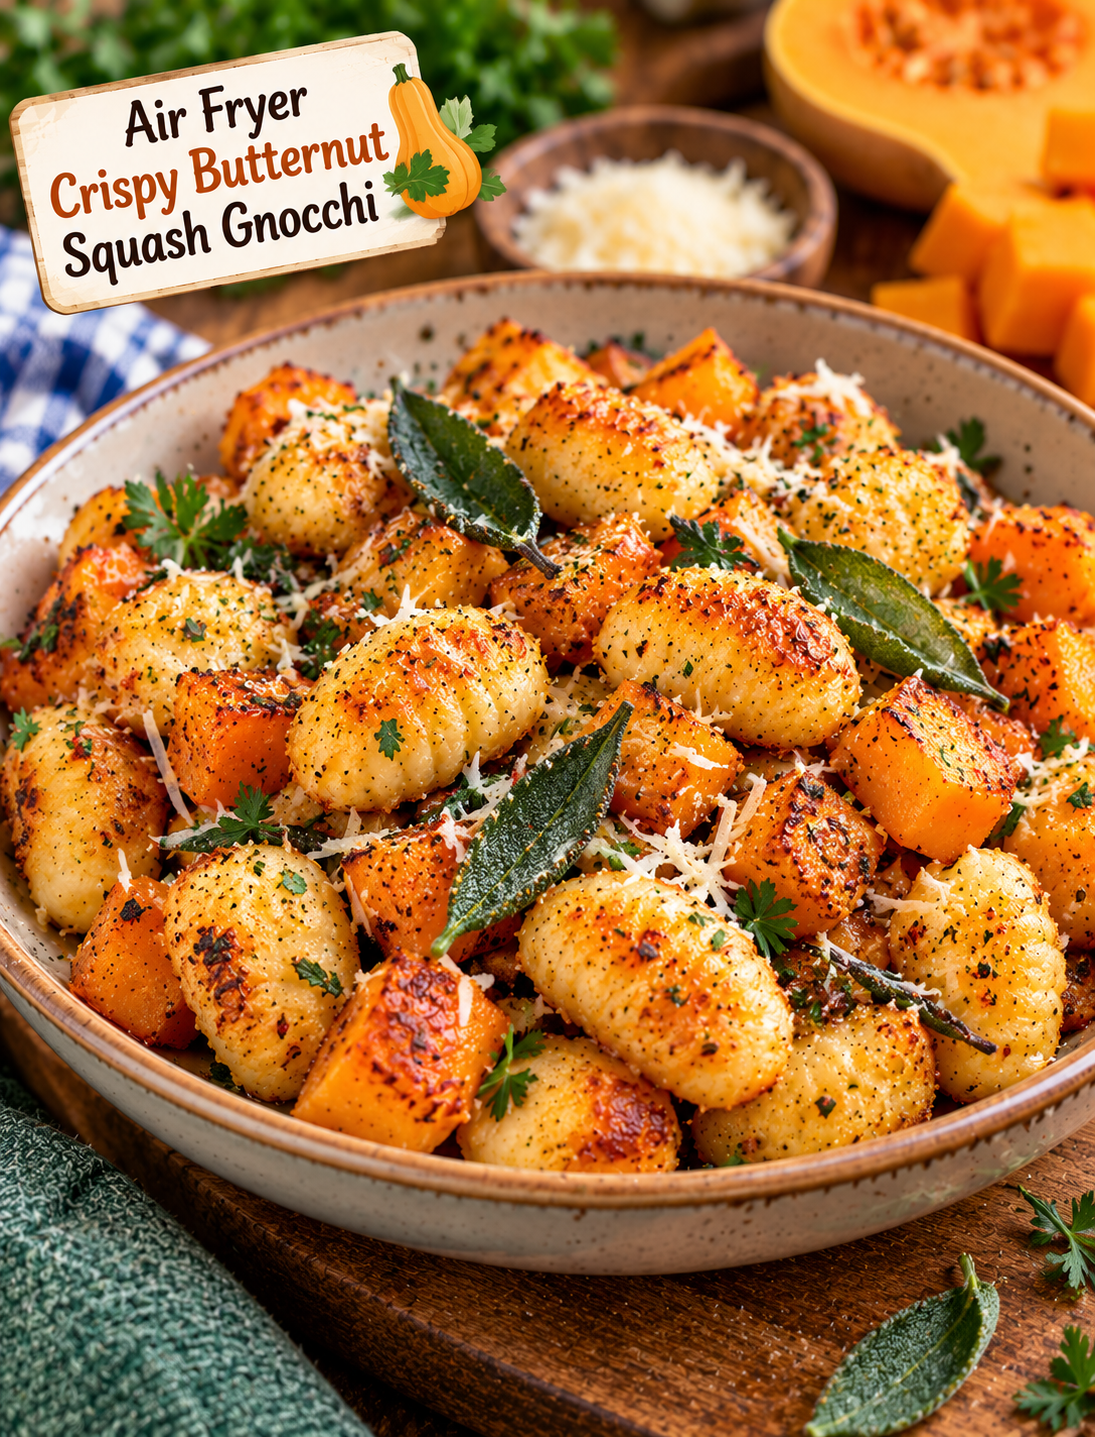
Air Fryer Crispy Butternut Squash Gnocchi

Crispy air fryer butternut squash gnocchi with Parmesan, sage, and roasted squash

Air Fryer Crispy Butternut Squash Gnocchi

When you want a cozy fall dinner without spending a lot of time in the kitchen, Air Fryer Crispy Butternut Squash Gnocchi is an easy recipe to keep on hand. Soft potato gnocchi turns golden and crisp in the air fryer, while roasted butternut squash adds a sweet, tender bite.

The combination of savory garlic, fresh herbs, Parmesan, and naturally sweet squash makes this dish comforting without feeling heavy. It works as a quick weeknight meal, a seasonal side dish, or an easy vegetarian lunch.

Unlike boiled gnocchi, this method skips the large pot of water. The gnocchi goes straight into the air fryer with a little oil and seasoning, which helps create crisp edges while keeping the inside tender.

Why You’ll Love This Recipe

  • Crispy texture: Air frying gives the gnocchi golden edges without deep frying.
  • Easy preparation: Most of the work involves tossing the ingredients with simple seasonings.
  • Fall-friendly flavor: Butternut squash, sage, garlic, and Parmesan create a classic seasonal combination.
  • Vegetarian: The recipe is naturally meat-free and works well as a hearty side or main dish.
  • Quick cleanup: Everything cooks in the air fryer with minimal kitchen mess.
  • Flexible ingredients: You can use fresh or shelf-stable gnocchi and adjust the herbs to your taste.
  • Family-friendly: The mild sweetness of squash balances the savory seasoning and cheese.

Ingredients You’ll Need

Main Ingredients

  • 1 pound shelf-stable or refrigerated potato gnocchi
  • 2 cups peeled butternut squash, cut into small ½-inch cubes
  • 1½ tablespoons olive oil
  • 2 cloves garlic, finely minced
  • ½ teaspoon Italian seasoning
  • ½ teaspoon smoked paprika
  • ¼ teaspoon black pepper
  • ¼ teaspoon salt
  • ½ teaspoon fresh or dried sage
  • ⅓ cup grated Parmesan cheese
  • 1 tablespoon chopped fresh parsley

Optional Finishing Ingredients

  • 1 tablespoon melted butter
  • Extra Parmesan
  • Fresh sage leaves
  • A small drizzle of maple syrup
  • Pinch of red pepper flakes
  • Toasted pumpkin seeds

Cutting the squash into small, even pieces is important because it allows the vegetables to cook at nearly the same rate as the gnocchi.

How to Make Air Fryer Crispy Butternut Squash Gnocchi

Step 1: Prepare the Butternut Squash

Peel the butternut squash and remove the seeds.

Cut the squash into small cubes that are roughly ½ inch in size.

Try to keep the pieces similar in size so they cook evenly.

Place the cubes in a large bowl.

Add 1 tablespoon of olive oil, salt, black pepper, smoked paprika, and sage.

Toss until every piece is lightly coated.

Step 2: Season the Gnocchi

Add the gnocchi to a separate bowl.

Do not boil the gnocchi first. Using it directly from the package helps the pieces develop a crisp exterior in the air fryer.

Add the remaining olive oil, minced garlic, and Italian seasoning.

Toss gently until the gnocchi is evenly coated.

Step 3: Preheat the Air Fryer

Preheat your air fryer to 400°F (200°C) for about 3 minutes.

A preheated basket helps the gnocchi begin browning quickly and promotes better crisping.

Lightly spray the basket if your air fryer tends to stick.

Step 4: Cook the Butternut Squash

Place the seasoned squash in the air fryer basket.

Spread it into as close to a single layer as possible.

Air fry at 400°F for 8 minutes.

Shake the basket once halfway through cooking.

The squash should begin to soften and develop lightly browned edges.

Step 5: Add the Gnocchi

Add the seasoned gnocchi to the basket with the partially cooked squash.

Toss or shake the basket carefully so the ingredients are distributed evenly.

Continue air frying at 400°F for another 7–10 minutes.

Shake the basket every 3–4 minutes to encourage even browning.

The gnocchi should look golden and crisp on the outside, while the squash should be tender when pierced with a fork.

Step 6: Add Parmesan

Transfer the hot gnocchi and squash to a large bowl.

Immediately sprinkle the Parmesan cheese over the top.

Toss gently so the cheese sticks to the warm ingredients.

For a richer finish, add 1 tablespoon of melted butter before tossing.

Step 7: Finish and Serve

Add fresh parsley and a few thinly sliced sage leaves.

For a sweet-savory fall flavor, add a very small drizzle of maple syrup.

If you enjoy heat, finish with a pinch of red pepper flakes.

Serve immediately while the gnocchi is crisp and the squash is warm.

Tips for Extra-Crispy Gnocchi

Do not boil the gnocchi first.
Shelf-stable and refrigerated gnocchi can cook directly in the air fryer, which helps the outside become crisp.

Avoid overcrowding.
Spread the ingredients into a loose layer so hot air can circulate around each piece.

Cut the squash small.
Large cubes take longer to become tender and may finish after the gnocchi.

Use enough oil to coat.
A light coating helps the surfaces brown without making the dish greasy.

Shake during cooking.
Moving the ingredients exposes different sides to the hot air and improves browning.

Add Parmesan at the end.
Adding it too early can cause the cheese to burn before the squash is tender.

How to Choose the Right Gnocchi

Shelf-stable potato gnocchi is convenient because it can be stored in the pantry and added directly to the air fryer.

Refrigerated gnocchi also works well and may have a softer texture before cooking.

Frozen gnocchi can be used, but it may require a few additional minutes of cooking time. Check the package and watch the texture closely during the final minutes.

For this recipe, potato gnocchi gives the best contrast between a crisp exterior and tender center.

Easy Flavor Variations

Garlic Butter Parmesan

Replace some of the olive oil with melted butter and add extra garlic. Finish with Parmesan and chopped parsley.

Maple Sage

Add 1 teaspoon of pure maple syrup after cooking and toss with fresh sage. The maple complements the natural sweetness of the squash.

Spicy Parmesan

Add ¼ teaspoon of red pepper flakes with the seasoning for a gentle kick.

Cranberry Pecan

After cooking, toss in a small handful of dried cranberries and toasted chopped pecans for a festive fall side dish.

Mediterranean Style

Skip the sage and add oregano, feta cheese, sun-dried tomatoes, and fresh parsley for a brighter flavor profile.

What to Serve With Crispy Butternut Squash Gnocchi

This dish can be served as a vegetarian main course or paired with a protein for a larger meal.

Good pairings include:

  • Roasted chicken breast
  • Air fryer turkey meatballs
  • Grilled salmon
  • Garlic green beans
  • Simple arugula salad
  • Roasted Brussels sprouts
  • Steamed broccoli
  • Cranberry walnut salad

For a complete fall dinner, serve the gnocchi alongside roasted chicken and a simple green salad.

How to Store Leftovers

Allow leftovers to cool before transferring them to an airtight container.

Refrigerate for up to 3 days.

For the best texture, reheat the leftovers in the air fryer at 375°F for 3–5 minutes.

Avoid reheating them in the microwave if you want to keep the gnocchi crisp.

If the leftovers seem dry, add a small amount of olive oil before reheating.

Can You Make This Recipe Ahead?

You can prepare the squash in advance by peeling and cutting it up to one day before cooking.

Store the prepared squash in an airtight container in the refrigerator.

The gnocchi can remain sealed until you are ready to cook.

For the best texture, season and air fry the ingredients shortly before serving rather than fully cooking them hours ahead.

Common Mistakes to Avoid

Using large squash cubes: They may remain firm while the gnocchi becomes too dark.

Overloading the basket: Crowding traps moisture and reduces crisping.

Using too much oil: Excess oil can make the gnocchi heavy instead of crisp.

Adding Parmesan too early: The cheese can brown too quickly.

Skipping the shake: Ingredients can cook unevenly if they stay in the same position.

Overcooking the gnocchi: Check it during the final few minutes because air fryer models vary.

Frequently Asked Questions

Can you air fry gnocchi without boiling it?

Yes. Shelf-stable and refrigerated potato gnocchi can be seasoned and cooked directly in the air fryer for a crisp exterior.

Do I need to peel butternut squash?

Yes, removing the tough outer skin gives the squash a tender texture and helps the seasoning coat the flesh evenly.

What temperature is best for crispy gnocchi?

Cooking at 400°F (200°C) provides enough heat to brown the gnocchi and roast the squash efficiently.

Can I use frozen butternut squash?

Yes. Frozen cubes can be used, but they may release more moisture and require a few extra minutes to brown.

Can I use frozen gnocchi?

Yes, although frozen gnocchi may need additional cooking time; check it frequently near the end.

Is this recipe vegetarian?

Yes, the recipe is vegetarian when prepared with Parmesan made without animal rennet; check the cheese label if this matters to you.

How do I make the gnocchi crispier?

Avoid overcrowding the basket, use a light coating of oil, and shake the basket several times during cooking.

Can I make this recipe without Parmesan?

Yes. You can replace Parmesan with nutritional yeast, crumbled feta, or another hard cheese depending on the flavor you want.

Final Thoughts

Air Fryer Crispy Butternut Squash Gnocchi is an easy way to turn a few simple ingredients into a cozy fall dish. The potato gnocchi develops crisp, golden edges while the butternut squash becomes tender and lightly caramelized.

Garlic, sage, Italian seasoning, and Parmesan bring savory flavor, while the natural sweetness of the squash adds balance. A small maple drizzle makes the dish even more seasonal without overpowering the other ingredients.

Because the recipe takes little prep and uses the air fryer instead of several pans, it is especially useful for busy weeknight dinners. Serve it as a vegetarian main dish, a holiday side, or a warm addition to a fall family meal.