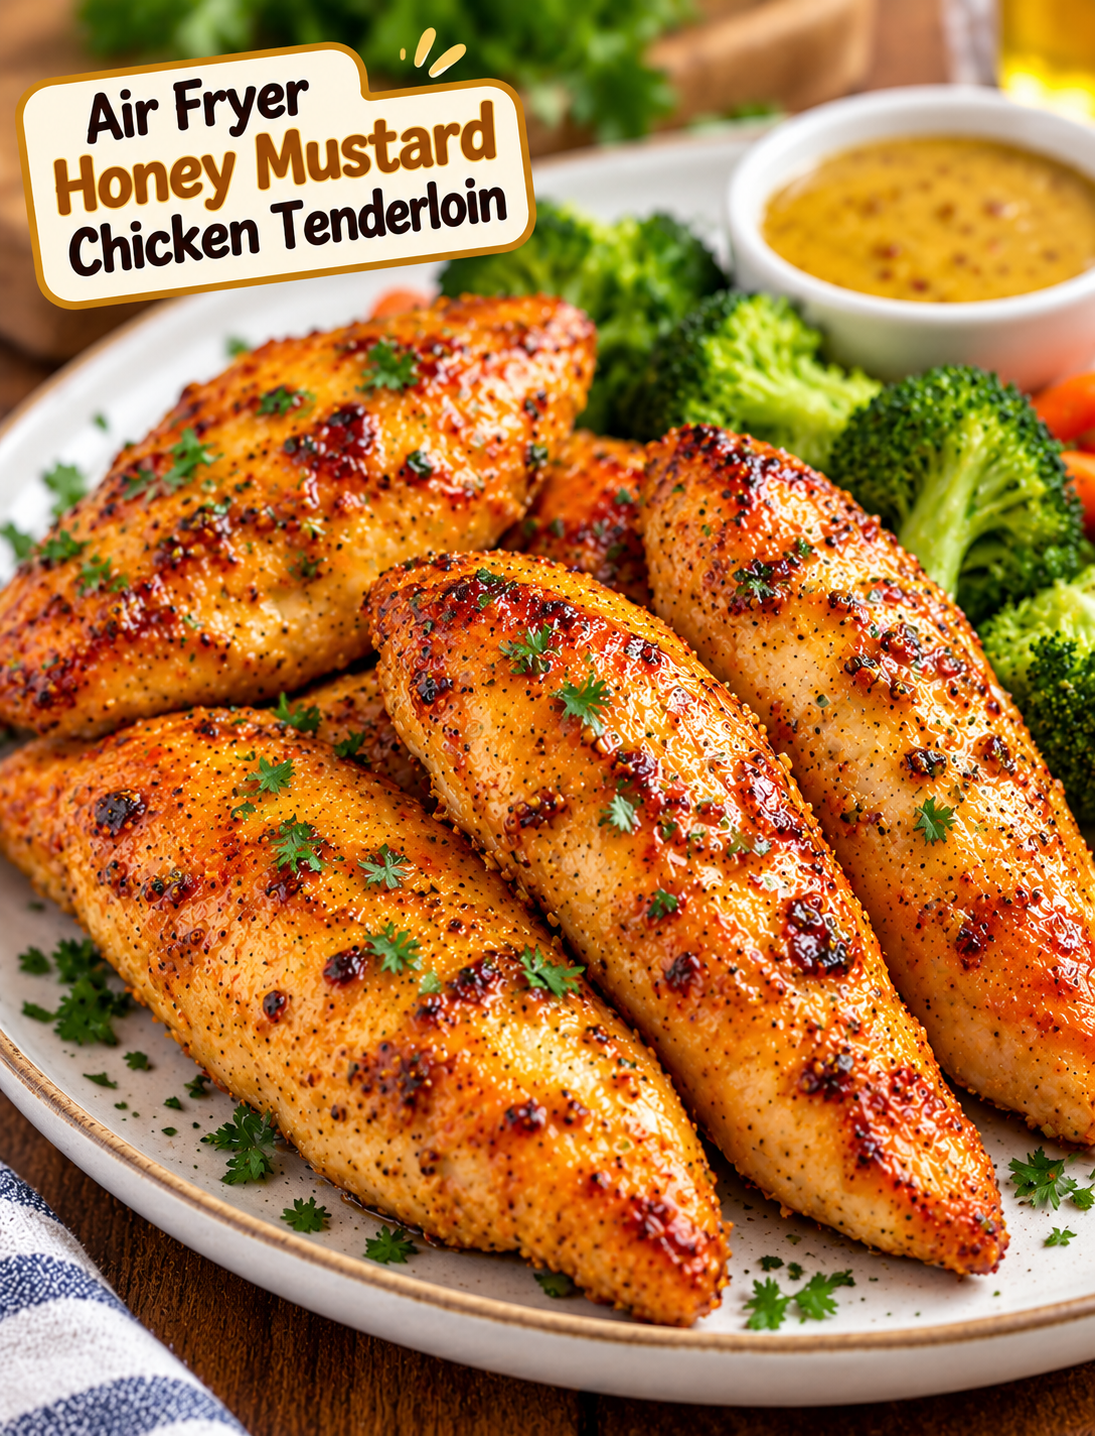
Air Fryer Honey Mustard Chicken Tenderloin

Air fryer honey mustard chicken tenderloins with a golden glaze served with vegetables

Air Fryer Honey Mustard Chicken Tenderloin

If you need a fast dinner that tastes like you spent much longer in the kitchen, Air Fryer Honey Mustard Chicken Tenderloin is a great choice. The chicken cooks quickly, stays tender, and develops a lightly browned outside covered in a sweet and tangy honey mustard glaze.

Chicken tenderloins are naturally lean and cook faster than larger chicken cuts. The air fryer uses circulating hot air to brown the outside while the honey mustard coating adds plenty of flavor.

This recipe is simple enough for a busy weeknight but flavorful enough for a family dinner. Serve the chicken with roasted vegetables, mashed potatoes, rice, a crisp salad, or your favorite side dish.

Why You’ll Love This Recipe

This chicken dinner has several features that make it easy to add to your weekly meal plan.

  • Quick cooking: Chicken tenderloins cook faster than whole chicken breasts.
  • Big flavor: Honey, Dijon mustard, and garlic create a balanced sweet and savory glaze.
  • Simple preparation: The chicken needs only basic seasoning and a quick sauce.
  • Less oil: The air fryer needs only a small amount of oil for browning.
  • Family-friendly: The mild sweetness makes the chicken appealing to both kids and adults.
  • Easy cleanup: Cooking everything in the air fryer keeps the process simple.
  • Flexible sides: Pair the chicken with vegetables, potatoes, rice, pasta, or salad.

Ingredients You’ll Need

For the Chicken

  • 1½ pounds chicken tenderloins
  • 1 tablespoon olive oil
  • ½ teaspoon garlic powder
  • ½ teaspoon paprika
  • ½ teaspoon onion powder
  • ½ teaspoon kosher salt
  • ¼ teaspoon black pepper

For the Honey Mustard Sauce

  • 3 tablespoons Dijon mustard
  • 2 tablespoons honey
  • 1 tablespoon whole-grain mustard
  • 1 teaspoon apple cider vinegar
  • 1 teaspoon olive oil
  • ½ teaspoon garlic powder
  • ¼ teaspoon smoked paprika
  • ¼ teaspoon black pepper

Dijon mustard gives the sauce a sharp, savory flavor, while honey adds sweetness without making the glaze overly heavy. Whole-grain mustard adds a little texture and extra mustard flavor.

How to Prepare the Chicken

Step 1: Pat the Chicken Dry

Remove the chicken tenderloins from the package and pat them dry with paper towels.

Removing excess moisture helps the seasoning stick and allows the chicken to brown better during air frying.

Step 2: Season the Tenderloins

Place the chicken in a bowl.

Add olive oil, garlic powder, paprika, onion powder, salt, and black pepper.

Toss until every piece is evenly coated.

Let the seasoned chicken sit for about 5 minutes while you prepare the honey mustard sauce.

Step 3: Make the Honey Mustard Sauce

Add Dijon mustard, honey, whole-grain mustard, apple cider vinegar, olive oil, garlic powder, smoked paprika, and black pepper to a small bowl.

Whisk until the sauce becomes smooth and evenly combined.

Set aside about 1 tablespoon of the finished sauce for serving.

How to Cook Air Fryer Honey Mustard Chicken Tenderloin

Step 4: Preheat the Air Fryer

Preheat your air fryer to 390°F (200°C) for about 3 minutes.

A preheated basket helps the chicken begin browning quickly instead of slowly warming from a cold basket.

Step 5: Add the Chicken

Lightly spray the air fryer basket with cooking spray if needed.

Arrange the chicken tenderloins in a single layer.

Leave a little space between each piece so the hot air can circulate around the chicken.

Brush the top of each tenderloin with the honey mustard sauce.

Step 6: Air Fry

Air fry the chicken at 390°F for 10–14 minutes, depending on the thickness of the tenderloins.

After about 6–7 minutes, carefully flip the chicken.

Brush the second side with the remaining sauce and continue cooking.

The chicken is ready when the thickest piece reaches an internal temperature of 165°F (74°C).

Because chicken tenderloins vary in size, use a meat thermometer rather than relying only on cooking time.

Step 7: Rest the Chicken

Transfer the cooked chicken to a clean plate.

Let it rest for 3–5 minutes before serving.

This short resting period allows the juices to settle and keeps the chicken tender when sliced.

Step 8: Serve

Arrange the chicken tenderloins on a serving plate.

Drizzle with the reserved honey mustard sauce.

For a fresh finish, sprinkle with chopped parsley or green onions.

Serve immediately while the chicken is warm and the glaze is flavorful.

Tips for Juicy Chicken Tenderloins

Small changes can help you get better results every time.

  • Don’t overcrowd the basket: Air needs to move around each tenderloin for even browning.
  • Use a thermometer: Chicken is safely cooked when the center reaches 165°F.
  • Avoid overcooking: Tenderloins are lean and can dry out if left in the air fryer too long.
  • Pat the chicken dry: Less surface moisture helps create better browning.
  • Apply the sauce evenly: A thin, even layer gives every piece a balanced flavor.
  • Flip halfway: Turning the chicken helps both sides cook and brown evenly.
  • Rest before serving: A few minutes of resting helps maintain a juicy texture.

What to Serve With Honey Mustard Chicken

This chicken works with many classic American side dishes.

For a simple weeknight dinner, serve it with roasted broccoli and crispy air fryer potatoes. The savory vegetables balance the sweet and tangy glaze.

For a lighter plate, pair the chicken with a green salad, cucumber, tomatoes, and a simple vinaigrette.

Rice, quinoa, steamed green beans, roasted carrots, corn, and sweet potatoes are also excellent choices.

You can also slice the cooked chicken and use it in wraps, sandwiches, grain bowls, or salads for an easy lunch the next day.

Recipe Variations

Make It Spicy

Add ¼ teaspoon of cayenne pepper or a pinch of crushed red pepper flakes to the honey mustard sauce.

Add Lemon

Add 1 teaspoon of fresh lemon juice to the sauce for a brighter, more refreshing flavor.

Use Maple Syrup

Replace the honey with pure maple syrup for a slightly deeper sweetness.

Add Fresh Herbs

Stir chopped rosemary, thyme, or parsley into the sauce before coating the chicken.

Make It Extra Crispy

Lightly spray the chicken with cooking oil before air frying. Avoid using too much oil because the honey glaze already contains natural sugar that promotes browning.

How to Store Leftovers

Allow leftover chicken to cool before placing it in an airtight container.

Refrigerate the cooked chicken for up to 3–4 days.

For the best texture, reheat the tenderloins in an air fryer at 350°F for 3–5 minutes.

Avoid reheating them for too long because chicken tenderloins can become dry when overheated.

Leftover chicken can also be sliced and added to salads, wraps, sandwiches, rice bowls, or meal-prep containers.

Frequently Asked Questions

Can I use chicken breast instead of tenderloins?

Yes, cut boneless chicken breast into evenly sized strips and adjust the cooking time based on thickness.

How do I know when chicken tenderloins are done?

Use an instant-read thermometer and remove the chicken when the thickest piece reaches 165°F (74°C).

Can I make the honey mustard sauce ahead?

Yes, prepare the sauce up to 2 days ahead and keep it covered in the refrigerator.

Can I use yellow mustard?

Yes, but Dijon mustard provides a sharper and more balanced flavor for this glaze.

Why did my chicken turn dry?

Chicken tenderloins can dry out when overcooked, so check the internal temperature early rather than relying only on the timer.

Can I use frozen chicken tenderloins?

For the best texture, thaw the chicken completely before seasoning and cooking it with the glaze.

How long should chicken tenderloins rest?

Let the cooked chicken rest for about 3–5 minutes before serving.

Can I make this recipe spicy?

Yes, add cayenne pepper, hot honey, or crushed red pepper flakes to the sauce for extra heat.

Final Thoughts

Air Fryer Honey Mustard Chicken Tenderloin is an easy way to turn simple chicken into a flavorful family dinner. The combination of Dijon mustard, honey, garlic, and mild spices creates a glaze that is sweet, tangy, and savory.

The air fryer keeps the cooking process quick while giving the chicken a lightly browned exterior. For the juiciest result, avoid overcooking the tenderloins and always check the thickest piece with a meat thermometer.

Pair the chicken with roasted vegetables, potatoes, rice, or a fresh salad, and you have a simple meal that works for busy weeknights, family dinners, and meal prep.
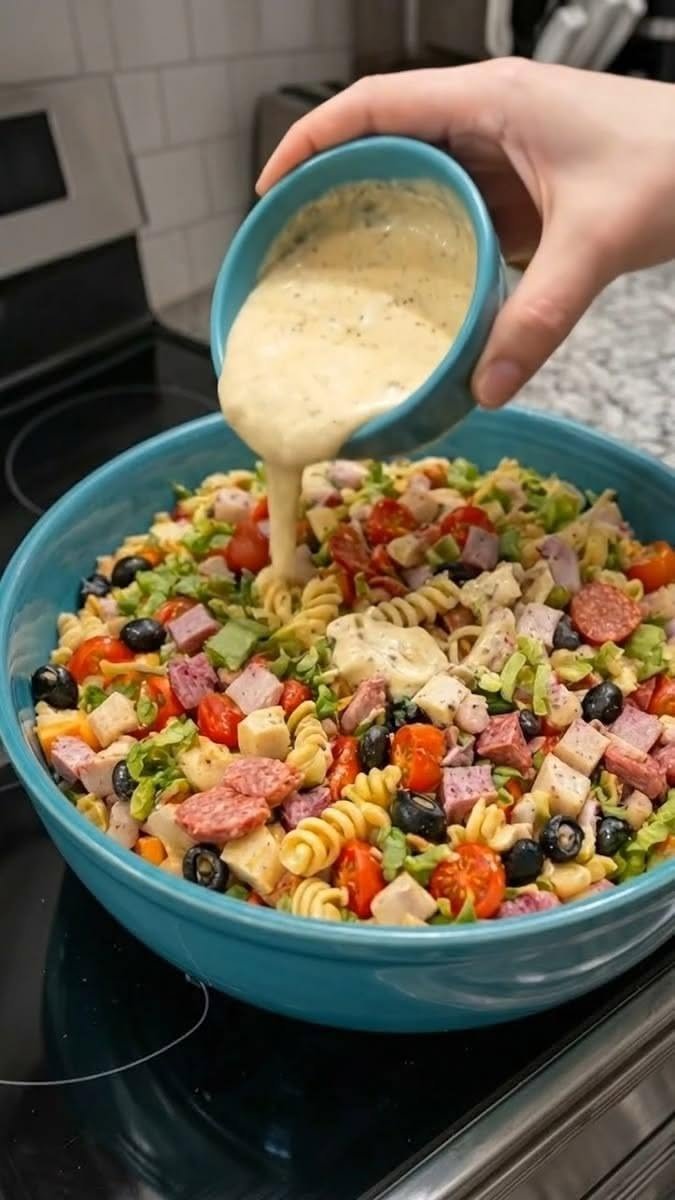
Loaded Chopped Italian Pasta Salad

Loaded Chopped Italian Pasta Salad

Ingredients

12 oz rotini or bow-tie pasta
1 cup cherry tomatoes, halved
1 cup cucumber, diced
1/2 cup red onion, finely chopped
1/2 cup black or Kalamata olives, sliced
1/2 cup pepperoncini, sliced
1 cup mozzarella pearls
1/2 cup Parmesan cheese, shredded
4 oz salami, chopped
4 oz pepperoni, chopped
1/4 cup fresh parsley, chopped
1/3 cup roasted red peppers, chopped

Italian Dressing

1/2 cup olive oil
1/4 cup red wine vinegar
1 tablespoon lemon juice
1 teaspoon Italian seasoning
1/2 teaspoon garlic powder
1/2 teaspoon Dijon mustard
1 teaspoon honey
Salt and black pepper, to taste

Instructions

Bring a large pot of salted water to a boil. Cook the pasta according to package directions until al dente. Drain and rinse briefly under cold water to stop the cooking process. Allow it to cool completely.
In a large bowl, combine the cooled pasta, cherry tomatoes, cucumber, red onion, olives, pepperoncini, roasted red peppers, mozzarella pearls, Parmesan, salami, pepperoni, and fresh parsley.
In a small bowl or jar, whisk together olive oil, red wine vinegar, lemon juice, Italian seasoning, garlic powder, Dijon mustard, honey, salt, and black pepper until well combined.
Pour the dressing over the pasta mixture and toss gently until everything is evenly coated. Taste and adjust the seasoning if needed.
Cover and refrigerate for at least 30 minutes before serving. This allows the pasta to absorb the dressing and gives the flavors time to blend.
Tips
For the best texture, cook the pasta just until al dente. Add extra dressing after refrigeration if the salad becomes dry. You can also add grilled chicken, artichoke hearts, chickpeas, or fresh basil for extra flavor and variety.

Serving

Serve chilled or slightly cool as a complete lunch, side dish, or party salad. It pairs beautifully with grilled chicken, burgers, sandwiches, or roasted vegetables.
Storage
Store leftovers in an airtight container in the refrigerator for up to 3 days. Give the salad a good toss before serving.

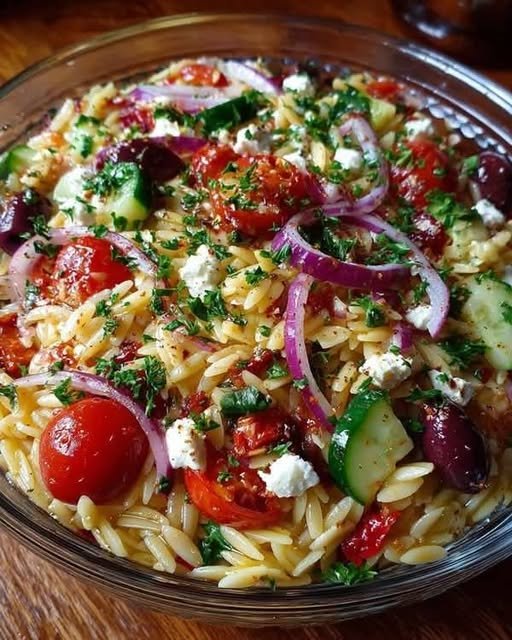
Mediterranean Orzo Salad

Mediterranean Orzo Salad

Description

Mediterranean Orzo Salad is a bright, refreshing, and satisfying dish filled with tender orzo, juicy tomatoes, crisp cucumber, briny olives, creamy feta, and fresh herbs. Everything is tossed in a zesty lemon-olive oil dressing that brings the ingredients together beautifully.

This versatile salad works wonderfully as a light lunch, side dish, or make-ahead meal. You can enjoy it on its own or add grilled chicken, shrimp, chickpeas, or another favorite protein for a more filling option. The combination of fresh vegetables, herbs, feta, and citrusy dressing makes every bite colorful and flavorful.

Ingredients

For the Salad:

  • 1½ cups dry orzo pasta
  • 1½ cups cherry tomatoes, halved
  • 1 large cucumber, diced
  • ½ cup Kalamata olives, sliced
  • ½ small red onion, finely chopped
  • ¾ cup crumbled feta cheese
  • ½ cup roasted red peppers, chopped
  • ¼ cup fresh parsley, chopped
  • ¼ cup fresh mint, chopped
  • 2 tablespoons fresh dill, chopped

For the Dressing:

  • ⅓ cup extra-virgin olive oil
  • 3 tablespoons fresh lemon juice
  • 1 tablespoon red wine vinegar
  • 1 teaspoon Dijon mustard
  • 1 garlic clove, finely minced
  • 1 teaspoon dried oregano
  • ½ teaspoon honey
  • Salt and freshly ground black pepper, to taste

Instructions

  1. Bring a large pot of salted water to a boil. Add the orzo and cook according to the package directions until tender but still slightly firm. Drain well and rinse briefly under cold water to stop the cooking process. Allow it to cool.
  2. While the orzo cools, prepare the vegetables. Add cherry tomatoes, cucumber, Kalamata olives, red onion, roasted red peppers, parsley, mint, and dill to a large serving bowl.
  3. In a small bowl, whisk together olive oil, lemon juice, red wine vinegar, Dijon mustard, garlic, oregano, honey, salt, and black pepper until the dressing is smooth and well combined.
  4. Add the cooled orzo to the vegetables. Pour the dressing over everything and gently toss until evenly coated.
  5. Fold in the crumbled feta cheese last so it stays slightly chunky. Taste and adjust the seasoning with additional lemon juice, salt, or pepper if desired.
  6. Cover and refrigerate for at least 30 minutes before serving. This resting time allows the orzo to absorb the bright Mediterranean flavors.

Tips & Variations

For extra protein, add grilled chicken, shrimp, chickpeas, or white beans. You can also add artichoke hearts, avocado, spinach, or sun-dried tomatoes. For a stronger Mediterranean flavor, sprinkle a little extra oregano and feta over the top before serving.

If the salad seems dry after refrigeration, simply add a small splash of olive oil and lemon juice and toss again.

Serving & Storage

Serve chilled or at room temperature as a side dish with grilled fish, chicken, or roasted vegetables. It is also delicious packed for lunch.

Store leftovers in an airtight container in the refrigerator for up to 4 days. Toss well before serving.

Creamy Shrimp Bisque

Creamy Shrimp Bisque

Description

Creamy Shrimp Bisque is a luxurious yet easy seafood soup made with tender shrimp, aromatic vegetables, tomatoes, herbs, and a silky cream base. It has a rich, savory flavor with a subtle sweetness from the shrimp and a hint of spice. Perfect for a cozy dinner, special occasion, or elegant starter, this comforting bisque comes together beautifully in one pot.

Ingredients

  • 1 lb shrimp, peeled and deveined
  • 2 tablespoons butter
  • 1 tablespoon olive oil
  • 1 small onion, finely diced
  • 1 celery stalk, finely diced
  • 1 small carrot, finely diced
  • 3 garlic cloves, minced
  • 2 tablespoons tomato paste
  • 3 cups seafood or chicken broth
  • 1/2 cup dry white wine or additional broth
  • 1/2 teaspoon paprika
  • 1/4 teaspoon cayenne pepper
  • 1/2 teaspoon dried thyme
  • 1 cup heavy cream
  • Salt and black pepper, to taste
  • 1 tablespoon lemon juice
  • 2 tablespoons fresh parsley, chopped

Instructions

  1. Melt butter with olive oil in a large pot over medium heat. Add onion, celery, and carrot. Cook for 5–6 minutes until softened.
  2. Add garlic and cook for 30 seconds. Stir in tomato paste, paprika, cayenne, and thyme. Cook for another minute to deepen the flavors.
  3. Pour in the white wine and simmer for 2 minutes. Add the broth and bring the mixture to a gentle boil. Reduce heat and simmer for 10 minutes.
  4. Add the shrimp and cook for 3–4 minutes, until pink and cooked through. Remove about half of the shrimp and set aside for serving.
  5. Using an immersion blender, carefully blend the soup until smooth and creamy. Alternatively, blend in batches using a regular blender.
  6. Return the reserved shrimp to the pot. Stir in the heavy cream and lemon juice. Warm gently for 2–3 minutes without allowing the bisque to boil.
  7. Season with salt and black pepper. Garnish with fresh parsley and serve hot.

Tips & Serving

For an extra-smooth bisque, strain the blended soup before adding the cream. Serve with crusty bread, garlic toast, or a simple green salad. A drizzle of olive oil or cream on top makes an elegant finishing touch.

Storage

Refrigerate leftovers in an airtight container for up to 3 days. Reheat gently over low heat and avoid boiling to prevent the cream from separating.

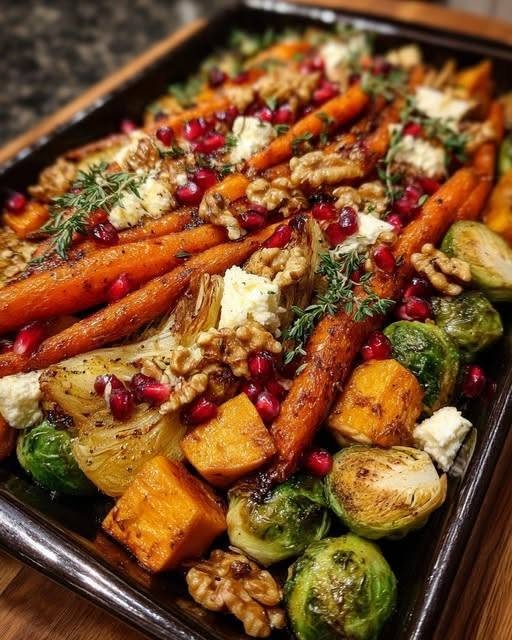
Festive Roasted Vegetable Salad with Feta, Walnuts, Pomegranate & Honey Balsamic Glaze

Festive Roasted Vegetable Salad with Feta, Walnuts, Pomegranate & Honey Balsamic Glaze

Ingredients

2 large carrots, sliced
1 large sweet potato, cubed
2 cups Brussels sprouts, halved
½ cup pomegranate arils
¾ cup crumbled feta
½ cup walnuts, toasted
2 tbsp honey
1 tbsp balsamic glaze
2 tbsp olive oil
1 tsp fresh thyme
Salt & black pepper

Directions

Preheat oven to 425°F (220°C) and line a baking sheet with parchment.
Toss carrots, sweet potato, and Brussels sprouts with olive oil, thyme, salt, and pepper.
Roast for 25–30 minutes, tossing halfway, until golden and caramelized.
Toast walnuts in a dry skillet for 3–4 minutes, until fragrant.
Whisk honey and balsamic glaze together.
Arrange the warm roasted vegetables on a serving platter.
Scatter feta, pomegranate arils, and toasted walnuts over the top.
Drizzle generously with the honey balsamic glaze.
Garnish with fresh thyme and serve warm or slightly cooled.

Nutritional Information

Servings: 6
Calories: 345 kcal
Protein: 9g
Carbohydrates: 38g
Fat: 19g
Fiber: 8g
Sodium: 390mg

Creamy Turkey Cucumber Roll-Ups with Pepper Jack

Turkey Roll-Ups with cucumber, creamy Pepper Jack filling, turkey slices, fresh herbs, and red bell pepper

Creamy Turkey Cucumber Roll-Ups with Pepper Jack

Turkey Roll-Ups are a creamy, crunchy, and protein-rich snack made with sliced turkey, fresh cucumber, smooth cream cheese, shredded Pepper Jack, and flavorful herbs. Each roll-up is easy to assemble and offers a satisfying combination of savory turkey, cool cucumber, creamy cheese, and a gentle kick from Pepper Jack.

These easy roll-ups work well for lunch, quick snacks, party platters, meal prep, picnics, and casual gatherings. They require no complicated cooking, making them especially useful when you need something fast and filling.

The cucumber adds freshness and crunch, while the turkey provides protein. Pepper Jack gives the filling a little heat without overpowering the other ingredients. You can also customize the filling with herbs, vegetables, or different cheeses.

Prep Time: 20 minutes
Cook Time: None
Chill Time: 15 minutes
Total Time: 35 minutes
Servings: 12 roll-ups
Course: Appetizer, Snack, Lunch
Cuisine: American-inspired

Ingredients

For the Roll-Ups

12 slices deli turkey

1 large cucumber

6 ounces cream cheese, softened

1 cup shredded Pepper Jack cheese

2 tablespoons mayonnaise

1 tablespoon fresh lemon juice

1/2 teaspoon garlic powder

1/2 teaspoon black pepper

1/4 teaspoon smoked paprika

1 tablespoon fresh parsley, chopped

1 tablespoon fresh dill, chopped

1/4 cup finely diced red bell pepper

2 tablespoons finely diced green onions

1/4 teaspoon salt

Optional Additions

Thin avocado slices

Baby spinach

Shredded carrots

Sliced jalapeños

Chopped olives

Fresh chives

Red pepper flakes

Step-by-Step Instructions

Prepare the Creamy Filling

Place the softened cream cheese in a medium mixing bowl.

Add mayonnaise and fresh lemon juice.

Stir until the mixture becomes smooth and creamy.

Add garlic powder, black pepper, smoked paprika, and salt.

Mix well.

Fold in shredded Pepper Jack cheese.

Add chopped parsley and fresh dill.

Stir gently until all ingredients are evenly distributed.

The filling should be creamy but thick enough to spread easily.

If the mixture feels too soft, place it in the refrigerator for about 10 minutes.

A firm filling makes the Turkey Roll-Ups easier to assemble.

Add the Vegetables

Finely dice the red bell pepper.

Slice the green onions into very small pieces.

Add both vegetables to the cream cheese mixture.

Stir gently.

Small vegetable pieces work best because large pieces can make the roll-ups difficult to close.

The peppers add color and a slight sweetness.

Green onions provide a mild savory flavor.

You can also add finely chopped cucumber to the filling, but keep the amount small because excess moisture can make the mixture watery.

Prepare the Cucumber

Wash the cucumber thoroughly.

Pat it dry.

Cut off both ends.

Use a vegetable peeler or mandoline slicer to create long, thin cucumber strips.

The strips should be flexible enough to bend without breaking.

Avoid making them too thick.

Very thick cucumber slices can make rolling difficult.

If the cucumber contains a lot of moisture, gently pat the strips with paper towels.

This helps keep the filling firm.

Fresh cucumber provides a cool, crisp layer that balances the rich cheese mixture in these Turkey Roll-Ups.

Prepare the Turkey

Lay the turkey slices flat on a clean cutting board.

If the slices are very large, cut them into smaller rectangles.

Choose turkey slices that are large enough to wrap around the filling.

Thin deli turkey works well because it bends easily.

Thicker slices provide a heartier bite but may be slightly harder to roll.

Pat the turkey gently with a paper towel if it contains excess moisture.

A dry surface helps the filling stay in place.

Assemble the Roll-Ups

Place one turkey slice on a flat surface.

Spread approximately 1 tablespoon of the creamy Pepper Jack mixture over the turkey.

Leave a small border around the edges.

Place one cucumber strip near one end of the turkey.

Roll the turkey tightly around the cucumber.

Continue rolling until the filling is enclosed.

Place the roll seam-side down.

Repeat with the remaining turkey slices.

Do not add too much filling.

An overloaded roll can split when you try to close it.

A moderate amount creates a neat shape and balanced flavor.

The combination of turkey, creamy cheese, and crisp cucumber makes Turkey Roll-Ups especially satisfying.

Chill the Roll-Ups

Arrange the finished roll-ups on a plate.

Cover them loosely with plastic wrap.

Refrigerate for about 15 minutes.

Chilling helps the cream cheese filling firm up.

It also makes the roll-ups easier to slice and serve.

If you are preparing them for a party, you can chill them for up to a few hours before serving.

Keep them refrigerated until you are ready to place them on the serving platter.

Tips for the Best Results

Use softened cream cheese so the filling mixes smoothly.

Do not melt the cream cheese.

Room-temperature cream cheese is easier to spread.

Choose thin turkey slices with enough surface area for rolling.

Slice the cucumber thinly.

Pat the cucumber dry before adding it.

Avoid adding too much filling.

Keep the filling chilled if your kitchen is warm.

Use freshly shredded Pepper Jack for the best texture.

Add lemon juice gradually.

Too much liquid can make the filling loose.

These simple tips help keep Turkey Roll-Ups neat, creamy, and easy to serve.

Choosing the Best Turkey

Deli turkey works well because it is thin and flexible.

You can use roasted turkey slices for a more homemade flavor.

Smoked turkey adds a deeper savory taste.

Peppered turkey can provide extra spice.

For a milder version, choose plain roasted turkey.

If you prefer a stronger flavor, smoked turkey pairs nicely with Pepper Jack.

The turkey should be sliced thin enough to roll without tearing.

Avoid slices with large holes or uneven edges.

A smooth slice creates a more attractive finished roll.

Choosing the Best Cucumber

English cucumbers are an excellent choice.

They have thin skin and fewer seeds.

Regular cucumbers can also work.

If using a large cucumber with many seeds, remove the watery center before slicing.

The goal is to create firm, flexible strips.

A mandoline slicer can make evenly thin pieces.

Always use caution when working with a mandoline.

You can also use a vegetable peeler to create wide cucumber ribbons.

The thin cucumber layer keeps Turkey Roll-Ups fresh and crunchy without overpowering the turkey and cheese.

Pepper Jack Substitutions

Pepper Jack gives the filling a mild spicy flavor.

If you prefer less heat, use Monterey Jack.

Cheddar provides a stronger, sharper flavor.

Mozzarella creates a mild and stretchy filling.

Colby Jack gives a balanced combination of creamy and savory flavors.

For extra heat, add a small amount of diced jalapeño.

You can also combine Pepper Jack with another cheese.

A mixture of half Pepper Jack and half cheddar creates a richer filling.

These options make Turkey Roll-Ups easy to adapt to different preferences.

Flavor Variations

Ranch Turkey Roll-Ups

Add 1 teaspoon of ranch seasoning to the cream cheese mixture.

The ranch flavor pairs well with cucumber and turkey.

Spicy Turkey Roll-Ups

Add diced jalapeño and red pepper flakes.

Use extra Pepper Jack for a stronger kick.

Mediterranean Version

Add chopped olives, feta, parsley, and a little oregano.

Replace some of the mayonnaise with Greek yogurt.

Avocado Version

Add thin avocado slices before rolling.

A little lemon juice can help prevent the avocado from browning.

Veggie Version

Add shredded carrots, spinach, and finely diced bell peppers.

The extra vegetables create a colorful and crunchy filling.

These variations keep Turkey Roll-Ups interesting when you want to prepare them regularly.

Make-Ahead Instructions

These roll-ups are excellent for preparing ahead.

Make the cream cheese filling earlier in the day.

Store it in a sealed container in the refrigerator.

Prepare the cucumber strips shortly before assembly.

Assemble the roll-ups several hours before serving.

Cover them and keep them refrigerated.

For the best texture, serve them within the same day.

If preparing them for a party, arrange them on a serving tray just before guests arrive.

Keep the platter chilled until serving time.

The make-ahead option makes Turkey Roll-Ups useful for parties, lunch boxes, and busy weekdays.

Meal Prep Instructions

Prepare several roll-ups at once.

Place each roll-up in an airtight container.

Use parchment paper between layers if necessary.

Keep them refrigerated.

Add fresh vegetables only when needed.

For meal prep, you can prepare the cream cheese filling for several days.

However, cucumber releases moisture over time.

For the freshest texture, assemble the roll-ups closer to the day you plan to eat them.

These Turkey Roll-Ups make a convenient grab-and-go snack.

Serving Suggestions

Serve the roll-ups chilled.

Arrange them on a platter with fresh cucumber slices.

Add cherry tomatoes for color.

Olives make a good savory side.

You can also serve them with a small bowl of ranch dressing.

For a larger lunch, add fresh fruit and a simple green salad.

Crackers provide extra crunch.

For parties, cut the roll-ups into smaller pieces and secure each one with a toothpick.

This makes them easy for guests to pick up.

The colorful filling makes Turkey Roll-Ups attractive on appetizer boards.

Party Presentation

Place the finished roll-ups on a large white serving platter.

Arrange them in rows or a circular pattern.

Garnish with fresh parsley and dill.

Add thin cucumber slices around the edges.

A few cherry tomatoes can provide bright color.

For a spicy platter, add sliced jalapeños.

You can also place small bowls of ranch or herb dip nearby.

If serving at a lunch gathering, combine the roll-ups with fruit, cheese cubes, olives, and crackers.

The simple presentation makes Turkey Roll-Ups look polished without requiring much effort.

Storage Instructions

Store leftover roll-ups in an airtight container.

Keep them refrigerated.

For the best quality, eat them within 1 to 2 days.

The cucumber may release moisture as it sits.

If possible, keep extra cucumber separate and assemble additional roll-ups when needed.

Do not leave the finished roll-ups at room temperature for an extended period.

Keep them chilled until serving.

Common Mistakes to Avoid

Do not use wet cucumber strips.

Excess moisture can loosen the filling.

Avoid using very thick cucumber slices.

Do not overfill the turkey.

An excessive amount of filling can cause the roll to open.

Avoid using cream cheese that is too cold.

Cold cream cheese can be difficult to spread.

Do not add too much lemon juice.

Too much liquid can make the filling soft.

Avoid cutting the roll-ups immediately after assembly if the filling is loose.

A short chilling period helps everything hold together.

These simple precautions help keep Turkey Roll-Ups neat and flavorful.

Frequently Asked Questions

Can I use chicken instead of turkey?

Yes. Thinly sliced cooked chicken can be used, although turkey provides the classic flavor for this recipe.

Can I use Greek yogurt instead of mayonnaise?

Yes. Greek yogurt creates a lighter filling with a pleasant tang.

Can I use regular Jack cheese?

Yes. Monterey Jack is a good choice if you want a milder flavor.

Can I make the recipe spicy?

Absolutely. Add jalapeños, red pepper flakes, or extra Pepper Jack.

Can I make these without cream cheese?

You can use thick Greek yogurt mixed with shredded cheese, although the texture will be different.

Can I prepare them the night before?

It is better to prepare them the same day because cucumber can release moisture. If necessary, assemble them the night before and keep them tightly covered and refrigerated.

Can I use cucumber ribbons?

Yes. A vegetable peeler can create wide cucumber ribbons that work very well.

Are these good for lunch boxes?

Yes. Keep them chilled in an insulated lunch bag with an ice pack.

Can I add avocado?

Yes. Thin avocado slices add creaminess and healthy fats.

What vegetables work best?

Bell peppers, spinach, shredded carrots, green onions, and thin cucumber strips are excellent choices.

Nutrition Information

Approximate nutrition per serving:

Calories: 165 kcal
Protein: 12g
Carbohydrates: 4g
Fat: 11g
Fiber: 1g
Sugar: 2g
Sodium: 510mg

Nutrition values are estimates and vary depending on the turkey, cheese, cream cheese, and other ingredients used.

Why You Will Love This Recipe

These Turkey Roll-Ups are quick, creamy, crunchy, and satisfying.

They require no oven.

They can be prepared in advance.

The turkey provides protein.

Cucumber adds freshness.

Cream cheese creates a smooth filling.

Pepper Jack provides a gentle kick.

Fresh herbs add brightness.

Another advantage is versatility.

The cheese can be changed to suit your taste. Different vegetables add extra color and crunch. A little spice makes the filling more flavorful. Children may prefer a milder version. These roll-ups also work well as a quick snack or light lunch.

They can also become part of a party platter.

For meal prep, prepare the filling ahead and assemble the roll-ups when needed.

The simple ingredients make Turkey Roll-Ups convenient for busy days.

Helpful Recipe Notes

Use a sharp knife when slicing the cucumber.

Thin cucumber ribbons are easier to roll.

If you use a mandoline, handle it carefully.

Keep the cream cheese filling thick.

If it becomes too soft, refrigerate it for a few minutes.

Fresh herbs provide the best flavor.

You can use dried herbs if fresh herbs are unavailable.

Adjust the amount of Pepper Jack based on your preferred spice level.

A lighter version works well with reduced-fat cream cheese and lean turkey. Shredded carrots add extra crunch and color. For a Mediterranean twist, mix in olives and feta. Jalapeños bring a spicy kick to the filling.

These adjustments make Turkey Roll-Ups easy to personalize.

Final Thoughts

Creamy Turkey Cucumber Roll-Ups with Pepper Jack are a simple option when you want something fresh, flavorful, and easy to prepare.

The turkey provides a savory protein base.

Cucumber brings a crisp and refreshing texture.

Cream cheese creates a creamy layer.

Pepper Jack adds mild heat.

Fresh parsley and dill brighten the filling.

Red bell pepper and green onion provide extra color and crunch.

The recipe does not require cooking, so assembly is quick.

Prepare the filling first.

Slice the cucumber into thin ribbons.

Lay the turkey flat.

Spread the filling evenly.

Add cucumber.

Roll everything tightly.

Then chill the finished pieces before serving.

For parties, cut each roll into smaller pieces and secure them with toothpicks. At lunchtime, serve larger pieces with fresh fruit and vegetables. During meal prep, keep the roll-ups chilled and enjoy them within one to two days.

You can also customize the recipe with avocado, spinach, carrots, jalapeños, olives, feta, or different cheeses.

The result is a flexible appetizer that can fit many different occasions.

Whether you need a quick snack, a lunch option, or an easy party appetizer, Turkey Roll-Ups offer a delicious combination of creamy, crunchy, savory, and slightly spicy flavors.

The simple preparation makes them especially convenient.

The fresh cucumber keeps every bite light, while Pepper Jack and cream cheese provide satisfying richness.

Serve them chilled with your favorite fresh vegetables, fruit, crackers, or dipping sauce.

With their colorful filling and easy preparation, Turkey Roll-Ups are a practical recipe to keep ready for busy weekdays, family gatherings, and casual entertaining.