Caramel Apple Rings

Caramel Apple Rings coated with caramel, toasted coconut, chopped nuts, and chocolate drizzle

Caramel Apple Rings

Caramel Apple Rings are a fun and delicious treat made with crisp apple slices, smooth caramel, toasted coconut, chopped nuts, and rich chocolate drizzle. Each apple ring is coated with sweet caramel and finished with crunchy toppings. The result is a combination of fresh fruit, chewy caramel, toasted coconut, and chocolate in every bite.

This easy dessert is perfect for fall parties, family gatherings, school treats, Halloween celebrations, afternoon snacks, and casual get-togethers. The recipe is simple enough for kids to help with, especially when it comes to adding the toppings.

Unlike traditional caramel apples, these Caramel Apple Rings are easier to eat because the apples are sliced into convenient rings. They also give you plenty of room to experiment with different toppings.

Prep Time: 20 minutes
Chill Time: 20 minutes
Total Time: 40 minutes
Servings: 8 apple rings
Course: Dessert, Snack
Cuisine: American-inspired

Ingredients

For the Apple Rings

4 large Granny Smith apples

1 tablespoon fresh lemon juice

2 cups soft caramel candies or caramel bits

2 tablespoons heavy cream

1 cup sweetened shredded coconut

1/2 cup chopped pecans or walnuts

1/2 cup semi-sweet chocolate chips

1 teaspoon coconut oil

Optional Toppings

Mini chocolate chips

Crushed peanuts

Chopped almonds

Toffee pieces

Sea salt

White chocolate drizzle

Cinnamon

Cookie crumbs

Step-by-Step Instructions

Prepare the Apples

Wash the apples thoroughly under cool running water.

Dry each apple completely with a clean kitchen towel.

Place one apple on a cutting board.

Use a sharp knife to remove the top and bottom ends.

Cut the apple horizontally into slices about 1/2 inch thick.

Each slice should look like a ring.

Use a small round cookie cutter or a paring knife to remove the center and seeds.

Repeat the process with the remaining apples.

Try to keep the slices similar in thickness. Even slices are easier to coat and provide a more consistent texture.

Place the apple rings on a plate lined with paper towels.

Pat both sides gently to remove extra moisture.

This step is important because caramel does not stick well to wet fruit.

The fresh apple provides a crisp contrast to the soft toppings in these Caramel Apple Rings.

Prevent Browning

Add fresh lemon juice to a small bowl.

Lightly brush the cut surfaces of the apples with lemon juice.

You do not need to soak the apples.

A light coating is enough to help maintain their fresh appearance.

The lemon also adds a subtle tang that balances the sweetness of the caramel.

If you plan to assemble the dessert immediately, you can simply prepare the apple slices and move to the next step.

For a party, keep the prepared rings refrigerated until you are ready to coat them.

Toast the Coconut

Place the shredded coconut in a dry skillet.

Set the skillet over medium-low heat.

Stir the coconut frequently.

Toast it for about 3 to 5 minutes.

The coconut should become lightly golden and fragrant.

Watch it closely because coconut can burn quickly.

Transfer the toasted coconut to a plate and let it cool.

Toasting gives the coconut a deeper flavor and adds extra crunch to the finished dessert.

You can also toast the chopped pecans or walnuts in the same skillet.

Cook the nuts for 2 to 3 minutes.

Stir them frequently.

Allow them to cool before using.

The combination of toasted coconut and nuts makes Caramel Apple Rings especially crunchy and flavorful.

Prepare the Caramel

Place the caramel candies or caramel bits in a microwave-safe bowl.

Add the heavy cream.

Heat the mixture for about 20 seconds.

Remove the bowl and stir.

Continue heating in short 15 to 20 second intervals.

Stir after each interval.

Continue until the caramel becomes smooth and easy to spread.

Do not overheat the caramel.

Very hot caramel can become too thin and may slide off the apples.

If the caramel seems too thick, add another teaspoon of cream.

Stir well.

The ideal consistency should be smooth enough to spread but thick enough to cling to the apple surface.

Allow the caramel to cool for a few minutes before dipping.

Warm caramel works better than extremely hot caramel for these Caramel Apple Rings.

Coat the Apple Rings

Take one prepared apple ring.

Dip it carefully into the warm caramel.

Turn the ring so the caramel covers the surface.

You can use a spoon to spread caramel over areas that are not completely covered.

Allow excess caramel to drip back into the bowl.

Place the coated ring on a parchment-lined baking sheet.

Repeat with the remaining apple slices.

If the caramel begins to thicken while you work, warm it again for a few seconds.

Do not make the caramel extremely hot.

A moderate temperature keeps the coating easier to handle.

Try to leave the center opening clear.

This gives the apple rings their recognizable shape and makes them easier to hold.

At this stage, the Caramel Apple Rings should have a smooth caramel coating.

Add the Toasted Coconut

While the caramel is still soft, sprinkle toasted coconut over each ring.

Press the coconut gently into the caramel.

This helps it stay attached after the caramel cools.

You can coat the entire top surface or cover only part of each ring.

For a heavier coconut topping, place the ring over a shallow bowl of toasted coconut and gently press.

Do not press too hard because the apple may become damaged.

The toasted coconut creates a pleasant contrast with the soft caramel.

Add the Nuts

Sprinkle chopped pecans or walnuts over the caramel.

You can use one type of nut or combine several varieties.

Pecans provide a rich, buttery flavor.

Walnuts have a slightly stronger and earthier taste.

Almonds add a firmer crunch.

If you are serving the dessert to guests, place different toppings in small bowls and allow everyone to customize their own ring.

This makes Caramel Apple Rings more interactive and fun for parties.

Prepare the Chocolate Drizzle

Place chocolate chips in a microwave-safe bowl.

Add coconut oil.

Heat for 15 to 20 seconds.

Stir thoroughly.

Continue in short intervals until the chocolate becomes smooth.

Avoid overheating the chocolate.

A gentle heating process produces a smoother drizzle.

Transfer the melted chocolate to a small piping bag or a plastic storage bag with the corner snipped off.

You can also use a spoon.

Drizzle the chocolate across the caramel-coated apples.

Move your hand back and forth to create thin chocolate lines.

Allow some chocolate to fall over the sides.

The dark chocolate creates a beautiful contrast against the golden caramel and green apple.

The finished Caramel Apple Rings should look glossy, colorful, and inviting.

Chill the Apple Rings

Place the baking sheet in the refrigerator.

Chill the apple rings for about 20 minutes.

This allows the caramel and chocolate to firm up.

The dessert is easier to handle after chilling.

If you prefer a softer caramel texture, chill for a shorter time.

For a firmer coating, allow the rings to chill for 30 minutes.

Avoid freezing the apples because freezing can change their texture.

Once the coating has set, remove the rings from the refrigerator.

Serve them immediately or keep them chilled until ready to serve.

Tips for Better Results

Choose firm apples with a crisp texture.

Granny Smith apples are an excellent option because their tart flavor balances sweet caramel.

Honeycrisp apples provide a sweeter alternative.

Fuji and Pink Lady apples can also work well.

Dry the apples thoroughly before adding caramel.

Moisture can prevent the caramel from sticking.

Keep the caramel warm but not extremely hot.

If the caramel becomes too thick, gently warm it again.

Use parchment paper to prevent sticking.

Add toppings while the caramel is still soft.

Chill the rings before serving.

These simple steps help create attractive Caramel Apple Rings with a crisp apple center and delicious toppings.

Best Apple Varieties

Granny Smith apples are a classic choice.

Their tart flavor creates a strong contrast with sweet caramel.

Honeycrisp apples offer a crisp texture with more natural sweetness.

Pink Lady apples have a balanced sweet-tart flavor.

Fuji apples are juicy and naturally sweet.

Gala apples can also be used, although they have a softer texture.

For the best results, choose apples that are firm and free from bruises.

Very soft apples can release extra moisture.

That moisture may make the caramel coating less stable.

Topping Ideas

There are many ways to customize this dessert.

Try crushed pretzels for a salty crunch.

Mini chocolate chips add extra chocolate flavor.

Toffee pieces provide a buttery texture.

Crushed cookies create a fun dessert topping.

White chocolate creates a sweeter finish.

A light sprinkle of sea salt can balance the caramel.

Cinnamon adds a warm fall flavor.

Crushed peanuts create a classic caramel-and-nut combination.

Dried cranberries add a fruity note.

For a colorful party tray, use several toppings on different apple rings.

The variety makes Caramel Apple Rings look attractive and gives guests different flavors to enjoy.

How to Make Them Kid-Friendly

Children can help with several parts of the recipe.

Adults should handle the knife, hot caramel, and melted chocolate.

Kids can help sprinkle coconut and nuts.

They can also choose their favorite toppings.

Set the toppings in small bowls.

Let each child decorate an apple ring.

This creates a fun kitchen activity.

For younger children, cut the finished rings into smaller pieces before serving.

Always supervise children around hot ingredients and sharp kitchen tools.

The colorful toppings make Caramel Apple Rings a fun treat for family activities.

Party Serving Ideas

Arrange the finished apple rings on a large white platter.

Add small bowls of extra toppings around the tray.

Place whole apples, cinnamon sticks, or fresh herbs around the edges for decoration.

A wooden serving board works beautifully for a fall party. Colorful sprinkles or candy decorations add a playful touch for Halloween. Birthday parties can feature a mix of white and dark chocolate drizzles for a fun presentation.

You can also cut the finished rings into smaller wedges.

This creates bite-sized pieces that are easy to serve.

Keep the platter chilled until guests are ready to eat.

The combination of fresh apples and sweet toppings makes Caramel Apple Rings an attractive addition to a dessert table.

Make-Ahead Instructions

You can prepare the toppings several hours ahead.

Toast the coconut and nuts.

Allow them to cool completely.

Store them in separate airtight containers.

The caramel can also be prepared shortly before assembly.

For the best texture, slice and coat the apples closer to serving time.

If you need to prepare the dessert earlier, keep the finished rings refrigerated.

Do not assemble them too far in advance because apples naturally release moisture.

That moisture can soften the caramel coating.

For parties, prepare the components ahead and assemble the Caramel Apple Rings a few hours before serving.

Storage Instructions

Store leftover rings in a sealed container.

Place parchment paper between layers if stacking is necessary.

Keep them refrigerated.

For the best texture, enjoy them within 1 to 2 days.

The apples may release some moisture over time.

That can soften the caramel and toppings.

For this reason, these treats are best when enjoyed fresh.

Do not leave the finished dessert at room temperature for several hours.

Keep them chilled when they are not being served.

Common Mistakes to Avoid

Do not use wet apple slices.

Always dry them thoroughly.

Avoid extremely hot caramel.

Very hot caramel can slide off the apples.

Do not use oversized apple slices.

Thicker rings can be harder to coat evenly.

Avoid adding toppings after the caramel has already hardened.

The toppings need soft caramel to stick properly.

Do not overheat chocolate.

Chocolate can become thick or grainy when overheated.

Avoid overcrowding the baking sheet.

Give each ring enough space.

Do not freeze the finished dessert.

Freezing can make the apples watery after thawing.

Following these simple tips will help your Caramel Apple Rings stay attractive and enjoyable.

Frequently Asked Questions

What apples work best?

Granny Smith, Honeycrisp, Pink Lady, and Fuji apples are all good choices.

Can I use homemade caramel?

Yes. Homemade caramel can be used as long as it has a thick enough consistency to coat the apple slices.

Why is my caramel sliding off?

The apples may be too wet, or the caramel may be too hot. Dry the apples thoroughly and allow the caramel to cool slightly.

Can I skip the coconut?

Absolutely. Replace it with chopped nuts, cookie crumbs, or another topping.

Can I use different nuts?

Yes. Pecans, walnuts, almonds, peanuts, and pistachios can all work well.

Can I use white chocolate?

Yes. White chocolate creates a sweet contrast with the dark caramel.

Can I make these without chocolate?

Yes. The apple rings are delicious with caramel, coconut, and nuts alone.

Can I use dairy-free caramel?

Yes. Choose a suitable dairy-free caramel and check the ingredient label if dietary restrictions are important.

Can I make them gluten-free?

Yes. The basic recipe can be gluten-free. Check packaged caramel, chocolate, and toppings to make sure they are suitable.

How long do they last?

For the best texture, enjoy them within 1 to 2 days and keep them refrigerated.

Nutrition Information

Approximate nutrition per serving:

Calories: 280 kcal
Protein: 3g
Carbohydrates: 39g
Fat: 14g
Fiber: 4g
Sugar: 29g
Sodium: 150mg

Nutrition values are estimates. Actual values depend on the type of apples, caramel, chocolate, nuts, coconut, and serving size used.

Why You Will Love This Recipe

These Caramel Apple Rings are a fun alternative to traditional caramel apples.

These treats are simple to portion and decorate. They are also easy to serve at parties and family gatherings.

The crisp apple provides freshness.

Caramel adds sweetness.

Toasted coconut brings texture.

Nuts add a satisfying crunch.

Chocolate provides a rich finish.

You can make every ring different by changing the toppings.

The recipe also requires simple ingredients that are easy to find.

Another advantage is the quick preparation.

The apples only need to be sliced and dried.

The caramel takes a few minutes to melt.

The toppings can be prepared while the caramel warms.

After assembly, a short chilling period helps everything set.

This makes the recipe practical for busy afternoons and casual gatherings.

The dessert can also be adjusted for different tastes.

Use tart apples for a stronger contrast.

Choose sweeter apples for a milder flavor.

Add sea salt for balance.

Use dark chocolate for a richer finish.

Choose white chocolate for extra sweetness.

Add nuts for crunch.

Skip the nuts if you prefer a simple version.

The possibilities make Caramel Apple Rings suitable for many occasions.

Serving and Presentation Notes

For the most attractive presentation, use apples with bright, clean skin.

Keep the caramel coating even.

Add toppings while the caramel is still soft.

Use a thin chocolate drizzle rather than covering the entire surface.

This allows the golden caramel and colorful toppings to remain visible.

Fresh apple rings look especially attractive when arranged in a circular pattern on a serving platter.

Place the largest pieces in the center.

Add smaller pieces around the edges.

Sprinkle a few extra nuts and coconut around the plate.

A few small bowls of additional toppings can make the presentation more inviting.

Cinnamon sticks and warm-toned decorations create a cozy autumn display. Colorful sprinkles are a fun choice for children’s parties. An elegant dessert table looks best with simple toppings, such as toasted walnuts, dark chocolate, and a pinch of sea salt.

Final Thoughts

Caramel Apple Rings bring together crisp apples, smooth caramel, toasted coconut, crunchy nuts, and chocolate in one easy dessert.

The recipe is simple enough for a casual afternoon snack.

It is also attractive enough for a holiday dessert table.

Start with firm apples.

Slice them evenly and remove the centers.

Dry the fruit thoroughly.

Warm the caramel gently.

Coat each apple ring and immediately add the toppings.

Finish with a chocolate drizzle.

Then chill the rings until the coating becomes firm.

The result is a fun combination of textures.

Every bite starts with a crisp apple.

Next comes the soft caramel.

Toasted coconut and nuts add crunch.

Finally, chocolate brings a rich finish.

You can customize the recipe with your favorite ingredients.

Try pecans, almonds, peanuts, pretzels, toffee, cookie crumbs, cinnamon, or dried fruit.

A festive presentation looks beautiful with colorful toppings. For an elegant finish, choose toasted walnuts and dark chocolate. Kids and family members can also decorate their own rings by choosing from several toppings.

The recipe is flexible, simple, and easy to adapt.

Because the apples are sliced into rings, they are also convenient to serve.

For the freshest texture, prepare them close to serving time and keep them refrigerated.

Whether you are planning a fall gathering, a holiday party, or simply looking for a fun homemade snack, Caramel Apple Rings offer a delicious way to enjoy fresh apples with classic caramel and chocolate flavors.

The combination of crisp fruit, chewy caramel, toasted coconut, crunchy nuts, and chocolate makes these treats hard to resist.

Once you try them, you can create your own topping combinations and make every batch unique.

Toasted Walnut Crusted Brie Bites with Cranberry Honey Glaze

Brie Bites with toasted walnut crust, melted Brie cheese, cranberry honey glaze, and fresh thyme

Toasted Walnut Crusted Brie Bites with Cranberry Honey Glaze

Brie Bites are a delicious appetizer made with creamy Brie cheese, toasted walnuts, crispy breadcrumbs, and a sweet cranberry honey glaze. Each bite has a golden crunchy coating on the outside and warm, melted cheese inside. The cranberry topping adds a bright fruity flavor, while honey gives the glaze a gentle sweetness.

These elegant Brie Bites are perfect for holiday parties, family gatherings, dinner parties, game nights, and special occasions. They look impressive on a serving platter, yet the preparation is surprisingly simple.

The combination of creamy cheese, crunchy walnuts, and cranberry glaze creates a wonderful balance of textures. Fresh thyme adds a light herbal note that brings everything together.

Prep Time: 25 minutes
Cook Time: 15 minutes
Total Time: 40 minutes
Servings: 8
Course: Appetizer
Cuisine: American-inspired
Calories: Approximately 210 per serving

Ingredients

For the Brie

8 ounces Brie cheese

1/2 cup finely chopped walnuts

1/2 cup panko breadcrumbs

1/4 cup all-purpose flour

1 large egg

1 tablespoon milk

1/2 teaspoon garlic powder

1/2 teaspoon dried thyme

1/4 teaspoon black pepper

1/4 teaspoon salt

2 tablespoons olive oil

For the Cranberry Honey Glaze

1/2 cup cranberry sauce

1 tablespoon fresh orange juice

2 tablespoons honey

1 teaspoon lemon juice

1/4 teaspoon cinnamon

1 teaspoon orange zest

Pinch of salt

For Garnishing

Fresh thyme sprigs

Extra toasted walnuts

Fresh cranberries, optional

Orange zest

Step-by-Step Instructions

Prepare the Brie

Place the Brie cheese in the refrigerator for about 20 minutes before cutting. Chilled Brie is easier to handle and cut into neat pieces.

Remove the cheese from its packaging.

Cut the Brie into eight small wedges or bite-sized pieces. Try to keep the pieces similar in size so they cook evenly.

You can leave the rind on the Brie. It is edible and adds flavor. If you prefer a smoother texture, carefully trim some of the rind from the outside.

Keep the cheese cold while preparing the coating.

The chilled cheese is easier to coat and less likely to soften during preparation. This simple step helps the Brie Bites keep their shape while they cook.

Toast the Walnuts

Place the chopped walnuts in a dry skillet over medium-low heat.

Toast them for about 3 to 4 minutes.

Stir frequently to prevent burning.

The walnuts should become fragrant and lightly golden.

Remove them from the skillet and allow them to cool.

Toasting brings out the natural oils in the walnuts and gives the finished appetizer a deeper flavor.

Once cooled, chop the walnuts finely if larger pieces remain.

The toasted walnuts provide the crunchy texture that makes these Brie Bites especially enjoyable.

Prepare the Coating Station

Set up three shallow bowls.

Add flour to the first bowl.

Whisk the egg and milk together in the second bowl.

Combine the toasted walnuts, panko breadcrumbs, garlic powder, dried thyme, black pepper, and salt in the third bowl.

Mix the walnut and breadcrumb mixture thoroughly.

The three-step coating creates layers around the cheese.

The flour helps the egg adhere.

The egg creates a sticky surface for the walnut mixture.

Finally, the breadcrumbs and walnuts form the crisp outer coating.

This method gives the Brie Bites a beautiful golden crust.

Coat the Brie

Take one piece of chilled Brie.

Lightly coat it with flour.

Shake off any excess.

Dip the piece into the egg mixture.

Turn it carefully so every side becomes coated.

Next, place it into the walnut and breadcrumb mixture.

Press the coating gently onto the cheese.

Make sure the edges are covered well.

Repeat the process with the remaining Brie pieces.

For an extra-crispy coating, dip each piece into the egg and walnut mixture a second time.

Place the coated pieces on a parchment-lined plate or tray.

Refrigerate them for 10 minutes before cooking.

This short chilling period helps the coating stay attached.

It also helps prevent the cheese from melting too quickly.

Well-coated Brie Bites should have an even layer of walnuts and breadcrumbs around each piece.

Prepare the Cranberry Honey Glaze

Add cranberry sauce to a small saucepan.

Stir in honey, orange juice, orange zest, lemon juice, cinnamon, and a pinch of salt.

Place the saucepan over low heat.

Warm the mixture for 3 to 5 minutes.

Stir occasionally.

The glaze should become smooth and slightly thinner.

Do not boil the mixture aggressively.

The goal is to warm the ingredients and blend the flavors.

Taste the glaze.

Add a little more honey if you prefer extra sweetness.

For a brighter flavor, add another small squeeze of lemon juice.

The cranberry glaze gives the Brie Bites their beautiful sweet-tart finish.

Cook the Brie

Preheat the oven to 400°F (200°C).

Place the coated Brie pieces on a parchment-lined baking sheet.

Lightly brush or drizzle them with olive oil.

Bake for approximately 10 to 15 minutes.

Watch them carefully during the final few minutes.

The coating should become golden brown and crisp.

The cheese should feel soft when gently pressed.

Avoid overbaking because the Brie can melt completely and escape from the coating.

If you want an even darker crust, place the tray under the broiler for about 30 to 60 seconds.

Stay close to the oven during broiling.

Remove the Brie Bites as soon as the coating becomes golden.

Allow them to rest for 3 to 5 minutes before serving.

Assemble the Appetizer

Arrange the warm Brie pieces on a serving platter.

Spoon a small amount of cranberry honey glaze over each piece.

You can also place the glaze in a small bowl and let guests add it themselves.

Sprinkle extra toasted walnuts over the top.

Add fresh thyme sprigs for color.

A little orange zest creates a beautiful finishing touch.

For a festive presentation, scatter a few fresh cranberries around the platter.

Serve the Brie Bites while the cheese is still warm and creamy.

The contrast between the crunchy coating and soft center makes every bite satisfying.

Tips for the Best Results

Keep the Brie chilled before coating.

Cold cheese is easier to handle.

Finely chop the walnuts so they stick well to the surface.

Use panko breadcrumbs for a lighter, crispier coating.

Press the coating gently onto each piece.

Chill the coated cheese before baking.

Avoid overcrowding the baking sheet.

Leave a little space between each piece.

Do not overbake the appetizer.

The cheese should become soft without completely escaping.

Serve the Brie Bites after a short resting period.

This allows the cheese to settle while remaining warm and creamy.

Easy Air Fryer Method

These Brie Bites can also be prepared in an air fryer.

Preheat the air fryer to 375°F (190°C).

Place the coated Brie pieces in the basket.

Leave space between them so the hot air can circulate.

Lightly spray the coating with olive oil.

Cook for approximately 6 to 8 minutes.

Check them after 5 minutes because air fryers vary.

The coating should be golden and crisp.

Remove the pieces carefully.

Allow them to rest for a few minutes before adding the cranberry glaze.

The air fryer method creates a particularly crisp exterior with less oil.

Make Them Ahead

You can prepare the coated Brie several hours before serving.

Arrange the coated pieces on a parchment-lined tray.

Cover them loosely.

Refrigerate until you are ready to cook.

The cranberry glaze can also be prepared ahead.

Store it in a sealed container in the refrigerator.

Warm the glaze gently before serving.

When guests arrive, bake the chilled cheese pieces until golden.

This makes the Brie Bites convenient for entertaining.

Avoid leaving prepared cheese at room temperature for long periods.

Keep it refrigerated until cooking time.

Flavor Variations

Maple Walnut Brie

Replace the honey with pure maple syrup.

The maple flavor pairs beautifully with toasted walnuts.

Spicy Cranberry Brie

Add a small pinch of red pepper flakes to the glaze.

A little heat creates an interesting contrast with the sweet cranberry.

Rosemary Version

Replace thyme with finely chopped fresh rosemary.

Use a small amount because rosemary has a strong flavor.

Orange Cranberry

Increase the orange zest and add a little extra orange juice.

This version has a brighter citrus flavor.

Apple Cranberry

Serve the finished appetizer with thin apple slices.

The crisp fruit adds freshness and natural sweetness.

Pecan Version

Replace the walnuts with finely chopped pecans.

Pecans create a slightly sweeter nutty flavor.

These variations make Brie Bites easy to customize for different occasions.

Serving Suggestions

Serve the warm appetizer with crisp apple slices.

Pear slices also work beautifully.

Add grapes for a fresh and colorful platter.

Crackers provide another easy pairing.

Toasted baguette slices are especially delicious with the creamy Brie.

For a larger appetizer board, add olives, nuts, dried fruit, crackers, and fresh fruit.

A small bowl of cranberry glaze can sit in the center of the platter.

The Brie Bites can become the centerpiece of a holiday cheese board.

For a dinner party, serve two or three pieces per guest alongside other appetizers.

The sweet cranberry glaze pairs well with savory roasted nuts and fresh herbs.

Holiday Presentation

These Brie Bites are especially attractive during the holiday season.

Use a white or wooden serving board to make the golden coating stand out.

Arrange the pieces in a circular pattern.

Place small spoonfuls of cranberry glaze around the platter.

Add fresh rosemary or thyme sprigs.

Scatter a few walnuts and cranberries around the edges.

Orange zest can add a bright pop of color.

For a festive table, place the appetizer near other small bites.

Serve them warm so guests can enjoy the melted center.

Storage Instructions

Leftover Brie Bites should be placed in an airtight container.

Refrigerate them promptly.

For the best quality, enjoy leftovers within 2 to 3 days.

Store the cranberry glaze separately when possible.

Reheat the cheese in a conventional oven or air fryer.

Avoid overheating because the Brie can melt out of the crust.

The microwave can make the coating soft, so it is not the preferred reheating method.

Warm the glaze separately.

Add fresh thyme and a small amount of cranberry topping after reheating.

Common Mistakes to Avoid

Do not use warm Brie during the coating process.

Soft cheese is difficult to handle.

Avoid large walnut pieces because they may fall away during cooking.

Do not skip the flour layer.

It helps the egg mixture adhere.

Do not leave gaps in the coating.

Exposed cheese can melt through the crust.

Avoid adding too much glaze before serving.

A small amount provides plenty of flavor.

Do not overbake the appetizer.

The goal is a crisp exterior and soft center.

Avoid overcrowding the baking tray.

Good airflow helps the coating become crisp.

These simple precautions help create Brie Bites with a reliable texture.

Frequently Asked Questions

Can I use a whole wheel of Brie?

Yes, but this recipe is designed for individual pieces. Smaller pieces are easier to coat and serve.

Can I use another cheese?

Camembert is a possible substitute because it has a similar creamy texture. The flavor will be slightly different.

Can I make these without walnuts?

Yes. Pecans, almonds, or additional breadcrumbs can replace the walnuts.

Can I make them gluten-free?

Use gluten-free flour and gluten-free panko breadcrumbs.

Can I prepare them the day before?

You can prepare the coated cheese in advance and keep it refrigerated. For the best texture, cook them on the day you plan to serve them.

Can I use homemade cranberry sauce?

Absolutely. Homemade cranberry sauce works very well.

Can I use cranberry jam?

Yes. If the jam is very thick, warm it with a small amount of orange juice.

How do I prevent the Brie from leaking?

Keep the cheese cold, coat it thoroughly, chill it before cooking, and avoid overbaking.

Can I fry them instead?

Yes. They can be shallow-fried in a small amount of oil until golden. Handle them carefully and avoid overheating the oil.

Can I make them in an air fryer?

Yes. Cook them at about 375°F (190°C) for 6 to 8 minutes, checking early because air fryers vary.

Nutrition Information

Approximate nutrition per serving:

Calories: 210 kcal
Protein: 7g
Carbohydrates: 16g
Fat: 14g
Fiber: 1g
Sugar: 8g
Sodium: 260mg

Nutrition values are estimates and can vary depending on the specific Brie, cranberry sauce, breadcrumbs, walnuts, and serving size.

Why You Will Love This Recipe

These Brie Bites bring together several flavors that work beautifully as an appetizer.

The Brie becomes warm and creamy.

The walnut coating becomes golden and crunchy.

Panko adds extra crispness.

Garlic and thyme provide savory depth.

Cranberry creates a bright sweet-tart flavor.

Honey balances the cranberry.

Orange adds a subtle citrus note.

Fresh thyme makes the presentation look elegant.

Another benefit is the simple preparation.

The cheese can be coated ahead of time.

The glaze can also be made in advance.

When it is time to serve, simply bake the cheese until golden and add the cranberry topping.

That makes the recipe useful for holiday entertaining.

You can also change the flavors according to your menu.

Use pecans instead of walnuts.

Add chili flakes for heat.

Try maple syrup instead of honey.

Add rosemary instead of thyme.

Serve the appetizer with apples, pears, crackers, or toasted bread.

The recipe works for casual gatherings and more formal celebrations.

Final Thoughts

These Brie Bites are an elegant appetizer with a simple preparation process and a wonderful combination of textures.

Creamy Brie sits inside a golden coating of toasted walnuts and crispy breadcrumbs.

The cranberry honey glaze adds sweetness and acidity.

Orange brings freshness, while thyme adds a subtle herbal finish.

For the best results, keep the Brie chilled during preparation.

Coat each piece carefully and press the walnut mixture firmly onto the cheese.

A short chilling period before baking helps the coating stay in place.

Bake until the outside is golden and the cheese is soft.

Avoid overcooking because Brie melts quickly.

Serve the warm pieces with cranberry glaze, fresh thyme, toasted walnuts, and fruit.

Apples and pears are especially good choices.

Crackers and toasted baguette slices also make excellent accompaniments.

For a holiday party, arrange the Brie Bites on a large serving board with cranberries, walnuts, herbs, and fresh fruit.

Guests can enjoy each piece easily while mingling. The recipe also works well for different dietary needs. Use gluten-free breadcrumbs when needed. Pecans or almonds can also replace the walnuts.

For a sweeter variation, maple syrup works beautifully.

For a spicy version, red pepper flakes add a gentle kick.

No matter how you customize them, Brie Bites offer a delicious contrast between crisp coating, creamy cheese, and bright cranberry glaze.

They are simple enough for a weekend gathering and attractive enough for a special celebration.

Prepare the components ahead, bake just before serving, and finish with the glaze and fresh herbs.

With their golden walnut crust, melted Brie center, and glossy cranberry topping, Brie Bites make a memorable addition to any appetizer table.

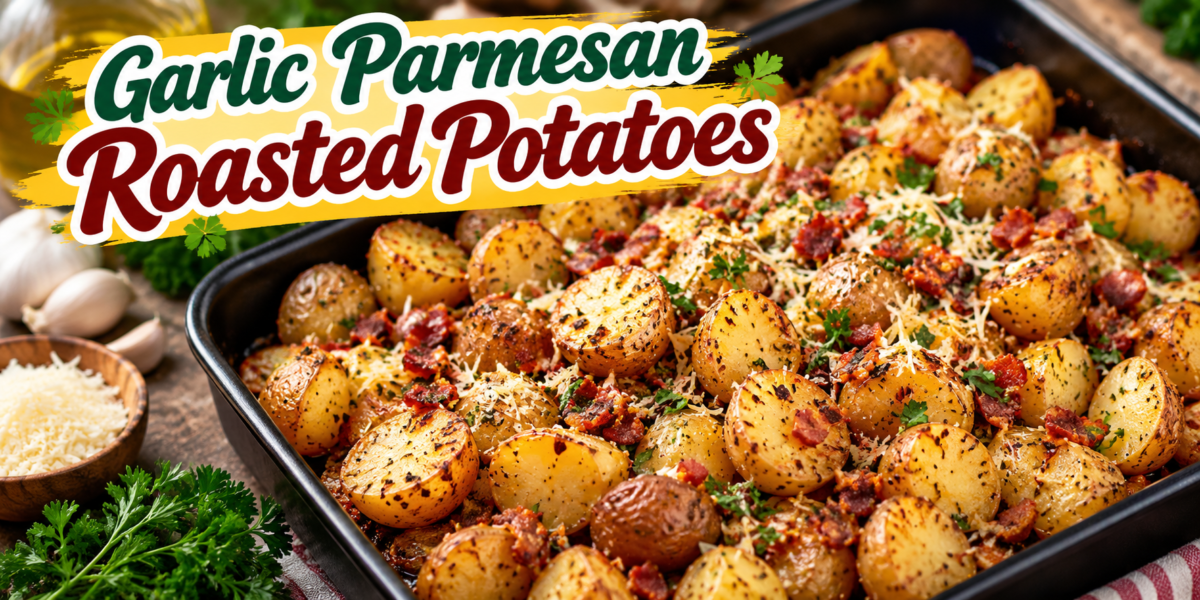
Garlic Parmesan Roasted Potatoes

Roasted Potatoes coated with garlic, Parmesan cheese, Italian herbs, olive oil, and fresh parsley

Garlic Parmesan Roasted Potatoes

Roasted Potatoes are one of the easiest side dishes to turn into something truly special. These Garlic Parmesan Roasted Potatoes combine golden baby potatoes with garlic, Parmesan cheese, Italian herbs, olive oil, and fresh parsley. The potatoes become crisp around the edges while staying soft and fluffy inside.

This recipe is simple enough for a weeknight dinner, yet delicious enough for holidays, family gatherings, and weekend meals. The combination of garlic and Parmesan creates a savory coating that sticks beautifully to every potato.

The secret to flavorful Roasted Potatoes is giving the potatoes enough space on the baking sheet. A crowded pan traps steam, while a spacious pan allows the potatoes to brown properly.

Ingredients

For the Potatoes

2 pounds baby potatoes, halved

3 tablespoons olive oil

4 garlic cloves, minced

1 teaspoon Italian seasoning

1/2 teaspoon dried oregano

1/2 teaspoon smoked paprika

1 teaspoon salt

1/2 teaspoon black pepper

1/2 teaspoon red pepper flakes, optional

For the Parmesan Topping

3/4 cup freshly grated Parmesan cheese

2 tablespoons fresh parsley, finely chopped

1 tablespoon melted butter

1 teaspoon garlic powder

1/2 teaspoon dried thyme

Optional Garnishes

Extra Parmesan cheese

Fresh parsley

Fresh thyme

Cooked crispy bacon, chopped

Red pepper flakes

Step-by-Step Instructions

Prepare the Potatoes

Start by washing the baby potatoes thoroughly. Remove any dirt from the skin and pat the potatoes completely dry with a clean kitchen towel.

Cut each potato in half. If some potatoes are larger than others, cut them into similar-sized pieces so everything cooks evenly.

Place the potatoes in a large mixing bowl.

Add olive oil, minced garlic, Italian seasoning, oregano, smoked paprika, salt, black pepper, and red pepper flakes if you want a little heat.

Toss everything together until the potatoes are evenly coated.

The garlic and herbs create a fragrant coating that gives these Roasted Potatoes their rich flavor.

Preheat the Oven

Preheat your oven to 425°F (220°C).

Line a large baking sheet with parchment paper if desired.

For extra browning, you can place the empty baking sheet in the oven while it preheats. A hot baking surface helps the cut sides of the potatoes begin cooking immediately.

Once the oven is fully heated, carefully remove the baking sheet.

Arrange the potatoes in a single layer with the cut sides facing down.

Leave a little space between each piece.

This step is important because proper spacing allows the heat to circulate around the potatoes.

Roast the Potatoes

Place the baking sheet in the preheated oven.

Roast the potatoes for about 20 minutes.

After 20 minutes, carefully turn the potatoes using a spatula or tongs.

Return the tray to the oven.

Continue roasting for another 15 to 20 minutes.

The potatoes should become golden brown on the outside and tender inside.

To test them, insert a fork into the thickest piece. It should slide in easily.

At this stage, the Roasted Potatoes should already have crisp edges and a soft center.

Prepare the Parmesan Mixture

While the potatoes roast, prepare the Parmesan topping.

Add freshly grated Parmesan cheese to a small bowl.

Mix in melted butter, garlic powder, dried thyme, and chopped parsley.

Stir until the ingredients are evenly combined.

Freshly grated Parmesan melts and browns more easily than many pre-shredded varieties.

The Parmesan mixture will create a savory crust that makes the potatoes especially delicious.

Add the Parmesan

Once the potatoes are tender and golden, remove the baking sheet from the oven.

Sprinkle the Parmesan mixture evenly over the potatoes.

Use a spatula to gently toss the potatoes if necessary.

Return the tray to the oven.

Bake for another 5 to 8 minutes.

The Parmesan should melt and become lightly golden.

Watch carefully during the final few minutes because cheese can brown quickly.

For an extra-crispy finish, switch the oven to broil for 1 to 2 minutes.

Stay near the oven while broiling.

The result should be golden potatoes covered with melted Parmesan and fragrant garlic.

Add Fresh Herbs

Remove the potatoes from the oven.

Allow them to rest for about 3 minutes.

Sprinkle fresh parsley over the top.

Add extra Parmesan if desired.

A small pinch of red pepper flakes can provide a pleasant contrast to the creamy Parmesan flavor.

Fresh herbs also add color and freshness to the finished dish.

At this point, your Roasted Potatoes are ready to serve.

Tips for Crispy Potatoes

Dry the potatoes thoroughly before seasoning them. Excess moisture can prevent proper browning.

Use enough oil to coat the potatoes lightly, but avoid soaking them.

Cut the potatoes into similar-sized pieces.

Preheat the oven completely before roasting.

Give each potato enough space on the baking sheet.

Place the cut sides against the hot baking surface for better browning.

Do not cover the baking sheet while the potatoes roast.

Turn the potatoes halfway through cooking.

Add the Parmesan near the end so it does not burn before the potatoes become tender.

For the crispiest Roasted Potatoes, use a large baking sheet rather than squeezing everything into a small pan.

Choosing the Best Potatoes

Baby potatoes are ideal for this recipe because their thin skins become pleasantly crisp while the centers remain creamy.

Red potatoes work very well because they hold their shape during roasting.

Yukon Gold potatoes provide a naturally buttery texture.

Small yellow potatoes are another excellent option.

You can also use regular potatoes cut into bite-sized cubes.

If using larger potatoes, try to keep the pieces around the same size.

Smaller pieces cook faster, while larger pieces need more time.

For especially flavorful Roasted Potatoes, leave the skins on when using thin-skinned potatoes.

Garlic Tips

Fresh garlic provides the strongest flavor.

Mince the garlic finely so it distributes evenly across the potatoes.

Garlic can burn at high temperatures, so adding some fresh garlic during the initial roast and finishing with garlic powder in the Parmesan mixture helps create a balanced flavor.

If you prefer a milder garlic taste, use three cloves instead of four.

For a stronger garlic flavor, add roasted garlic near the end.

You can also drizzle the finished potatoes with a small amount of garlic-infused olive oil.

These small changes can give your Roasted Potatoes a completely different flavor profile.

Parmesan Tips

Freshly grated Parmesan is recommended for the best texture.

Finely grated cheese coats the potatoes more evenly.

For a stronger flavor, use Parmesan with a slightly aged character.

You can also combine Parmesan with Pecorino Romano.

Avoid adding all the cheese at the beginning because it can become overly dark before the potatoes are cooked.

Adding the cheese during the final stage allows it to melt and develop a golden crust.

For extra cheesy Roasted Potatoes, add a small amount of mozzarella after the Parmesan has melted.

Easy Flavor Variations

Spicy Garlic Potatoes

Add extra red pepper flakes and a pinch of cayenne.

Serve with a cooling yogurt dip.

Herb Parmesan Potatoes

Increase the fresh parsley and add rosemary, thyme, or basil.

The herbs create a bright contrast with the rich Parmesan.

Lemon Parmesan Potatoes

Add fresh lemon zest after roasting.

A small squeeze of lemon juice just before serving can also brighten the flavor.

Bacon Parmesan Potatoes

Add cooked crispy bacon after the potatoes finish roasting.

The smoky bacon pairs especially well with garlic and Parmesan.

Mediterranean Style

Add oregano, parsley, lemon zest, and a little crumbled feta.

Kalamata olives can also be served alongside the potatoes.

Creamy Garlic Version

Serve the finished potatoes with a small bowl of garlic yogurt sauce.

The creamy sauce provides a delicious contrast to the crisp edges.

These variations make Roasted Potatoes easy to adapt for different meals and preferences.

Serving Suggestions

Garlic Parmesan Roasted Potatoes pair well with grilled chicken, roasted turkey, steak, pork, or fish.

For a vegetarian dinner, serve them with roasted vegetables and a fresh green salad.

They are also delicious alongside scrambled eggs or an omelet for breakfast or brunch.

Serve them with grilled vegetables and a creamy yogurt dip for a lighter meal.

A simple tomato and cucumber salad adds freshness.

You can also place the potatoes into a grain bowl with chickpeas, greens, cucumber, tomatoes, and feta.

For a family dinner, serve the Roasted Potatoes directly from the baking tray.

The golden color and melted Parmesan make them especially inviting.

Make-Ahead Instructions

You can prepare the potatoes several hours before cooking.

Wash and cut the potatoes.

Keep them refrigerated in a sealed container.

Before roasting, pat them completely dry.

Prepare the Parmesan mixture separately.

When you are ready to cook, season the potatoes and place them on a baking sheet.

Roast according to the recipe instructions.

For the best texture, do not fully cook the potatoes hours in advance and then leave them at room temperature.

Freshly roasted Roasted Potatoes have the best crispness.

Storage Instructions

Allow leftover potatoes to cool before storing.

Place them in an airtight container.

Refrigerate for up to 3 to 4 days.

For the best texture, reheat them in a hot oven or air fryer.

A microwave can warm them quickly, but the exterior will not become as crisp.

To refresh the potatoes in the oven, spread them on a baking sheet and heat at 400°F (205°C) for about 8 to 12 minutes.

Add fresh parsley and Parmesan after reheating.

Frequently Asked Questions

Can I use large potatoes?

Yes. Cut them into small, even cubes so they cook at the same rate as baby potatoes.

Do I need to peel the potatoes?

No. Thin potato skins become crisp and flavorful during roasting.

Why are my potatoes not crispy?

Excess moisture, too much oil, or an overcrowded baking sheet can prevent proper browning.

Make sure the potatoes are dry and have enough space around them.

Can I use pre-shredded Parmesan?

You can, although freshly grated Parmesan generally gives a better coating and melts more evenly.

Can I make these potatoes without butter?

Yes. Replace the butter with another tablespoon of olive oil.

Can I add onions?

Absolutely. Add thick slices of onion during the final 20 minutes so they do not burn.

Can I add vegetables?

Yes. Bell peppers, zucchini, mushrooms, and broccoli can be roasted alongside the potatoes. Keep in mind that different vegetables have different cooking times.

Can I make them spicy?

Yes. Add red pepper flakes, cayenne, or chopped fresh chili.

What dipping sauce goes well with them?

Garlic yogurt sauce, ranch dressing, tzatziki, or a lemon-herb sauce all work well.

Can I serve them for breakfast?

Yes. They pair nicely with eggs, avocado, tomatoes, and fresh herbs.

Nutrition Information

Approximate nutrition per serving:

Calories: 285 kcal
Protein: 9g
Carbohydrates: 37g
Fat: 12g
Fiber: 4g
Sugar: 2g
Sodium: 520mg

Nutrition values are estimates and may vary depending on the exact ingredients, cheese, oil, and serving size used.

Why You Will Love This Recipe

These Roasted Potatoes are easy to prepare and require only everyday ingredients.

The outside becomes golden and crisp while the inside remains soft and fluffy.

Garlic adds savory depth.

Parmesan creates a delicious cheesy crust.

Italian seasoning and oregano bring a fragrant herbal flavor.

Fresh parsley adds color and freshness.

Another benefit is versatility.

The potatoes can be served with breakfast, lunch, or dinner.

They work well for casual family meals and special occasions.

You can also change the seasoning depending on the main course.

For a Mediterranean meal, add oregano, lemon, parsley, and feta. A spicy dinner gets extra flavor from a sprinkle of chili flakes. If you prefer a richer side dish, add crispy bacon and extra Parmesan. Lemon zest and fresh herbs create a lighter, fresher finish. Best of all, the recipe requires very little hands-on cooking.

Once the potatoes are seasoned, the oven does most of the work.

This makes Roasted Potatoes especially useful when you are preparing several dishes at the same time.

Helpful Recipe Notes

For the best browning, use a light coating of olive oil.

Do not add too much salt before adding Parmesan because Parmesan naturally contains salt.

If your potatoes are very small, begin checking them after 25 to 30 minutes of total roasting time.

If the pieces are large, they may require additional cooking time.

Every oven is slightly different, so use tenderness and color as your final guides.

When the potatoes are finished, allow them to rest briefly before serving.

This helps the cheese settle onto the surface.

Fresh herbs should be added after cooking for the brightest flavor.

For a beautiful presentation, place the potatoes on a serving platter and sprinkle them with parsley, Parmesan, and a little cracked black pepper.

These details make homemade Roasted Potatoes look just as inviting as they taste.

Final Thoughts

Garlic Parmesan Roasted Potatoes are a comforting side dish that combines simple ingredients with plenty of flavor.

The potatoes are seasoned with garlic, herbs, olive oil, paprika, salt, and pepper before being roasted until golden.

A Parmesan mixture is added near the end, creating a delicious crust without burning the cheese.

Fresh parsley provides the finishing touch.

The recipe is flexible enough to suit many different meals.

Serve it with grilled meats, fish, roasted vegetables, salads, or eggs.

Lemon, chili, fresh herbs, feta, or crispy bacon can add a different flavor to the potatoes.

For the best result, remember the basics: dry the potatoes well, cut them evenly, preheat the oven, avoid overcrowding the pan, and add Parmesan near the end.

With these simple techniques, Roasted Potatoes can become crisp, golden, tender, and full of garlic-Parmesan flavor every time.

Roasted Potatoes are an easy side dish for both quick weeknight dinners and larger family meals.


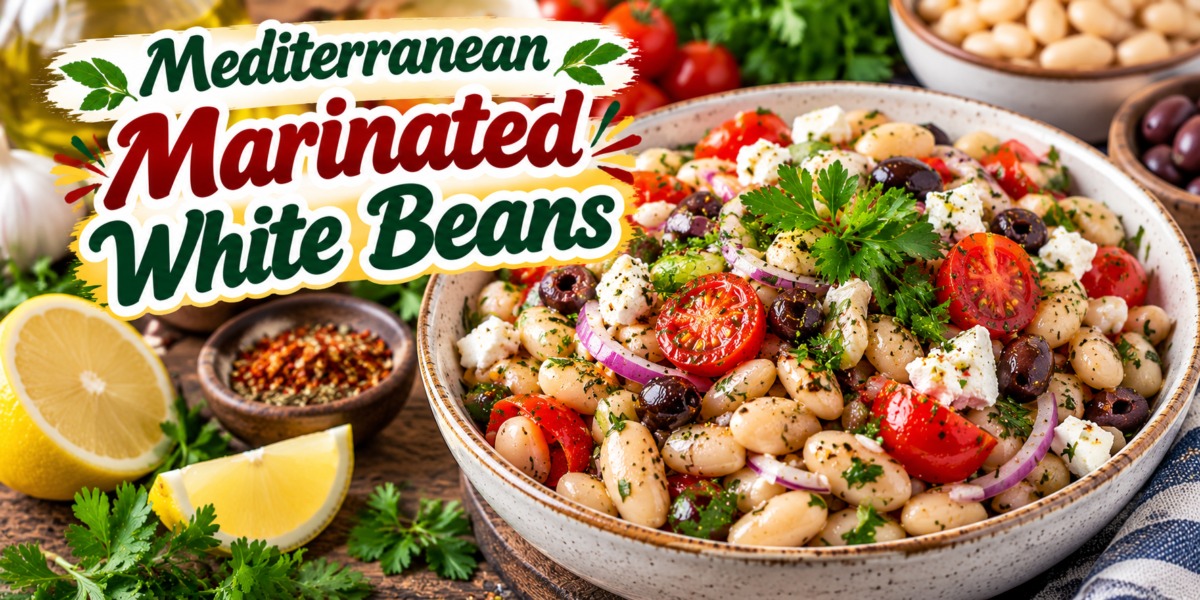
Mediterranean Marinated White Beans

Marinated White Beans with cherry tomatoes, red onion, fresh herbs, Kalamata olives, lemon, and feta

Mediterranean Marinated White Beans

Marinated White Beans are a simple Mediterranean-inspired dish made with creamy white beans, extra-virgin olive oil, fresh lemon juice, garlic, red onion, cherry tomatoes, parsley, dill, oregano, and a touch of Dijon mustard. The beans soak up the bright dressing, creating a flavorful side dish, lunch, appetizer, or light vegetarian meal.

This recipe is easy to prepare and requires no complicated cooking techniques. Simply whisk the dressing, combine the ingredients, and allow everything to rest so the flavors can develop. The result is creamy, fresh, tangy, and packed with Mediterranean flavor.

These Marinated White Beans are also excellent for meal prep because the flavor becomes even better after a few hours in the refrigerator.

Prep Time: 15 minutes
Marinating Time: 30 minutes
Total Time: 45 minutes
Servings: 6
Course: Side Dish, Lunch, Appetizer
Cuisine: Mediterranean

Ingredients

For the White Beans

3 cans white beans, 15 ounces each, drained and rinsed

1 cup cherry tomatoes, halved

1/2 medium red onion, finely sliced

1/3 cup fresh parsley, chopped

1/4 cup fresh dill, chopped

2 tablespoons fresh basil, chopped

1/4 cup Kalamata olives, sliced

1/4 cup crumbled feta cheese, optional

For the Marinade

1/3 cup extra-virgin olive oil

3 tablespoons fresh lemon juice

1 tablespoon red wine vinegar

1/2 teaspoon ground cumin

2 garlic cloves, finely minced

1 teaspoon Dijon mustard

1 teaspoon dried oregano

1/2 teaspoon salt

1/4 teaspoon red pepper flakes, optional

1 teaspoon lemon zest

1/2 teaspoon black pepper

Step-by-Step Instructions

Prepare the White Beans

Open the cans of white beans and transfer them to a colander.

Drain the beans thoroughly.

Rinse them under cool running water until the water runs clear.

Allow the beans to drain for several minutes.

Excess water can dilute the marinade, so drying the beans slightly helps them absorb the dressing.

Transfer the beans to a large mixing bowl.

Cannellini beans are an excellent choice because they have a creamy center and delicate skin. Great northern beans or navy beans can also work well.

The creamy texture makes Marinated White Beans especially satisfying.

Prepare the Vegetables

Wash the cherry tomatoes and cut them in half.

Thinly slice the red onion.

Chop the parsley, dill, and basil.

Slice the Kalamata olives.

If the red onion has a strong flavor, place the slices in cold water for 5 minutes. Drain them thoroughly before adding them to the salad.

The vegetables add freshness, color, and crunch.

Cherry tomatoes contribute natural sweetness, while red onion provides a gentle sharpness.

Fresh herbs bring a bright Mediterranean aroma to the dish.

Make the Marinade

Add extra-virgin olive oil to a small bowl.

Pour in the fresh lemon juice and red wine vinegar.

Add minced garlic and Dijon mustard.

Sprinkle in oregano, cumin, black pepper, salt, and red pepper flakes if using.

Add the lemon zest.

Whisk everything until the dressing looks smooth and well combined.

The lemon juice and vinegar provide acidity.

Olive oil adds richness.

Garlic and oregano provide savory flavor.

Dijon mustard helps bring the ingredients together.

This bright dressing gives Marinated White Beans their signature flavor.

Combine the Ingredients

Pour the marinade over the drained beans.

Add cherry tomatoes, red onion, parsley, dill, basil, and Kalamata olives.

Use a large spoon to fold everything together gently.

Avoid stirring too aggressively because the beans can break apart.

The goal is to coat the ingredients evenly while keeping the beans mostly intact.

If using feta, add it now or reserve it for serving.

At this stage, the salad should look colorful and glossy.

Let the Beans Marinate

Cover the bowl.

Place it in the refrigerator for at least 30 minutes.

For deeper flavor, allow the beans to marinate for 2 to 4 hours.

Stir gently once or twice during the resting time.

The beans gradually absorb the lemon, garlic, herbs, and olive oil.

This resting period is one of the most important steps because it allows the flavors to blend.

After marinating, taste the beans.

Add more lemon juice if you want extra brightness.

A small pinch of salt can also enhance the flavor.

Properly rested Marinated White Beans have a much more developed flavor than beans served immediately after mixing.

Tips for the Best Results

Use high-quality olive oil because it forms a large part of the dressing.

Fresh lemon juice gives a brighter flavor than bottled juice.

Drain and rinse canned beans thoroughly.

Allow the beans to dry slightly before adding the marinade.

Choose beans that are tender but still firm enough to hold their shape.

Fresh herbs provide the best flavor.

Do not add too much vinegar because the lemon already provides acidity.

Taste the dressing before pouring it over the beans.

Adjust salt, lemon, and pepper according to your preference.

Allow enough marinating time for the beans to absorb the dressing.

These simple steps help make Marinated White Beans flavorful, balanced, and satisfying.

Easy Variations

Add Roasted Red Peppers

Chopped roasted red peppers add sweetness and smoky flavor.

They also create beautiful color.

Add Cucumber

Diced cucumber provides extra crunch and freshness.

Add it shortly before serving for the best texture.

Add Avocado

Diced avocado makes the dish creamier.

Add it just before serving to prevent browning.

Add Artichokes

Marinated or canned artichoke hearts make an excellent Mediterranean addition.

Drain them well before chopping.

Add Roasted Vegetables

Roasted zucchini, bell peppers, or eggplant can turn the beans into a more substantial meal.

Allow roasted vegetables to cool before mixing them into the salad.

Add Extra Herbs

Mint can provide a refreshing flavor alongside parsley and dill.

Use it sparingly so it does not overpower the other herbs.

These additions make it easy to customize Marinated White Beans for different meals.

How to Make the Recipe More Filling

Serve the beans over cooked quinoa.

Brown rice also makes a hearty base.

Whole-grain couscous is another excellent option.

You can add roasted sweet potatoes for extra substance.

Hard-boiled eggs can also be served alongside the beans if you are not following a vegan diet.

For a plant-based meal, combine the beans with hummus and warm pita.

A serving of Marinated White Beans becomes a more complete meal when paired with whole grains and extra vegetables.

Serving Suggestions

Serve the beans chilled or slightly cool.

Spoon them over toasted sourdough bread.

Warm pita makes another excellent choice.

You can also place them over a bed of mixed greens.

Add cucumber, tomatoes, olives, and feta for a larger Mediterranean salad.

For an appetizer, serve the beans in a shallow bowl with toasted bread on the side.

A drizzle of olive oil and a sprinkle of fresh herbs make an attractive finish.

Fresh lemon wedges can be served alongside the dish.

These Marinated White Beans also pair beautifully with grilled vegetables, roasted chicken, fish, or Mediterranean grain bowls.

Make-Ahead Instructions

This recipe is ideal for making ahead.

Prepare the beans and marinade in the morning.

Refrigerate them until lunchtime.

For dinner, prepare the salad several hours before serving.

The longer the beans rest, the more flavor they absorb.

If preparing more than one day ahead, keep delicate ingredients such as avocado and cucumber separate.

Add them shortly before serving.

The dressing can also be prepared separately and refrigerated.

Bring it close to room temperature before mixing because olive oil can become cloudy and firm when chilled.

Storage Instructions

Store leftover Marinated White Beans in an airtight container.

Keep them refrigerated.

For the best quality, enjoy them within 3 to 4 days.

Use a clean spoon each time you serve the dish.

If the beans seem dry after refrigeration, add a small drizzle of olive oil and a squeeze of lemon juice.

Stir gently before serving.

Fresh herbs may darken slightly over time, but the beans should remain flavorful.

Do not leave the finished salad at room temperature for extended periods.

Common Mistakes to Avoid

Do not skip rinsing canned beans.

Excess canned liquid can affect the flavor of the marinade.

Avoid using too much olive oil.

The dressing should coat the beans without pooling heavily at the bottom.

Do not overmix the salad.

White beans can break easily when handled roughly.

Avoid adding watery vegetables too early if you plan to store the salad.

Do not use too much vinegar.

The combination of lemon and vinegar should remain balanced.

Avoid serving the beans immediately if you have time to marinate them.

A short resting period greatly improves the flavor.

These details help keep Marinated White Beans creamy, fresh, and well balanced.

Frequently Asked Questions

What type of white beans should I use?

Cannellini beans are an excellent choice because they are creamy and hold their shape well. Great northern and navy beans can also be used.

Can I use dried beans?

Yes. Cook the dried beans until tender, then cool and drain them thoroughly before preparing the recipe.

Can I make this recipe vegan?

Yes. Simply leave out the optional feta cheese. The remaining ingredients are plant-based.

Can I add feta?

Absolutely. Feta adds a salty and creamy Mediterranean flavor.

Can I use lime instead of lemon?

Lemon is recommended because it pairs naturally with the herbs and beans. Lime can work, but it will create a different flavor.

How long should the beans marinate?

At least 30 minutes is helpful. Two to four hours gives the best flavor.

Can I make it spicy?

Yes. Add red pepper flakes or finely chopped fresh chili.

Can I add tuna?

Yes. If you want additional protein, drained tuna can be folded in just before serving.

Can I serve the beans warm?

Yes. Although they are delicious chilled, they can also be served slightly warm with toasted bread or roasted vegetables.

Can I prepare the marinade ahead?

Yes. Whisk the marinade and refrigerate it in a sealed container. Stir well before using.

Nutrition Information

Approximate nutrition per serving:

Calories: 310 kcal
Protein: 11g
Carbohydrates: 34g
Fat: 15g
Fiber: 9g
Sugar: 4g
Sodium: 520mg

Nutrition values are estimates and can vary depending on the beans, olive oil, feta, and other ingredients used.

Why You Will Love This Recipe

There are plenty of reasons to add Marinated White Beans to your regular meal rotation.

The recipe is simple.

No complicated cooking technique is required.

Canned beans make preparation quick.

Fresh herbs create a bright flavor.

Lemon adds freshness.

Olive oil provides richness.

Garlic adds savory depth.

Tomatoes provide natural sweetness.

Kalamata olives contribute a salty Mediterranean note.

Feta adds creaminess when included.

Another benefit is versatility.

The beans can be served as a side dish.

They work beautifully over toast.

You can spoon them over salad greens.

They also make a convenient lunch when paired with pita or whole grains.

For meal prep, prepare the beans ahead and keep them refrigerated.

The flavor often improves after resting because the beans absorb the dressing.

You can also change the ingredients depending on what is available.

Add roasted peppers, artichokes, cucumber, avocado, or extra herbs.

A little chili creates a spicy version.

For a heartier meal, serve the beans with quinoa or brown rice.

The recipe is naturally plant-based when feta is omitted.

That makes Marinated White Beans a flexible option for many different meal plans.

Final Thoughts

Marinated White Beans are proof that simple pantry ingredients can create a flavorful Mediterranean-inspired meal.

Creamy white beans absorb the bright lemon and olive oil dressing.

Garlic, oregano, cumin, and fresh herbs add depth.

Cherry tomatoes provide sweetness.

Red onion adds crunch.

Kalamata olives bring a savory, salty flavor.

Optional feta gives the salad an extra creamy finish.

The recipe takes only a few minutes to assemble, yet allowing the beans to rest creates a much deeper flavor.

For the best result, use fresh lemon juice, good olive oil, and plenty of fresh herbs.

Serve the beans with toasted bread, warm pita, mixed greens, roasted vegetables, or cooked grains.

The recipe can also be customized with cucumber, roasted peppers, artichokes, avocado, or plant-based toppings.

For busy weekdays, prepare a batch ahead and store it in the refrigerator.

The beans can become part of several meals throughout the week.

Serve them chilled for lunch, slightly warm alongside roasted vegetables, or spooned over crisp greens.

The combination of creamy beans, fresh vegetables, fragrant herbs, tangy lemon, and rich olive oil makes Marinated White Beans an easy recipe worth keeping on hand.

Whether you are preparing a quick lunch, a Mediterranean-inspired side dish, or a simple plant-based dinner, Marinated White Beans offer plenty of flavor with very little effort.

Vegan Cuban Recipes with Bold Traditional Flavors

Cuban Recipes featuring vegan black beans, rice, bell peppers, tomatoes, avocado, cilantro, and lime

Vegan Cuban Recipes with Bold Traditional Flavors

Cuban Recipes are known for bold garlic, citrus, herbs, beans, rice, vegetables, and comforting spices. This vegan Cuban-inspired recipe brings those traditional flavors together in a hearty one-pot meal without using meat or dairy. Black beans, rice, bell peppers, tomatoes, onion, garlic, cumin, oregano, lime, and fresh cilantro create a satisfying combination that is simple enough for a weeknight dinner.

These Cuban Recipes are especially enjoyable when you want a flavorful plant-based meal. The beans provide a hearty texture, while the rice absorbs the fragrant tomato and spice mixture. Fresh lime juice adds brightness at the end, and cilantro gives the dish a fresh finish.

These Cuban Recipes are perfect for anyone who enjoys bold flavors and hearty plant-based meals.


Prep Time: 15 minutes
Cook Time: 40 minutes
Total Time: 55 minutes
Servings: 6
Cuisine: Cuban-inspired
Course: Main Dish

Ingredients

For the Cuban-Style Bean Mixture

Olive oil: 2 tablespoons
Yellow onion: 1 medium, diced
Green bell pepper: 1, diced
Red bell pepper: 1, diced
Garlic cloves: 4, minced
Cooked black beans: 2 cups
Diced tomatoes: 1 can (14 ounces)
Tomato paste: 1 tablespoon
Ground cumin: 1 teaspoon
Dried oregano: 1 teaspoon
Smoked paprika: 1/2 teaspoon
Black pepper: 1/2 teaspoon
Salt: 1/2 teaspoon
Red pepper flakes: 1/4 teaspoon, optional
Bay leaf: 1
Vegetable broth: 1 1/2 cups

For the Rice

2 cups long-grain white rice

1 tablespoon olive oil

1/2 teaspoon salt

2 1/2 cups vegetable broth

For the Fresh Topping

1/4 cup fresh cilantro, chopped

2 green onions, sliced

1 avocado, diced

1 lime, cut into wedges

1/4 cup diced red onion

Step-by-Step Instructions

Prepare the Vegetables

Begin by washing and preparing all the vegetables.

Dice the yellow onion and bell peppers into small, even pieces.

Mince the garlic.

Chop the cilantro and green onions.

Keep the avocado and lime aside for serving.

Evenly cut vegetables cook more consistently and create a better texture throughout the dish.

The combination of onion, peppers, and garlic creates the aromatic foundation for these Cuban Recipes.

Fresh vegetables give these Cuban Recipes plenty of color and texture.

Sauté the Onion and Peppers

Heat olive oil in a large deep skillet or Dutch oven over medium heat.

Add the diced yellow onion.

Cook for about 3 minutes, stirring occasionally.

Next, add the green and red bell peppers.

Cook for another 4 to 5 minutes.

The vegetables should soften without becoming completely mushy.

Add the minced garlic.

Cook for approximately 30 seconds.

The garlic should become fragrant but should not turn dark.

This slow sauté helps build a flavorful base before the beans and tomatoes are added.

This aromatic base gives Cuban Recipes their warm and savory character.

Add the Cuban Seasonings

Add cumin, oregano, smoked paprika, black pepper, salt, and red pepper flakes if using.

Stir well so the spices coat the vegetables.

Cook for about 30 seconds.

Heating the spices briefly helps release their aroma.

Cumin provides an earthy flavor, while oregano adds a herbal note.

Smoked paprika contributes a gentle smoky character.

Together, these seasonings create the bold flavor associated with many Cuban Recipes.

These simple spices help bring authentic-inspired flavor to Cuban Recipes.

Add Tomatoes and Tomato Paste

Add the diced tomatoes.

Stir in the tomato paste.

Cook the mixture for approximately 3 minutes.

The tomato paste helps deepen the flavor and gives the sauce a richer consistency.

Scrape the bottom of the pan gently as you stir.

Any flavorful bits left from the vegetables can become part of the sauce.

Add the Black Beans

Add the cooked black beans to the skillet.

Pour in 1 1/2 cups of vegetable broth.

Add the bay leaf.

Stir everything together.

Bring the mixture to a gentle simmer.

Reduce the heat to low.

Cover and cook for about 15 minutes.

The beans will absorb some of the tomato and spice flavors while the sauce becomes thicker.

If the mixture becomes too thick, add a small splash of vegetable broth.

This bean mixture gives the dish its hearty texture and makes these Cuban Recipes satisfying without meat.

The seasoned beans make these Cuban Recipes hearty and satisfying.

Prepare the Rice

While the beans simmer, prepare the rice.

Rinse the rice under cool water until the water runs mostly clear.

This helps remove excess surface starch and can produce fluffier rice.

Heat one tablespoon of olive oil in a medium saucepan.

Add the rinsed rice.

Stir for about 1 minute.

Add 2 1/2 cups vegetable broth and 1/2 teaspoon salt.

Bring the liquid to a gentle boil.

Reduce the heat to low.

Cover the saucepan.

Cook according to the rice package instructions, usually around 15 to 20 minutes.

Do not repeatedly open the lid while the rice cooks.

Once the liquid has been absorbed, remove the saucepan from the heat.

Let the rice rest, covered, for 5 minutes.

Fluff it gently with a fork.

The fluffy rice provides the perfect base for the rich bean mixture.

Combine the Rice and Beans

You can serve the rice and beans separately or combine them.

For a bowl-style presentation, spoon rice into each serving bowl.

Add a generous portion of the seasoned black beans.

Allow some of the tomato sauce to spread over the rice.

This creates a colorful and comforting meal.

For a one-pot presentation, gently fold the cooked rice into the bean mixture.

Do not stir too aggressively because you want the rice to remain fluffy.

The combination of seasoned beans and rice is one of the most satisfying features of Cuban Recipes.

Add the Fresh Toppings

Top each serving with fresh cilantro.

Add sliced green onions and diced red onion.

Place a few avocado pieces on top.

Finish with fresh lime juice.

The citrus cuts through the richness of the beans and rice.

Fresh herbs add brightness and color.

For additional heat, add sliced jalapeño or a pinch of red pepper flakes.

These fresh toppings make the final dish feel lighter and fresher.

Tips for the Best Results

Use cooked black beans that are tender but not mushy.

If using canned beans, drain and rinse them before adding them to the recipe.

Fresh garlic gives the strongest flavor.

Do not burn the garlic because it can become bitter.

Toast the dry spices briefly before adding the liquids.

This helps release their natural aroma.

Use fresh lime juice instead of bottled juice when possible.

For fluffy rice, rinse it thoroughly and avoid opening the lid repeatedly during cooking.

Let the rice rest before fluffing.

Allow the bean mixture to simmer gently rather than boiling aggressively.

These steps help create flavorful and well-balanced Cuban Recipes at home.

Easy Ingredient Variations

Use Pinto Beans

Pinto beans can replace black beans.

They provide a slightly softer texture and mild flavor.

Add Sweet Potatoes

Diced sweet potatoes can be added with the bell peppers.

They bring natural sweetness and extra texture.

Add Plantains

Sliced ripe plantains can be pan-fried separately and served alongside the beans and rice.

Their sweetness creates a delicious contrast with the savory spices.

Add Corn

Corn kernels provide sweetness and color.

Add them during the final 5 minutes of cooking.

Add Mushrooms

Sliced mushrooms can be sautéed with the peppers.

They add an earthy texture to the dish.

These changes allow you to create different Cuban Recipes while keeping the same flavorful foundation.

How to Make the Dish Spicier

The basic recipe has mild seasoning.

For more heat, add red pepper flakes.

Fresh jalapeño can also be added with the bell peppers.

Another option is to serve hot sauce at the table.

You can also add a small amount of cayenne pepper.

Start with a little and increase gradually.

This allows everyone to control the spice level.

How to Make It More Traditional-Inspired

Garlic, cumin, oregano, citrus, beans, and rice are important flavor components in many Cuban-inspired dishes.

Fresh lime juice adds acidity.

Cilantro provides a fresh finish.

Plantains can be served on the side.

You can also add avocado, sliced red onion, or a simple tomato salad.

Keep the seasoning balanced rather than using too many spices.

The goal is a fragrant, savory dish where each ingredient remains recognizable.

Serving Suggestions

Serve the beans and rice in individual bowls.

Add avocado and fresh cilantro.

Place lime wedges around the plate.

Fried or baked plantains make a delicious side.

A simple tomato and cucumber salad can add freshness.

You can also serve the meal with roasted vegetables.

For a larger dinner, add warm tortillas or crusty bread.

A small bowl of fresh salsa works well for guests who enjoy extra heat.

The colorful toppings make these Cuban Recipes especially attractive when served family-style.

Fresh lime and cilantro add a bright finish to these Cuban Recipes.

Meal Prep Instructions

This recipe is excellent for meal preparation.

Cook the beans and rice separately.

Allow both components to cool before storing.

Divide them into individual containers.

Keep fresh avocado and lime separate.

Add cilantro and fresh vegetables shortly before eating.

When ready to serve, reheat the rice and beans thoroughly.

Add the fresh toppings afterward.

The separate components help preserve the texture of the rice and vegetables.

This makes the meal convenient for busy weekdays.

Preparing the ingredients ahead makes these Cuban Recipes convenient for busy days.

Storage Instructions

Store leftover beans and rice in airtight containers.

Refrigerate them within two hours of cooking.

Use refrigerated leftovers within 3 to 4 days for the best quality.

Keep avocado and fresh herbs separate.

Reheat only the portion you plan to eat.

If the bean mixture becomes thick after refrigeration, add a splash of vegetable broth while reheating.

Stir gently until hot.

Fresh lime juice can be added after reheating.

Freezing Instructions

The bean mixture freezes well.

Allow it to cool completely.

Transfer it to freezer-safe containers.

Freeze for up to 2 months for the best quality.

Rice can also be frozen in individual portions.

Thaw the food in the refrigerator before reheating.

Add fresh cilantro, avocado, and lime after reheating.

Fresh toppings should not be frozen with the cooked beans and rice.

Common Mistakes to Avoid

Do not skip rinsing canned beans.

Avoid burning the garlic.

Do not add too much liquid to the bean mixture.

Avoid overcooking the rice.

Do not stir rice repeatedly while it cooks.

Avoid adding avocado during cooking.

Fresh avocado tastes best when added immediately before serving.

Do not forget the lime juice.

The acidity helps balance the rich beans and rice.

Avoid using excessive spices.

A few well-chosen seasonings can create better flavor than a long list of spices.

Frequently Asked Questions

Are these Cuban Recipes vegan?

Yes. This recipe uses beans, vegetables, rice, herbs, and vegetable broth, so it can be prepared without animal products.

Can I use canned black beans?

Yes. Drain and rinse them before adding them to the skillet.

Can I use brown rice?

Absolutely. Brown rice adds a nuttier flavor and more texture. Follow the cooking instructions on your package.

Can I use quinoa instead of rice?

Yes. Quinoa provides another plant-based grain option and works well with the seasoned beans.

Can I add plantains?

Yes. Fried or baked plantains make an excellent side dish.

Can I prepare the recipe ahead?

Yes. Cook the beans and rice ahead, then store them separately in the refrigerator.

Can I freeze the leftovers?

Yes. Both the bean mixture and rice can be frozen separately.

What can I use instead of black beans?

Pinto beans or kidney beans can be used, although the flavor and texture will be slightly different.

Can I add meat?

The recipe is designed as a vegan meal. If you are not following a vegan diet, cooked chicken or another protein can be served separately.

What makes the flavor bold?

Garlic, cumin, oregano, tomatoes, peppers, lime, and fresh herbs provide the main layers of flavor.

Simple pantry ingredients make these Cuban Recipes easy to prepare at home.

Nutrition Information

Approximate nutrition per serving:

Calories: 430 kcal
Protein: 14g
Carbohydrates: 70g
Fat: 11g
Fiber: 12g
Sugar: 7g
Sodium: 560mg

Nutrition values are estimates and can vary depending on the ingredients and portion sizes used.

Why You Will Love This Recipe

These Cuban Recipes are a great option when you want a plant-based meal that does not feel boring.

The black beans provide a hearty texture.

Rice makes the meal filling.

Bell peppers add sweetness and color.

Tomatoes create a rich base.

Garlic gives the dish savory depth.

Cumin and oregano add warmth.

Fresh lime juice balances everything.

Avocado creates a creamy contrast.

Fresh cilantro finishes the dish with a bright herbal note.

Another advantage is flexibility.

The recipe can be served mild or spicy, depending on your preference. White rice and brown rice both work well in this dish. For extra variety, add plantains, corn, sweet potatoes, mushrooms, or other vegetables. Preparing the components ahead of time also makes quick lunches much easier.

The recipe is easy to scale for family dinners or meal preparation.

Final Thoughts

Cuban Recipes often shine because simple ingredients are combined with aromatic seasonings and fresh finishing touches.

This vegan Cuban-inspired meal follows that idea with black beans, rice, peppers, tomatoes, garlic, cumin, oregano, lime, and herbs.

The beans simmer in a flavorful tomato mixture until they become rich and satisfying.

Fluffy rice provides a soft base.

Fresh avocado adds creaminess, while cilantro and lime brighten every bite.

Plantains, salsa, or a simple salad can complete the meal.

For meal prep, store the rice and beans separately and add fresh toppings when serving.

The recipe is also easy to customize.

Extra vegetables can increase the volume, while jalapeños and red pepper flakes can bring additional heat.

Different beans can be used when needed.

Brown rice or quinoa can also replace white rice.

Whether you prepare it for a family dinner, weekday lunch, or plant-based meal plan, these Cuban Recipes offer a colorful and comforting combination of textures and flavors.

The result is a hearty bowl with traditional Cuban-inspired ingredients and a fresh vegan approach.

Serve it warm with plenty of lime, fresh cilantro, creamy avocado, and your favorite toppings for a flavorful homemade meal.

With beans, rice, vegetables, herbs, and citrus, these Cuban Recipes bring plenty of flavor to the table.

Perfect Easy Roasted Eggplant Recipe

Roasted Eggplant layered with tomato sauce, melted mozzarella, Parmesan cheese, and fresh basil

Perfect Easy Roasted Eggplant Recipe

Description

Roasted Eggplant is a simple, flavorful side dish made with tender eggplant, olive oil, garlic, tomatoes, Parmesan, mozzarella, and fresh basil. The eggplant becomes beautifully soft inside with lightly caramelized edges, while the tomato sauce and melted cheese create a comforting Mediterranean-inspired flavor.

This recipe is easy enough for a weeknight dinner and delicious enough to serve when guests come over. The ingredients are simple, affordable, and easy to find. You can serve it as a side dish, vegetarian main course, or topping for toasted bread and pasta.

The secret to delicious Roasted Eggplant is preparing the slices properly, using enough seasoning, and giving the vegetables enough space on the baking tray.

Ingredients

For the Eggplant

2 large eggplants, sliced into 1/2-inch rounds

3 tablespoons olive oil

1 teaspoon salt

1/2 teaspoon black pepper

1 teaspoon Italian seasoning

1/2 teaspoon garlic powder

1/2 teaspoon paprika

For the Tomato Sauce

2 cups crushed tomatoes

3 garlic cloves, minced

1 tablespoon olive oil

1 teaspoon dried oregano

1/2 teaspoon dried basil

1/2 teaspoon salt

1/4 teaspoon black pepper

1/4 teaspoon red pepper flakes, optional

For the Topping

1 cup shredded mozzarella cheese

1/2 cup grated Parmesan cheese

1/4 cup fresh basil, chopped

1 tablespoon fresh parsley, chopped

Step-by-Step Instructions

Prepare the Eggplant

Start by washing the eggplants and removing the stems.

Slice them into rounds about 1/2 inch thick. Try to keep the slices similar in size so they cook evenly.

Place the slices on a large baking sheet or cutting board.

Sprinkle both sides with salt.

Let them sit for about 15 minutes. This step can help draw out some excess moisture and improve the final texture.

Pat the slices dry with paper towels.

Season both sides with black pepper, Italian seasoning, garlic powder, and paprika.

Drizzle olive oil over the slices and gently toss or brush until they are evenly coated.

This preparation gives the Roasted Eggplant a flavorful surface and helps the slices develop golden edges.

Roast the Eggplant

Preheat your oven to 425°F (220°C).

Line a large baking sheet with parchment paper.

Arrange the eggplant slices in a single layer.

Leave a little space between the pieces.

Avoid stacking them because crowded slices tend to steam instead of roast.

Place the tray in the oven.

Roast for about 20 minutes.

Carefully flip the slices.

Continue roasting for another 10 to 15 minutes.

The eggplant should become tender in the center with golden-brown edges.

Keep an eye on the slices during the final few minutes because thinner pieces may cook faster.

Well-roasted Roasted Eggplant should be tender without becoming completely mushy.

Prepare the Tomato Sauce

While the eggplant is roasting, prepare the sauce.

Heat one tablespoon of olive oil in a saucepan over medium heat.

Add the minced garlic.

Cook for about 30 seconds until fragrant.

Do not allow the garlic to burn.

Add crushed tomatoes, oregano, dried basil, salt, black pepper, and red pepper flakes if using.

Stir well.

Bring the sauce to a gentle simmer.

Cook for 10 to 12 minutes.

Stir occasionally.

The sauce should become slightly thicker and more flavorful.

Taste and adjust the seasoning.

Fresh tomato sauce adds moisture and acidity that balance the richness of the cheese and Roasted Eggplant.

Assemble the Dish

Reduce the oven temperature to 400°F (200°C).

Spread a thin layer of tomato sauce across the bottom of a baking dish.

Arrange a layer of roasted eggplant over the sauce.

Add another spoonful of tomato sauce.

Sprinkle some mozzarella and Parmesan over the top.

Continue layering the eggplant, sauce, and cheese until everything has been used.

Finish with a generous layer of mozzarella and Parmesan.

The cheese should cover most of the surface.

Add a little dried oregano if desired.

This layered method allows the sauce to soak into the Roasted Eggplant while the cheese creates a golden, bubbling topping.

Bake Until Golden

Place the assembled dish in the oven.

Bake uncovered for 15 to 20 minutes.

The cheese should melt completely and become lightly golden.

For a darker topping, switch to broil for 1 to 2 minutes.

Watch the dish closely during broiling.

Remove it from the oven and let it rest for about 5 minutes.

Scatter fresh basil and parsley over the top.

The resting time allows the sauce to settle and makes the dish easier to serve.

Tips for the Best Results

Choose eggplants that feel firm and have smooth, shiny skin.

Smaller or medium eggplants can have a tender texture and fewer large seeds.

Cut the slices evenly so they roast at the same rate.

Do not use excessive oil. Eggplant absorbs oil quickly, so a moderate amount is usually enough.

Give the slices plenty of room on the baking tray.

This is one of the most important steps for getting nicely browned Roasted Eggplant.

Roast at a high temperature to encourage caramelization.

Flip the slices halfway through cooking.

If your eggplant releases a lot of moisture, continue roasting for a few extra minutes.

Fresh garlic and herbs provide more flavor than relying only on dried seasonings.

Let the finished dish rest before serving.

Easy Variations

Add Bell Peppers

Thinly sliced bell peppers can be roasted alongside the eggplant.

Red, yellow, and orange peppers add sweetness and color.

Add Zucchini

Zucchini can be layered with the eggplant.

Slice it thinly and roast it briefly before assembling the dish.

Add Mushrooms

Sliced mushrooms create an earthy flavor.

Roast them separately first so excess moisture does not make the casserole watery.

Make It Spicy

Add extra red pepper flakes to the tomato sauce.

You can also add thinly sliced fresh chili peppers.

Add Fresh Herbs

Basil is a natural pairing, but parsley, oregano, thyme, or rosemary can also be used.

Fresh herbs added after baking give the Roasted Eggplant a bright finish.

Serving Suggestions

Serve the dish warm as a vegetarian main course.

It pairs beautifully with a crisp green salad.

Crusty bread is perfect for soaking up the tomato sauce.

You can also serve the Roasted Eggplant over pasta for a more substantial dinner.

For a Mediterranean-style meal, add olives, cucumber, tomatoes, hummus, and warm pita bread.

A spoonful of plain Greek yogurt can provide a cool contrast to the warm tomato sauce.

The dish also works well alongside grilled chicken or fish when you want to serve it as a vegetable side.

Make-Ahead Instructions

The eggplant can be roasted several hours ahead.

Prepare the tomato sauce separately and keep it refrigerated.

When you are ready to serve, assemble the layers in a baking dish.

Add the cheese just before baking.

This makes Roasted Eggplant convenient for dinner parties and busy evenings.

You can also assemble the entire dish earlier in the day.

Cover it and refrigerate until needed.

Allow a little extra baking time if the dish is cold from the refrigerator.

Storage Instructions

Allow leftovers to cool before storing.

Place them in an airtight container.

Refrigerate for up to 3 to 4 days.

Reheat individual portions in the oven or microwave.

The oven usually gives the best texture because it helps warm the eggplant without making the cheese overly soft.

Keep fresh basil separate and add it after reheating.

Leftover Roasted Eggplant can also be chopped and added to pasta, sandwiches, wraps, or grain bowls.

Common Mistakes to Avoid

Avoid slicing the eggplant too thin because it can become overly soft.

Do not overcrowd the baking sheet.

Too much oil can make the dish greasy.

Avoid under-seasoning the eggplant.

Do not rush the roasting process.

The eggplant needs enough heat and time to become tender.

Avoid using too much tomato sauce between the layers.

Excess sauce can make the dish watery.

Do not add fresh basil before baking because it can lose its fresh flavor.

Add it after the dish comes out of the oven.

These simple details make a noticeable difference in the final texture of Roasted Eggplant.

Frequently Asked Questions

Do I need to peel the eggplant?

No. The skin is edible and helps the slices hold their shape during cooking.

Why is my eggplant watery?

Eggplant naturally contains moisture. Salting, patting the slices dry, and roasting them at high heat can help reduce excess moisture.

Can I use a different cheese?

Yes. Mozzarella and Parmesan can be replaced or combined with provolone, Italian cheese blends, or Pecorino Romano.

Can I make this recipe vegan?

Yes. Replace the dairy cheese with your favorite plant-based mozzarella and Parmesan alternatives.

Can I grill the eggplant?

Yes. Grill the slices until tender and lightly charred before layering them with the tomato sauce.

Can I use jarred tomato sauce?

Absolutely. A good-quality marinara sauce is a convenient substitute for homemade tomato sauce.

Can I freeze leftovers?

Yes, although the texture of the eggplant may become softer after thawing. Store cooled portions in freezer-safe containers.

How can I make the dish crispier?

Roast the eggplant thoroughly before layering and avoid adding excessive sauce.

Can I add meat?

Yes. Cooked ground beef, turkey, or Italian sausage can be added between the layers if you want a meatier casserole.

What herbs work best?

Fresh basil is especially delicious, but parsley, oregano, thyme, and rosemary also complement the dish.

Nutrition Information

Approximate nutrition per serving:

Calories: 285 kcal
Protein: 13g
Carbohydrates: 22g
Fat: 17g
Fiber: 7g
Sugar: 9g
Sodium: 680mg

Nutrition values are estimates and can vary depending on the ingredients and portion sizes used.

Why You Will Love This Recipe

There are many reasons to keep Roasted Eggplant in your recipe rotation.

The eggplant becomes tender and flavorful during roasting.

Tomato sauce adds brightness and moisture.

Mozzarella creates a creamy, melted topping.

Parmesan adds a savory finish.

Fresh basil brings everything together.

The recipe is also flexible enough for different diets and preferences.

This recipe is easy to customize for different preferences. For a vegetarian or vegan version, choose suitable plant-based ingredients. Extra vegetables can add more color, flavor, and texture. For more heat, increase the chili or red pepper flakes. Different cheeses can create new flavor combinations. Leftovers can also be used in pasta, sandwiches, wraps, or grain bowls.

Another benefit is that most of the work happens in the oven.

Once the eggplant is prepared, roasting develops much of its flavor without constant stirring.

The finished Roasted Eggplant can be served as a side dish or made into a complete meal with bread, salad, pasta, or grains.

Final Thoughts

Roasted Eggplant is a simple way to turn fresh eggplant into a comforting and flavorful dish.

The high-temperature roasting process gives the slices tender centers and golden edges.

Tomato sauce adds a bright Mediterranean flavor, while mozzarella and Parmesan create a rich, bubbling topping.

Fresh basil and parsley provide a refreshing finish.

For the best result, choose firm eggplants, slice them evenly, season them well, and avoid overcrowding the baking tray.

The recipe can easily be adapted with zucchini, peppers, mushrooms, olives, extra herbs, or a little spice.

Serve Roasted Eggplant with crusty bread for a simple vegetarian dinner, or pair it with grilled chicken or fish as a flavorful side.

It is also useful for meal prep because leftovers can be refrigerated and reheated.

The combination of tender vegetables, savory tomato sauce, melted cheese, and fresh herbs makes Roasted Eggplant a satisfying recipe for weeknight dinners, family meals, and casual gatherings.

Once you make this recipe, Roasted Eggplant can become an easy favorite whenever you want a warm, flavorful vegetable dish with simple Mediterranean-inspired ingredients.