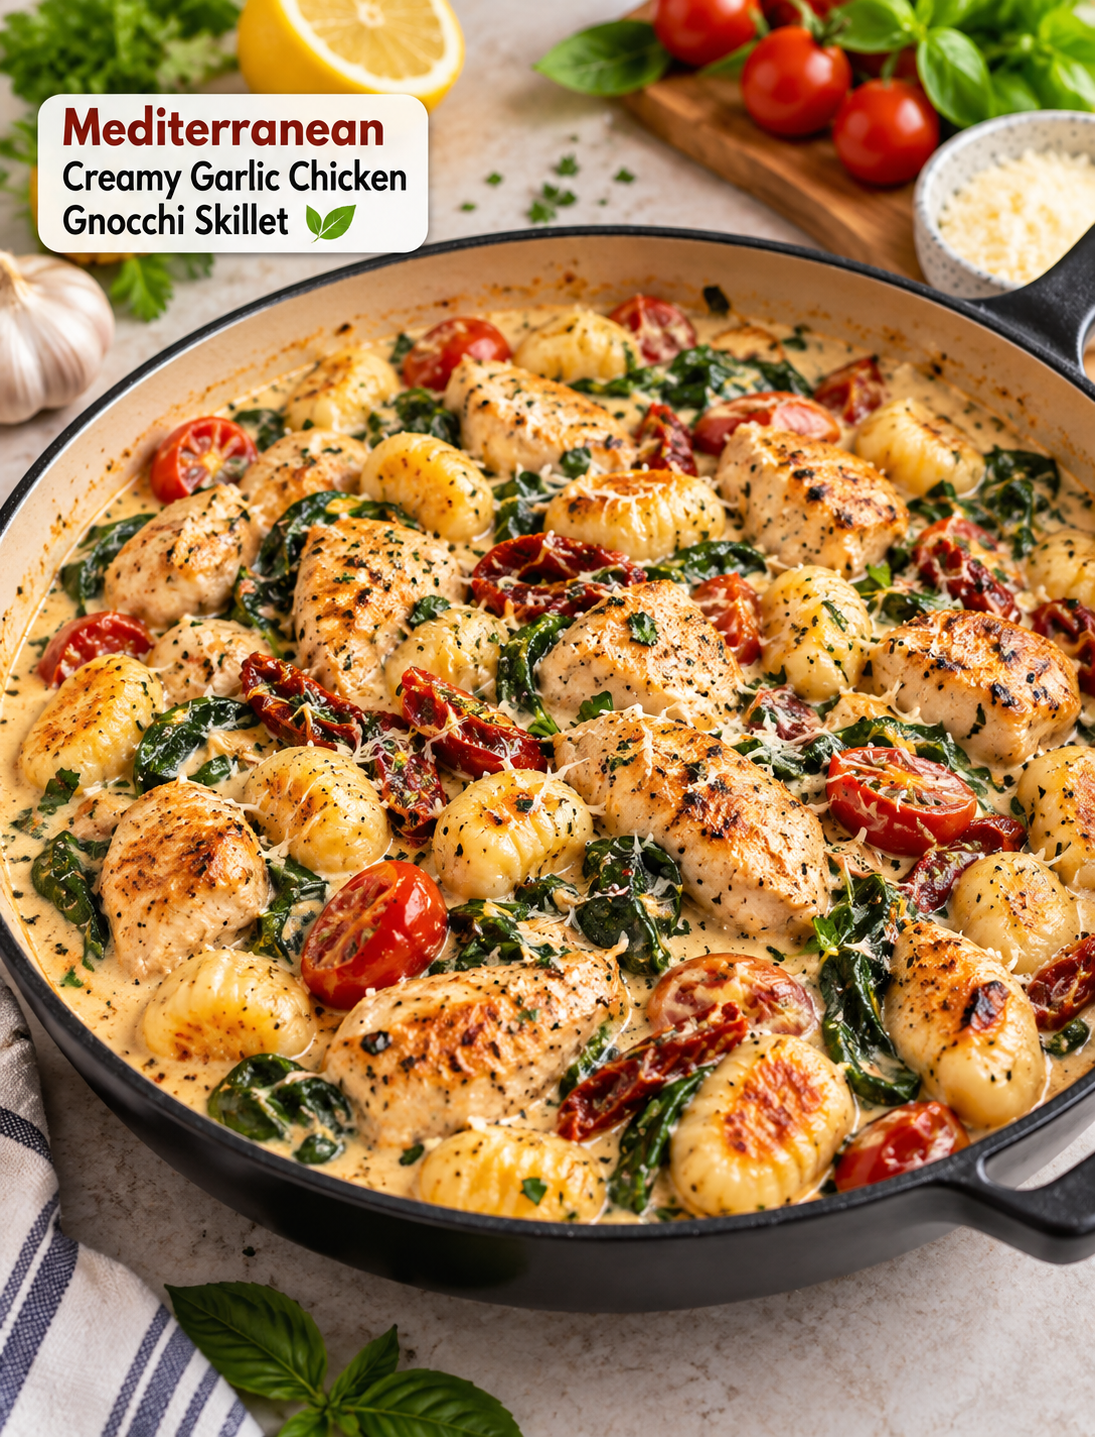
Mediterranean Creamy Garlic Chicken Gnocchi Skillet

Mediterranean creamy garlic chicken gnocchi skillet with golden gnocchi, tender chicken, spinach, cherry tomatoes, and creamy garlic sauce

Mediterranean Creamy Garlic Chicken Gnocchi Skillet

If you need a comforting dinner that feels special without taking all evening, this Mediterranean Creamy Garlic Chicken Gnocchi Skillet is a great choice. It combines tender chicken, golden pan-seared gnocchi, garlic, sun-dried tomatoes, fresh spinach, and a creamy lemon Parmesan sauce in one skillet.

The entire meal comes together in about 30 minutes, making it practical for busy weeknights. The gnocchi develops a lightly crisp outside while staying soft inside, and the creamy sauce brings all the ingredients together.

This recipe also works well for casual dinners with family or guests because it looks colorful and tastes fresh without requiring complicated cooking techniques.

Why You’ll Love This Recipe

  • One-pan meal: Chicken, gnocchi, vegetables, and sauce are prepared in one skillet for easier cleanup.
  • Ready in 30 minutes: The recipe uses simple ingredients and quick cooking methods.
  • Crispy and creamy: Pan-seared gnocchi adds texture to the smooth garlic cream sauce.
  • Mediterranean flavors: Lemon, oregano, tomatoes, garlic, and fresh herbs give the dish a bright finish.
  • Easy to customize: You can use dairy-free cream, gluten-free gnocchi, or another protein.
  • Family-friendly: The mild seasoning can be adjusted easily for different tastes.

Ingredients You’ll Need

For the Chicken and Gnocchi

  • 1 lb boneless, skinless chicken breast or thighs, cut into bite-size strips
  • 1 package (16 oz) potato gnocchi
  • 2 tbsp olive oil, divided
  • 1 tsp dried oregano
  • ½ tsp smoked paprika, optional
  • Salt and black pepper, to taste

For the Creamy Garlic Sauce

  • 4 garlic cloves, finely minced
  • ½ cup sun-dried tomatoes, drained and chopped
  • 1 cup cherry tomatoes, halved
  • 2 cups fresh spinach or chopped kale
  • 1 cup unsweetened cream, regular or plant-based
  • ⅓ cup grated Parmesan cheese or dairy-free alternative
  • Zest and juice of ½ lemon
  • 2 tbsp fresh basil or parsley, chopped

Helpful ingredient note: Shelf-stable or refrigerated gnocchi can be cooked directly in the skillet, so there is no need to boil it first.

How to Make Mediterranean Creamy Garlic Chicken Gnocchi Skillet

Step 1: Season and Cook the Chicken

Pat the chicken dry with a paper towel so it browns more easily. Season it with oregano, smoked paprika, salt, and black pepper.

Heat 1 tablespoon of olive oil in a large skillet over medium heat. Add the chicken in a single layer and cook for about 5–6 minutes, turning occasionally, until browned and cooked through.

Transfer the chicken to a plate and keep it nearby while you prepare the rest of the dish.

Step 2: Crisp the Gnocchi

Add the remaining 1 tablespoon of olive oil to the same skillet. Add the gnocchi in an even layer.

Let it cook undisturbed for 2–3 minutes so the bottoms can turn golden. Stir and continue cooking for another 2–3 minutes, allowing several sides to become lightly crisp.

Remove the gnocchi and place it with the cooked chicken.

Tip: Avoid overcrowding the skillet. If necessary, cook the gnocchi in two batches so it browns instead of steaming.

Step 3: Build the Garlic Tomato Base

Lower the heat to medium-low. Add the minced garlic, chopped sun-dried tomatoes, and halved cherry tomatoes.

Cook for about 2 minutes, stirring frequently. The garlic should become fragrant, while the cherry tomatoes should begin to soften.

If browned bits are stuck to the bottom of the skillet, add a small splash of broth or lemon juice and gently scrape them up. These browned bits add extra flavor to the sauce.

Step 4: Add the Greens

Add the fresh spinach or chopped kale to the skillet. Stir for 1–2 minutes until the greens soften.

Spinach cooks quickly, while kale may need an extra minute or two. Keep the heat moderate to prevent the garlic from burning.

Step 5: Make the Creamy Sauce

Pour the cream into the skillet and stir well. Add the Parmesan and let the mixture simmer gently for 2–3 minutes.

The sauce should become slightly thicker without boiling aggressively. Taste and adjust the salt and black pepper if needed.

Important: Sun-dried tomatoes and Parmesan can already contain plenty of salt, so season the sauce after both ingredients have been added.

Step 6: Bring Everything Together

Return the cooked chicken and crispy gnocchi to the skillet. Gently toss everything through the sauce until the chicken and gnocchi are evenly coated.

Cook for another 1–2 minutes to warm everything through.

If the sauce becomes too thick, add a small splash of milk or broth until it reaches your preferred consistency.

Step 7: Add the Fresh Finish

Turn off the heat and add the lemon zest and lemon juice. Sprinkle with fresh basil or parsley.

Serve the skillet immediately while the gnocchi is warm and the sauce is creamy.

Tips for the Best Results

  • Use a wide skillet: More surface area helps the chicken and gnocchi brown properly.
  • Dry the chicken first: Excess moisture can prevent good browning.
  • Do not boil shelf-stable gnocchi: Pan-searing gives it a better golden texture.
  • Keep the cream at a gentle simmer: High heat can make dairy-based sauces separate.
  • Add lemon at the end: Fresh lemon juice brightens the rich sauce without overpowering it.
  • Taste before adding salt: Parmesan and sun-dried tomatoes provide natural saltiness.
  • Serve right away: The sauce thickens as it sits, while the gnocchi is best when freshly crisped.

Easy Variations

Make It Dairy-Free

Use unsweetened cashew, oat, or coconut cream and replace Parmesan with nutritional yeast or a dairy-free cheese alternative.

Add More Vegetables

Roasted red peppers, artichokes, mushrooms, zucchini, peas, or broccoli can be added for extra vegetables and texture.

Change the Protein

Shrimp, tofu, tempeh, or chickpeas can replace chicken. Cook each alternative according to its texture and cooking time.

Make It Gluten-Free

Choose certified gluten-free gnocchi and check the labels on packaged ingredients such as broth, Parmesan alternatives, and seasonings.

Add More Mediterranean Flavor

A small pinch of chili flakes, za’atar, crumbled feta, or toasted pine nuts can add more flavor and texture.

How to Store and Reheat

Place cooled leftovers in an airtight container and refrigerate for up to 3 days.

Reheat gently in a skillet over low to medium-low heat. Add a splash of milk, cream, or broth while warming to loosen the sauce and help restore its creamy texture.

For the best texture, avoid reheating the dish over very high heat because the sauce may become too thick or separate.

Frequently Asked Questions

Can I cook gnocchi without boiling it first?

Yes. Shelf-stable and refrigerated gnocchi can be pan-seared directly in olive oil until golden and tender.

What type of chicken works best?

Boneless, skinless chicken breast is lean and quick to cook, while boneless thighs provide more moisture and a richer flavor.

Can I make this recipe dairy-free?

Yes. Use plant-based cream and replace Parmesan with nutritional yeast or your preferred dairy-free cheese.

Can I use frozen gnocchi?

Yes, but follow the package directions because frozen gnocchi may require different cooking instructions than refrigerated or shelf-stable varieties.

How can I make the sauce thicker?

Simmer the cream gently for a few extra minutes, or add a small amount of Parmesan to help the sauce thicken naturally.

Can I use kale instead of spinach?

Yes. Chopped kale works well, but cook it a little longer than spinach so it becomes tender.

What can I use instead of sun-dried tomatoes?

Roasted red peppers or chopped fresh tomatoes can replace them, although the final dish will have a milder flavor.

Can I prepare this meal ahead of time?

You can cook the chicken and prepare the vegetables ahead, but pan-sear the gnocchi and finish the sauce close to serving for the best texture.

Nutrition Information

Approximate nutrition per serving, based on four servings:

  • Calories: 480
  • Protein: 32g
  • Fat: 22g
  • Carbohydrates: 38g
  • Fiber: 4g
  • Sugar: 5g
  • Sodium: 520mg

Nutrition values can vary depending on the type of cream, gnocchi, Parmesan, and chicken used.

Final Thoughts

This Mediterranean Creamy Garlic Chicken Gnocchi Skillet brings together everything you want in an easy weeknight dinner: tender chicken, golden gnocchi, colorful vegetables, garlic, herbs, and a smooth lemon Parmesan sauce.

Because everything finishes in one skillet, cleanup stays simple while the flavor remains satisfying. Keep the recipe classic for a quick family meal, or customize it with extra vegetables, a different protein, or dairy-free ingredients.

With only about 30 minutes from start to finish, this creamy chicken and gnocchi dinner is an easy option for busy nights when you want something comforting, flavorful, and homemade.

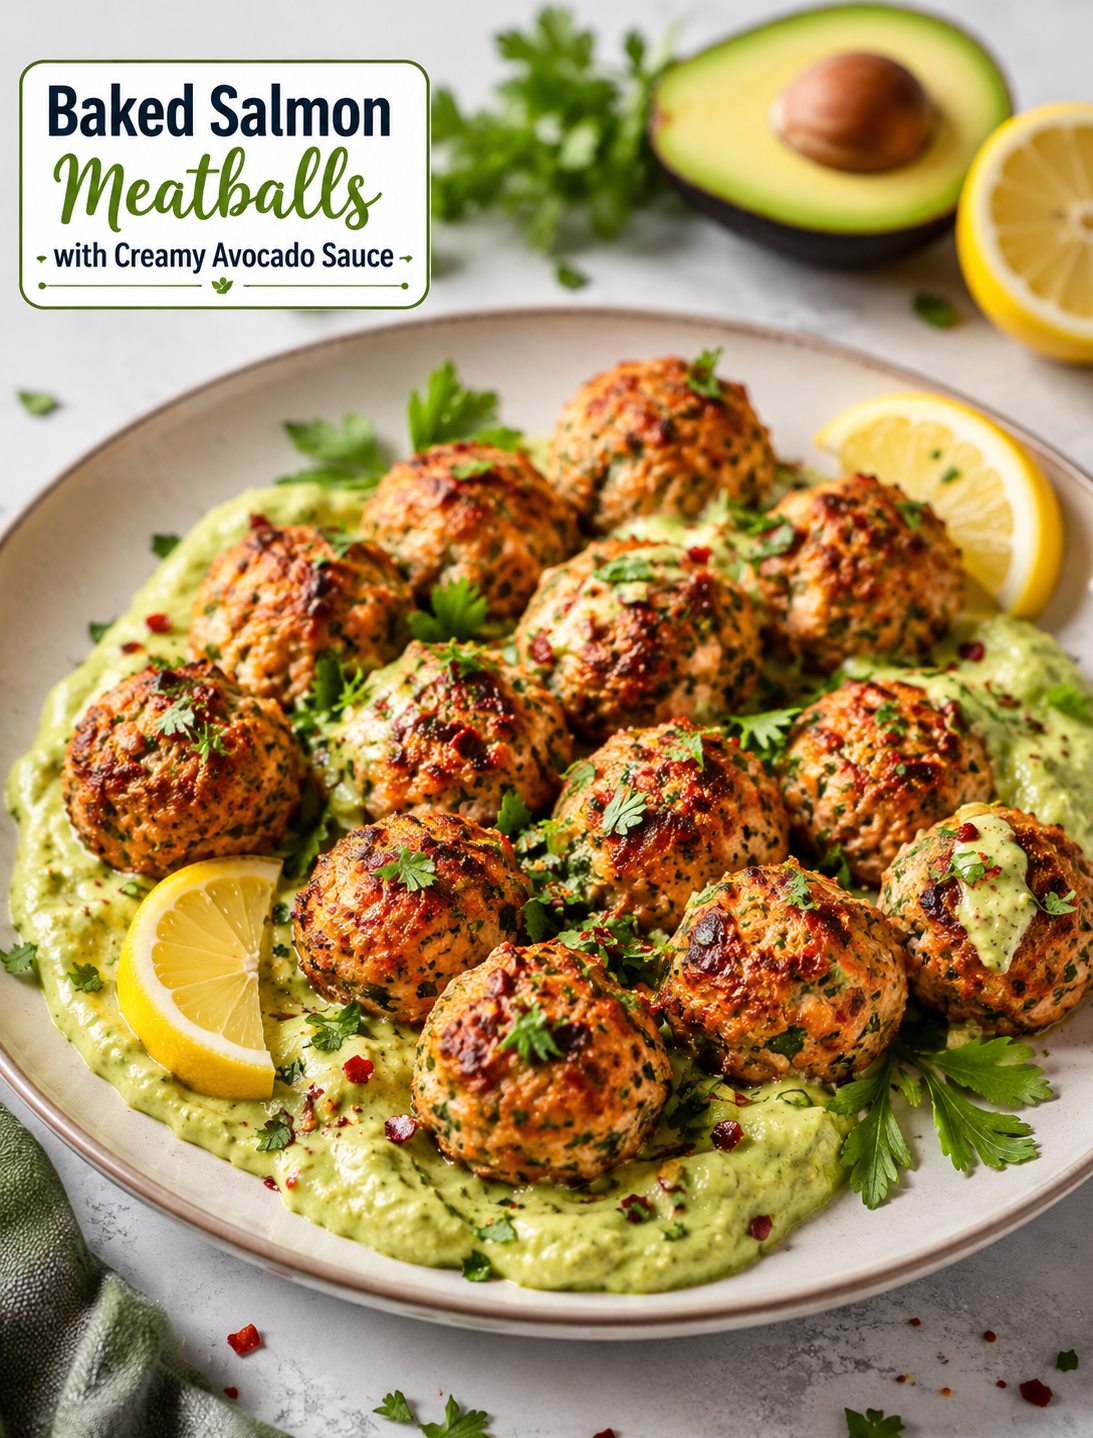
Baked Salmon Meatballs with Creamy Avocado Sauce

Baked Salmon Meatballs with Creamy Avocado Sauce

Baked Salmon Meatballs with Creamy Avocado Sauce

Baked Salmon Meatballs with Creamy Avocado Sauce are a fresh and flavorful way to enjoy salmon without making the usual fillet. Finely chopped salmon is mixed with breadcrumbs, egg, parsley, garlic, onion powder, paprika, lemon juice, and olive oil. The mixture is shaped into small meatballs and baked until lightly golden and fully cooked.

The creamy avocado sauce brings a cool, tangy finish to every bite. Ripe avocado is blended with Greek yogurt, citrus juice, garlic, and fresh herbs for a smooth sauce that pairs well with the warm salmon.

This easy salmon recipe works for a weeknight dinner, family lunch, party appetizer, or meal-prep meal. Serve the meatballs with rice, quinoa, salad, roasted vegetables, or crisp lettuce cups for a complete meal.

Ingredients

For the Salmon Meatballs

  • 1 lb (450 g) salmon fillet, skin removed and finely chopped
  • ½ cup breadcrumbs
  • 1 large egg, lightly beaten
  • 2 tbsp fresh parsley, chopped
  • 1 tsp garlic powder
  • ½ tsp onion powder
  • ½ tsp paprika
  • ½ tsp salt
  • ¼ tsp freshly ground black pepper
  • 1 tbsp fresh lemon juice
  • 1 tbsp olive oil

The salmon should be fresh and free of visible bones. Finely chopping the fish helps the ingredients hold together while leaving the meatballs with a pleasant texture. Regular breadcrumbs work well, while panko can create a lighter and slightly crispier outside.

For the Creamy Avocado Sauce

  • 1 large ripe avocado
  • ½ cup plain Greek yogurt
  • 1½ tbsp fresh lime or lemon juice
  • 1 small garlic clove, minced
  • 2 tbsp fresh cilantro or parsley
  • 2–3 tbsp water, as needed
  • ¼ tsp salt
  • ⅛ tsp black pepper

Choose an avocado that feels slightly soft when gently pressed. A ripe avocado blends more easily and creates a smoother sauce.

Optional Garnishes

  • Fresh parsley or cilantro
  • Lime or lemon wedges
  • Red pepper flakes
  • Diced green onion
  • Sesame seeds
  • Fresh dill

These toppings add color, freshness, and extra flavor without making the recipe complicated.

Servings

This recipe makes 4 servings and produces approximately 16–18 salmon meatballs, depending on their size.

For an appetizer, make smaller portions and adjust the baking time based on their size.

Preparation Time

Prep Time: 20 minutes
Cook Time: 15–18 minutes
Total Time: Approximately 40 minutes

The short cooking time makes this recipe practical for busy weeknights.

Instructions

1. Prepare the Oven

Preheat the oven to 400°F (200°C).

Line a baking sheet with parchment paper or lightly grease it with olive oil. Parchment helps prevent sticking and makes cleanup easier.

2. Prepare the Salmon

Remove the skin and check the salmon carefully for visible bones. Pat the fillet dry with paper towels.

Finely chop the salmon with a sharp knife. Aim for very small pieces rather than large chunks. Do not turn the fish into a completely smooth paste because small pieces give the meatballs a better texture.

3. Make the Meatball Mixture

Place the chopped salmon in a large bowl. Add the breadcrumbs, beaten egg, parsley, garlic powder, onion powder, paprika, salt, black pepper, lemon juice, and olive oil.

Gently mix the ingredients until they are evenly combined. Avoid overmixing because it can make the finished meatballs dense.

4. Chill the Mixture

Refrigerate the mixture for about 10–15 minutes.

Chilling is optional, but it makes a soft mixture easier to handle. It is especially useful when the salmon mixture feels difficult to shape.

5. Shape the Meatballs

Use clean hands or a small cookie scoop to divide the mixture into 16–18 equal portions.

Gently roll each portion into a ball. Place the meatballs on the prepared baking sheet with a little space between them.

Keeping the portions similar in size helps them cook evenly.

6. Bake

Bake the meatballs for approximately 15–18 minutes, depending on their size.

The outside should be lightly golden, and the center should be fully cooked. For food safety, salmon should reach an internal temperature of 145°F (63°C).

Avoid baking the meatballs longer than necessary because salmon can become dry when overcooked.

7. Prepare the Avocado Sauce

While the salmon cooks, prepare the sauce.

Add the avocado, Greek yogurt, lime or lemon juice, garlic, parsley or cilantro, salt, and black pepper to a blender or food processor.

Blend until smooth and creamy. Add water one tablespoon at a time until the sauce reaches the texture you prefer.

Keep the sauce thick if you plan to use it as a dip. Add a little more water when you want a thinner sauce for drizzling.

8. Taste and Adjust

Taste the avocado sauce before serving.

Add a little more lemon or lime juice for extra brightness. Add another pinch of salt if needed.

For a spicy version, blend in a small amount of jalapeño or add red pepper flakes.

9. Serve

Remove the baked meatballs from the oven and let them rest for a couple of minutes.

Arrange them on a serving plate and drizzle with the creamy avocado sauce. You can also serve the sauce on the side for dipping.

Finish with fresh herbs, citrus wedges, or a light sprinkle of red pepper flakes. Serve warm.

Serving Ideas

These salmon meatballs are easy to pair with different sides, so you can change the meal based on what you have available.

With Rice

Serve the meatballs over fluffy white or brown rice and drizzle the avocado sauce over the top.

With Quinoa

Quinoa makes a hearty base and pairs well with the savory salmon and creamy citrus sauce.

With Salad

Build a fresh salad with mixed greens, cucumber, tomatoes, and red onion. Use the avocado sauce as a flavorful dressing.

In Lettuce Cups

Place the cooked meatballs inside crisp lettuce leaves and add avocado sauce for a fresh, lighter meal.

With Roasted Vegetables

Serve with roasted broccoli, asparagus, zucchini, bell peppers, or carrots for an easy dinner plate.

As an Appetizer

Make smaller meatballs and serve them with toothpicks and avocado dipping sauce at parties or casual gatherings.

Recipe Notes

Use Fresh Salmon

Fresh salmon gives the meatballs excellent flavor and texture. If using previously frozen salmon, thaw it completely and pat it dry before chopping.

Keep the Salmon Cold

Cold salmon is easier to chop and shape. If the mixture becomes too soft, refrigerate it briefly before forming the meatballs.

Don’t Overmix

Mix only until the ingredients are combined. Excessive mixing can make the texture firm and dense.

Don’t Overbake

Salmon cooks quickly, so watch the cooking time carefully. An instant-read thermometer makes it easier to check for doneness.

Choose a Ripe Avocado

A slightly soft avocado blends into a smoother sauce. An underripe avocado may leave the sauce thick and uneven.

Helpful Tips

Make Them Extra Crispy

Lightly brush or spray the meatballs with olive oil before baking. For additional browning, place them under the broiler for 1–2 minutes, watching them closely.

Add More Herbs

Fresh dill, cilantro, parsley, and chives all complement the flavor of salmon.

Add a Little Heat

Add cayenne pepper, chili flakes, or finely diced jalapeño to the meatball mixture. Hot sauce can also add heat to the avocado sauce.

Use Panko.

Panko breadcrumbs can give the meatballs a lighter texture and a slightly crispier exterior than standard breadcrumbs.

Make Smaller Meatballs

For parties or appetizers, shape the mixture into bite-sized portions. Reduce the cooking time as needed and always check that the center is fully cooked.

Storage

Store cooked salmon meatballs in an airtight container in the refrigerator for up to 3 days.

Keep the avocado sauce in a separate airtight container. It is best eaten fresh but can be refrigerated for approximately 1 day.

Press plastic wrap directly against the surface of the sauce to help reduce browning.

Freezing

The baked salmon meatballs can be frozen for 2–3 months.

Allow them to cool completely before placing them in a freezer-safe container or bag. Thaw them overnight in the refrigerator, then reheat gently in the oven or air fryer.

The creamy avocado sauce is best made fresh because its texture and color can change after freezing.

Approximate Nutritional Information

Per serving, assuming four servings and approximately one-quarter of the avocado sauce:

  • Calories: 420
  • Protein: 32 g
  • Carbohydrates: 20 g
  • Fat: 25 g
  • Fiber: 5 g
  • Sugar: 2 g
  • Sodium: Approximately 500 mg

Nutrition values are estimates and can vary based on the salmon, breadcrumbs, Greek yogurt, avocado, portion sizes, and other ingredients used.

Potential Benefits

Rich in Protein

Salmon and Greek yogurt provide protein that can make a meal more satisfying. This combination works well for a filling lunch or dinner.

Source of Omega-3 Fatty Acids

Salmon provides omega-3 fatty acids, including EPA and DHA. These fats are part of a balanced eating pattern and support normal body functions.

Avocado Provides Healthy Fats

Avocado adds monounsaturated fats, fiber, and several vitamins and minerals to the sauce.

Provides Fiber

Avocado, herbs, and vegetables served with the meatballs can contribute dietary fiber. For more fiber, pair the dish with quinoa, beans, vegetables, or a large salad.

Nutrient-Dense Meal

Salmon, avocado, Greek yogurt, herbs, and vegetables provide a range of nutrients in one flavorful meal. The recipe can also be adjusted with different sides to fit your meal plan.

Frequently Asked Questions

Can I use canned salmon?

Yes. Drain canned salmon well and remove bones or skin if preferred; the finished texture will differ from fresh salmon.

Can I use frozen salmon?

Yes. Thaw the salmon completely in the refrigerator and pat it very dry before chopping.

Can I use almond flour instead of breadcrumbs?

Yes. Almond flour can replace breadcrumbs, although it may slightly change the texture of the meatballs.

Can I make these gluten-free?

Yes. Use certified gluten-free breadcrumbs or another gluten-free binder suitable for the recipe.

Can I make them without eggs?

Yes, but the egg helps bind the mixture, so an egg substitute may produce a softer and more fragile texture.

Why are my salmon meatballs falling apart?

Excess moisture can weaken the mixture; add a tablespoon of breadcrumbs and chill it for about 15 minutes before shaping.

Can I air fry the meatballs?

Yes. Air fry at about 375°F (190°C) for 10–14 minutes, turning halfway, and check that the center reaches 145°F (63°C).

Can I make the avocado sauce without Greek yogurt?

Yes. Blend avocado with citrus juice, garlic, herbs, a little olive oil, and water for a dairy-free alternative.

Final Thoughts

Baked Salmon Meatballs with Creamy Avocado Sauce offer a simple twist on traditional meatballs. The salmon stays tender when cooked carefully, while garlic, herbs, paprika, and lemon add balanced savory flavor.

The avocado sauce adds creamy texture and bright citrus flavor without requiring a complicated preparation. Serve these meatballs with rice, quinoa, roasted vegetables, or a crisp salad for an easy family dinner.

For entertaining, make smaller portions and serve them with toothpicks and avocado dipping sauce. For meal prep, store the cooked meatballs and sauce separately so each serving stays fresh and flavorful.

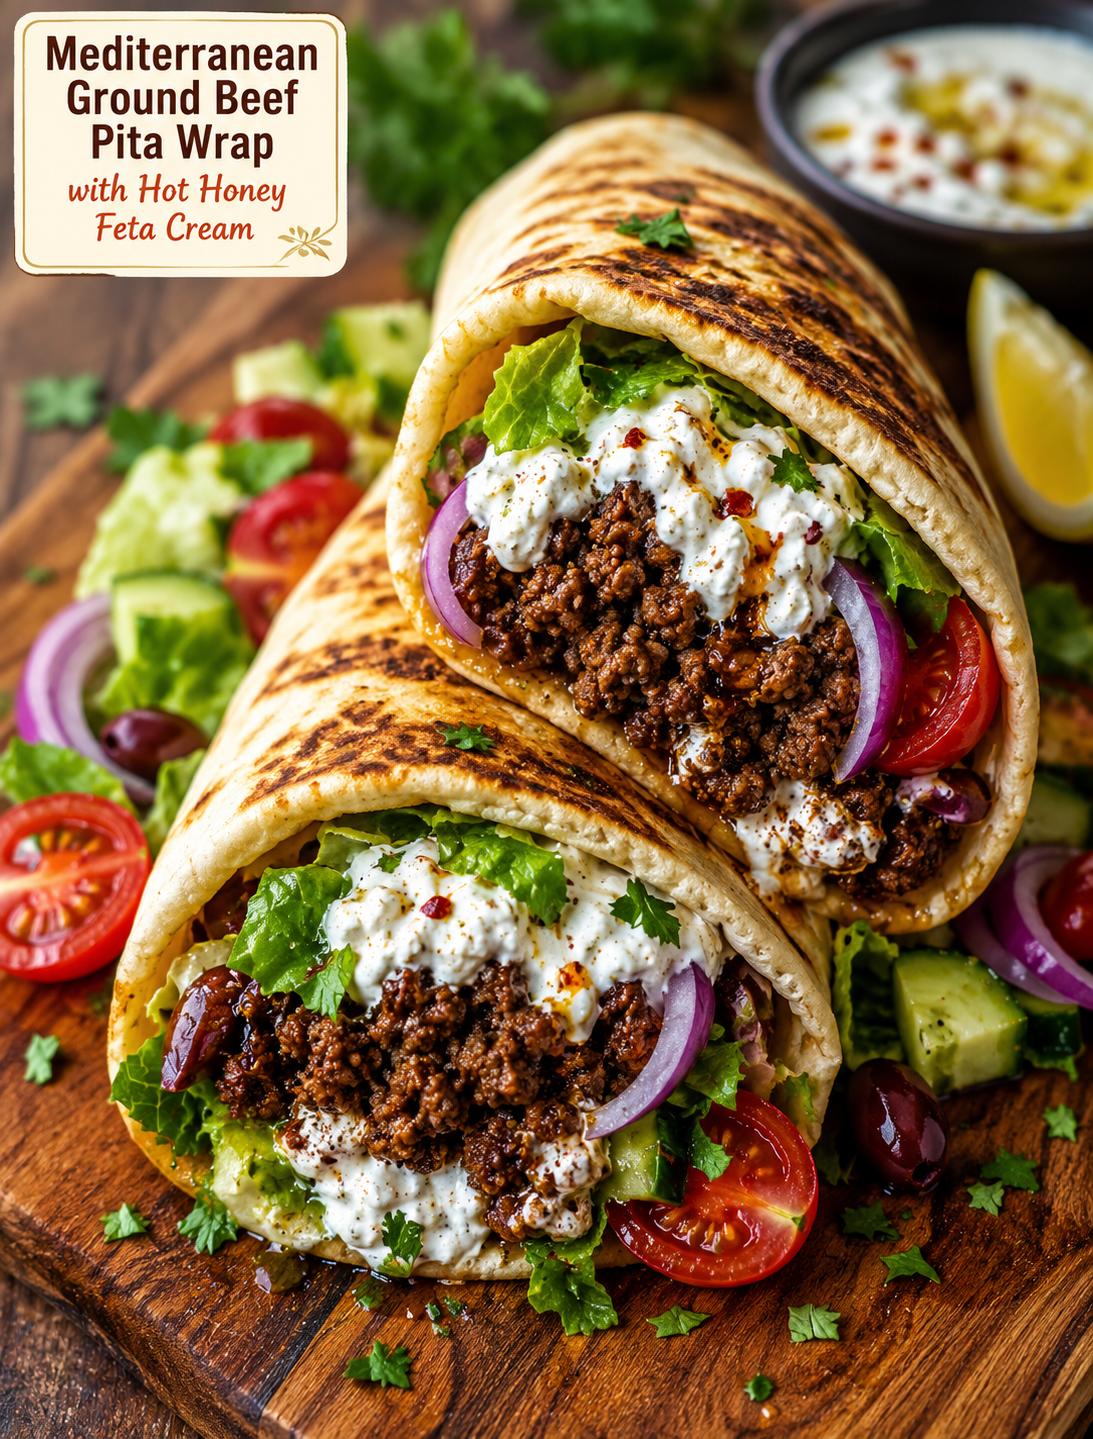
Mediterranean Ground Beef Pita Wrap with Hot Honey Feta Cream

Mediterranean Ground Beef Pita Wrap

Mediterranean Ground Beef Pita Wrap with Hot Honey Feta Cream

Difficulty: Easy
Servings: 4
Prep Time: 15 minutes
Cook Time: 15 minutes
Total Time: 30 minutes

Description

These Mediterranean Ground Beef Pita Wraps with Hot Honey Feta Cream are packed with bold, fresh, savoury flavours. Seasoned ground beef is cooked with garlic, paprika, cumin, oregano, and lemon, then tucked into warm pita bread with crisp vegetables and a creamy feta sauce.

The star of the recipe is the hot honey feta cream—a smooth, tangy, slightly sweet sauce with a gentle spicy kick. The combination of salty feta, creamy yoghurt, honey, and chilli creates an irresistible contrast with the warmly spiced beef.

These wraps are perfect for a quick weeknight dinner, lunch, meal prep, or casual entertaining.

Ingredients For;

Beef

  • 500 g ground beef
  • 1 tablespoon olive oil
  • 3 garlic cloves, minced
  • 1 teaspoon paprika
  • 1 teaspoon ground cumin
  • 1 teaspoon dried oregano
  • 1/2 teaspoon smoked paprika
  • 1/2 teaspoon salt
  • 1/4 teaspoon black pepper
  • 1 tablespoon fresh lemon juice
  • 2 tablespoons chopped fresh parsley

Hot Honey Feta Cream

  • 100 g feta cheese, crumbled
  • 1/2 cup plain Greek yogurt
  • 1 tablespoon hot honey
  • 1 tablespoon fresh lemon juice
  • 1 small garlic clove, minced
  • 1 tablespoon extra-virgin olive oil
  • 1/4 teaspoon chili flakes, optional
  • 1–2 tablespoons water, as needed

Wraps

  • 4 pita breads
  • 1 cup chopped lettuce
  • 1/2 cucumber, diced
  • 1 cup cherry tomatoes, halved
  • 1/4 red onion, thinly sliced
  • 1/4 cup Kalamata olives, sliced, optional
  • Fresh parsley or mint
  • Extra feta, optional
  • Lemon wedges for serving

Instructions

1. Prepare the Beef Seasoning

In a small bowl, combine the paprika, cumin, oregano, smoked paprika, salt, and black pepper.

Mix well.

Having the seasoning prepared beforehand makes it easier to season the beef evenly while it cooks.

2. Cook the Ground Beef

Heat 1 tablespoon olive oil in a large skillet over medium-high heat.

Add the ground beef.

Cook for approximately 5–7 minutes, breaking it apart with a wooden spoon or spatula as it cooks.

Continue until the beef is browned and cooked through.

If there’s a large amount of excess fat, carefully drain some of it from the skillet.

3. Add the Garlic and Spices

Add the minced garlic to the cooked beef.

Cook for about 30–60 seconds, stirring frequently.

Add the prepared spice mixture.

Stir thoroughly so the spices coat the beef.

Cook for another 1–2 minutes to allow the spices to become fragrant.

4. Finish the Beef

Turn off the heat.

Add fresh lemon juice and chopped parsley.

Stir well.

Taste and adjust the seasoning if necessary.

The finished beef should be savoury, aromatic, slightly smoky, and bright from the lemon.

Set aside while you prepare the feta cream.

5. Make the Hot Honey Feta Cream

Add the crumbled feta, Greek yoghurt, hot honey, lemon juice, garlic, olive oil, and chilli flakes to a blender or food processor.

Blend until smooth and creamy.

If the mixture is too thick, add 1 tablespoon water at a time until you reach a smooth, spreadable consistency.

Taste and adjust the flavour For;

Sweetness, add another small drizzle of honey.

More heat, add additional chilli flakes.

Tang, add another squeeze of lemon juice.

6. Prepare the Fresh Vegetables

Wash and prepare the vegetables.

Chop the lettuce and cucumber.

Halve the cherry tomatoes.

Thinly slice the red onion.

Slice the olives if using.

Place everything in separate bowls or combine them into a simple salad mixture.

7. Warm the Pitta

Warm the pita breads in a dry skillet over medium heat for approximately 20–30 seconds per side.

You can also warm them in the oven or microwave.

Don’t overheat them, or they may become brittle and difficult to fold.

If using thick pita pockets, carefully open them.

For flat pita bread, simply place the fillings in the centre and fold like a wrap.

8. Assemble the Wraps

Spread a generous spoonful of hot honey feta cream over each warm pita.

Add a layer of lettuce.

Top with the seasoned ground beef.

Add cucumber, tomatoes, red onion, and Kalamata olives.

Sprinkle with fresh parsley or mint and additional feta if desired.

Finish with a small drizzle of hot honey for an extra sweet-spicy kick.

9. Fold and Serve

Fold the bottom of the pita upward slightly, then fold in the sides.

Roll tightly into a wrap.

Serve immediately with fresh lemon wedges.

For an extra Mediterranean touch, serve with hummus, a Greek salad, or roasted vegetables.

Recipe Notes

Choose the right ground beef

Ground beef with moderate fat content works especially well because it keeps the filling juicy and flavourful.

If using very lean beef, you may need an additional drizzle of olive oil during cooking.

Don’t overcook the beef

Cook just until browned and cooked through. Overcooking can make ground beef dry.

Fresh lemon makes a difference

The lemon juice added at the end brightens the spices and balances the richness of the beef and feta.

Blend the feta sauce

Blending creates a smooth, creamy sauce. If you prefer a more rustic texture, mash the ingredients together with a fork instead.

Adjust the heat

Hot honey and chilli flakes can vary significantly in spiciness. Start with a small amount and increase according to your taste.

Helpful Tips

1. Prep everything first.
Because the beef cooks quickly, prepare the vegetables and sauce before you start cooking.

2. Don’t overcrowd the skillet.
A large skillet helps the beef brown instead of steaming.

3. Warm the pita immediately before assembling.
Warm pita is softer and less likely to crack.

4. Keep the sauce cold.
The contrast between warm spiced beef and cool feta cream is especially delicious.

5. Add crunch.
Cucumber, lettuce, and red onion provide a refreshing contrast to the tender beef.

6. Use fresh herbs.
Parsley and mint add a bright Mediterranean finish.

Delicious Variations

Chicken Pita Wrap

Replace ground beef with ground chicken or turkey.

Use the same seasoning mixture and cook until the meat reaches a safe internal temperature.

Lamb Pita Wrap

Ground lamb works beautifully with cumin, oregano, garlic, and feta.

The richer lamb pairs particularly well with the bright lemony sauce.

Vegetarian Version

Replace the beef with roasted chickpeas, lentils, mushrooms, or a combination of vegetables.

Extra-Spicy Wrap

Add diced jalapeño or crushed red pepper to the beef and increase the chilli flakes in the feta cream.

Greek-Inspired Version

Add cucumber, tomato, red onion, Kalamata olives, oregano, and a generous amount of feta.

Make-Ahead Instructions

You can prepare most of the components ahead of time.

Cook the beef and refrigerate it in an airtight container for up to 3–4 days.

The feta cream can also be refrigerated for approximately 3–4 days.

Store the vegetables separately when possible.

When ready to eat, warm the beef and pita, then assemble the wrap with the chilled feta cream and fresh vegetables.

Storage

For the best texture, store the components separately rather than assembling the entire wrap in advance.

Fully assembled wraps can become soggy because of the sauce and vegetables.

Keep:

  • Beef in one container
  • Feta cream in another
  • Vegetables separately
  • Pita wrapped tightly

Assemble immediately before serving.

Approximate Nutritional Information

Per wrap, based on 4 servings:

  • Calories: approximately 650–700
  • Protein: approximately 35–40 g
  • Carbohydrates: approximately 45–50 g
  • Fat: approximately 32–36 g
  • Fiber: approximately 5–7 g
  • Sugar: approximately 7–10 g
  • Sodium: approximately 800–1,000 mg

Nutrition is an estimate and will vary depending on the ground beef, pita, feta, yoghurt, and amount of sauce used.

For a lighter option, use smaller pita breads, leaner ground beef, and a reduced amount of feta cream.

Benefits of This Recipe

Protein-rich

Ground beef, Greek yoghurt, and feta contribute substantial protein, making these wraps satisfying and suitable for a protein-focused meal.

Includes vegetables

Fresh lettuce, cucumber, tomatoes, and onion add fibre, freshness, colour, and texture.

Healthy fats

Olive oil, feta, and Greek yoghurt contribute fats that help create a satisfying meal.

Flavorful without complicated cooking

The combination of cumin, paprika, garlic, oregano, lemon, and herbs creates a lot of flavour with simple ingredients.

Balanced meal

A pita wrap combines protein, carbohydrates, vegetables, and fats in one convenient meal.

These are general nutritional benefits of the ingredients and aren’t medical claims.

Frequently Asked Questions

Can I use ground turkey instead of beef?

Yes. Ground turkey is an excellent substitute. Because it is often leaner than beef, avoid overcooking it.

Can I make the feta cream without Greek yoghurt?

Yes. You can use a little extra feta with olive oil and lemon juice, although the texture will be thicker and more intensely salty.

Can I use regular honey instead of hot honey?

Absolutely. Add regular honey and a pinch of chilli flakes to create your own sweet-spicy sauce.

Is the sauce very spicy?

Not necessarily. The heat depends on the hot honey and chilli flakes. Start with a small amount and adjust.

Can I use naan instead of pita?

Yes. Naan, flatbread, or tortillas can all work as alternatives.

Can I make this recipe gluten-free?

Yes. Use certified gluten-free pita or another gluten-free flatbread.

Can I prepare the beef ahead of time?

Yes. Cooked beef can be refrigerated for up to 3–4 days and reheated before assembling.

How can I make the wrap lower in carbohydrates?

Use a low-carb pita or wrap and increase the amount of lettuce, cucumber, and other non-starchy vegetables.

Can I add hummus?

Definitely. Spread a thin layer of hummus underneath the feta cream for another delicious Mediterranean flavour.

What should I serve with these wraps?

Try them with Greek salad, hummus, roasted vegetables, cucumber salad, or a simple lentil soup.

Final Thoughts

This Mediterranean Ground Beef Pita Wrap with Hot Honey Feta Cream is a fantastic combination of savoury, creamy, fresh, sweet, and spicy flavours. The cumin-and-paprika-seasoned beef provides a hearty filling, while the tangy feta cream adds richness and a subtle kick.