Loaded Air Fryer Potato Skins with Cheese & Herb

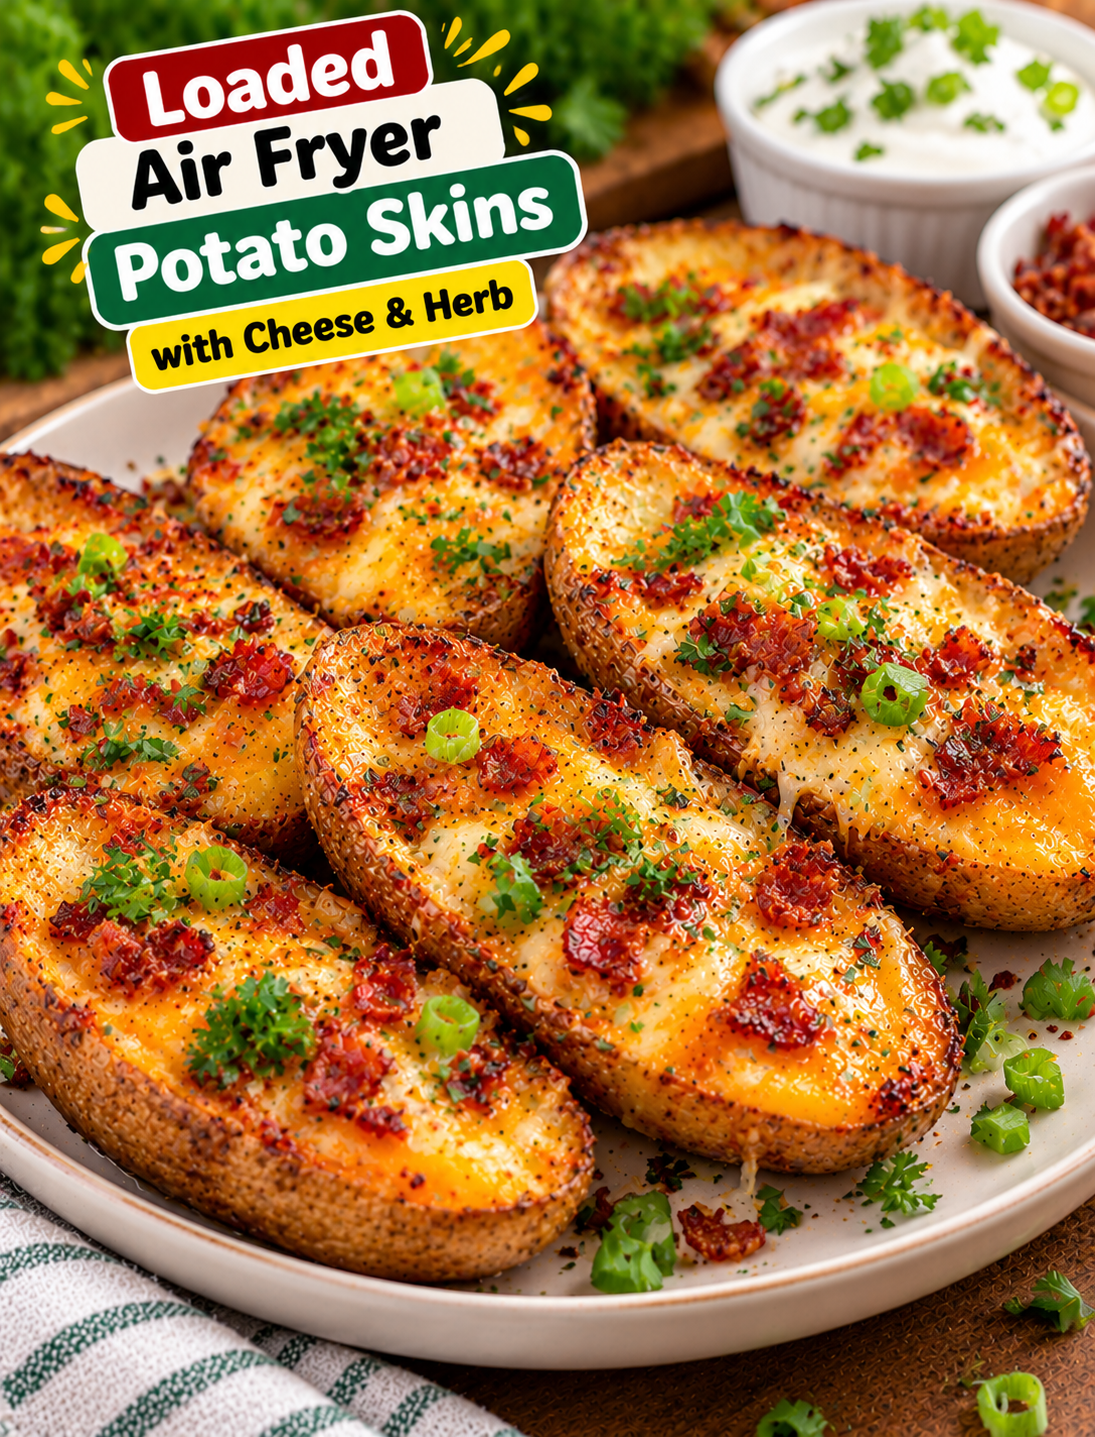
Loaded air fryer potato skins topped with melted cheddar cheese, fresh chives, and parsley on a serving plate.
Loaded Air Fryer Potato Skins with Cheese & Herb

Crispy potato skins filled with melted cheese, fresh herbs, and savory toppings make an easy appetizer for game day, family movie night, or a casual weekend snack. These Loaded Air Fryer Potato Skins with Cheese & Herb have golden edges, tender potato centers, and a cheesy topping that melts beautifully in just a few minutes.

The air fryer helps crisp the potato shells without deep-frying them. You can prepare the potatoes ahead of time, customize the toppings, and serve them straight from the basket while the cheese is warm and gooey.

This recipe uses simple ingredients you can find at most U.S. grocery stores. Serve the potato skins with sour cream, Greek yogurt, salsa, or your favorite dipping sauce for an easy crowd-pleasing dish.

Recipe Overview

  • Prep time: 15 minutes
  • Cook time: 35–45 minutes, depending on potato size and whether the potatoes are already cooked
  • Total time: About 50–60 minutes
  • Servings: 4
  • Course: Appetizer, snack, or side dish
  • Cuisine: American-inspired
  • Cooking method: Air fryer
  • Main ingredients: Russet potatoes, cheddar cheese, olive oil, garlic powder, and fresh herbs

Why You’ll Love These Loaded Potato Skins

  • Crispy texture: Air frying helps the potato shells develop golden, crisp edges.
  • Simple ingredients: You only need a handful of everyday ingredients.
  • Easy to customize: Add cooked bacon, green onions, jalapeños, or diced tomatoes.
  • Great for sharing: Serve them on a platter for parties, game nights, and family gatherings.
  • Flexible serving options: Enjoy them as an appetizer, snack, or side dish with burgers and grilled chicken.
  • Fresh herb flavor: Chives and parsley add freshness that balances the rich cheese.

Ingredients for Loaded Air Fryer Potato Skins

Use medium russet potatoes for sturdy skins that hold the filling well. Choose potatoes that are similar in size so they cook at roughly the same rate.

Main Ingredients

  • 4 medium russet potatoes: Their thick skins are ideal for crisping and holding toppings.
  • 1 tablespoon olive oil: Helps the potato skins brown and turn crisp.
  • 1/2 teaspoon kosher salt: Seasons the potato shells.
  • 1/2 teaspoon garlic powder: Adds a savory garlic flavor without extra moisture.
  • 1/4 teaspoon black pepper: Gives the potatoes a mild, peppery taste.
  • 1 cup shredded sharp cheddar cheese: Provides a rich flavor and smooth, melted topping.
  • 2 tablespoons chopped fresh chives: Add a mild onion flavor and bright color.
  • 1 tablespoon chopped fresh parsley: Brings a fresh herbal finish.
  • 1/4 teaspoon smoked paprika, optional: Adds a gentle smoky note and warm color.

Optional Toppings

Choose one or more toppings to make the recipe your own:

  • 3 strips cooked bacon, crumbled
  • 2 tablespoons sliced green onions
  • 2 tablespoons sour cream
  • 2 tablespoons plain Greek yogurt
  • 2 tablespoons finely diced jalapeños
  • 2 tablespoons salsa
  • A small pinch of red pepper flakes

Tip: Pat washed potatoes completely dry before cooking. Excess water can slow browning and make the skins less crisp.

How to Make Loaded Air Fryer Potato Skins with Cheese & Herb

Follow these steps for potato skins with crisp edges, fluffy centers, and melted cheese.

Step 1: Wash and Dry the Potatoes

Scrub the potatoes under cool running water to remove dirt from the skins. Dry them thoroughly with a clean kitchen towel.

Pierce each potato several times with a fork to allow steam to escape during cooking. Do not wrap the potatoes in foil because the foil can trap moisture and interfere with crisp skin.

Step 2: Cook the Whole Potatoes

Preheat your air fryer to 400°F (200°C) if your model recommends preheating.

Place the potatoes in the basket in a single layer, leaving space around them for air to circulate. Cook for about 30–40 minutes, turning them halfway through.

Cooking time depends on potato size and air fryer performance. The potatoes are ready when a fork slides into the center easily. If they remain firm, continue cooking in 5-minute increments.

Step 3: Let the Potatoes Cool Slightly

Transfer the cooked potatoes to a heat-safe plate or cutting board. Allow them to cool for about 5–10 minutes so you can handle them safely.

Cut each potato lengthwise into two halves. Use a spoon to scoop out most of the soft center, leaving a layer of potato about 1/4 inch thick against the skin.

Save the scooped potato for mashed potatoes, potato cakes, or soup. Leaving a sturdy layer inside each shell helps prevent the skins from breaking.

Step 4: Season the Potato Shells

Brush the inside and outside of each potato skin lightly with olive oil. Sprinkle both sides with salt, garlic powder, black pepper, and smoked paprika if using.

Arrange the shells in the air fryer basket with the cut side facing up. Avoid stacking them because crowded shells may cook unevenly.

Step 5: Air Fry Until Crisp

Air fry the empty shells at 400°F (200°C) for 5–8 minutes. Check them near the end of cooking because thinner skins can brown quickly.

The edges should look golden and feel firmer. If you prefer extra-crispy potato skins, cook for another 1–2 minutes while watching closely.

Step 6: Add the Cheese

Remove the basket carefully. Divide the shredded cheddar evenly among the potato shells.

For a richer cheese topping, combine cheddar with a little Monterey Jack. Keep the filling level below the edges so the cheese does not spill over excessively.

If you are using fully cooked bacon, sprinkle it over the cheese now. Do not add sour cream or other cold toppings before air frying.

Step 7: Melt the Cheese

Return the filled potato skins to the air fryer. Cook at 350°F (175°C) for 2–4 minutes, or until the cheese has melted.

Check frequently during the final minute. Cheese can brown quickly, especially in air fryers with strong top heating elements.

Step 8: Finish with Fresh Herbs

Carefully transfer the hot potato skins to a serving plate. Sprinkle chopped chives and parsley over the melted cheese.

Add green onions, jalapeños, or red pepper flakes if desired. Serve immediately with sour cream, Greek yogurt, or salsa on the side.

For the best texture, add wet toppings just before serving rather than placing them in the air fryer.

Tips for Extra-Crispy Potato Skins

  • Choose russet potatoes: Their thick skins and fluffy interiors work well for this recipe.
  • Dry the potatoes thoroughly: Water left on the surface can slow browning.
  • Leave a thin potato layer: Scooping too deeply can make the shells fragile.
  • Avoid overcrowding: Arrange the shells in a single layer so hot air can circulate.
  • Use freshly shredded cheese: It often melts more smoothly than some pre-shredded blends.
  • Add herbs at the end: Fresh parsley and chives keep their color and flavor when added after cooking.
  • Adjust for your air fryer: Basket size and heating strength vary, so use visual cues as well as the suggested times.

Best Cheese and Herb Combinations

Sharp cheddar gives these potato skins a bold, classic flavor, but other combinations work well too.

  • Cheddar and chives: A familiar baked-potato flavor with a fresh finish.
  • Cheddar and parsley: Rich cheese balanced by a clean herbal taste.
  • Cheddar and Monterey Jack: A creamy, stretchy cheese topping.
  • Mozzarella and parsley: A milder flavor with a soft, melty texture.
  • Cheddar and green onions: A savory option that pairs well with cooked bacon.
  • Pepper Jack and cilantro: A spicier variation with a bright herbal note.

For the most balanced flavor, use one main cheese and one or two herbs rather than adding every topping at once.

What to Serve with Cheesy Potato Skins

These potato skins pair well with simple sides and dips. Try serving them with:

  • Sour cream or plain Greek yogurt
  • Fresh salsa or pico de gallo
  • A crisp green salad
  • Air-fried chicken tenders
  • Grilled chicken or turkey burgers
  • Steamed broccoli or roasted vegetables
  • A vegetable platter with ranch dip

For a game-day spread, serve the skins alongside vegetables, wings, and two dipping sauces. For a lighter meal, pair two potato skin halves with a salad and a yogurt-based dip.

Storage and Reheating Instructions

How to Store Leftovers

Let the potato skins cool, then place them in an airtight container. Refrigerate within two hours of cooking and use within 3–4 days.

For the best quality, store sour cream, salsa, and other cold toppings separately. This helps the potato shells stay firmer during storage.

How to Reheat Potato Skins

Place the refrigerated potato skins in the air fryer in a single layer. Reheat at 350°F (175°C) for about 3–5 minutes, checking that the centers are hot and the cheese has melted again.

Add fresh herbs after reheating. Avoid reheating them with sour cream or other toppings that can become watery.

Can You Freeze Potato Skins?

You can freeze the cooked shells before adding the cheese and fresh herbs for better texture. Cool them completely, freeze them in a single layer, and transfer them to a freezer-safe container.

For best quality, use within about 2–3 months. Reheat from frozen until hot, then add cheese and cook until melted; timing will vary by shell size and air fryer.

Common Mistakes to Avoid

  • Scooping out too much potato: Thin shells can split when you add the toppings.
  • Skipping the crisping step: Adding cheese too early can leave the skins soft.
  • Using wet toppings during cooking: Moisture can make the shells soggy.
  • Overloading the basket: Crowding blocks airflow and leads to uneven browning.
  • Cooking at one temperature for the entire recipe: A slightly lower temperature for melting the cheese helps reduce over-browning.
  • Ignoring size differences: Smaller potatoes cook faster, so check them before larger ones.

Frequently Asked Questions

1. What potatoes are best for air fryer potato skins?

Russet potatoes are ideal because they have thick skins and fluffy centers that are easy to scoop out.

2. How long do potato skins take in the air fryer?

Whole medium potatoes usually take 30–40 minutes at 400°F, followed by 5–8 minutes to crisp the shells and 2–4 minutes to melt the cheese.

3. Why are my potato skins not crispy?

They may be damp, overcrowded, or not crisped long enough before adding cheese. Dry the skins and cook them in a single layer.

4. Can I make potato skins ahead of time?

Yes. Cook and scoop the potatoes ahead, refrigerate the shells, then season, crisp, fill, and melt the cheese shortly before serving.

5. Can I use a different type of cheese?

Yes. Monterey Jack, mozzarella, Pepper Jack, or a cheddar blend can work, depending on the flavor and melt you prefer.

6. Can I make these potato skins vegetarian?

Yes. Leave out the bacon and use cheese, herbs, green onions, and vegetables such as jalapeños or diced tomatoes.

7. How do I know when the potato skins are done?

The shells should have golden, crisp edges, and the cheese should be fully melted. The original potatoes must also be fork-tender before you scoop them.

8. Can I reheat leftover loaded potato skins?

Yes. Reheat them in an air fryer at 350°F for about 3–5 minutes, checking that the filling is hot before serving.

Final Thoughts

Loaded Air Fryer Potato Skins with Cheese & Herb are a practical way to turn simple potatoes into a crisp, savory appetizer. The combination of cheddar, garlic seasoning, chives, and parsley creates a classic flavor, while optional toppings let you adapt the recipe to your family or guests.

For the best results, cook the potatoes until tender, leave enough potato inside each shell, crisp the shells before adding cheese, and finish with fresh herbs. Serve them hot with your favorite dip for a snack that fits game day, parties, or an easy weekend meal.
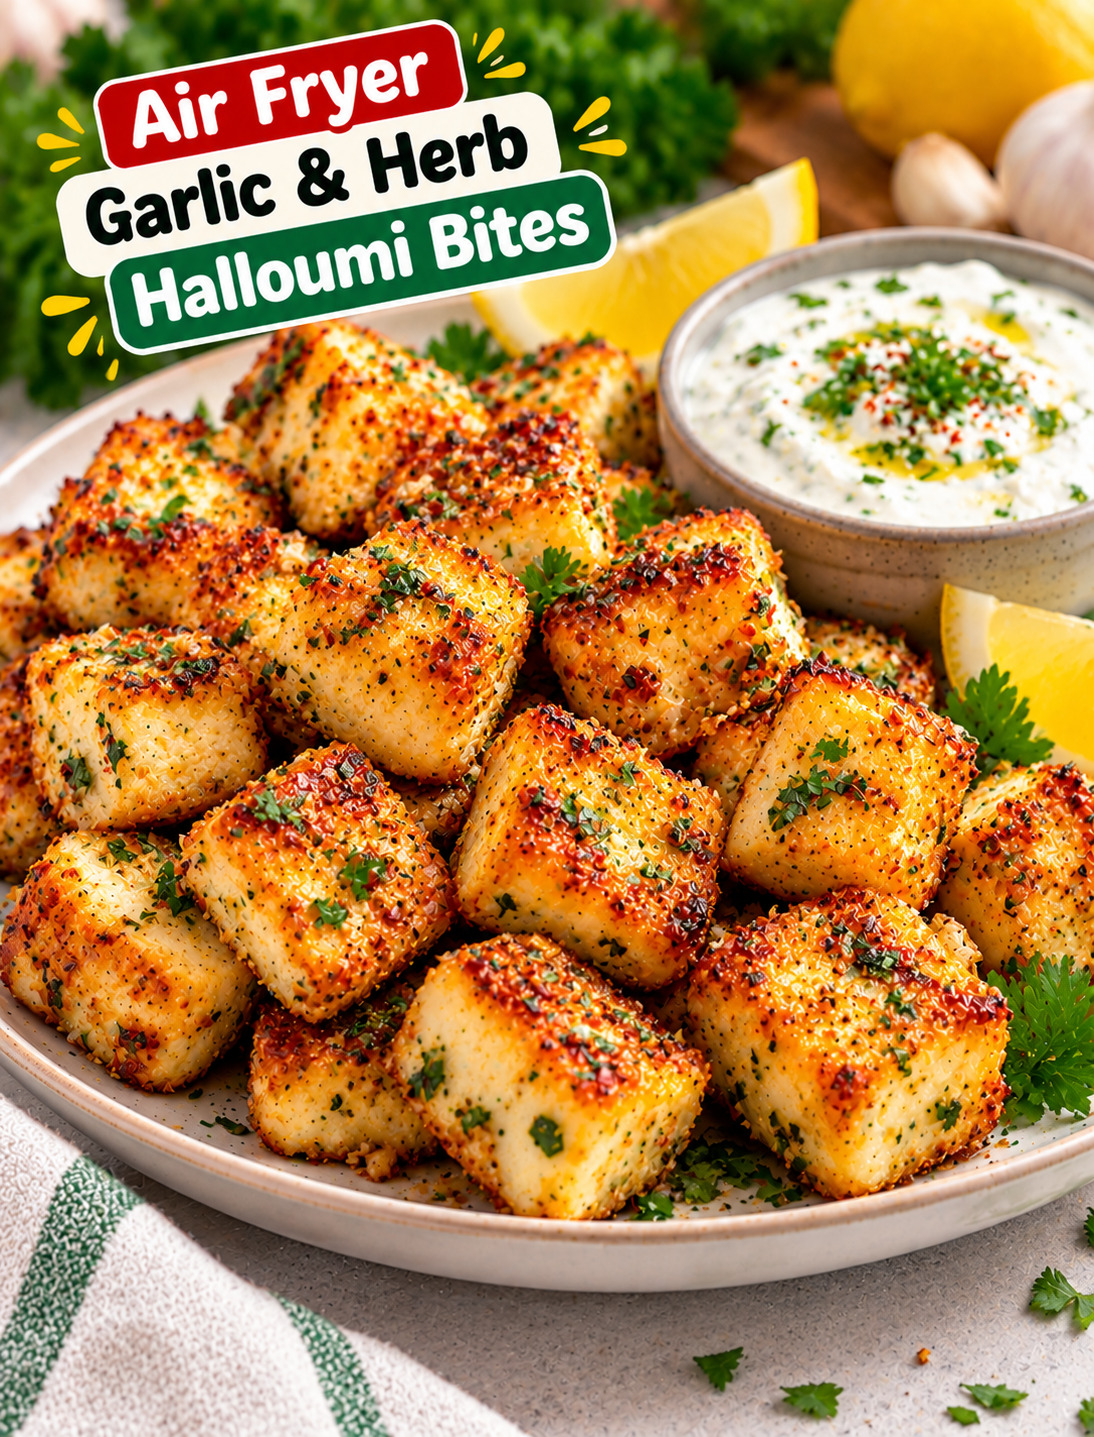
Air Fryer Garlic & Herb Halloumi Cheese Bites

Golden air fryer garlic and herb halloumi cheese bites garnished with fresh parsley and lemon, served with creamy yogurt dipping sauce.
Air Fryer Garlic & Herb Halloumi Cheese Bites

Looking for a quick, savory snack with golden edges and a soft, chewy center? These Air Fryer Garlic & Herb Halloumi Cheese Bites are an easy way to enjoy Mediterranean-inspired flavors at home. Halloumi cheese is seasoned with garlic, oregano, parsley, and olive oil, then air fried until lightly golden on the outside.

Unlike many soft cheeses, halloumi holds its shape when heated, making it a great choice for air frying. Its salty flavor pairs well with fresh lemon juice, fragrant herbs, and a creamy yogurt dip.

Serve these crispy cheese bites as a party appetizer, a quick afternoon snack, or a side dish with grilled chicken and fresh vegetables. They need only a handful of ingredients and cook in minutes, making them a useful recipe for busy days.

Why You’ll Love This Recipe

These halloumi bites are simple to prepare and full of savory flavor.

  • Golden edges: The air fryer helps brown the cheese without deep frying.
  • Garlic and herb flavor: Garlic, oregano, parsley, and olive oil add a Mediterranean touch.
  • Quick cooking: The cheese usually needs only a few minutes in the air fryer.
  • Simple ingredients: Most ingredients are easy to find at larger U.S. grocery stores.
  • Versatile serving options: Enjoy the bites as an appetizer, snack, or side dish.
  • Easy to customize: Add chili flakes, lemon zest, or your favorite dried herbs.
  • Great for sharing: Serve them on a platter with toothpicks and dipping sauce.

Ingredients You’ll Need

For the Halloumi Bites

  • 8 ounces halloumi cheese
  • 1 tablespoon olive oil
  • 2 cloves garlic, finely minced
  • 1 teaspoon dried oregano
  • 1 teaspoon dried parsley
  • ½ teaspoon smoked paprika
  • ¼ teaspoon black pepper
  • 1 teaspoon fresh lemon juice
  • 1 teaspoon lemon zest, optional

Halloumi is a firm cheese that browns well and keeps its shape when heated. It is naturally salty, so you usually do not need extra salt in the seasoning.

For the Optional Yogurt Dip

  • ½ cup plain Greek yogurt
  • 1 teaspoon fresh lemon juice
  • 1 small garlic clove, finely grated
  • 1 teaspoon chopped fresh parsley
  • A pinch of black pepper

The cool yogurt dip balances the warm, salty cheese. You can also serve the bites with tzatziki, marinara sauce, or a simple lemon-garlic dressing.

For Garnishing

  • Chopped fresh parsley
  • Extra lemon wedges
  • A small pinch of red pepper flakes, optional

How to Make Air Fryer Garlic & Herb Halloumi Cheese Bites

Step 1: Prepare the Halloumi

Remove the halloumi from its package and drain any liquid.

Pat the cheese dry with paper towels to remove excess moisture. This helps the outside brown more evenly in the air fryer.

Cut the cheese into bite-size cubes, about ¾ to 1 inch wide. Try to keep the pieces similar in size so they cook at the same rate.

If the cheese is very wet, let it sit on a paper towel for a few minutes before seasoning.

Step 2: Make the Garlic Herb Seasoning

Add the olive oil, minced garlic, dried oregano, dried parsley, smoked paprika, black pepper, lemon juice, and optional lemon zest to a small bowl.

Stir until the ingredients are well combined.

The olive oil helps the seasoning coat the cheese, while the garlic and herbs add flavor to its browned surface.

Step 3: Coat the Cheese Pieces

Place the halloumi cubes in a medium mixing bowl.

Pour the garlic herb mixture over the cheese.

Toss gently until the pieces are coated on all sides.

Avoid mixing too roughly because the cubes can break apart if pressed hard.

Step 4: Preheat the Air Fryer

Preheat your air fryer to 390°F for about 3 minutes, if recommended by your appliance’s instructions.

Lightly grease the basket with an air-fryer-safe cooking spray if needed.

A preheated basket helps the cheese begin browning as soon as cooking starts.

Step 5: Arrange the Halloumi Bites

Place the seasoned cheese cubes in the basket in a single layer.

Leave a little space between the pieces so hot air can circulate around them.

Avoid overcrowding the basket because closely packed pieces may brown unevenly.

If necessary, cook the halloumi in two batches.

Step 6: Air Fry Until Golden

Air fry the halloumi at 390°F for about 5–8 minutes.

Turn or shake the pieces gently halfway through cooking.

Start checking after 5 minutes because halloumi can brown quickly, depending on the size of the cubes and the air fryer model.

Remove the bites when the edges are golden and the outside has developed a lightly crisp texture. Halloumi should remain firm rather than becoming soft and stretchy like mozzarella.

Step 7: Prepare the Yogurt Dip

While the cheese cooks, add Greek yogurt, lemon juice, grated garlic, parsley, and black pepper to a small bowl.

Stir until smooth.

Taste the dip and add a little more lemon juice if you prefer a brighter flavor.

Keep the dip refrigerated until serving.

Step 8: Garnish and Serve

Transfer the cooked halloumi bites to a serving plate.

Sprinkle with fresh parsley and a little lemon zest.

Serve immediately with lemon wedges and the yogurt dip on the side.

For the best texture, eat the bites while warm because halloumi becomes firmer as it cools.

Tips for Perfect Halloumi Bites

Use these simple tips to get evenly browned cheese with plenty of flavor.

  • Dry the cheese first: Removing surface moisture helps the outside brown.
  • Cut evenly sized cubes: Similar pieces cook at the same rate.
  • Use a light coating of oil: Too much oil can make the cheese greasy.
  • Do not overcrowd the basket: Space helps the edges brown more evenly.
  • Check the cheese early: Halloumi can become too dark if cooked for too long.
  • Turn halfway through: This helps more sides develop a golden color.
  • Skip extra salt at first: Halloumi is already salty, so taste before adding more.
  • Serve immediately: The texture is best while the cheese is warm.

Easy Recipe Variations

Spicy Garlic Halloumi

Add ¼ teaspoon of red pepper flakes or cayenne pepper to the seasoning mixture. Serve with a cool yogurt dip to balance the heat.

Lemon Herb Halloumi

Add extra lemon zest and fresh parsley for a brighter flavor. Finish with a squeeze of lemon just before serving.

Mediterranean Halloumi Bites

Season the cheese with oregano, thyme, paprika, and olive oil. Serve with cherry tomatoes, cucumber, olives, and warm pita.

Honey Garlic Halloumi

Drizzle a small amount of honey over the cooked cheese and finish with minced parsley. Add the honey after air frying so it does not burn.

Smoked Paprika Halloumi

Increase the smoked paprika slightly for a deeper, smoky flavor that pairs well with grilled vegetables.

Sesame Herb Halloumi

Sprinkle sesame seeds over the seasoned cheese before cooking for a subtle nutty taste and extra texture.

What to Serve With Halloumi Cheese Bites

These bites can be served alone or as part of a larger meal.

Try pairing them with:

  • Greek salad
  • Warm pita bread
  • Tzatziki sauce
  • Hummus
  • Roasted vegetables
  • Grilled chicken
  • Couscous or rice
  • Cherry tomatoes and cucumber
  • Lemon-garlic yogurt dip

For a party platter, serve the cheese with cucumber slices, olives, pita wedges, and two dipping sauces. For a simple lunch, add the bites to a fresh salad with tomatoes and lemon dressing.

Storage and Reheating

Halloumi tastes best freshly cooked, when the edges are golden and the center is warm.

If you have leftovers, let them cool and refrigerate them in an airtight container within 2 hours.

Store cooked halloumi for up to 3–4 days in the refrigerator.

To reheat, place the bites in the air fryer at 350°F for about 2–3 minutes, checking frequently to avoid over-browning.

The cheese may become firmer after refrigeration, and reheating will not fully restore the texture of freshly cooked halloumi.

Avoid the microwave when possible because it can make the cheese rubbery.

Common Mistakes to Avoid

Leaving the Cheese Wet

Excess moisture can prevent even browning. Pat the halloumi dry before adding the seasoning.

Cutting Uneven Pieces

Large cubes may need more time than small ones. Keep the pieces close to the same size for consistent results.

Using Too Much Oil

Halloumi already contains fat, so a light coating is enough to help the herbs stick.

Overcooking the Cheese

Too much cooking can make halloumi tough and overly firm. Start checking after 5 minutes and remove it once the edges are golden.

Adding Too Much Salt

Halloumi is naturally salty. Taste the finished dish before adding extra salt to the seasoning or dip.

Forgetting to Turn the Bites

Turning the cubes halfway through cooking helps expose more surfaces to the hot air.

Frequently Asked Questions

Can I use halloumi straight from the refrigerator?

Yes. Drain and pat it dry before cutting and seasoning; there is no need to bring it to room temperature.

How long should halloumi cook in the air fryer?

Halloumi cubes usually take about 5–8 minutes at 390°F, depending on their size and your air fryer.

Does halloumi melt in the air fryer?

Halloumi generally holds its shape when heated, although it softens inside and develops browned edges.

Do I need to soak halloumi before cooking?

Most packaged halloumi can be cooked directly after draining and drying, but soaking may help if your particular cheese tastes very salty.

Can I make halloumi bites without oil?

Yes. You can air fry halloumi without added oil, although a small amount helps the garlic and herbs coat the cheese.

What dip goes best with garlic herb halloumi?

Lemon-garlic yogurt dip, tzatziki, hummus, and marinara all pair well with the salty cheese.

Can I prepare halloumi bites ahead of time?

You can cut and season the cheese shortly before cooking, but air fry it just before serving for the best texture.

Why did my halloumi turn rubbery?

Halloumi becomes firmer as it cools and can turn tough if overcooked. Reduce the cooking time and serve it immediately.

Final Thoughts

These Air Fryer Garlic & Herb Halloumi Cheese Bites are a simple way to enjoy golden, savory cheese with garlic, herbs, and fresh lemon. The air fryer helps brown the outside while keeping the cheese firm and pleasantly chewy.

For the best results, dry the halloumi well, cut it into even cubes, use a light coating of oil, and check it early during cooking. Serve the bites warm with lemon-garlic yogurt dip, fresh vegetables, or pita bread for an easy appetizer with Mediterranean flavor.

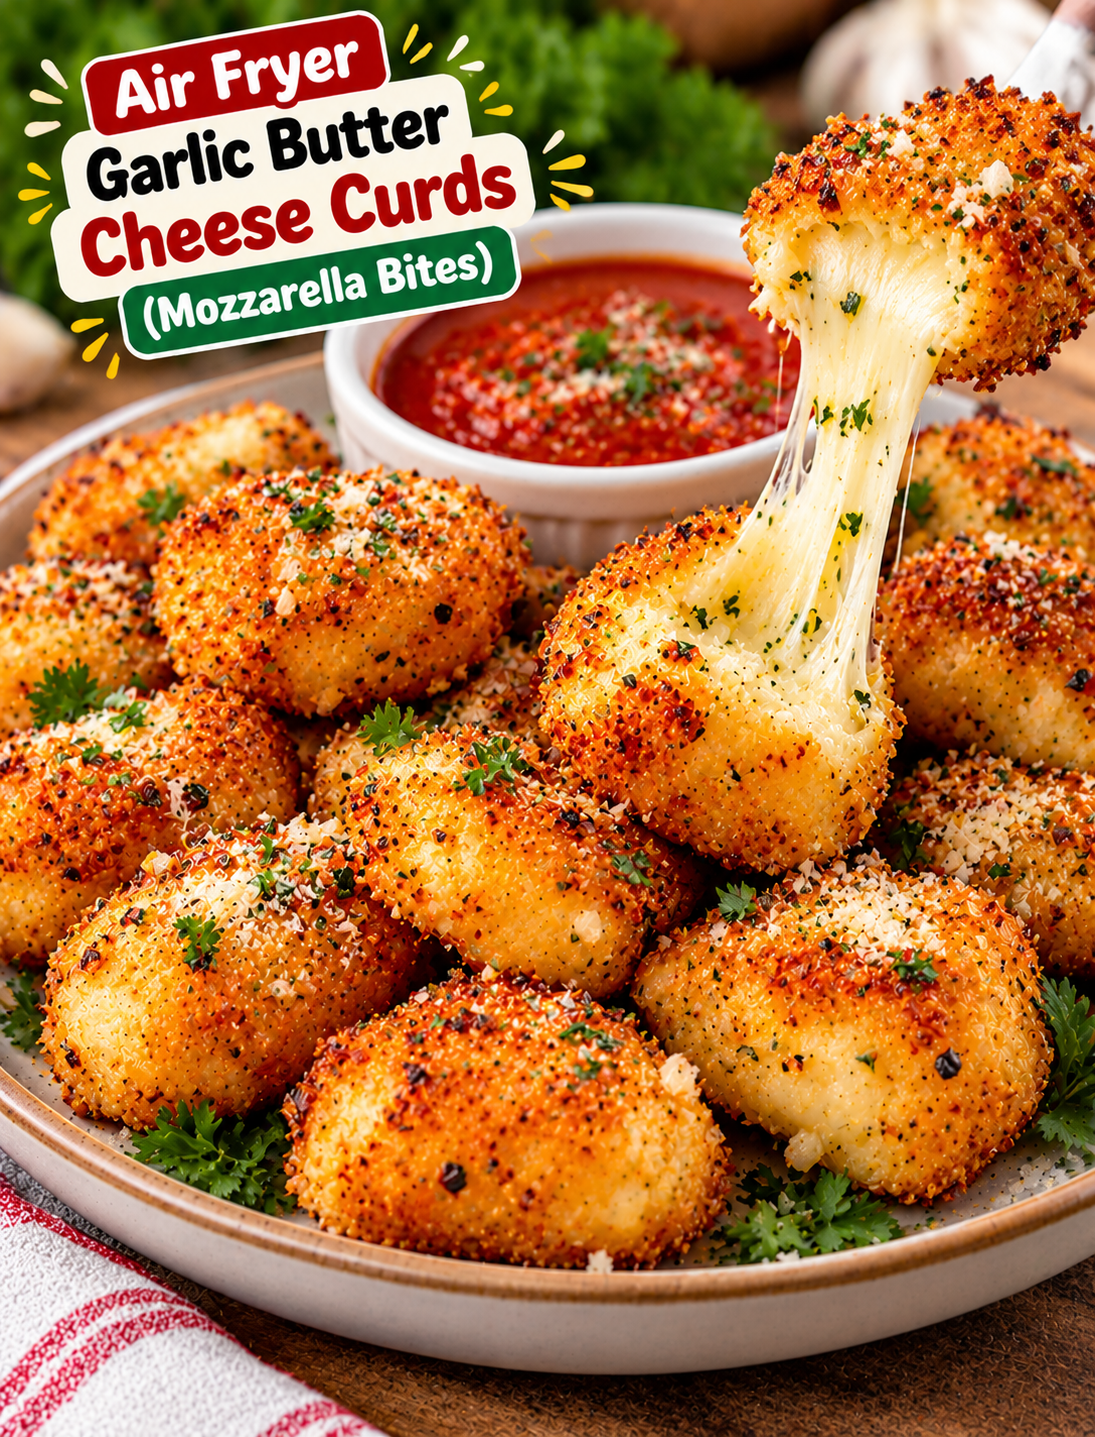
Air Fryer Crispy Garlic Butter Cheese Curds

Crispy air fryer garlic butter cheese curds and mozzarella bites coated in golden breadcrumbs, sprinkled with Parmesan, and served with marinara sauce.
Air Fryer Crispy Garlic Butter Cheese Curds (or Mozzarella Bites)

If you love crispy cheese with a warm, gooey center, these Air Fryer Crispy Garlic Butter Cheese Curds are a snack worth making. Each bite has a crunchy golden coating, melted cheese inside, and a rich garlic-butter flavor that makes it hard to stop at just one.

This recipe is perfect for game days, movie nights, family gatherings, or a quick appetizer when you want something cheesy without deep frying. The air fryer helps the coating turn crisp while the cheese softens inside.

You can make this recipe with cheese curds or mozzarella bites. Cheese curds offer a mild, slightly springy texture, while mozzarella gives you the familiar stretchy cheese pull. Serve them with warm marinara, ranch dressing, or spicy garlic dip for a crowd-pleasing snack.

Why You’ll Love This Recipe

These cheesy bites are easy to prepare and bring plenty of flavor to your snack table.

  • Crunchy coating: Breadcrumbs create a crisp shell around the cheese.
  • Gooey center: Mozzarella and cheese curds soften beautifully when heated.
  • Rich garlic-butter flavor: Garlic, butter, and parsley add a savory finish.
  • Air-fried instead of deep-fried: A light coating of oil helps brown the outside.
  • Great for parties: Serve them with toothpicks and dipping sauces.
  • Easy to customize: Add Italian herbs, smoked paprika, or red pepper flakes.
  • Quick cooking: Frozen breaded cheese bites can cook in just a few minutes, depending on size and air fryer model.

Ingredients You’ll Need

For the Cheese Bites

  • 12 ounces cheese curds or mozzarella pearls, drained and patted dry
  • ½ cup all-purpose flour
  • 2 large eggs
  • 1 tablespoon water
  • 1 cup panko breadcrumbs
  • ½ cup finely grated Parmesan cheese
  • 1 teaspoon garlic powder
  • 1 teaspoon Italian seasoning
  • ¼ teaspoon paprika
  • ¼ teaspoon black pepper
  • Olive oil spray, as needed

For the most reliable results, use small cheese curds or firm mozzarella pieces that are easy to coat. If using fresh mozzarella pearls, drain and dry them thoroughly because excess moisture can cause the coating to loosen.

For the Garlic Butter

  • 3 tablespoons unsalted butter
  • 2 cloves garlic, finely minced
  • 1 tablespoon chopped fresh parsley
  • 1 teaspoon grated Parmesan cheese
  • ¼ teaspoon Italian seasoning
  • A small pinch of salt, optional

The garlic butter adds flavor after cooking. Toss the bites lightly so the coating stays crisp instead of becoming soaked in butter.

Optional Dipping Sauces

Choose one or two sauces to serve alongside the cheese bites.

  • Warm marinara sauce
  • Ranch dressing
  • Garlic aioli
  • Spicy mayo
  • Honey mustard
  • Buffalo ranch dip

How to Make Air Fryer Crispy Garlic Butter Cheese Curds

Step 1: Prepare the Cheese

Separate the cheese curds if they are stuck together. If using mozzarella, cut a firm block into bite-size cubes or use drained mozzarella pearls.

Pat the cheese dry with paper towels.

Place the cheese in the freezer for 20–30 minutes before breading. Chilled cheese is less likely to melt too quickly while the coating cooks.

Do not skip drying the cheese because surface moisture can prevent the breading from sticking.

Step 2: Set Up the Breading Station

Prepare three shallow bowls.

  • Bowl 1: Add the all-purpose flour.
  • Bowl 2: Whisk the eggs with 1 tablespoon of water.
  • Bowl 3: Mix the panko breadcrumbs, Parmesan, garlic powder, Italian seasoning, paprika, and black pepper.

Keep the bowls close together so you can coat each piece without making a mess.

Step 3: Coat the Cheese

Roll each cheese piece in flour and shake off the excess.

Dip it into the egg mixture, making sure all sides are covered.

Press it into the breadcrumb mixture until the outside is evenly coated.

For a stronger barrier against cheese leaks, dip the coated piece in egg and breadcrumbs a second time.

Place the breaded pieces on a parchment-lined tray, leaving a little space between them.

Step 4: Freeze the Breaded Bites

Place the tray in the freezer for at least 30–45 minutes, or until the coating is firm.

This step is important because cheese melts quickly at high heat. Starting with firm, frozen bites gives the breading more time to crisp before the cheese escapes.

For easier meal prep, freeze the breaded bites in a single layer before transferring them to a freezer-safe container.

Step 5: Preheat the Air Fryer

Preheat your air fryer to 375°F for about 3 minutes, if recommended by your model’s instructions.

Lightly spray the basket with an air-fryer-safe cooking spray.

Do not pour loose oil into the basket because it can collect beneath the food and affect the texture.

Step 6: Arrange the Cheese Bites

Place the frozen cheese bites in the basket in a single layer.

Leave space between each piece so hot air can circulate around the coating.

Lightly spray the tops with olive oil spray. This helps the breadcrumbs turn golden and crisp.

Avoid overcrowding the basket. Cook in batches if necessary.

Step 7: Air Fry Until Golden

Air fry the bites at 375°F for about 4–6 minutes, checking them early.

Cooking time depends on the size of the cheese, the thickness of the coating, and your air fryer.

Look for a golden coating and remove the bites before cheese begins leaking heavily.

If you are using a packaged frozen product, follow its cooking instructions first because some products need a different temperature or cooking time.

Let the bites rest for about 1 minute before handling. The melted cheese inside will be very hot.

Step 8: Make the Garlic Butter

While the cheese bites cook, melt the butter in a small saucepan over low heat.

Add the minced garlic and cook for about 30–45 seconds, stirring constantly.

Remove the pan from the heat as soon as the garlic smells fragrant. Garlic can become bitter if it browns too much.

Stir in the parsley, Parmesan, and Italian seasoning.

Step 9: Add the Garlic Butter and Serve

Transfer the cooked cheese bites to a large bowl.

Drizzle a small amount of garlic butter over them and toss gently. Use only enough butter to add flavor without soaking the crust.

Sprinkle with extra Parmesan and parsley if desired.

Serve immediately with marinara, ranch, or your favorite dipping sauce.

Tips for Extra-Crispy Cheese Bites

Follow these simple tips to reduce cheese leaks and keep the outside crunchy.

  • Dry the cheese well: Moisture makes the coating harder to attach.
  • Chill before breading: Firm cheese is easier to handle.
  • Double-coat the pieces: An extra egg-and-crumb layer creates a stronger shell.
  • Freeze before cooking: A firm, frozen center helps prevent early melting.
  • Use panko breadcrumbs: Their coarse texture gives a crunchier finish.
  • Spray lightly with oil: A thin layer helps the coating brown.
  • Avoid overcrowding: Space helps hot air reach every side.
  • Check early: Small cheese bites can burst if cooked too long.
  • Add garlic butter sparingly: Too much liquid can soften the crust.

Easy Recipe Variations

Spicy Garlic Cheese Bites

Add ¼ teaspoon of crushed red pepper flakes or cayenne pepper to the breadcrumb mixture. Serve with spicy mayo for extra heat.

Italian Herb Cheese Bites

Add extra oregano, basil, and parsley to the breadcrumbs for a stronger Italian-inspired flavor.

Extra-Parmesan Mozzarella Bites

Increase the Parmesan slightly in the coating and sprinkle a little more over the cooked bites before serving.

Buffalo Cheese Bites

Toss the cooked cheese bites lightly with a small amount of buffalo sauce instead of garlic butter. Serve with ranch dressing.

Lemon Garlic Cheese Bites

Add a little lemon zest to the garlic butter and finish with a small squeeze of lemon juice for a bright flavor.

Air Fryer Frozen Mozzarella Bites

For a quicker option, use store-bought frozen breaded mozzarella bites. Arrange them in a single layer and follow the package directions, checking early to prevent cheese leakage.

What to Serve With Garlic Butter Cheese Bites

These crispy cheese snacks pair well with simple sides and dips.

Try serving them with:

  • Marinara sauce
  • Ranch dressing
  • Garlic aioli
  • Buffalo sauce
  • Fresh vegetable sticks
  • A green salad
  • Chicken wings
  • Mini burgers or sliders
  • Potato wedges

For a game-day spread, serve the bites alongside wings, vegetables, and two dipping sauces. For a simple snack, a small bowl of warm marinara is often enough.

Storage and Reheating

These cheese bites taste best immediately after cooking because the coating is crisp and the cheese is warm.

If you have leftovers, let them cool briefly and refrigerate them in an airtight container within 2 hours.

Store cooked leftovers in the refrigerator for up to 3–4 days.

Reheat them in the air fryer at 350°F for about 2–4 minutes, checking frequently. The coating may crisp again, but the cheese can melt quickly.

Avoid the microwave when possible because it often makes the coating soft and can cause the cheese to become overly hot.

For food safety, do not leave cheese bites at room temperature for extended periods.

Common Mistakes to Avoid

Skipping the Freezing Step

Warm cheese can melt before the breading becomes crisp. Freeze the coated pieces until firm before air frying.

Using Wet Mozzarella

Excess moisture can make the coating slide off. Drain and pat fresh mozzarella dry before breading.

Applying Only One Thin Coating

A weak coating may split and allow the cheese to leak. Use a double coating for small or soft cheese pieces.

Overcooking the Bites

Cheese can escape quickly once the center becomes hot. Check the bites early and remove them when the crust is golden.

Adding Too Much Garlic Butter

A heavy drizzle can soften the breadcrumbs. Toss with a small amount just before serving.

Overcrowding the Basket

Crowded cheese bites cook unevenly. Arrange them in one layer and cook in batches.

Frequently Asked Questions

Can I use frozen cheese curds?

Yes, but follow the package directions if they are already breaded. For unbreaded curds, thaw only as needed for handling, dry them well, and coat them before freezing again.

Why did my cheese bites burst?

They may have cooked too long, started too warm, or had a weak coating. Freeze the breaded pieces and check them early during air frying.

Can I use fresh mozzarella?

Yes. Use firm mozzarella pieces or pearls, drain them thoroughly, pat them dry, and freeze them before breading.

How long should I air fry mozzarella bites?

Homemade frozen bites often take about 4–6 minutes at 375°F, but size and air fryer models vary, so check early.

Do I need to use panko breadcrumbs?

No. Regular breadcrumbs work, but panko usually gives the coating a lighter, crunchier texture.

Can I prepare the cheese bites ahead of time?

Yes. Bread the cheese, freeze the pieces in a single layer until firm, and store them in a freezer-safe container until ready to cook.

What dipping sauce goes best with cheese bites?

Marinara is a classic choice, while ranch, garlic aioli, and spicy mayo offer creamy or spicy alternatives.

Can I make these without garlic butter?

Yes. Serve the crispy cheese bites plain with dipping sauce, or sprinkle them with Parmesan and Italian herbs after cooking.

Final Thoughts

These Air Fryer Crispy Garlic Butter Cheese Curds or Mozzarella Bites are a fun way to enjoy crunchy breading, warm melted cheese, and savory garlic flavor in one snack. They work well for parties, game days, movie nights, or a quick appetizer.

For the best results, dry the cheese, use a firm double coating, freeze the breaded bites before cooking, and check them early in the air fryer. Finish with a light drizzle of garlic butter and serve immediately with marinara or ranch.

Once you master the basic method, you can change the herbs, add a little heat, or try different dipping sauces to create your own favorite version.

Crispy Air Fryer Parmesan Garlic Zucchini Fries

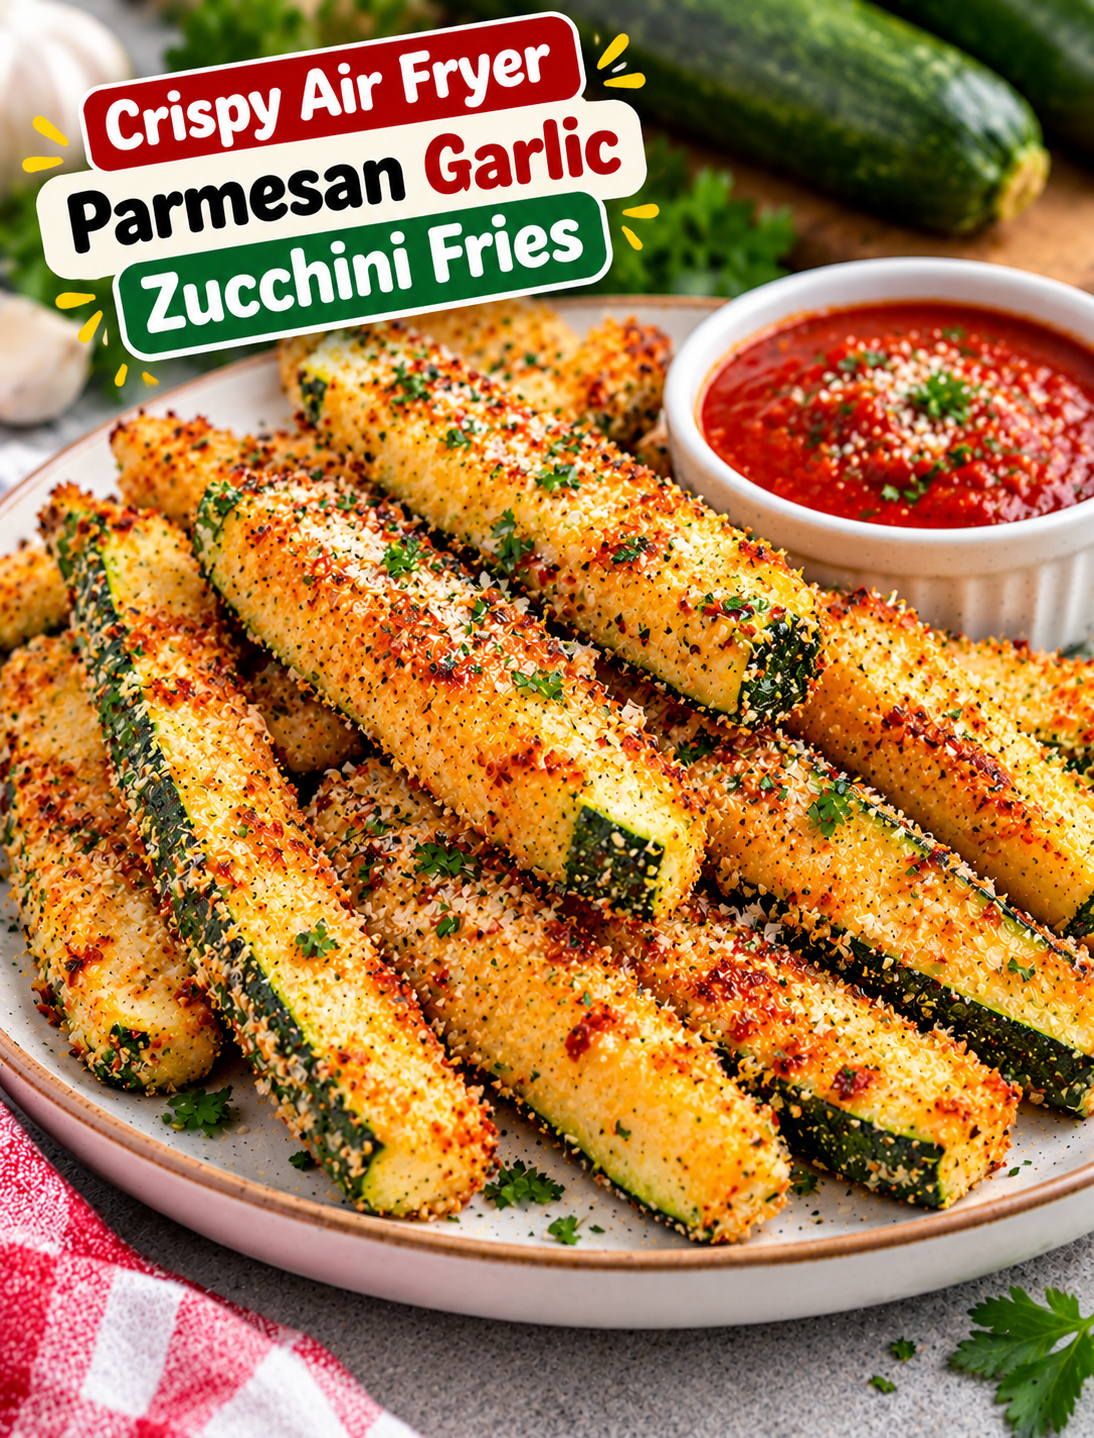
Crispy air fryer Parmesan garlic zucchini fries coated in golden breadcrumbs and served with marinara dipping sauce.
Crispy Air Fryer Parmesan Garlic Zucchini Fries

Want a crispy snack without deep frying? These Crispy Air Fryer Parmesan Garlic Zucchini Fries are a tasty way to enjoy fresh zucchini with a golden, cheesy coating. Each fry is seasoned with garlic, Parmesan cheese, and herbs, then air fried until the outside turns crisp and the inside stays tender.

This easy recipe is perfect for busy weeknights, game-day snacks, or a simple side dish for burgers, sandwiches, and grilled chicken. The air fryer uses a light coating of oil to help the breading brown without needing a pot of hot oil.

The secret to a good batch is removing excess moisture from the zucchini and coating each piece evenly. With a few simple ingredients and the right cooking method, you can make flavorful zucchini fries at home in about 20 minutes.

Why You’ll Love These Zucchini Fries

These zucchini fries offer plenty of flavor with simple ingredients and an easy cooking process.

  • Crispy coating: Panko breadcrumbs create a crunchy outer layer.
  • Savory garlic flavor: Garlic powder and Parmesan add a rich, cheesy taste.
  • Quick preparation: The fries take only a few minutes to prepare before air frying.
  • Less oil than deep frying: A light spray of oil helps the coating brown.
  • Easy to customize: Add Italian seasoning, smoked paprika, or red pepper flakes.
  • Great for dipping: Serve with marinara, ranch, or garlic yogurt sauce.
  • Versatile side dish: Pair them with burgers, wraps, chicken, or sandwiches.

Ingredients You’ll Need

For the Zucchini Fries

  • 2 medium zucchini
  • ½ cup all-purpose flour
  • 2 large eggs
  • 1 tablespoon water
  • 1 cup panko breadcrumbs
  • ½ cup finely grated Parmesan cheese
  • 1 teaspoon garlic powder
  • 1 teaspoon Italian seasoning
  • ½ teaspoon paprika
  • ½ teaspoon salt
  • ¼ teaspoon black pepper
  • Olive oil spray, as needed

Choose firm zucchini with smooth skin and no soft spots. Medium zucchini are easier to cut into evenly sized fries and usually contain less excess moisture than very large ones.

Panko breadcrumbs give the coating a lighter crunch than many standard breadcrumbs. Finely grated Parmesan sticks more evenly to the crumbs and adds a salty, nutty flavor.

Optional Dipping Sauces

Choose one or two sauces to serve alongside the fries.

  • Marinara sauce
  • Ranch dressing
  • Garlic yogurt dip
  • Lemon garlic aioli
  • Spicy mayo
  • Tzatziki sauce

How to Make Crispy Air Fryer Parmesan Garlic Zucchini Fries

Step 1: Wash and Cut the Zucchini

Rinse the zucchini under cool running water and pat dry with a clean towel.

Trim off both ends. Cut each zucchini in half crosswise, then slice each section into sticks about ½ inch thick.

Try to keep the fries similar in size so they cook evenly. Very thin pieces may become soft or overcook before the coating turns golden.

Step 2: Remove Excess Moisture

Place the zucchini sticks on paper towels and gently pat them dry.

For better results, sprinkle them lightly with a little salt and let them rest for 10 minutes. Blot away any moisture that collects on the surface.

This step helps the coating stick and reduces the chance of soggy fries.

Step 3: Prepare the Breading Station

Set out three shallow bowls.

First bowl, add the flour.

Second bowl, whisk the eggs with 1 tablespoon of water until smooth.

Third bowl, combine the panko breadcrumbs, Parmesan cheese, garlic powder, Italian seasoning, paprika, black pepper, and remaining salt if needed.

Mix the breadcrumb mixture well so the garlic and cheese are distributed throughout.

Step 4: Coat the Zucchini Sticks

Working with a few pieces at a time, coat the zucchini sticks lightly in flour.

Shake off the excess flour, dip each piece into the egg mixture, and allow the extra egg to drip away.

Press the zucchini into the Parmesan breadcrumb mixture until all sides are covered.

Place the coated fries on a clean plate or tray in a single layer.

Tip: Use one hand for the dry coating and the other for the egg mixture to reduce clumping on your fingers.

Step 5: Preheat the Air Fryer

Preheat your air fryer to 400°F for about 3 minutes, if your model recommends preheating.

Lightly spray the basket with an air-fryer-safe cooking spray to help prevent sticking.

Do not pour oil directly into the basket because excess oil can collect underneath the food.

Step 6: Arrange the Fries in the Basket

Place the coated zucchini sticks in a single layer.

Leave a little space between each piece so hot air can move around the coating.

Avoid stacking or overcrowding the basket. Cook in batches if needed.

Lightly spray the tops of the fries with olive oil spray. This helps the breadcrumbs and Parmesan develop a golden color.

Step 7: Air Fry Until Golden

Air fry the zucchini fries at 400°F for 8–12 minutes.

Turn them carefully halfway through cooking so both sides brown evenly.

Check the fries after 8 minutes because cooking times vary between air fryer models and zucchini thickness.

Remove the fries when the coating is golden and crisp and the zucchini inside is tender.

Let the fries rest for about 1–2 minutes before serving. The coating will be very hot immediately after cooking.

Step 8: Garnish and Serve

Transfer the finished fries to a serving plate.

Sprinkle with a little extra Parmesan cheese and chopped parsley if desired.

Serve immediately with warm marinara, ranch dressing, garlic yogurt dip, or your favorite sauce.

For the best crunch, serve the fries soon after cooking rather than covering them with a lid.

Tips for Extra-Crispy Zucchini Fries

A few simple techniques help the coating stay crisp instead of turning soft.

  • Dry the zucchini well: Excess water can loosen the breading.
  • Cut evenly sized sticks: Similar pieces cook at the same rate.
  • Use panko breadcrumbs: Their coarse texture creates a crunchy coating.
  • Shake off excess flour: A thick flour layer can become pasty.
  • Let excess egg drip away: Too much egg can make the breading clump.
  • Press the coating gently: This helps the crumbs stick to the zucchini.
  • Use a light oil spray: A thin coating promotes browning without making the fries greasy.
  • Cook in batches: Crowded fries tend to steam instead of crisp.
  • Serve immediately: The coating gradually softens as the zucchini releases moisture.

Easy Recipe Variations

Spicy Parmesan Zucchini Fries

Add ¼ teaspoon of cayenne pepper or crushed red pepper flakes to the breadcrumb mixture. Adjust the amount to your preferred heat level.

Italian Herb Zucchini Fries

Add extra dried oregano, basil, and parsley to the coating for a stronger Italian-inspired flavor.

Extra-Cheesy Zucchini Fries

Mix 2 tablespoons of finely grated Parmesan into the breadcrumbs and sprinkle a little more over the fries after cooking.

Gluten-Free Zucchini Fries

Use a gluten-free all-purpose flour blend and gluten-free panko breadcrumbs. Check the ingredient labels on all seasonings and sauces.

Low-Carb Style Zucchini Fries

Replace the flour and panko coating with finely grated Parmesan and crushed pork rinds. The texture will differ from traditional breaded fries, but the coating can still brown nicely.

Lemon Garlic Zucchini Fries

Add ½ teaspoon of lemon zest to the breadcrumb mixture and serve with a squeeze of fresh lemon juice.

What to Serve With Zucchini Fries

These crispy vegetable fries work as a snack, appetizer, or side dish.

Try pairing them with:

  • Air fryer chicken tenders
  • Grilled chicken breast
  • Burgers or sliders
  • Turkey sandwiches
  • Homemade wraps
  • Baked fish
  • Roasted potatoes
  • A fresh green salad

For a party platter, serve the fries with two or three dipping sauces so guests can choose their favorite.

Best Dipping Sauces

A good dip adds flavor and makes these fries even more enjoyable.

  • Marinara sauce: A classic tomato-based option that complements Parmesan.
  • Ranch dressing: Creamy ranch balances the garlic and herbs.
  • Garlic yogurt dip: Mix plain Greek yogurt with lemon juice, minced garlic, and a pinch of salt.
  • Lemon garlic aioli: A rich dip with a bright citrus finish.
  • Spicy mayo: Mix mayonnaise with a little hot sauce for extra heat.
  • Tzatziki: A cool cucumber-yogurt sauce that pairs well with garlic and herbs.

Storage and Reheating

Zucchini fries are best served fresh because zucchini naturally contains a lot of water.

If you have leftovers, let them cool briefly and store them in an airtight container in the refrigerator for up to 3 days.

To reheat, place the fries in the air fryer at 375°F for about 3–5 minutes, checking until the coating is crisp and the center is heated through.

Avoid reheating them in a covered container or stacking them while hot because trapped steam can soften the breading.

Freezing cooked zucchini fries is not ideal because the zucchini may become watery after thawing.

Common Mistakes to Avoid

Skipping the Drying Step

Wet zucchini makes it harder for the flour, egg, and breadcrumbs to stay attached. Pat each piece dry before breading.

Using Too Much Breading

A thick coating may fall off during cooking. Shake away excess flour and egg before adding the breadcrumbs.

Overcrowding the Basket

Air needs to circulate around each fry. Arrange the pieces in a single layer and cook in batches.

Using Too Little Oil Spray

Breadcrumbs can remain pale and dry without a light coating of oil. Spray the exposed surfaces evenly.

Overcooking the Zucchini

Very long cooking can make the center soft and release more moisture. Begin checking after 8 minutes.

Leaving the Fries Covered

Steam softens the crispy coating. Serve the fries on an open plate and keep any dipping sauce on the side.

Frequently Asked Questions

How long do zucchini fries take in the air fryer?

They usually take 8–12 minutes at 400°F, depending on their thickness and your air fryer model.

Why are my zucchini fries soggy?

Excess moisture, overcrowding, or a thick coating can cause soggy fries. Dry the zucchini well and cook in a single layer.

Do I need to peel zucchini before making fries?

No. The skin is edible and helps the sticks hold their shape during breading and cooking.

Can I make zucchini fries without eggs?

Yes. Use a suitable milk-based coating or an egg-free batter to help the breadcrumbs adhere, though the texture may differ.

Which breadcrumbs work best?

Panko breadcrumbs create a lighter, crunchier coating than many standard breadcrumbs.

Can I prepare zucchini fries ahead of time?

You can cut and dry the zucchini ahead, but bread the pieces shortly before air frying for the best texture.

Are Parmesan zucchini fries gluten-free?

Not with regular flour and panko. Use certified gluten-free flour and breadcrumbs to make a gluten-free version.

What temperature is best for air fryer zucchini fries?

400°F works well for browning the coating while cooking the zucchini. Check early to avoid overcooking.

Final Thoughts

These Crispy Air Fryer Parmesan Garlic Zucchini Fries turn fresh zucchini into a golden, cheesy snack with a savory garlic flavor. Panko breadcrumbs add crunch, Parmesan brings a rich taste, and the air fryer makes preparation simple.

For the best results, dry the zucchini thoroughly, coat each stick evenly, and leave space between the fries while cooking. Serve them hot with marinara, ranch, or garlic yogurt dip for an easy appetizer or side dish.

Whether you’re preparing a game-day snack or adding a vegetable side to dinner, this recipe is a practical way to enjoy zucchini with plenty of flavor and texture.

Air Fryer Loaded Mini Pizza Roll-Ups

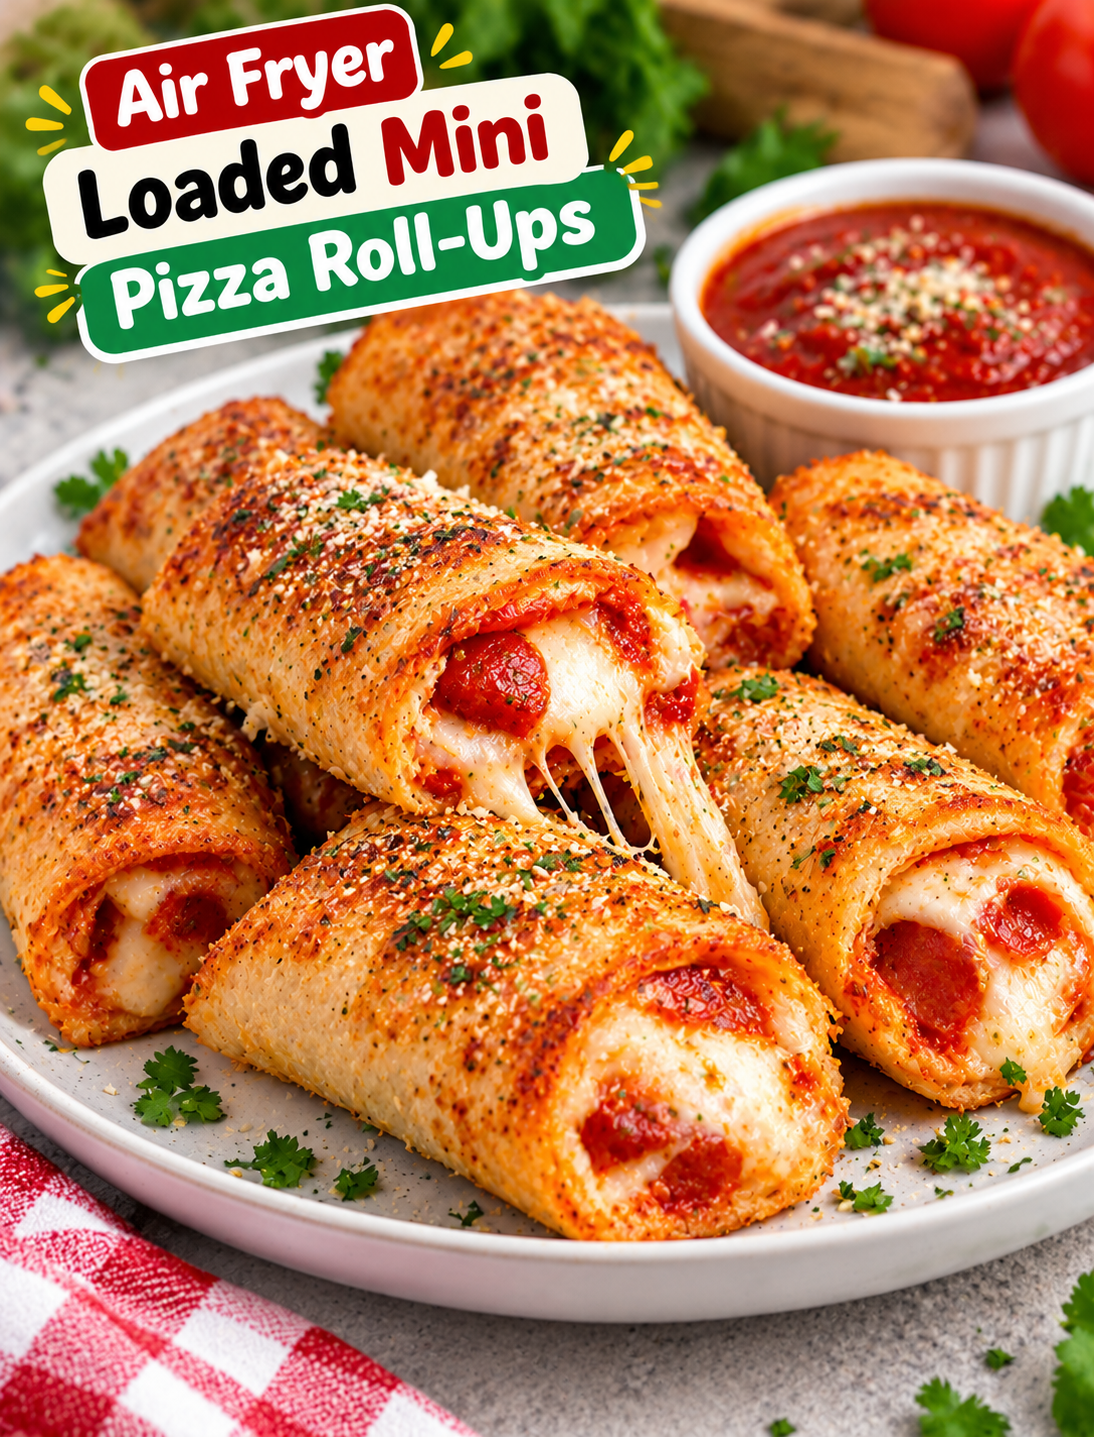
Crispy air fryer loaded mini pizza roll-ups filled with melted mozzarella, pepperoni, and pizza sauce

Air Fryer Loaded Mini Pizza Roll-Ups

These Air Fryer Loaded Mini Pizza Roll-Ups turn classic pizza flavors into crispy, bite-sized rolls that are ready in minutes. Each roll is packed with melted mozzarella, savory pepperoni, pizza sauce, and Italian seasoning, then cooked until the outside is golden and crisp.

They are a fun choice for game days, after-school snacks, quick lunches, family movie nights, or easy party appetizers. The air fryer gives the rolls a crunchy finish without needing a deep fryer.

You can also customize the filling with your favorite pizza toppings. Try cooked sausage, mushrooms, bell peppers, olives, or extra cheese to make every batch your own.

Why You’ll Love These Mini Pizza Roll-Ups

This recipe uses simple ingredients and a fast cooking method, making it useful when you want pizza without waiting for a full pie to bake.

  • Quick to make: The roll-ups cook in the air fryer in just a few minutes.
  • Crispy outside: Lightly brushing the rolls with oil helps create a golden finish.
  • Cheesy center: Mozzarella melts into the pizza sauce for a warm, gooey filling.
  • Easy to customize: Use your favorite pizza toppings or leftover cooked ingredients.
  • Great for sharing: Their small size makes them easy to serve at parties and gatherings.
  • Kid-friendly: Familiar pizza flavors make these an easy snack for children.
  • No deep frying: The air fryer provides crisp texture with only a small amount of oil.

Ingredients You’ll Need

For the Pizza Roll-Ups

  • 8 slices soft white or wheat sandwich bread
  • ½ cup pizza sauce
  • 1 cup shredded mozzarella cheese
  • ½ cup finely chopped pepperoni
  • 1 teaspoon Italian seasoning
  • ¼ teaspoon garlic powder
  • 1 tablespoon grated Parmesan cheese
  • 1 tablespoon melted butter or olive oil
  • ½ teaspoon dried parsley, optional

Use soft sandwich bread that can flatten without cracking. Fresh mozzarella can also work, but shredded low-moisture mozzarella melts evenly and creates less excess moisture.

Optional Pizza Toppings

You can add small amounts of other toppings without making the rolls difficult to wrap.

Good options include:

  • Cooked Italian sausage
  • Finely diced bell peppers
  • Sliced black olives
  • Finely chopped mushrooms
  • Diced jalapeños
  • Cooked bacon
  • Sun-dried tomatoes
  • Red pepper flakes

Always cook raw meat before adding it to the roll-ups. Keep vegetable pieces small so the rolls remain easy to fold and seal.

How to Make Air Fryer Loaded Mini Pizza Roll-Ups

Step 1: Flatten the Bread

Place one slice of bread on a clean cutting board.

Use a rolling pin to flatten the bread into a thin, even rectangle.

Repeat with all the slices.

Flattening the bread makes it flexible enough to roll tightly and helps create a crisp outer layer during air frying.

Tip: Avoid pressing the bread so hard that it becomes torn or paper-thin.

Step 2: Add the Pizza Sauce

Spread about 1 tablespoon of pizza sauce over each flattened bread slice.

Leave a small border around the edges.

Too much sauce can make the bread soggy and cause the filling to leak during cooking.

For a stronger tomato flavor, use a thick pizza sauce rather than a thin pasta sauce.

Step 3: Add Cheese and Toppings

Sprinkle mozzarella evenly over the sauce.

Add the chopped pepperoni and a small amount of Parmesan.

Finish with Italian seasoning and garlic powder.

Keep the filling toward the center of the bread so the roll can close properly.

Avoid overfilling because melted cheese and sauce can escape while the rolls cook.

Step 4: Roll the Bread

Starting from one short end, roll the bread tightly around the filling.

Continue rolling until you have a compact cylinder.

Place the roll seam-side down.

Repeat with the remaining bread slices.

If a roll does not stay closed, lightly press the seam against the cutting board for a few seconds.

Step 5: Prepare the Air Fryer

Preheat the air fryer to 375°F for about 3 minutes.

Lightly brush the outside of each roll with melted butter or olive oil.

A thin coating is enough to help the bread brown and crisp.

Do not soak the rolls with oil because excess oil can make the bread greasy.

Step 6: Air Fry the Pizza Roll-Ups

Place the rolls in the air fryer basket with the seam-side down.

Leave a little space between each roll so hot air can circulate around them.

Air fry at 375°F for 5 to 8 minutes.

Turn the rolls halfway through cooking if your air fryer does not brown evenly.

Cook until the bread is golden and crisp and the cheese inside has melted.

Because air fryers vary in power, start checking around the 5-minute mark.

Step 7: Let Them Rest

Carefully remove the pizza roll-ups from the basket.

Let them rest for about 1 to 2 minutes before serving.

The filling will be extremely hot immediately after cooking, especially the melted cheese and sauce.

Sprinkle the finished rolls with dried parsley or a little Parmesan if desired.

Tips for Crispy Pizza Roll-Ups

Getting the outside crisp while keeping the filling inside takes a few simple steps.

  • Flatten the bread evenly: This helps the rolls cook at the same rate.
  • Use less sauce: A thin layer prevents soggy bread.
  • Do not overfill: Too much cheese or pepperoni can make the rolls burst.
  • Roll tightly: A compact roll keeps the filling contained.
  • Place seam-side down: This helps the roll stay closed while cooking.
  • Use a light oil coating: A small amount helps create a golden crust.
  • Avoid overcrowding: Space allows hot air to reach every side.
  • Watch the final minutes: Bread can brown quickly in an air fryer.

Easy Flavor Variations

These roll-ups are easy to change based on your favorite pizza combination.

Pepperoni Pizza Roll-Ups

Use pepperoni, mozzarella, pizza sauce, and Italian seasoning for a classic pizza flavor.

Supreme Pizza Roll-Ups

Add finely chopped bell peppers, olives, mushrooms, and cooked sausage along with the cheese.

Spicy Pizza Roll-Ups

Add crushed red pepper flakes and diced jalapeños for a spicy version.

BBQ Chicken Pizza Roll-Ups

Replace pizza sauce with a thin layer of BBQ sauce and add cooked shredded chicken, mozzarella, and red onion.

Garlic Cheese Roll-Ups

Skip the meat and add extra mozzarella, Parmesan, garlic powder, and Italian herbs.

Hawaiian-Style Roll-Ups

Add finely chopped cooked ham and small pieces of pineapple with the mozzarella.

Keep the added ingredients finely chopped so the bread can still roll tightly.

What to Serve With Pizza Roll-Ups

These mini pizza rolls are delicious on their own, but a dipping sauce makes them even more enjoyable.

Try serving them with:

  • Warm marinara sauce
  • Ranch dressing
  • Garlic butter
  • Spicy marinara
  • Creamy Parmesan dip
  • Hot honey
  • Garlic herb sauce

For a party platter, arrange the rolls around small bowls of two or three dipping sauces.

For a quick family meal, serve them with a simple green salad, roasted vegetables, or fresh fruit.

How to Store Leftovers

Allow leftover roll-ups to cool completely before storing them.

Place them in an airtight container and refrigerate for up to 3 days.

For the best texture, reheat them in the air fryer instead of the microwave.

Air fry refrigerated roll-ups at 350°F for about 3 to 5 minutes, or until heated through and crisp again.

Check the center before serving because the melted cheese can become very hot.

Can You Make Them Ahead?

Yes. You can prepare the rolls several hours before cooking and keep them covered in the refrigerator.

For the best results, avoid storing them for too long after assembly because the sauce can gradually soften the bread.

When ready to serve, lightly brush the rolls with oil and air fry them directly from the refrigerator.

Add about 1 to 2 minutes to the cooking time if needed.

Common Mistakes to Avoid

Adding Too Much Sauce

Excess sauce can make the bread soft and difficult to roll. Use a thin, even layer instead.

Overloading the Filling

Too many toppings can prevent the bread from sealing and cause cheese to leak during cooking.

Skipping the Preheat

A preheated air fryer helps the bread begin crisping as soon as it enters the basket.

Using Wet Toppings

Drain vegetables and other ingredients with excess moisture before adding them to the rolls.

Overcrowding the Basket

Crowding blocks hot air and can leave some sides pale or soft.

Cutting Immediately

Give the rolls a minute or two to rest so the hot cheese and sauce are less likely to spill out.

Frequently Asked Questions

Can I use tortillas instead of bread?

Yes, small flour tortillas can work, but the texture will be different and more like a crispy tortilla pizza roll.

How long do pizza roll-ups take in an air fryer?

Most batches take about 5 to 8 minutes at 375°F, depending on the air fryer and the size of the rolls.

Can I make these without pepperoni?

Yes. Replace pepperoni with cooked sausage, vegetables, chicken, bacon, or simply add more cheese.

Why are my pizza roll-ups soggy?

Too much sauce, wet toppings, or overcrowding the air fryer can prevent the bread from becoming crisp.

Can I freeze pizza roll-ups?

Yes. Freeze fully cooled rolls in a freezer-safe container, then reheat them in the air fryer until hot and crisp.

What cheese is best for pizza roll-ups?

Low-moisture shredded mozzarella melts smoothly and gives the rolls a classic pizza-style cheese pull.

Can I use whole wheat bread?

Yes. Soft whole wheat bread works well, although it may produce a slightly firmer texture than white bread.

What temperature is best for air frying them?

375°F provides a good balance between crisping the bread and melting the cheese without burning the outside too quickly.

Final Thoughts

These Air Fryer Loaded Mini Pizza Roll-Ups are an easy way to enjoy classic pizza flavors in a small, crispy package. Soft bread wraps around pizza sauce, mozzarella, pepperoni, and Italian seasoning before the air fryer turns everything golden and crunchy.

The recipe is flexible enough for busy weeknights, school snacks, game-day gatherings, and casual parties. You can keep the filling classic or add your favorite toppings for a personalized version.

For the best results, use a thin layer of sauce, avoid overfilling, roll the bread tightly, and leave space between the rolls in the air fryer. Serve them warm with marinara, ranch, or your favorite dipping sauce for an easy snack everyone can grab and enjoy.

Crispy Rice Paper Chicken Roll-Ups

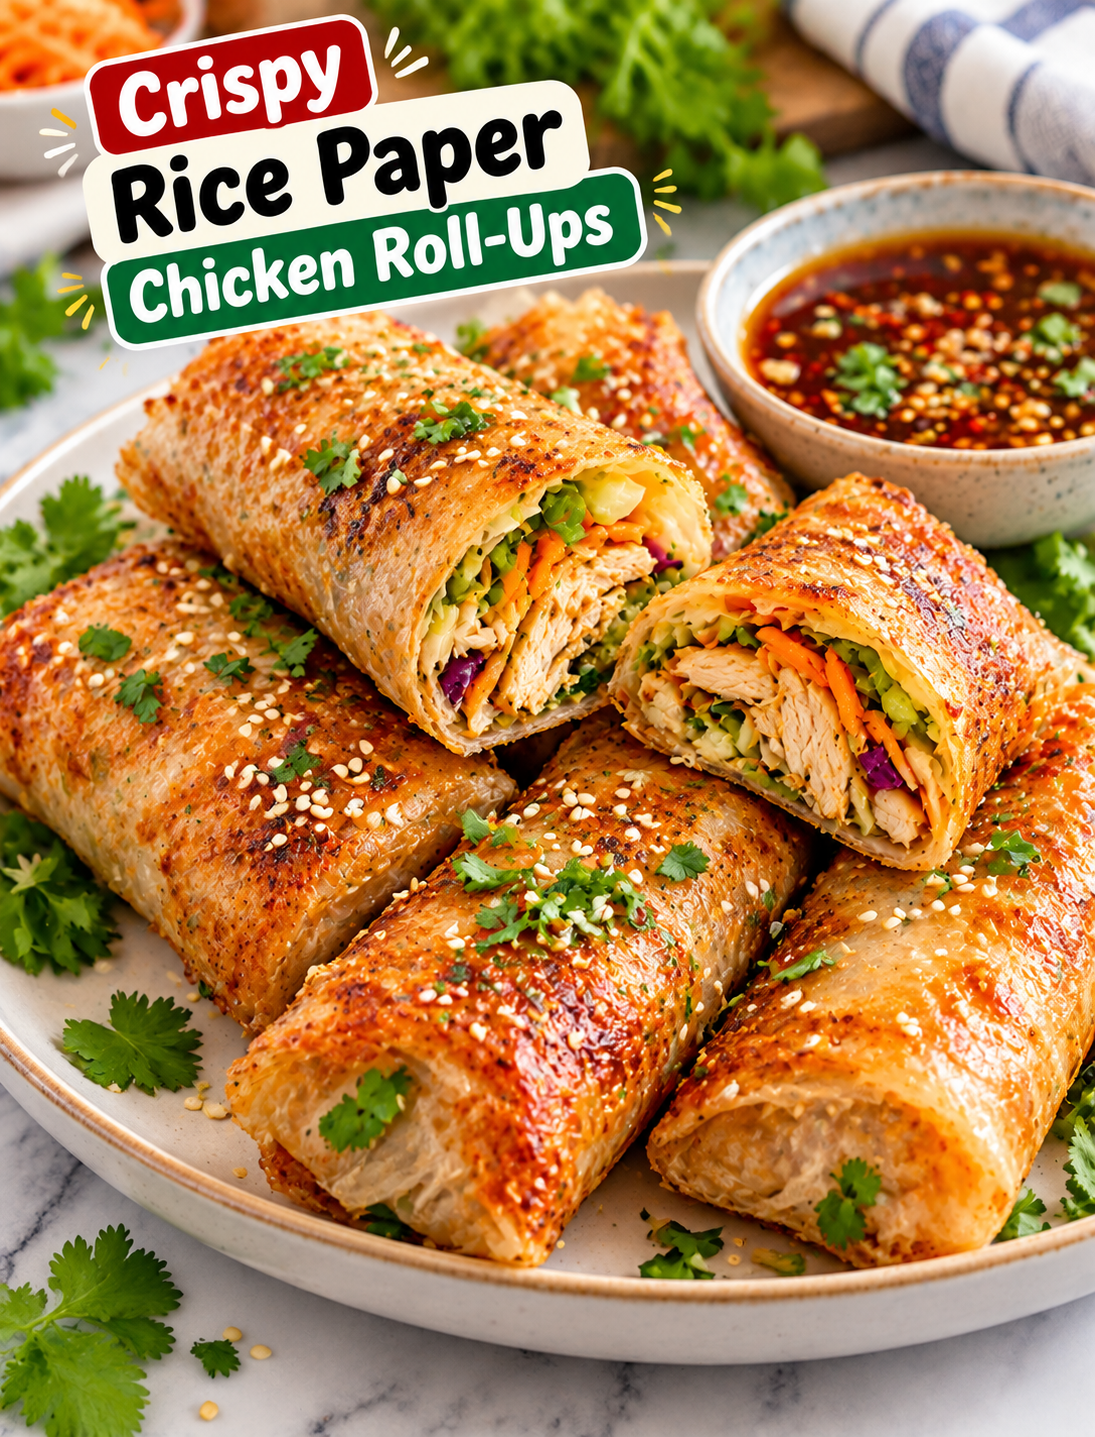
Crispy rice paper chicken roll-ups filled with seasoned chicken and vegetables, served with dipping sauce

Crispy Rice Paper Chicken Roll-Ups

These Crispy Rice Paper Chicken Roll-Ups are a simple way to turn seasoned chicken and fresh vegetables into a crunchy, satisfying meal. Rice paper wrappers become golden and crisp when cooked, while the chicken filling stays juicy and flavorful inside.

This recipe is inspired by the popular crispy rice paper snack trend, but it uses everyday ingredients that are easy to find at most U.S. grocery stores. You can serve the roll-ups as an appetizer, quick lunch, party snack, or light dinner.

The filling combines cooked chicken, shredded carrots, cabbage, green onions, and simple seasonings. A little soy sauce and sesame oil add savory flavor without making the filling too heavy.

The best part is the texture. The outside becomes crisp and lightly chewy, while the center is warm, tender, and packed with seasoned chicken and vegetables.

Why You’ll Love This Recipe

These chicken roll-ups are easy to prepare and work well for busy weeknights.

  • Crispy texture: Rice paper turns golden and crunchy when cooked properly.
  • Easy filling: Cooked chicken and fresh vegetables make a quick savory mixture.
  • Simple ingredients: Most ingredients are available at regular supermarkets.
  • Quick cooking: The assembled rolls only need a few minutes to become crisp.
  • Easy to customize: Change the vegetables, sauce, or protein to suit your taste.
  • Great for sharing: Cut them in half and serve with dipping sauces for parties.
  • Meal-prep friendly: The filling can be prepared ahead of time.

Ingredients You’ll Need

For the Chicken Filling

  • 2 cups cooked shredded chicken
  • 1 cup finely shredded cabbage
  • ½ cup shredded carrots
  • 3 green onions, thinly sliced
  • 2 cloves garlic, minced
  • 1 tablespoon low-sodium soy sauce
  • 1 teaspoon sesame oil
  • ½ teaspoon grated fresh ginger
  • ¼ teaspoon black pepper
  • 1 teaspoon rice vinegar
  • 1 teaspoon cooking oil

Rotisserie chicken is a convenient choice for this recipe. You can also use leftover roasted chicken or freshly cooked chicken breast.

For the Rice Paper Roll-Ups

  • 8 to 10 round rice paper wrappers
  • 2 tablespoons cooking oil, if pan-frying
  • Water for softening the rice paper

Choose medium or large rice paper sheets so they are easier to fold around the filling.

Optional Dipping Sauce

  • 3 tablespoons low-sodium soy sauce
  • 1 tablespoon rice vinegar
  • 1 teaspoon honey
  • ½ teaspoon sesame oil
  • ½ teaspoon chili garlic sauce
  • 1 teaspoon finely sliced green onion

Mix the ingredients in a small bowl and adjust the chili sauce to your preferred heat level.

How to Make Crispy Rice Paper Chicken Roll-Ups

Step 1: Prepare the Chicken Filling

Place a large skillet over medium heat and add 1 teaspoon of cooking oil.

Add the minced garlic and grated ginger. Cook for about 30 seconds until fragrant.

Add the shredded cabbage and carrots.

Cook the vegetables for 2 to 3 minutes, stirring often. They should soften slightly while keeping some crunch.

Add the shredded chicken, soy sauce, sesame oil, black pepper, and rice vinegar.

Stir everything together and cook for another 2 to 3 minutes.

Turn off the heat and mix in the sliced green onions.

Let the filling cool for several minutes before wrapping.

Important: The filling should be warm rather than very hot when you add it to the rice paper. Excess heat can make the wrappers difficult to handle.

Step 2: Prepare Your Work Surface

Place a clean cutting board or large plate near your cooking area.

Fill a shallow dish with lukewarm water.

Keep the rice paper wrappers, chicken filling, and a clean plate nearby.

Work with one wrapper at a time because soaked rice paper becomes sticky quickly.

Step 3: Soften the Rice Paper

Dip one rice paper wrapper into the lukewarm water for about 5 to 10 seconds.

Remove it while the wrapper is still slightly firm.

Place it flat on your work surface.

Do not soak the wrapper until it becomes completely soft. It will continue to soften as you add the filling.

Step 4: Add the Filling

Place about 2 to 3 tablespoons of the chicken mixture slightly below the center of the wrapper.

Keep the filling compact and avoid adding too much.

Leave enough empty space around the edges to fold the wrapper securely.

If you add too much filling, the rice paper can tear during rolling or cooking.

Step 5: Fold the Roll-Up

Fold the bottom edge of the rice paper over the chicken filling.

Fold both sides toward the center.

Roll the wrapper upward while gently pressing the filling into a compact shape.

Continue rolling until you have a tight cylinder.

Place the finished roll seam-side down on a clean plate.

Repeat with the remaining rice paper and filling.

Step 6: Let the Rolls Set

Allow the wrapped roll-ups to rest for about 2 to 3 minutes.

This gives the rice paper time to become slightly tacky and helps the seam hold together.

Keep the rolls separated so they do not stick to one another.

Step 7: Cook Until Crispy

You can cook the roll-ups in a skillet, air fryer, or oven.

Skillet Method

Heat a nonstick skillet over medium heat and lightly coat it with cooking oil.

Place the roll-ups seam-side down in the pan.

Cook for about 2 to 3 minutes per side.

Turn them carefully with tongs until all sides are golden and crisp.

Avoid high heat because the outside can brown before the wrapper becomes evenly crisp.

Air Fryer Method

Preheat the air fryer to 375°F.

Lightly brush or spray the roll-ups with oil.

Place them in the basket in a single layer with space between each roll.

Air fry for about 8 to 10 minutes, turning halfway through.

Cook until the wrappers are golden and crisp.

Air fryer cooking times can vary, so start checking after 7 minutes.

Oven Method

Preheat the oven to 425°F.

Place the roll-ups on a parchment-lined baking sheet.

Lightly brush them with oil.

Bake for approximately 12 to 16 minutes, turning them halfway through.

Remove them when the wrappers are crisp and lightly golden.

Tips for Perfect Crispy Roll-Ups

A few small details can make these chicken rolls much easier to prepare.

  • Do not over-soak the rice paper: A wrapper that is too soft can tear easily.
  • Use a moderate amount of filling: Two to three tablespoons are usually enough.
  • Keep the filling fairly dry: Excess liquid can weaken the wrapper.
  • Roll firmly: A tight roll helps keep the filling inside during cooking.
  • Leave space between rolls: This prevents sticking and helps them crisp evenly.
  • Use moderate heat: Very high heat can burn the wrapper before the inside warms.
  • Cook seam-side down first: This helps seal the roll.
  • Serve soon after cooking: The wrappers are crispest when freshly cooked.

Easy Variations

This recipe is flexible, so you can adjust the filling based on what you have available.

Spicy Chicken Roll-Ups

Add chili flakes, sriracha, or chili garlic sauce to the chicken mixture for extra heat.

Teriyaki Chicken Roll-Ups

Replace some of the soy sauce with a small amount of teriyaki sauce for a sweeter flavor.

Chicken and Cheese Roll-Ups

Add a small amount of shredded mozzarella or Monterey Jack cheese before rolling. Keep the filling amount moderate so the wrapper does not split.

Fresh Vegetable Roll-Ups

Add thinly sliced bell peppers, cucumber, or fresh herbs for extra color and crunch.

Ground Chicken Version

Replace shredded chicken with cooked ground chicken. Break the meat into small pieces so it mixes evenly with the vegetables.

Vegetarian Option

Replace the chicken with sautéed mushrooms, shredded cabbage, carrots, edamame, or crumbled tofu.

What to Serve With Chicken Roll-Ups

A flavorful dipping sauce makes these crispy rolls even better.

Try serving them with:

  • Sweet chili sauce
  • Soy-ginger dipping sauce
  • Spicy mayo
  • Peanut sauce
  • Sriracha mayo
  • Sesame dipping sauce
  • Garlic chili sauce

For a complete meal, serve the roll-ups with a simple cucumber salad, steamed edamame, or Asian-style slaw.

For a party, cut each roll diagonally and arrange the pieces on a platter with two or three dipping sauces.

How to Store Leftovers

For the best texture, these roll-ups are best eaten immediately after cooking.

If you have leftovers, allow them to cool completely before placing them in an airtight container.

Refrigerate them for up to 3 days.

Avoid stacking many rolls directly on top of one another because the wrappers can stick together.

To reheat, use an air fryer at 350°F for about 3 to 5 minutes.

Avoid the microwave when possible because it can make the rice paper soft and chewy instead of crisp.

Can You Make Them Ahead?

Yes, but it is best to prepare the filling ahead rather than fully assemble the rolls.

Cook and cool the chicken mixture, then refrigerate it in an airtight container for up to 3 days.

When you are ready to cook, prepare fresh rice paper wrappers and assemble the roll-ups.

This method gives you a better texture than storing fully wrapped uncooked rolls for a long period.

Common Mistakes to Avoid

Overfilling the Wrapper

Too much chicken can cause the rice paper to split while rolling or cooking.

Soaking the Rice Paper Too Long

Rice paper becomes softer as it sits, so a short dip in water is usually enough.

Using Watery Filling

Drain excess moisture from vegetables and avoid adding too much sauce to the chicken mixture.

Cooking at Excessive Heat

High heat can burn the wrapper before the filling is heated properly.

Crowding the Pan

Give each roll enough space so hot air or cooking heat can reach the surface evenly.

Frequently Asked Questions

Can I use raw chicken?

Yes, but cook the chicken completely before adding it to the rice paper and confirm it reaches 165°F internally.

Why does my rice paper tear?

Rice paper can tear when it is over-soaked, overfilled, or handled too roughly while wrapping.

Can I make these in an air fryer?

Yes. Lightly oil the rolls and air fry them at 375°F for about 8 to 10 minutes, turning halfway through.

Can I use leftover rotisserie chicken?

Absolutely. Rotisserie chicken is one of the easiest options because the meat is already cooked and seasoned.

How do I make the rolls extra crispy?

Use a light coating of oil, avoid overcrowding, and cook the rolls until the wrapper becomes evenly golden.

Can I freeze rice paper chicken rolls?

Freezing fully assembled rolls is not recommended because the texture of softened rice paper can change after thawing.

What dipping sauce goes best with them?

Sweet chili sauce, spicy mayo, peanut sauce, and soy-ginger sauce all pair well with the savory chicken filling.

Can I make these without chicken?

Yes. Substitute cooked tofu, mushrooms, edamame, or additional vegetables for a vegetarian version.

Final Thoughts

These Crispy Rice Paper Chicken Roll-Ups are a fun way to turn simple chicken and vegetables into a crunchy meal or appetizer. The rice paper creates a light, crisp exterior while the seasoned chicken filling adds plenty of savory flavor.

For the best results, keep the filling fairly dry, avoid over-soaking the wrappers, and cook the rolls in a single layer. Serve them hot with your favorite dipping sauce for a quick lunch, easy dinner, or shareable snack.

Once you have the basic method down, you can change the filling and sauce to create a different version every time.